Rebuild Time....
Discussion


Not a lot of progress recently, but the engine work by Powers should ship next week.
I'll be self assembling the engine which I'm looking forward to a lot.
However, there are a couple of tools I need but would prefer not to have to buy for the 5 minutes that I need them.
So does anyone have a rod stretch bolt gauge and timing wheel I could borrow? Postage paid obviously!
Thanks
I'll be self assembling the engine which I'm looking forward to a lot.
However, there are a couple of tools I need but would prefer not to have to buy for the 5 minutes that I need them.
So does anyone have a rod stretch bolt gauge and timing wheel I could borrow? Postage paid obviously!
Thanks
Edited by Willfin on Saturday 11th February 20:48

Unfortunately not.
The block I bought from a certain 2nd hand company in the north east turned out to be a duffer, only finding that out once Dom had done the top hat liners and a dummy build. An expensive mistake. Only the 4.0l crank has been of any use.
I sent dom my knackered 3.6 block out of my car, and he has stripped it down ready for machine work and shipping next week hopefully. Top man.
Got everything primed in the garage ready to complete the engine over the Xmas break.
Nice Xmas present hopefully!
Edited by Willfin on Saturday 11th February 20:49
The block, once cleaned and with new top hats, was found to have a main bearing out of line and a lip on the main cap bearing face so the crank was very tight once bolted down and wouldn't have lasted long.
I'll build a table or look to have it repaired somehow, would be an expensive table!
Bottom end and all the goodies are due back next week and then I can get started although I'll have to pause for a hospital visit soon after! I do have the FFF2 head but haven't unpacked it yet as I need to clean the garage so it's über clean ready for the build!
Yeah it will be a FFF2 and 4.2, I will do the run in on the standard eco with a chip and then have the uprated mbe installed.
A hone of the crankshaft main caps is possible, but it was just easier to send Dom my other block. Opportunity to repair and sell on if of any interest to anyone.
A hone of the crankshaft main caps is possible, but it was just easier to send Dom my other block. Opportunity to repair and sell on if of any interest to anyone.
Edited by Willfin on Saturday 11th February 20:58
So the block has arrived from Powers on a saturday delivery, all packed impeccably and ready to go for the build.
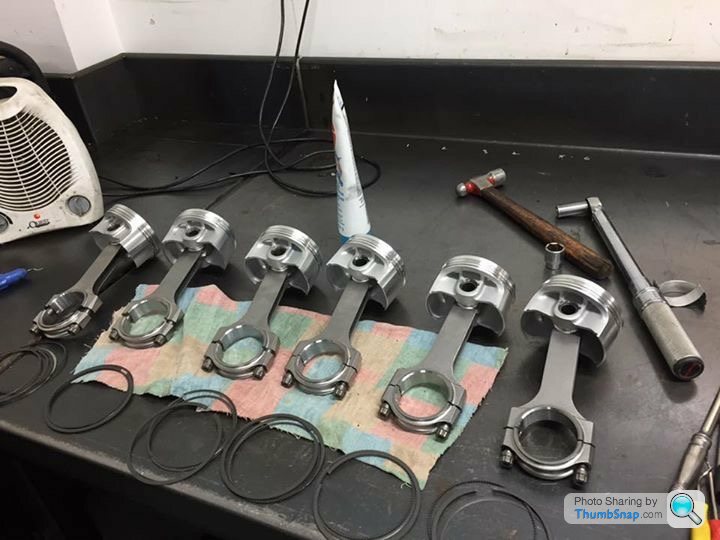
Having uncovered everything, I discovered Dom had progressed a bit further than a dummy build and fitted the pistons, crank et al, much to my satisfaction! It wasn't the original intention but happy for him to help my cause!
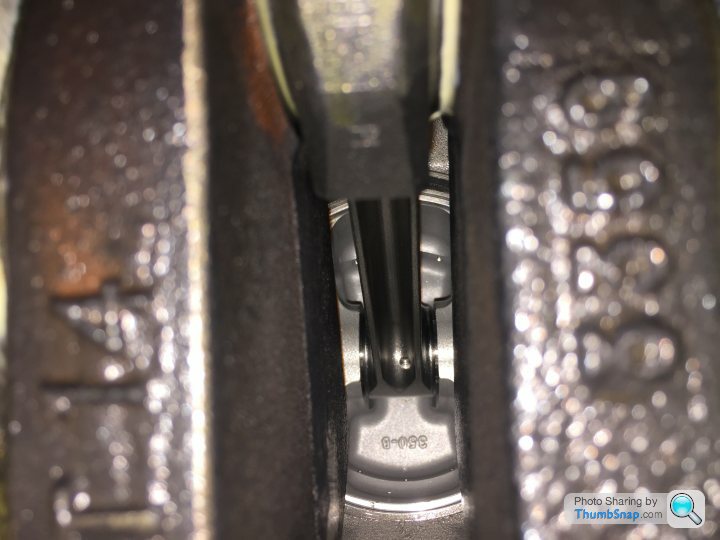
Anyhow, Ive now got the engine mounted on the engine stand in the garage and ready to tick my way through large list of jobs. Ive got a varley manual which is a good reference document to look at for torque values etc.
All tools in hand ready to go!
Three assembly pics at Powers.


Back home and ready for full assembly.

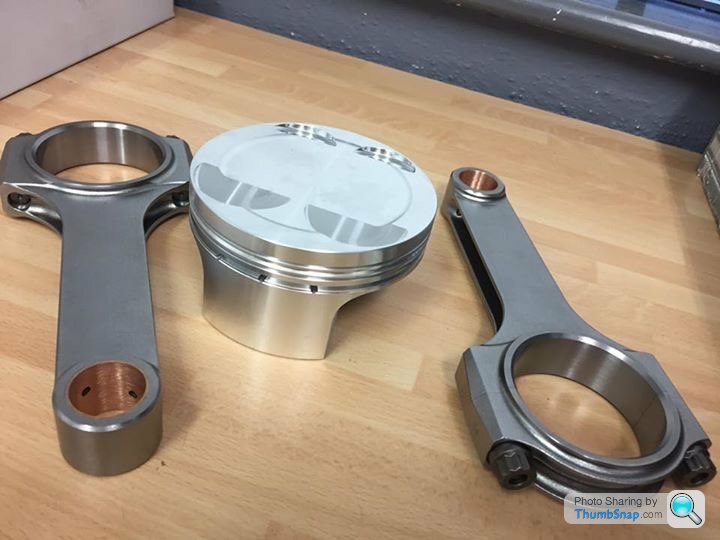
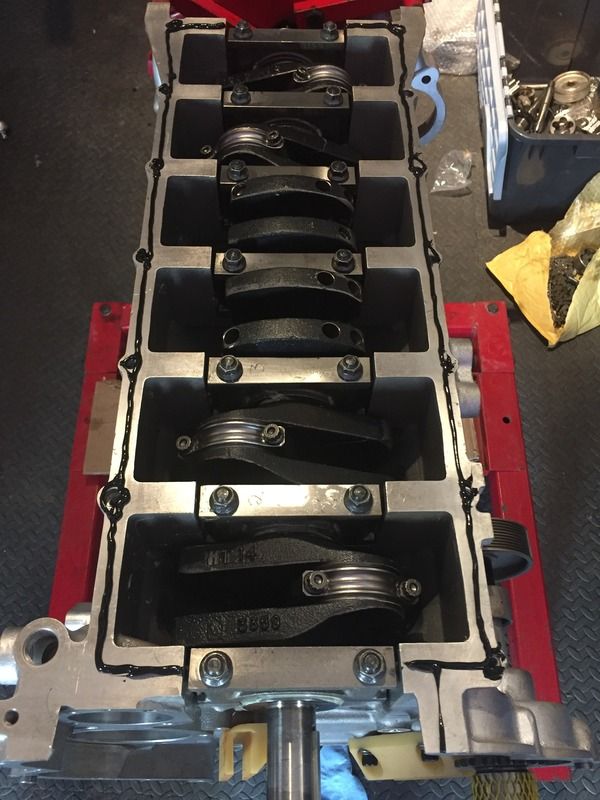
Lovely forged rods.
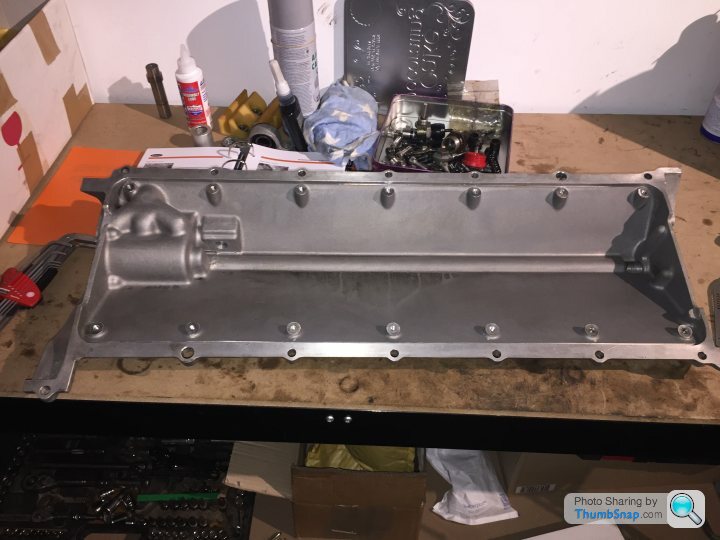
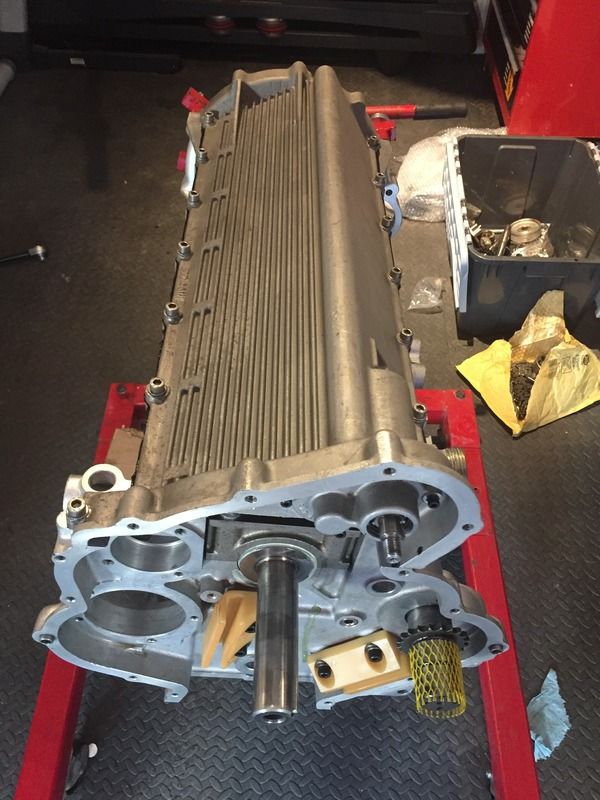
Sparkly clean sump....by Powers
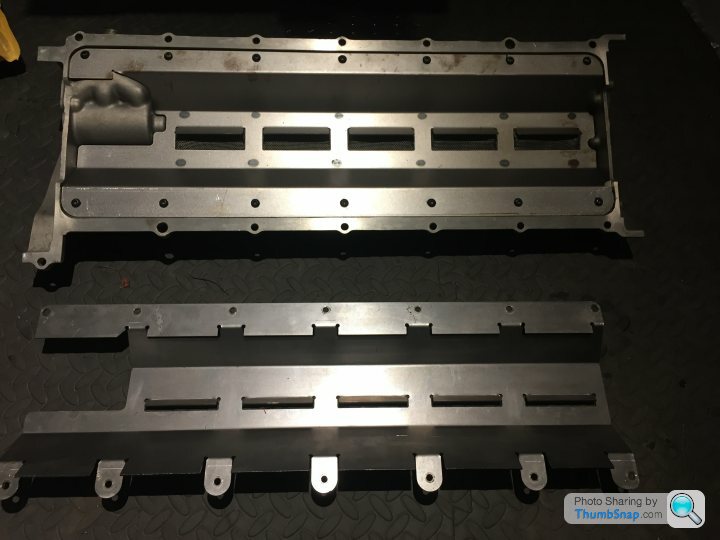
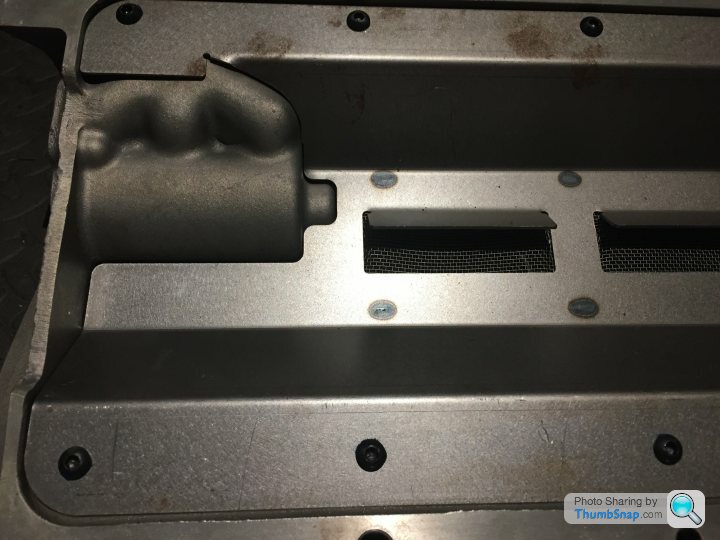
Racing Green baffle plate.....
Modified baffle panel to prevent debris damaging scavenge pump on TVR Speed 6 engines. This baffle panel has been carefully designed and laser cut to fit the dry sump casting accurately. Oil is directed to the scavenge pump via the mesh filtered centre vanes. This baffle panel will prevent serious damage to the scavenge pump and sump casting in the event of a mechanical failure in the engine.
Aux shaft bearing ready for driving home.
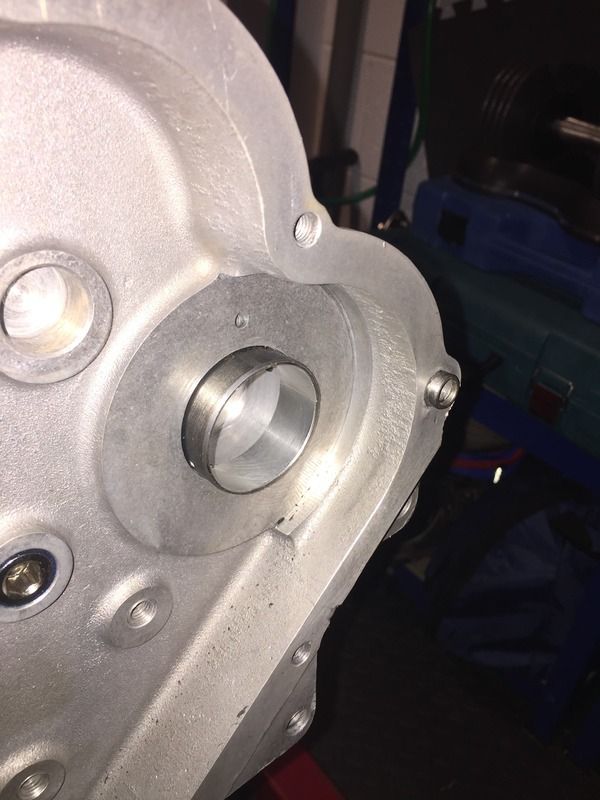
Tomorrow should have the aux shaft installed and scavenge pump checked, installed into the sump and sump fitted!
Having uncovered everything, I discovered Dom had progressed a bit further than a dummy build and fitted the pistons, crank et al, much to my satisfaction! It wasn't the original intention but happy for him to help my cause!
Anyhow, Ive now got the engine mounted on the engine stand in the garage and ready to tick my way through large list of jobs. Ive got a varley manual which is a good reference document to look at for torque values etc.
All tools in hand ready to go!
Three assembly pics at Powers.
Back home and ready for full assembly.
Lovely forged rods.
Sparkly clean sump....by Powers
Racing Green baffle plate.....
Modified baffle panel to prevent debris damaging scavenge pump on TVR Speed 6 engines. This baffle panel has been carefully designed and laser cut to fit the dry sump casting accurately. Oil is directed to the scavenge pump via the mesh filtered centre vanes. This baffle panel will prevent serious damage to the scavenge pump and sump casting in the event of a mechanical failure in the engine.
Aux shaft bearing ready for driving home.

Tomorrow should have the aux shaft installed and scavenge pump checked, installed into the sump and sump fitted!
Edited by Willfin on Saturday 11th February 23:01
So the bottom end has been parts supplied, fitted, and all engineering work by Power and it's the 4.5 upgrade without the crank ? (bored out by 200cc, top hat liners, skimmed, H-beam rods and forged pistons)
I presume you will be putting the bigger injectors in ? I think they are always recommended with the 4.3 and 4.5 as the existing ones aren't up to the job ?
Great thread ! Keep us posted !
I presume you will be putting the bigger injectors in ? I think they are always recommended with the 4.3 and 4.5 as the existing ones aren't up to the job ?
Great thread ! Keep us posted !
RedSpike66 said:
The block look super clean... I presume it's been 'Soda blasted' whatever that is..
Does anyone know how to keep it like that ..
Can it be painted with some heat resistant paint ?
The block and chain covers, sump etc. just oxidize and get tatty again really quickly otherwise..
Yep you can acid etch and paint them. In the grand scheme of things they don't get massively hot. Does anyone know how to keep it like that ..
Can it be painted with some heat resistant paint ?
The block and chain covers, sump etc. just oxidize and get tatty again really quickly otherwise..

Original casting
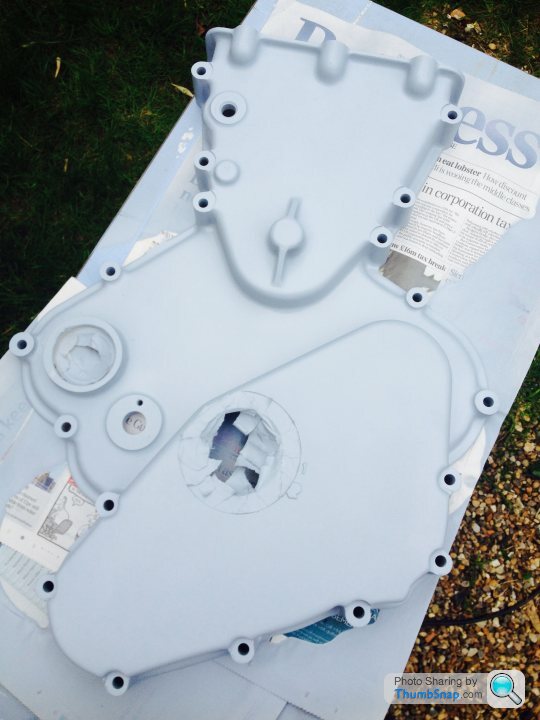
Acid etch primer
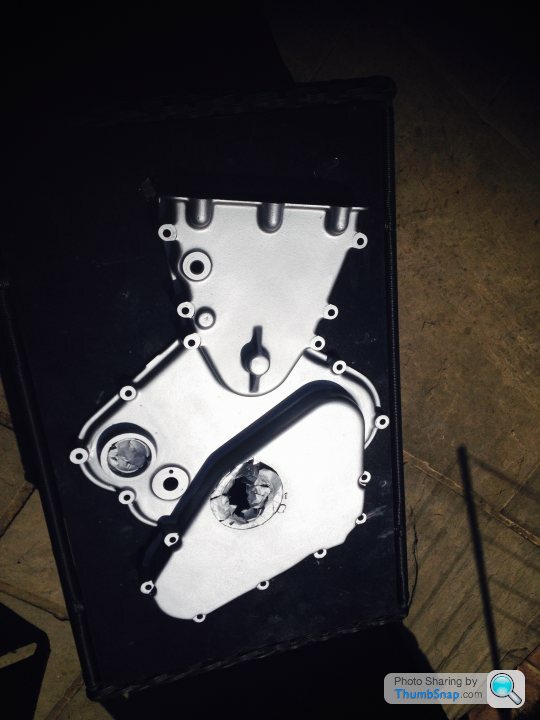
Final finish
Great finish that Matti.
The block was cleaned and painted at Powers by Dom so not sure what they used, but sure happy with the result anyway!
I've managed to get in the garage and finish off a couple of small jobs.
Auxiliary shaft and primary chain guides now installed.
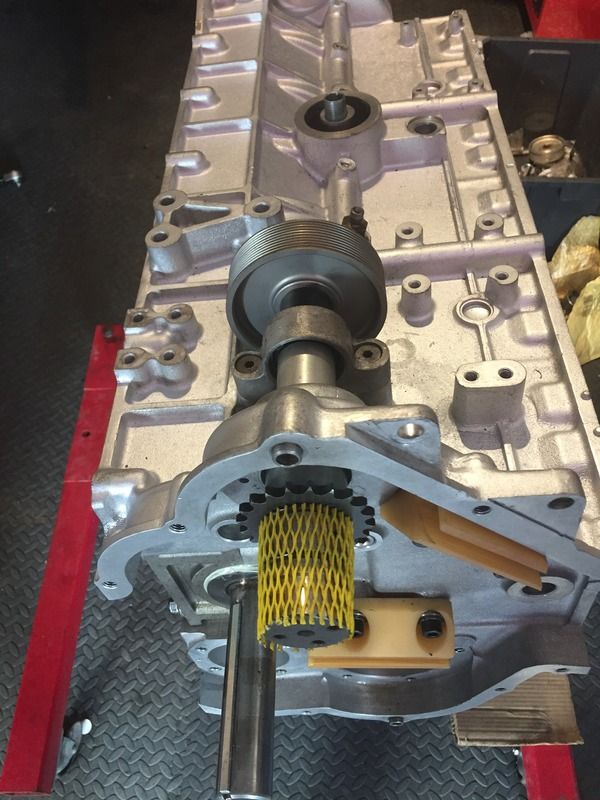
Sump sealed (now redone to timing cover face) and installed along with refurbished scavenger pump.
Next up is installing the half time bearing with the roller bearing and oil feed. Then water and oil pumps and sprockets etc.
Hopefully sorted next week!
The block was cleaned and painted at Powers by Dom so not sure what they used, but sure happy with the result anyway!
I've managed to get in the garage and finish off a couple of small jobs.
Auxiliary shaft and primary chain guides now installed.

Sump sealed (now redone to timing cover face) and installed along with refurbished scavenger pump.


Next up is installing the half time bearing with the roller bearing and oil feed. Then water and oil pumps and sprockets etc.
Hopefully sorted next week!
Edited by Willfin on Tuesday 31st January 10:20
RedSpike66 said:
WOW !!!
That looks amazing...
What paint do you use ? I presume it is a form of heat resistant paint ?
Do you spray from the 'can' of have to use professional tools ?
Mike, that's all done with cans. I have an LVLP spray set up but as it's a satin finish it's straight out the can. Wasn't anything especially heat resistant just auto paint can go look what brand it was. That looks amazing...
What paint do you use ? I presume it is a form of heat resistant paint ?
Do you spray from the 'can' of have to use professional tools ?
The key (literally) is the acid etch. It "bites" into the alloy and gives the top coat something to cling to.
Gassing Station | Speed Six Engine | Top of Page | What's New | My Stuff