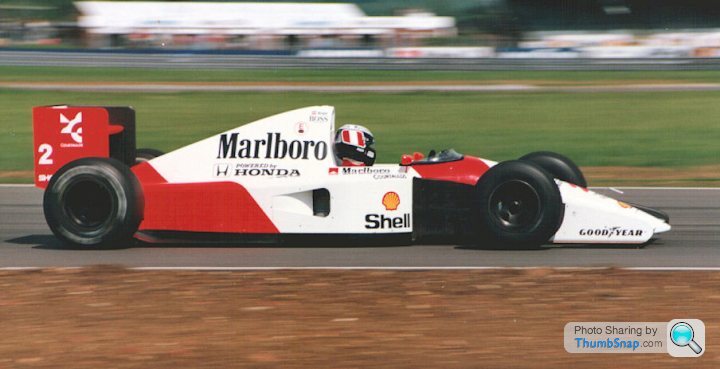
Tamiya 1:12 McLaren MP4/6 Rebuild/Upgrade
Discussion


MonkeySpanker said:
As an ex tyre fitter the weights look spot on although they're 'silver' lead in real life. Also the wheel balancing machine's can be set so all the weight goes inside the rim but I have to admit to not balancing many (any) F1 wheels. The silver tape's adhesive is a bit more heat resistant than that used on the gaffer/duct tape. Generally tape's used to temporarily hold the weight on so the position could be fine tuned before being stuck down. Keep up the excellent work 
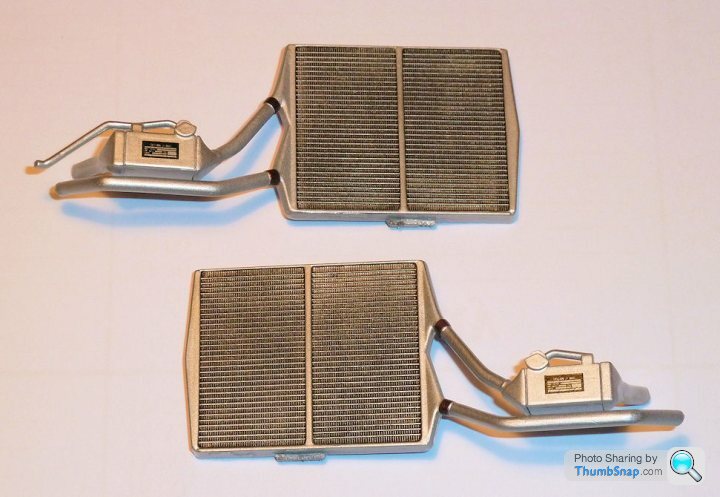
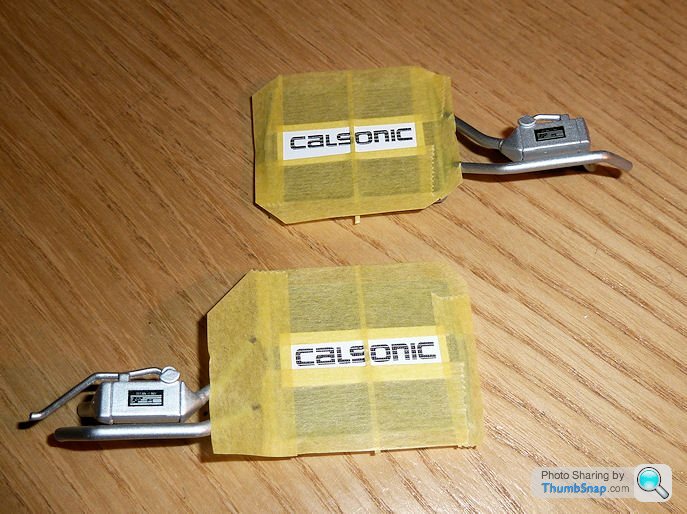
Thanks, yes I remember they were lead. I thought the colour wasn't worth worrying about becasue they'd be covered up with the tape. I wanted the block effect to show through the tape though, whcih is why I scribed the lines.Stripped and repainted the radiators. I was never happy with the Calsonic decals. This time I've left them off altogether. I tried to find a spray stencil, but to no avail. I think the hose connectores should be anodised purple, but since they won't be seen, and they lack any real detail I decided to repaint them as original. I also re-applied the decals to what I assume are oil heat exchangers, just so it'll at least be complete under the body. Even these simple assemblies will become models in themselves when I build the bare chassis. Loads of detail and refinement to be added.
Also managed to remove the harness fittings without damaging the fabric straps:
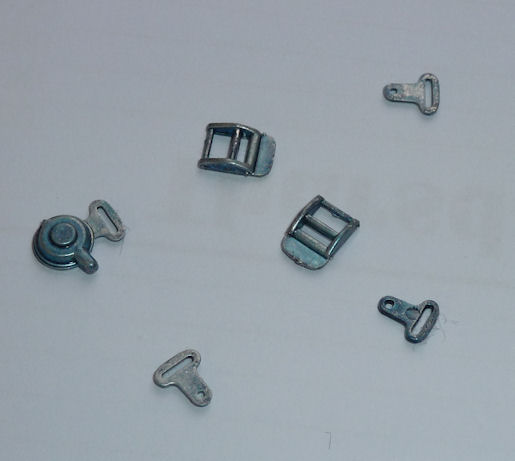
I'll Alclad them and spray some Tamiya Clear Blue on them - make a better job this time hopefully:
Also managed to remove the harness fittings without damaging the fabric straps:
I'll Alclad them and spray some Tamiya Clear Blue on them - make a better job this time hopefully:
Apologies for the thread hijack but I'm struggling to find sponsor decals for the Senna JPS Lotus, Toleman, Ralt and McLaren. There are the odd set on eBay but I'm not keen on bringing things in from China or Hong Kong having had bad experiences in the past.
Can anyone point me in the right direction please?
Can anyone point me in the right direction please?
ferrisbueller said:
Apologies for the thread hijack but I'm struggling to find sponsor decals for the Senna JPS Lotus, Toleman, Ralt and McLaren. There are the odd set on eBay but I'm not keen on bringing things in from China or Hong Kong having had bad experiences in the past.
Can anyone point me in the right direction please?
If you're not already a member of the F1M forum , then I'd join and ask there. There are some knowledgable folks on there, both modellers and suppliers. I got a set of MP4/6 original Tamiya decals for 10 (to replace the one's I've stripped), plus the offer of some free Marlboro decals from a supplier. All within about an hour of putting a request on there.Can anyone point me in the right direction please?
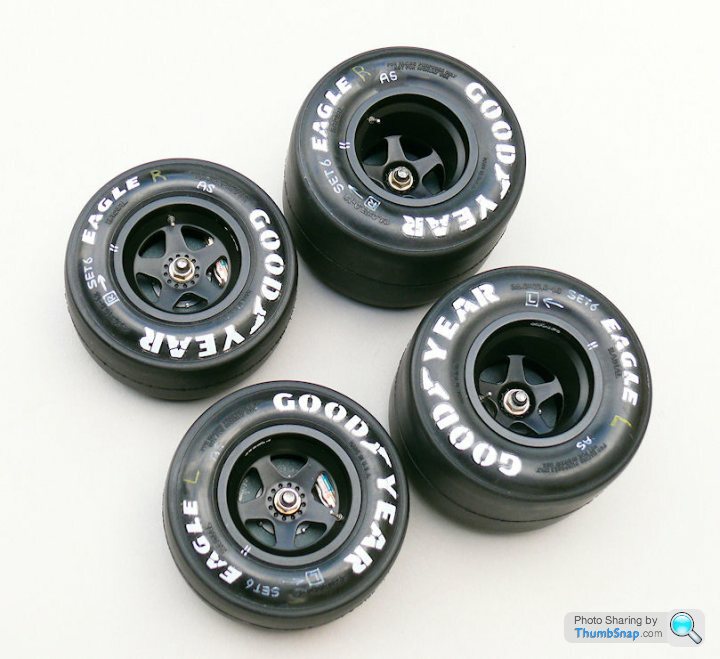
Fitted the TVF1 axles and wheel nuts. I coated the axles with Alclad Jet Exhaust, and the nuts with Polished Brass. It's worn of the sharp edges with handling, and looks more realistic. I've also hand written some notes on the tyres loosely based on my original, but changing "SM" to "AS". The "SM" was presumably Stefano Modena from my Jordan tyre.
They do look a bit glossy around the edges, I'll have to find a way of dulling the sidewalls a bit. I've used Humbrol gloss at 1:24 before, but not sure it is really OK for a larger scale. Even so, they are a huge improvement on my original effort:
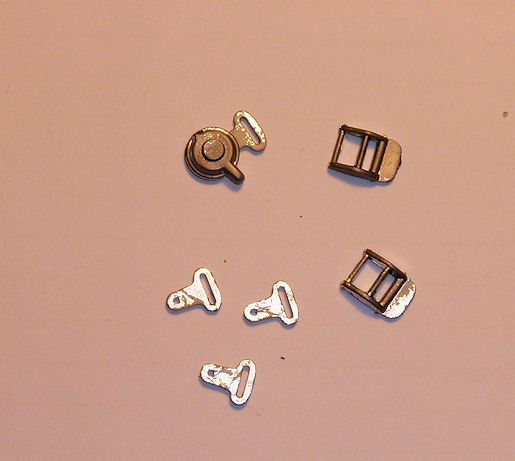
Also repainted the harness buckles in Alclad Burnt Blue over Aluminium, or Aluminium for the tongues. The buckle, according to the Joe Honda book, was partially painted in gloss blue. I've used an old decal to represent the writing in the middle. I added some small rivets to the outside of the adjusters to represent the ends of the harness pins. The whole lot just needs a coat of satin clear. Unfortunately I seem to have lost one of the tonges in transit somewhere:

They do look a bit glossy around the edges, I'll have to find a way of dulling the sidewalls a bit. I've used Humbrol gloss at 1:24 before, but not sure it is really OK for a larger scale. Even so, they are a huge improvement on my original effort:
Also repainted the harness buckles in Alclad Burnt Blue over Aluminium, or Aluminium for the tongues. The buckle, according to the Joe Honda book, was partially painted in gloss blue. I've used an old decal to represent the writing in the middle. I added some small rivets to the outside of the adjusters to represent the ends of the harness pins. The whole lot just needs a coat of satin clear. Unfortunately I seem to have lost one of the tonges in transit somewhere:
IroningMan said:
How are you going to tackle the seam around the tyre tread now that you've fitted and painted them?
I generally spin them in a drill and use coarse emery paper - but that might wreck your work so far.
The real unused tyres had an identical mould line around them. Im going to get some labels to put on the carcass, and they will represent an unused "sticker set". For my previous xjr9 I ran the tyres on my belt sander on a majeshift axle. That worked well for used tyres.I generally spin them in a drill and use coarse emery paper - but that might wreck your work so far.
ETA The tyres arent fixed, they are a perfect fit and dont need glue, they can easily be removed if necessary.
Drove past the McLaren showroom in Milan yesterday after a bit of a night out. Unfortunately it was all a bit of a blur, but I'm pretty sure there was an MP4/6 (or maybe a 4/7) in the showroom. I didn't want to look all uncool by asking to stop for me to take some reference pictures for a model though...
dr_gn said:
Drove past the McLaren showroom in Milan yesterday after a bit of a night out. Unfortunately it was all a bit of a blur, but I'm pretty sure there was an MP4/6 (or maybe a 4/7) in the showroom. I didn't want to look all uncool by asking to stop for me to take some reference pictures for a model though...
Yes, the have it.Get in and ask for it, they will be more than happy to let you have a nosey.
Were you clubbing at Gattopardo?

Enricogto said:
dr_gn said:
Drove past the McLaren showroom in Milan yesterday after a bit of a night out. Unfortunately it was all a bit of a blur, but I'm pretty sure there was an MP4/6 (or maybe a 4/7) in the showroom. I didn't want to look all uncool by asking to stop for me to take some reference pictures for a model though...
Yes, the have it.Get in and ask for it, they will be more than happy to let you have a nosey.
Were you clubbing at Gattopardo?
Someone from the F1M forum made me these excellent stencils for the radiator logos. It wasn't seen on all MP4/6 radiators, but I'll try it anyway since it does replicate the original kit decal (which looked rubbish):
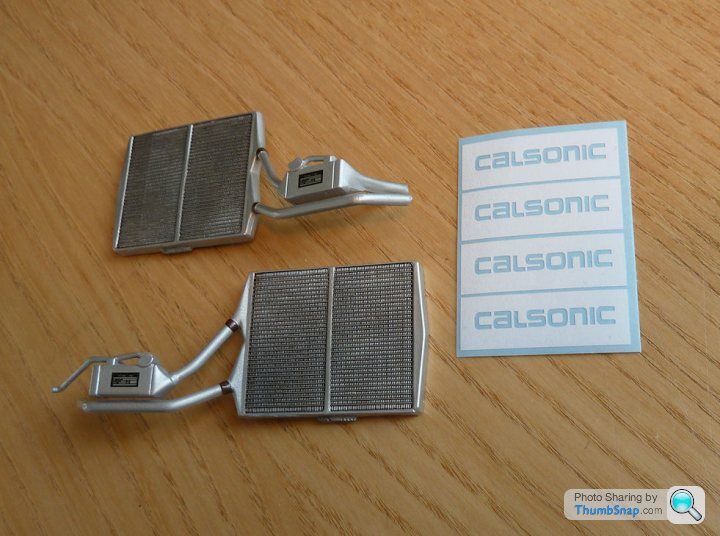
I've not detailled these radiators at all, since it's a kerbside version. On the chassis version, all the hose connectors and fittings will be replicated. The Calsonic lettering is visible through the sidepod air exit when fitted.
I've not detailled these radiators at all, since it's a kerbside version. On the chassis version, all the hose connectors and fittings will be replicated. The Calsonic lettering is visible through the sidepod air exit when fitted.

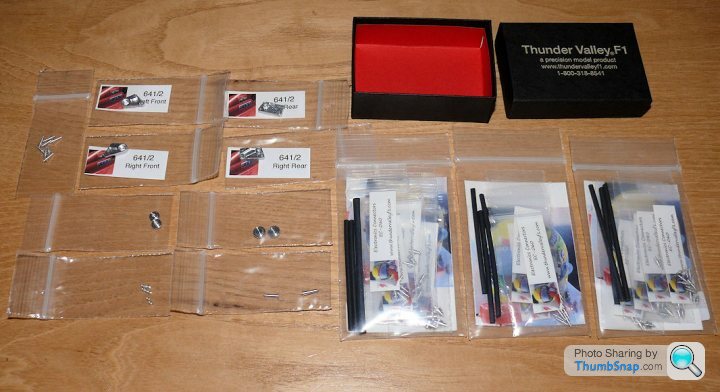
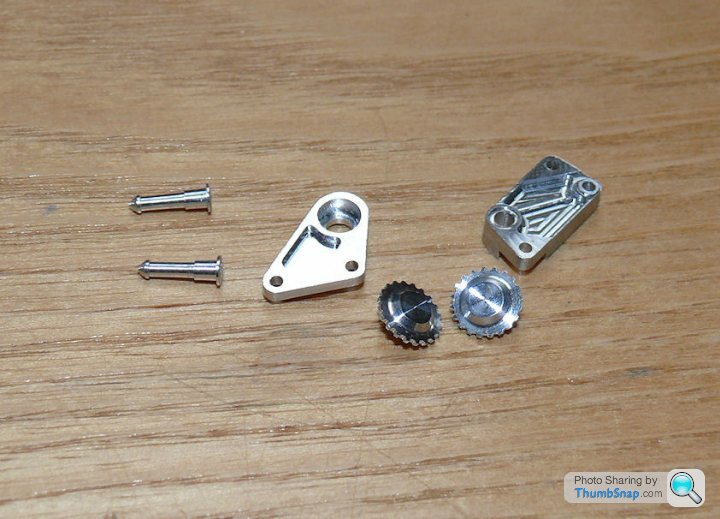
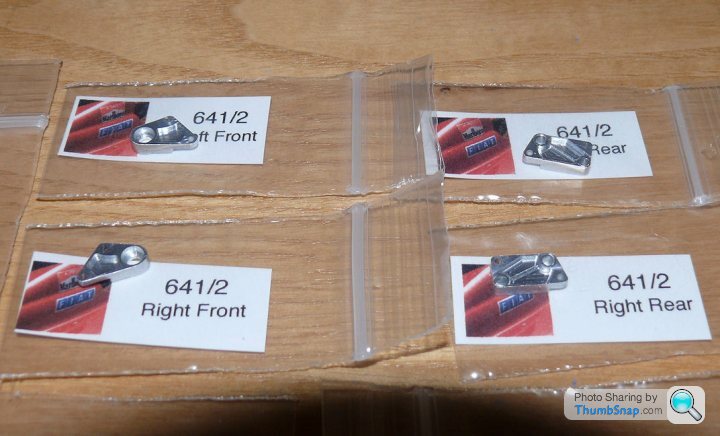
A few more bits of CNC porn arrived from Thunder valley F1 this morning; electrical connectors for all three 1:12 cars, suspension bellcranks and pivots for the Ferrari 641:
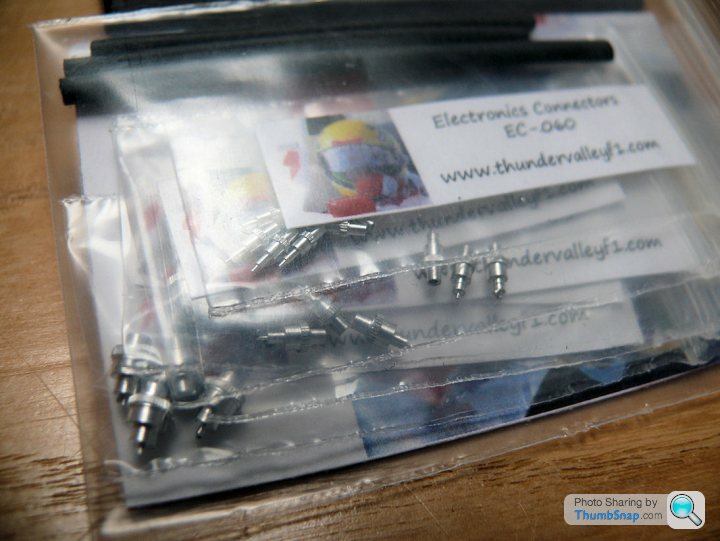
Now the Tornado GR4 is done, and the paper trawler almost there, I can't wait to finish the MP4/6 rebuild and then get stuck into some serious model engineering on the FW14B and 641.
Now the Tornado GR4 is done, and the paper trawler almost there, I can't wait to finish the MP4/6 rebuild and then get stuck into some serious model engineering on the FW14B and 641.
This evening I picked up the another MP4/6. Again, as with the FW14B, only £90. This will be built as the "bare chassis" version to go alongside the one I'm currently rebuilding to be "kerbside":
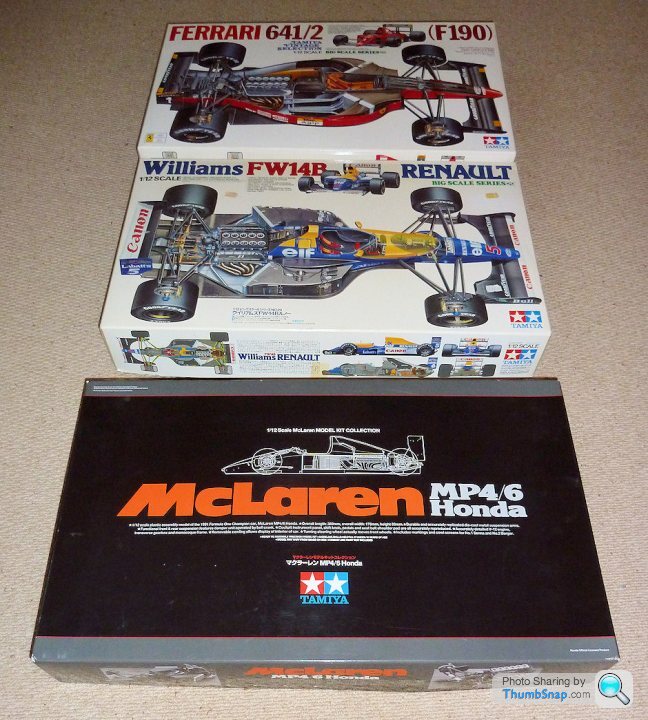
It's a re-issue with no Good-Year logos, which is no problem since I've got a complete set of aftermarket decals. On good point is that I've now got a second set of "McLaren" logos, which I quite like.
I mentioned previously that the major issue I had with re-furbing my original engine cover was that when I originally built the model back in '99, I had to flat the paint back becasue of a mistake, and I'd accidentally flatted off one of the teardrops for the rear suspension. To my amazement, whe I looked at the new one, it also only had one teardrop. This casued considerable disbelief. The seller thought it might be a coincidence, and that the re-issues we made using a damaged mould. It turns out that the car should only have one teradrop, and it's for the throttle linkage, not the suspension:
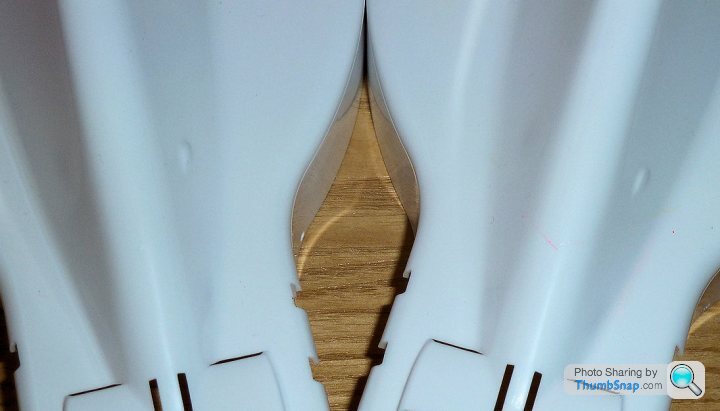
All these years I've been kicking myself for being careless enough to damage the body so badly (and - luckily - putting off correcting it!), when it was right all along.
It's a re-issue with no Good-Year logos, which is no problem since I've got a complete set of aftermarket decals. On good point is that I've now got a second set of "McLaren" logos, which I quite like.
I mentioned previously that the major issue I had with re-furbing my original engine cover was that when I originally built the model back in '99, I had to flat the paint back becasue of a mistake, and I'd accidentally flatted off one of the teardrops for the rear suspension. To my amazement, whe I looked at the new one, it also only had one teardrop. This casued considerable disbelief. The seller thought it might be a coincidence, and that the re-issues we made using a damaged mould. It turns out that the car should only have one teradrop, and it's for the throttle linkage, not the suspension:
All these years I've been kicking myself for being careless enough to damage the body so badly (and - luckily - putting off correcting it!), when it was right all along.
Got to work on the engine cover and a few more body parts. I've removed all the old paint and filled and sanded the seams I didn't bother with last time. I also drilled out the body fastener positions so I can use more realsitic p/e parts. Then gave it an overall light abrasive rub over to give a key for the first guide coat of Tamiya Fine Surface Pirmer:
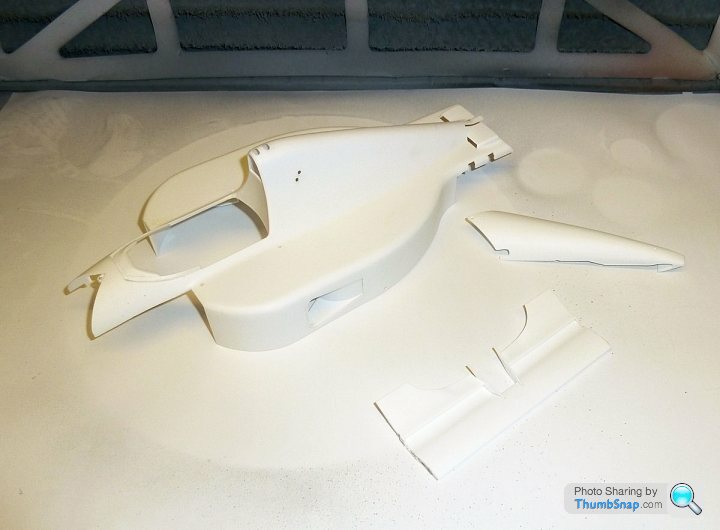
Strange how sometimes a coat of primer can be either a bit demoralising, or show unexpectedly good results. This one was much better than I expected; I think a lot of the errors I thought would get highlighted must have been just smoothed over bits of contrasting plastic/old paint. Now they are one colour, many of the apparent flaws disappeared:

Next job will be to flat and prime the rear wing parts, front endplates and the body panels around the rear suspension. I'll also drill out all the tiny holes in the endplates for the wing incidence adjustment bolts.
Strange how sometimes a coat of primer can be either a bit demoralising, or show unexpectedly good results. This one was much better than I expected; I think a lot of the errors I thought would get highlighted must have been just smoothed over bits of contrasting plastic/old paint. Now they are one colour, many of the apparent flaws disappeared:
Next job will be to flat and prime the rear wing parts, front endplates and the body panels around the rear suspension. I'll also drill out all the tiny holes in the endplates for the wing incidence adjustment bolts.
Gassing Station | Scale Models | Top of Page | What's New | My Stuff