Tamiya Caterham 1/12 - modified
Discussion


That answers the question about the steps - no issues at all by the look of it. I guess the only remaining question is how long the parts last before they degrade with UV? Then again if they're coated with paint it should slow the process down. The cowling I made for a 1:72 model aircraft using this process is still fine after about 4 years.
Right - back on it after a trip to France and marshaling at the British F1 GP!
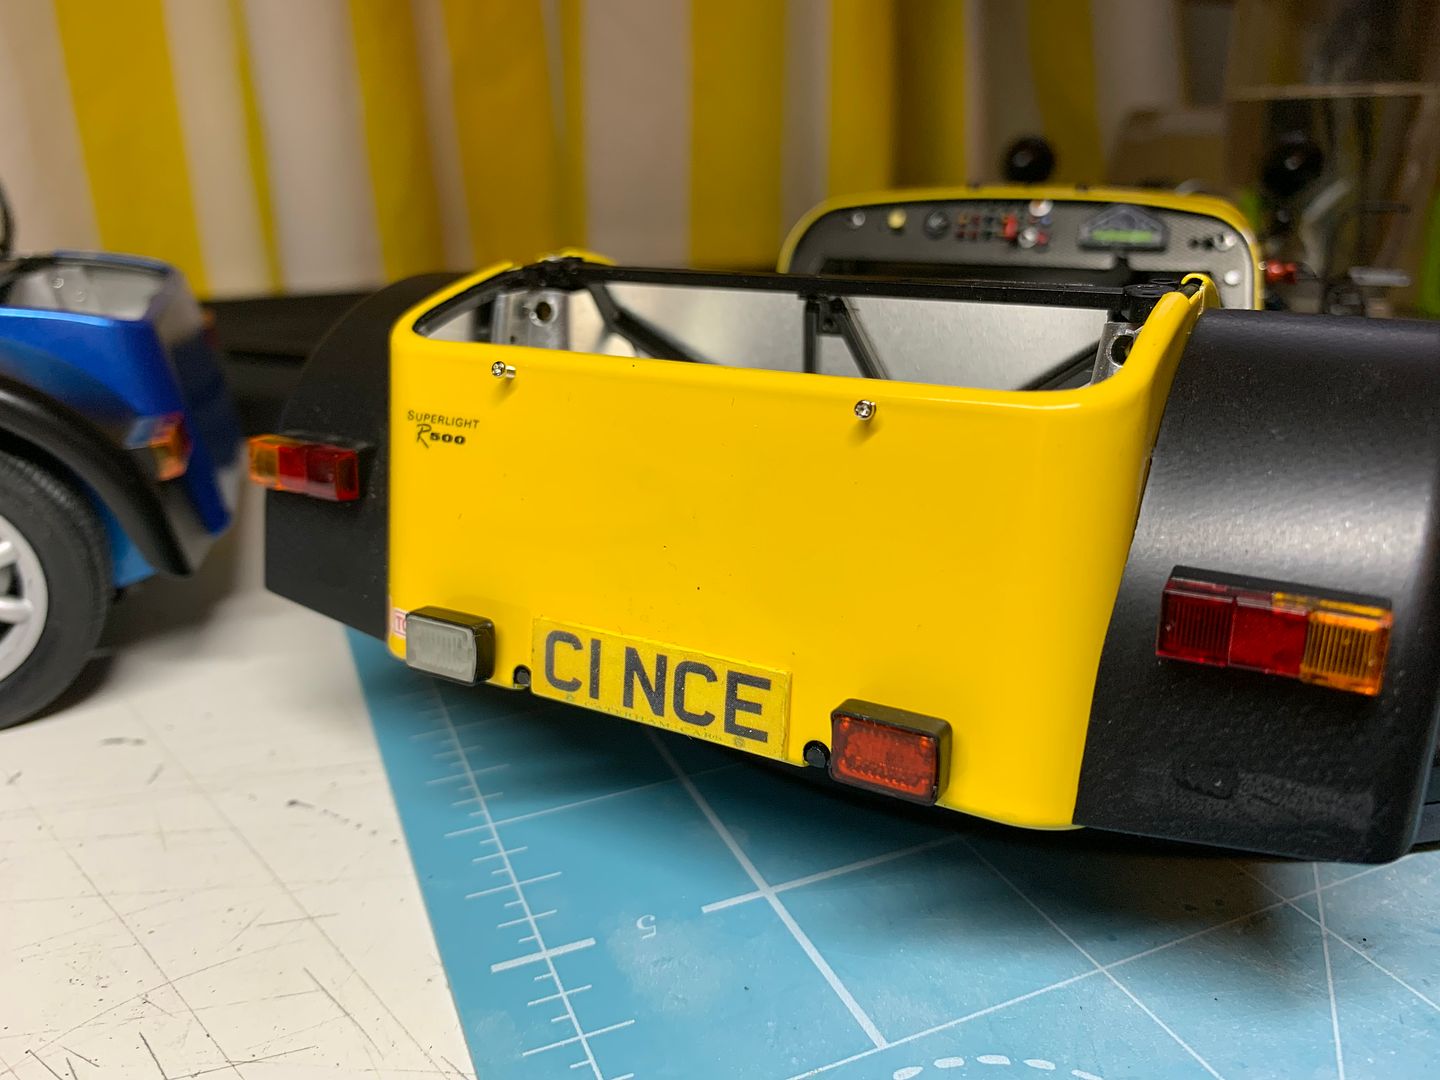
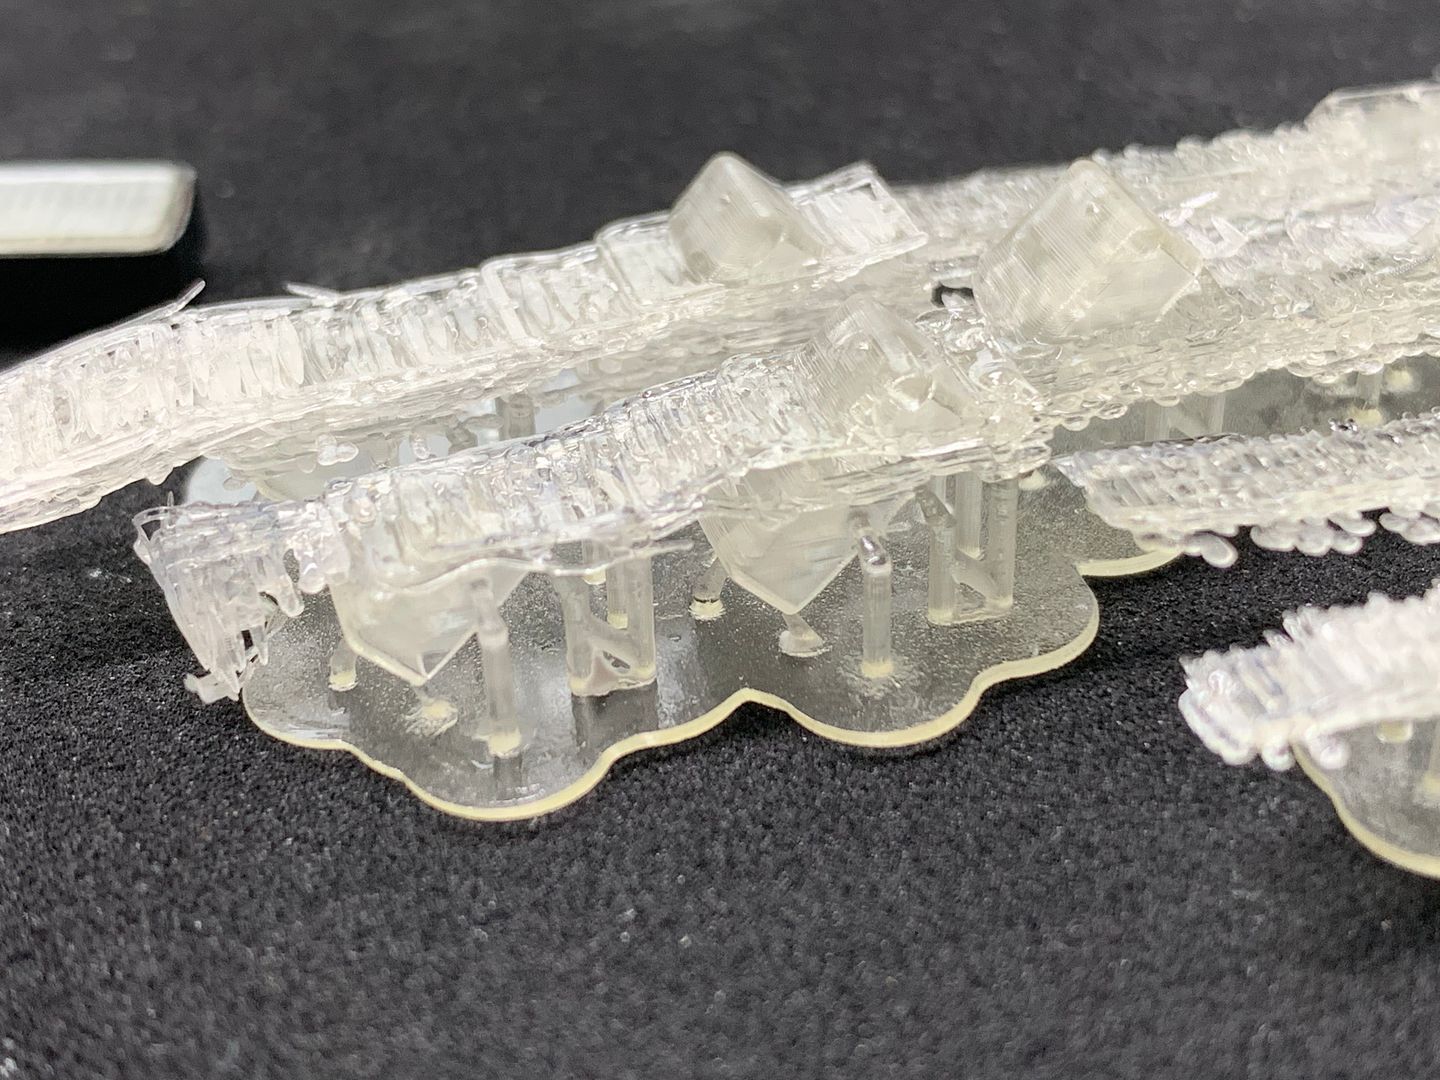
I tried a bit of clear resin to make the rear fog and reverse lights - I'd made the casing already, so made the 'lens' to fit inside. I thought I'd try a few details inside in the lens to see if it showed when painted (with clear red) - it actually worked quite well! I used a bit of silver paint inside the lens to help, especially with the reverse light. I'll add some screw details later...
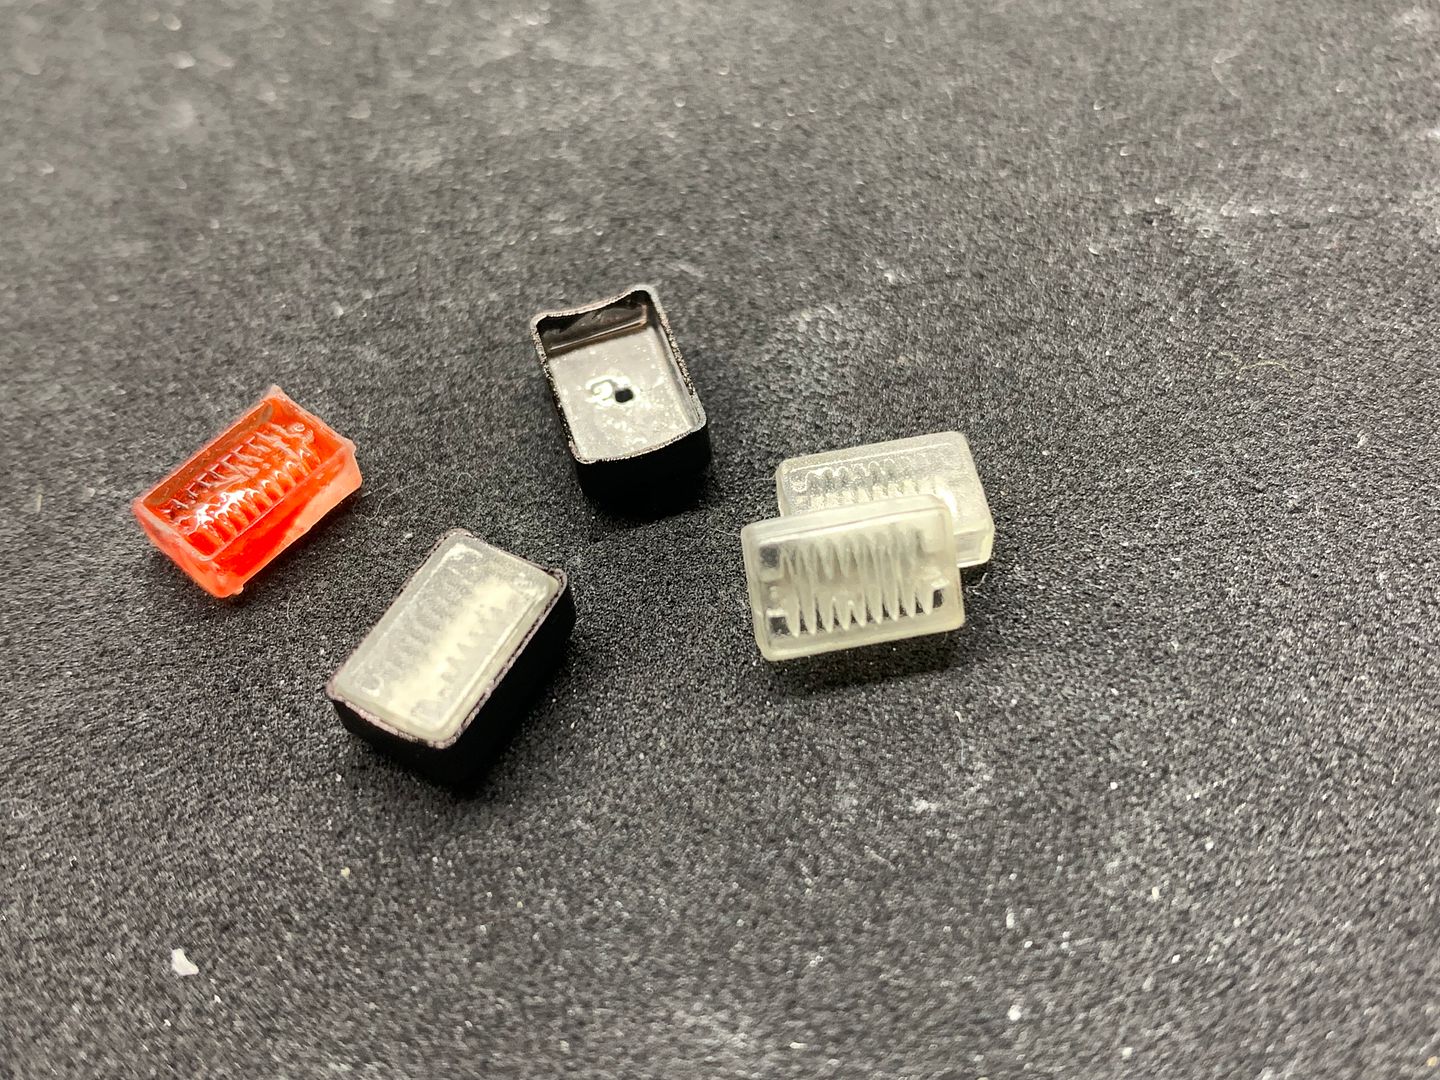
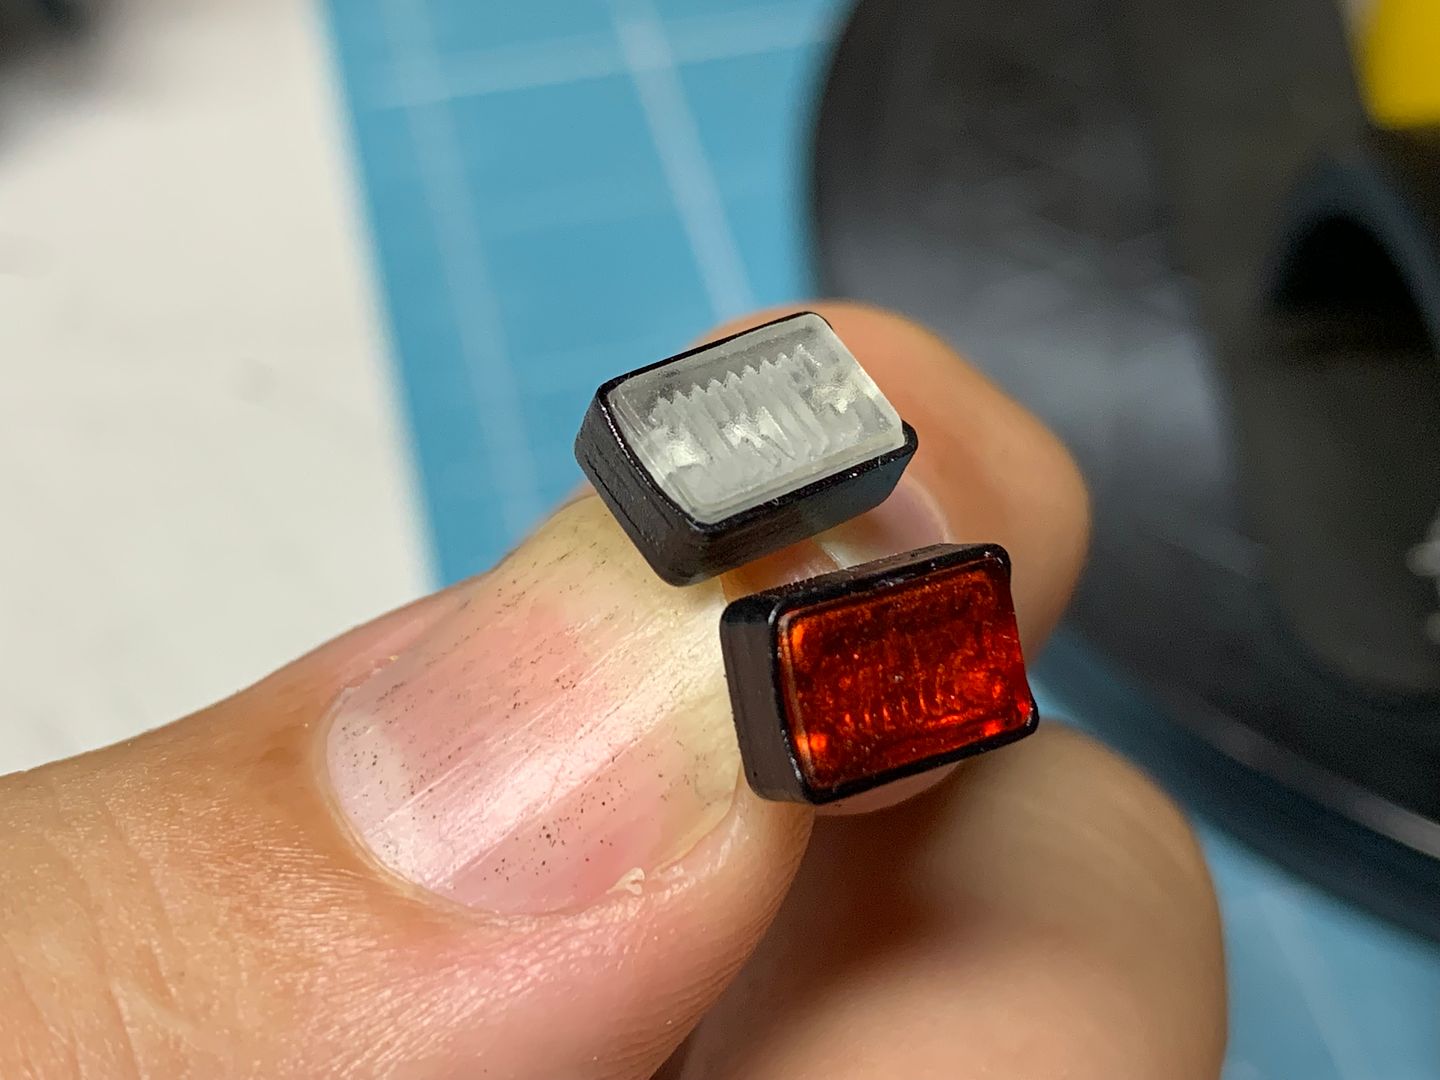
I had a back-up plan using some clear red reflectors cut up, but the printed clear worked well...

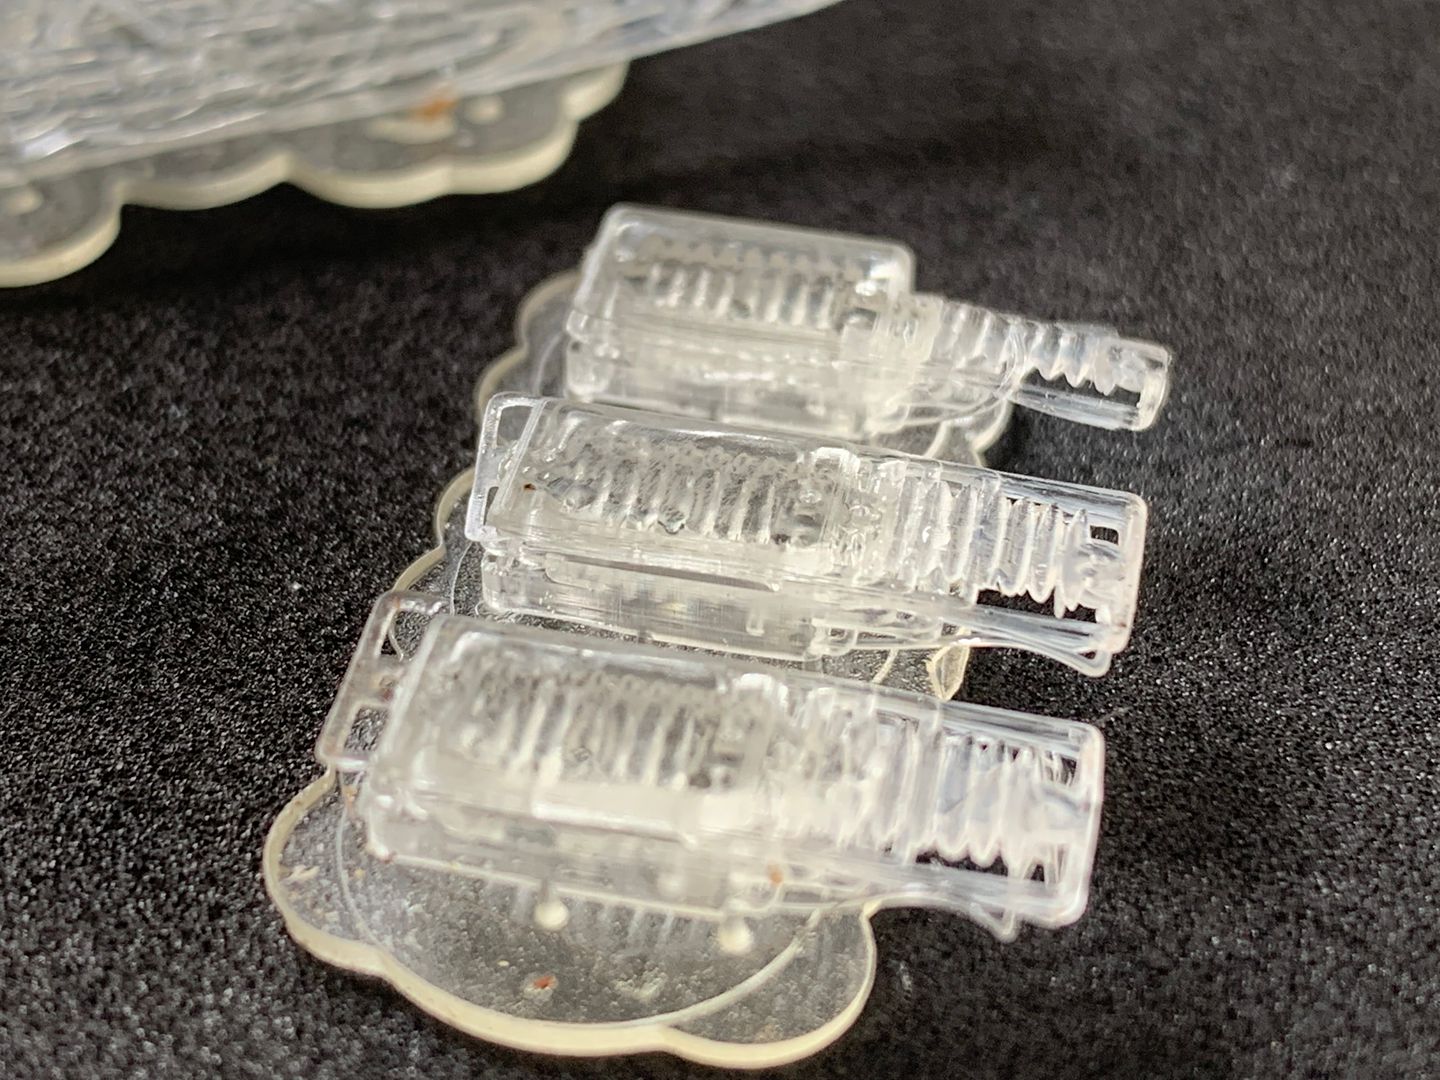
...although I did have some weird artifacting with some of the prints - I think what happened was that the first few layers stuck to the FEP film, not the plate - then it stuck, and then i was getting some refraction of the UVA light through the clear resin - no idea, but I managed to get a few pieces that worked for what I needed.
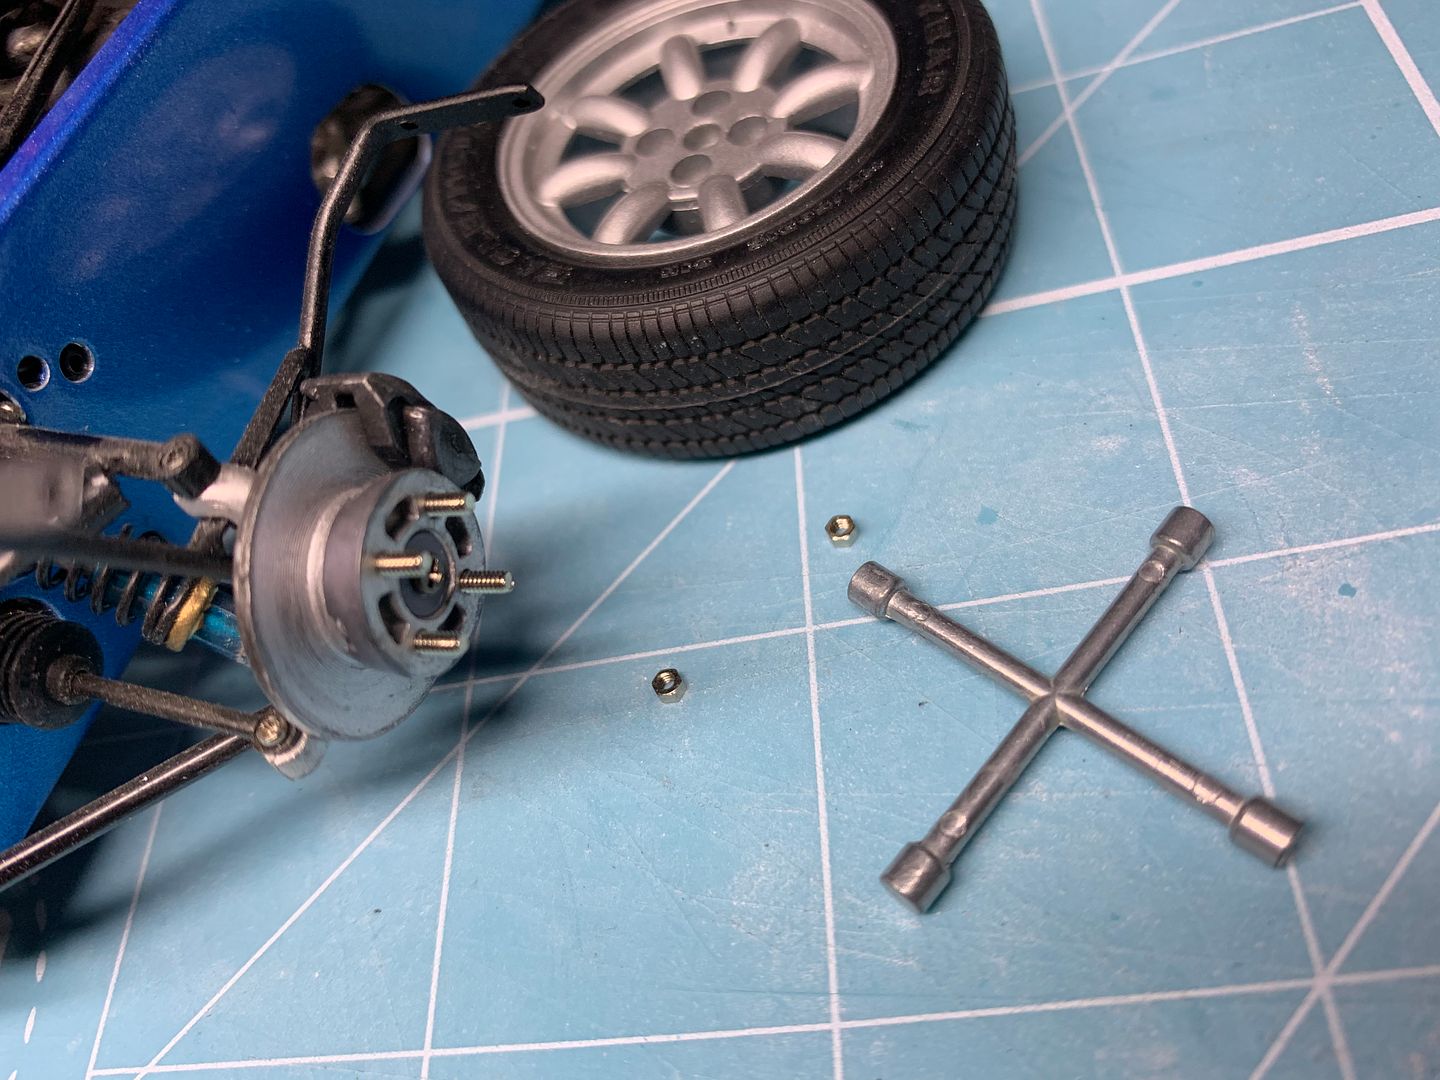
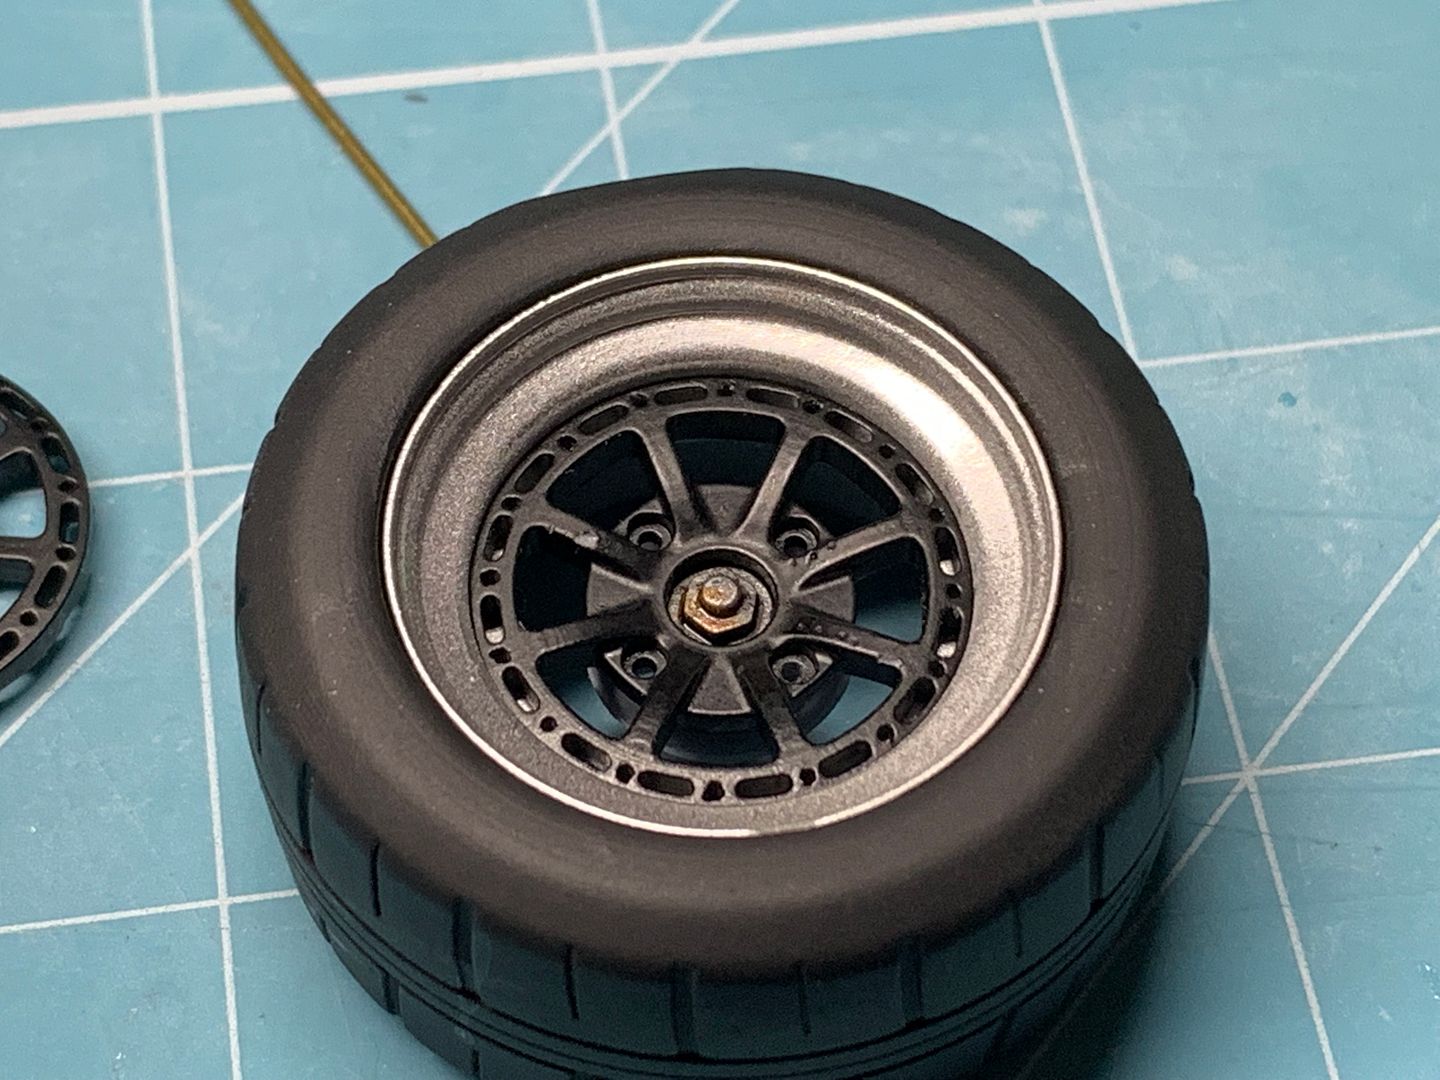
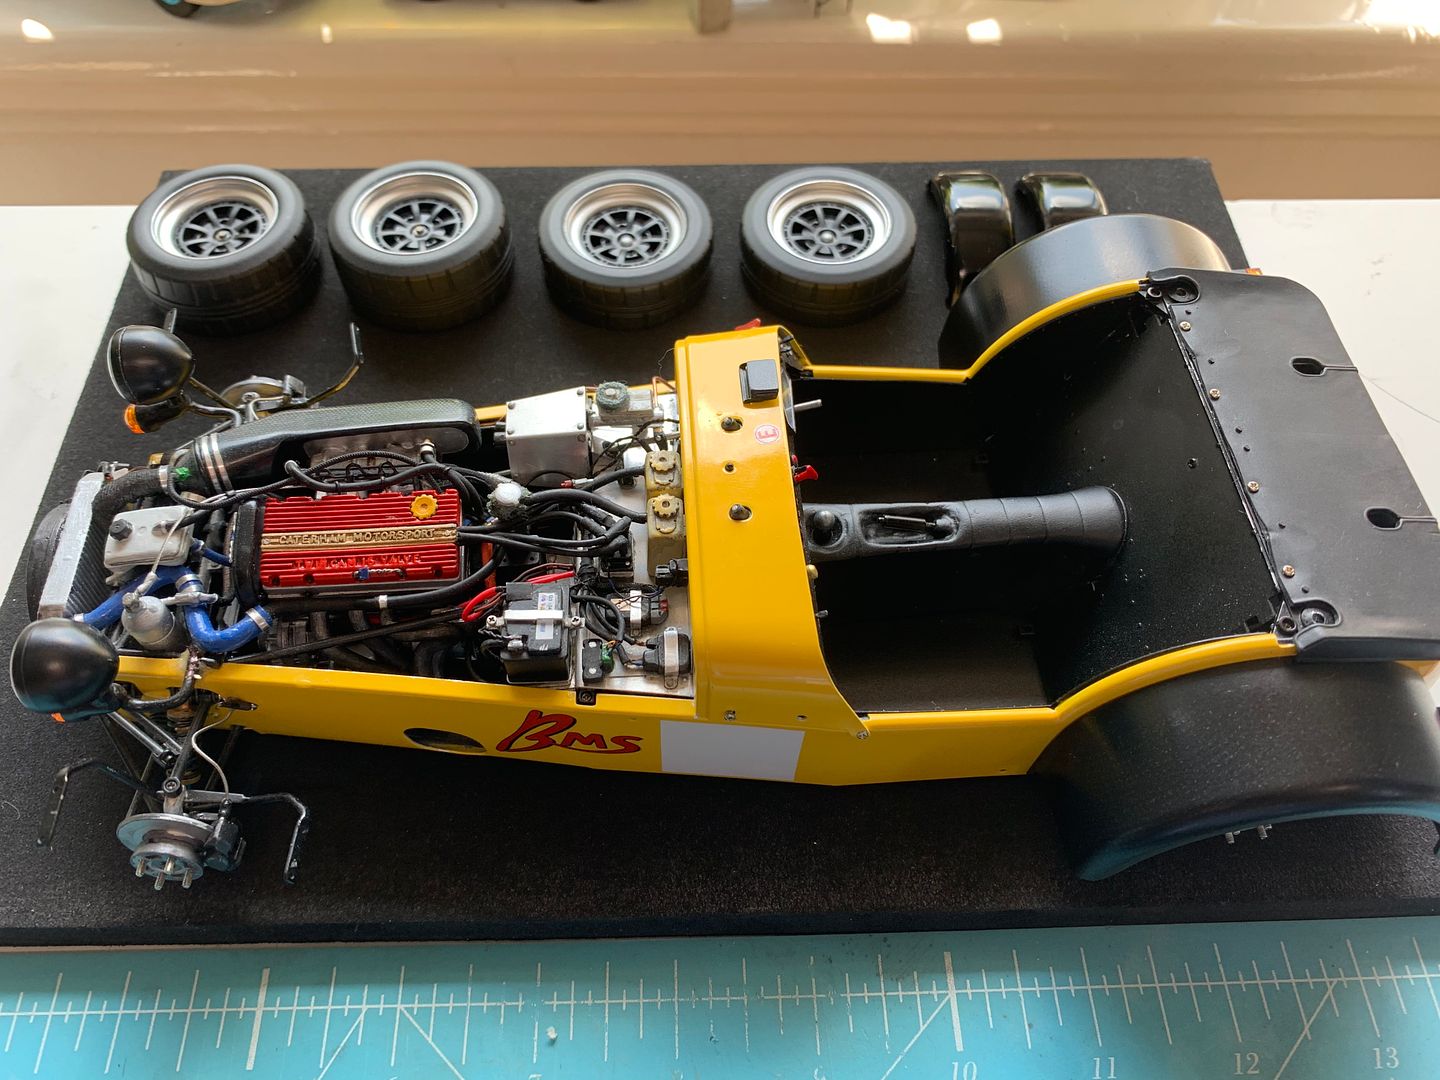
I needed to find a way to fit my wheels - the bolt holes did not quite line up - I think the file was scaled slightly over the years, but I wanted something stronger anyway...
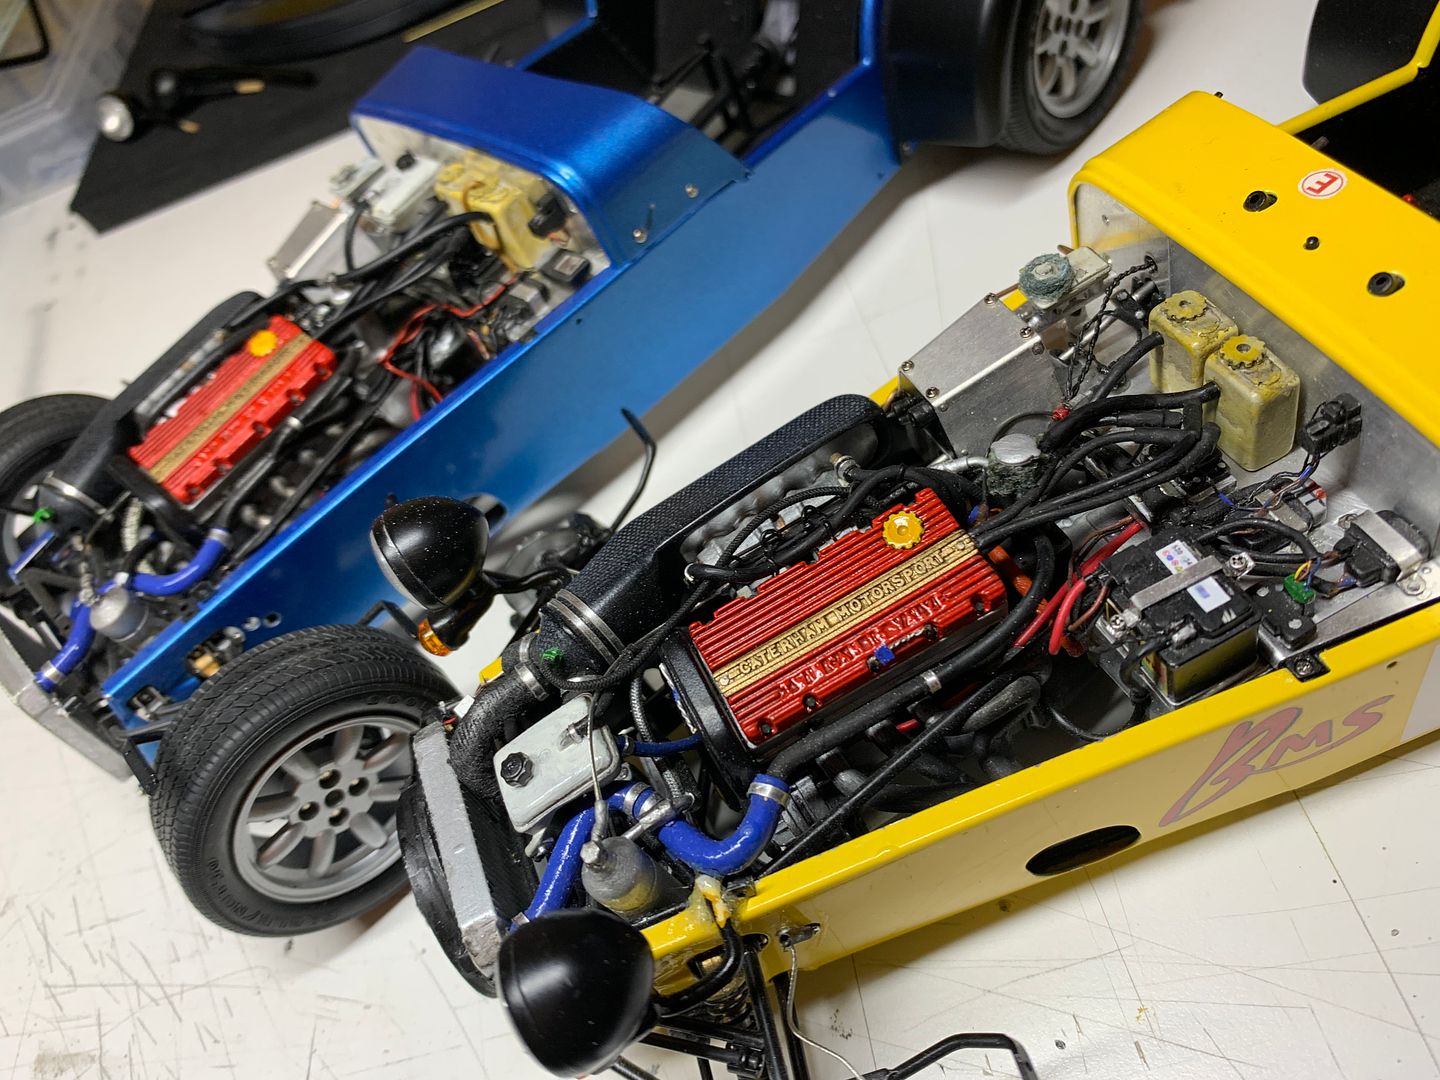
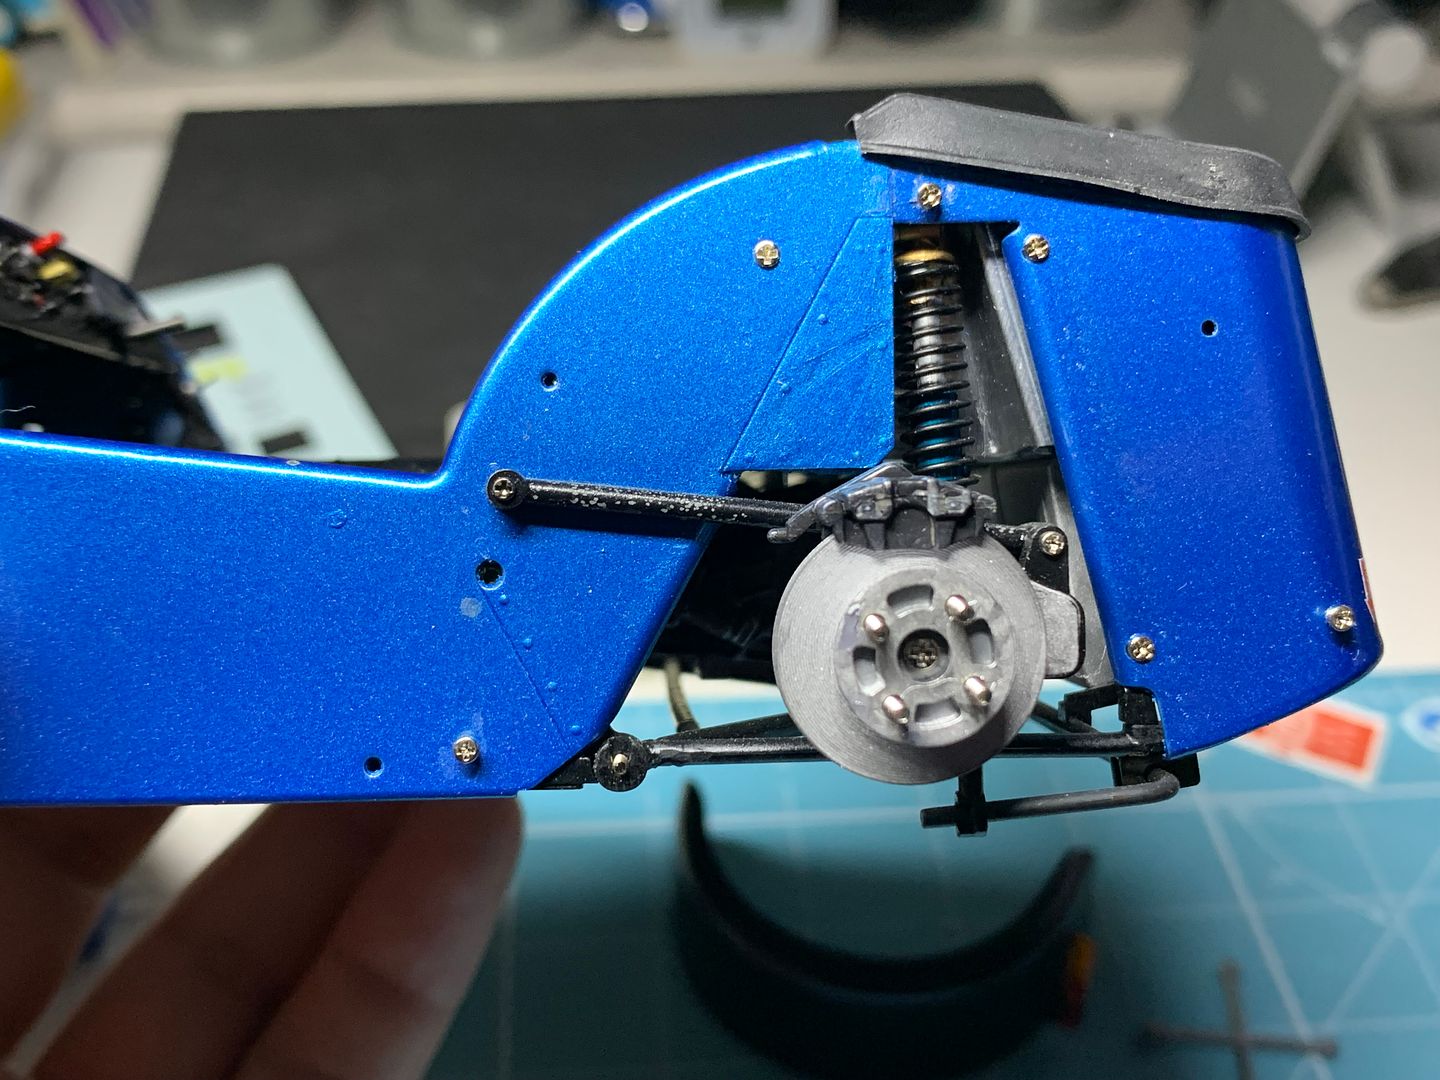
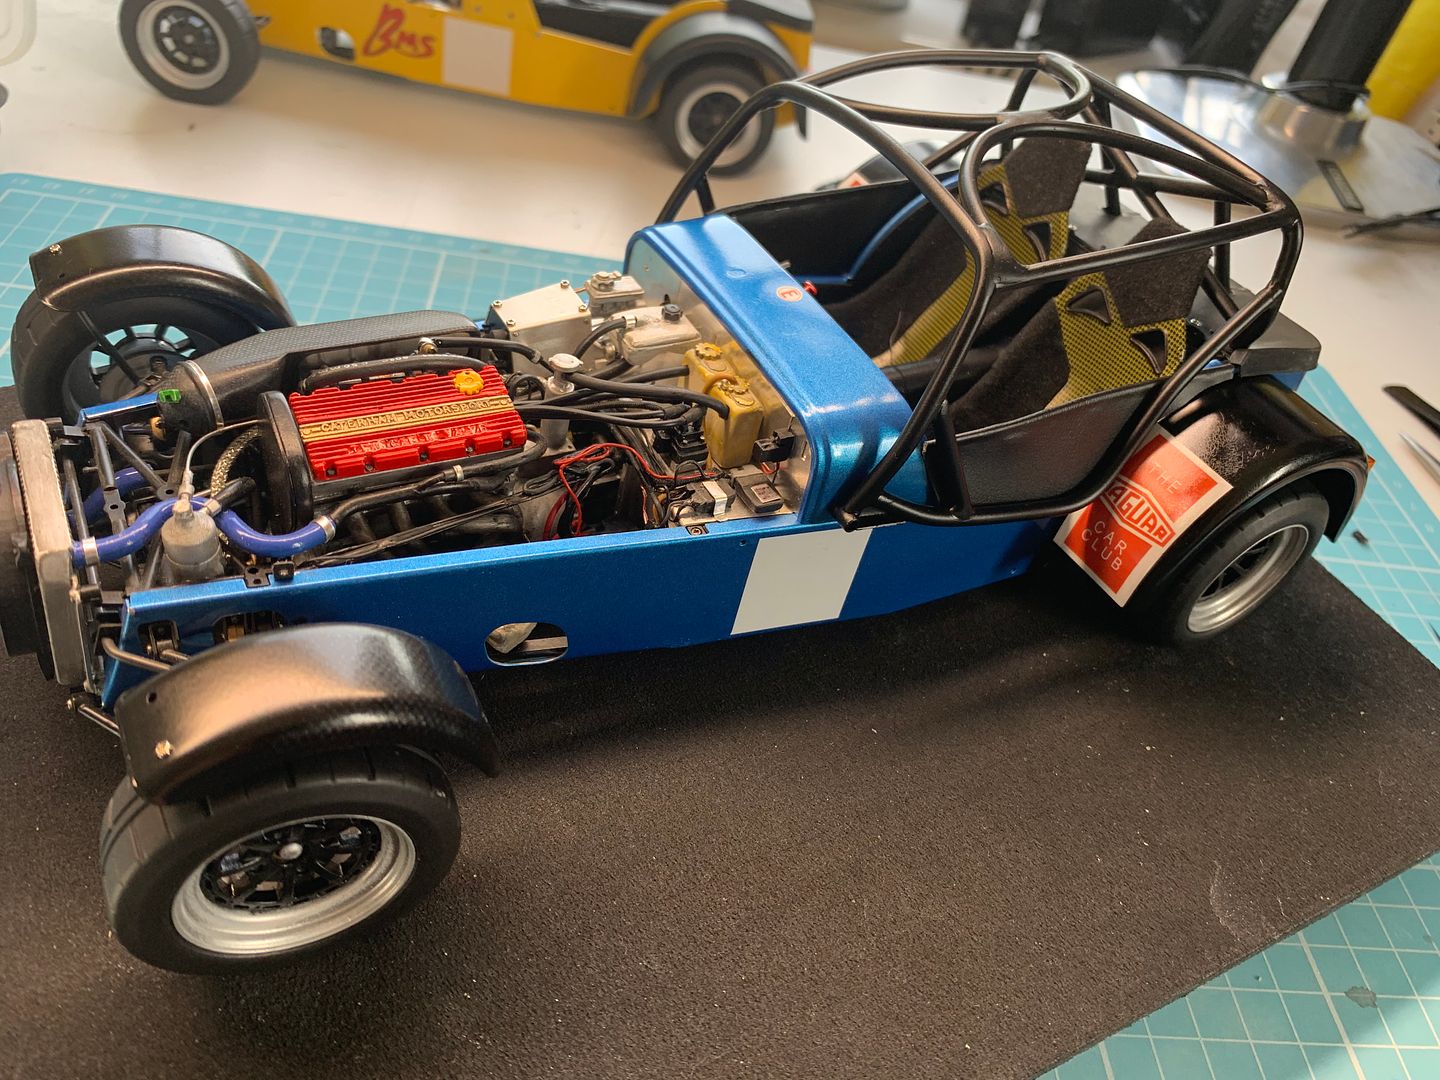
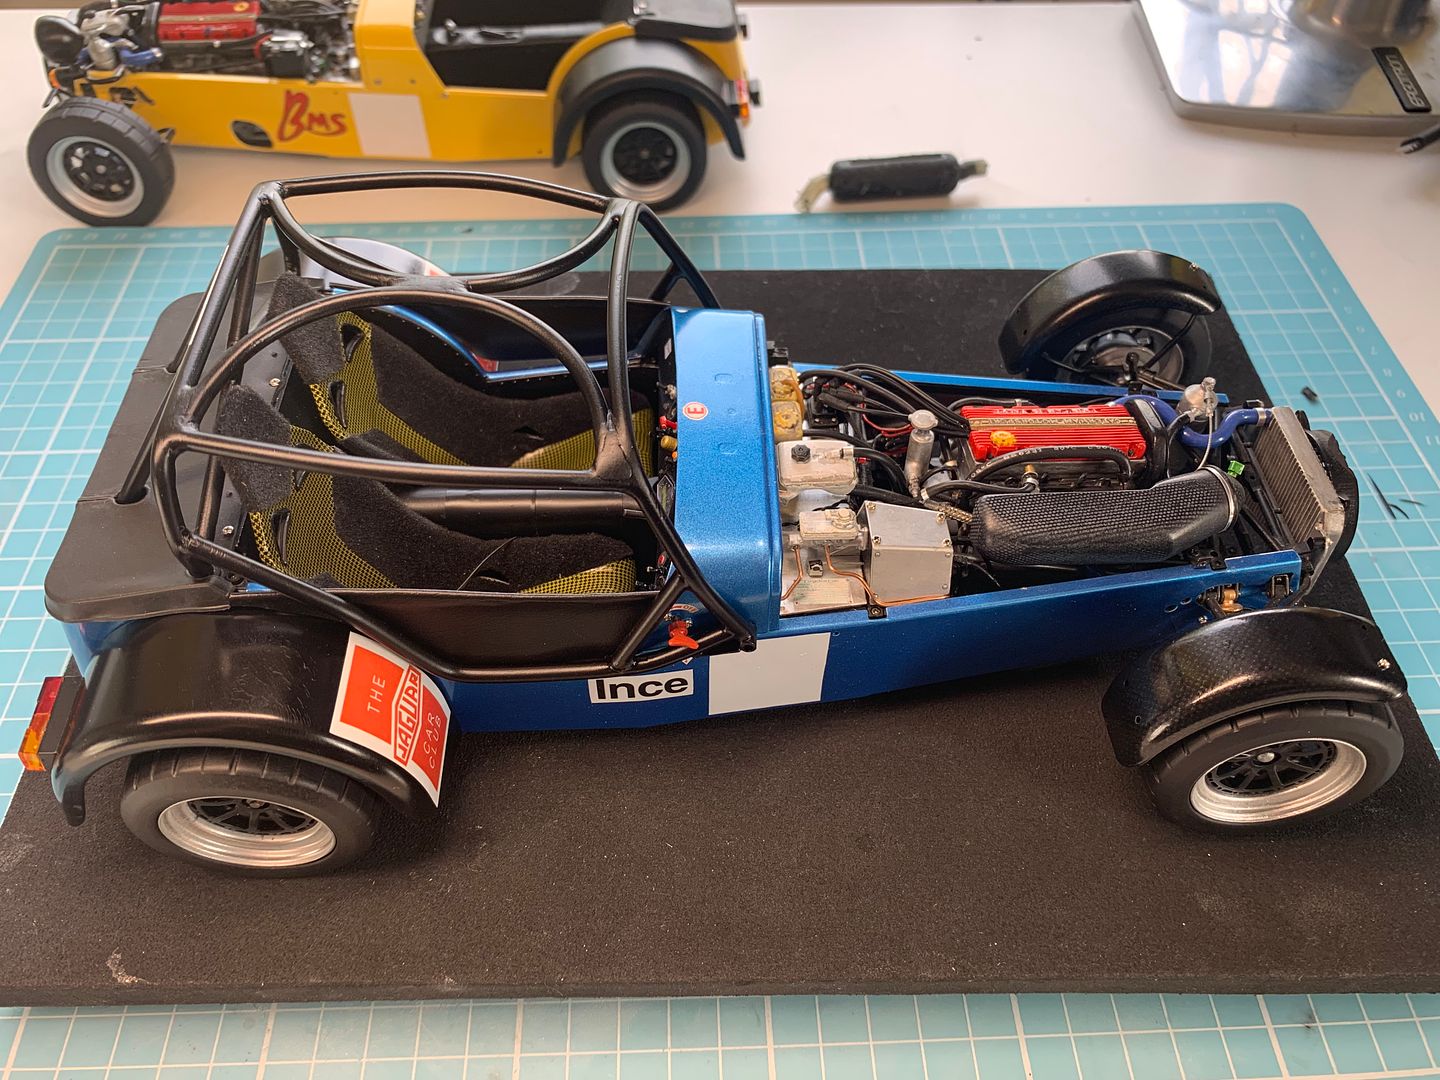
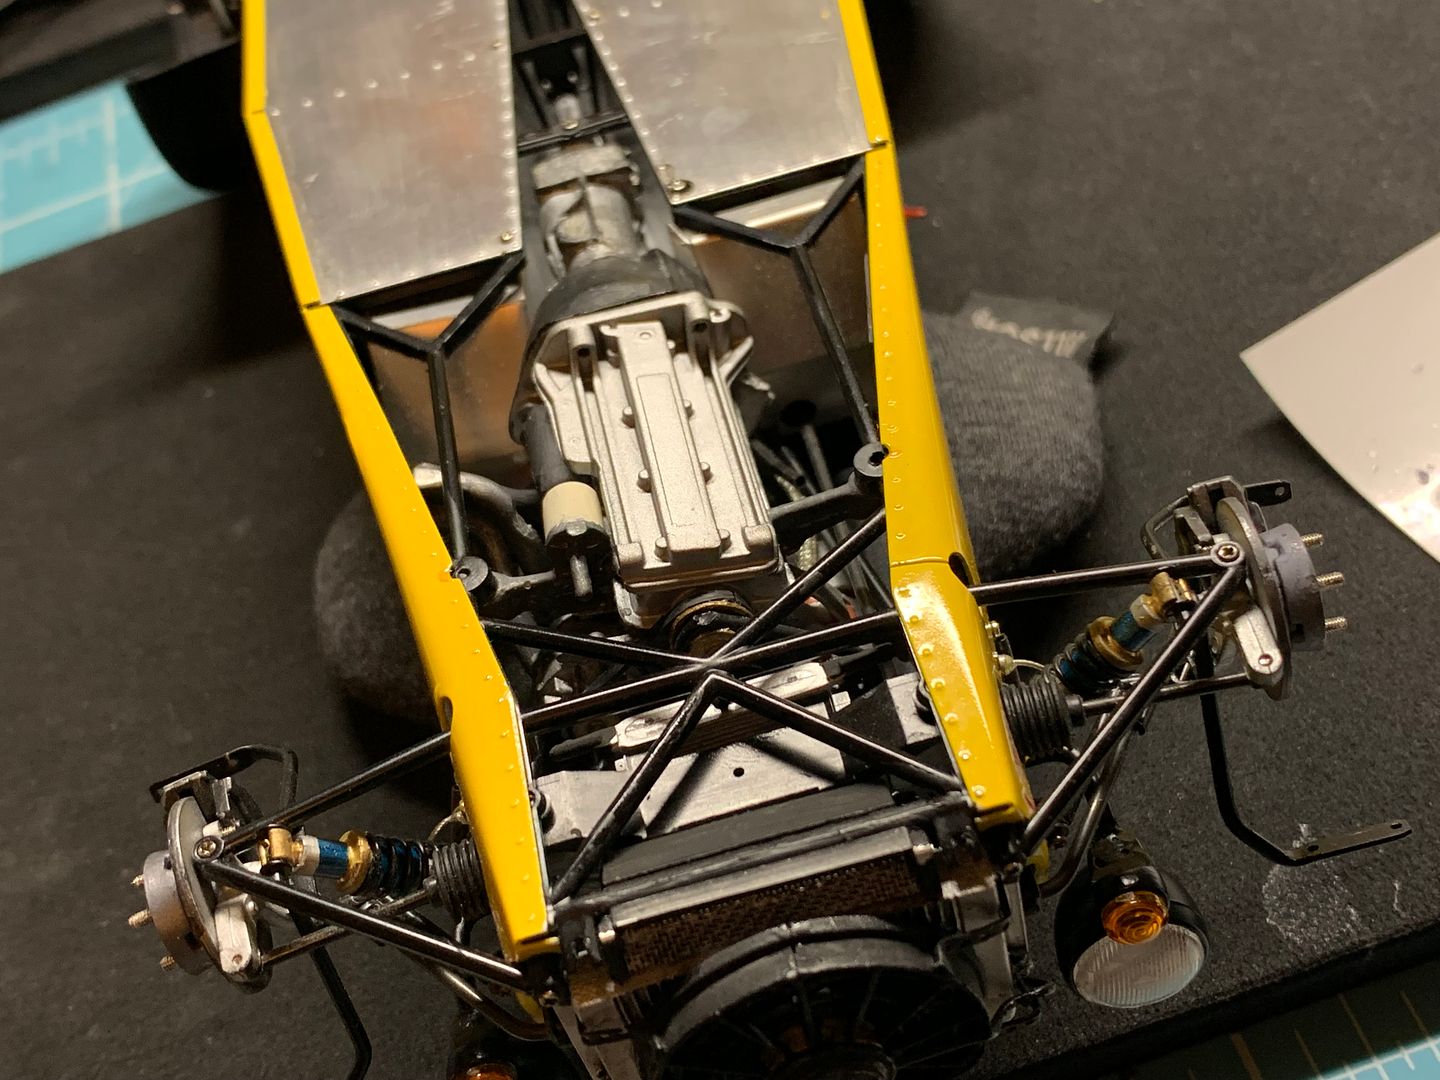
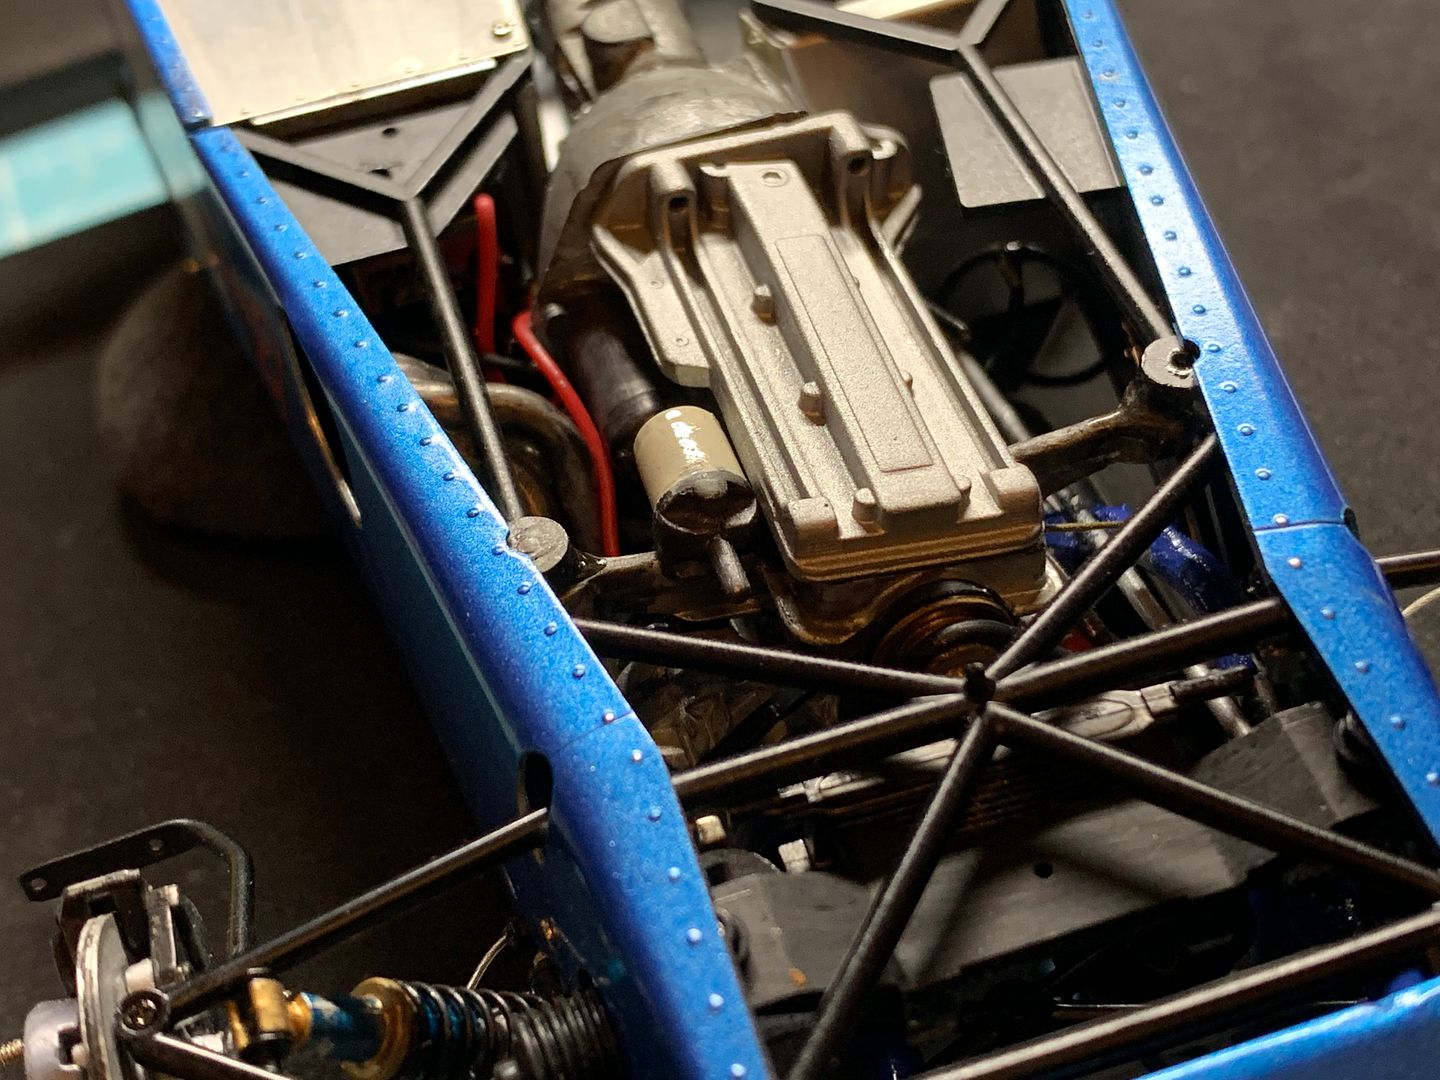
Incidentally, the Tamiya kit is so well made that it even has the alternative suspension mounts that the 'real' car has - in this model the trailing arm (link arm?) is fitted in 'comfort' mode - the lower boss is for better handling. It is all to do with 'rear steer' on the de-dion tube, and this kit actually can be used to demonstrate the difference and why the 2 positions work - I'll make a video next time I make one...
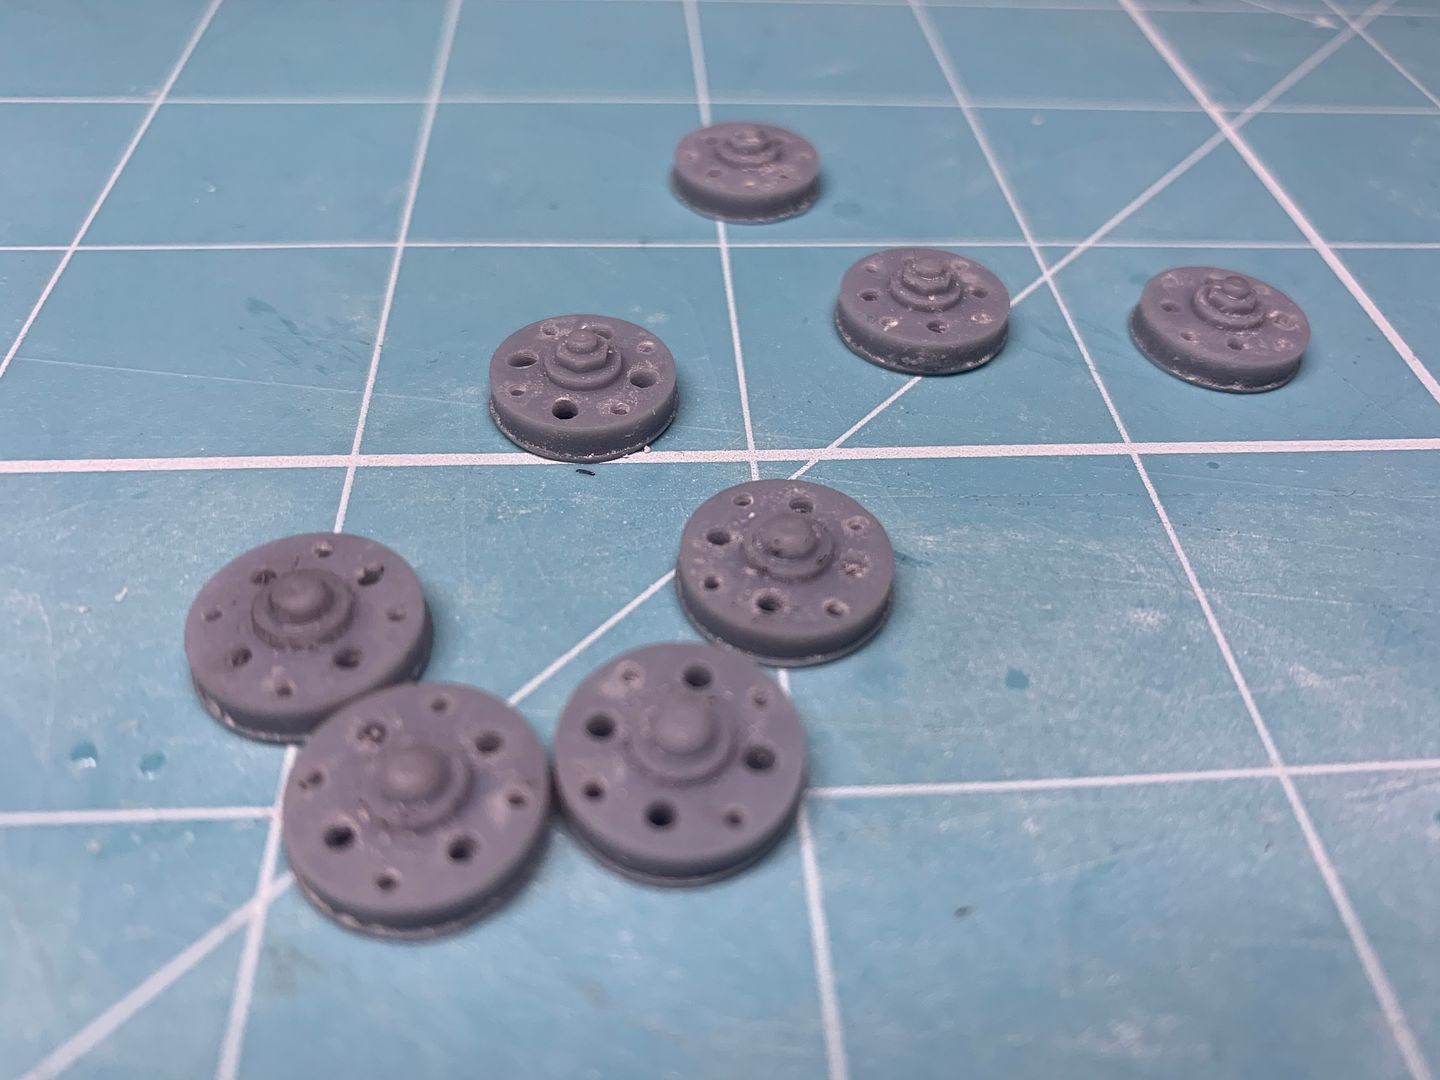
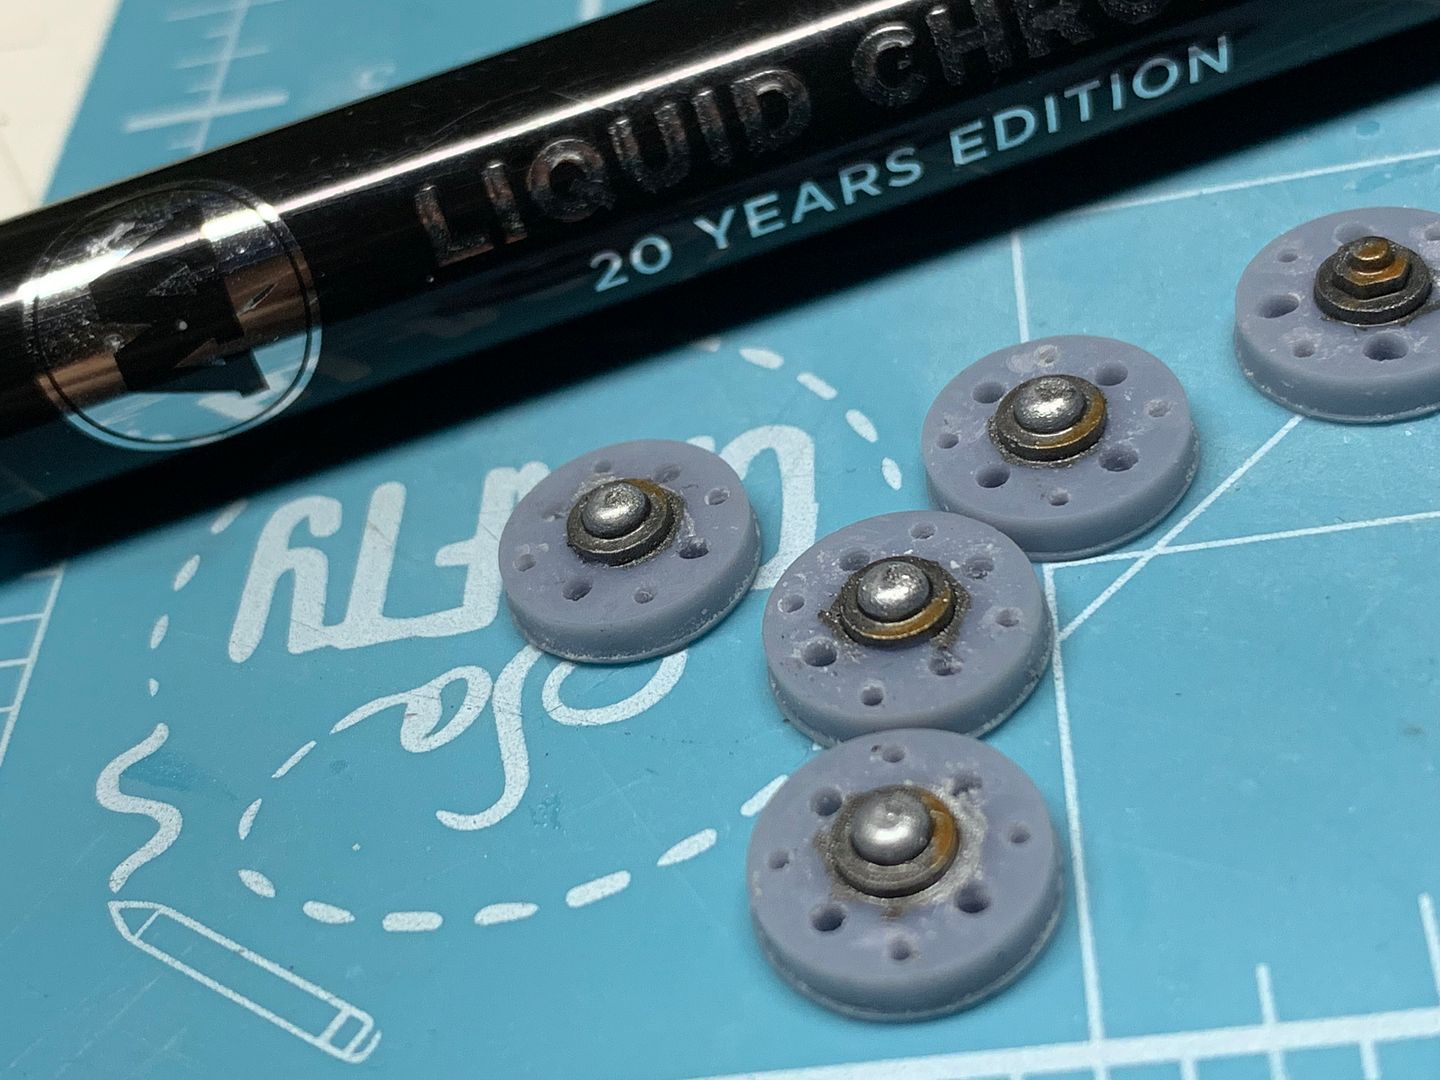
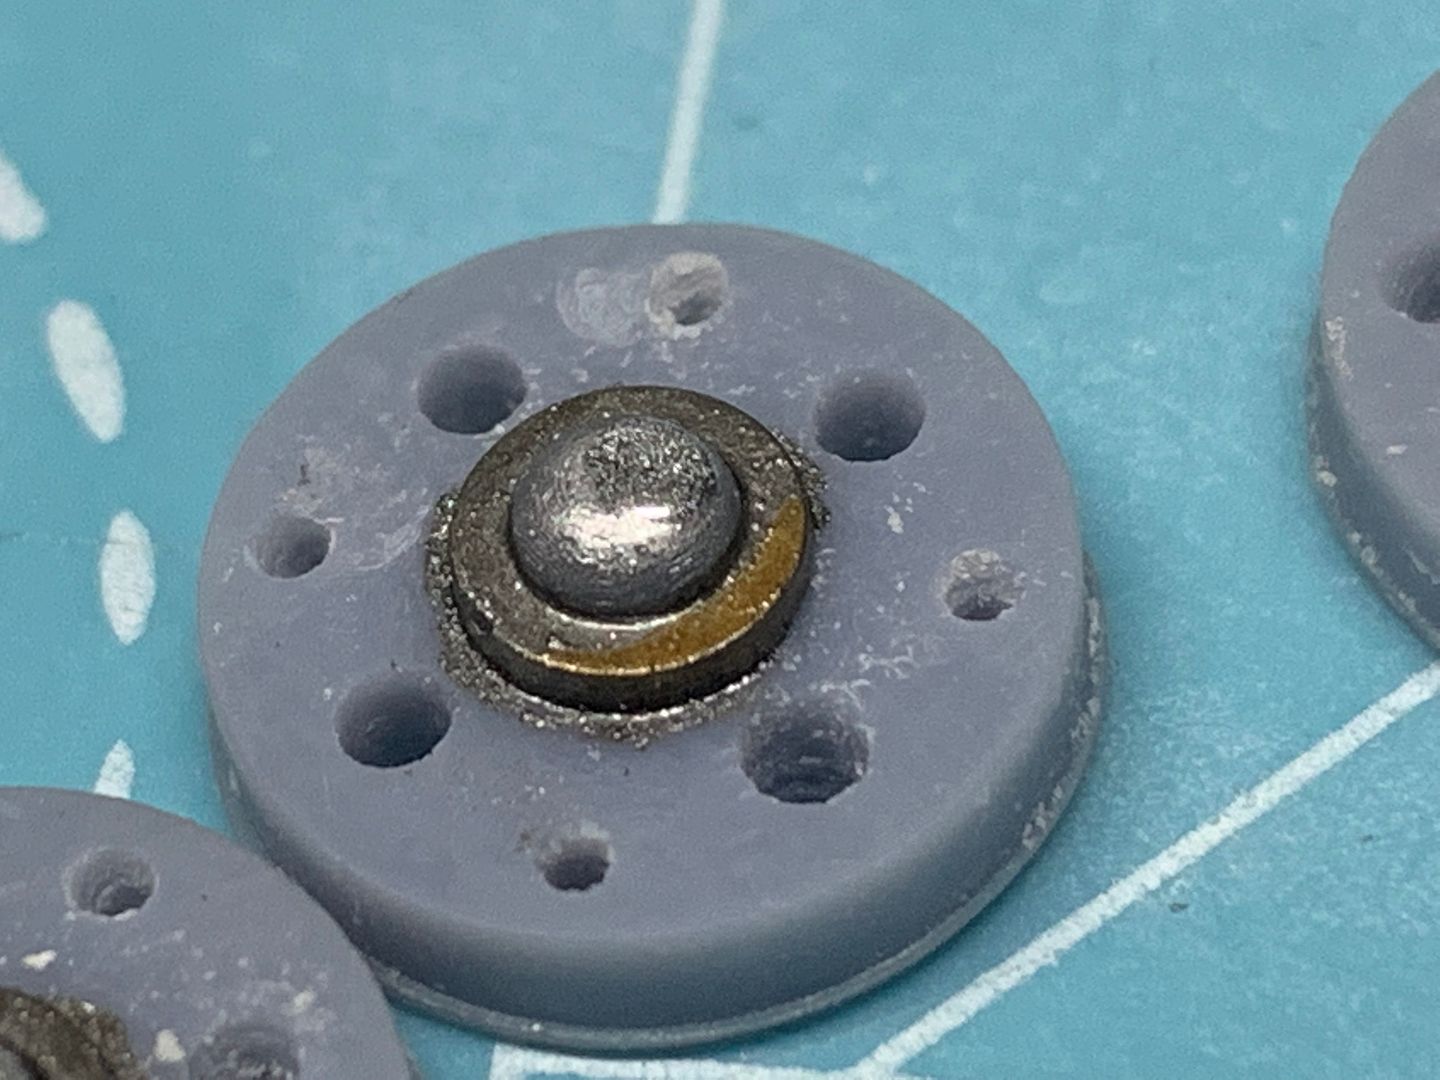
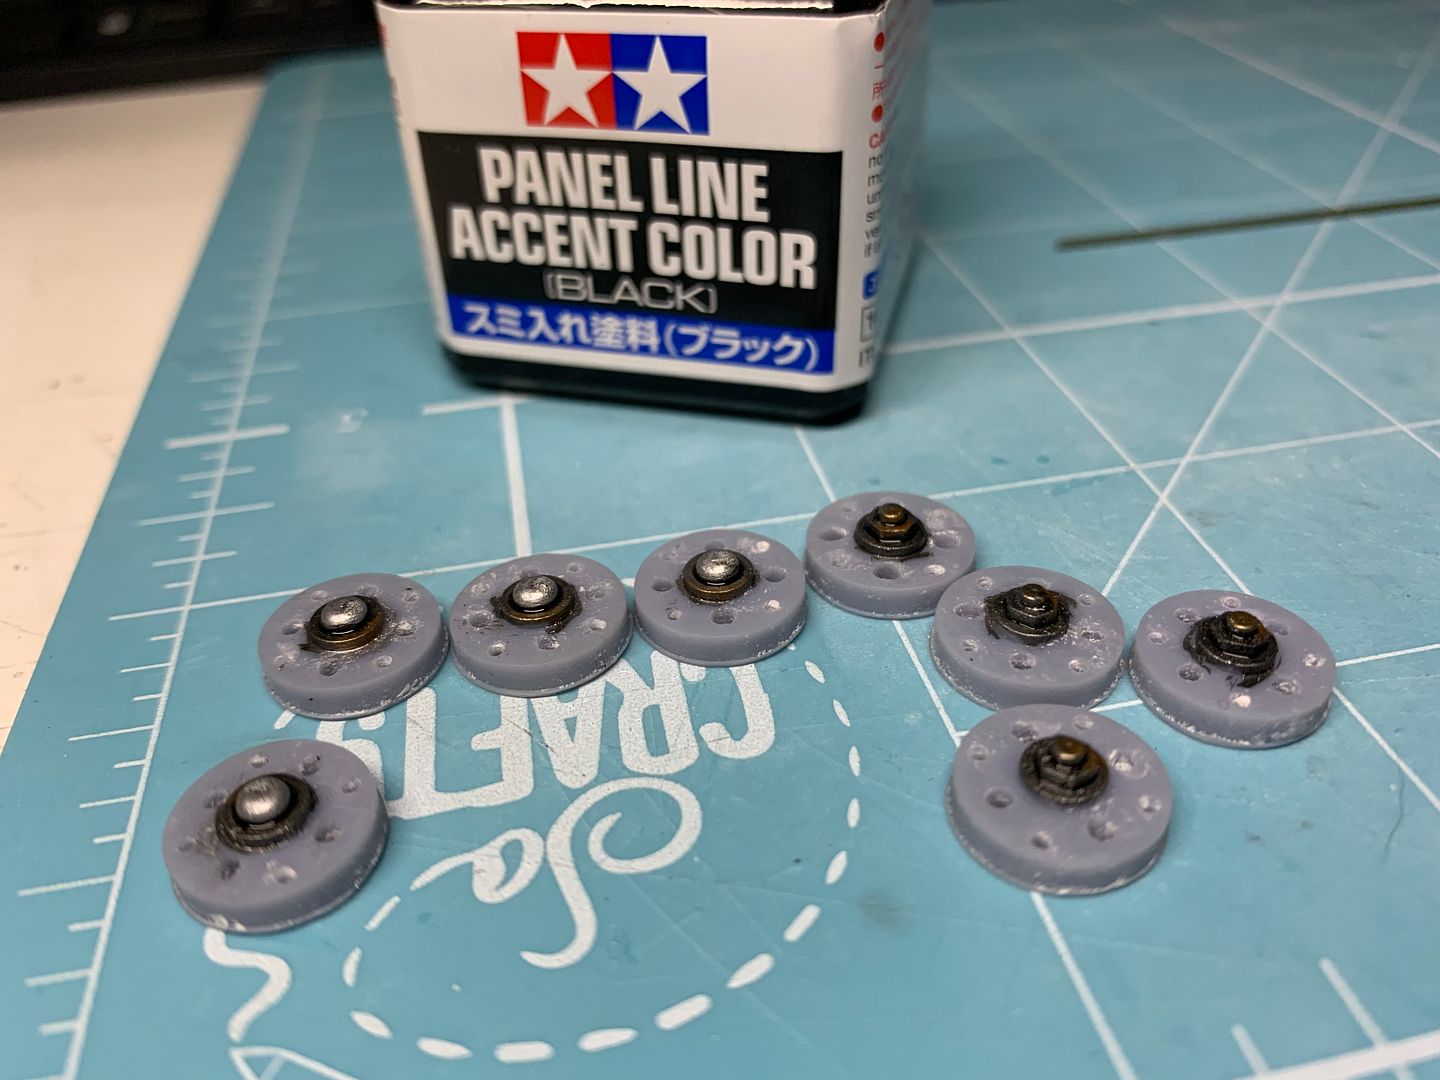
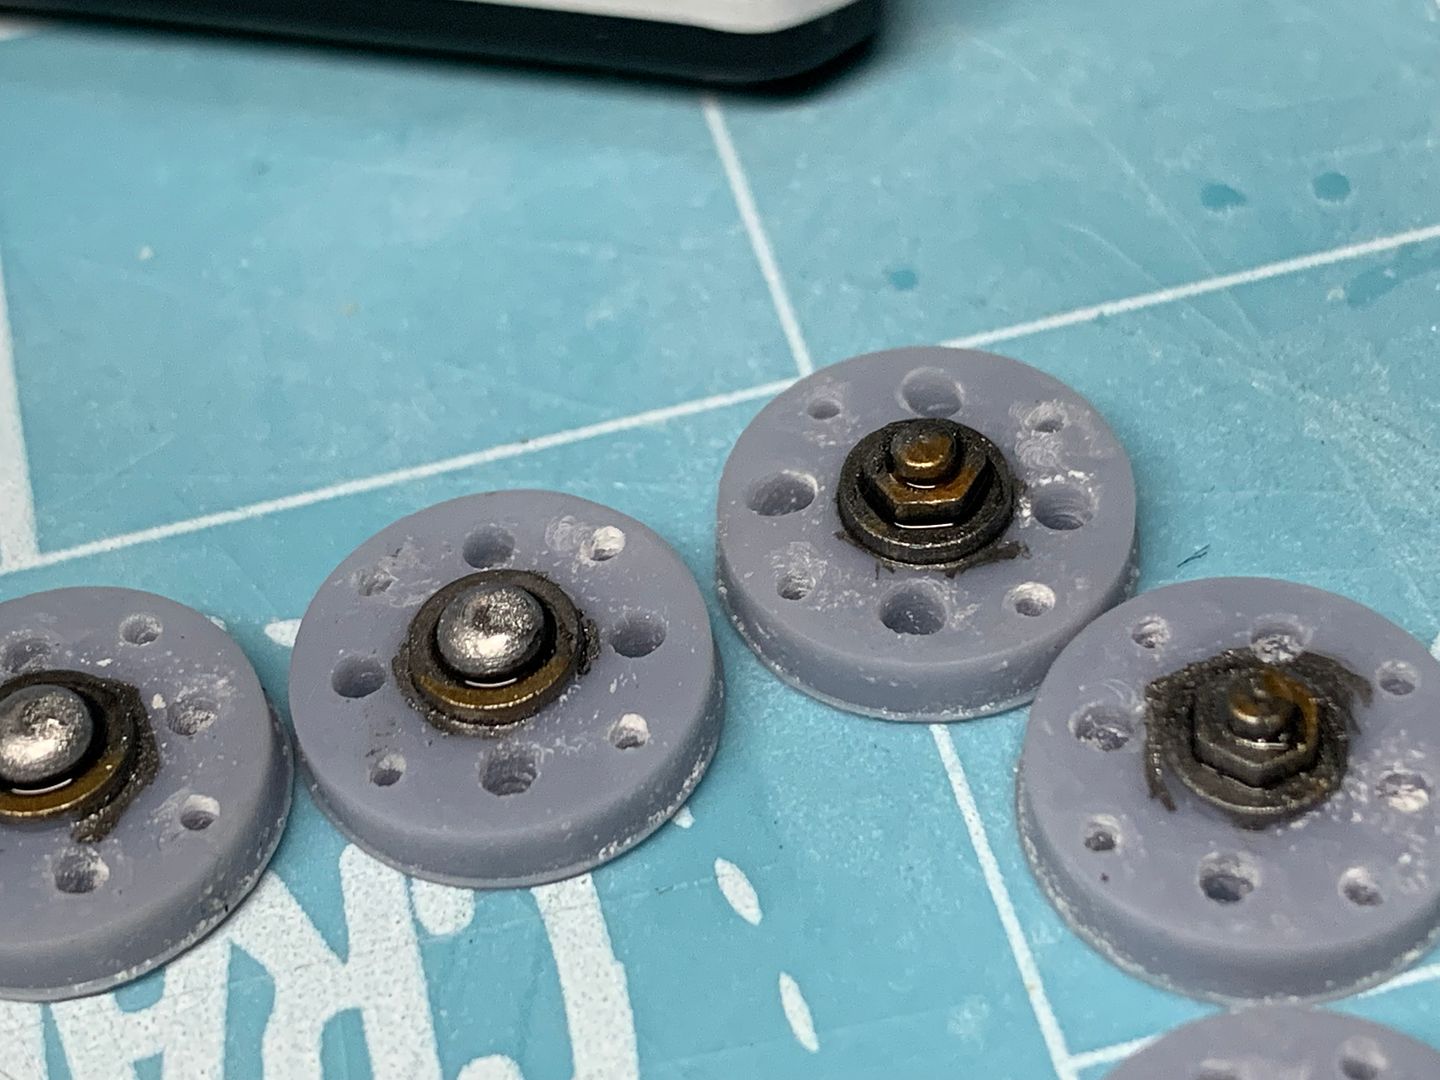
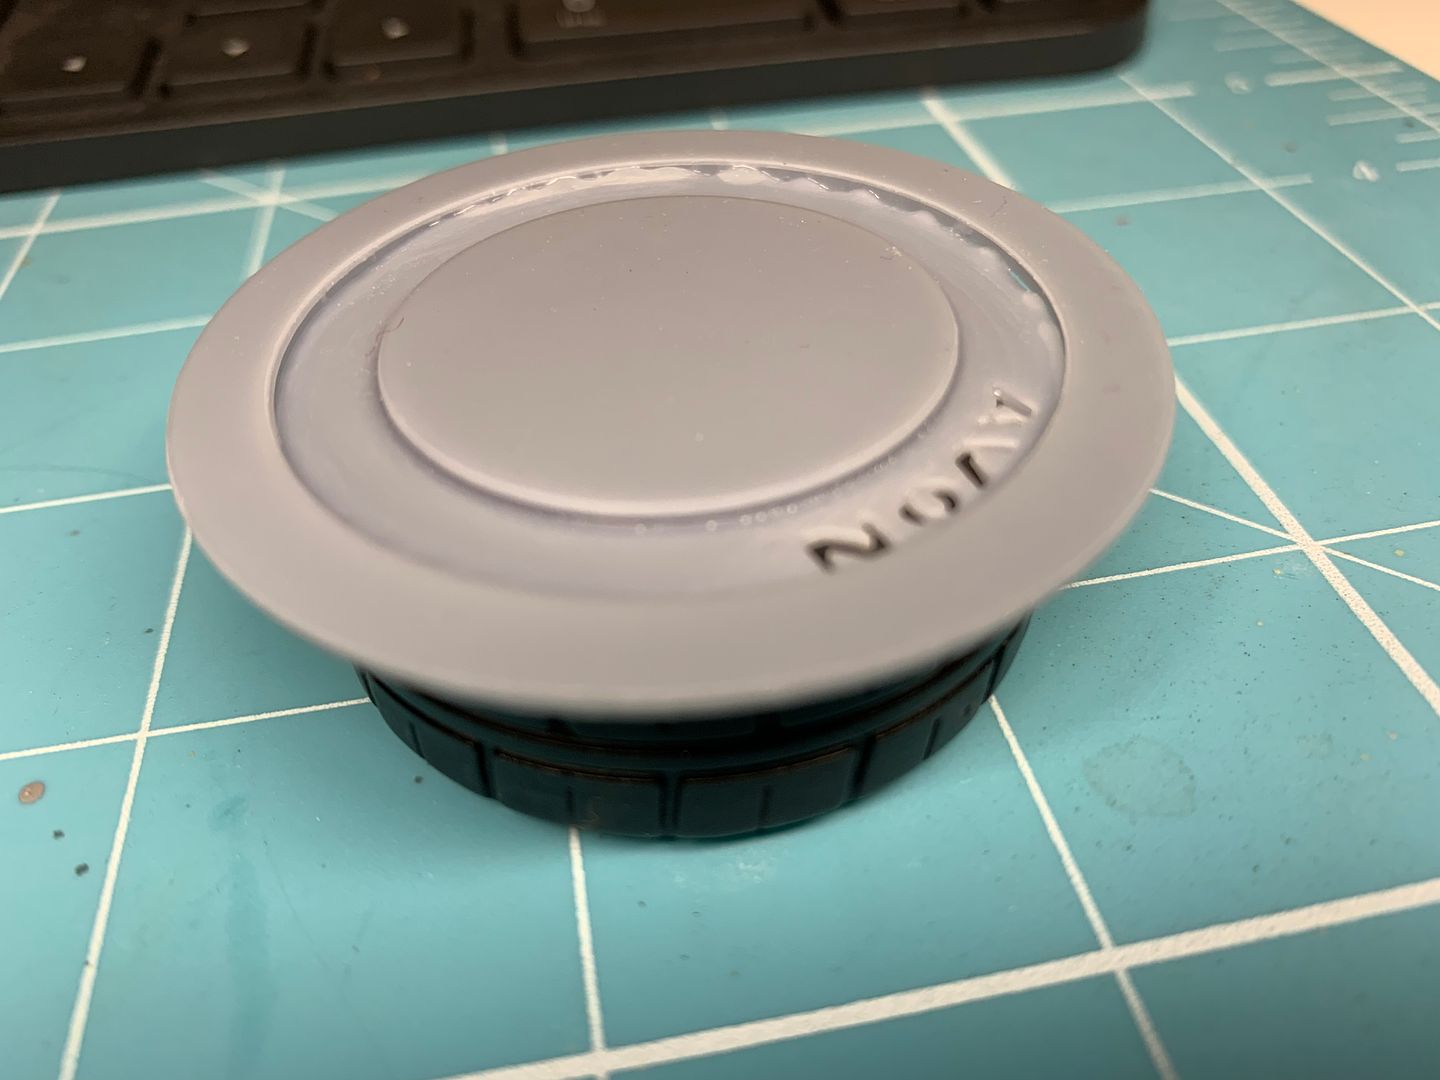
So I drew up some 'spacers' (I wanted a slightly wider track) which included the rear bub bolt and the front bearing grease cap. These would mount on the existing wheel bolts, and fit snuggly into my new alloys.
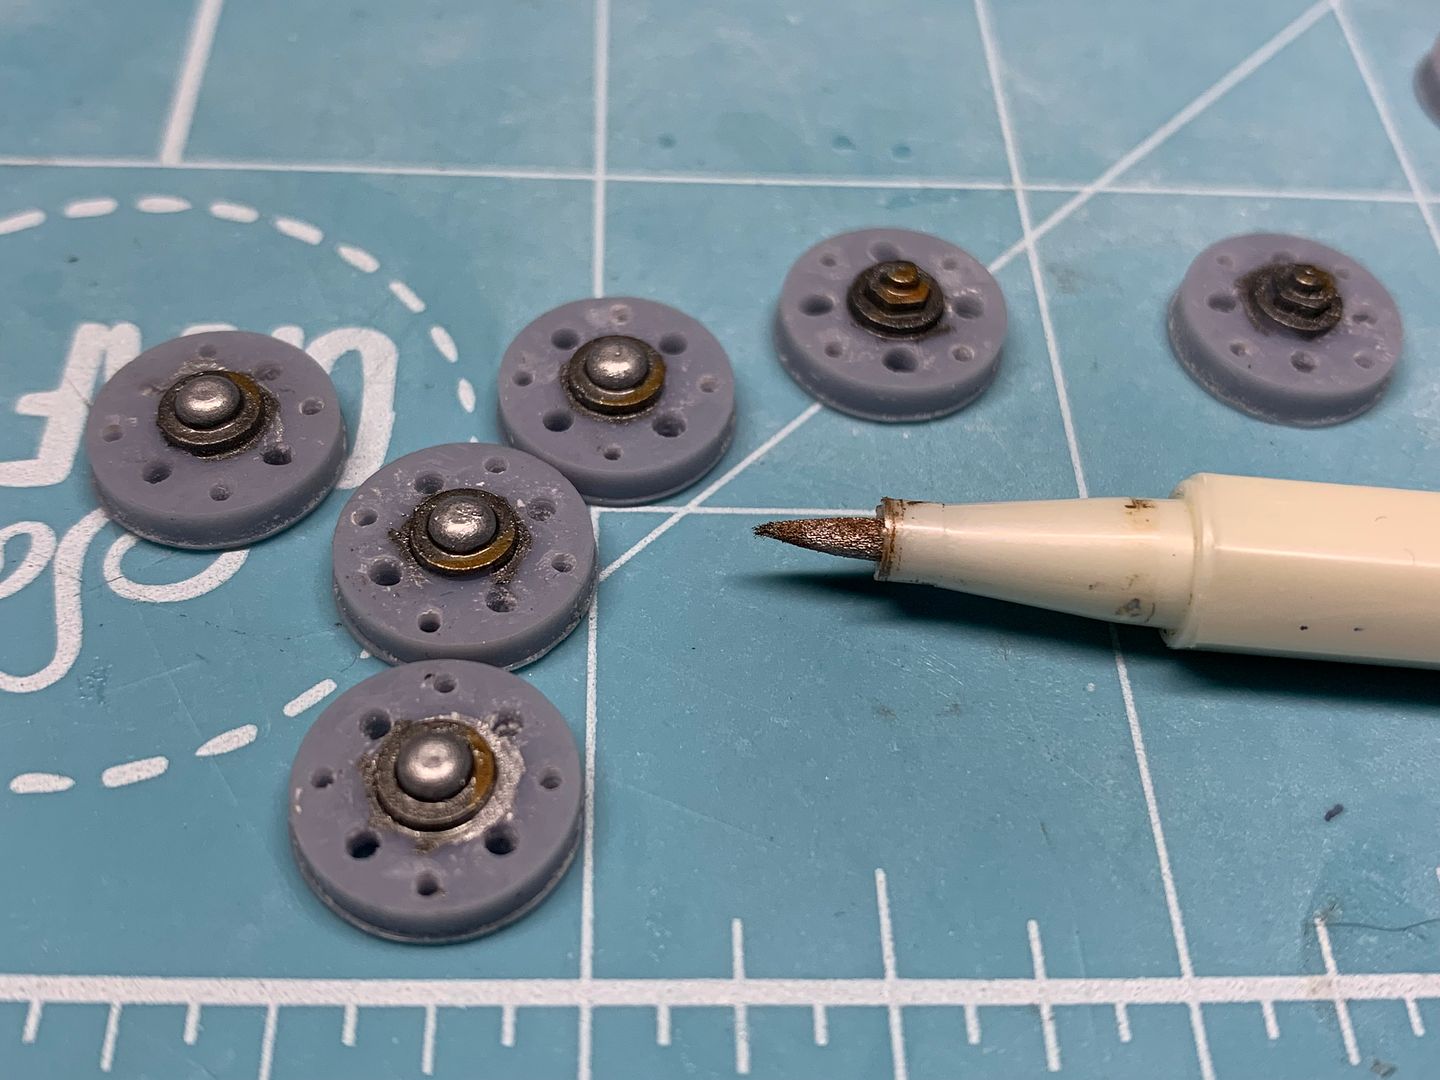
I used my trusty metallic pens to colour these - quick and effective!
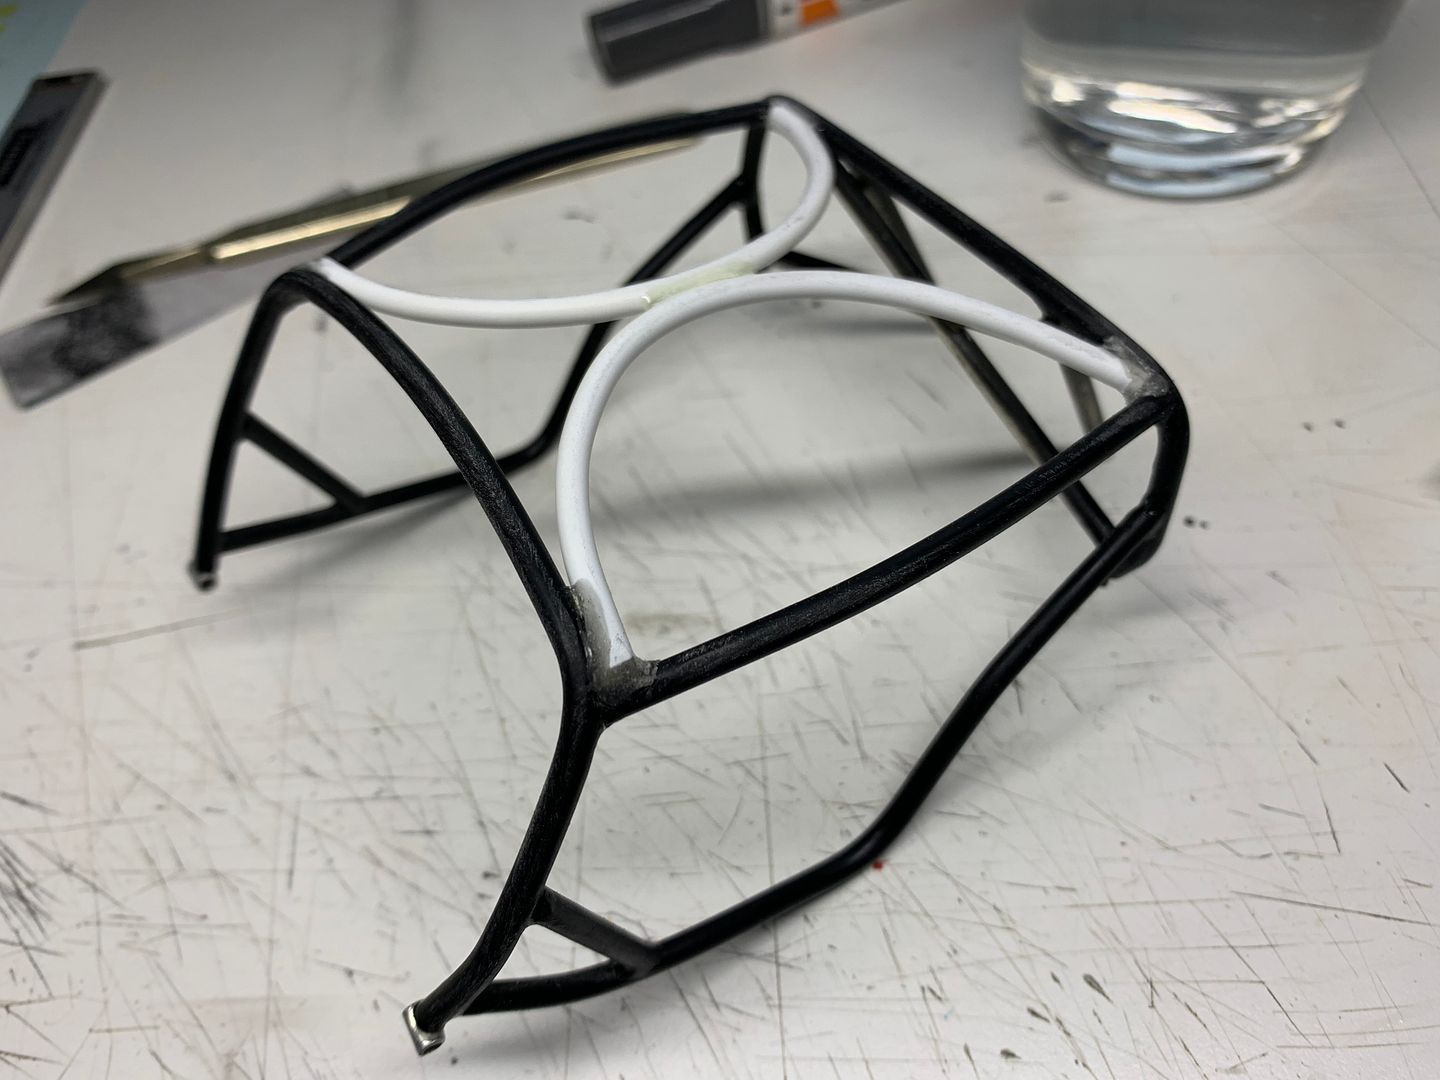
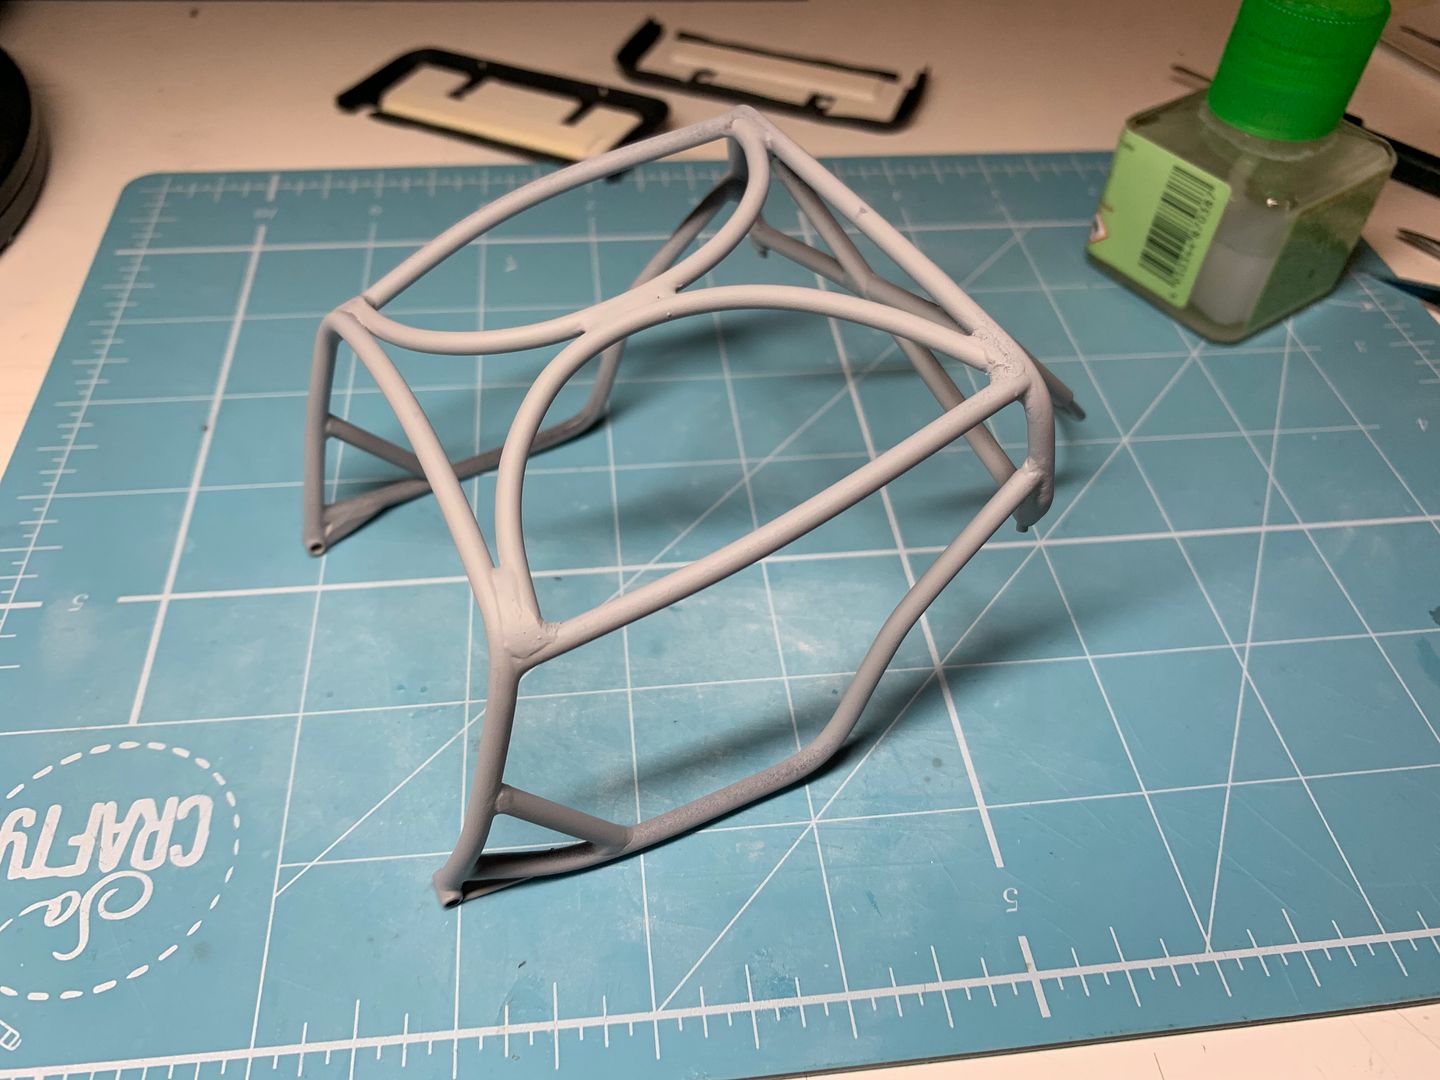
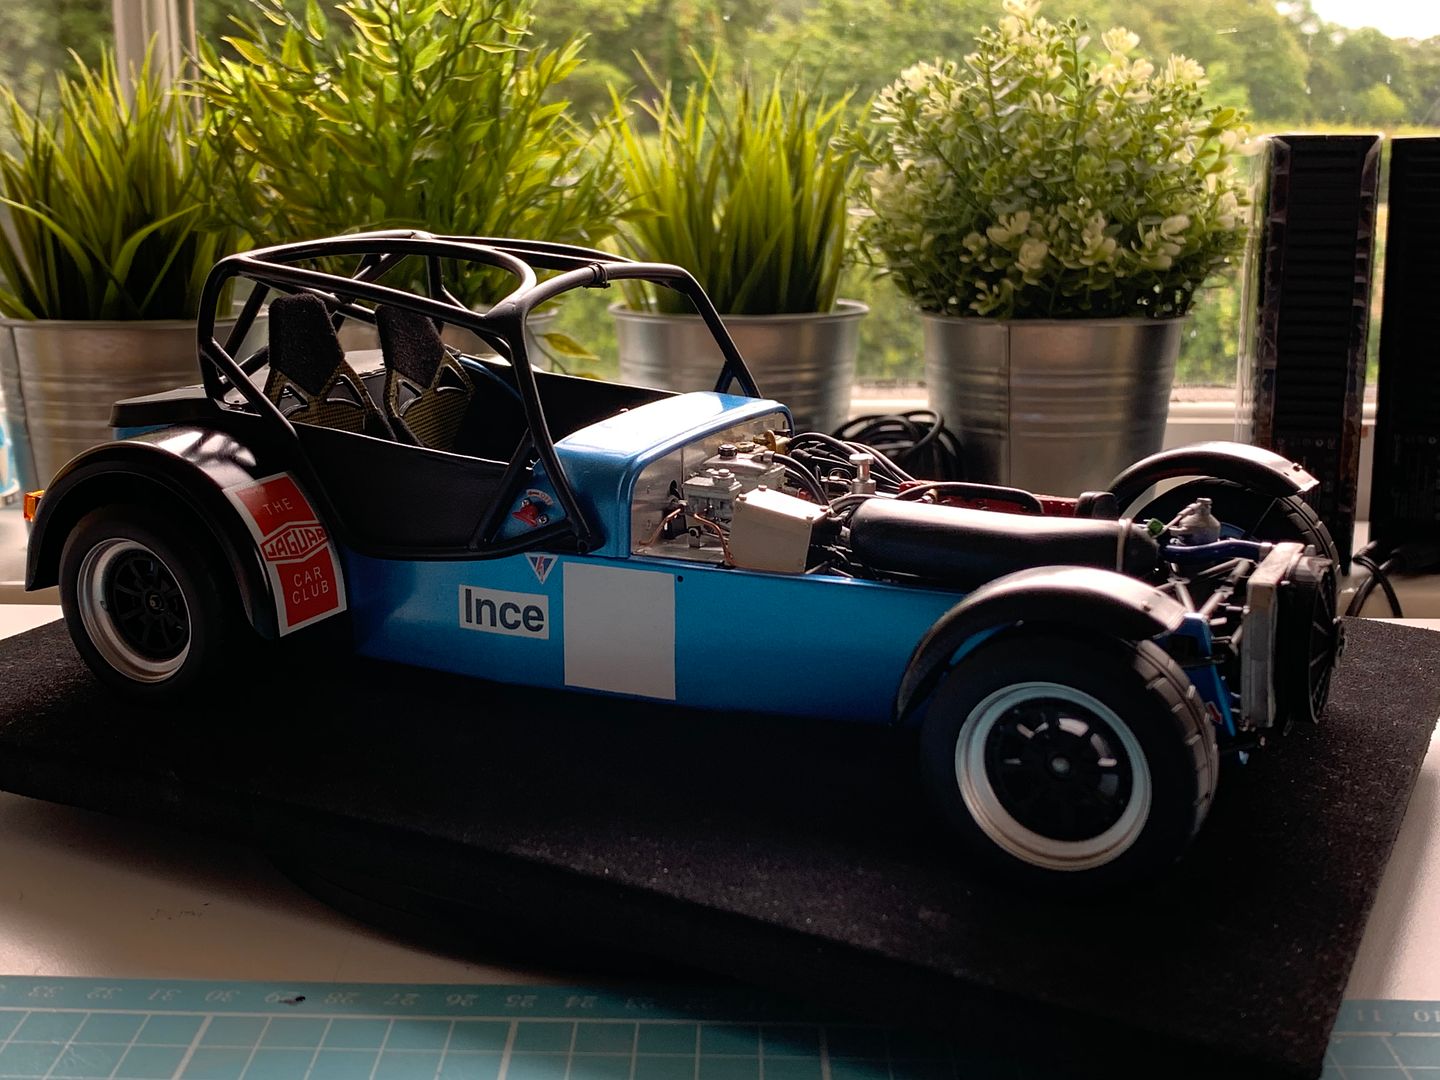
Needed to finish one of the cages...
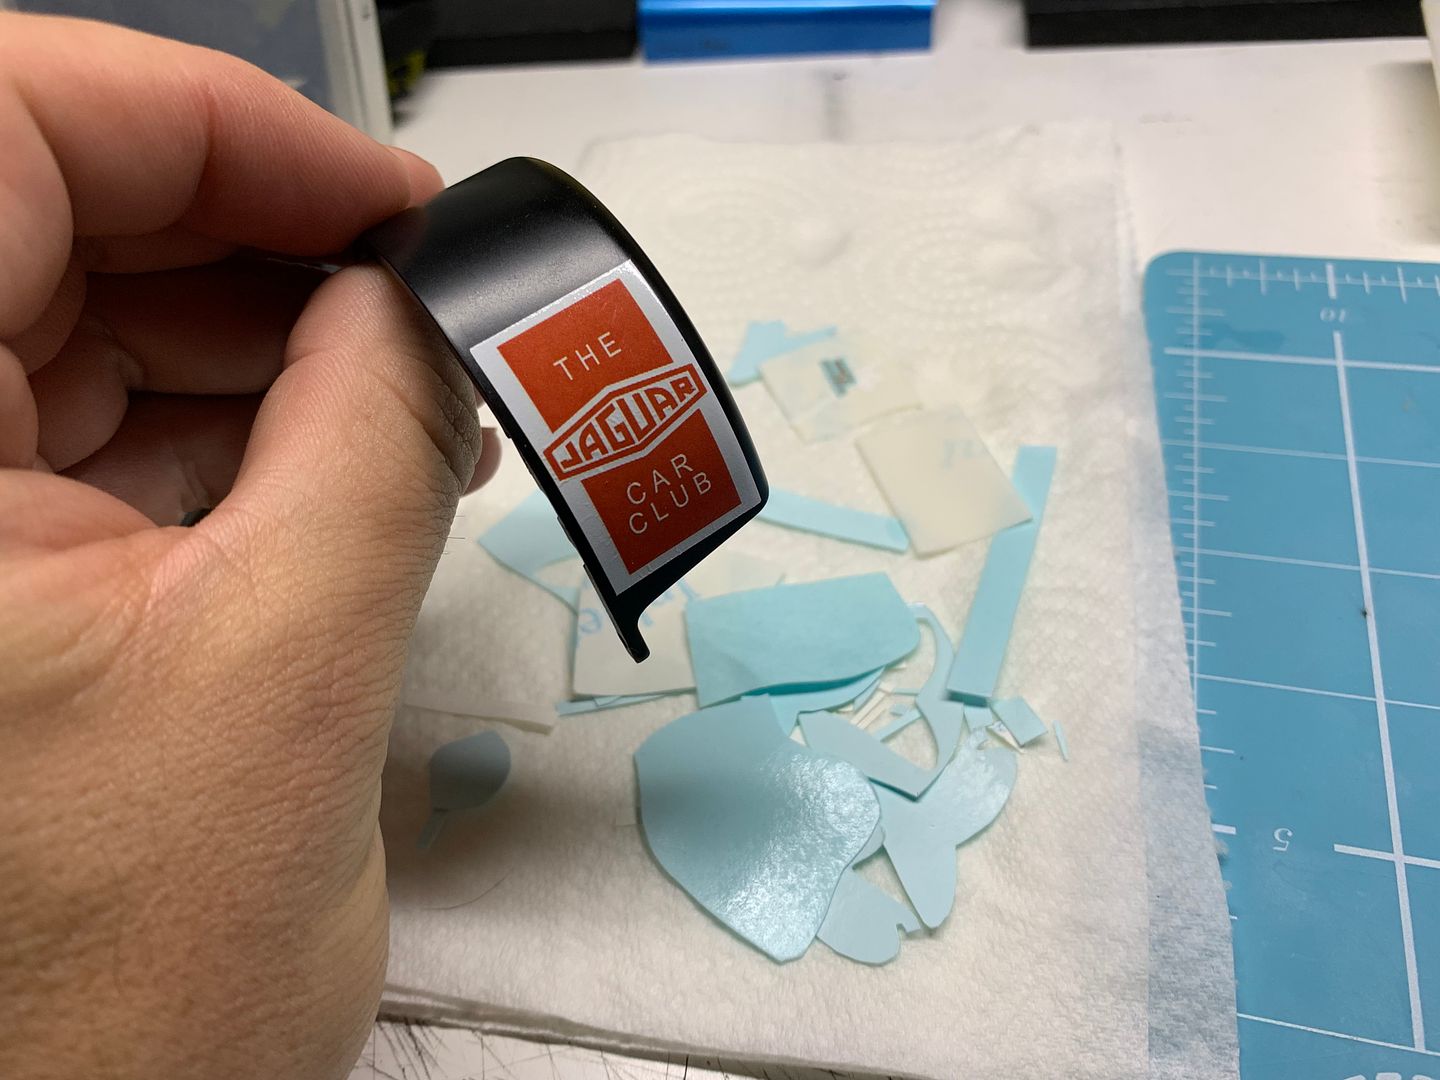
...and some more decals.
I tried a bit of clear resin to make the rear fog and reverse lights - I'd made the casing already, so made the 'lens' to fit inside. I thought I'd try a few details inside in the lens to see if it showed when painted (with clear red) - it actually worked quite well! I used a bit of silver paint inside the lens to help, especially with the reverse light. I'll add some screw details later...
I had a back-up plan using some clear red reflectors cut up, but the printed clear worked well...
...although I did have some weird artifacting with some of the prints - I think what happened was that the first few layers stuck to the FEP film, not the plate - then it stuck, and then i was getting some refraction of the UVA light through the clear resin - no idea, but I managed to get a few pieces that worked for what I needed.
I needed to find a way to fit my wheels - the bolt holes did not quite line up - I think the file was scaled slightly over the years, but I wanted something stronger anyway...
Incidentally, the Tamiya kit is so well made that it even has the alternative suspension mounts that the 'real' car has - in this model the trailing arm (link arm?) is fitted in 'comfort' mode - the lower boss is for better handling. It is all to do with 'rear steer' on the de-dion tube, and this kit actually can be used to demonstrate the difference and why the 2 positions work - I'll make a video next time I make one...
So I drew up some 'spacers' (I wanted a slightly wider track) which included the rear bub bolt and the front bearing grease cap. These would mount on the existing wheel bolts, and fit snuggly into my new alloys.
I used my trusty metallic pens to colour these - quick and effective!
Needed to finish one of the cages...
...and some more decals.

Hard not to go back to parts that I fitted/assembled 15 years ago and replace/improve!
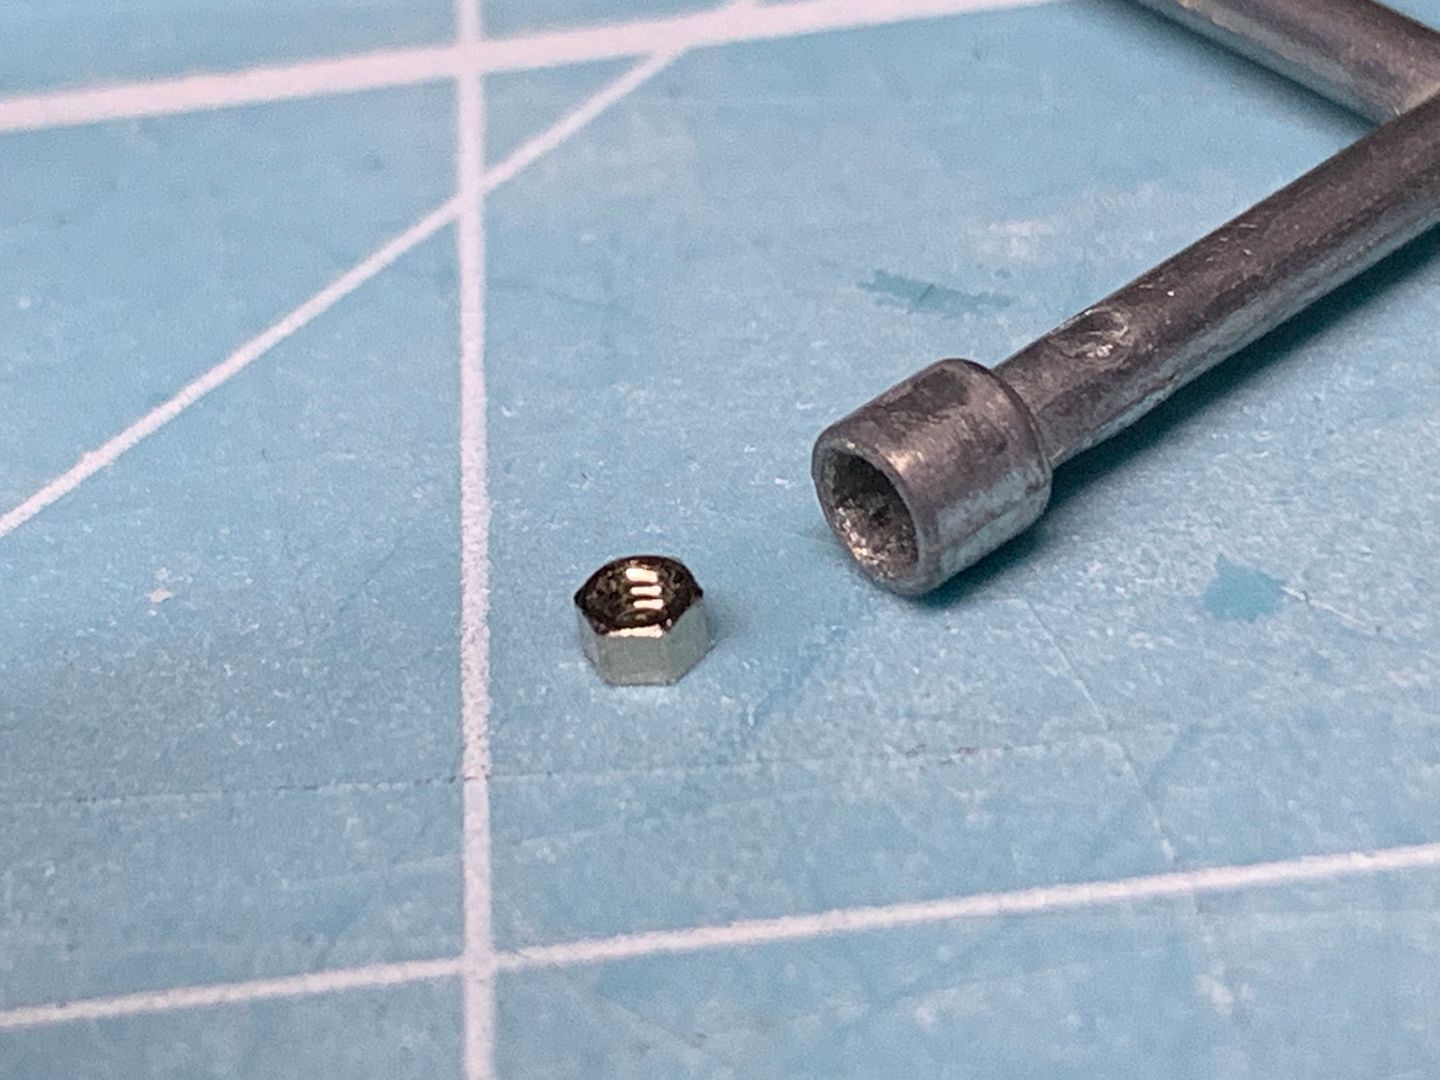
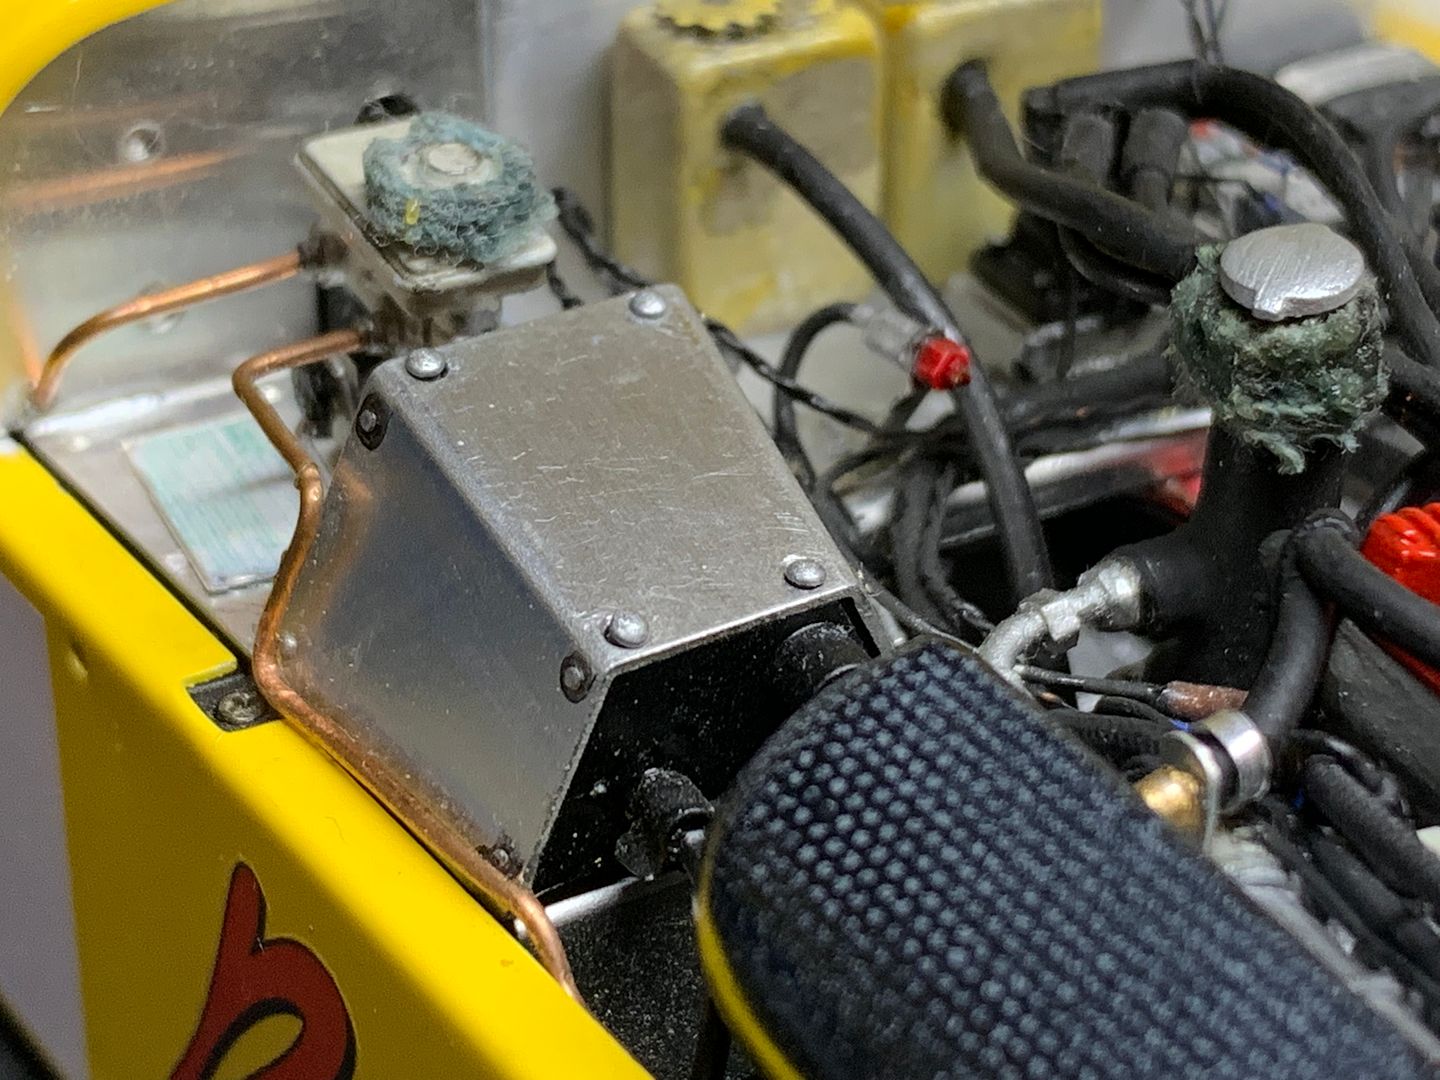
I changed these 'large' screws which held the pedal box cover on with 'rivets'...
I need to be careful with this, otherwise I might never finish...
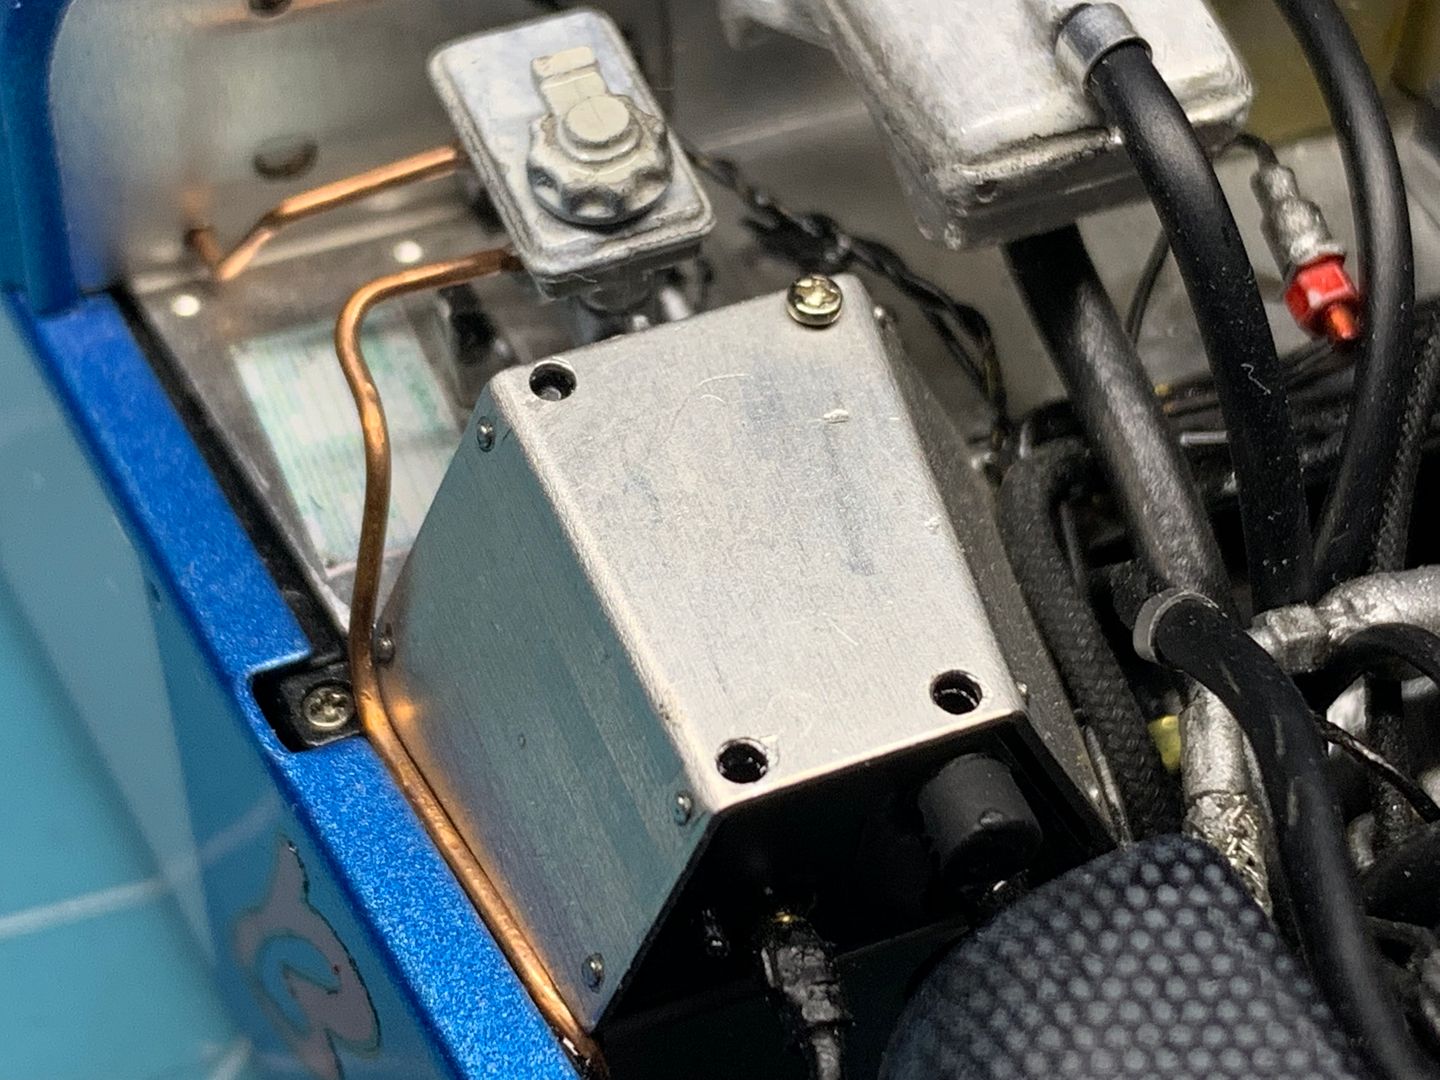
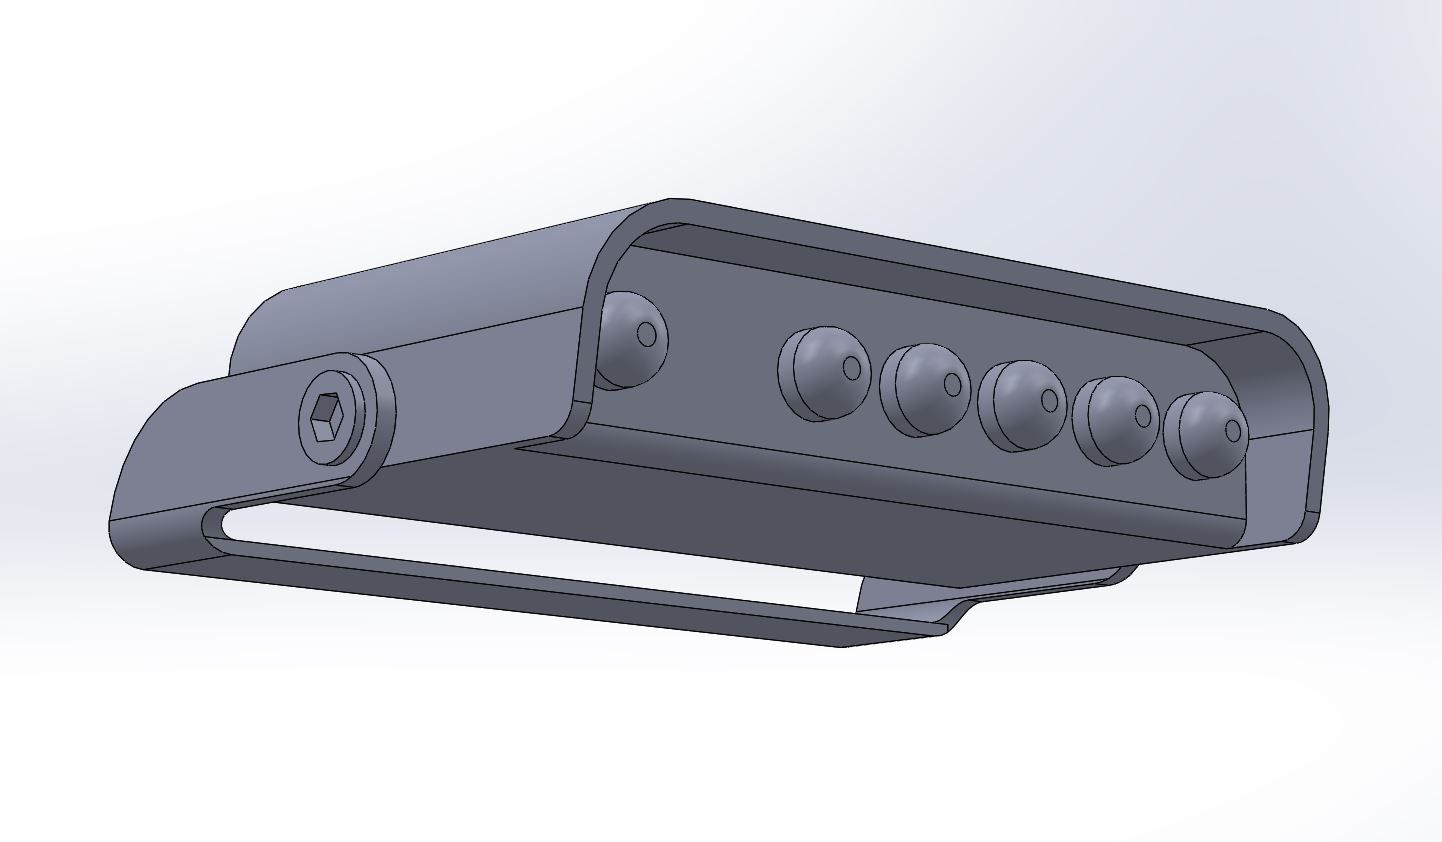
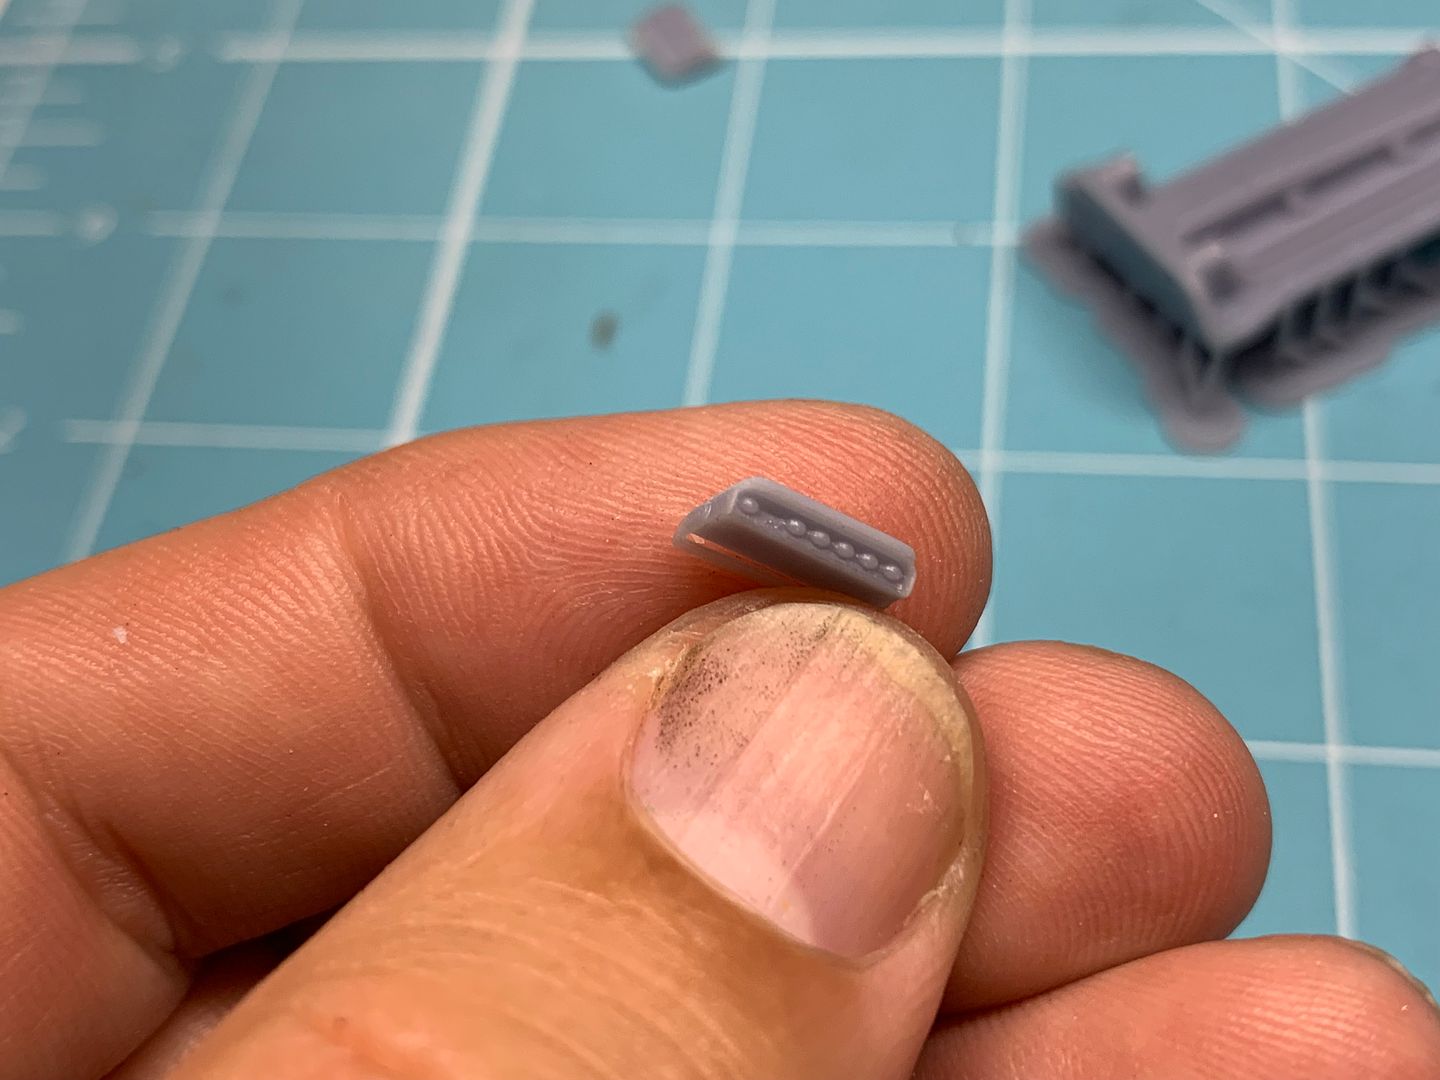
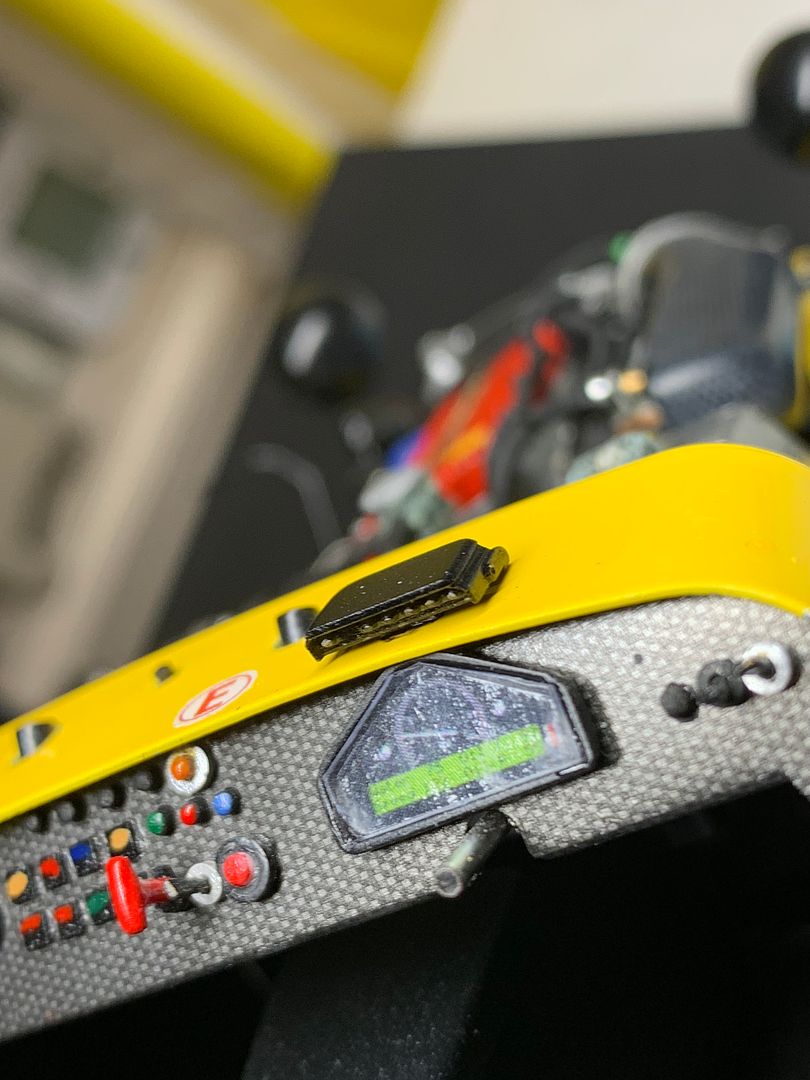
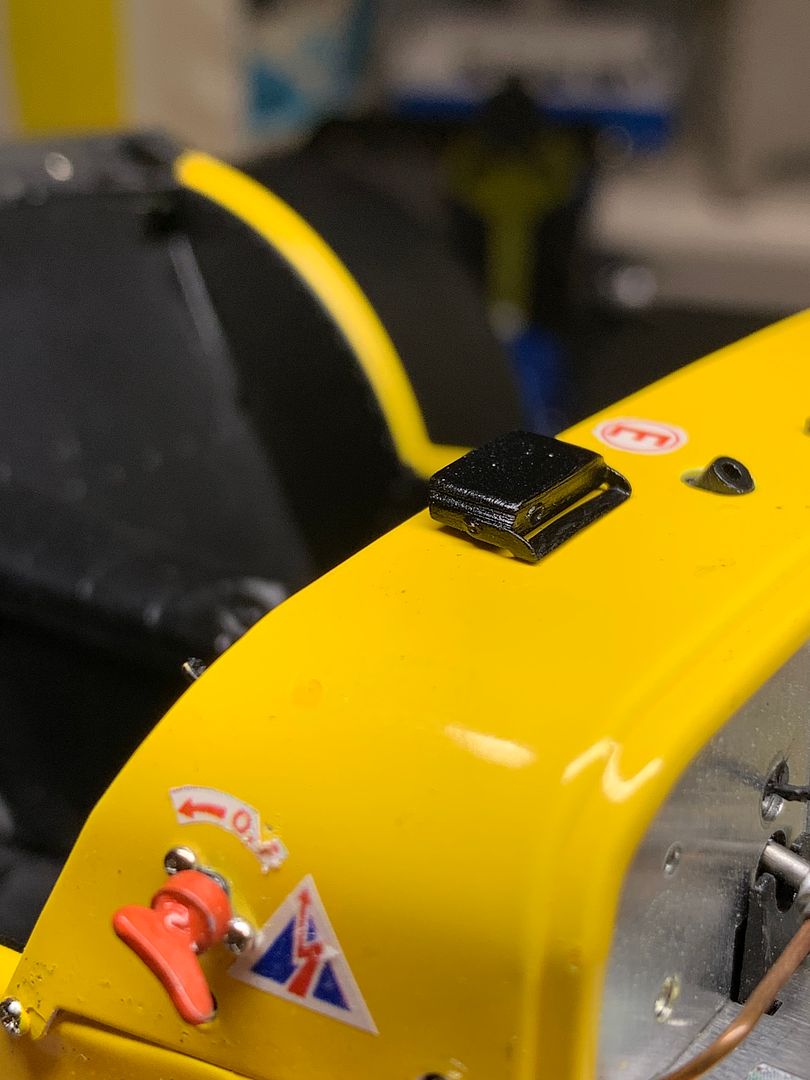
3D printer is getting more use - first with the shift-light module...
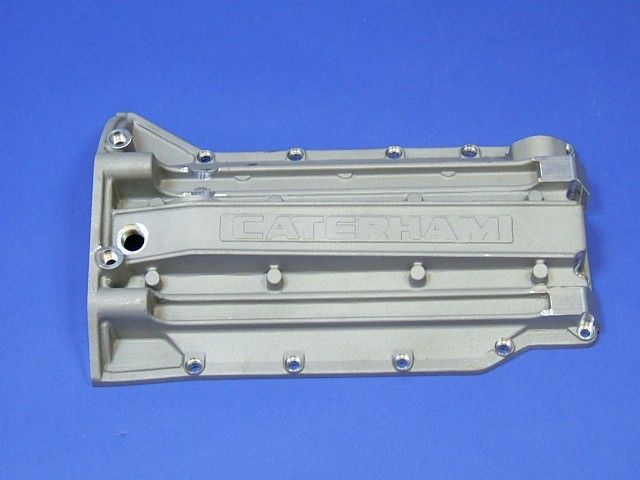
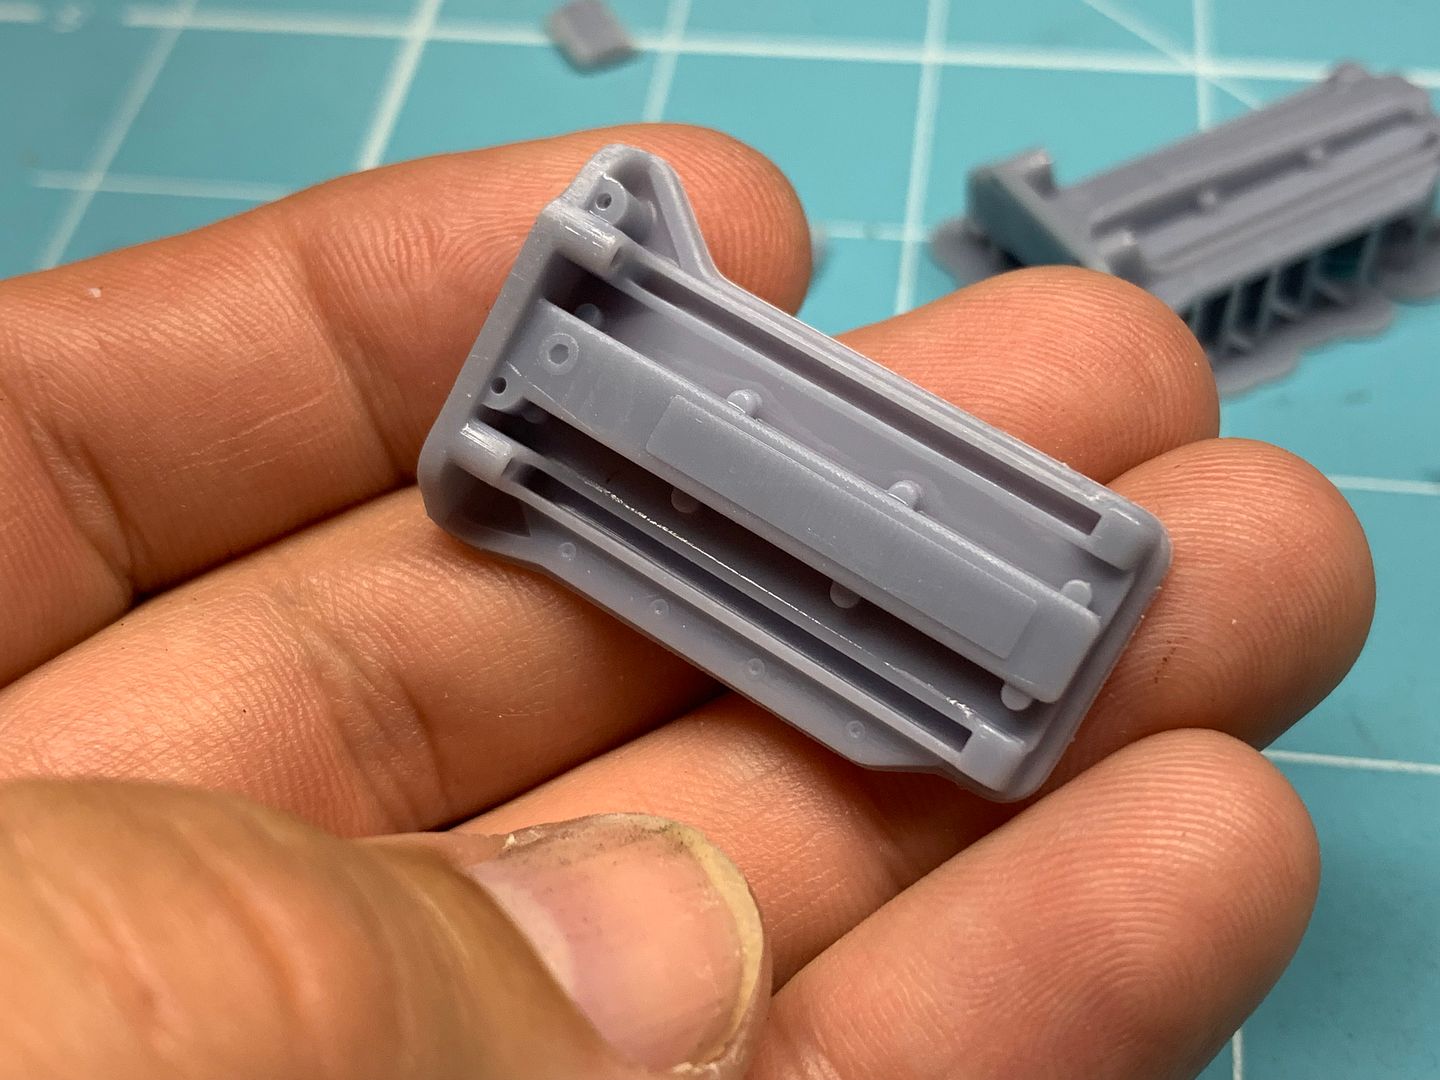
And then making 2 dry sump pans - these can't be seen once fitted, as the car is so low - but they need to be there on the bottom of my custom 'K-series' engine...so not 'perfect' modeling, but good enough.

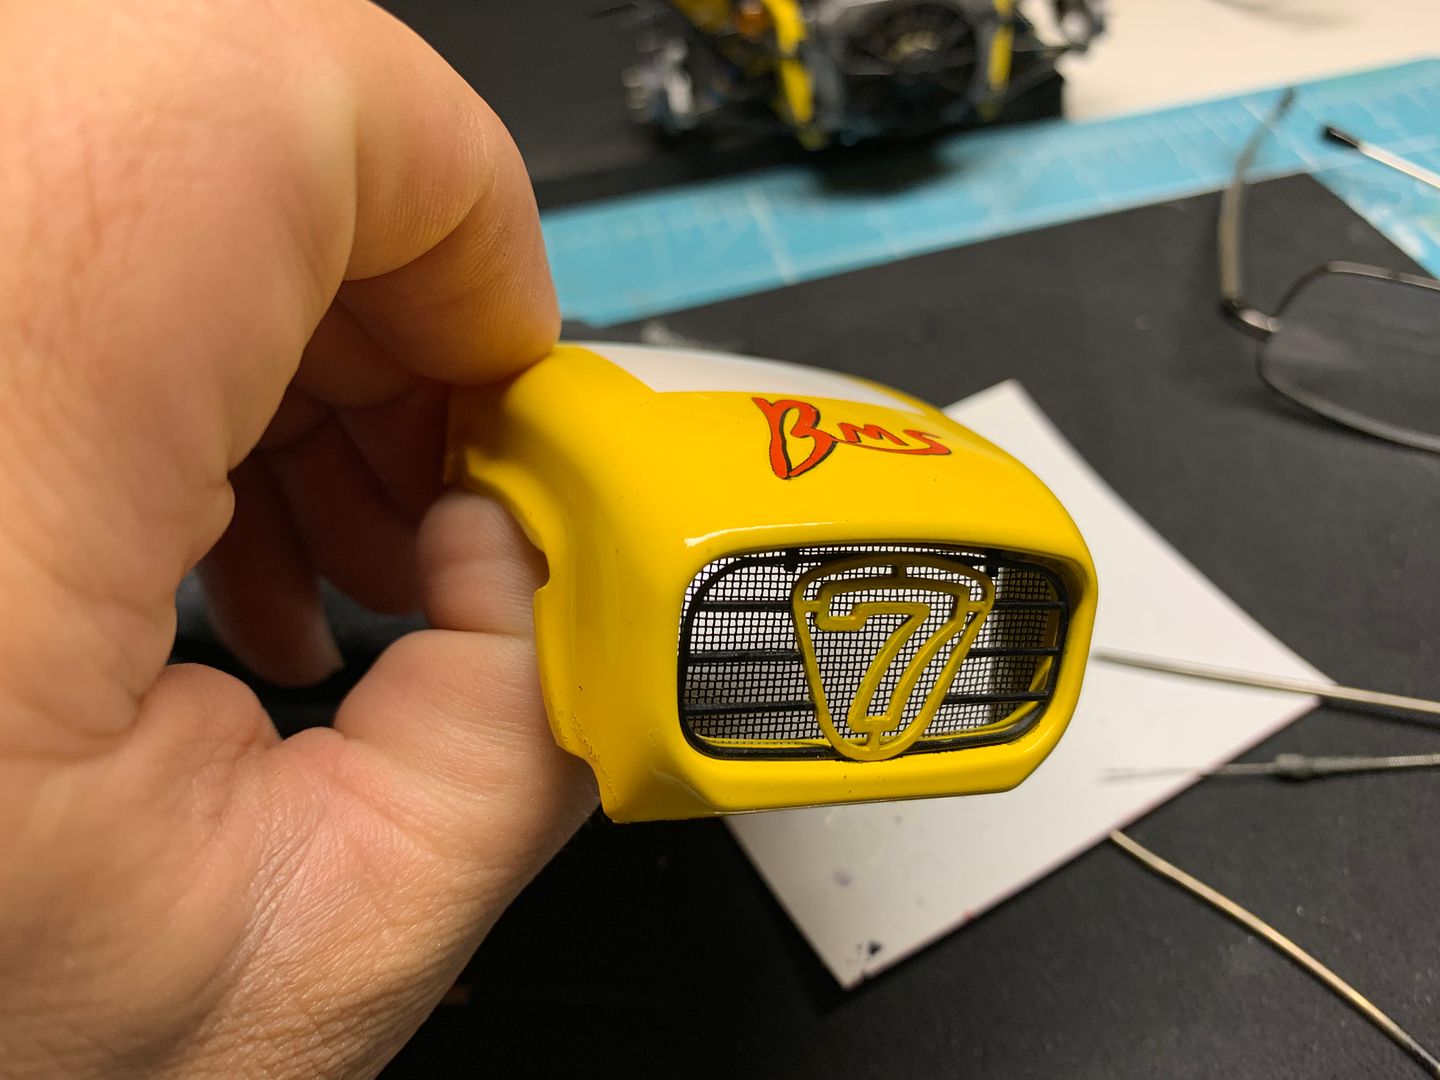
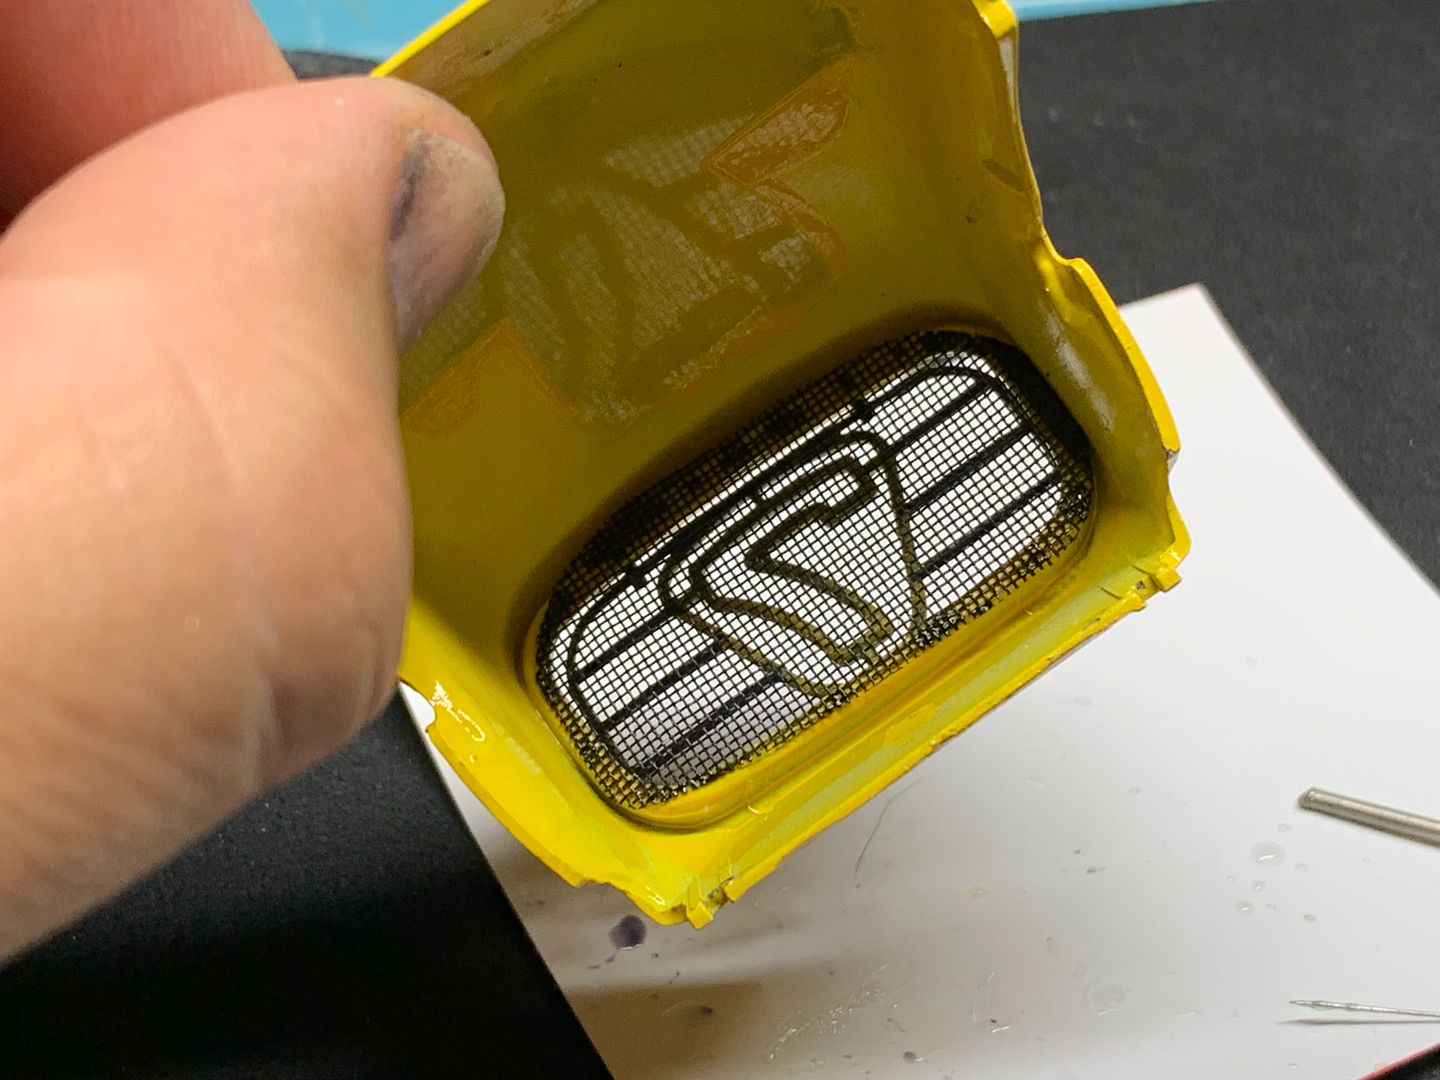
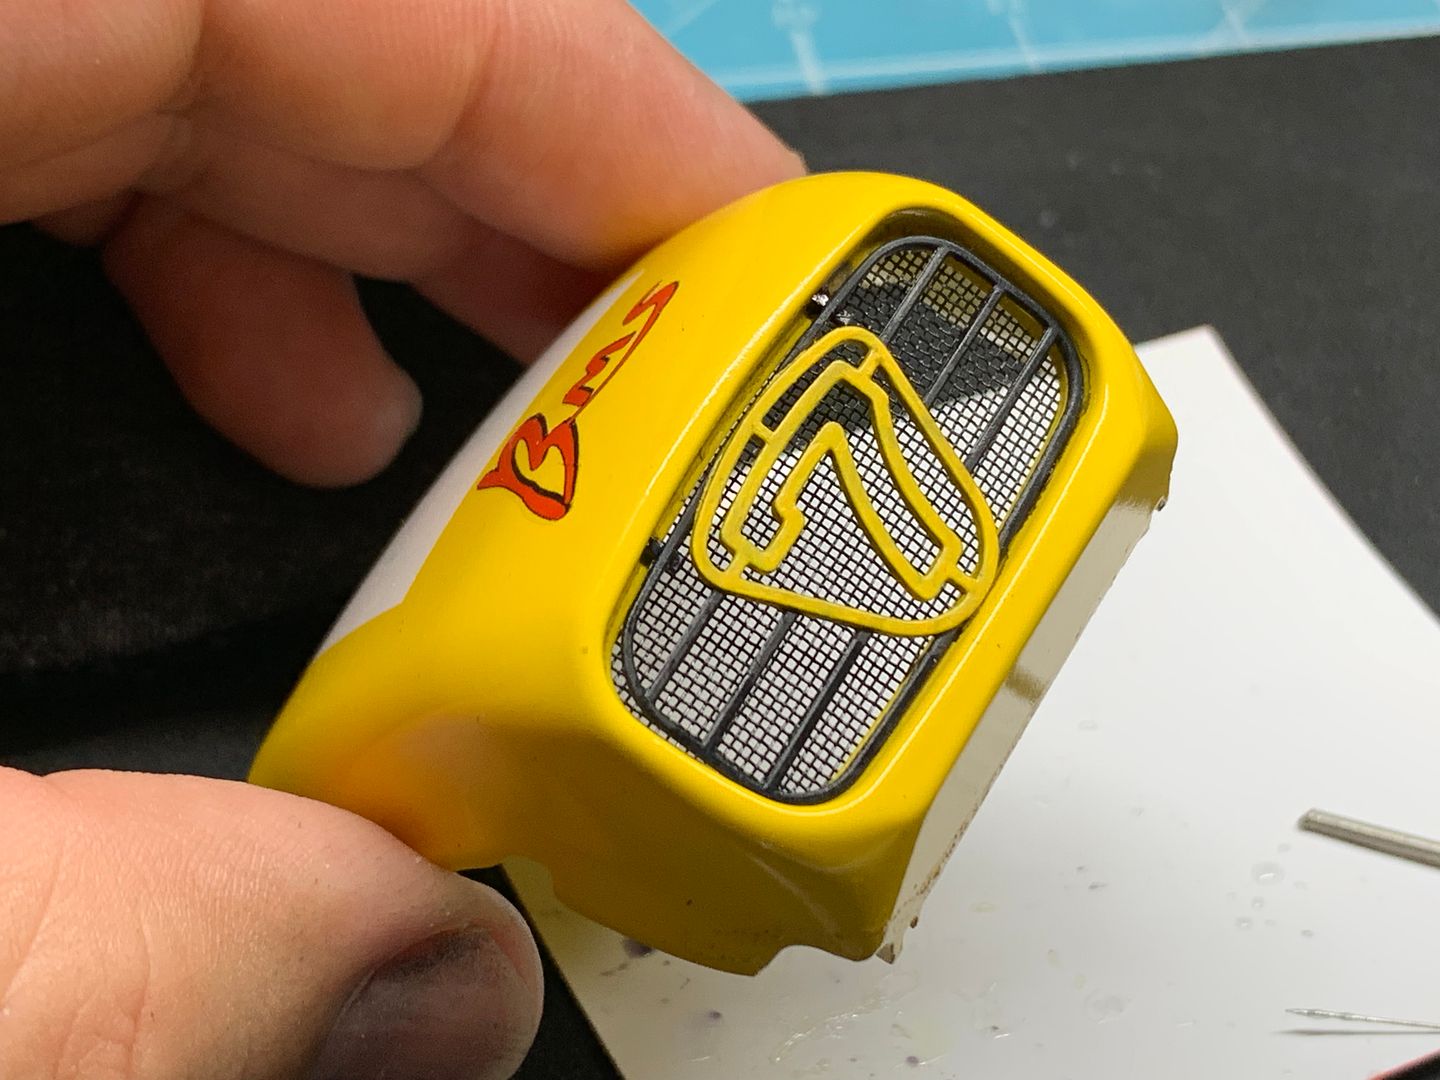
Having made the '7' grill with the 3D printer, I now added the mesh 'panel' that sits behind the grill, in front of the radiator. This has worked out really nicely, imo! I sprayed a plastic mesh and glued in place, to be trimmed later...
Of course it isn't all plain sailing. The paint finish on the rear wings had develped tiny cracks - it may have been the clear coat I used - but it meant I had to sand back and re-do. I masked the (home made) decal on the wings and sanded/resprayed. It only required a polish really. But the masking tape pulled the decal off...grrrr. I thought I had clear coated over the decal, but it didn't seem to hold it...
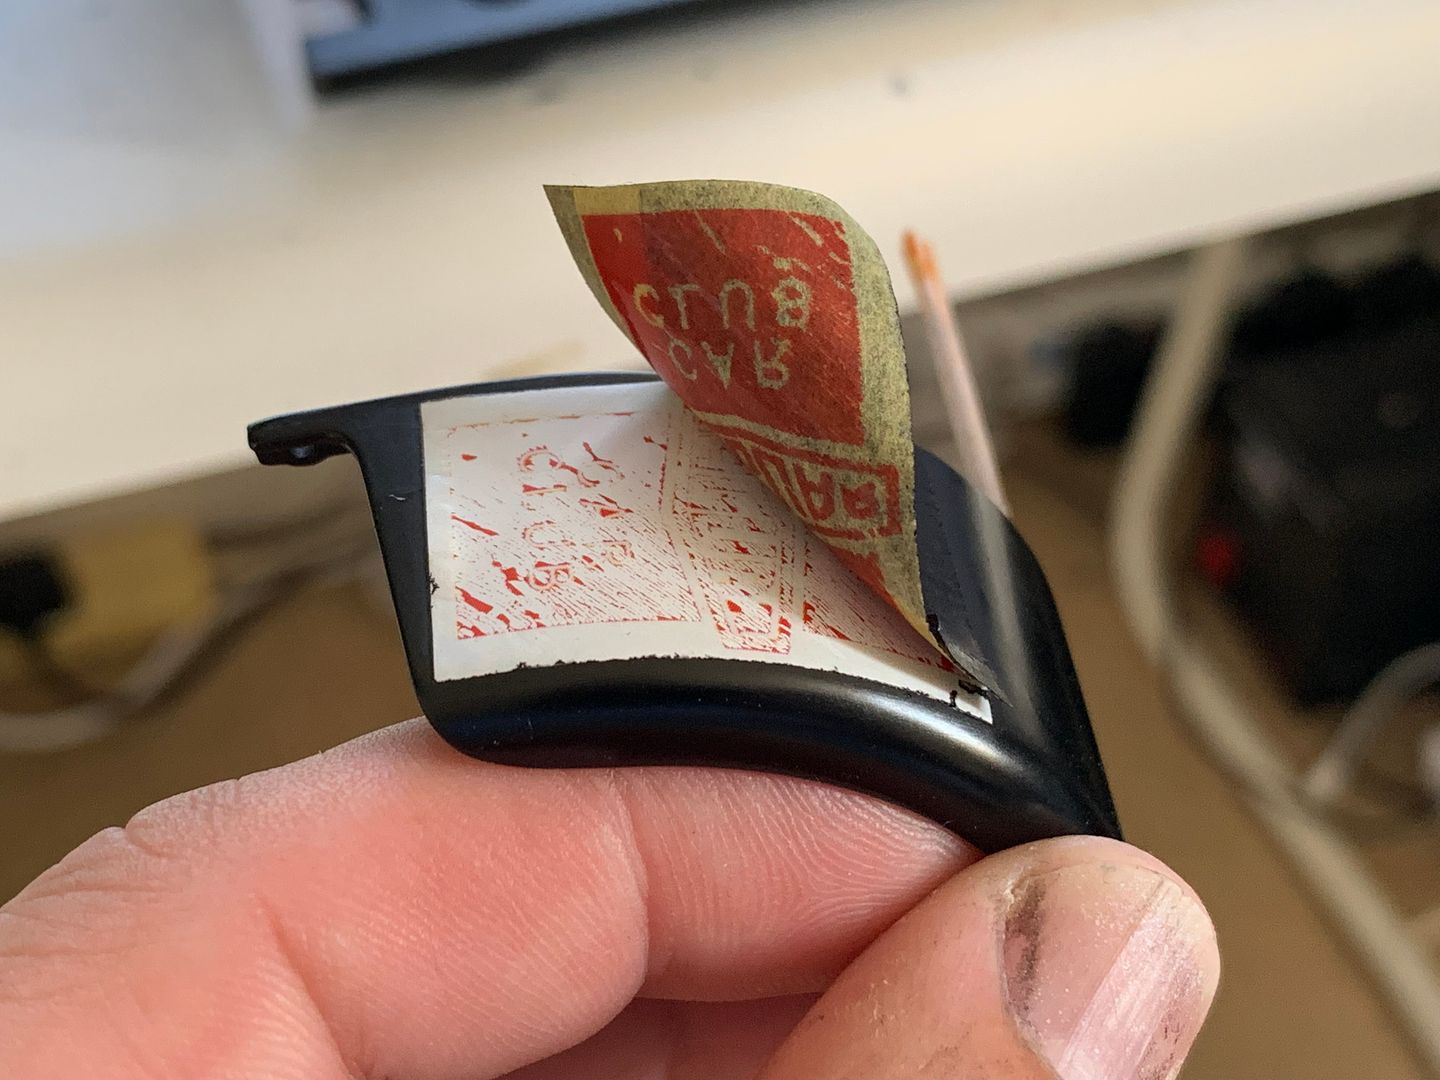
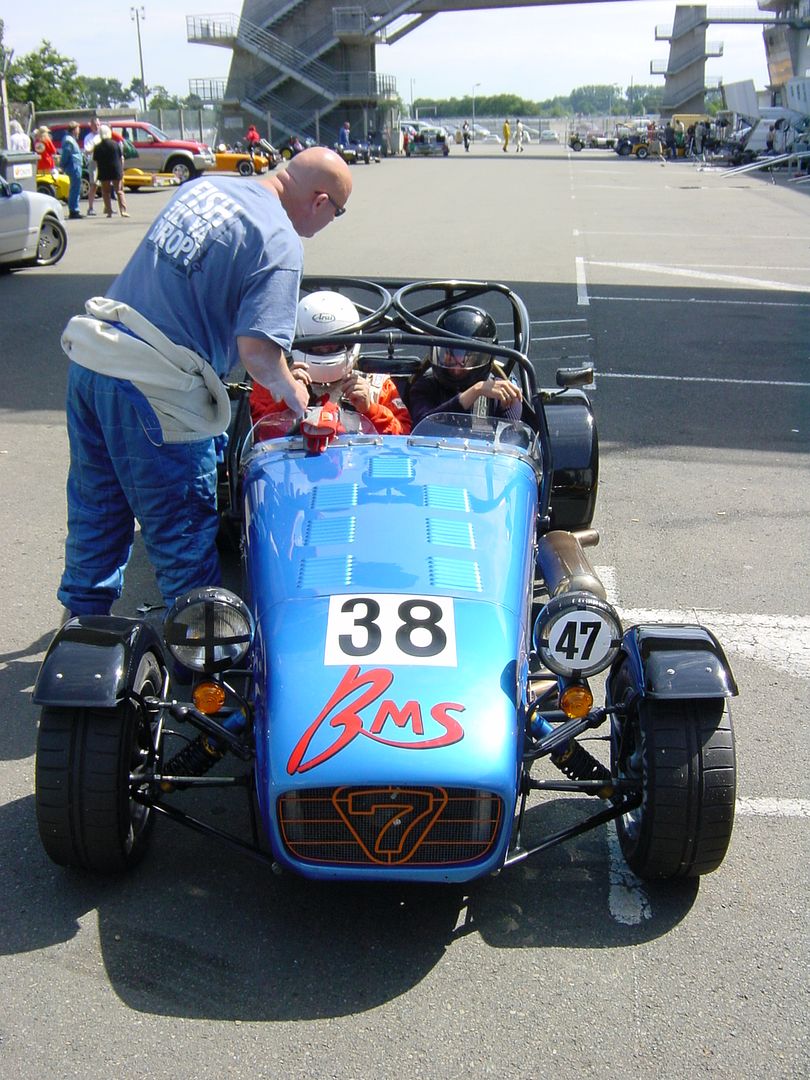
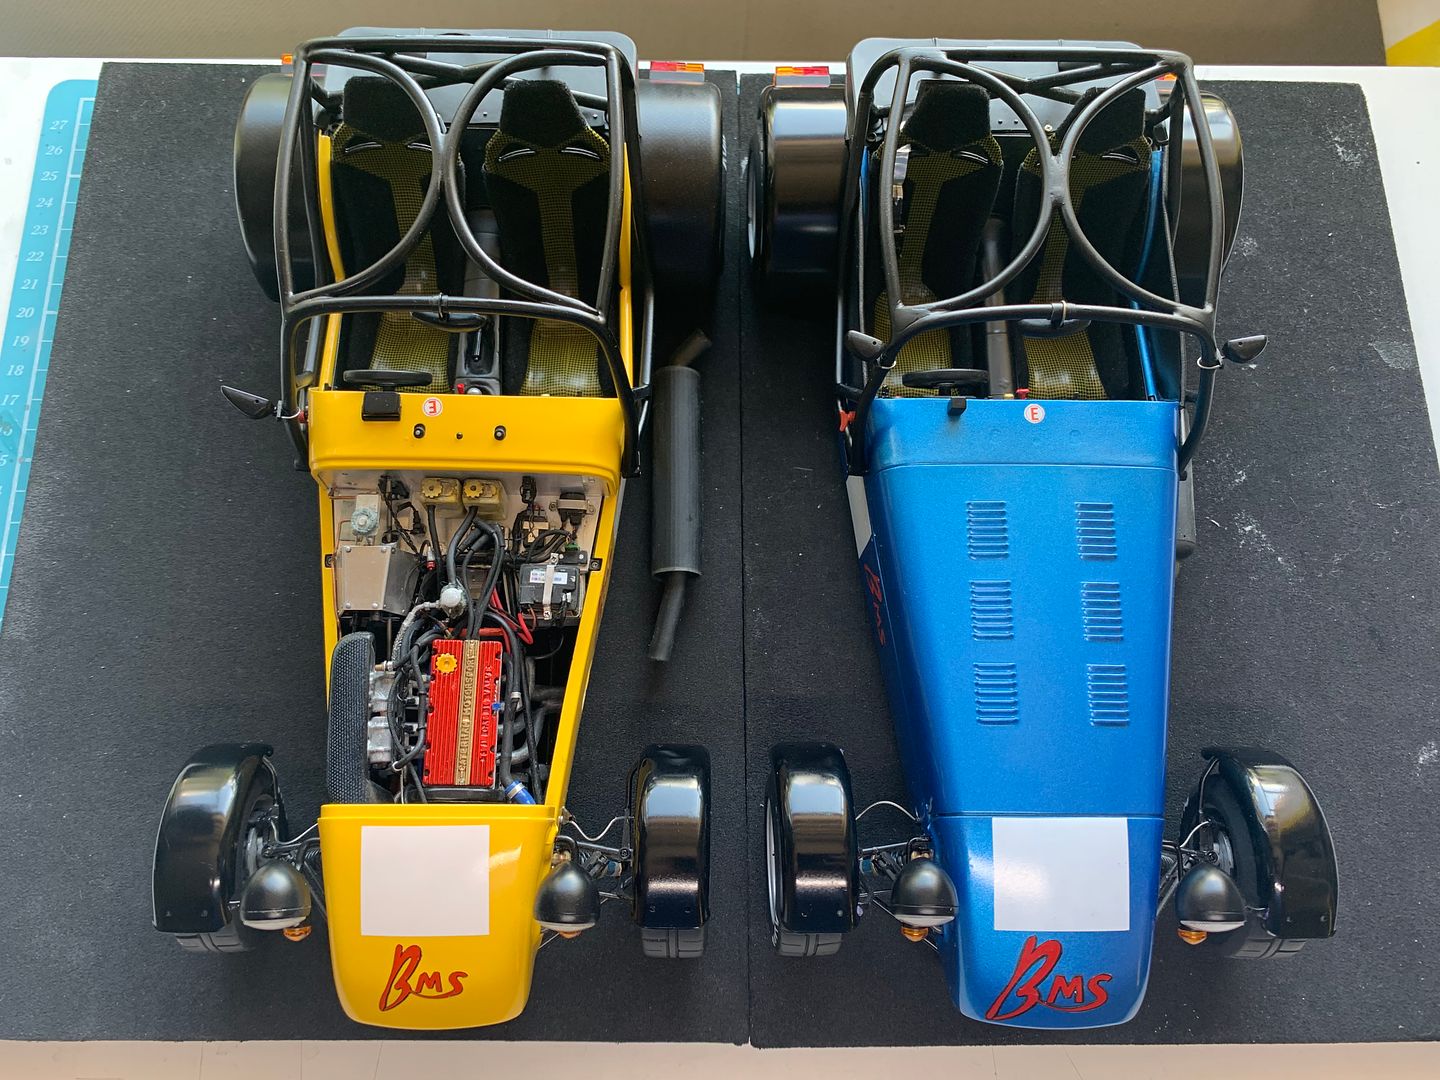
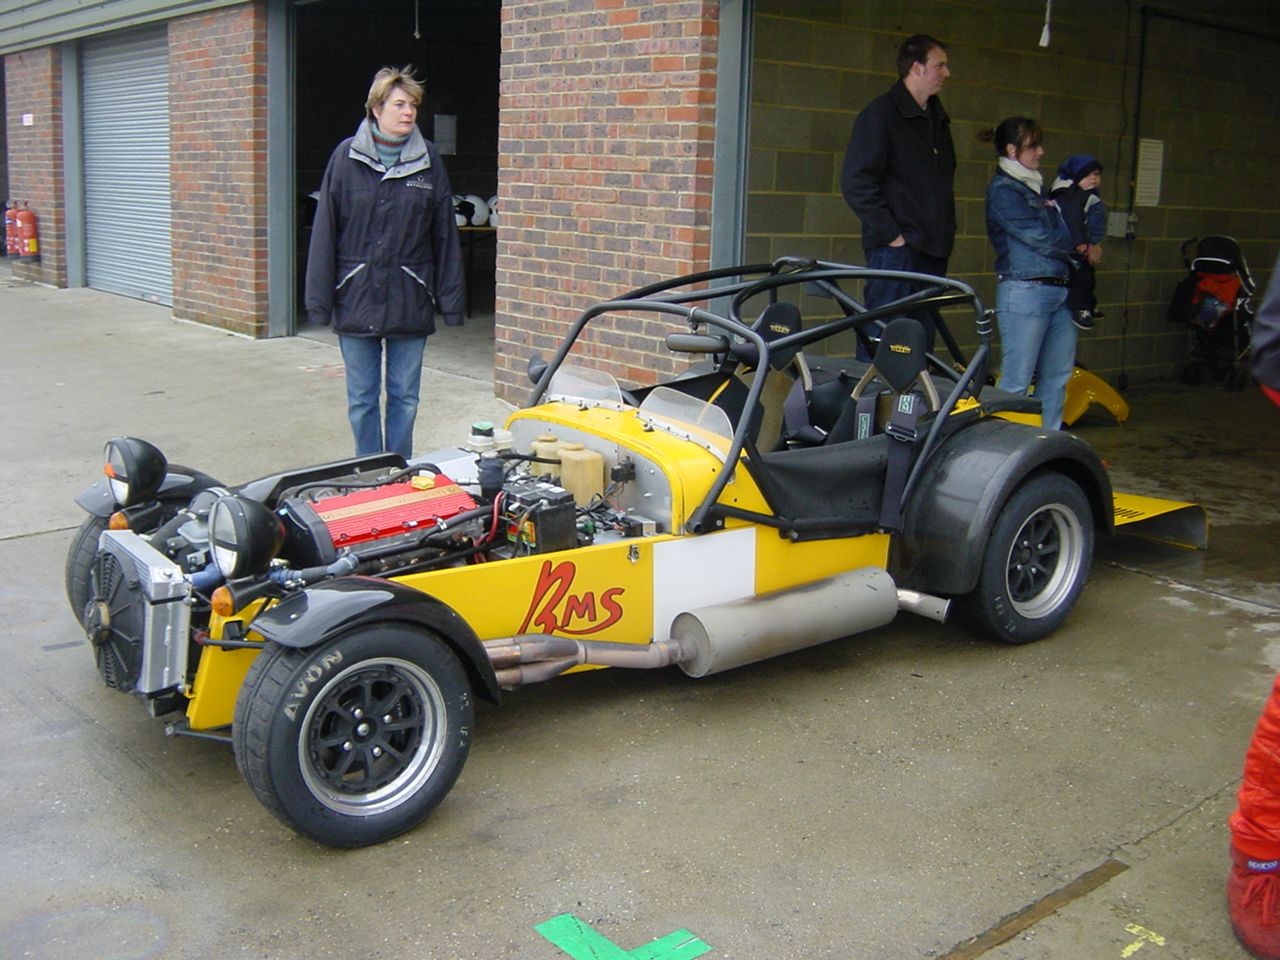
So I had to remove, re-sand and re-spray without the decal - I did not have any more of these, which I had printed in NYC. No big deal, as only one time-period of the car had these particular race stickers on - as you can see they are not in the photo of the real car in the photo in the previous post.
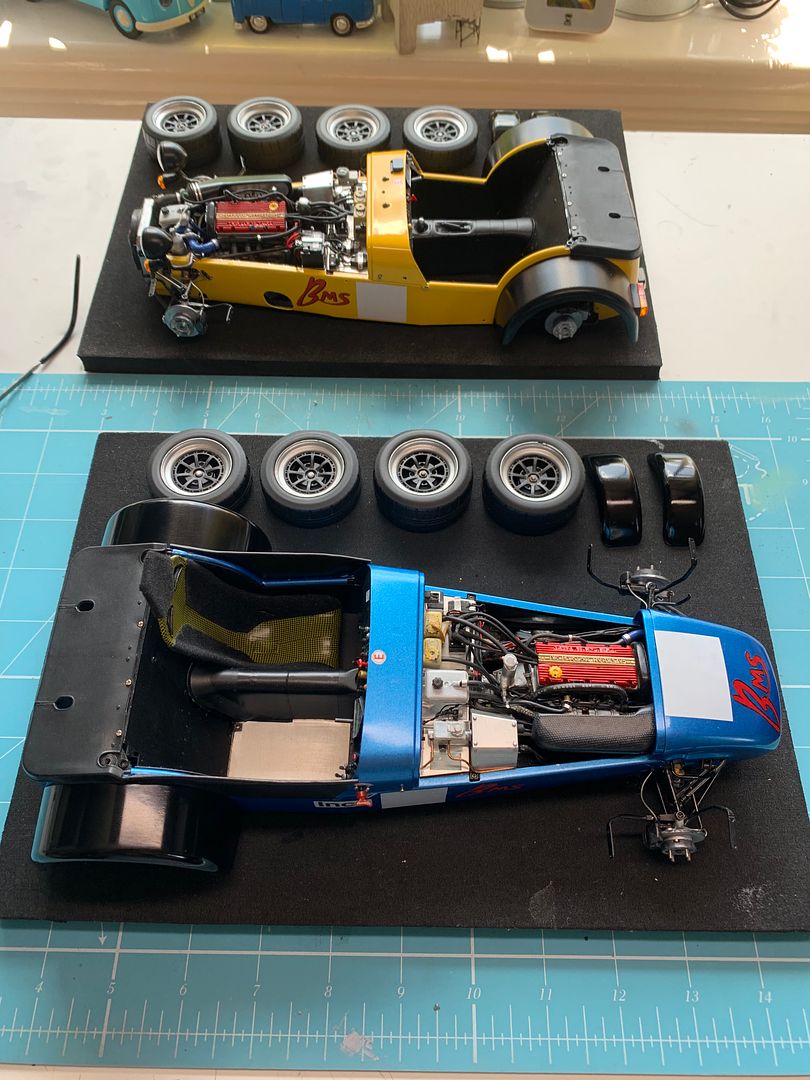
Starting to assemble more sub-assemblies/parts now...
I changed these 'large' screws which held the pedal box cover on with 'rivets'...
I need to be careful with this, otherwise I might never finish...
3D printer is getting more use - first with the shift-light module...
And then making 2 dry sump pans - these can't be seen once fitted, as the car is so low - but they need to be there on the bottom of my custom 'K-series' engine...so not 'perfect' modeling, but good enough.
Having made the '7' grill with the 3D printer, I now added the mesh 'panel' that sits behind the grill, in front of the radiator. This has worked out really nicely, imo! I sprayed a plastic mesh and glued in place, to be trimmed later...
Of course it isn't all plain sailing. The paint finish on the rear wings had develped tiny cracks - it may have been the clear coat I used - but it meant I had to sand back and re-do. I masked the (home made) decal on the wings and sanded/resprayed. It only required a polish really. But the masking tape pulled the decal off...grrrr. I thought I had clear coated over the decal, but it didn't seem to hold it...
So I had to remove, re-sand and re-spray without the decal - I did not have any more of these, which I had printed in NYC. No big deal, as only one time-period of the car had these particular race stickers on - as you can see they are not in the photo of the real car in the photo in the previous post.
Starting to assemble more sub-assemblies/parts now...
Wheels needed some more details before fitting, so I added some tyre valves and the wheel nuts, and then the 3D printer was used to make a mask for spraying the 'AVON' graphic on the tyres, which is a detail which will look great on the race car. Luckily it worked first time...
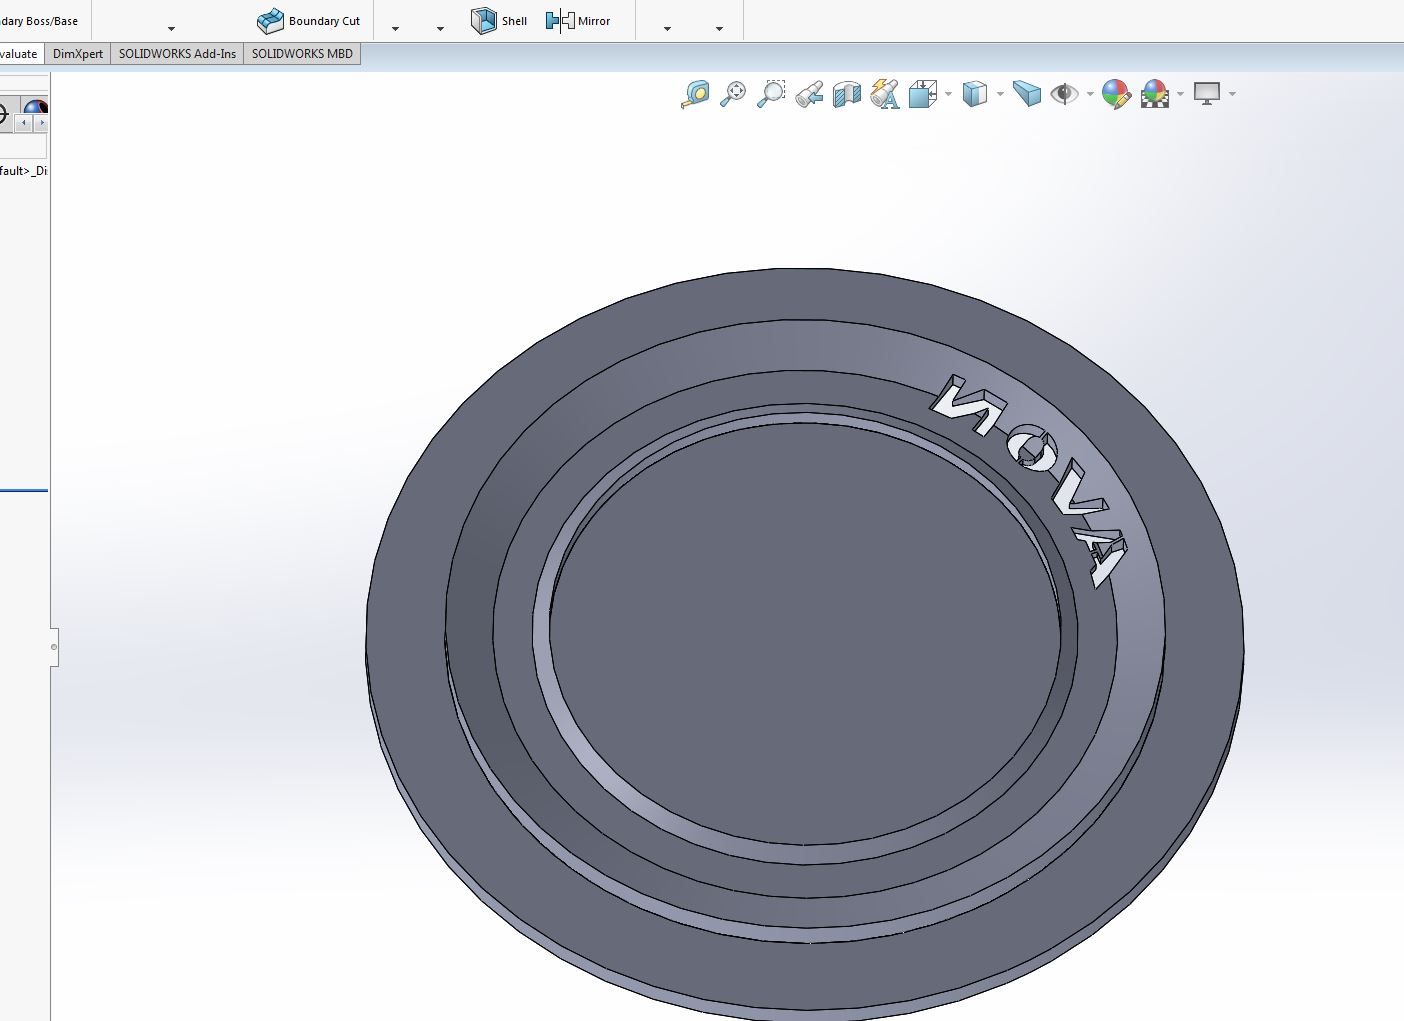
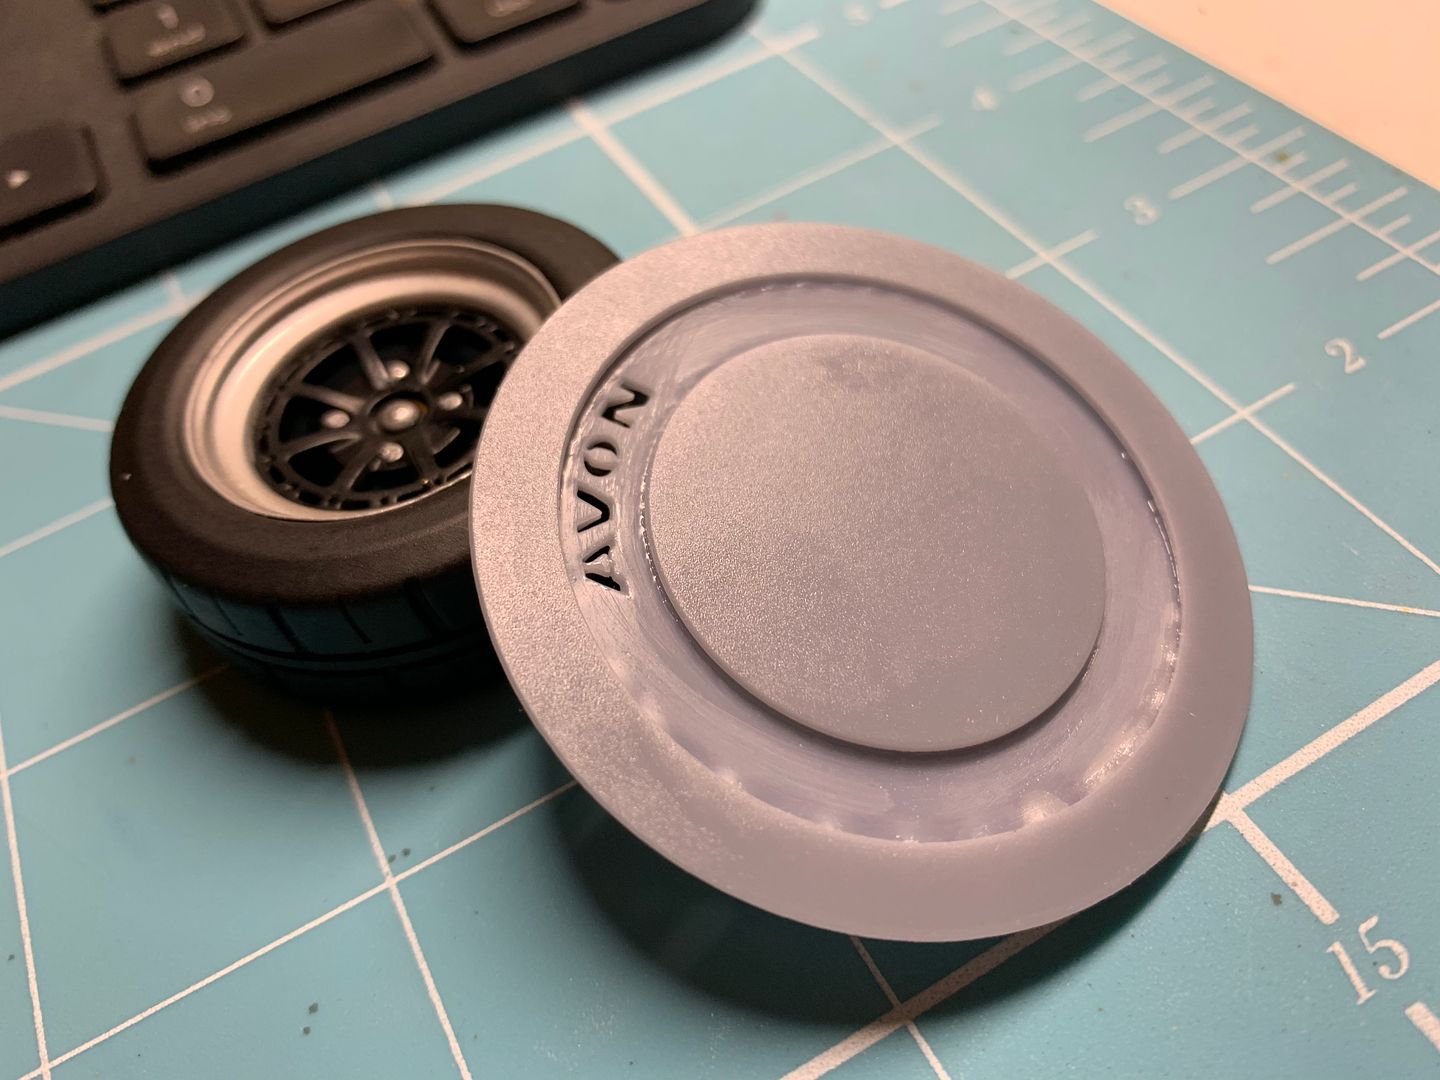
I modeled the tyre profile on the mask, as the spray would need to go around the profile of the tyres...
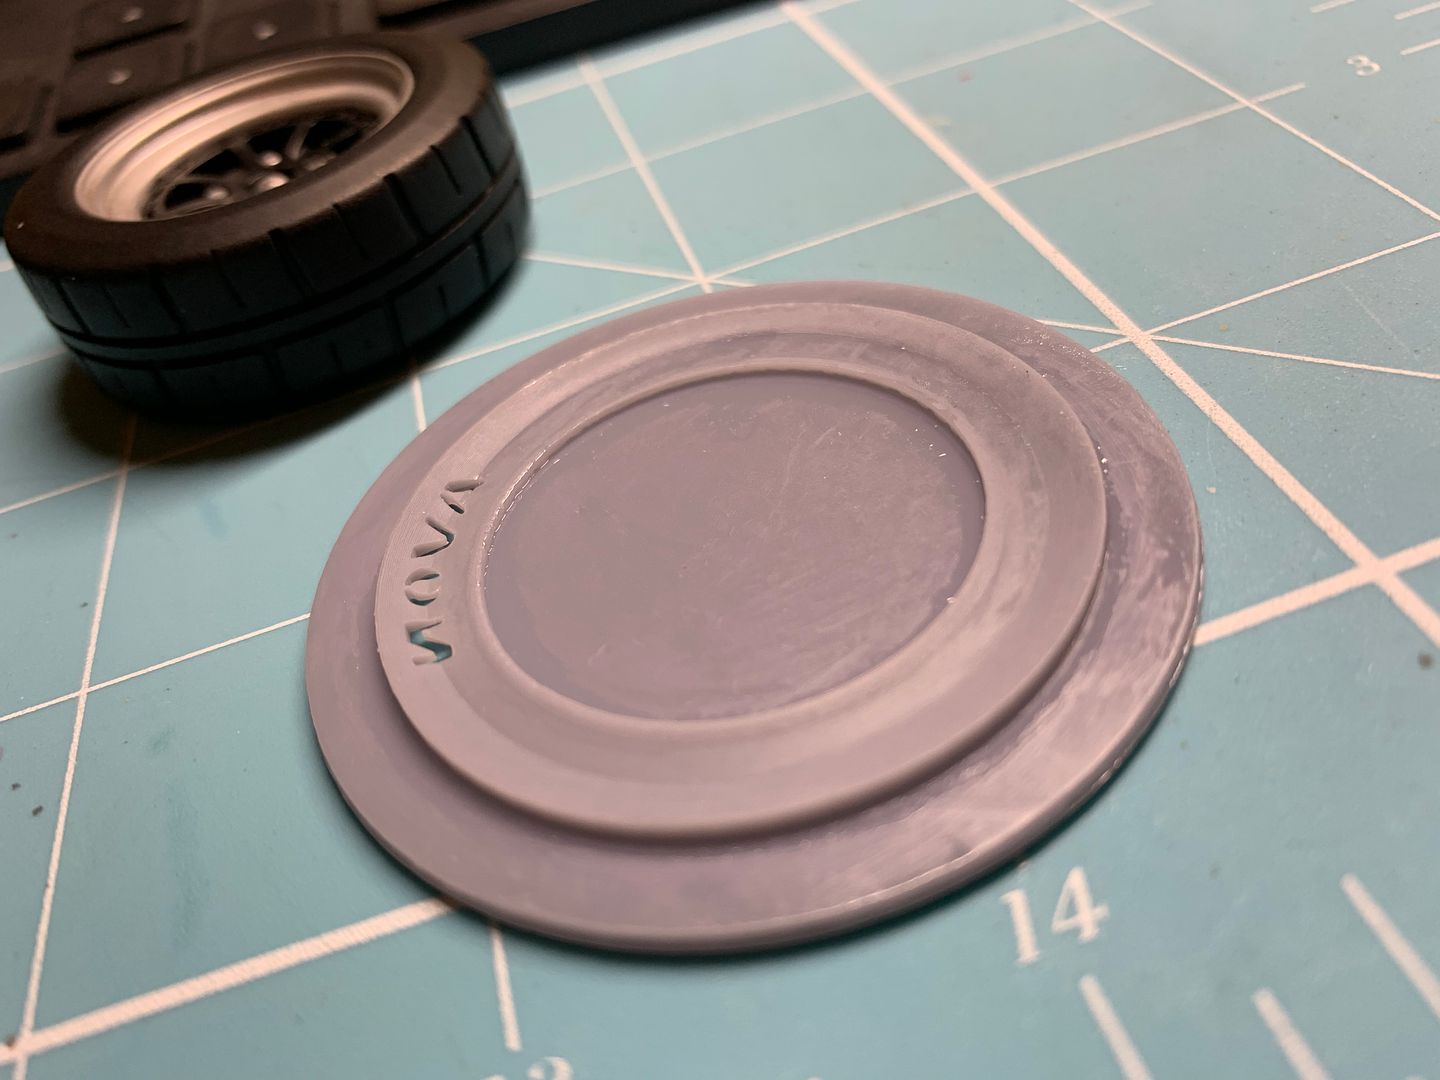
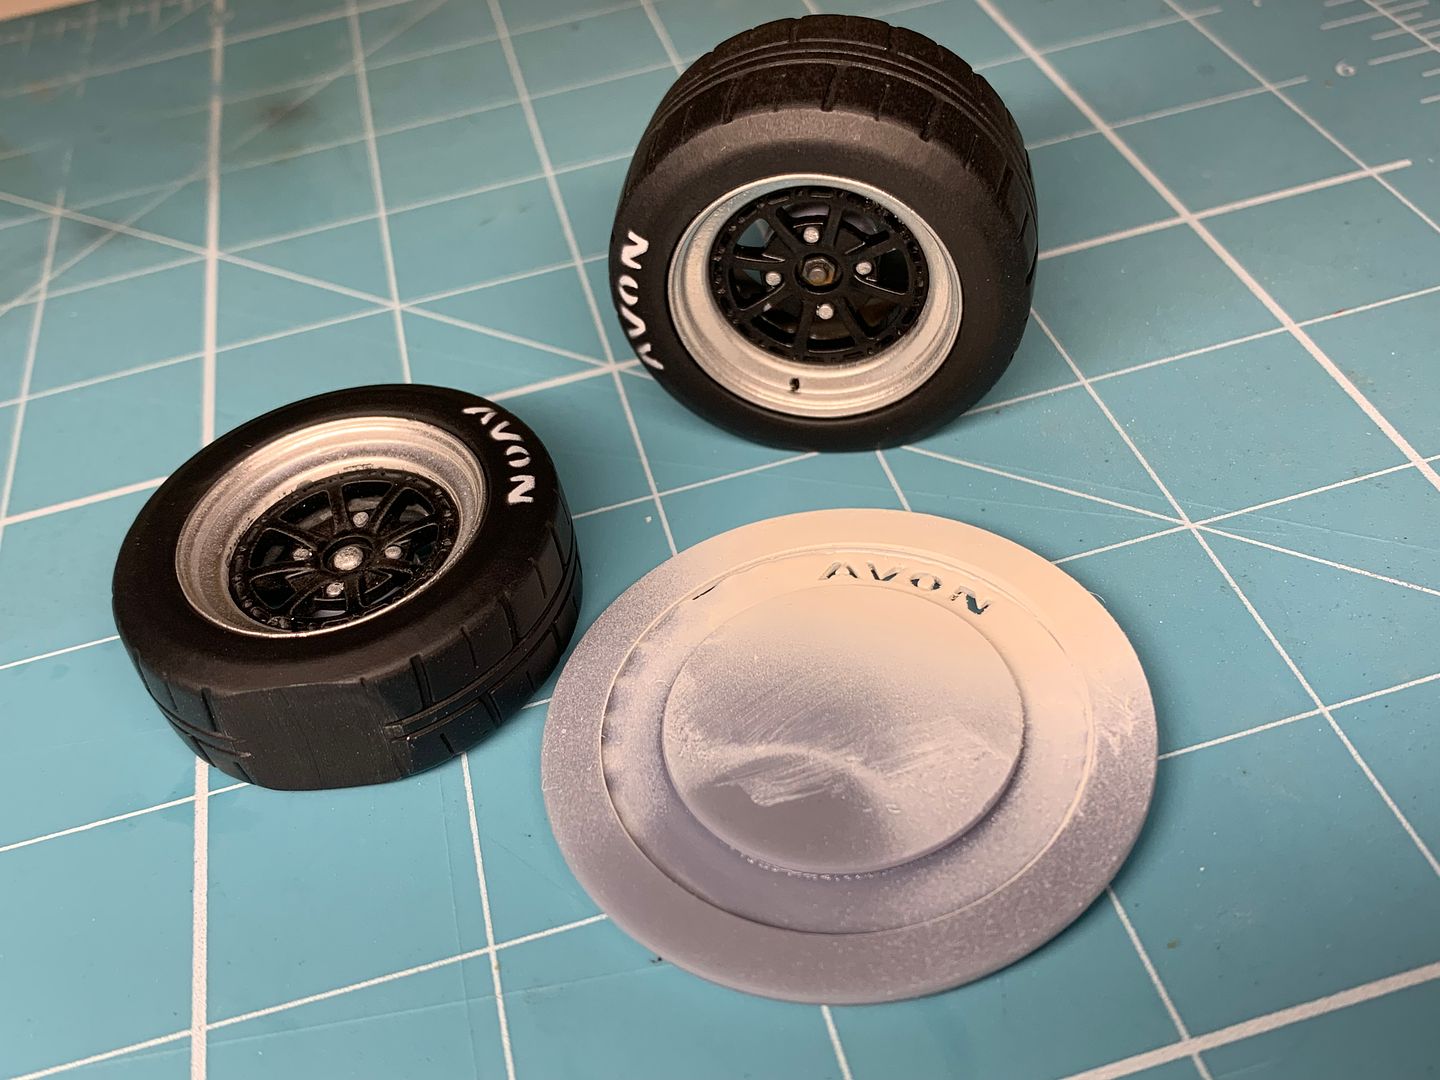
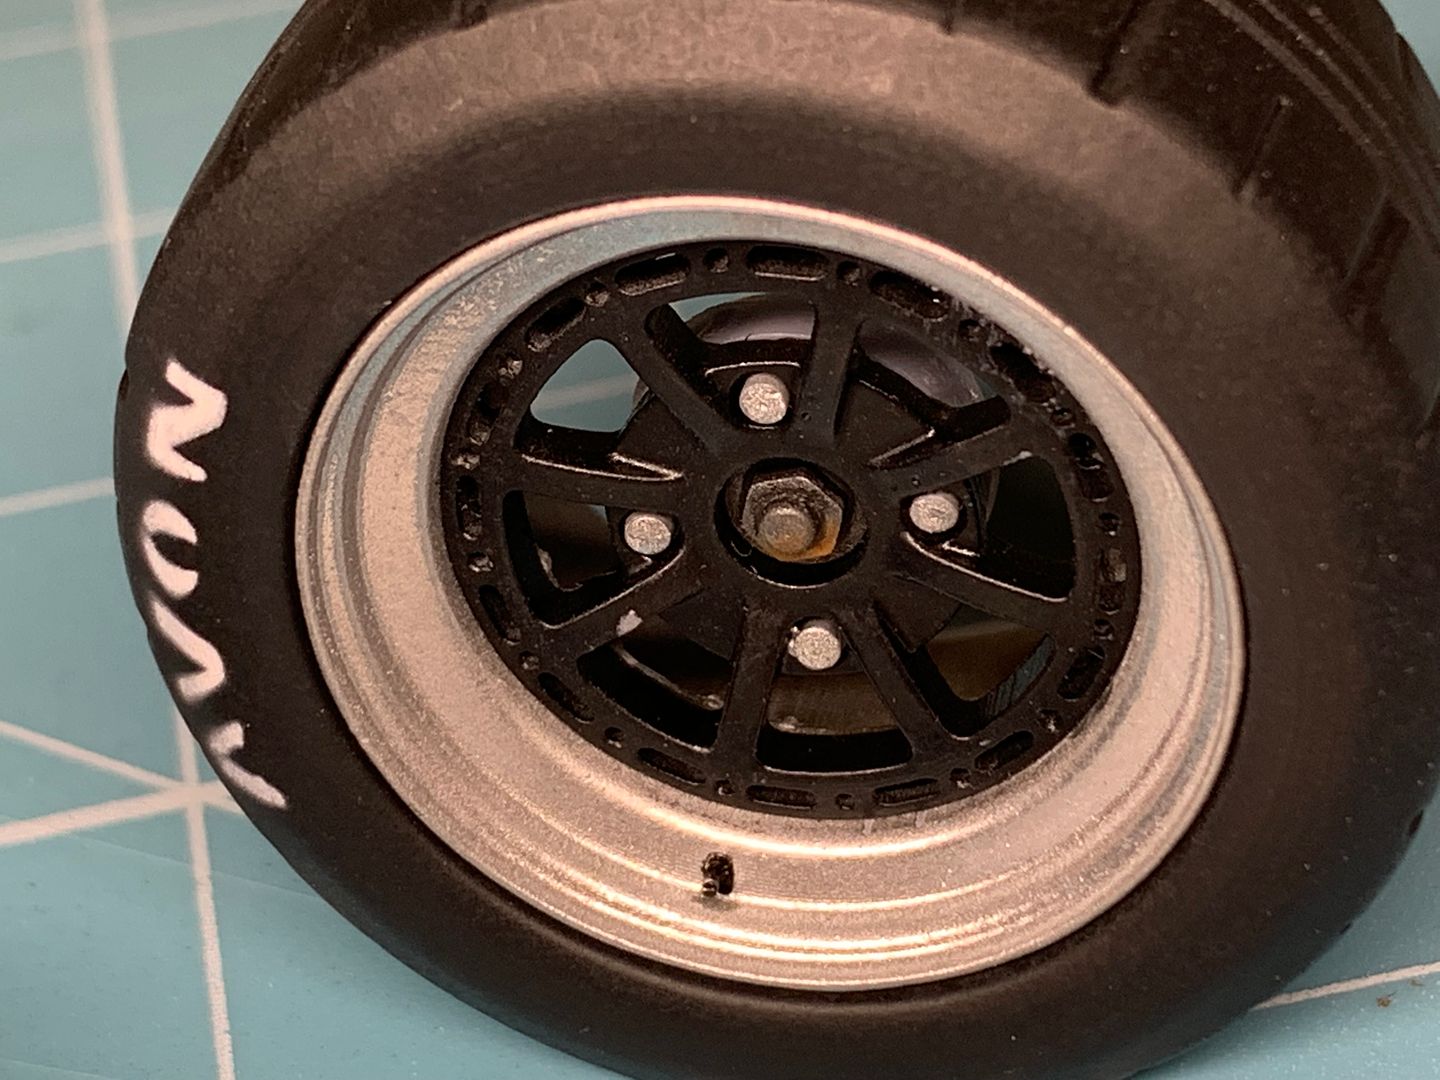
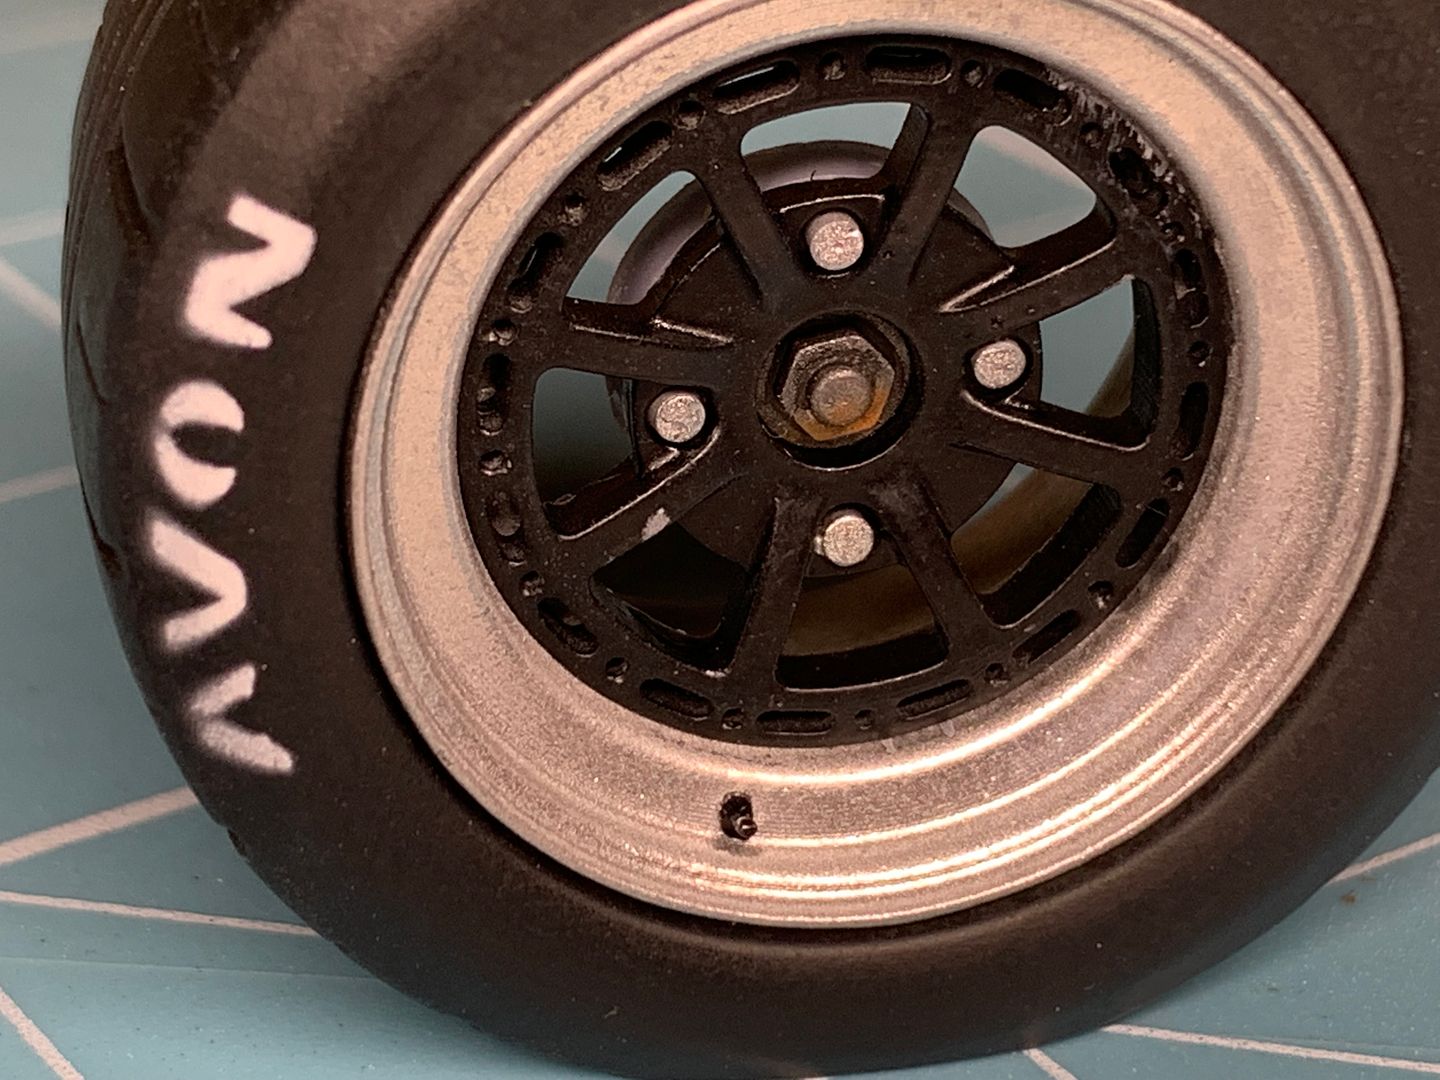
tiny bit of touching-up will be required on the wheel paint....
I modeled the tyre profile on the mask, as the spray would need to go around the profile of the tyres...
tiny bit of touching-up will be required on the wheel paint....
If it has been a while you might want to send those wheels off to Mike for crack testing 
I am always staggered by how amazing this detailing is. It looks fantastic. I have one of these kits in the wardrobe waiting to be built one day soon...one day in the future...one day never...I give up.
I am always staggered by how amazing this detailing is. It looks fantastic. I have one of these kits in the wardrobe waiting to be built one day soon...one day in the future...one day never...I give up.
It could be part of my 'back in the UK - what next...' plan. If you want this level of detail though.....I guess as race cars these are about as far removed from the base kit as is possible, but I am glad I can't work out the hours they have taken...."how much?"...."if you have to ask..."
Most would be far more simple....AND they re-released the Tamiya kit...
Right - almost there with these..so some more details:
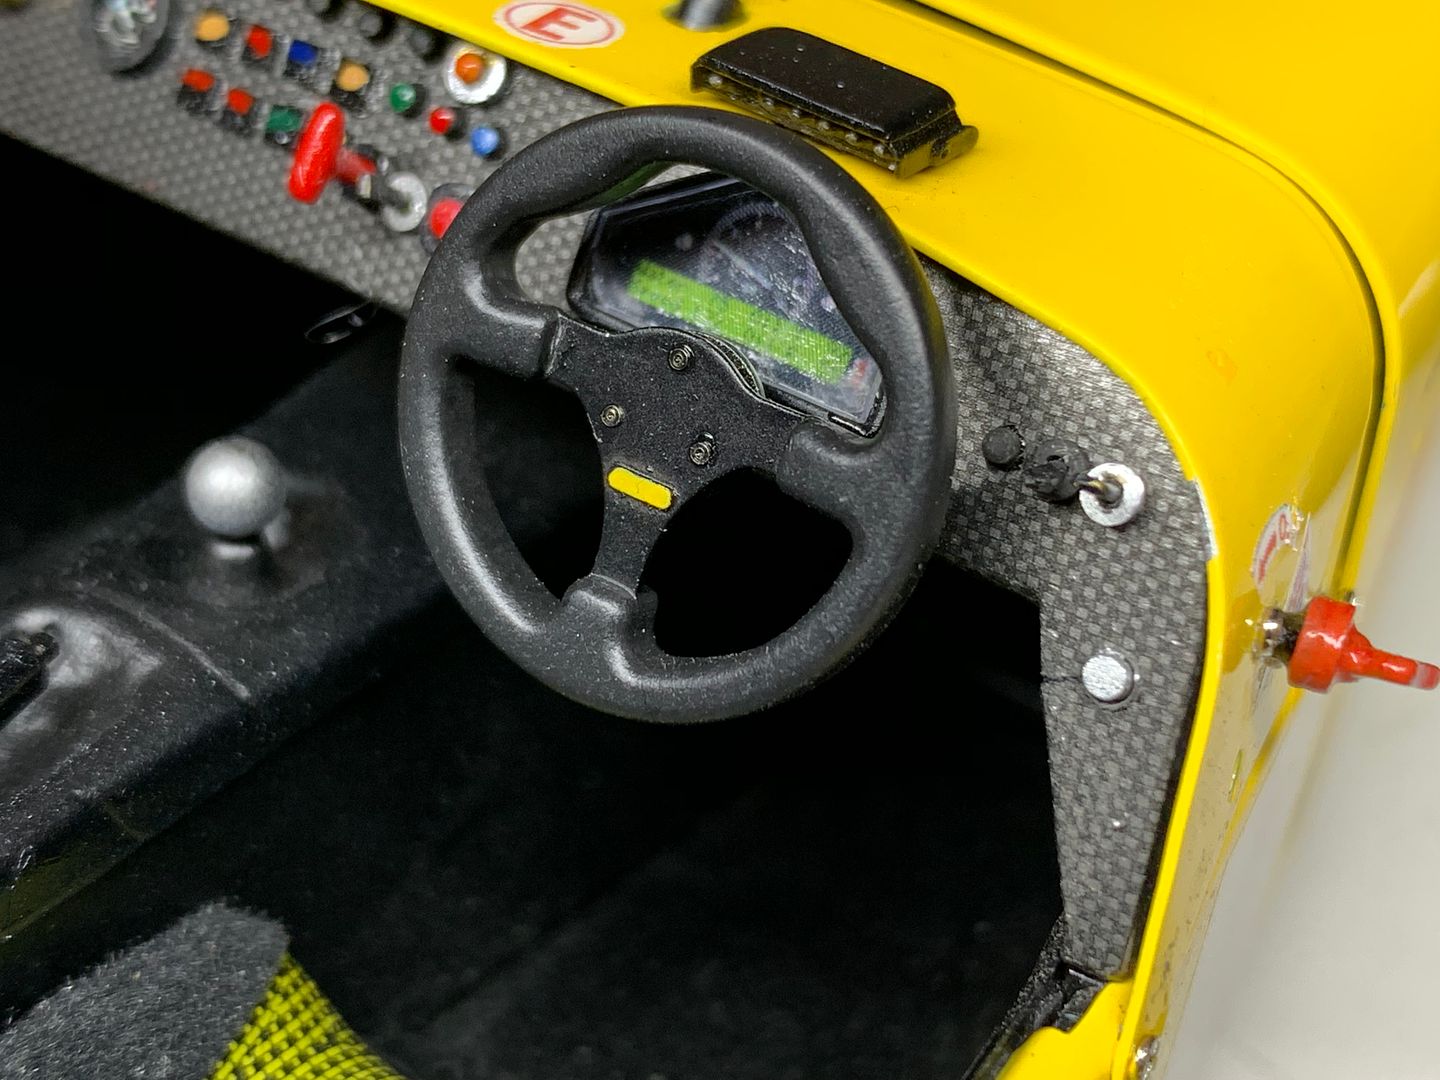
Kit comes with a large steering wheel - JPE version comes with a MOMO but not the right one, and I need 2 anyway - so back to Solidworks and the 3D printer!
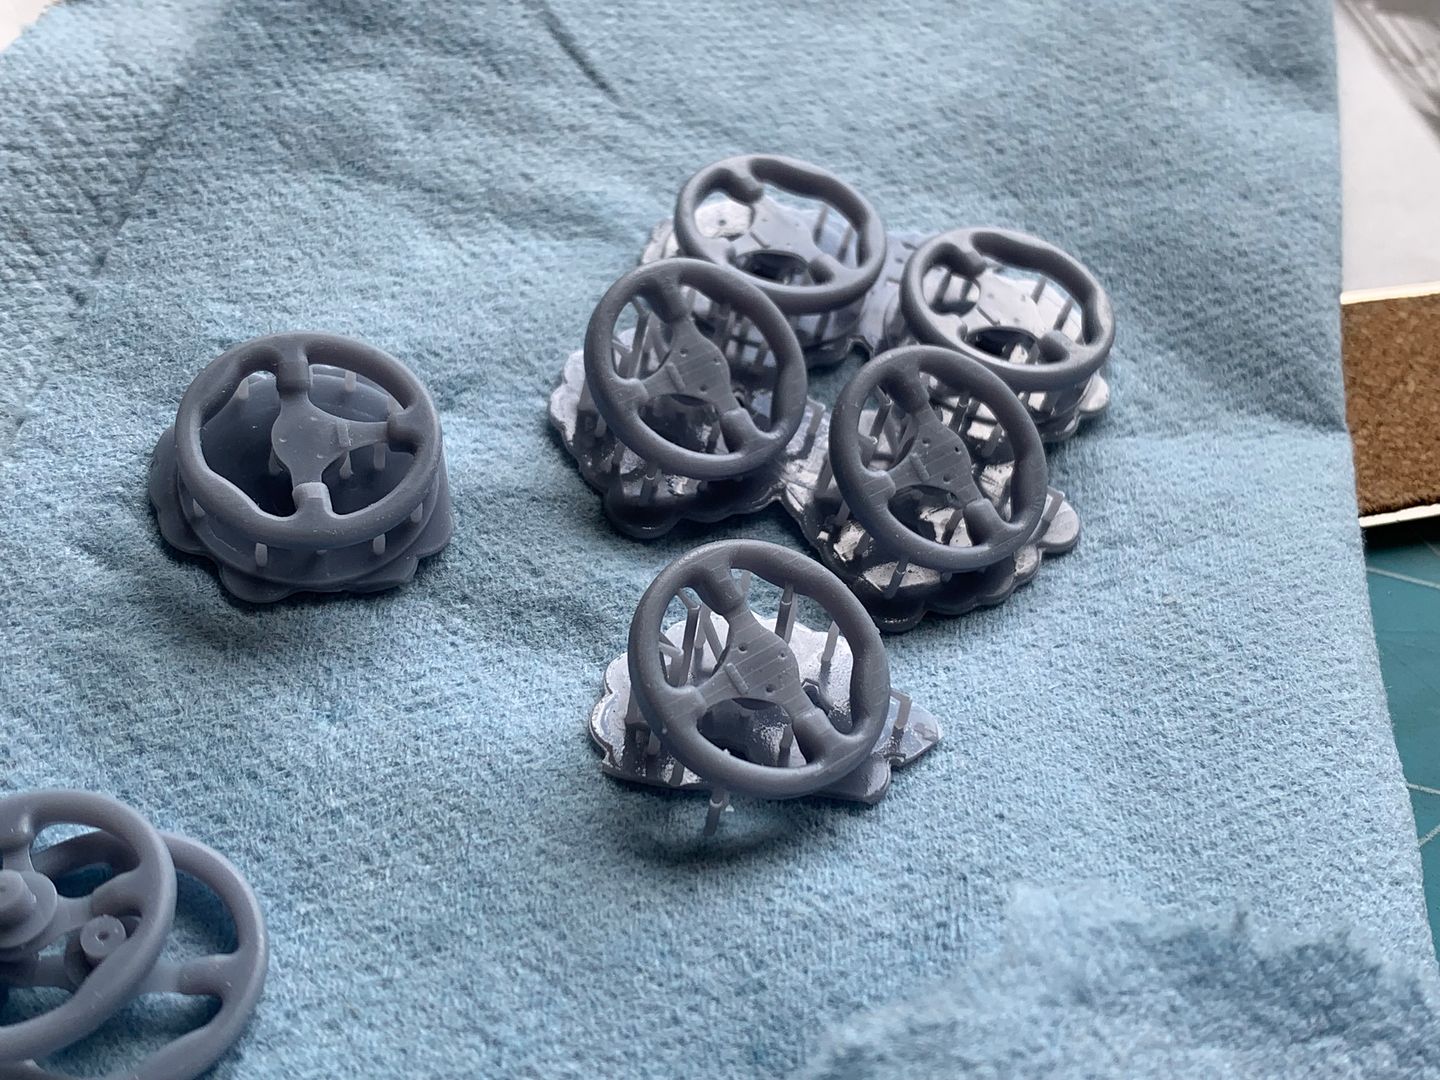
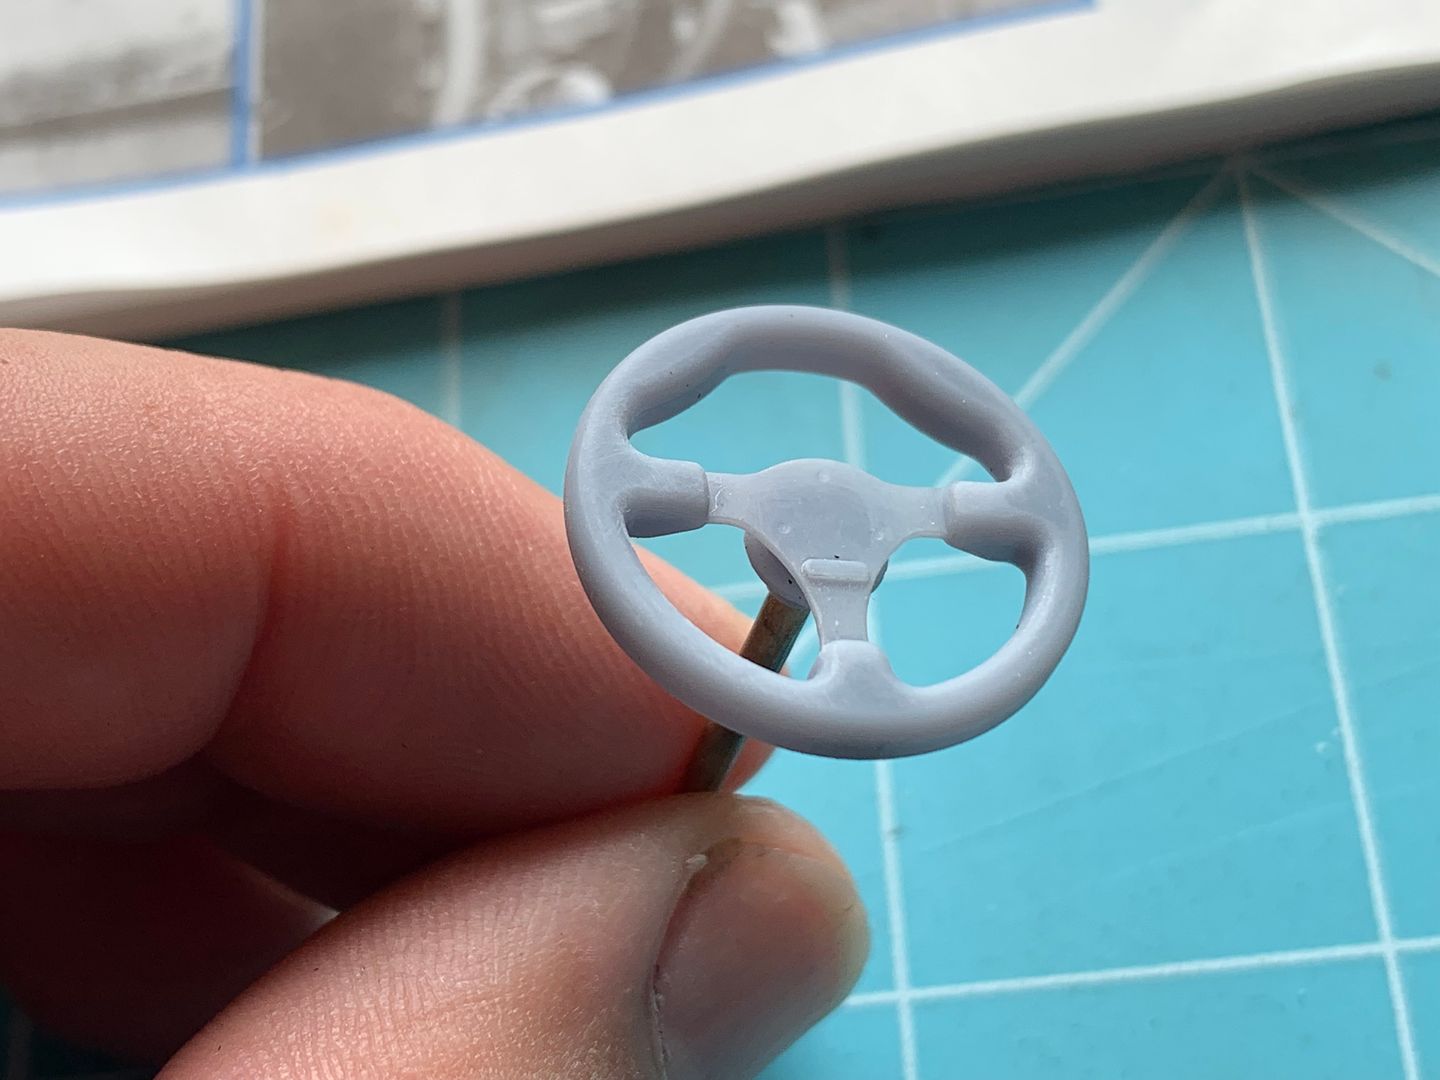
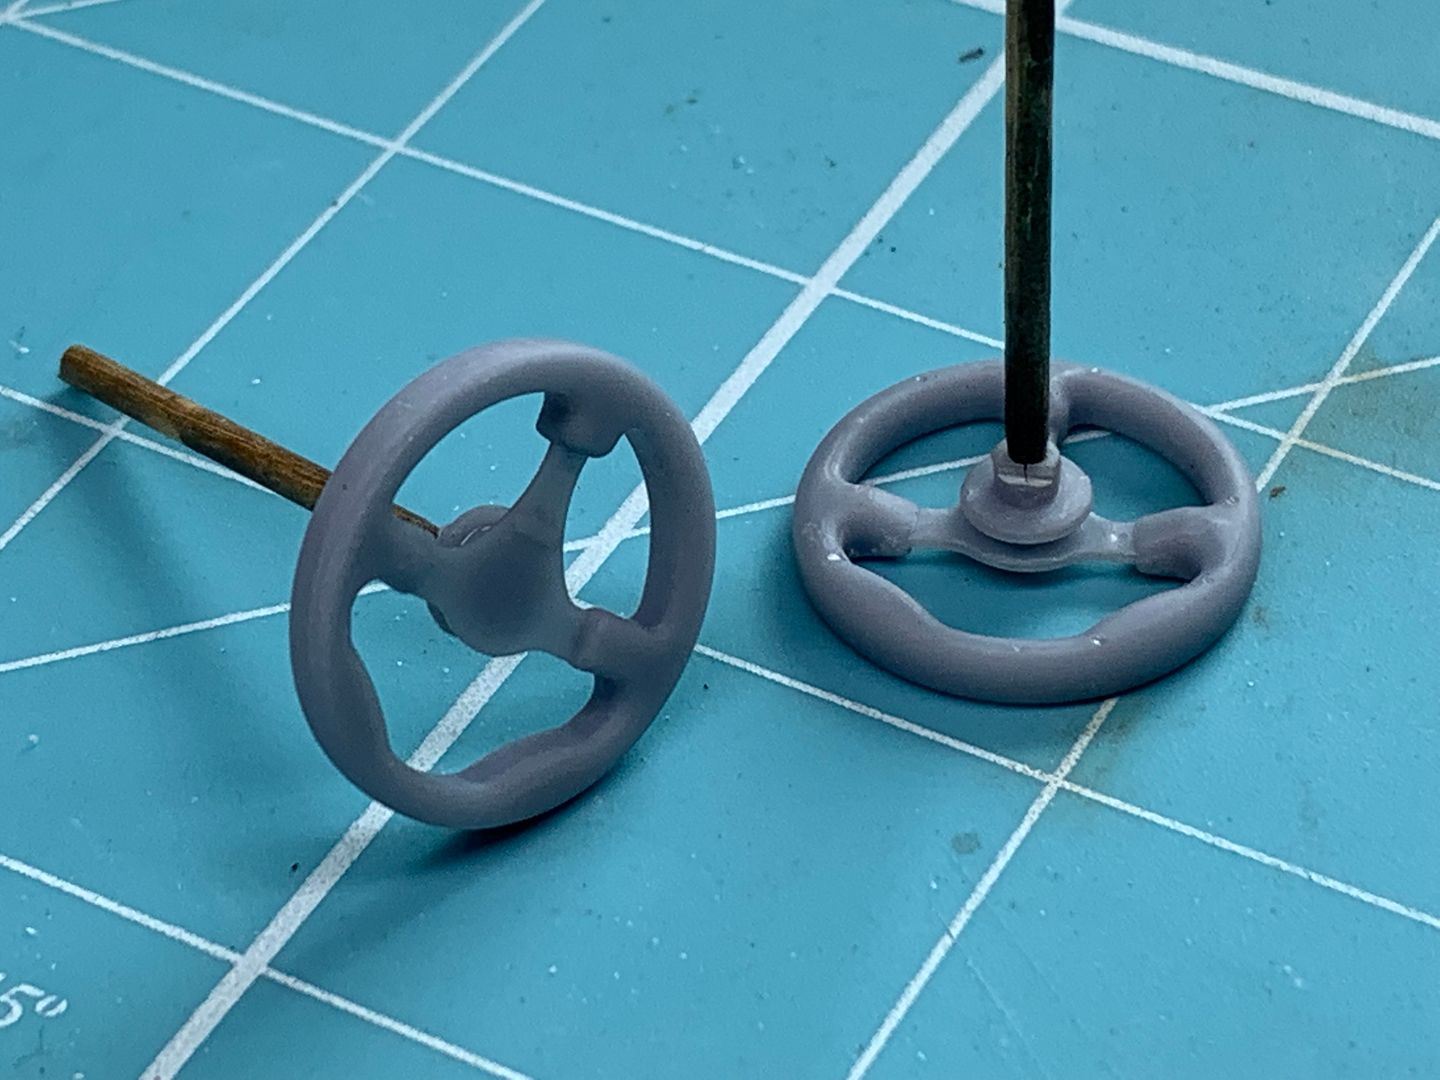
..end result:
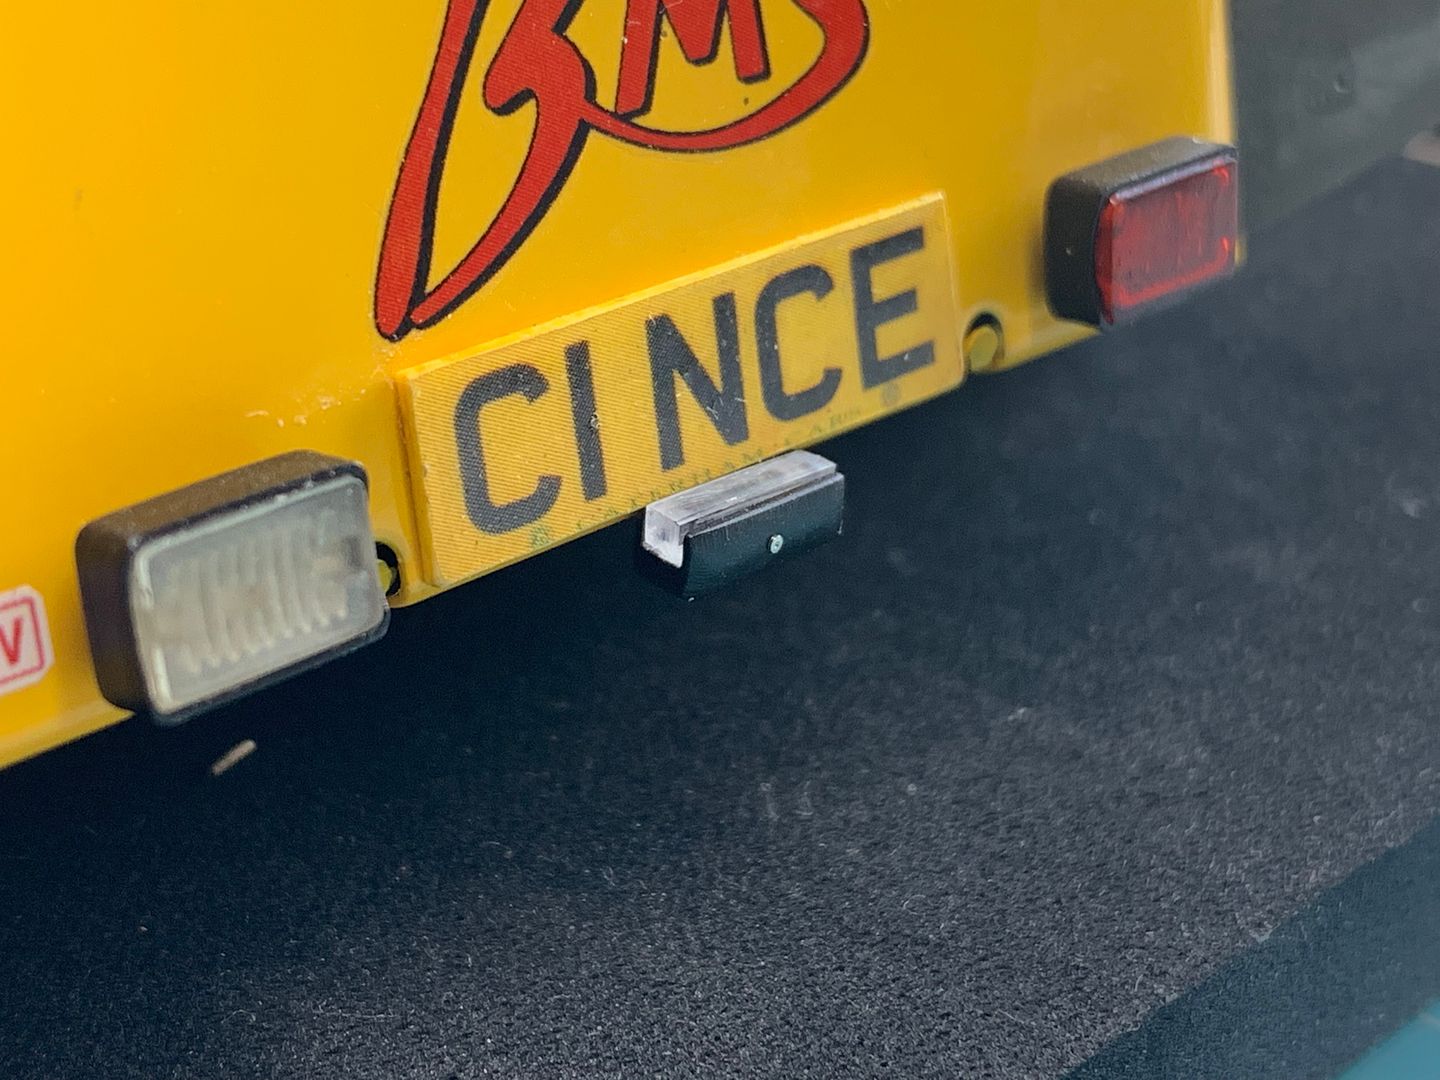
I also made some numberplate lights for the rear of both cars...

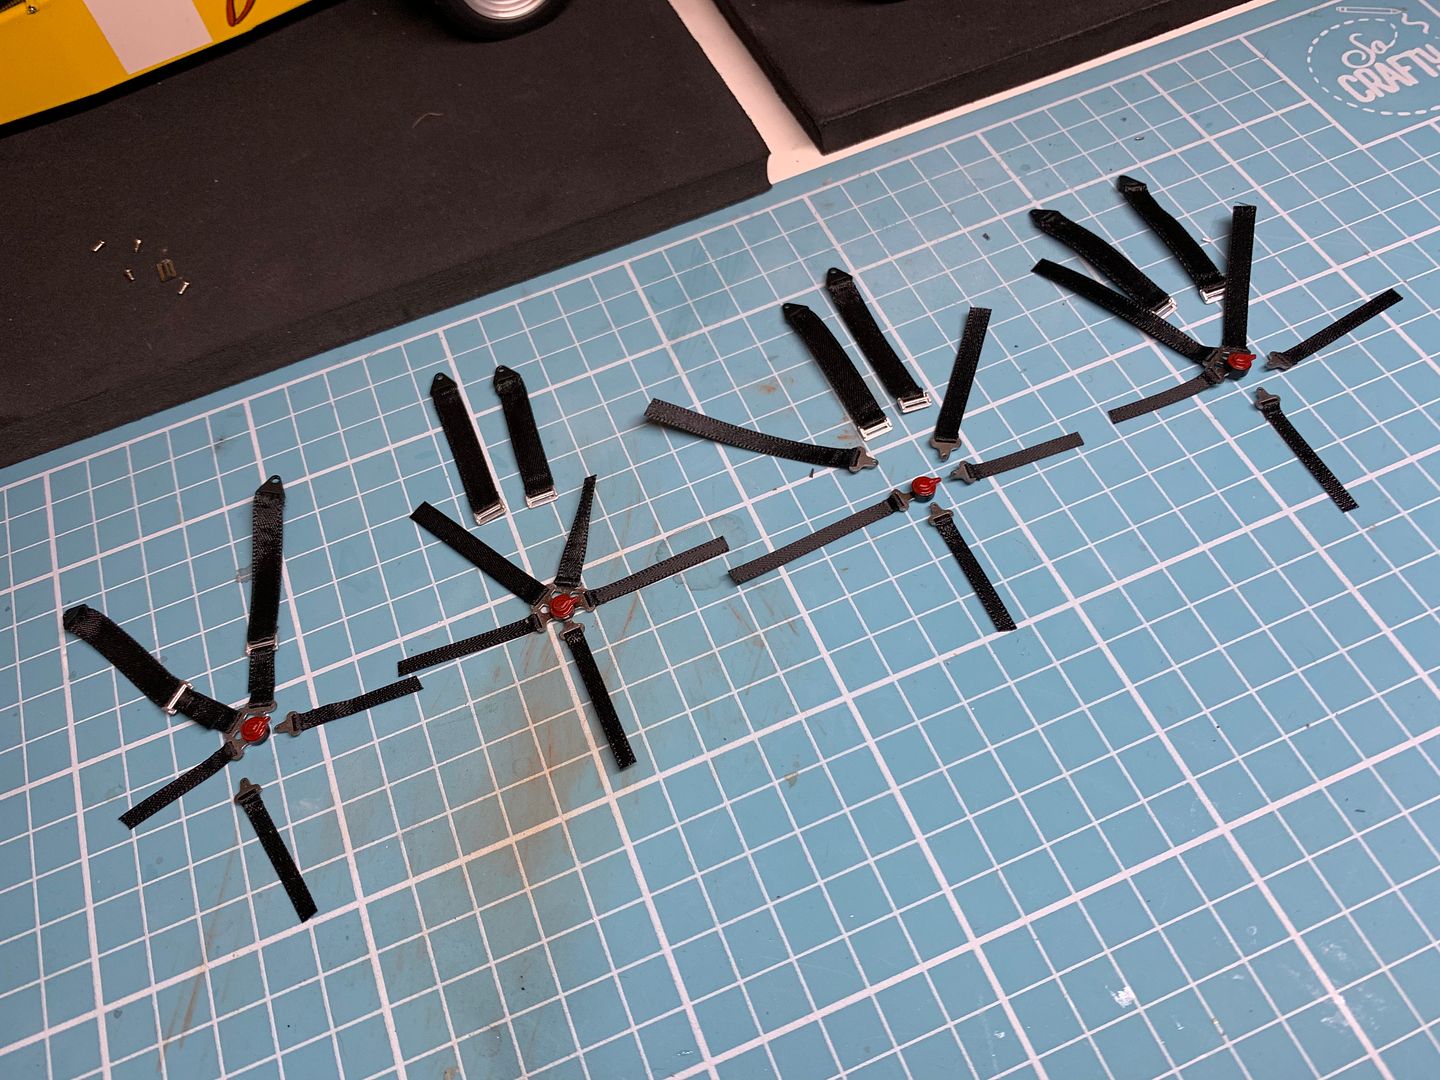
One of the last big jobs - seat belts.
The kit comes with a set of harnesses, with some sticky-backed, satin finish material, printed - but red. And not great detail - so I have to make my own. Standard practice is to use ribbon - I did play around with using 'lead' sheet - as found round the top of fancy fizzy wine bottles - used by the scale WWII plane makers - it is great because you can shape it really easily - but better on smaller scales I think - a bit thin for my purposes....
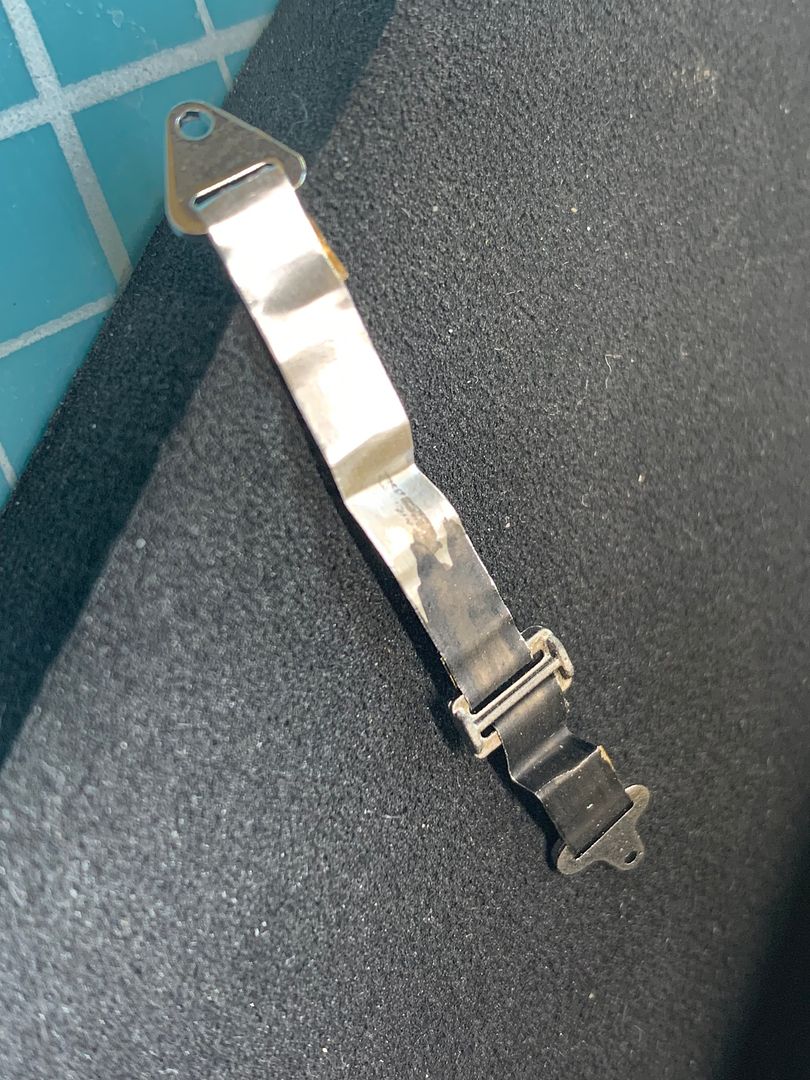
So I bought some black ribbon - 4, 5 and 6mm covered it.
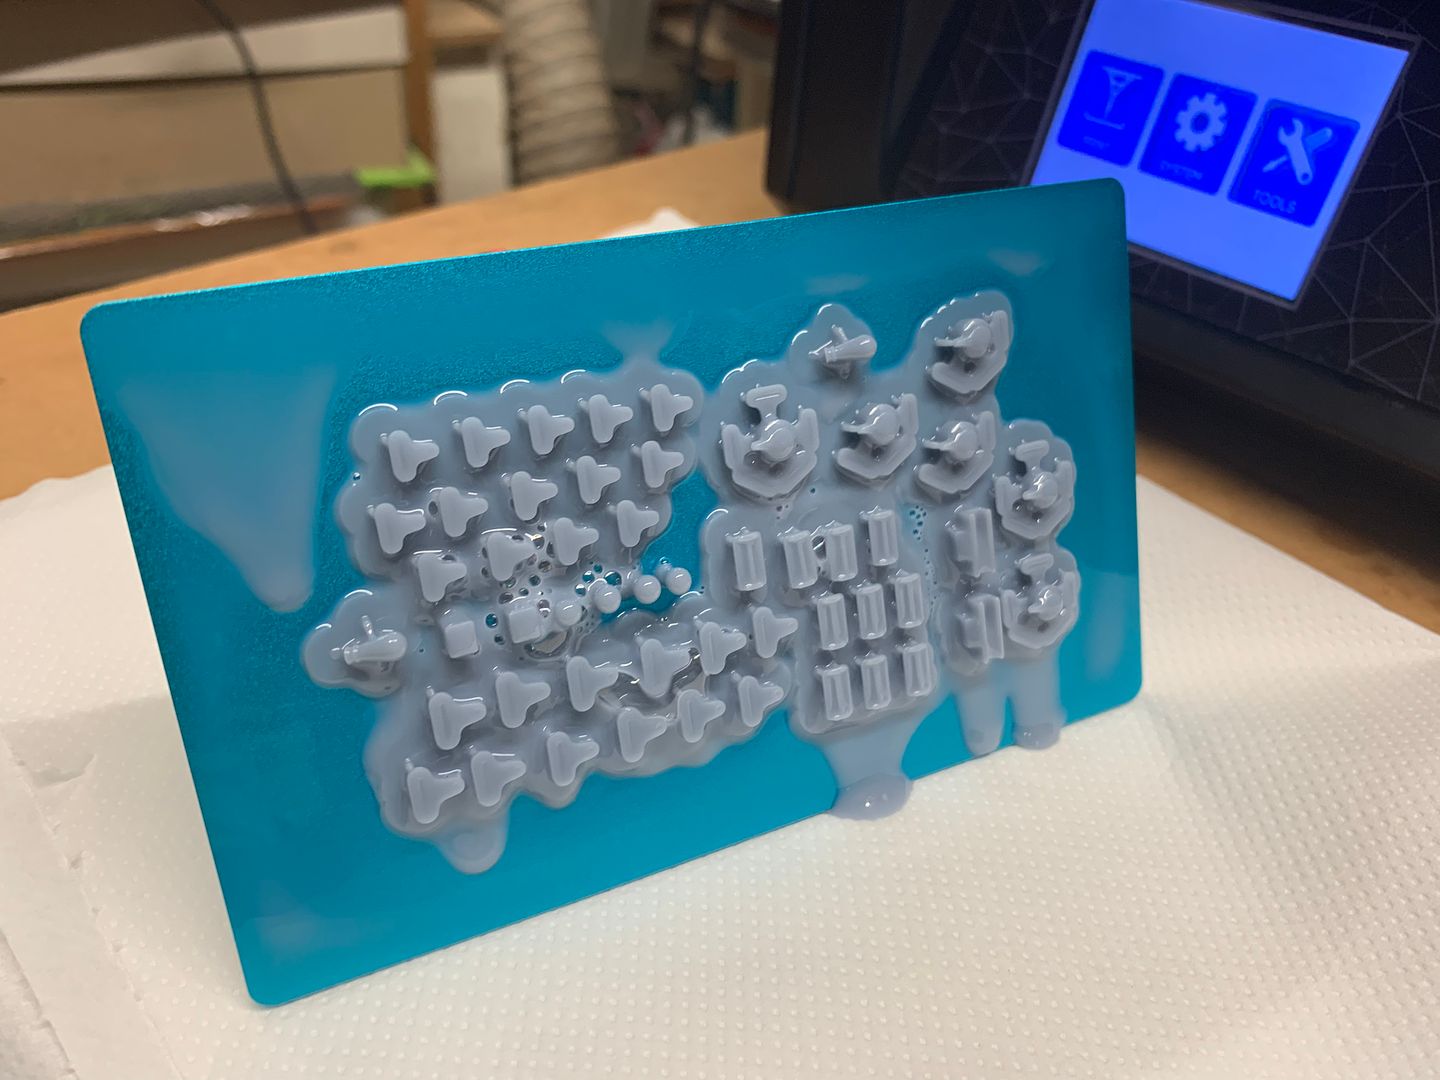
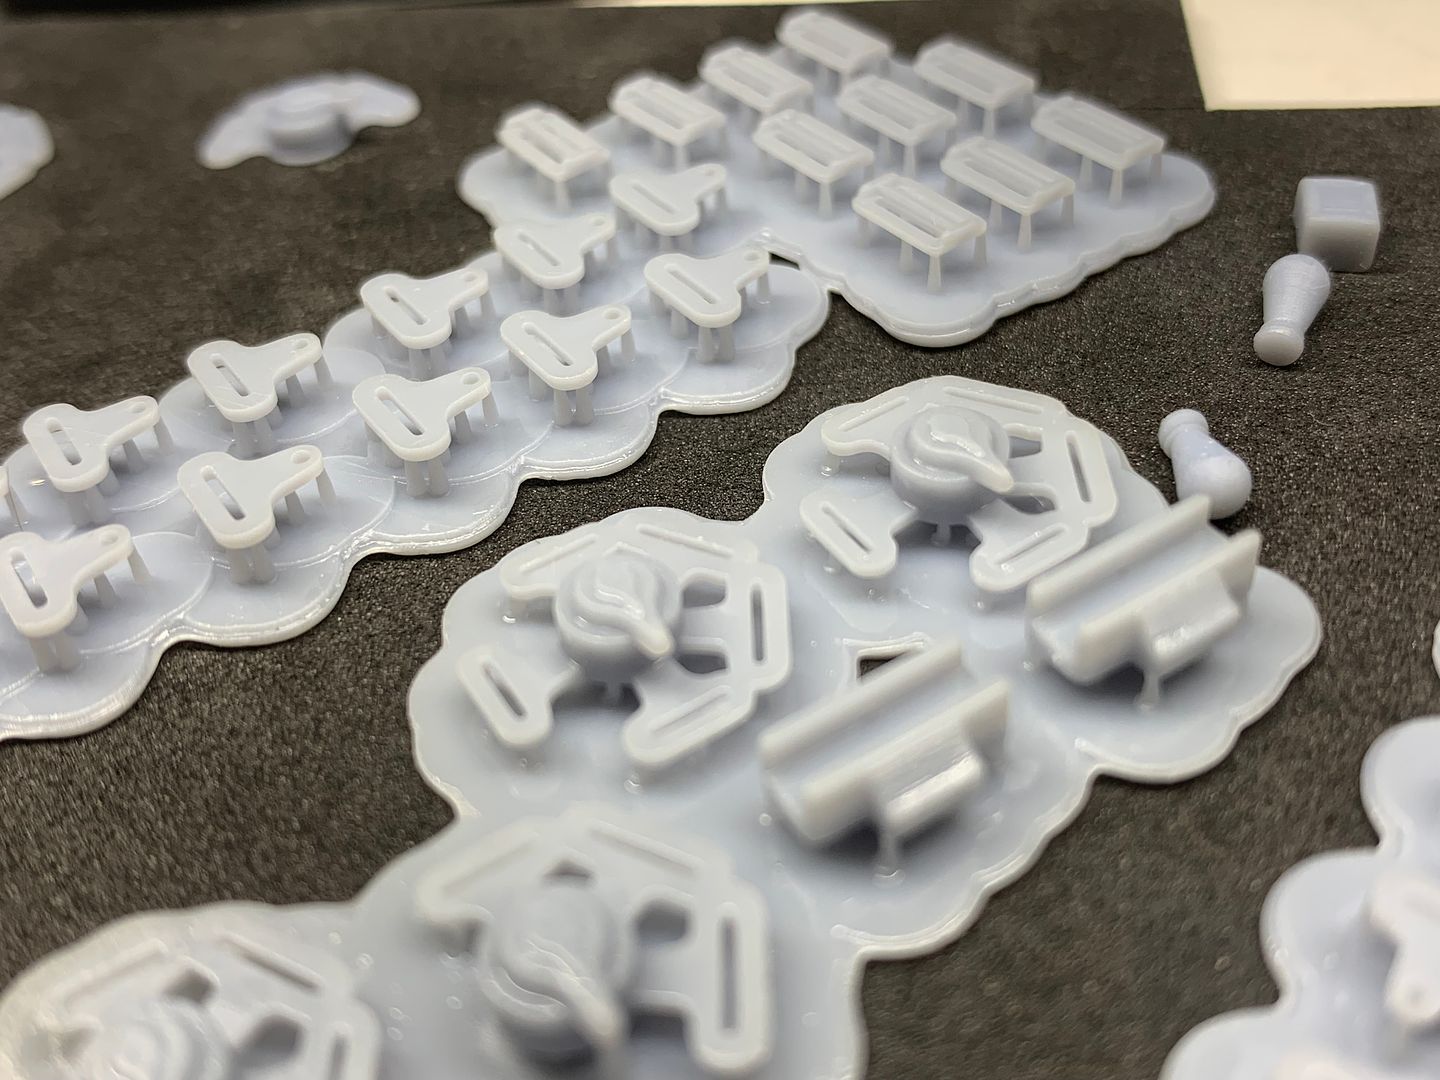
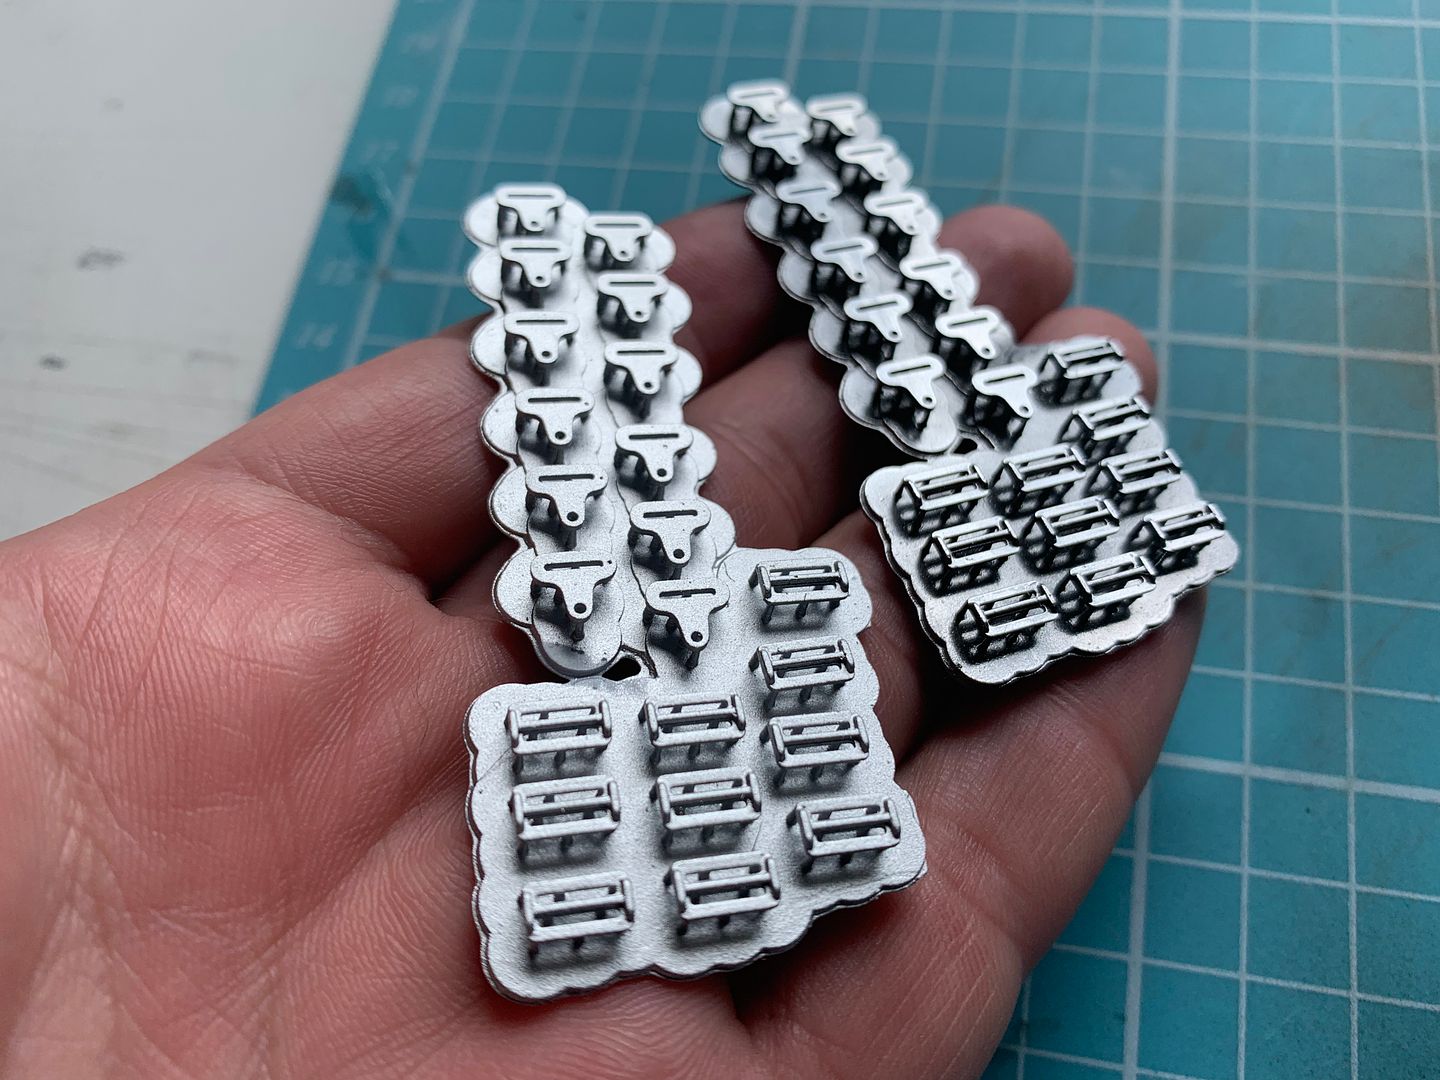
I needed lots of buckles and clips, so I redrew them in 3D and printed a variety - advantage of this printing is that if you fill the bed completely, it takes no longer to process - so may as well make some spairs/some to lose/some to try different finishes with...
Testing...
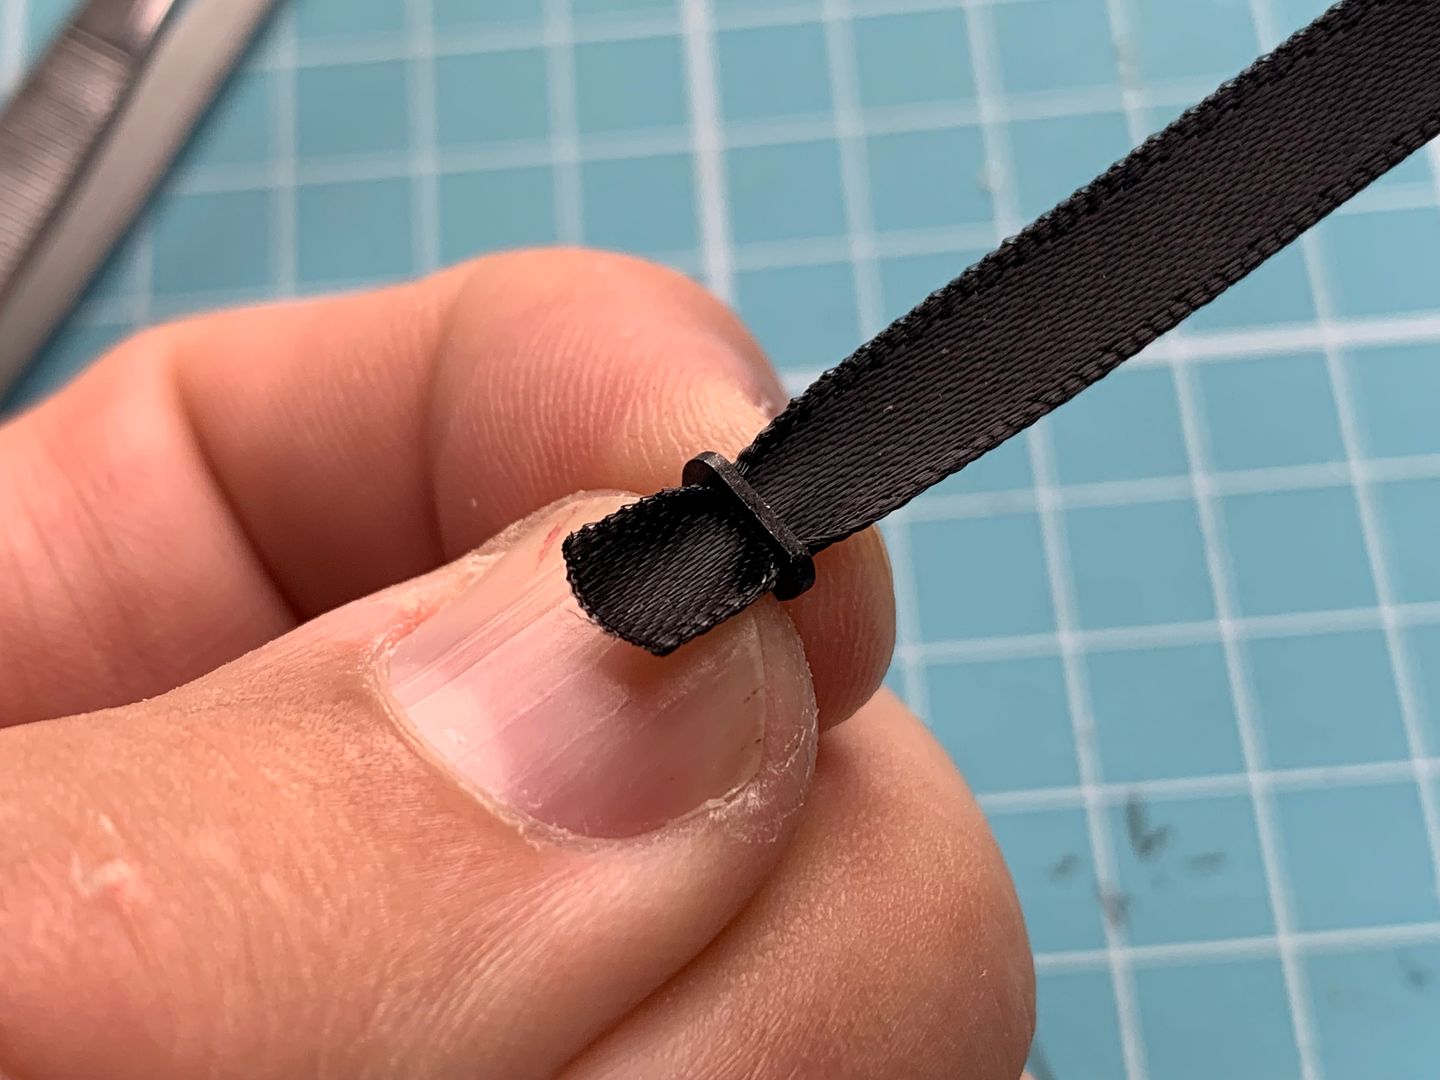
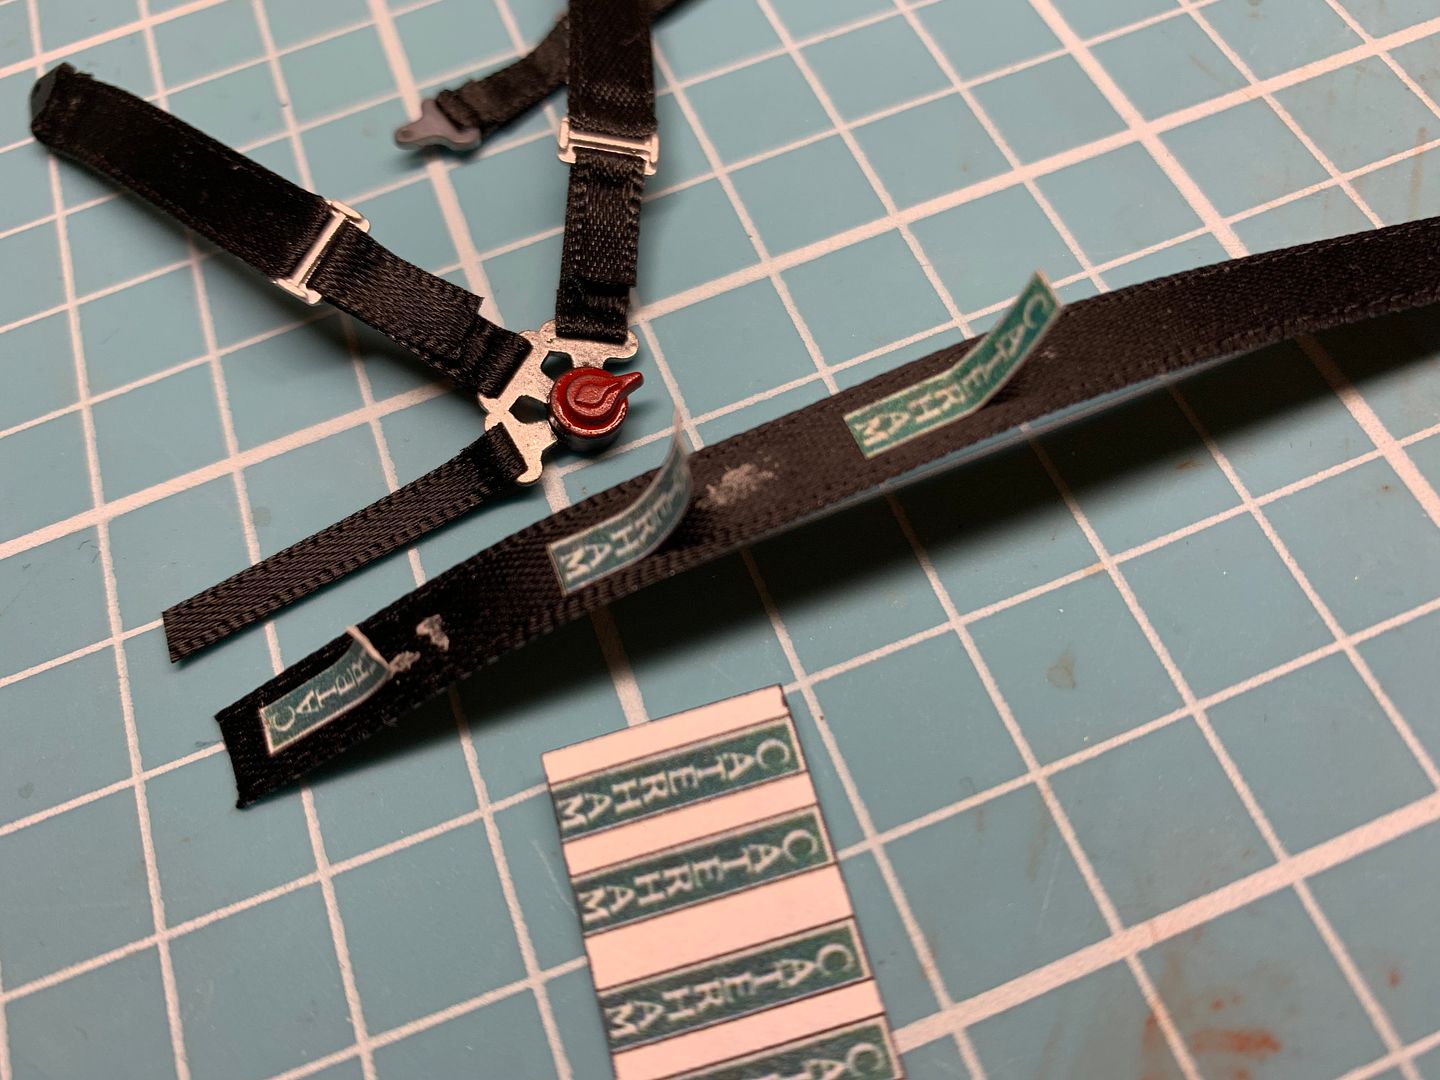
I wanted this 'crease' at the top buckle...
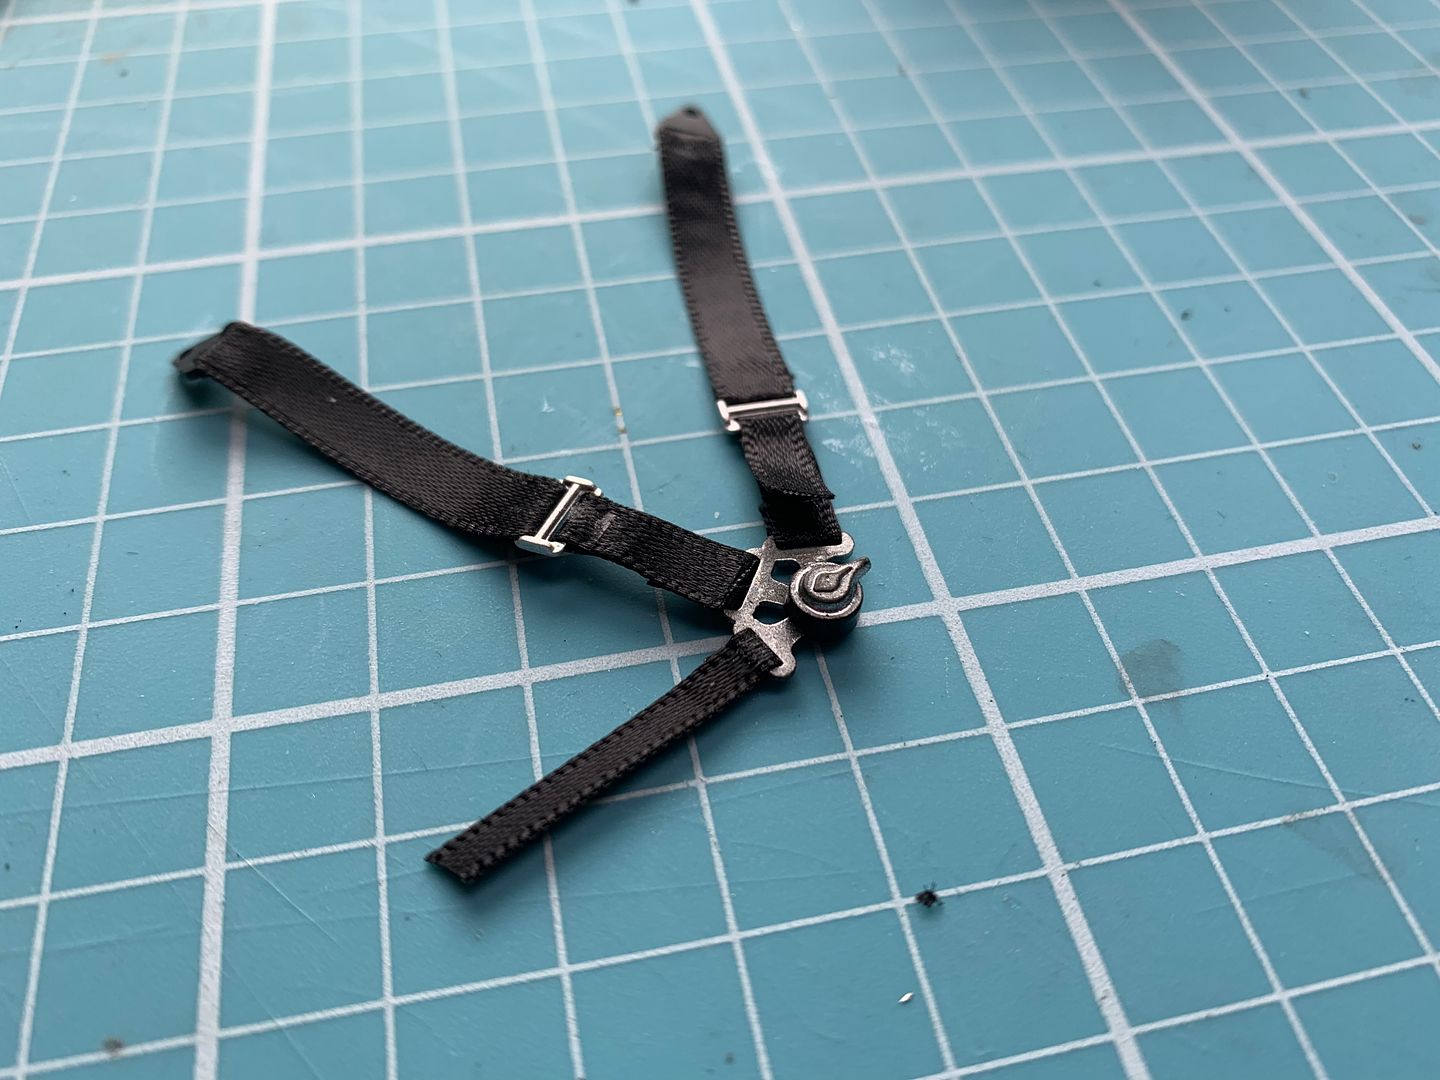
I din't want them all the same in all 4 seats, so I varied which buckles were connected and which would be 'loose'.
Fiddly little buggers to make though - folded the ribbon and glued with super-glue.

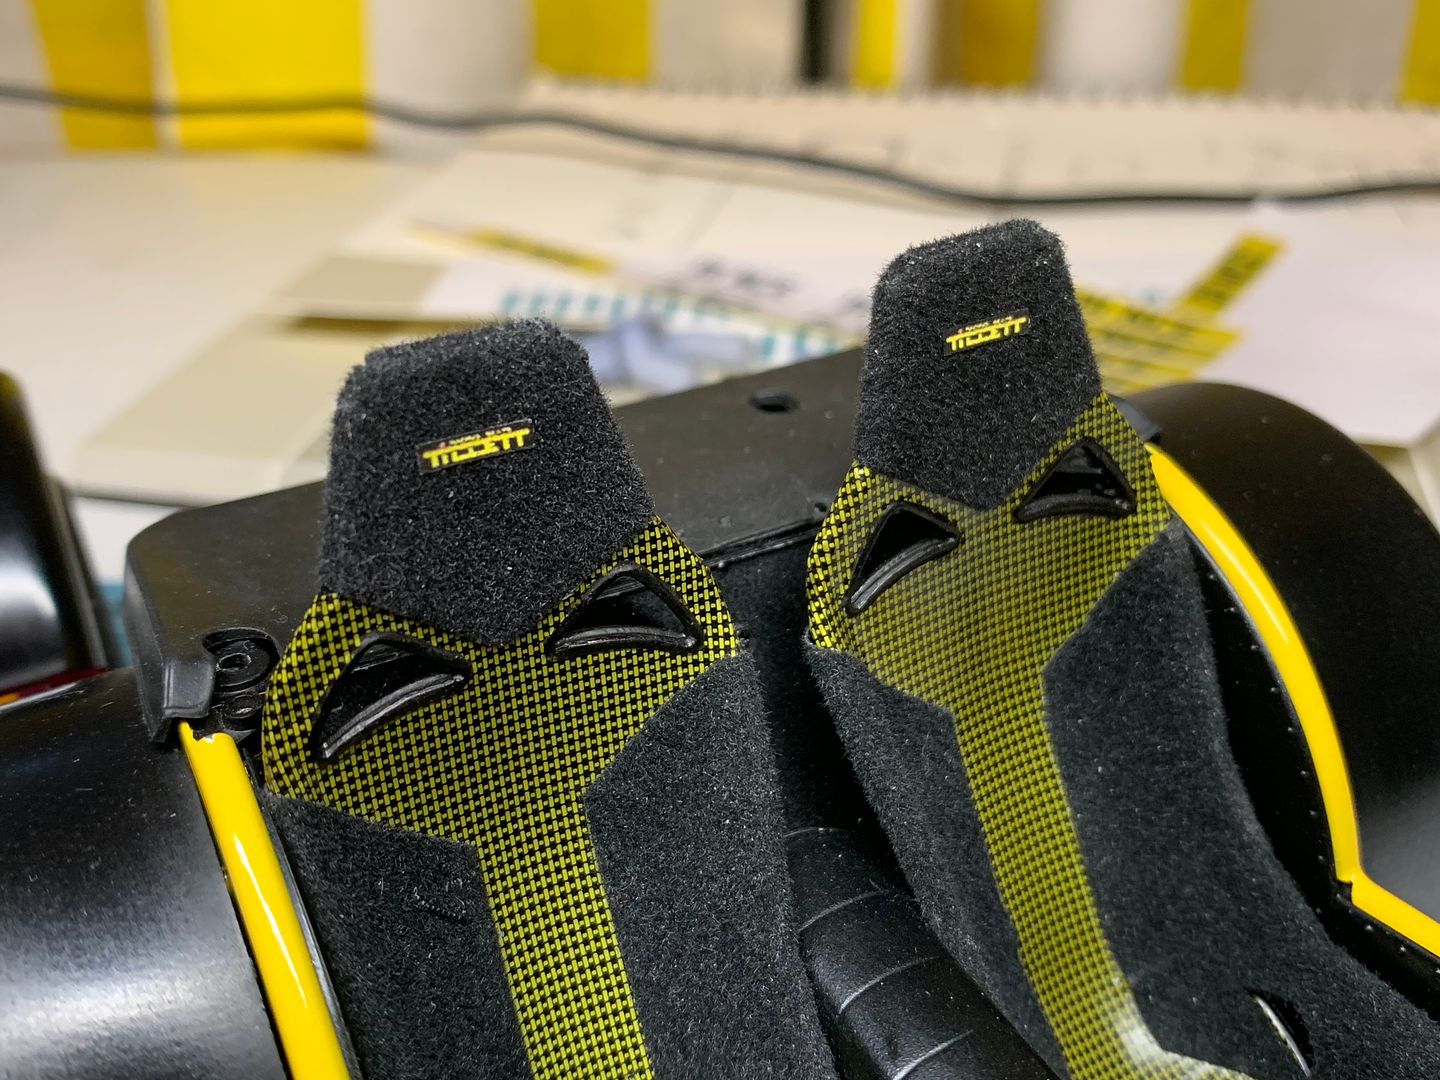
Trying different glues for the paper printed 'Caterham' logos...
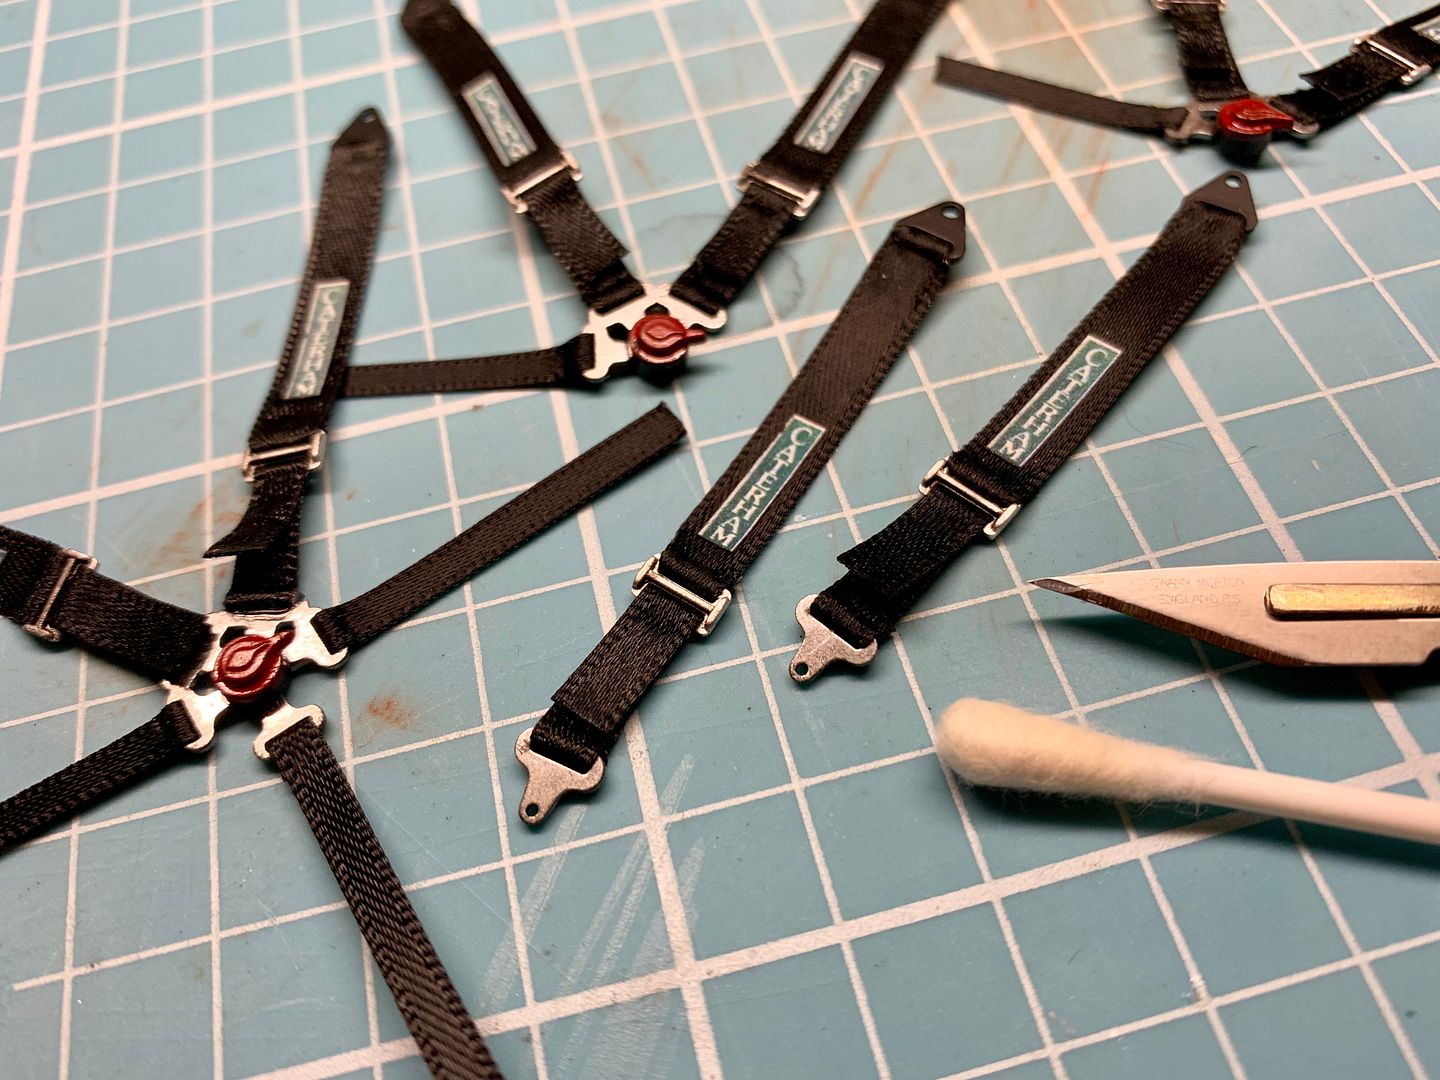
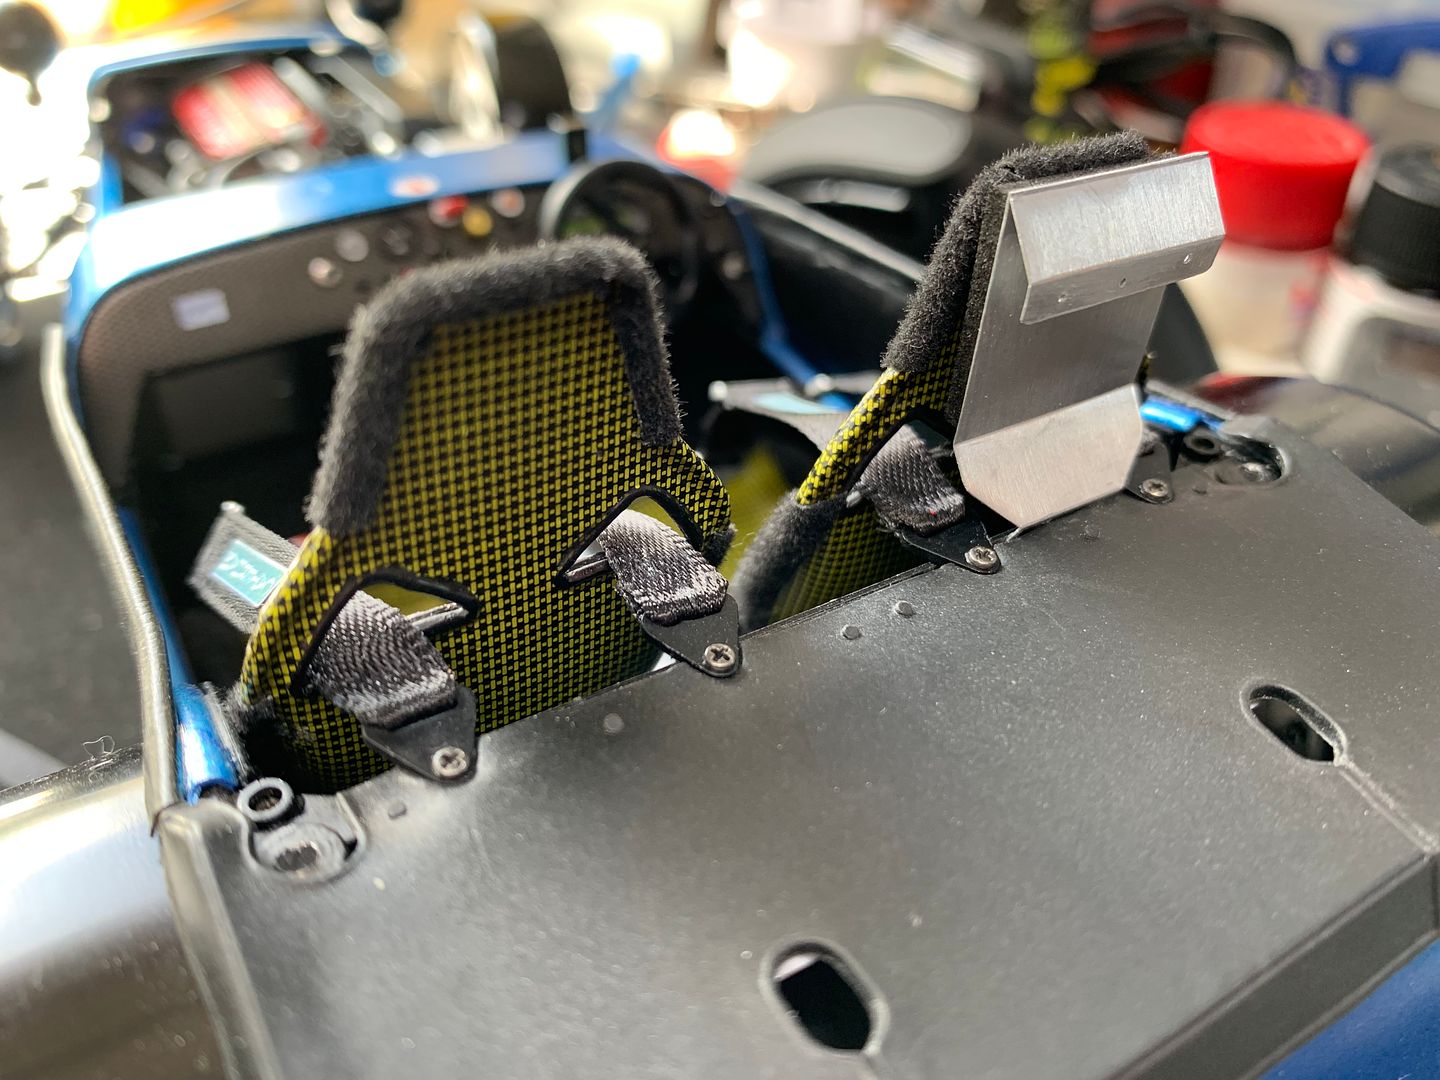
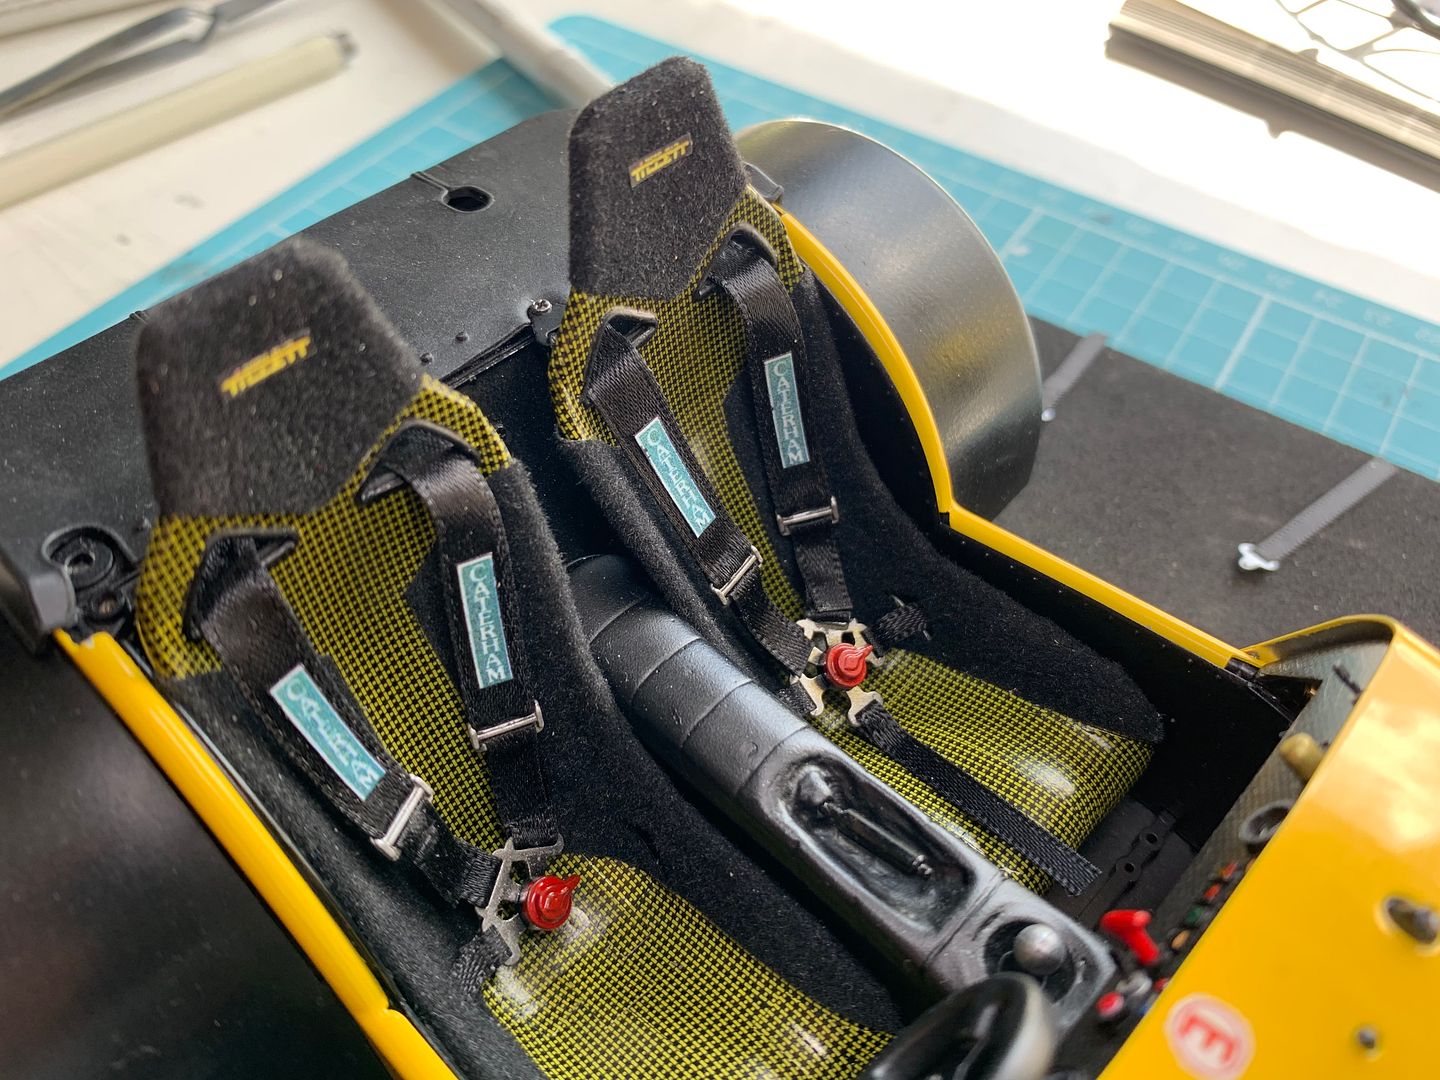
...and completed:
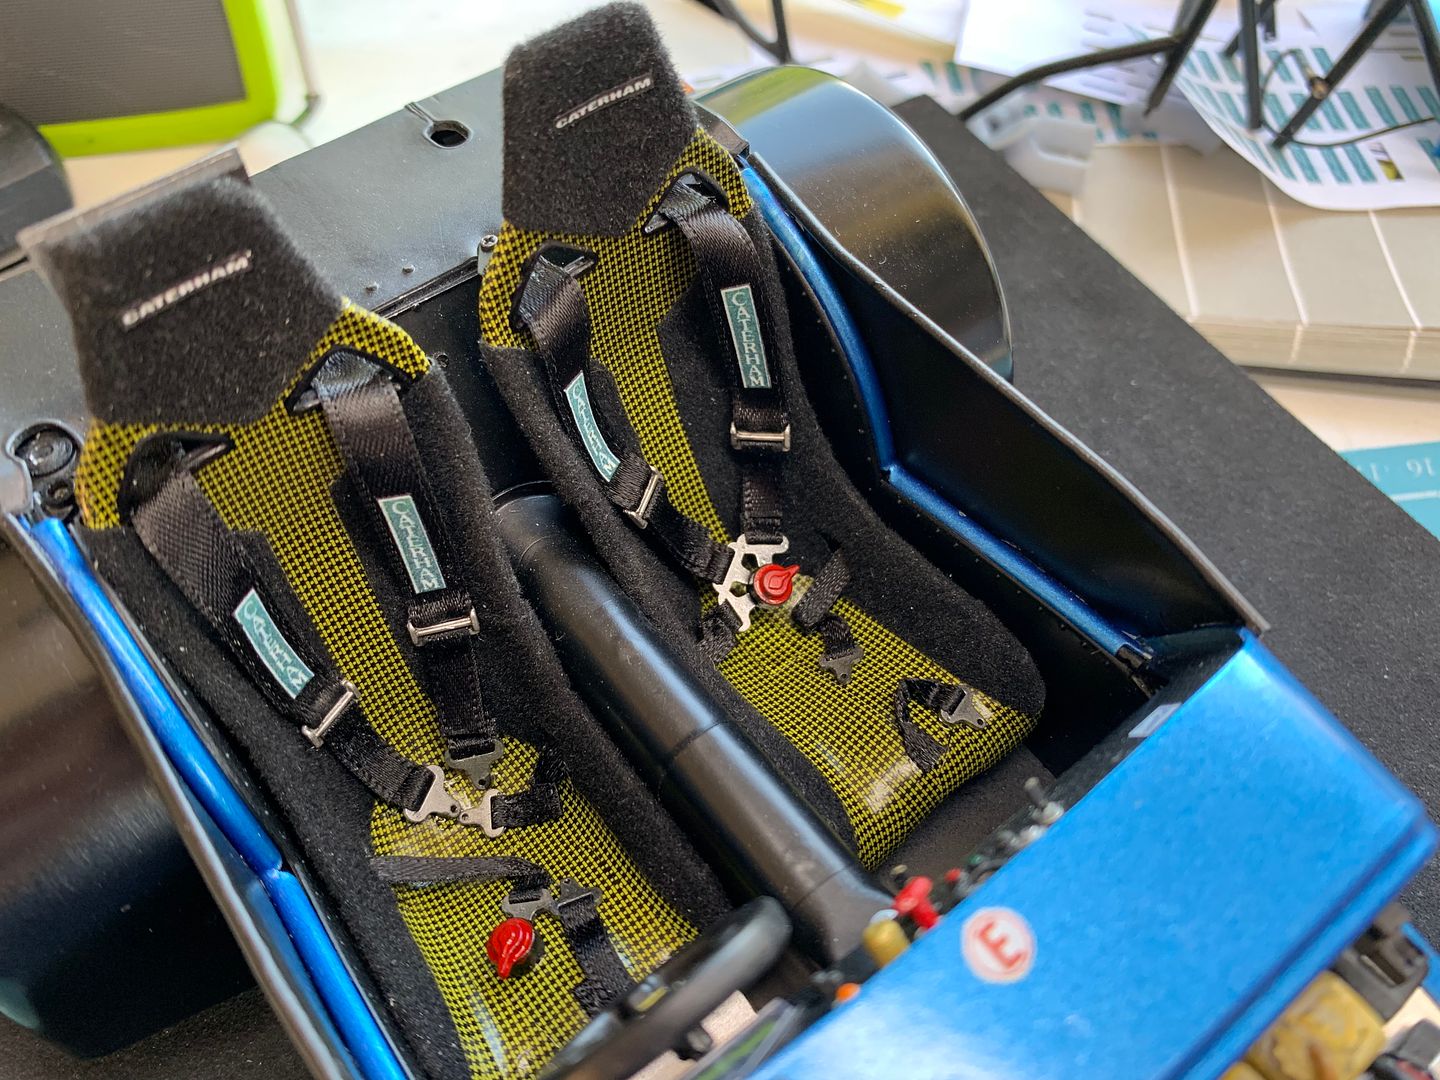
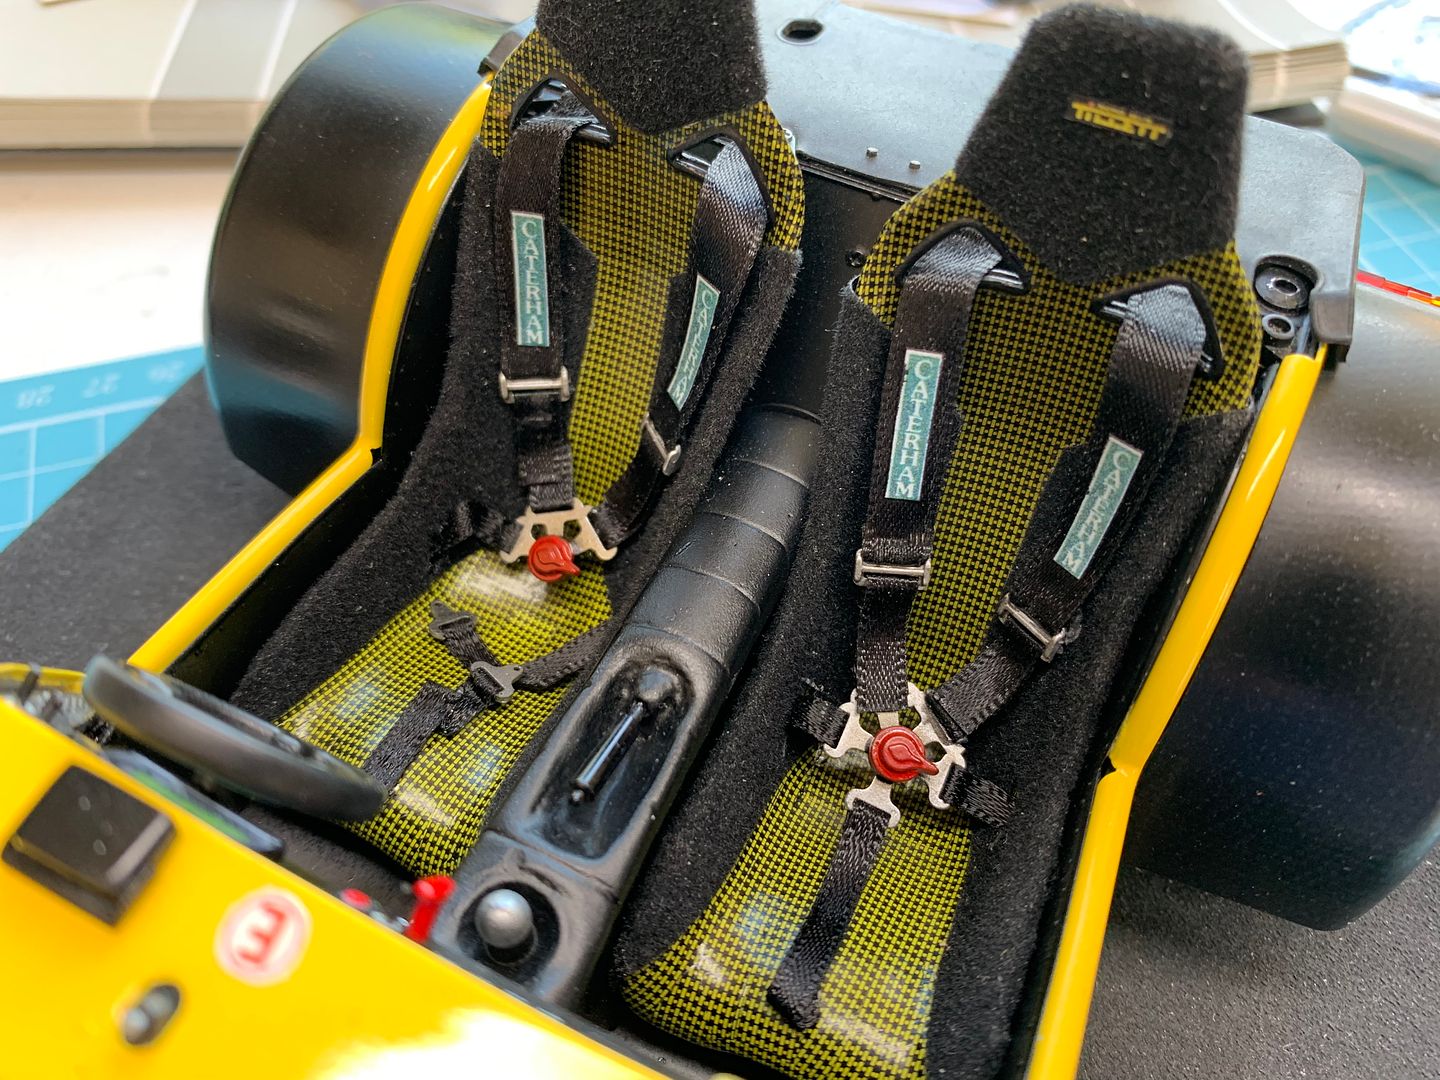
Applied logo's to the seats - each car was different - particularly important for the customer! I think one of the cars was perhaps the first with a particular branding (Tillet or Caterham)

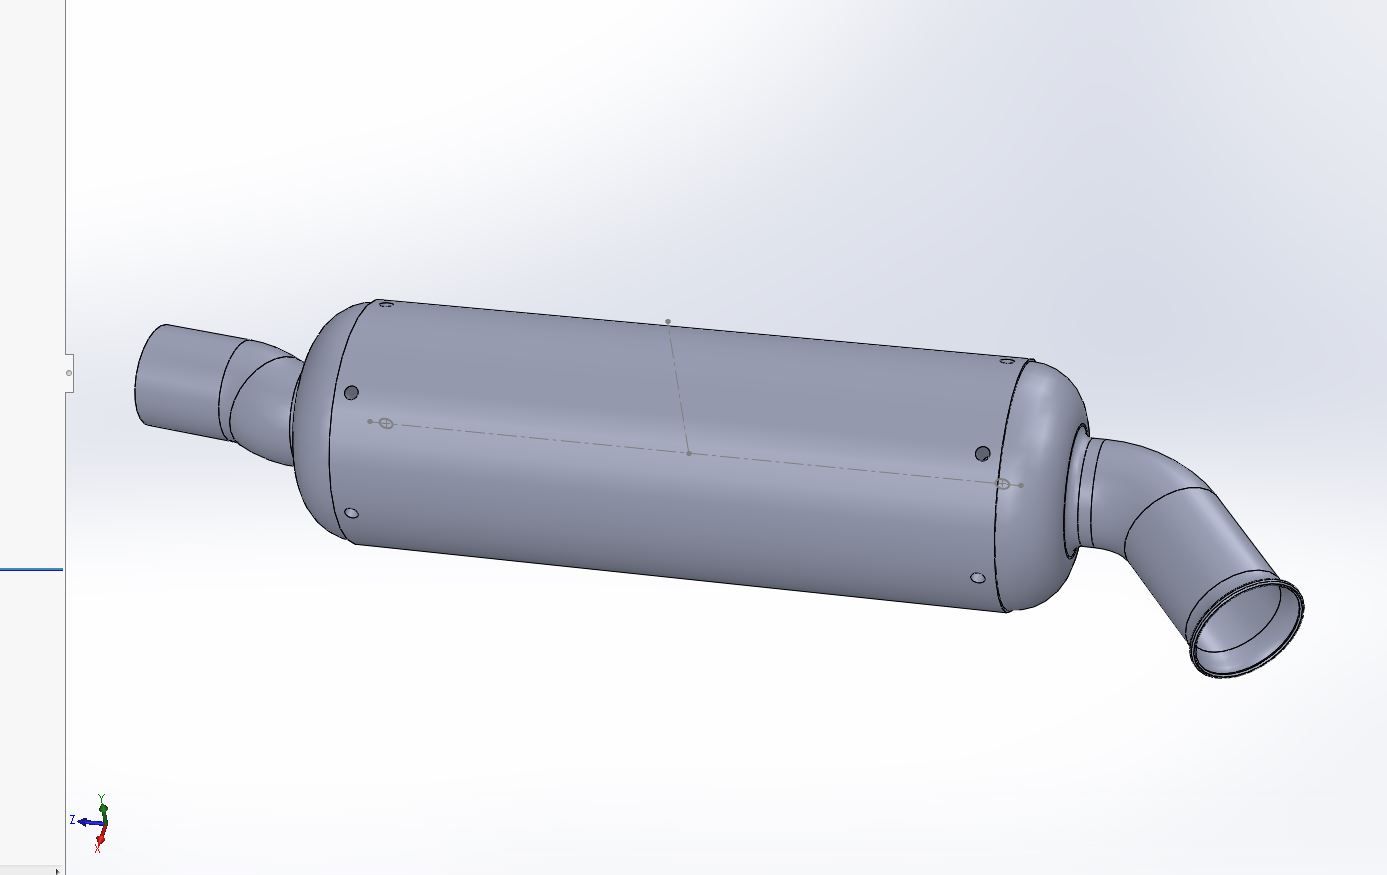
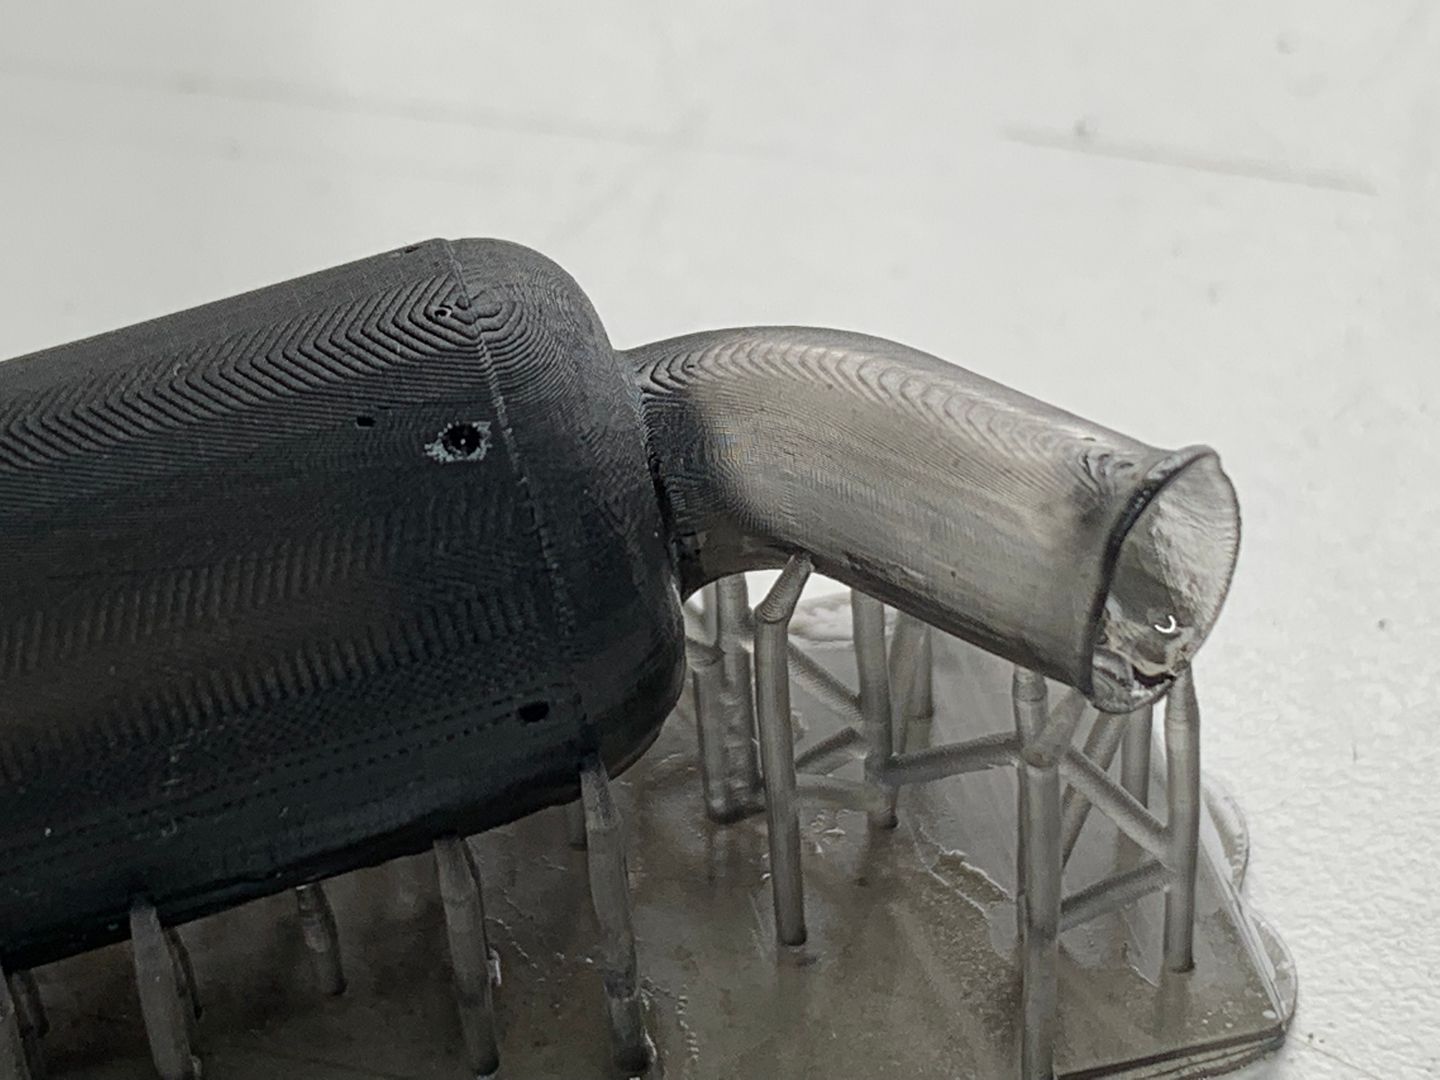
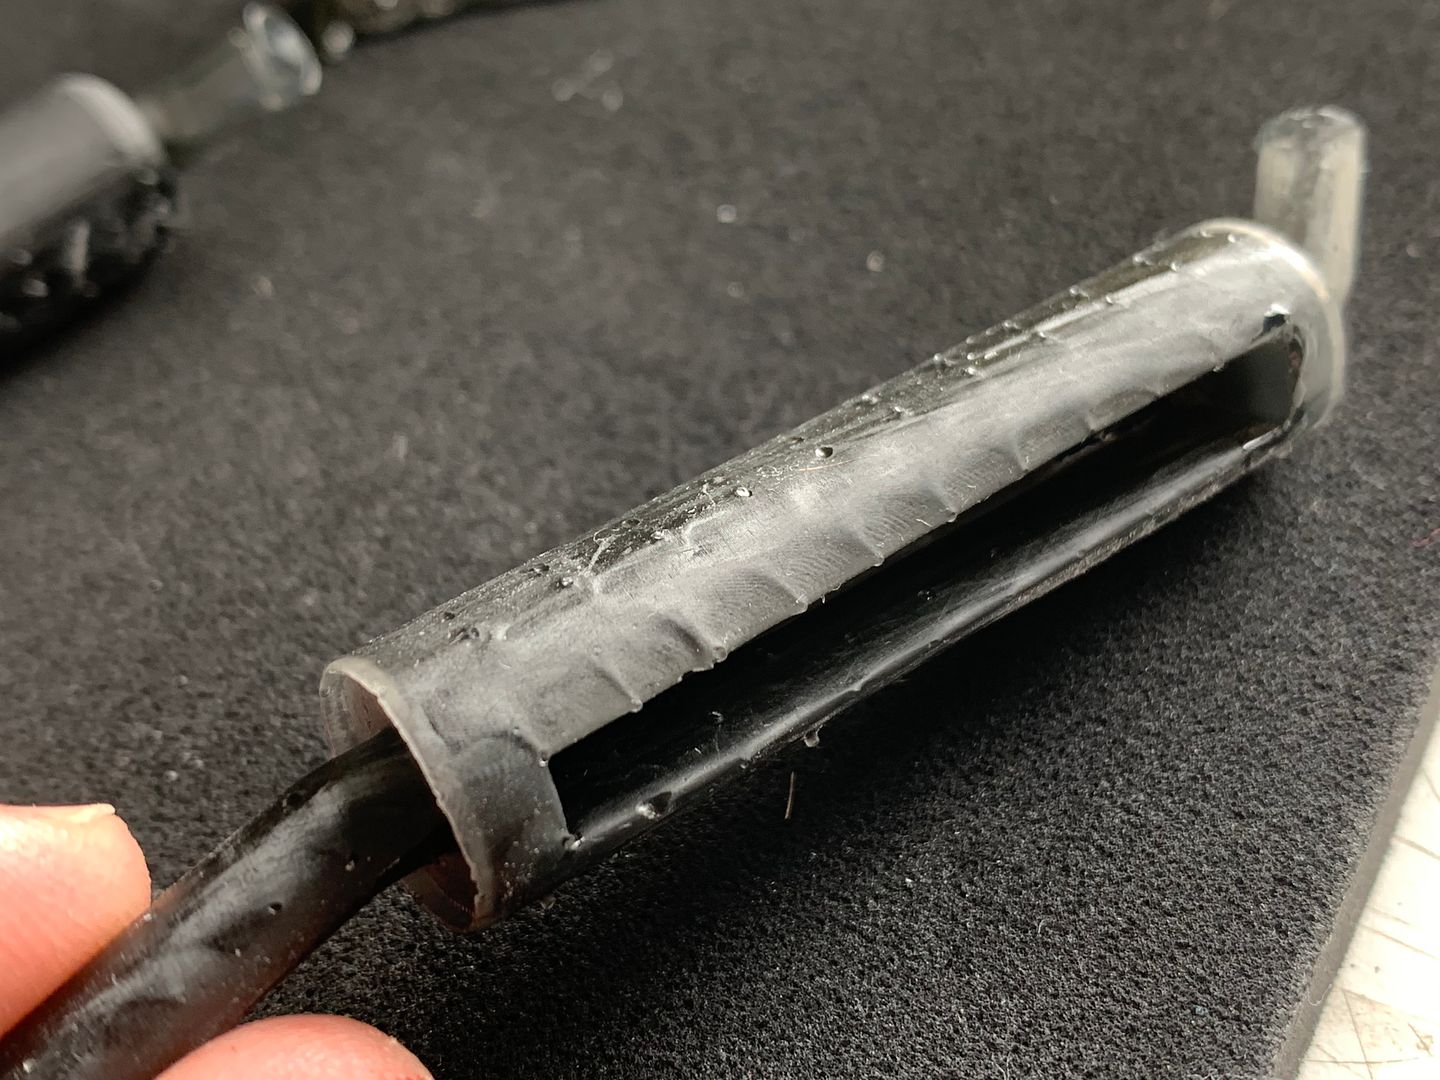
Exhausts next - I have been playing with the best way to draw/print these - I had some sagging in some prints when done on their side:
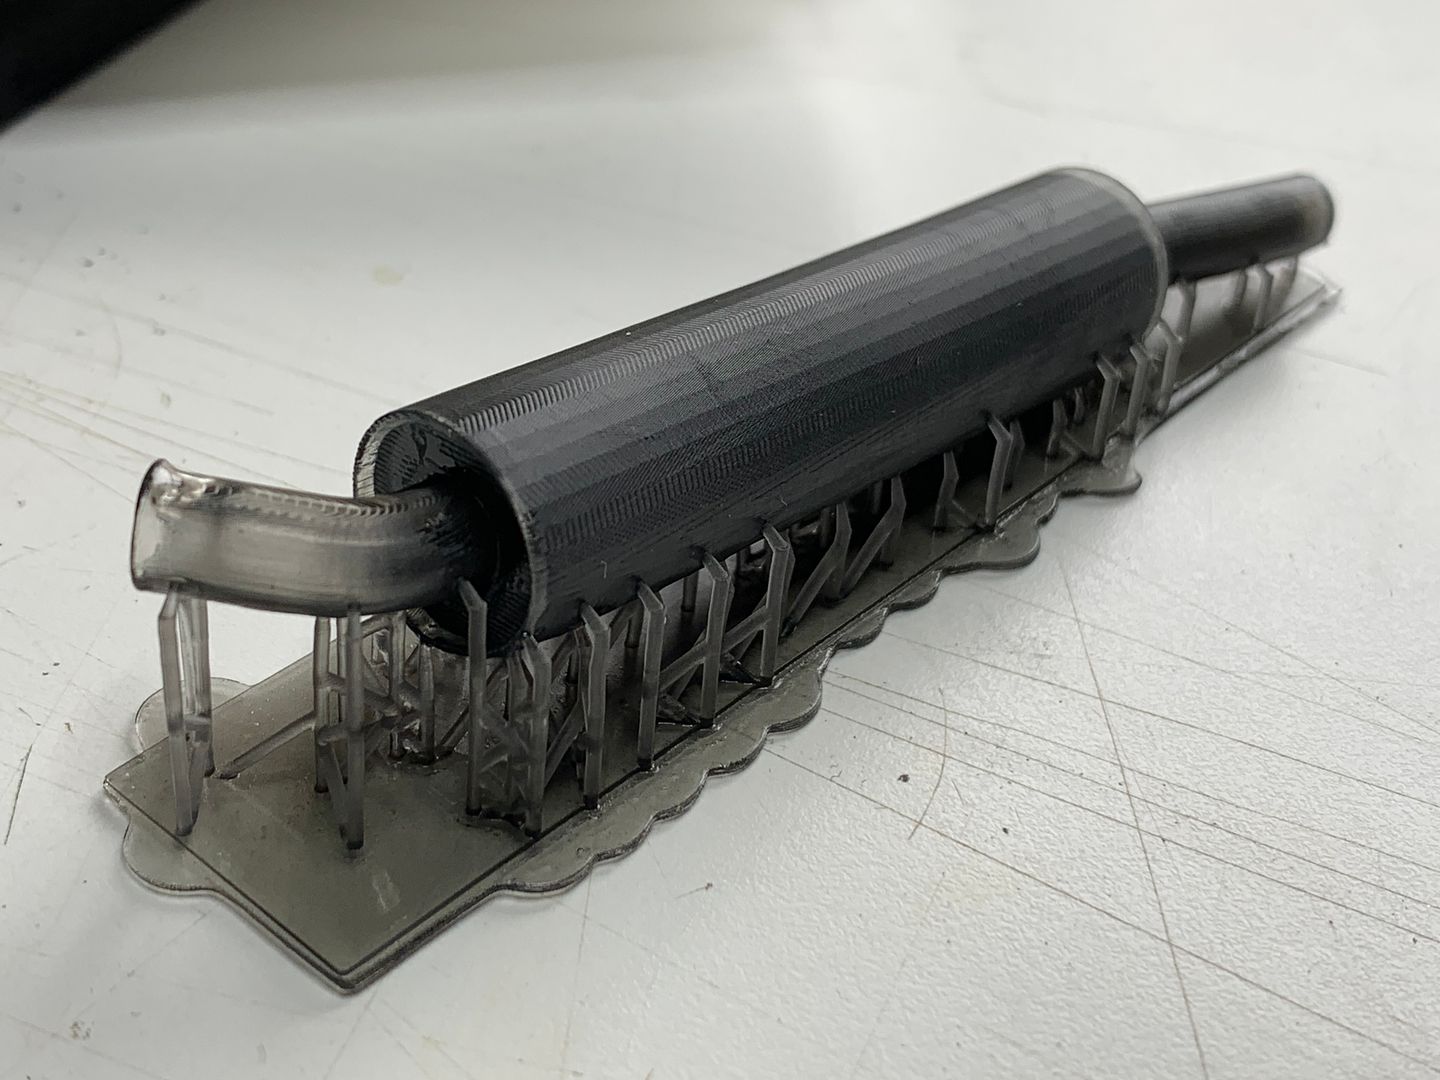
(Note, these black test pieces were printed at a lower resolution to speed up the printing time!)
- I tried 2 halves, but just adding work to actually join and fill/smooth - so the vertically printed ones work best - print takes a LOT longer because of the much larger number of 0.01mm layers! - not figuring out the pipe run - again a bit of a bugger to do!
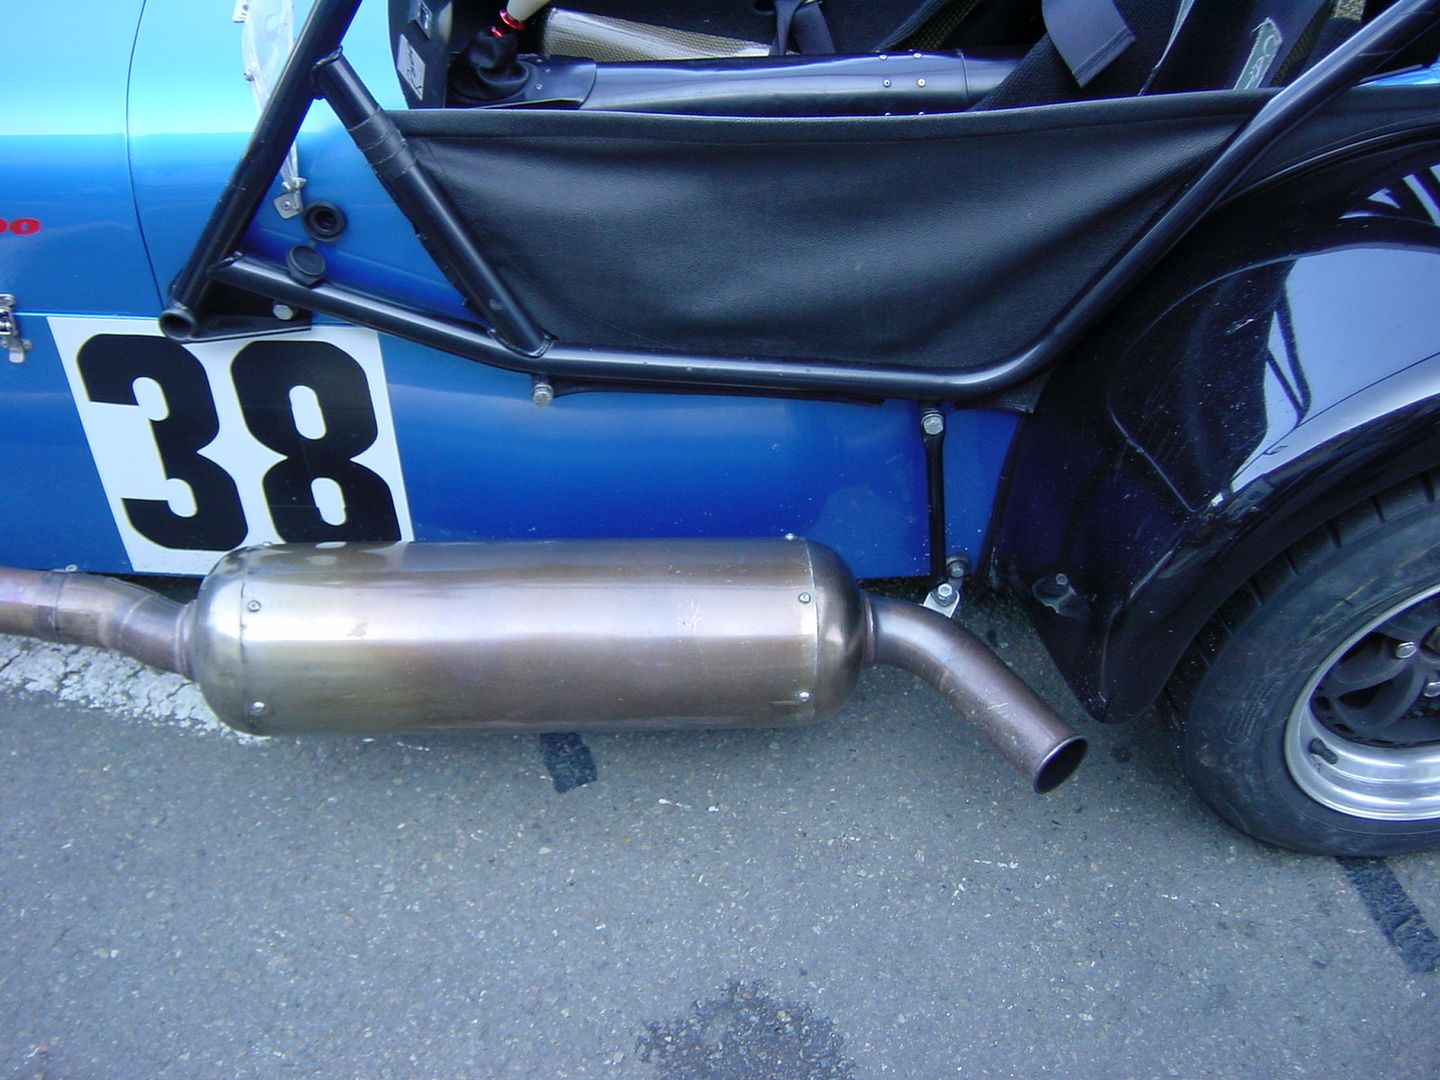
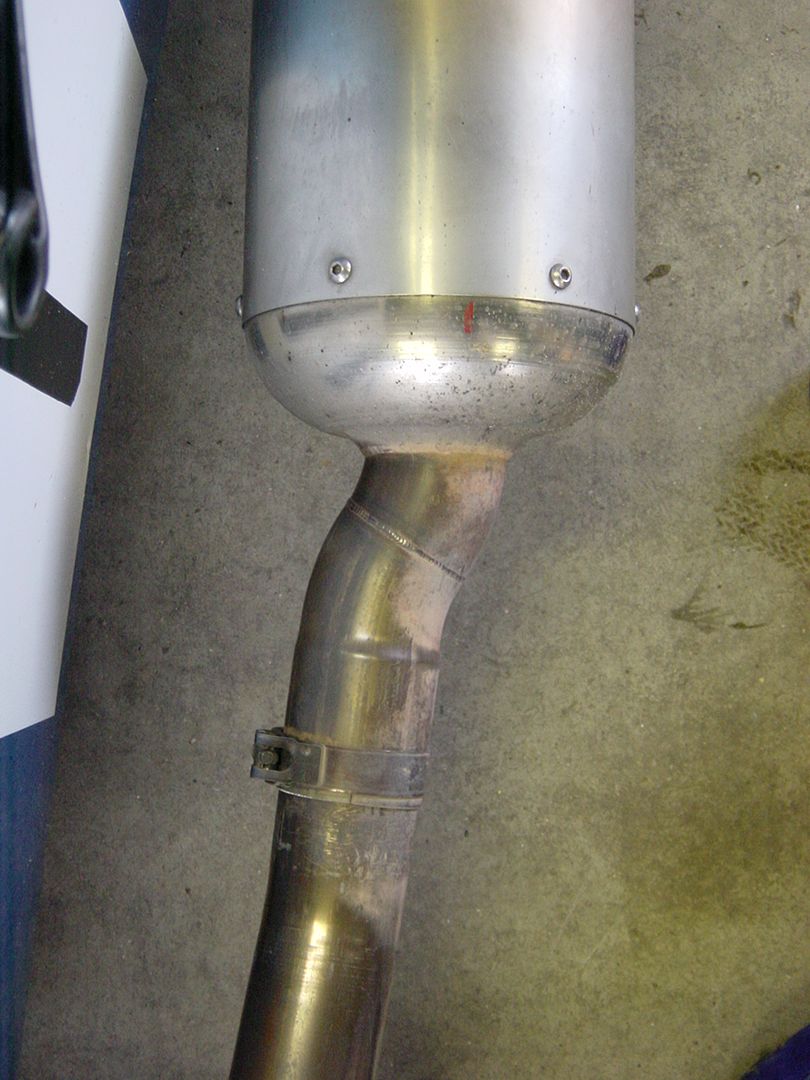
Of course each car has a different can!!
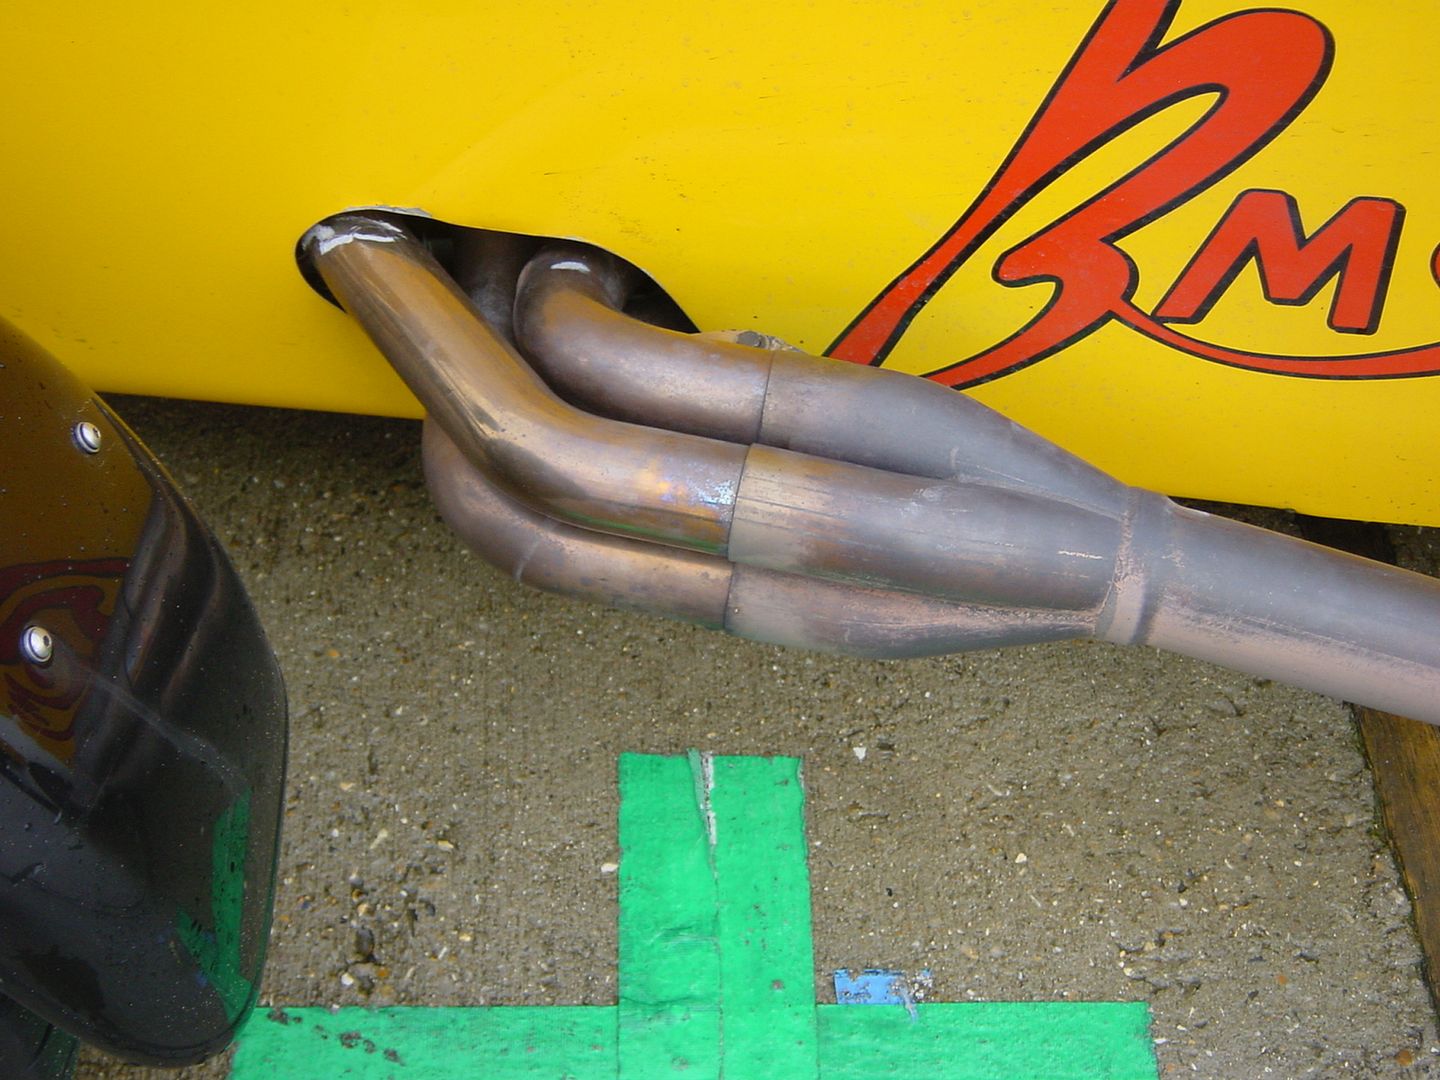
Making the exhaust system in separate parts lets me play with the angles more easily - so end pipe, can, long bent piece into collector, and then the 4 pipes that disappear into the side skin - engine-bay side pipes were done years ago as part of the engine.
Once this is done, the last 'big' job is the clear 'windscreen' wind deflectors...
Most would be far more simple....AND they re-released the Tamiya kit...
Right - almost there with these..so some more details:
Kit comes with a large steering wheel - JPE version comes with a MOMO but not the right one, and I need 2 anyway - so back to Solidworks and the 3D printer!
..end result:
I also made some numberplate lights for the rear of both cars...
One of the last big jobs - seat belts.
The kit comes with a set of harnesses, with some sticky-backed, satin finish material, printed - but red. And not great detail - so I have to make my own. Standard practice is to use ribbon - I did play around with using 'lead' sheet - as found round the top of fancy fizzy wine bottles
- used by the scale WWII plane makers - it is great because you can shape it really easily - but better on smaller scales I think - a bit thin for my purposes....So I bought some black ribbon - 4, 5 and 6mm covered it.
I needed lots of buckles and clips, so I redrew them in 3D and printed a variety - advantage of this printing is that if you fill the bed completely, it takes no longer to process - so may as well make some spairs/some to lose/some to try different finishes with...
Testing...
I wanted this 'crease' at the top buckle...
I din't want them all the same in all 4 seats, so I varied which buckles were connected and which would be 'loose'.
Fiddly little buggers to make though - folded the ribbon and glued with super-glue.
Trying different glues for the paper printed 'Caterham' logos...
...and completed:
Applied logo's to the seats - each car was different - particularly important for the customer! I think one of the cars was perhaps the first with a particular branding (Tillet or Caterham)
Exhausts next - I have been playing with the best way to draw/print these - I had some sagging in some prints when done on their side:
(Note, these black test pieces were printed at a lower resolution to speed up the printing time!)
- I tried 2 halves, but just adding work to actually join and fill/smooth - so the vertically printed ones work best - print takes a LOT longer because of the much larger number of 0.01mm layers! - not figuring out the pipe run - again a bit of a bugger to do!
Of course each car has a different can!!
Making the exhaust system in separate parts lets me play with the angles more easily - so end pipe, can, long bent piece into collector, and then the 4 pipes that disappear into the side skin - engine-bay side pipes were done years ago as part of the engine.
Once this is done, the last 'big' job is the clear 'windscreen' wind deflectors...
Edited by caterhamnut on Saturday 17th August 23:06
Exhausts:
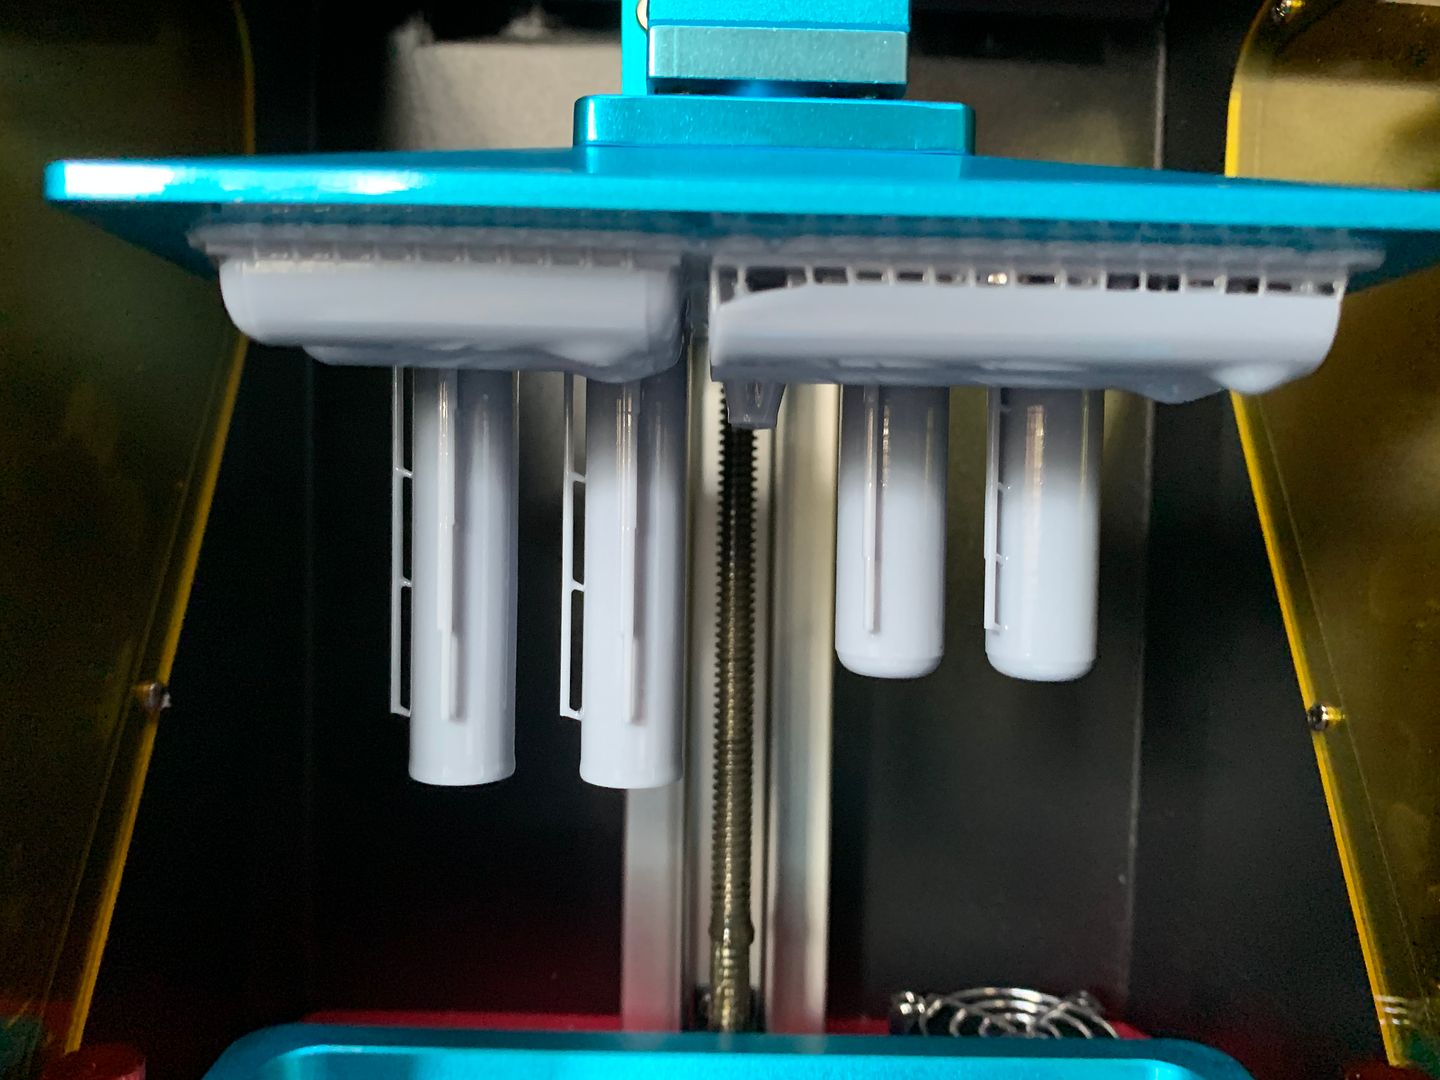
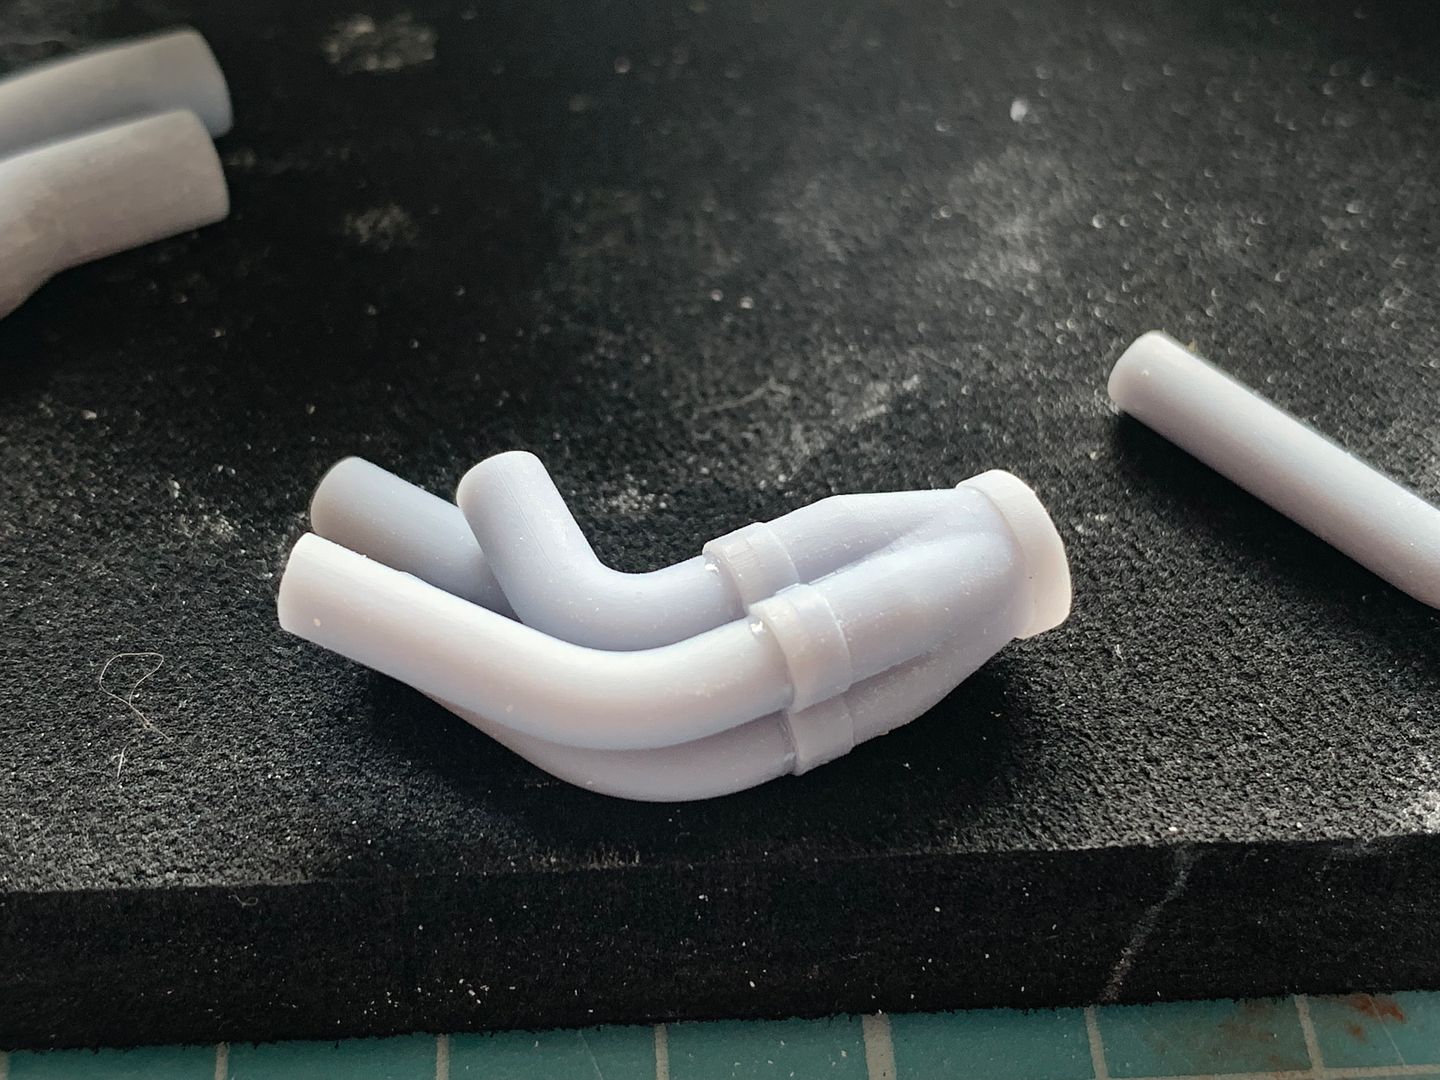
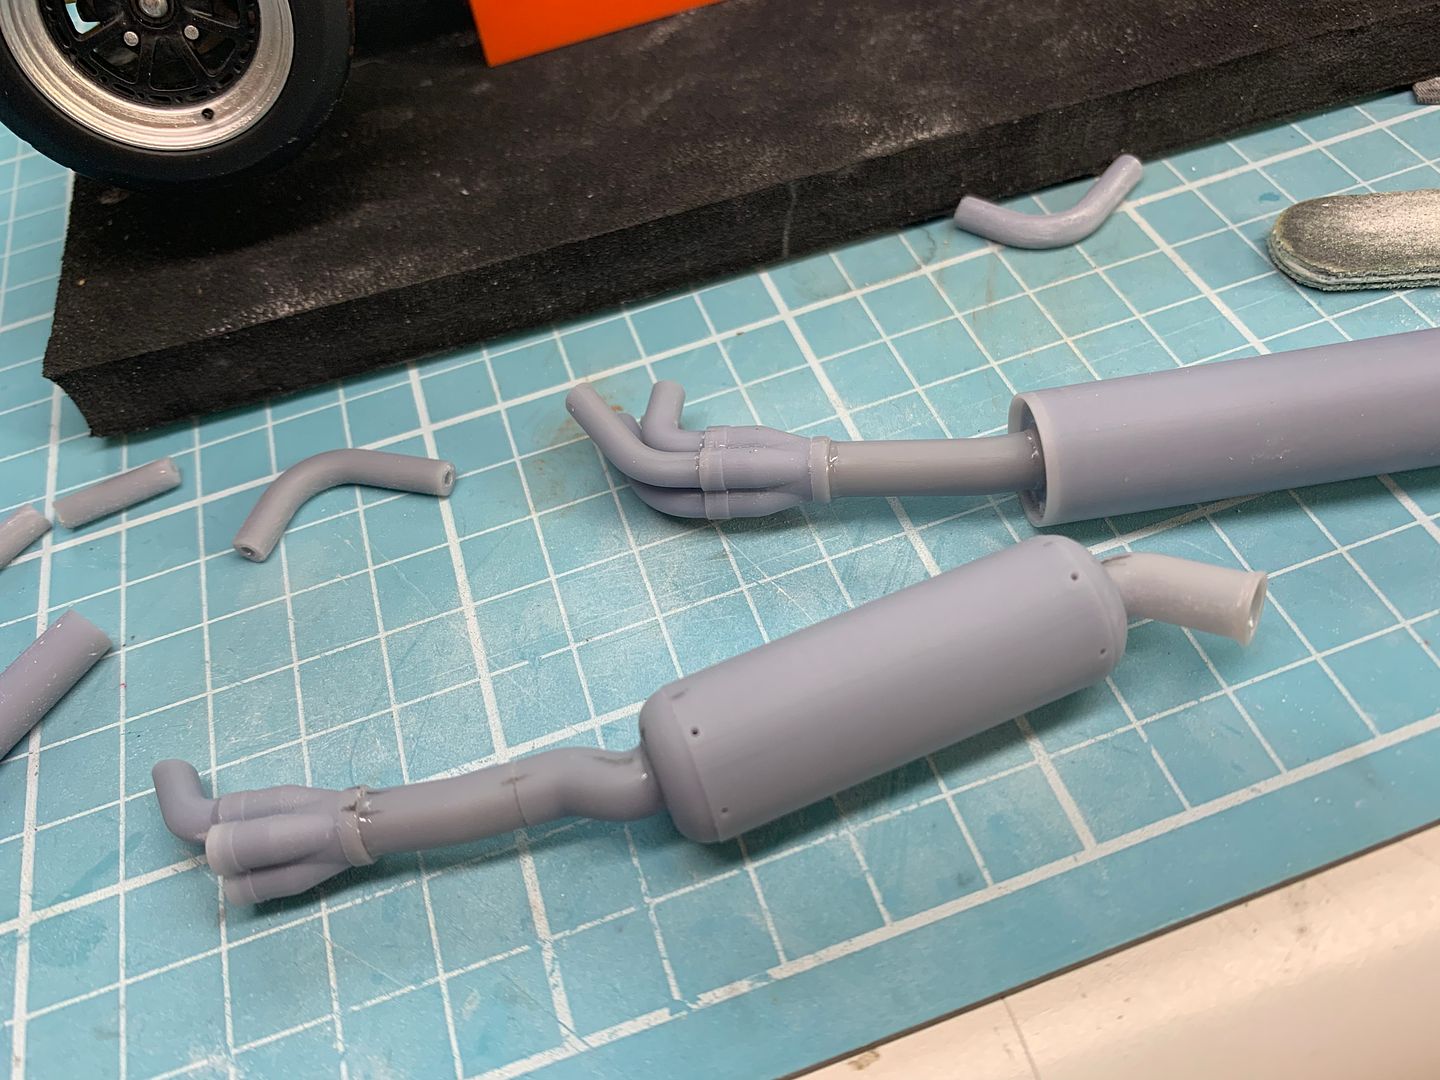
I drew up a selection of pipes for the exhaust system - printer had a fit in the first print so I ended up with a solid lump halfway up the pipes - be good for a space craft panel in the future!

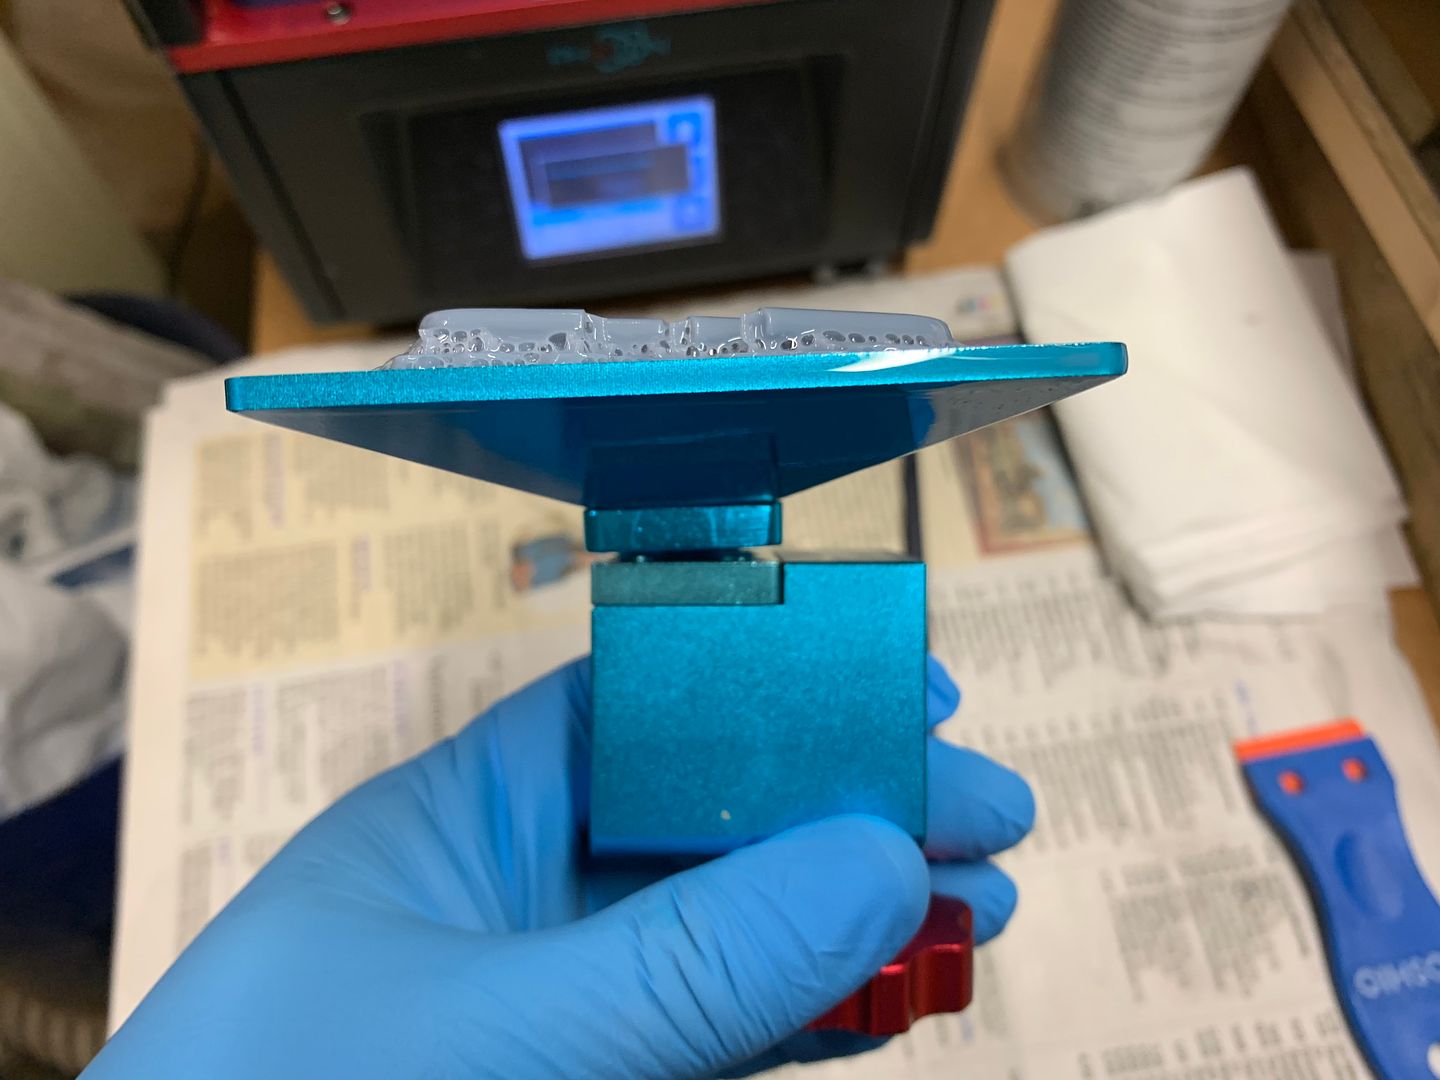
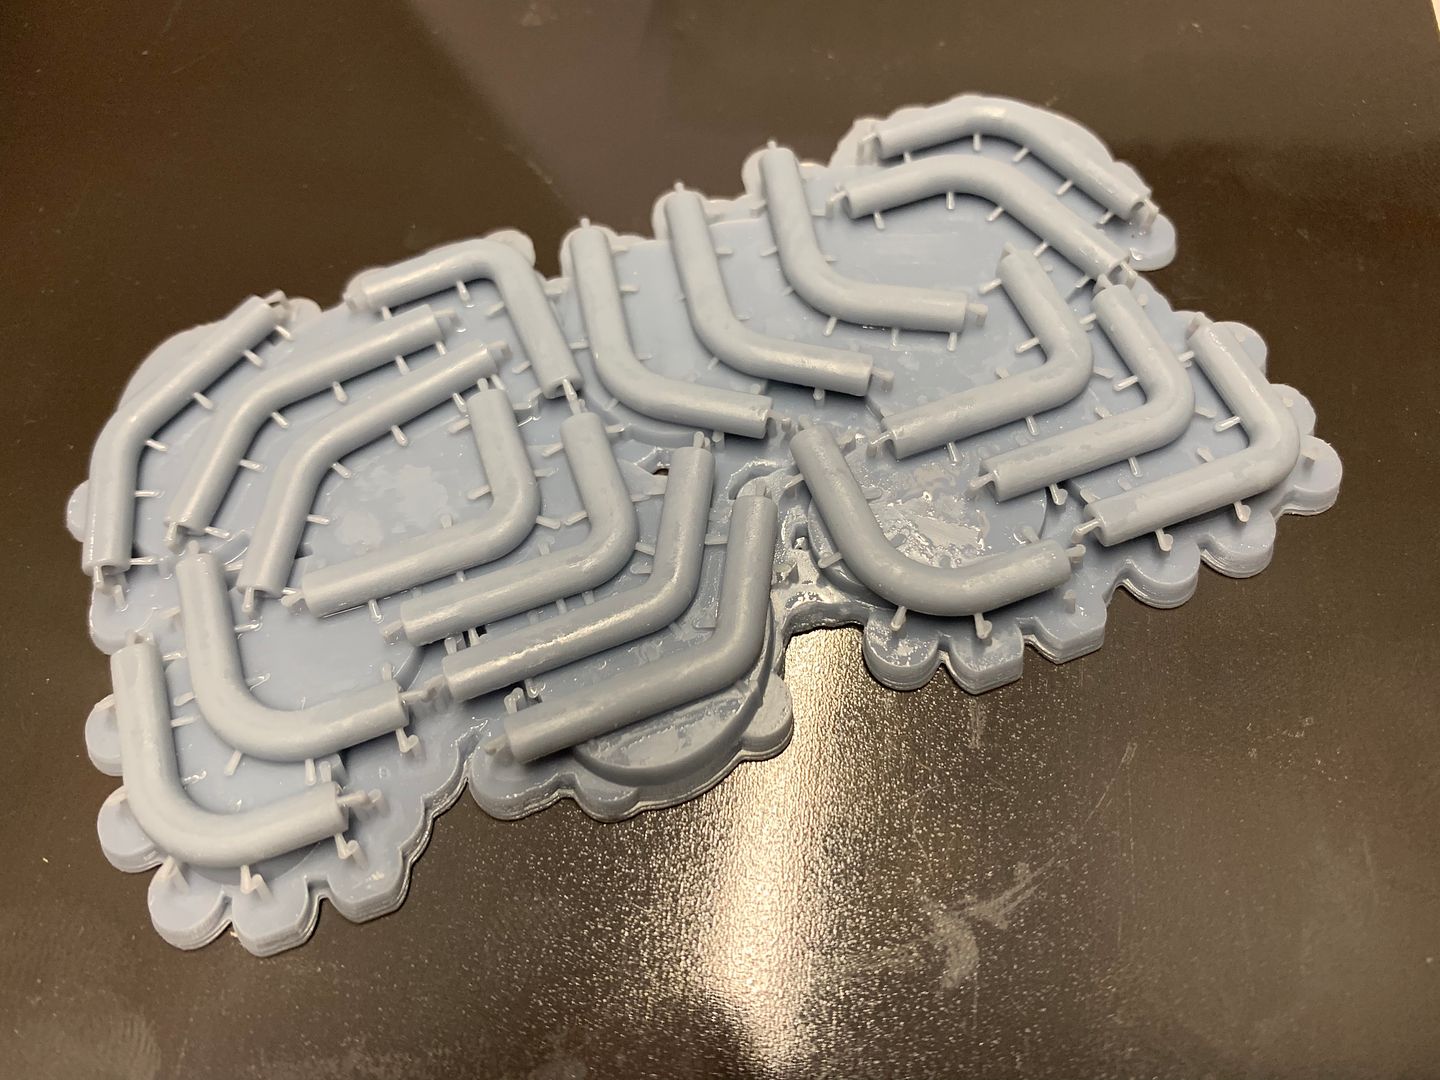
Re-setting the level of the printer plate solved the issue and I printed the pipes...
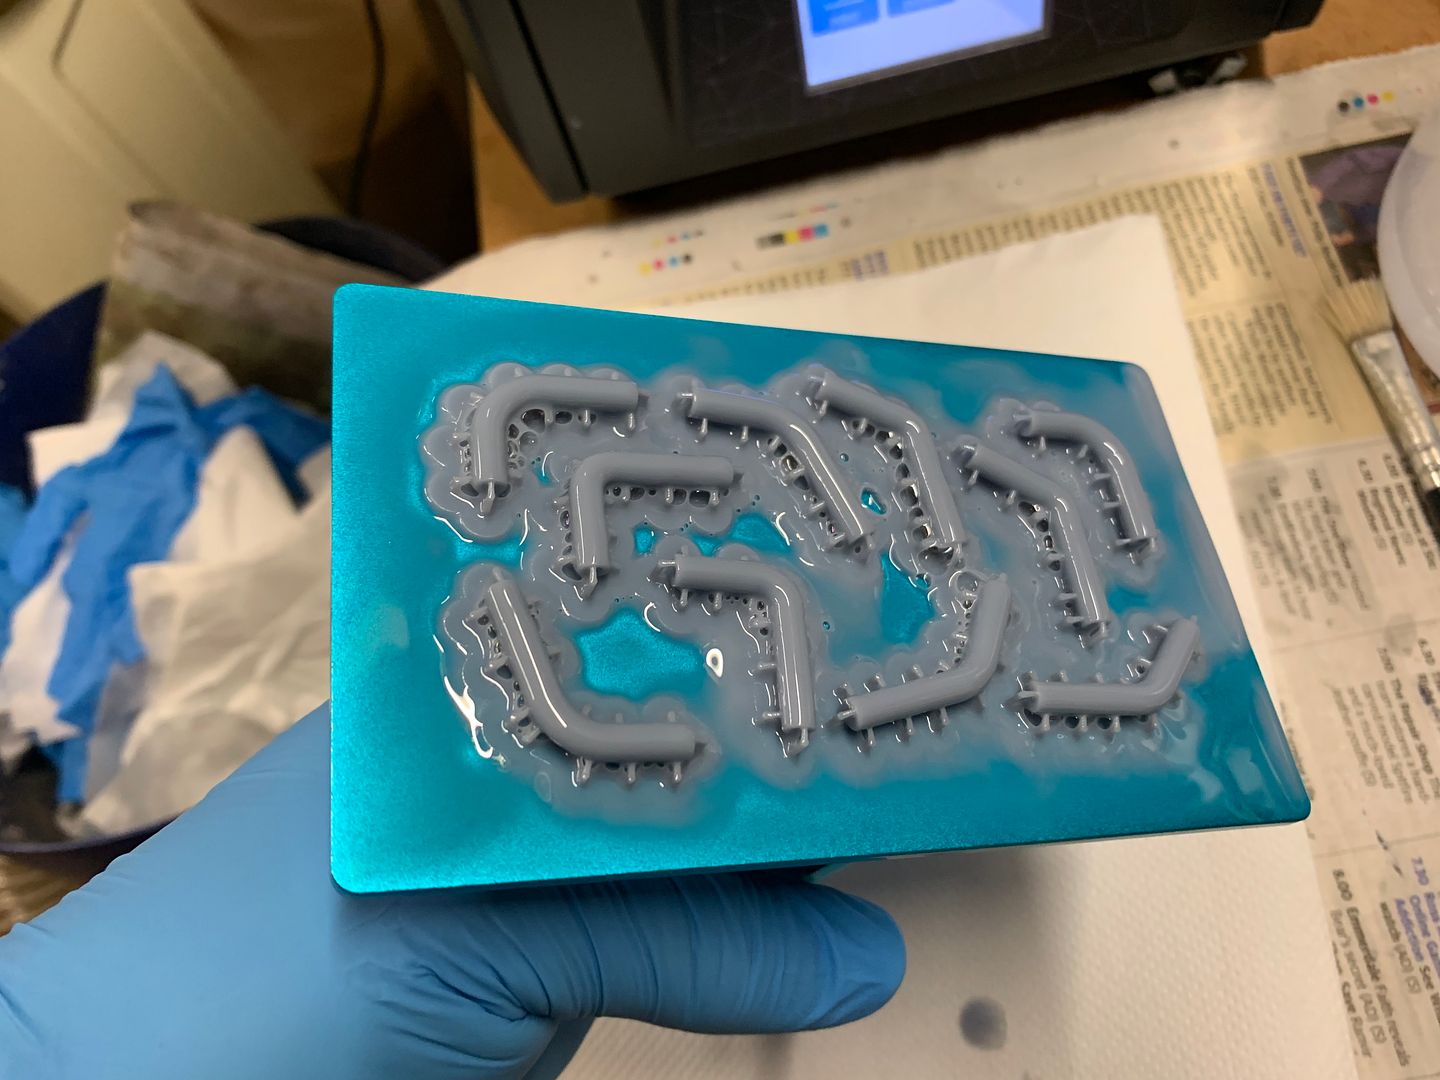

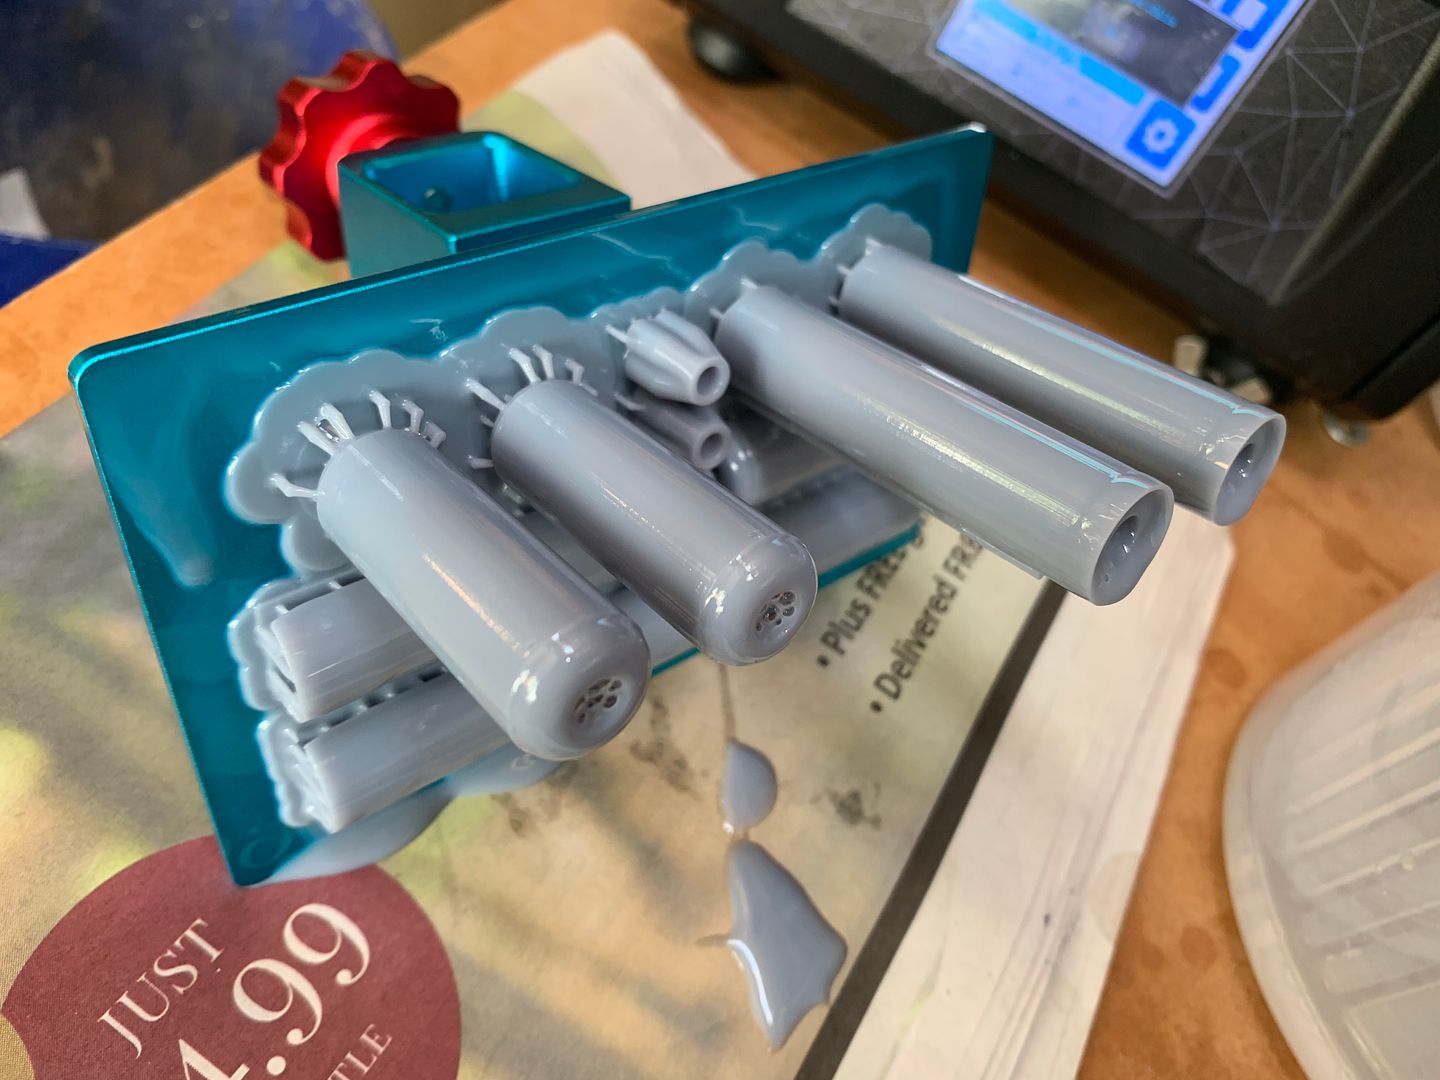
Lots of trimming and sanding later, I had a 'kit' of parts.
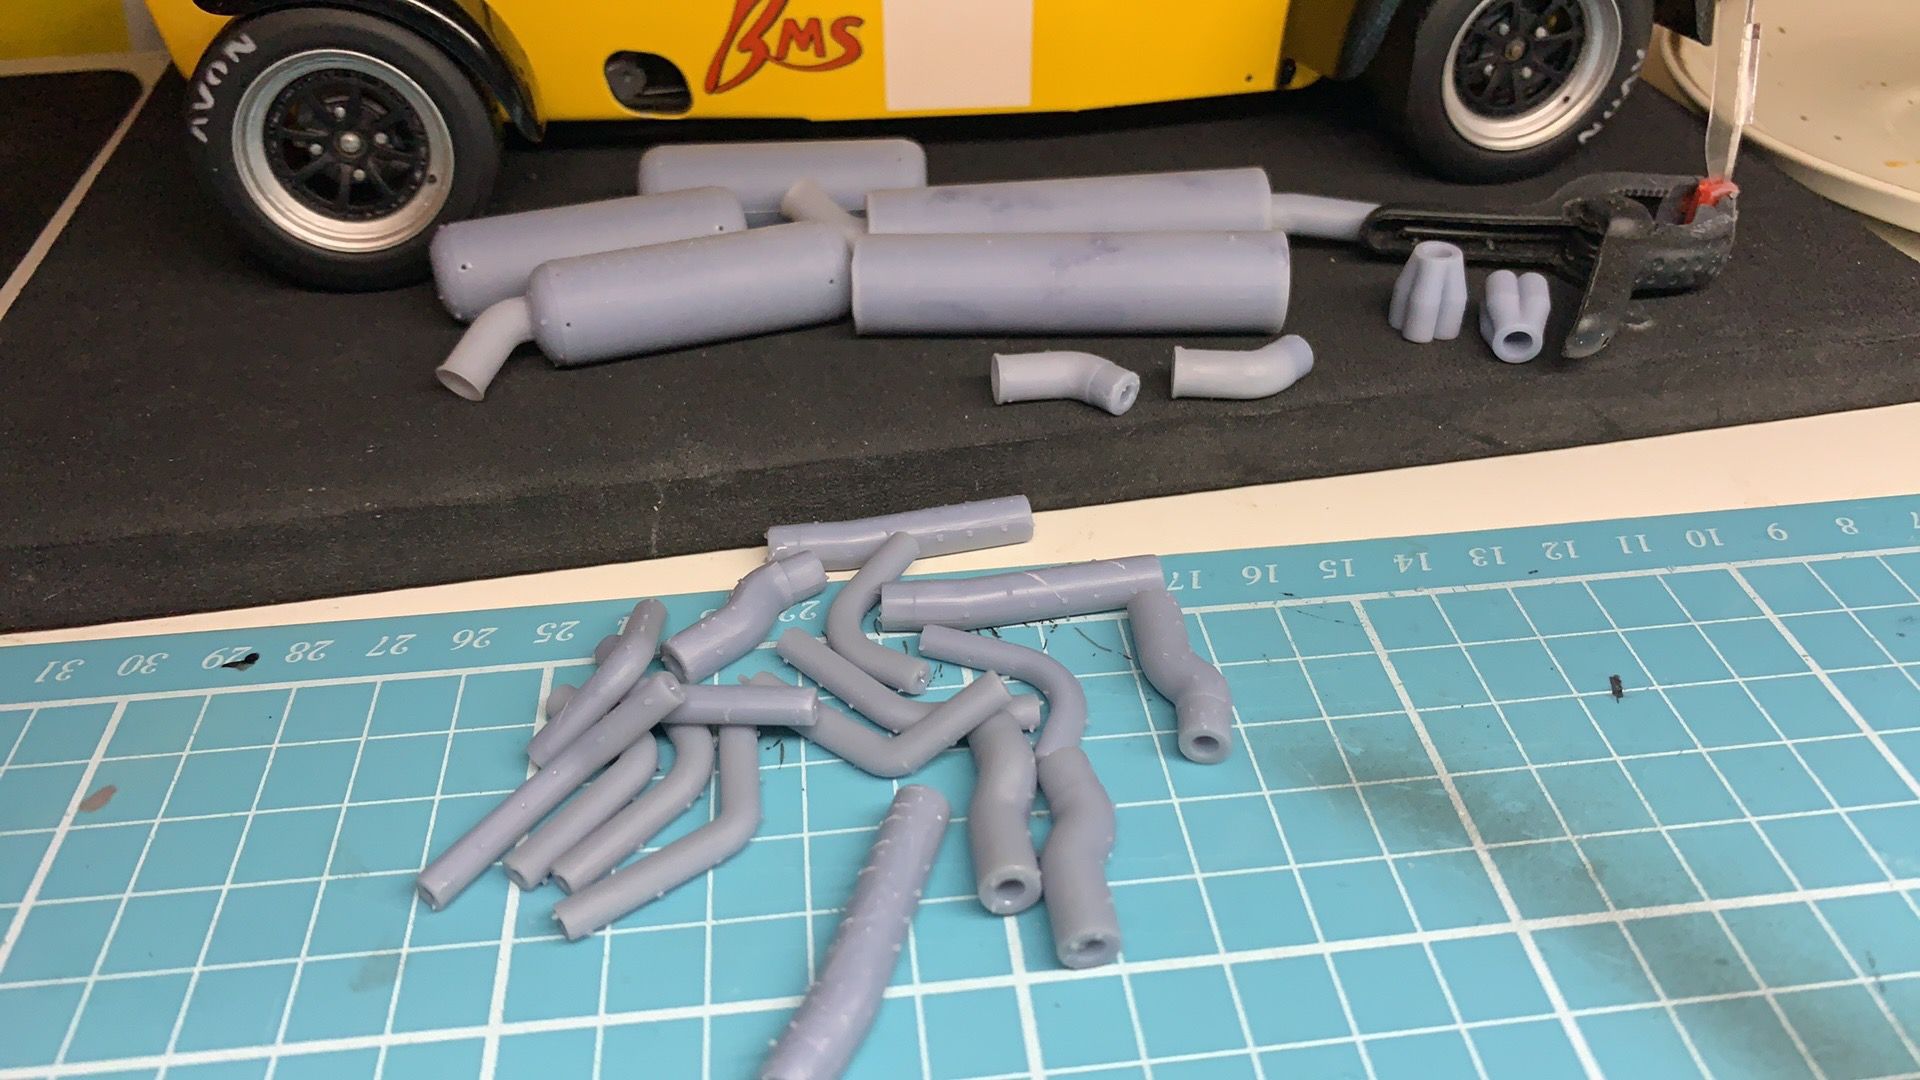
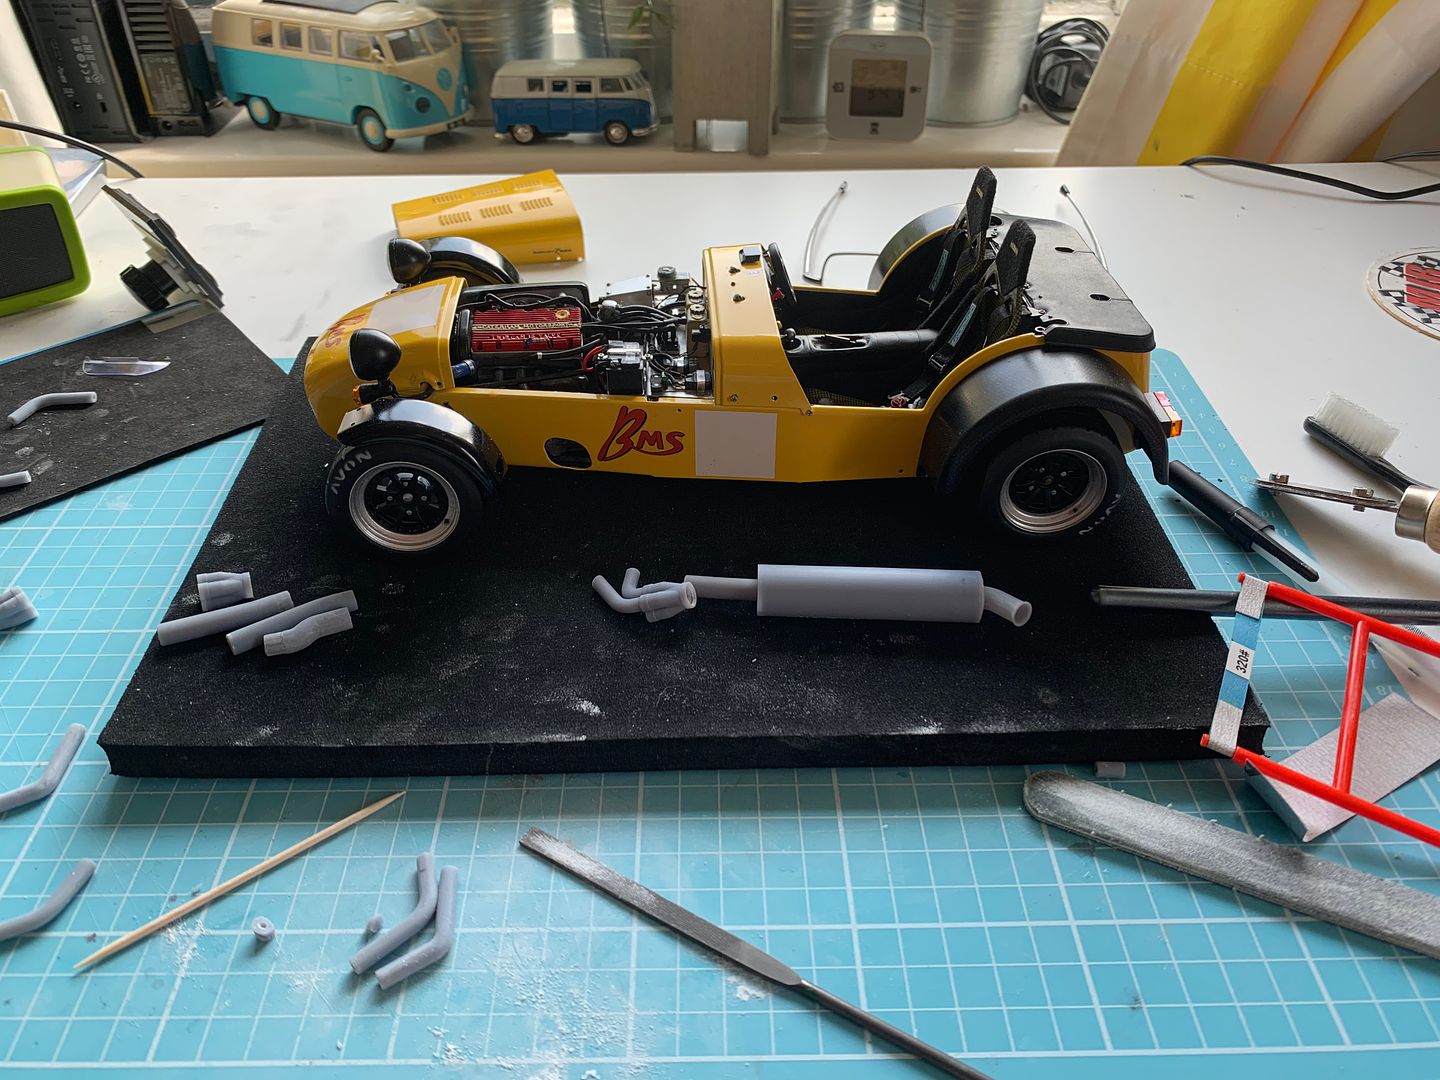
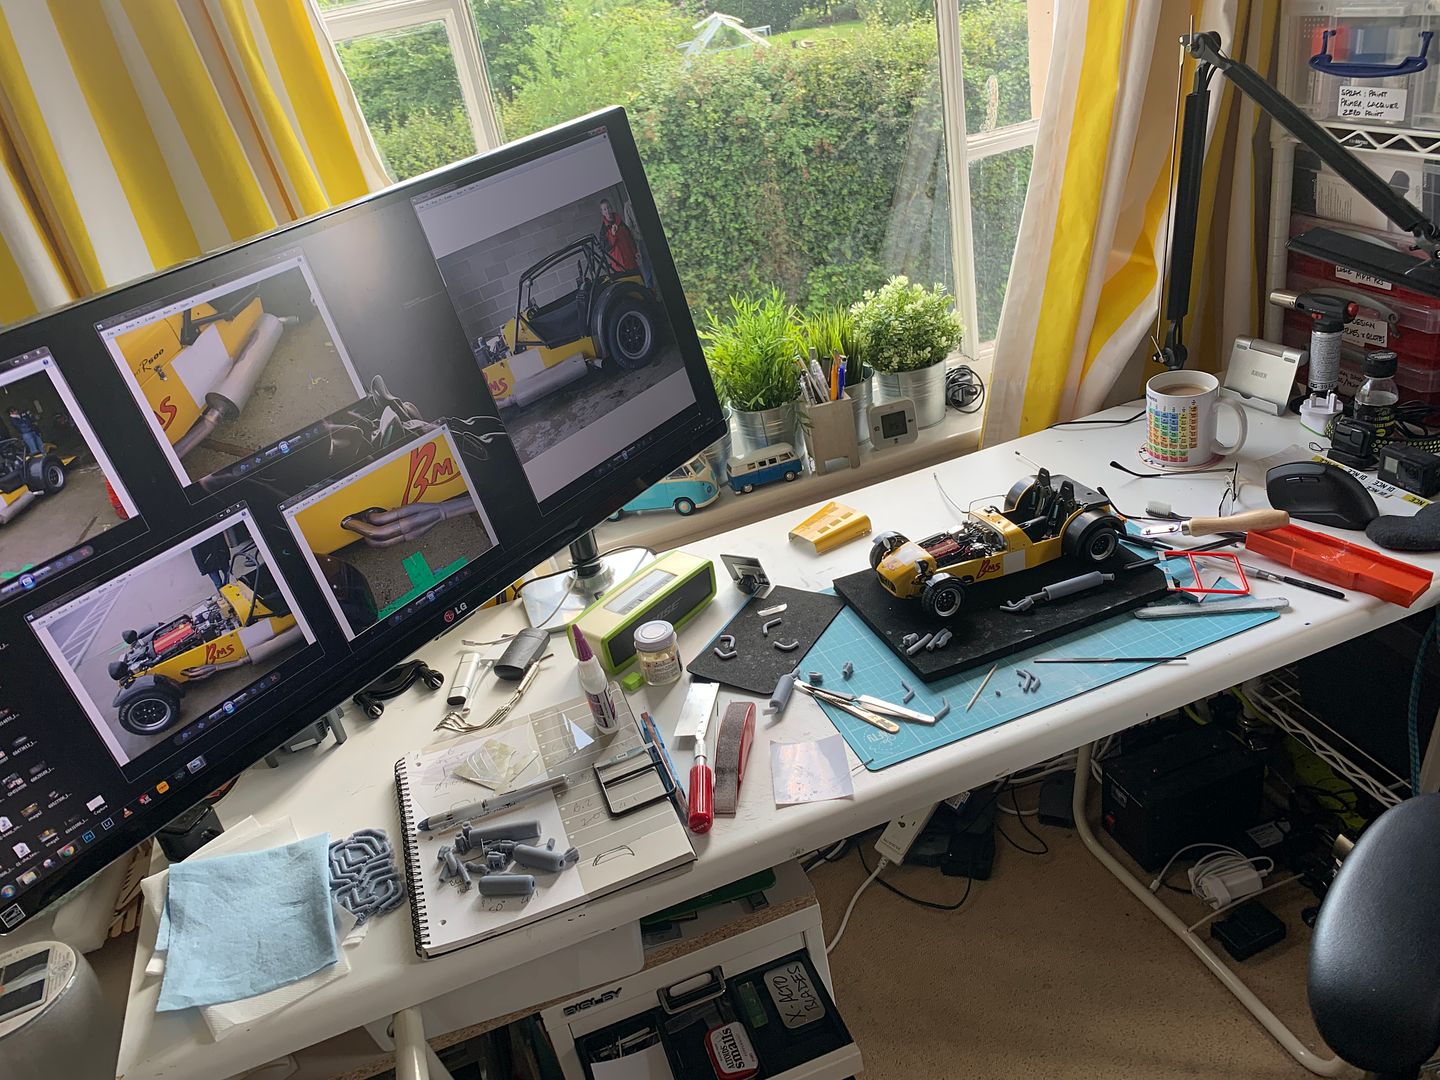
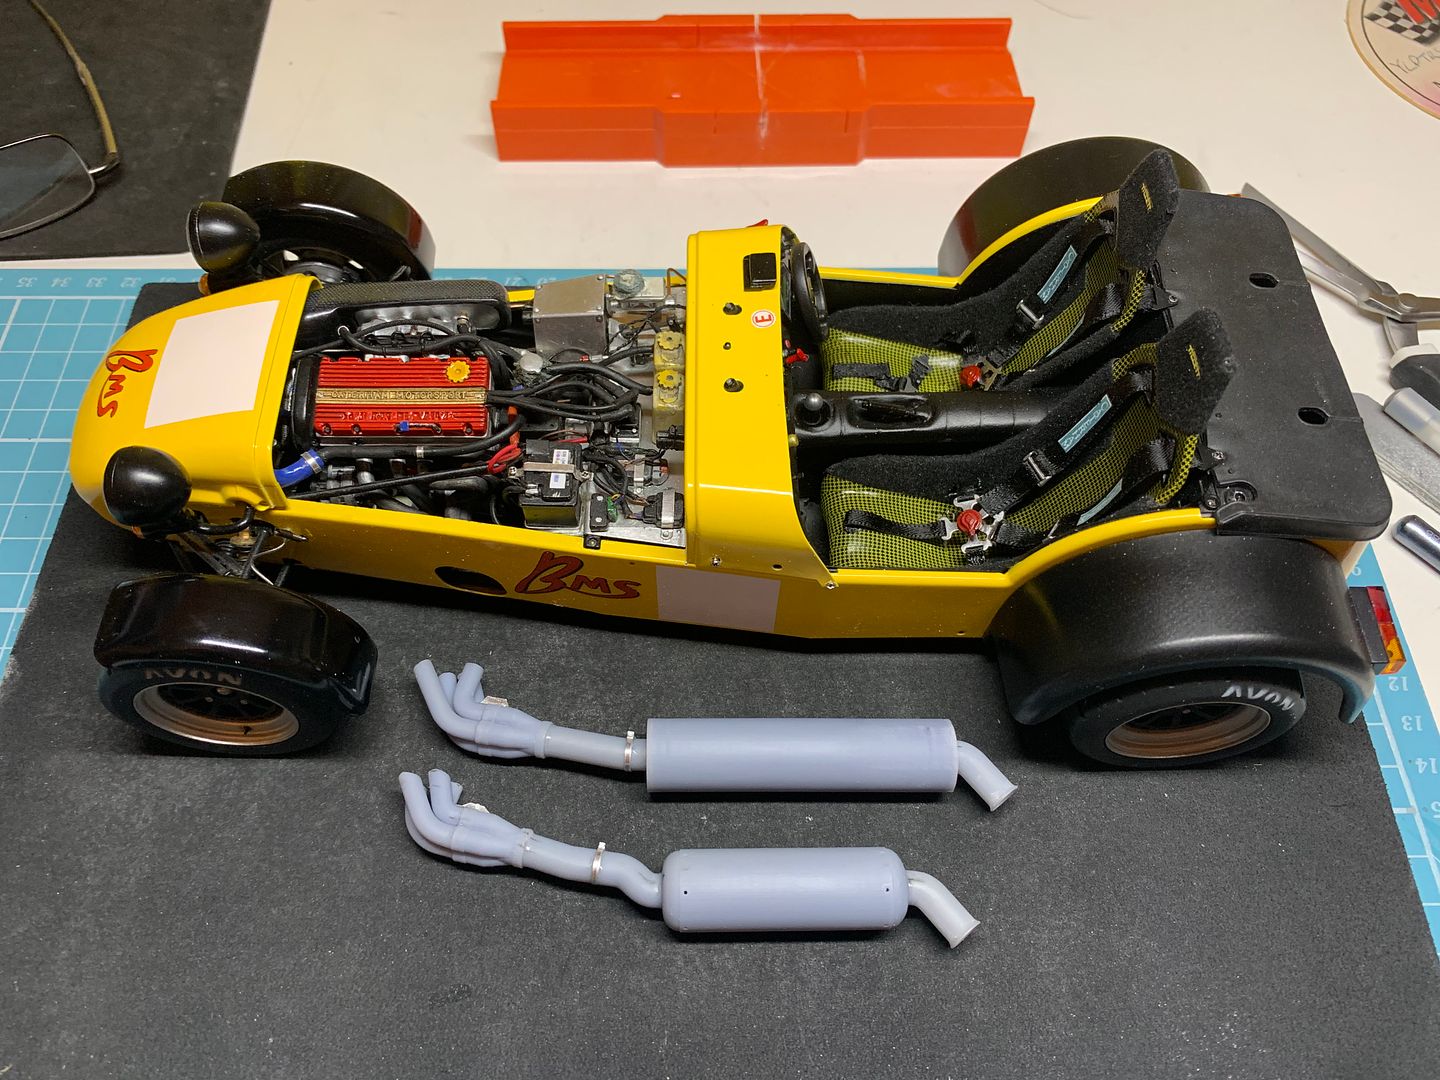
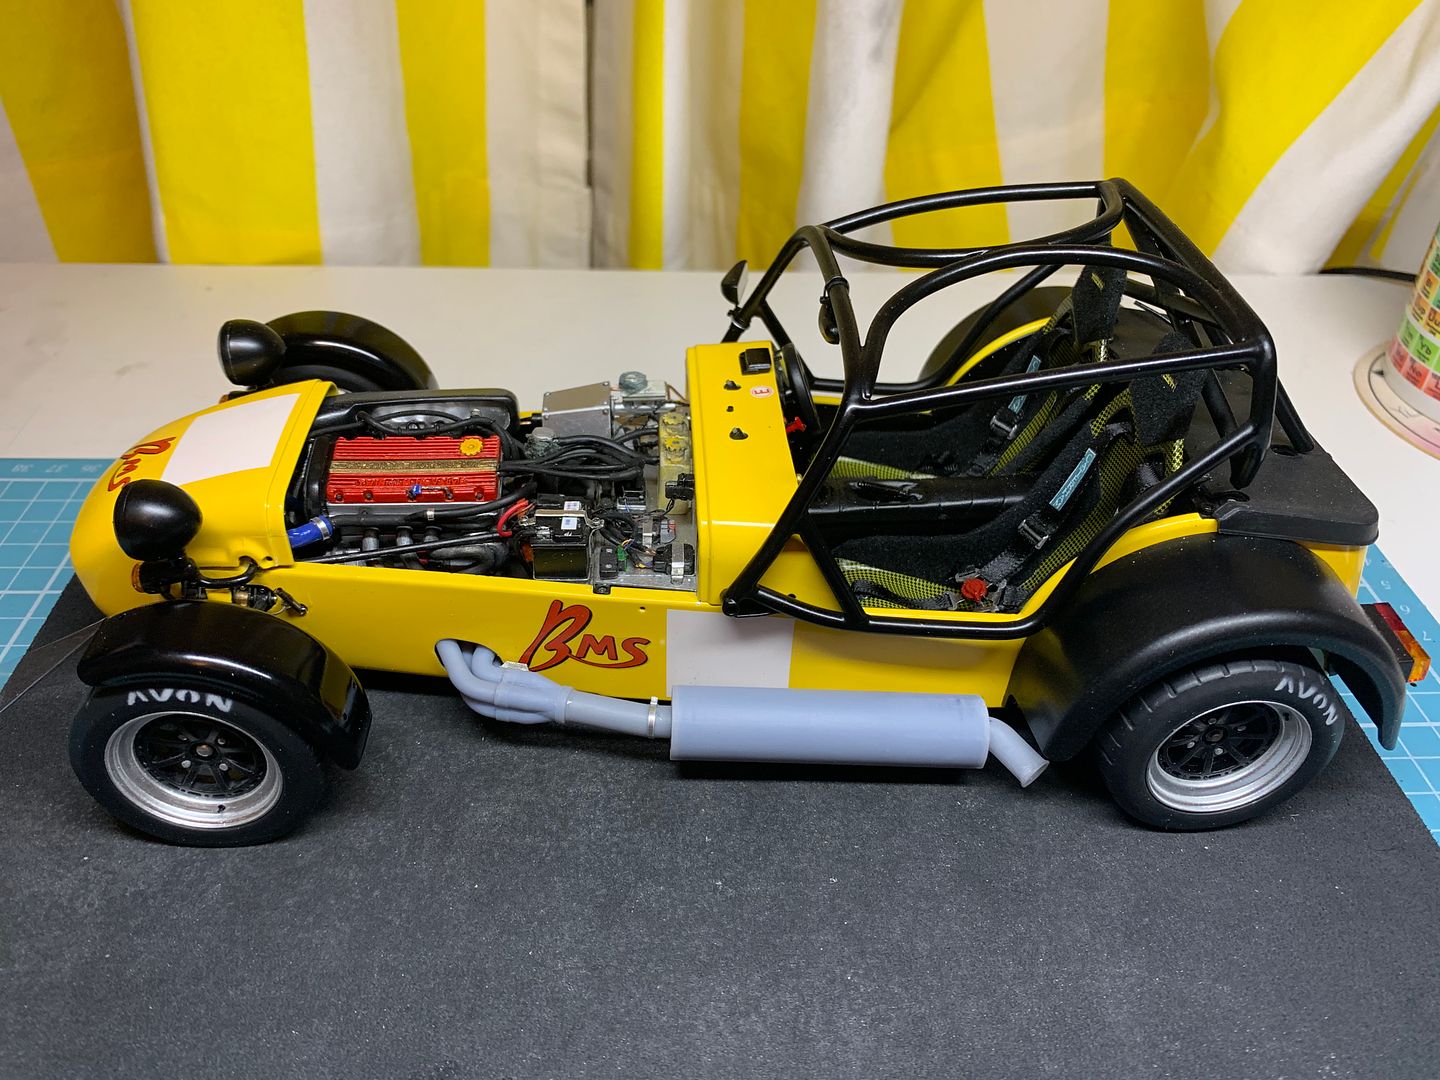
A slow process of offering the exhaust up to the car and cutting each pipe to size and length so it fitted through the skin - just as much of a pain as when you fit the 1:1 'real' pipes - believe me! But everything fitted together fairly well...
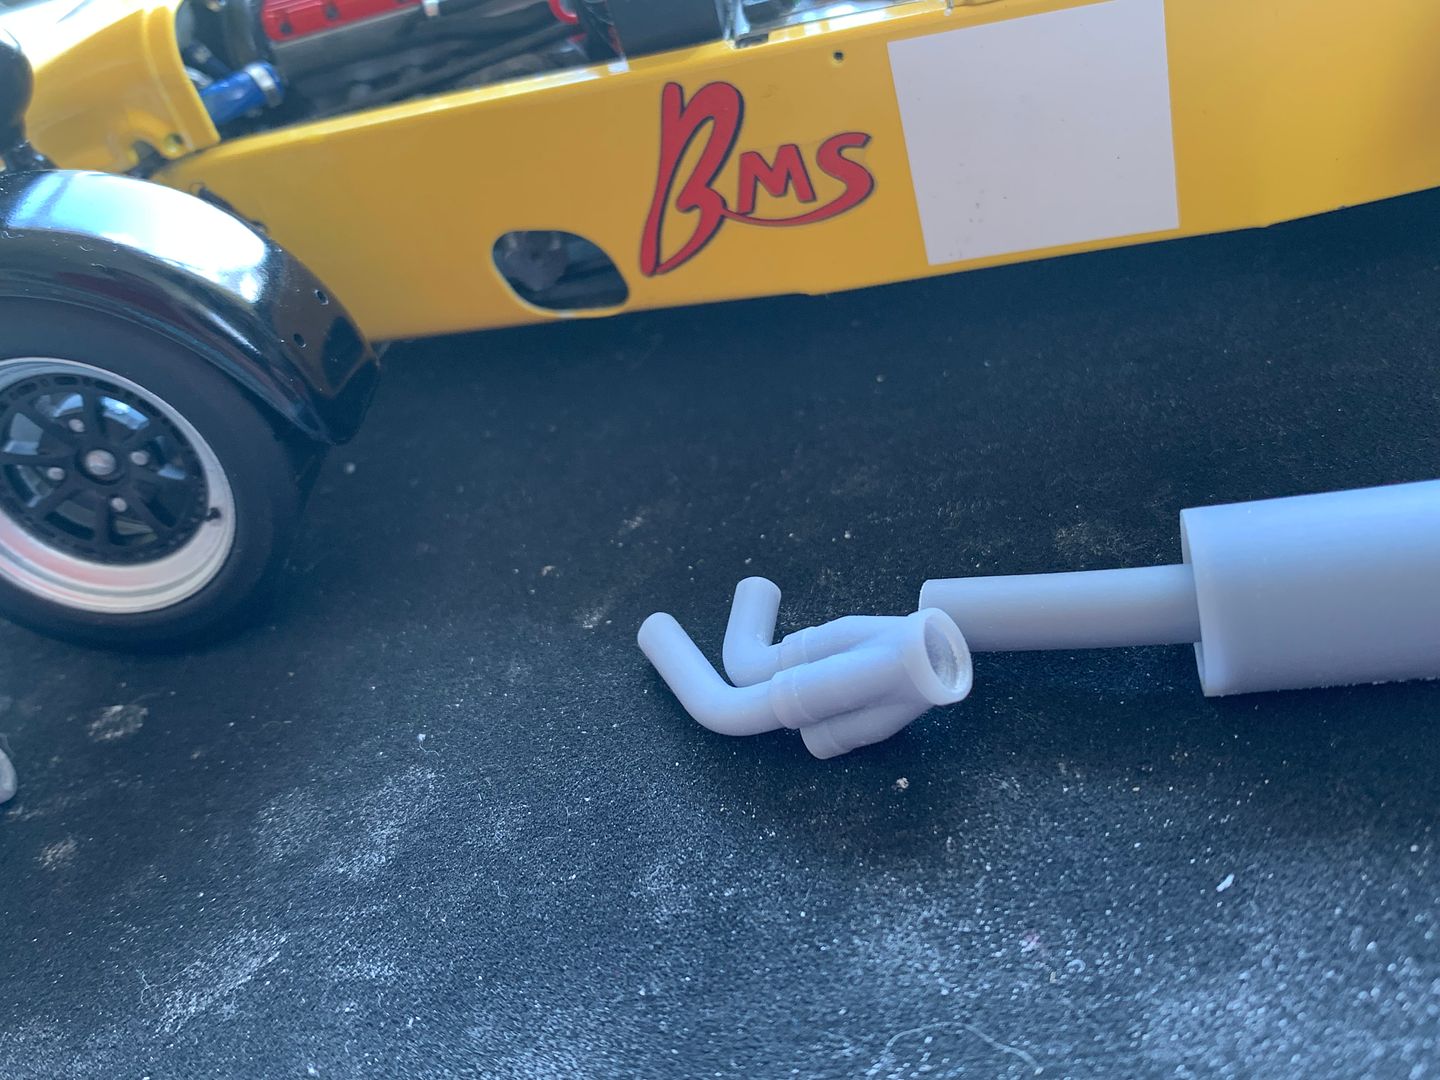
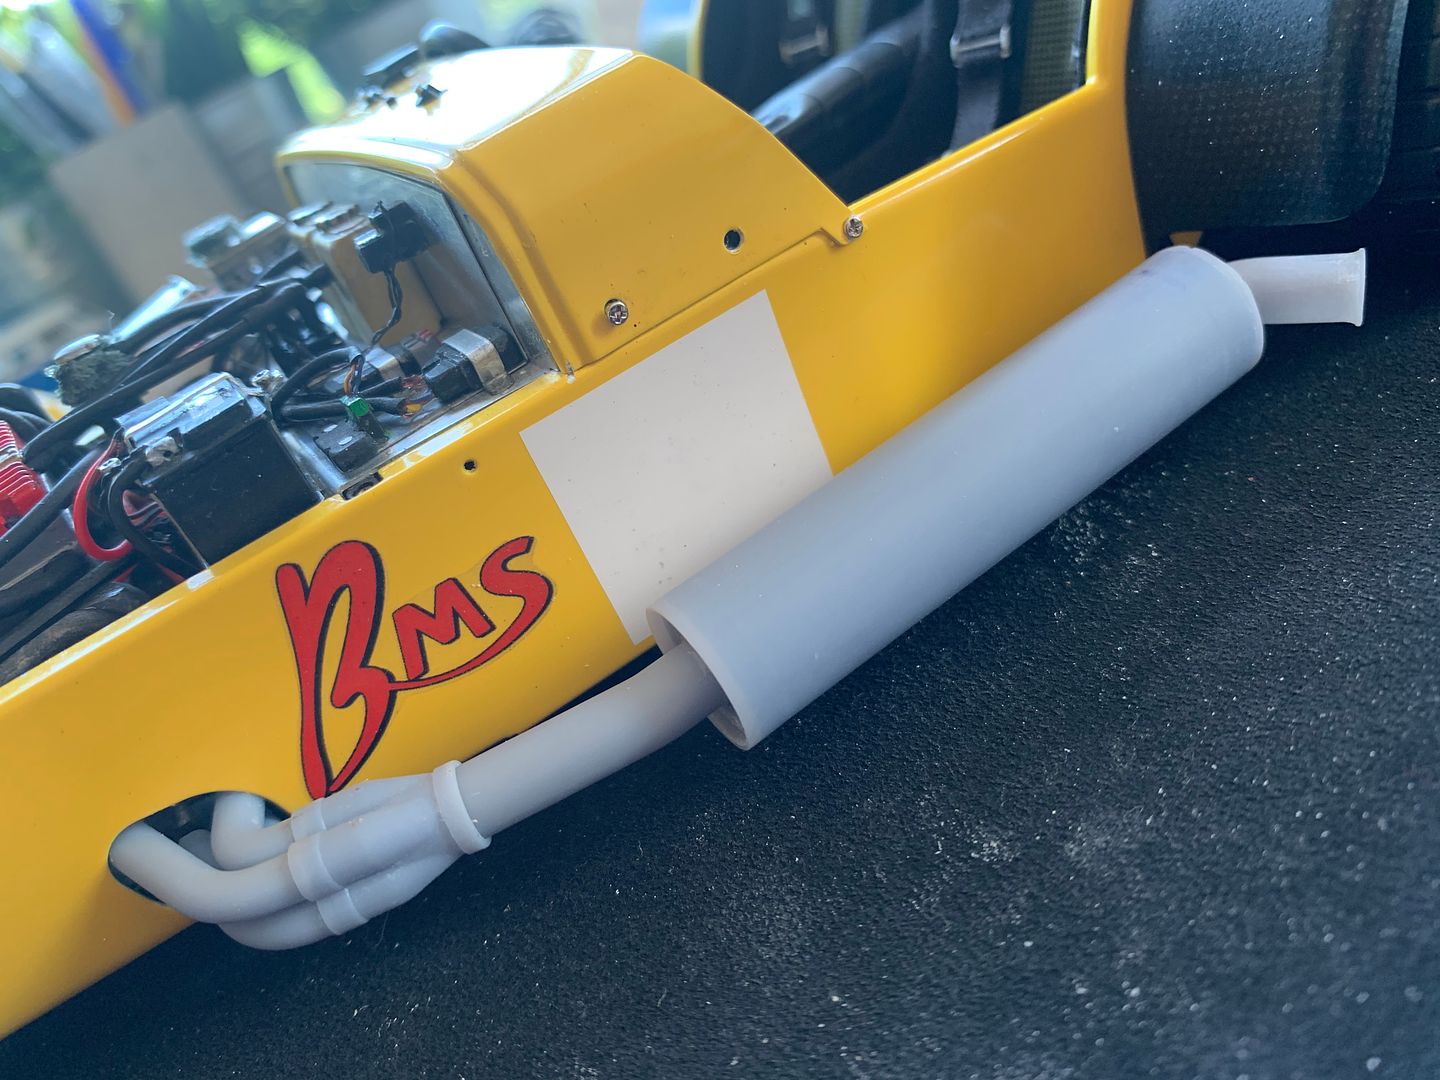
Of course there are two of them.
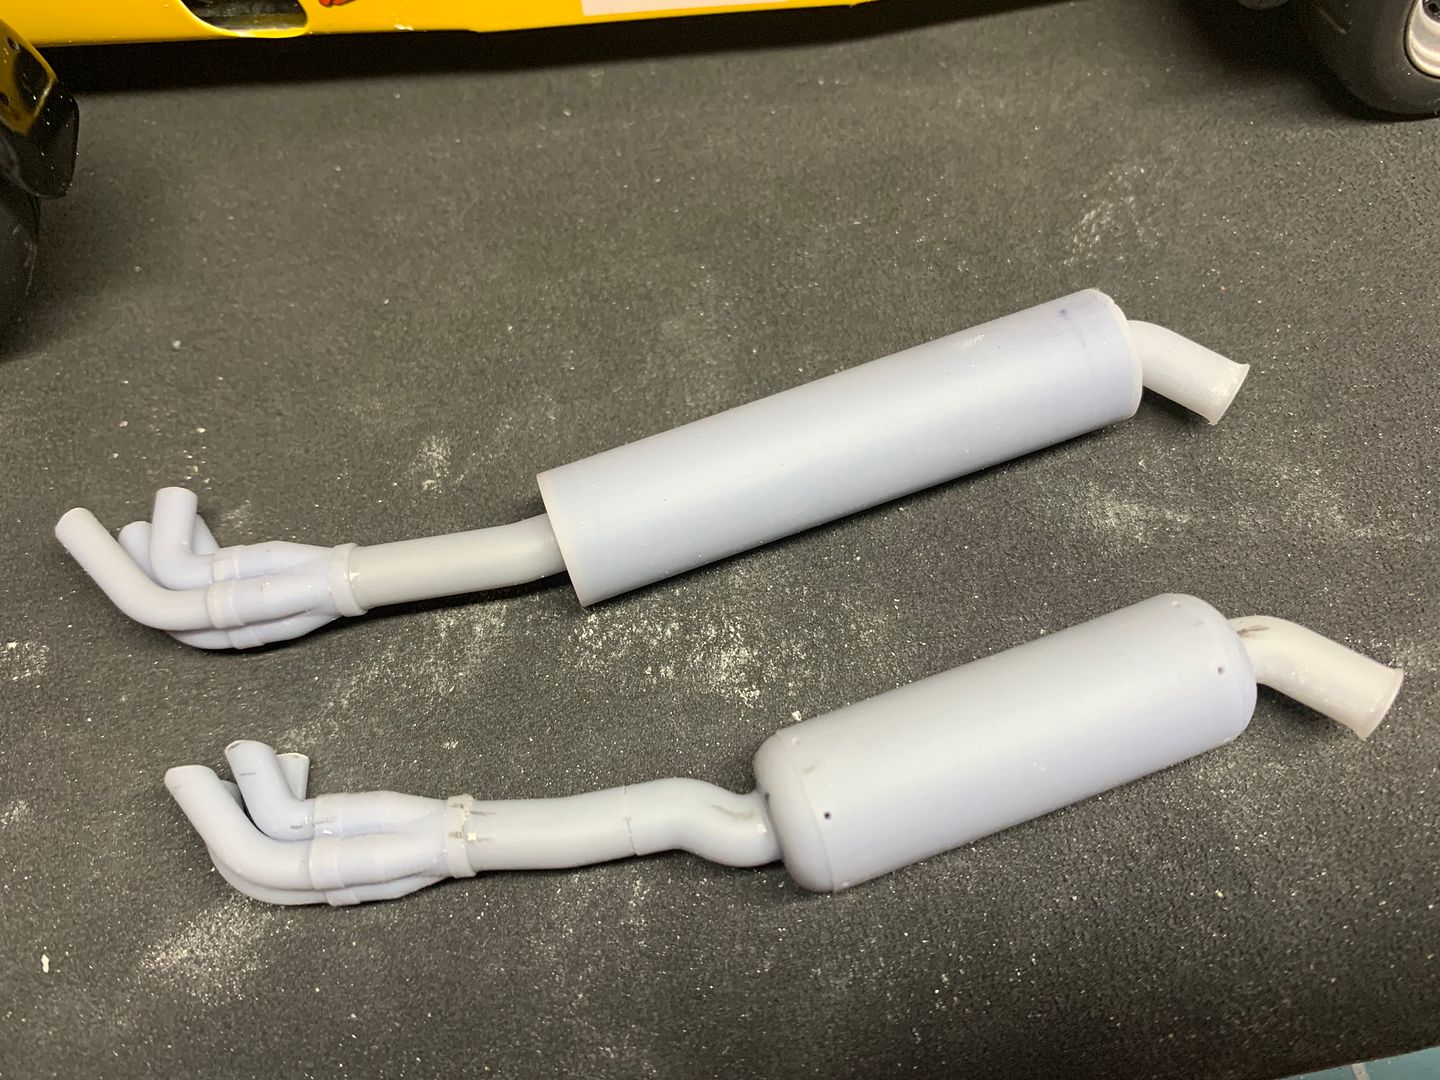
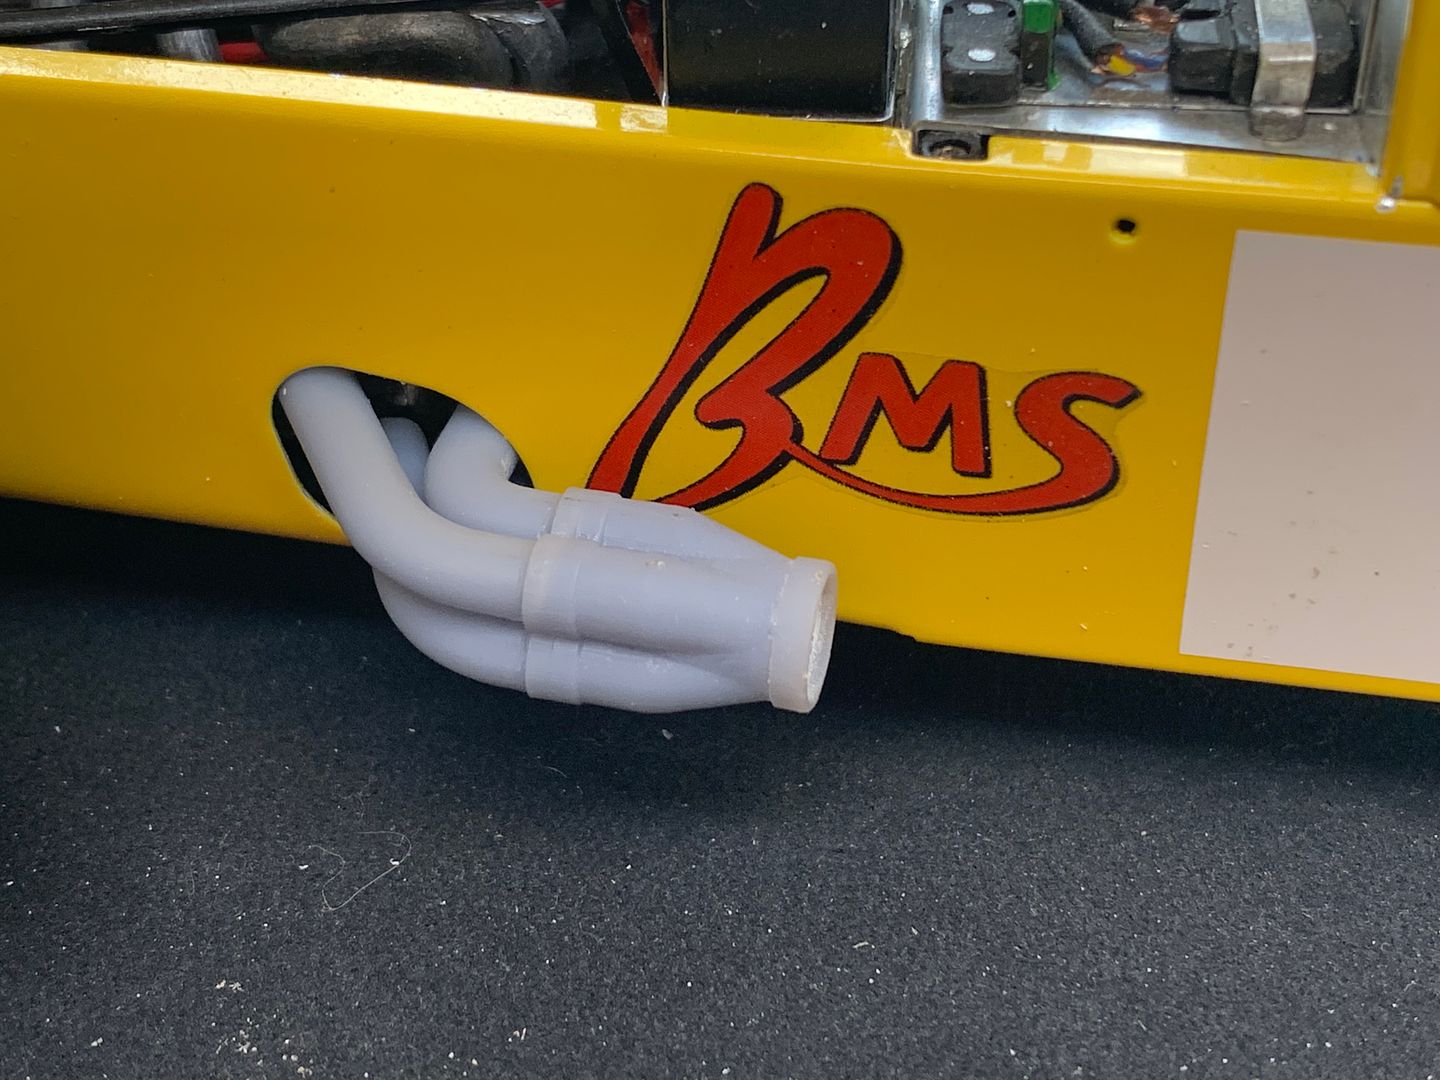
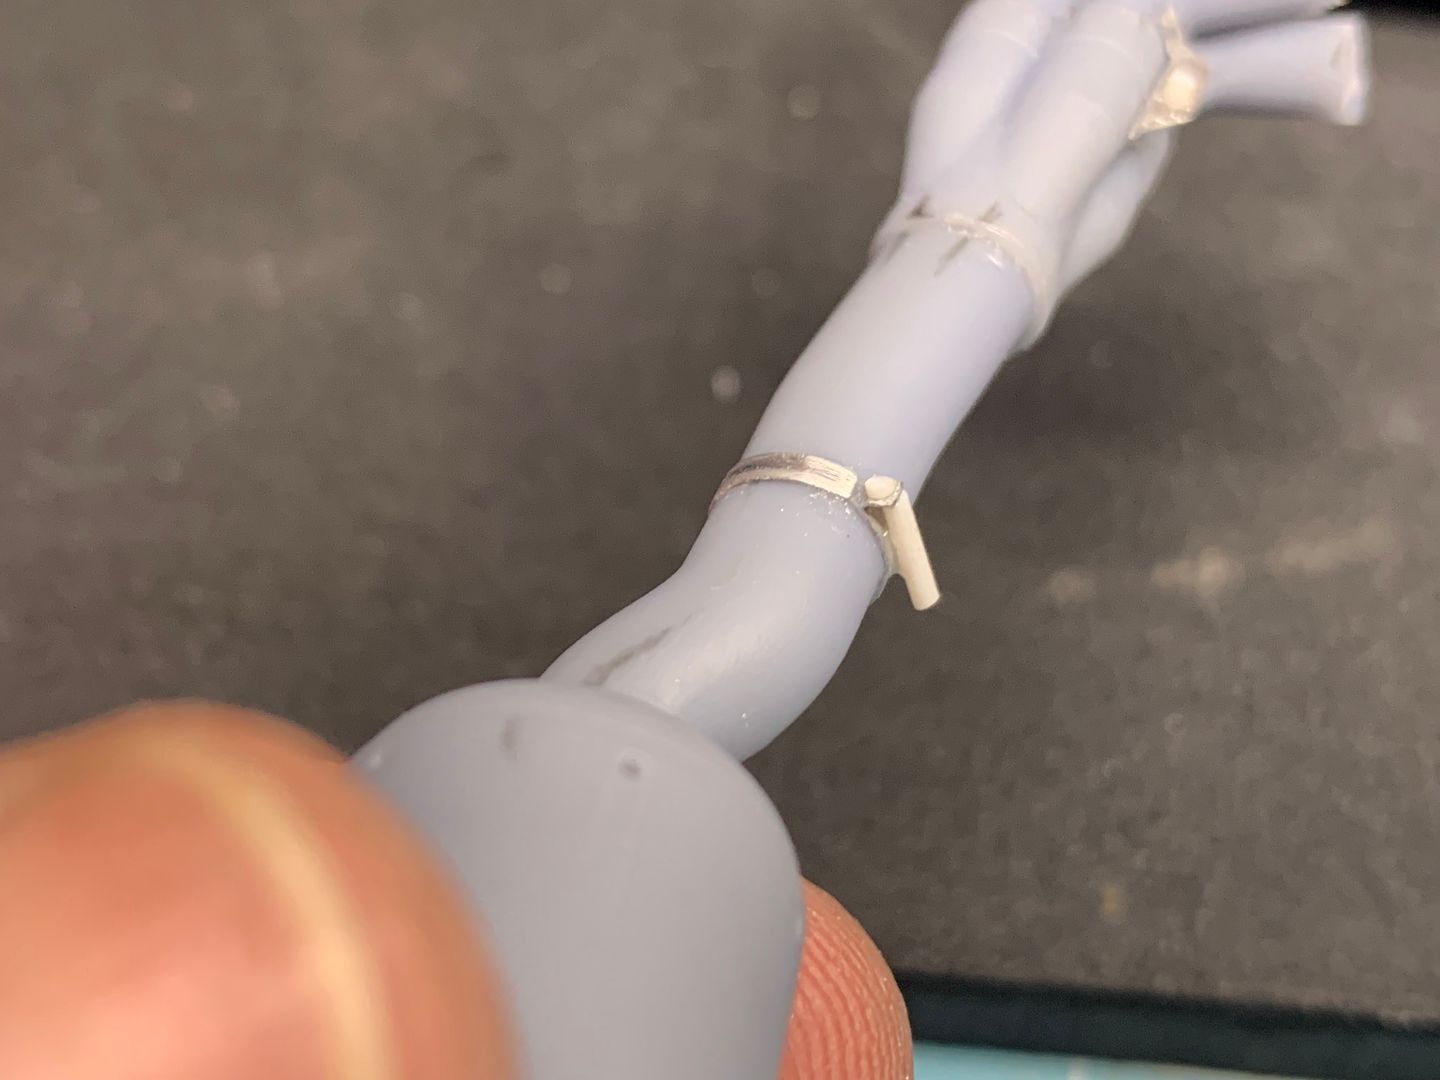
I added some details, such as exhaust clamps and tabs. I wanted to paint everything in one go, rather than add after - on the real exhaust everything is pretty much the same colour...
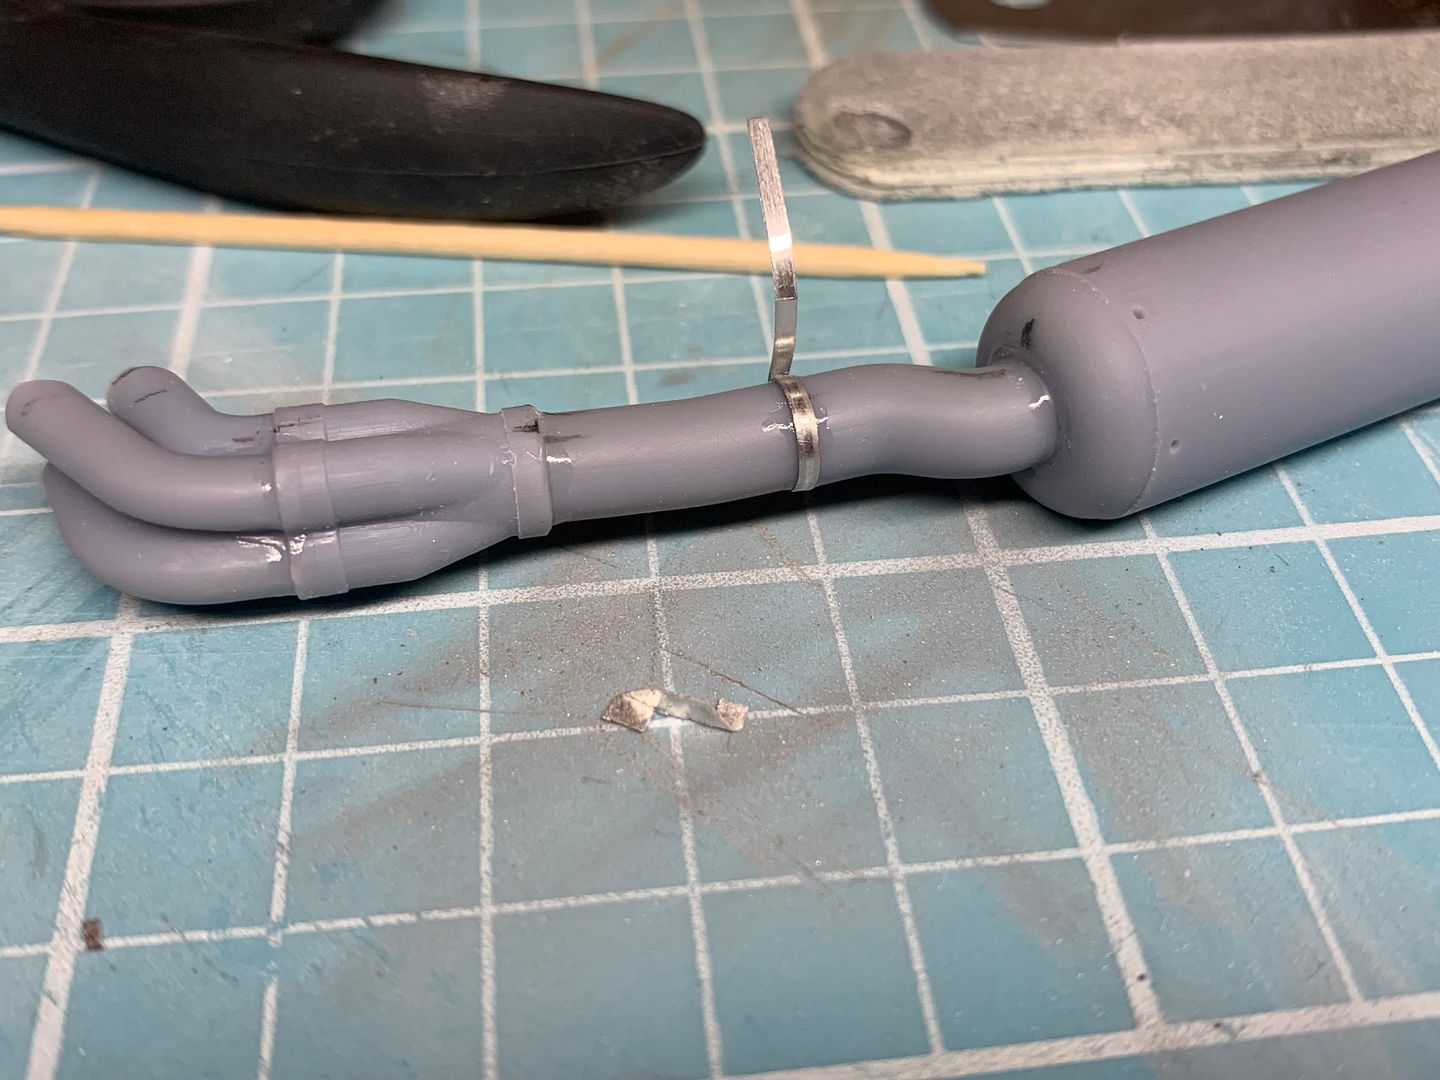
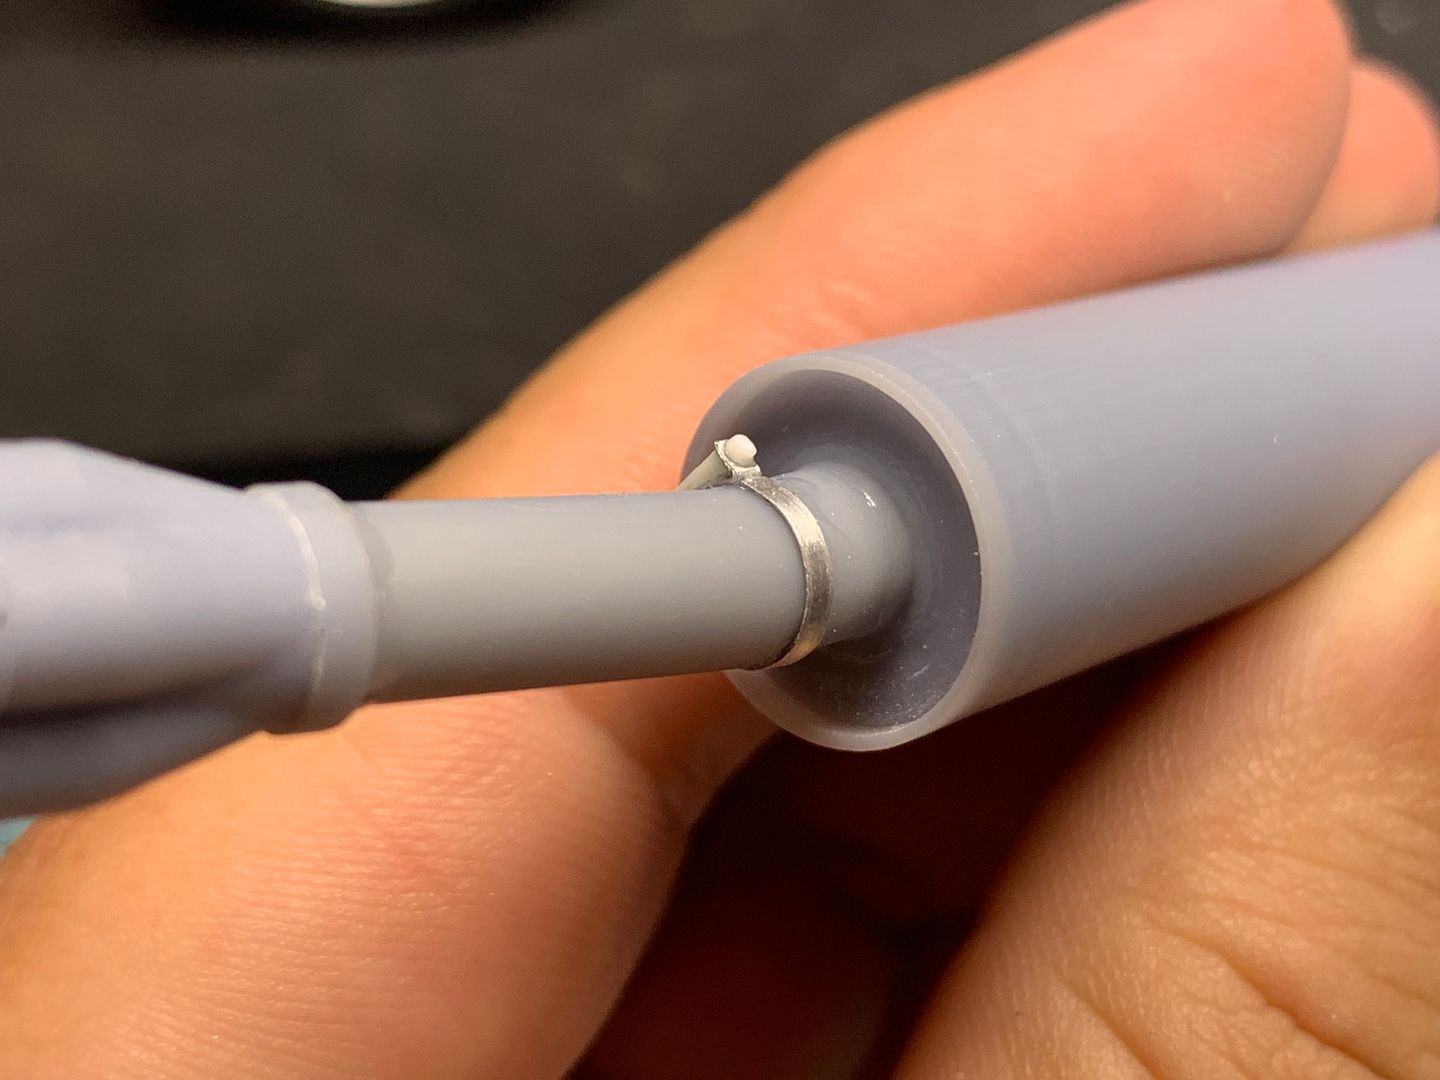
Pretty chuffed how these came out - again the 3D printer saved a lot of work with trying to bend plastic tube - you still have to put the work in drawing the parts, and a lot of finishing...
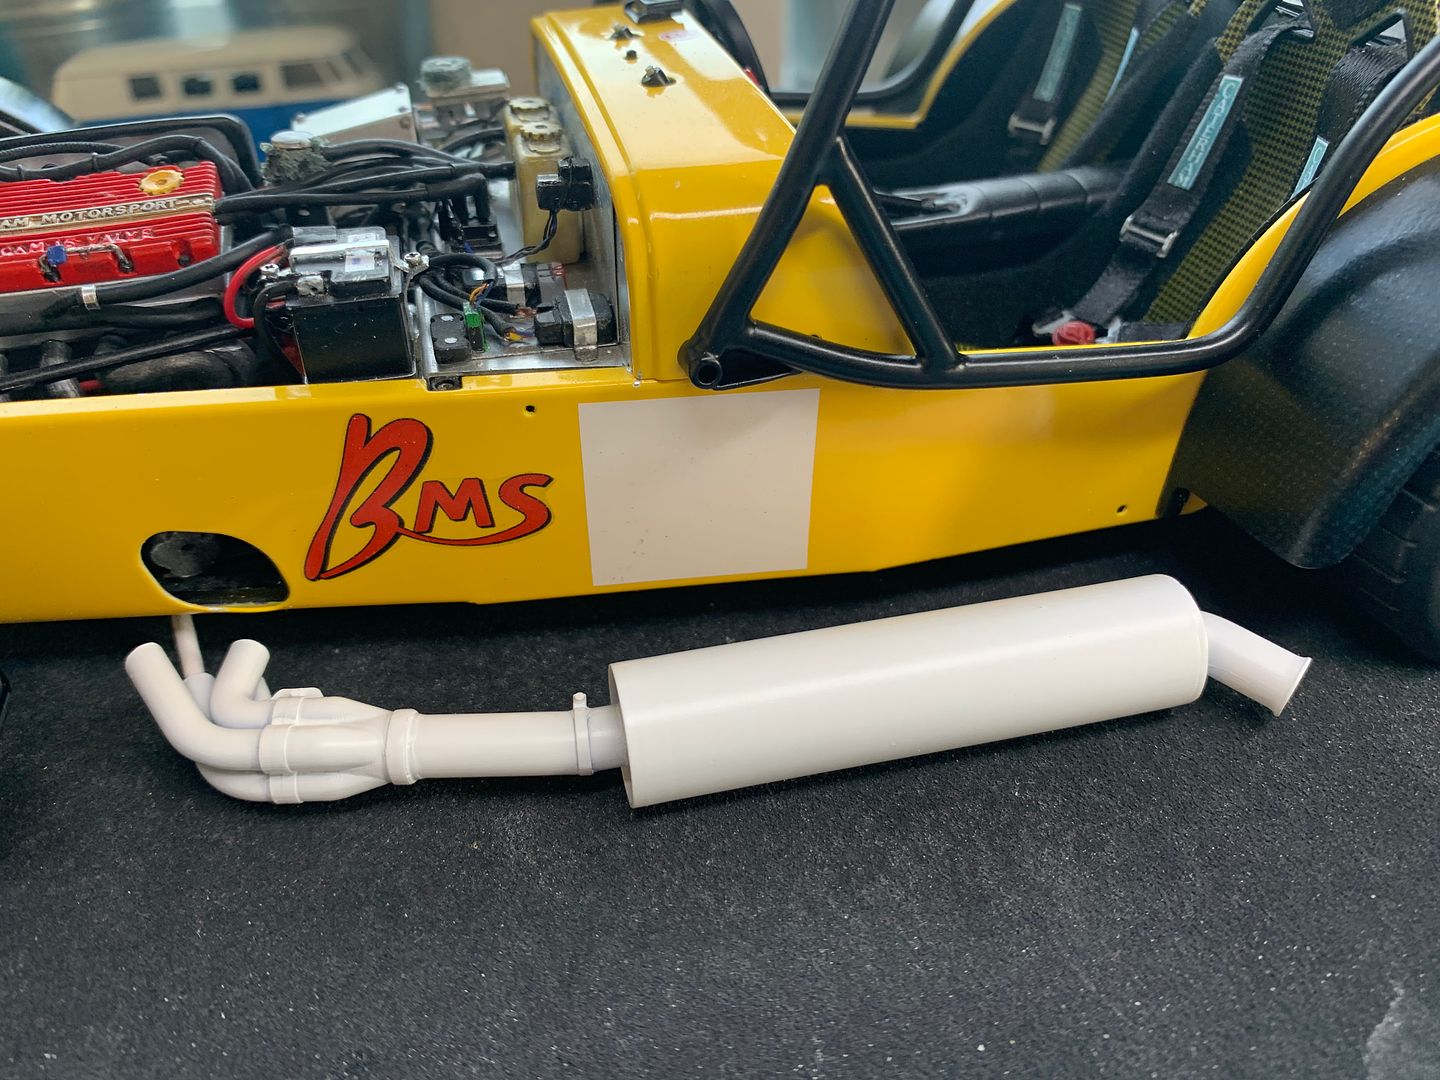
Primed and ready to paint...
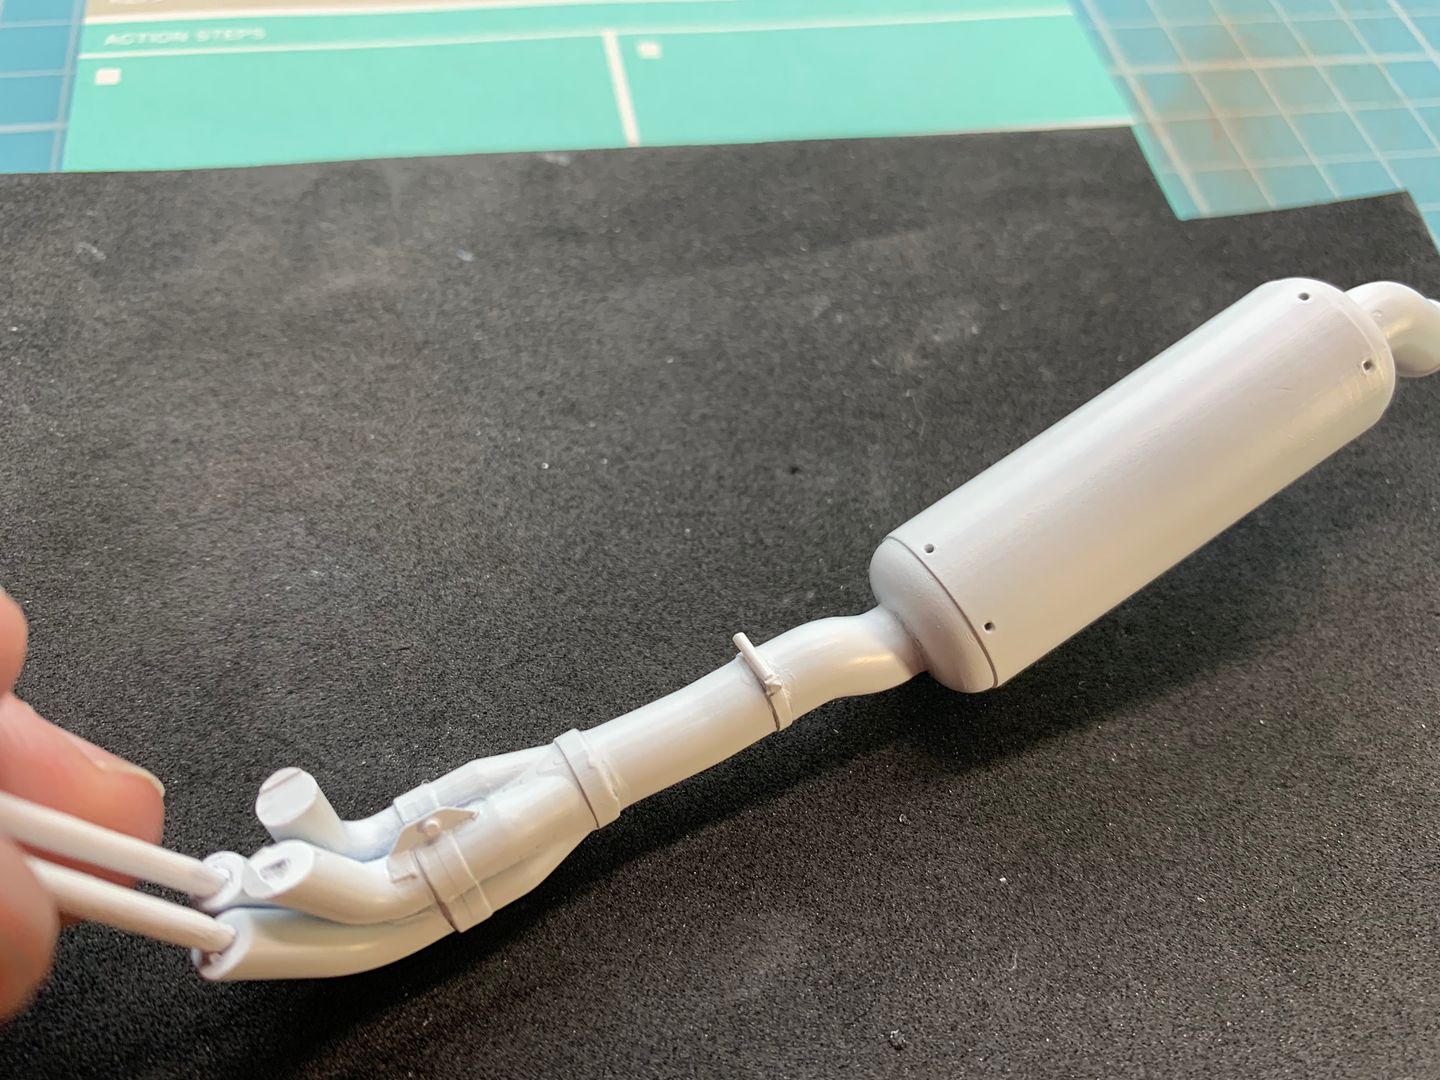
The holes on one can are for the rivets - fitted after painting.
I drew up a selection of pipes for the exhaust system - printer had a fit in the first print so I ended up with a solid lump halfway up the pipes - be good for a space craft panel in the future!
Re-setting the level of the printer plate solved the issue and I printed the pipes...
Lots of trimming and sanding later, I had a 'kit' of parts.
A slow process of offering the exhaust up to the car and cutting each pipe to size and length so it fitted through the skin - just as much of a pain as when you fit the 1:1 'real' pipes - believe me! But everything fitted together fairly well...
Of course there are two of them.
I added some details, such as exhaust clamps and tabs. I wanted to paint everything in one go, rather than add after - on the real exhaust everything is pretty much the same colour...
Pretty chuffed how these came out - again the 3D printer saved a lot of work with trying to bend plastic tube - you still have to put the work in drawing the parts, and a lot of finishing...
Primed and ready to paint...
The holes on one can are for the rivets - fitted after painting.
Gassing Station | Scale Models | Top of Page | What's New | My Stuff