Airfix 1/144 De Havilland Comet
Discussion


I'm probably taking on far too many airliner projects at the moment but I've also commenced work on this in addition to the DC-4 and the 737.
This is the current boxing of this venerable kit (almost as old as me) and I have to say the moulds have not been too kind.
I had to spend a lot of time cleaning up and tidying the joins. This resulted in losing all of the raised panel line detail, which, to be honest, in 1/144 I don't think are that appropriate anyway. I spent a lot of time blending and filling the gaps around the flight deck transparencies using gap filing super glue. I will be using decals instead of glazing so damaging the clear cockpit windows during the sanding process was of no matter. It was more important that the nose was nice and smooth - especially on this aeroplane as the Comet was famous for its "non-stepped" and smooth nose.
The wing is a very simple affair consisting of just one upper half and one lower half. They went together fairly well but there was a bit of damage to one of the trailing edges which I fixed, again, using gap filling super glue.
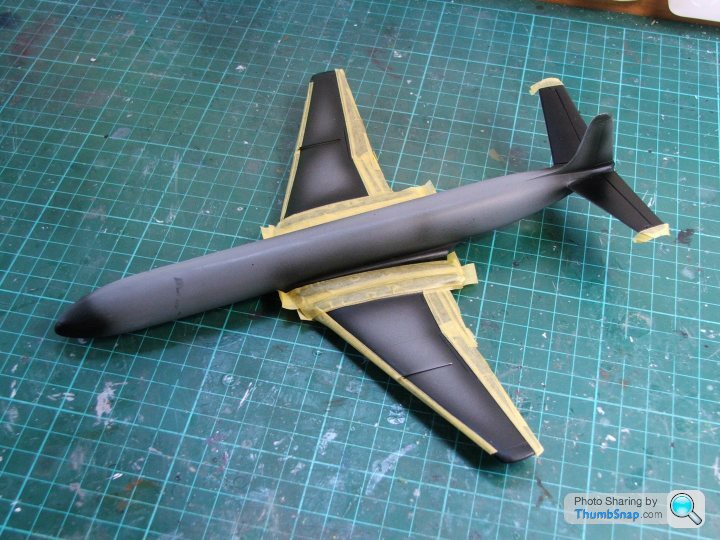
Initially, when I test fitted the assembled wing to the underside of the fuselage, I found an enormous gap. However, careful tidying up of the join in the recess area in the lower fuselage where the wing is placed improved the fit no end. There was still a noticeable gap (although nothing like as bad as it could have been) to which I applied some Humbrol filler. Next stage was the sanding of the filler, blending the wing to fuselage join and applying some primer which I have now done..
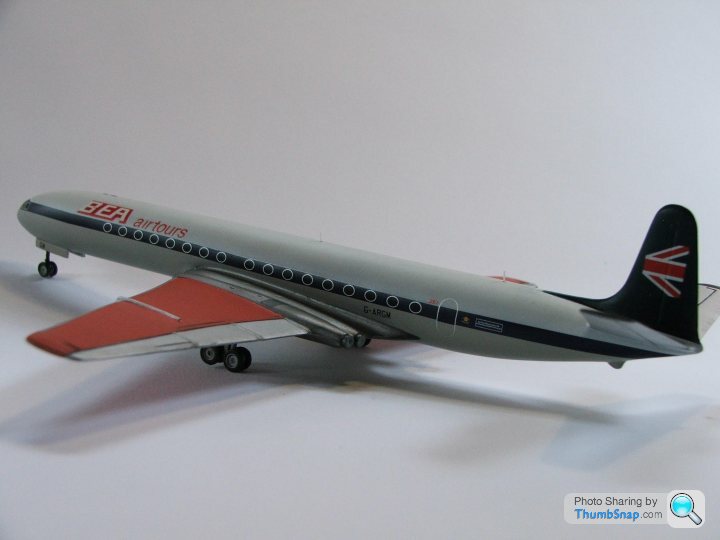
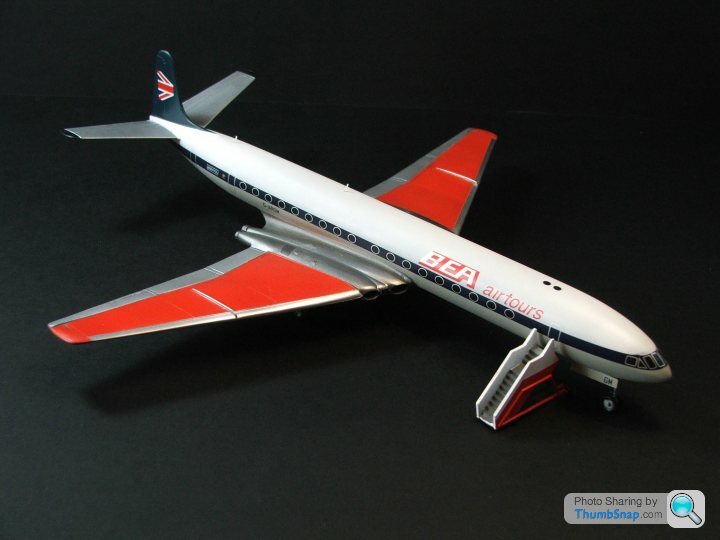
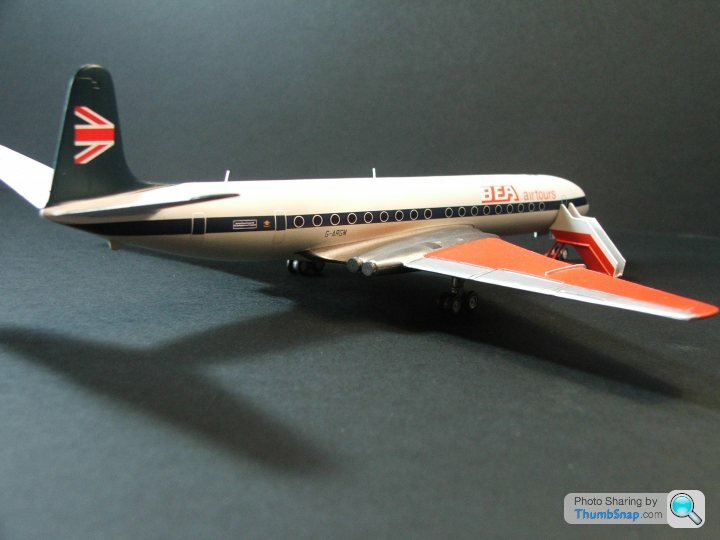
I still haven't decided what scheme to do it in. The BEA Airtours scheme supplied in the kit is nice and I may try that. On the other hand, I also have a set of Liveries Unlimited BEA Red Square markings which I would also like to do - especially the earlier version with the polished metal lower fuselage.
I also have a set of 1950s BEA markings for the one and only Comet 3. The Comet 3 was shorter than the Comet 4B by 36 inches, which equates to only 6 mm in 1/144, so I wouldn't bother trying try to shorten the fuselage.
I'll see how the construction goes on before I make a final decision on what version to do although I'm leaning towards the decals that come in the box..


This is the current boxing of this venerable kit (almost as old as me) and I have to say the moulds have not been too kind.
I had to spend a lot of time cleaning up and tidying the joins. This resulted in losing all of the raised panel line detail, which, to be honest, in 1/144 I don't think are that appropriate anyway. I spent a lot of time blending and filling the gaps around the flight deck transparencies using gap filing super glue. I will be using decals instead of glazing so damaging the clear cockpit windows during the sanding process was of no matter. It was more important that the nose was nice and smooth - especially on this aeroplane as the Comet was famous for its "non-stepped" and smooth nose.
The wing is a very simple affair consisting of just one upper half and one lower half. They went together fairly well but there was a bit of damage to one of the trailing edges which I fixed, again, using gap filling super glue.
Initially, when I test fitted the assembled wing to the underside of the fuselage, I found an enormous gap. However, careful tidying up of the join in the recess area in the lower fuselage where the wing is placed improved the fit no end. There was still a noticeable gap (although nothing like as bad as it could have been) to which I applied some Humbrol filler. Next stage was the sanding of the filler, blending the wing to fuselage join and applying some primer which I have now done..
I still haven't decided what scheme to do it in. The BEA Airtours scheme supplied in the kit is nice and I may try that. On the other hand, I also have a set of Liveries Unlimited BEA Red Square markings which I would also like to do - especially the earlier version with the polished metal lower fuselage.
I also have a set of 1950s BEA markings for the one and only Comet 3. The Comet 3 was shorter than the Comet 4B by 36 inches, which equates to only 6 mm in 1/144, so I wouldn't bother trying try to shorten the fuselage.
I'll see how the construction goes on before I make a final decision on what version to do although I'm leaning towards the decals that come in the box..
I've build hundreds of them over the years so have got used to all their permutations. At the moment the plastic they are using is softer than at other times in the past. Personally, I prefer softer plastic to hard plastic as it is more easilly sanded and rubbed down, something that may be necessary with Airfix kits, especially if they are from old moulds like this one.Softer plastic is also less prone to cracking and splitting when being removed from the sprues.
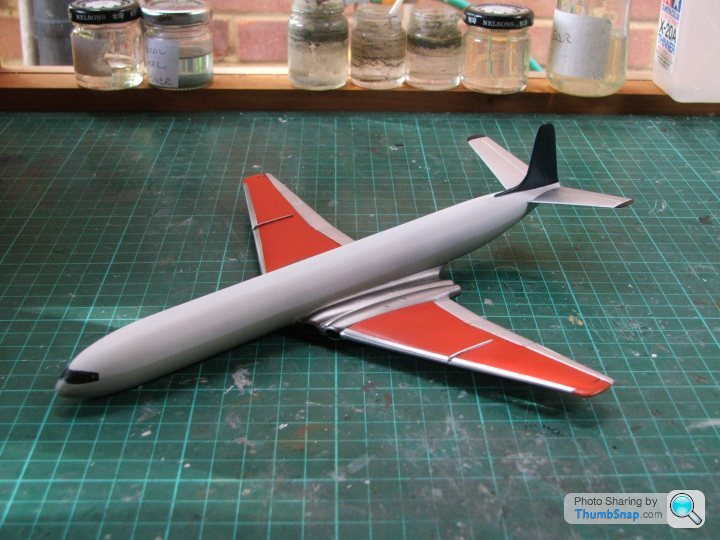
After basic priming, I sprayed Tamiya Gloss Black on all the areas that will be polished metal. Gloss Black is a good base coat for metallics.
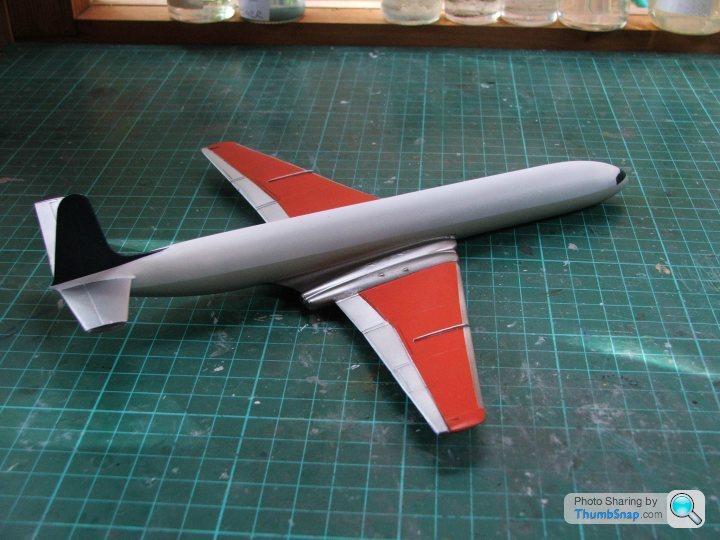
Originally BEA Comets had their lower fuselages in polished bare metal but later they started painting them light grey. When they switched from the "Red Square"! era to the "Speedjack" era they retained those grey undersides.
I then masked of those black areas as I want to keep them black for the moment. This was so I can paint the centre sections of the wings in the classic BEA red wings. The next step will be to spray a white base coat onto the areas that will be red.

After basic priming, I sprayed Tamiya Gloss Black on all the areas that will be polished metal. Gloss Black is a good base coat for metallics.
Originally BEA Comets had their lower fuselages in polished bare metal but later they started painting them light grey. When they switched from the "Red Square"! era to the "Speedjack" era they retained those grey undersides.
I then masked of those black areas as I want to keep them black for the moment. This was so I can paint the centre sections of the wings in the classic BEA red wings. The next step will be to spray a white base coat onto the areas that will be red.
Latest update.
I have sprayed the red areas of the wings and removed the masking from the previously sprayed black areas. The next step will be to mask the red areas and spray aliminium over the black areas of the wing.
I will leave the red paint another 24 hours to dry before applying any masking to it.
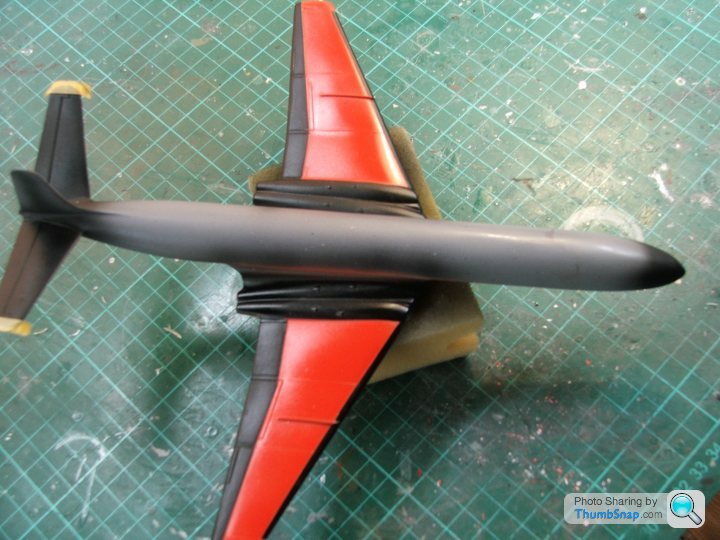
I have sprayed the red areas of the wings and removed the masking from the previously sprayed black areas. The next step will be to mask the red areas and spray aliminium over the black areas of the wing.
I will leave the red paint another 24 hours to dry before applying any masking to it.
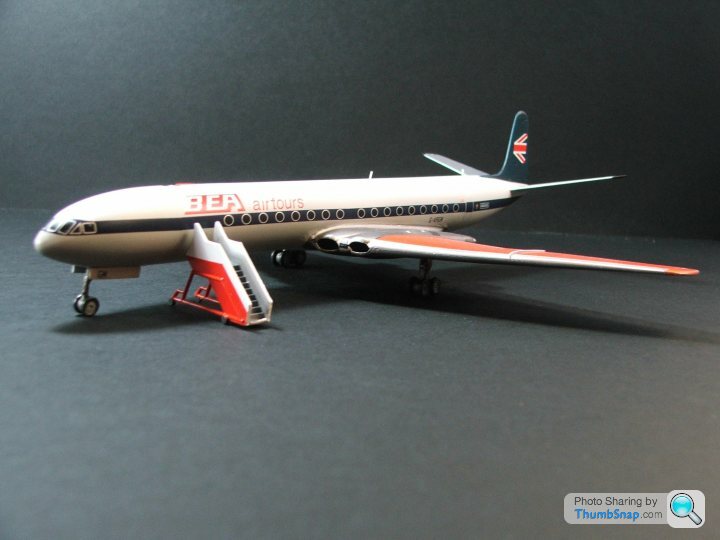
Progress is being made. The painting is more or less completed although some touching and tidying up will be required. Red wings are bit of a faff. They must have been a right pain on the real things.
Once the painting is completed to my satisfaction, I'll post up another set of pictures before I start applying the decals.
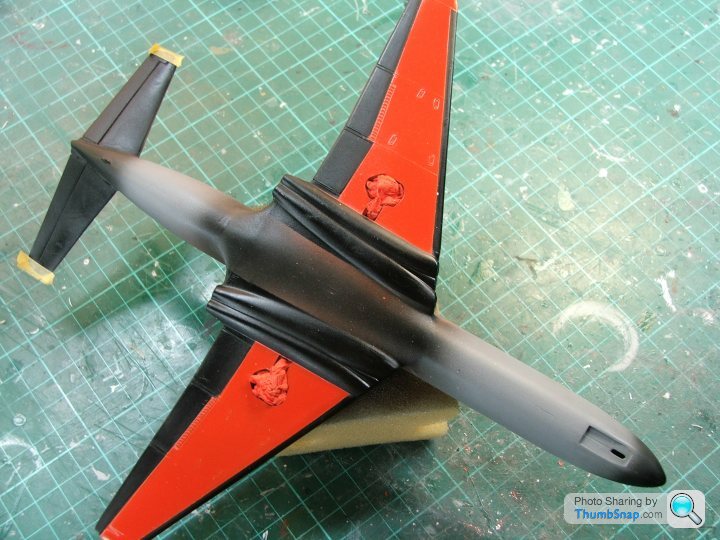
One area I'm a bit concerned about are the flight deck window frames. Airfix has incorporated the framing as part of the window cheatline. The problem is that they have left the window panel sections clear, the assumption being that you will have used the kit transparencies for the windows. However, as you can see from the pictures shown, I elected to sand and blend them into the fuselage as -
a) the windows didn't fit that well
b) they aren't very accurate from a shape point of view
c) I prefer decals for depicting airliner windows anyway
My plan was to paint a black area over the cockpit window area, which I have done which, in theory, should lie directly under the cockpit window framing decal. However, I'm not altogether convinced that this painted cockpit glazing area is going to match the decal shape precisely, which it needs to do. The problem is that I won't know until the decal is applied - and at that point it would be too late. So, I'm thinking about ways in which I can test the matching of the painted window with the decal without wrecking the decal.
If only Airfix had just given us a cockpit window decal option.
Once the painting is completed to my satisfaction, I'll post up another set of pictures before I start applying the decals.
One area I'm a bit concerned about are the flight deck window frames. Airfix has incorporated the framing as part of the window cheatline. The problem is that they have left the window panel sections clear, the assumption being that you will have used the kit transparencies for the windows. However, as you can see from the pictures shown, I elected to sand and blend them into the fuselage as -
a) the windows didn't fit that well
b) they aren't very accurate from a shape point of view
c) I prefer decals for depicting airliner windows anyway
My plan was to paint a black area over the cockpit window area, which I have done which, in theory, should lie directly under the cockpit window framing decal. However, I'm not altogether convinced that this painted cockpit glazing area is going to match the decal shape precisely, which it needs to do. The problem is that I won't know until the decal is applied - and at that point it would be too late. So, I'm thinking about ways in which I can test the matching of the painted window with the decal without wrecking the decal.
If only Airfix had just given us a cockpit window decal option.
Eric Mc said:
So, I'm thinking about ways in which I can test the matching of the painted window with the decal without wrecking the decal.
Something I'm considering but not tried yet. ...photocopy the decal onto the lightest grade paper you can find and apply damp to the model or bite the bullet and print onto clear transfer paper and damn the expense!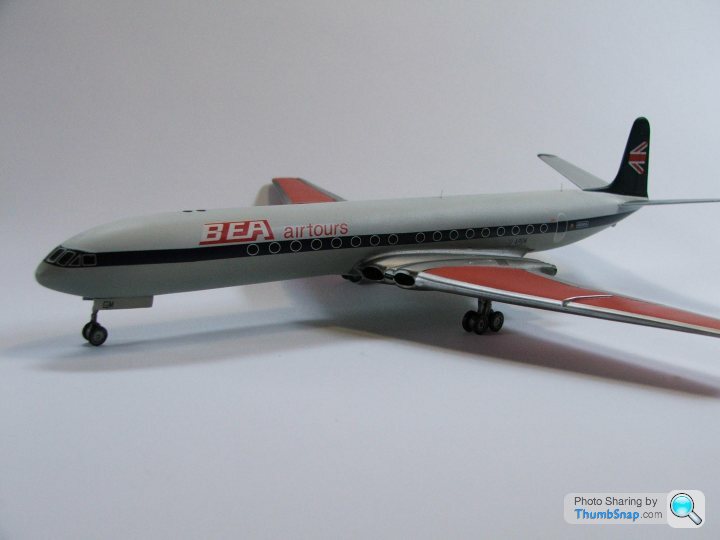


Gassing Station | Scale Models | Top of Page | What's New | My Stuff