Revell 1/12 Ford Shelby GT500

Revell 1/12 Ford Shelby GT500

Author
Discussion

silverfoxcc

7,688 posts

145 months

Tuesday 6th February 2018
quotequote all
Will look good against the new 1/12 Routemaster weekly build

Langweilig

Original Poster:

4,325 posts

211 months

Tuesday 6th February 2018
quotequote all
4321go said:
Wow! They’ve really captured the plasticieness of American automobile interiors there!!!
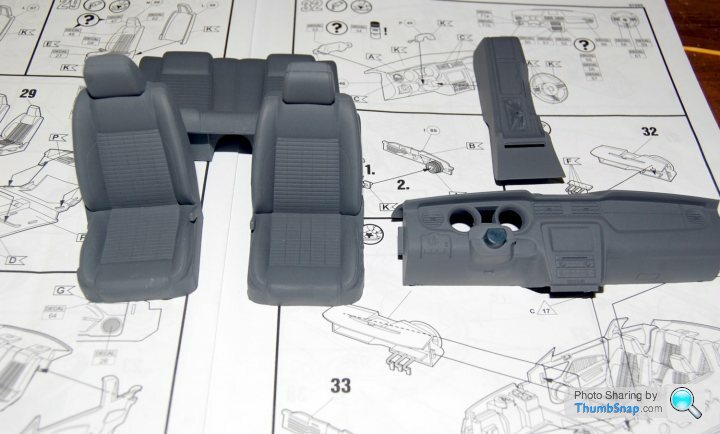
When you see the photos of the interior, you may want to consider scratchbuilding some additional details. For example, the seat belts. It's one of the areas where the kit lacks detail.

Langweilig

Original Poster:

4,325 posts

211 months

Tuesday 6th February 2018
quotequote all


Time for a rattle can full of Humbrol acrylic primer.

Langweilig

Original Poster:

4,325 posts

211 months

Friday 9th February 2018
quotequote all


After masking off the areas where parts are located, another coat of Humbrol primer acrylic.


All done.


Seats, dashboard and transmission tunnel painted with Humbrol tank grey acrylic spray.

Langweilig

Original Poster:

4,325 posts

211 months

Sunday 11th February 2018
quotequote all


Shelby stripes and cobra decals added to the seats. They didn't adhere very well without Decal Soft.

Langweilig

Original Poster:

4,325 posts

211 months

Friday 16th February 2018
quotequote all


Customer specification body colour - Tamiya TS51 racing blue.


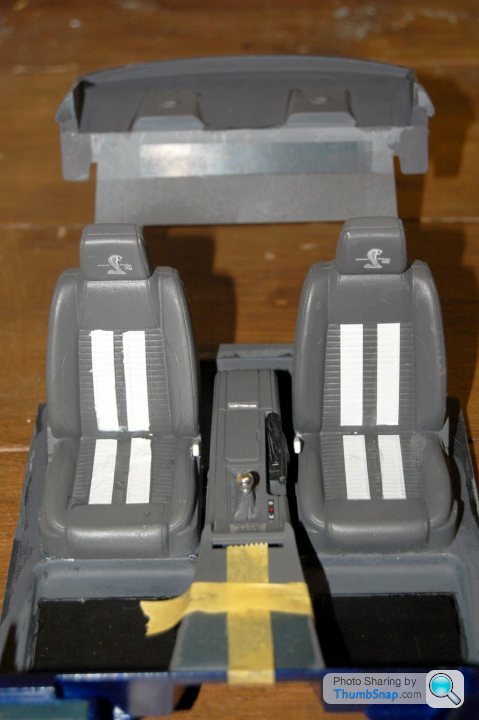
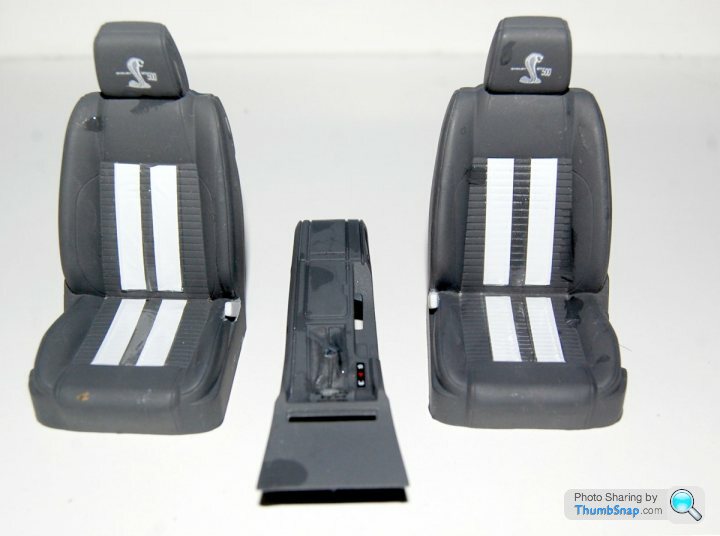
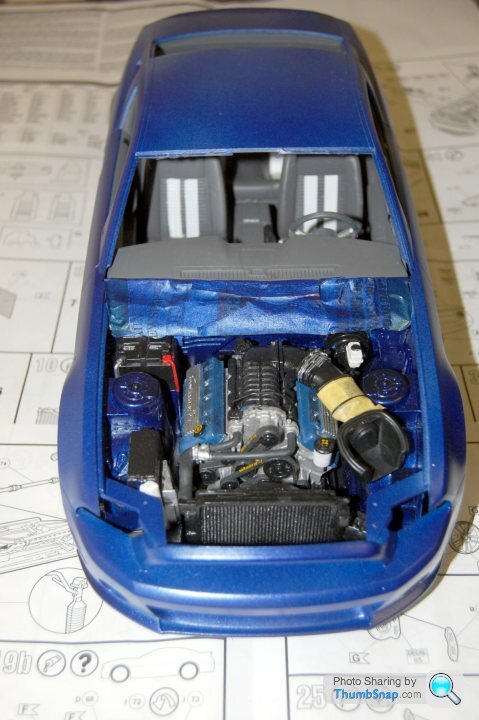
Assembly begun on the interior. Front seats and transmission tunnel in place. Parcel shelf painted with Revell 378 acrylic. Floor carpeting painted with Revell 78. Mats painted with Tamiya rubber black.

Edited by Langweilig on Monday 19th February 21:46

Langweilig

Original Poster:

4,325 posts

211 months

Monday 19th February 2018
quotequote all


Door panels painted with Humbrol dark sea grey 27 acrylic spray. There were decals supplied for the door-mounted speakers. I found them to be rubbish. So I just painted the details on using Tamiya silver X11 and gunmetal X10 acrylics.

Langweilig

Original Poster:

4,325 posts

211 months

Friday 23rd February 2018
quotequote all


One door in place. Purely a test-fit at this stage.


With the first of the transparent parts, I want to start work on the dashboard.

Langweilig

Original Poster:

4,325 posts

211 months

Tuesday 27th February 2018
quotequote all


Dial decal added. There's a choice of three decals in the kit. I needed no decal soft for this.

Langweilig

Original Poster:

4,325 posts

211 months

Saturday 3rd March 2018
quotequote all


Centre screen decal added. You have a choice of three - Climate (shown), radio or a Shelby GT500 graphic.


The cobra badge on the steering wheel should've been a chrome part, not a decal. All the ICE decals in place. Same with the battery. Bulkhead painted with the body colour.

Langweilig

Original Poster:

4,325 posts

211 months

Saturday 10th March 2018
quotequote all


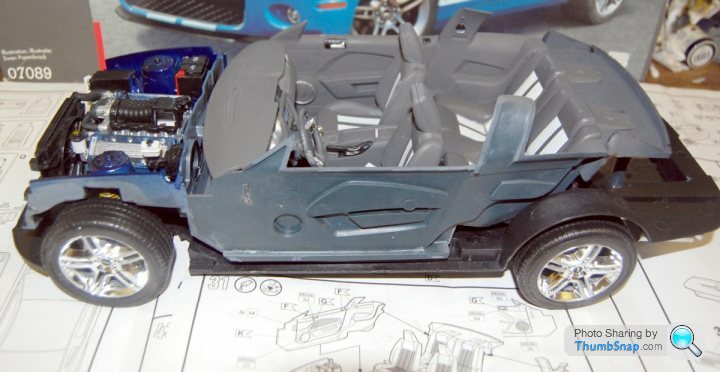
Assembly is 50% complete.


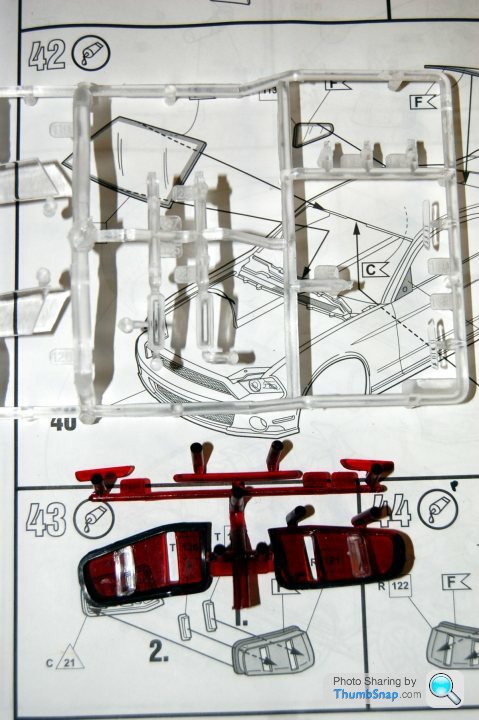
Trouble with the stripe decals on the rear seats. They just wouldn't adhere to the surface, no matter how much decal softener I used. The only solution was to attack it with a rattle can of Humbrol matt varnish acrylic. Success.


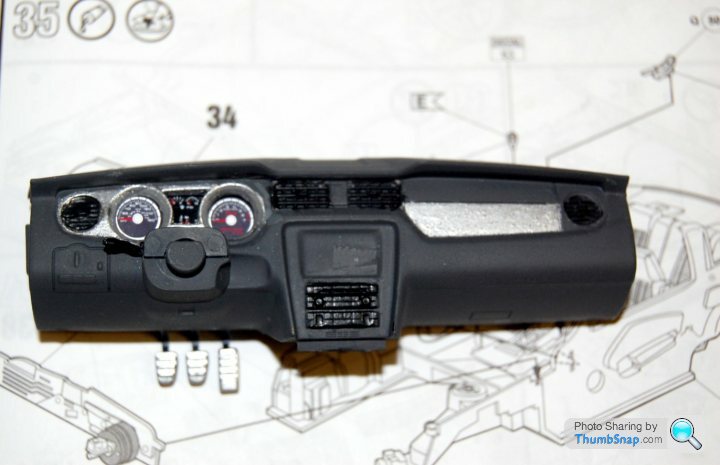
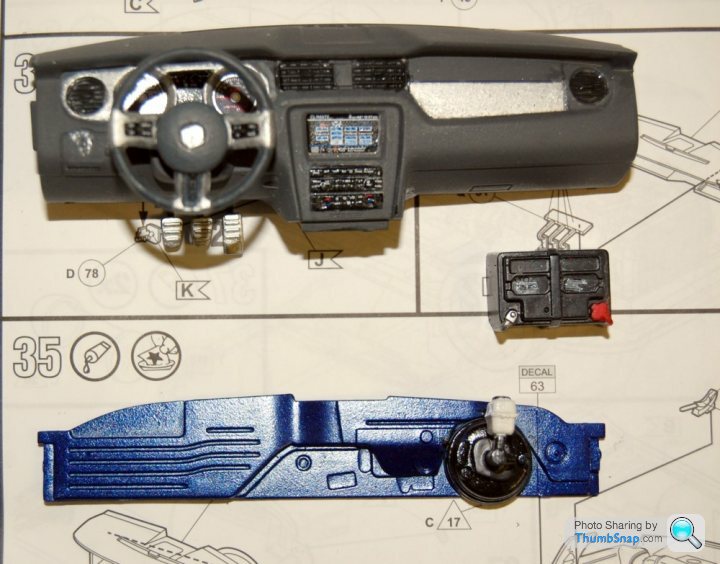
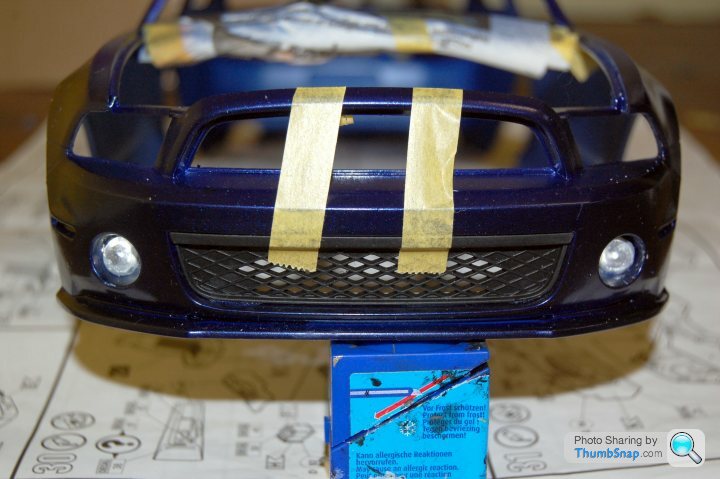
More confusing paint notations from Revell. They didn't specify that all of the glove compartment and ventilator surround had to painted aluminium. Thanks to Google images, I rectified that. Brush painted with Tamiya aluminium acrylic.

Langweilig

Original Poster:

4,325 posts

211 months

Sunday 18th March 2018
quotequote all


A few sub-assemblies to deal with. The air filter and resevoirs. Paints used Revell aquacolour matt sand and matt white and also satin black.


I want to prepare the body shell for painting. First, I used Humbrol Maskol to mask off areas where more parts will be attached.

Langweilig

Original Poster:

4,325 posts

211 months

Friday 23rd March 2018
quotequote all


Body shell painted with Humbrol acrylic primer spray. I bagged it up after it dried to keep dust and fibres off it. I painted the grilles with Humbrol satin black spray.


How the body and bonnet look after three coats of Tamiya TS51.


A test fit at this stage.

Langweilig

Original Poster:

4,325 posts

211 months

Saturday 31st March 2018
quotequote all


Air filter assembled and painted. Sun visors with more decals. Front grilles with a chrome cobra badge.


The brakelights. Already moulded in red plastic. No need for clear red paint.

Langweilig

Original Poster:

4,325 posts

211 months

Tuesday 10th April 2018
quotequote all


Brakelights ready to be fixed to their chrome parts.

Langweilig

Original Poster:

4,325 posts

211 months

Saturday 21st April 2018
quotequote all


Next stage - attaching the front grilles. The areas around the fog lights haven't been painted well. So, I'll touch them up later.


The bodyshell's now firmly in place.

Langweilig

Original Poster:

4,325 posts

211 months

Tuesday 8th May 2018
quotequote all


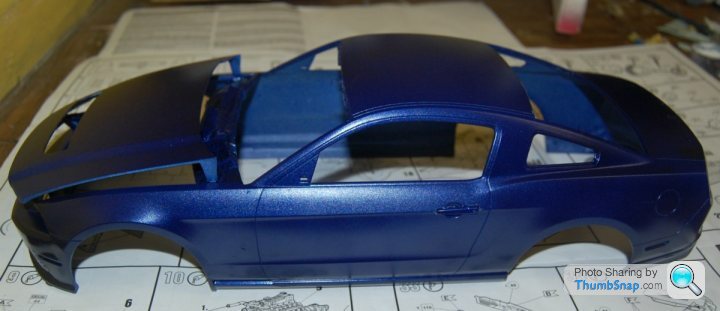
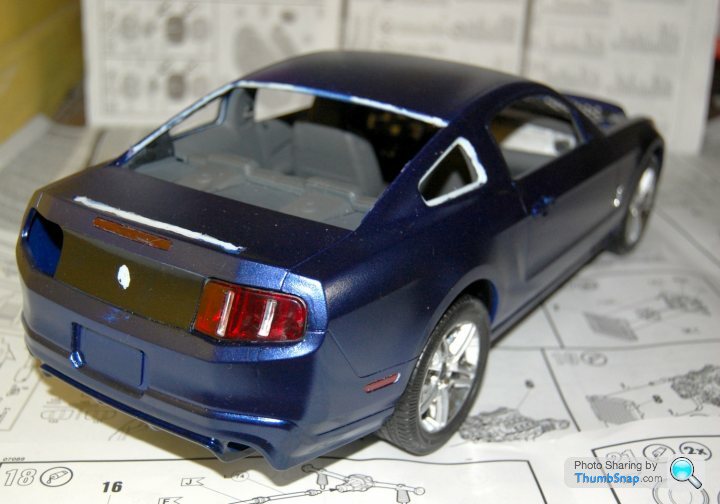
Masking removed to accommodate the windows and rear wing. I painted part of the back end in gloss black paint. I saw it on Jay Leno's Garage, so it must be good.


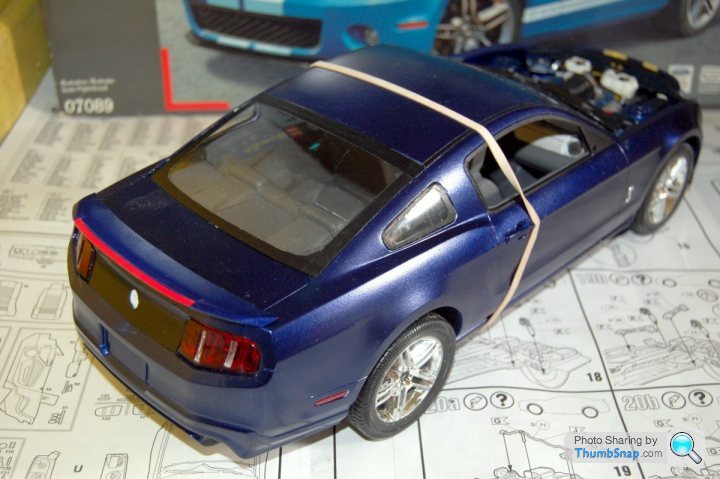
Windows in place. Painting could've been easier if Revell had provided masking seals in the same way that Tamiya do. It would make painting the curves easier.

AshVX220

5,929 posts

190 months

Wednesday 9th May 2018
quotequote all
Looks great, that blue is an excellent colour.

Langweilig

Original Poster:

4,325 posts

211 months

Thursday 10th May 2018
quotequote all
AshVX220 said:
Looks great, that blue is an excellent colour.
Thanks. It took three cans and four coats to really bring up the glossy finish.

Langweilig

Original Poster:

4,325 posts

211 months

Wednesday 27th June 2018
quotequote all


A look at the front before I fix the headlights in place. More chrome plating to scrape off.


Job done.


Before I attach the bonnet, let's take a look at what'll be underneath it.

Edited by Langweilig on Wednesday 27th June 20:48