Paper Ship: SMS Emden (1910), 1:250
Discussion


dr_gn said:
Not sure, Shortar53 on here builds (and finishes!) them too, and there are a few dedicated paper model forums out there which are well supported. Overall though I reckon the proportion sold to finished (or started) is tiny; even smaller than for plastic kits.
Yep, done a few. Only done the one with the laser cut detail set (the sea shepherd one was for my desk rather than the sons ceiling), but the von der Tann is appx 2 feet long. Ive done several small tugs as gifts for the family.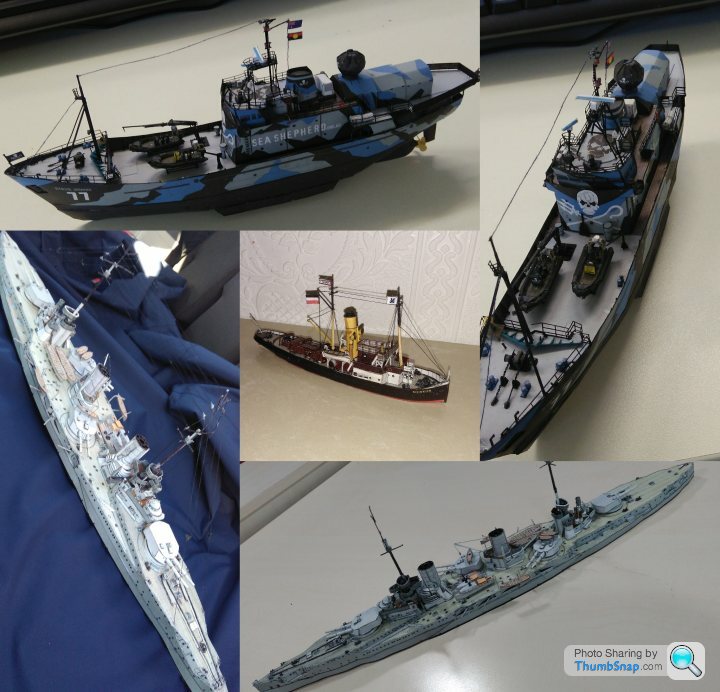
I usually get them from Amazon, but not sure how many they sell
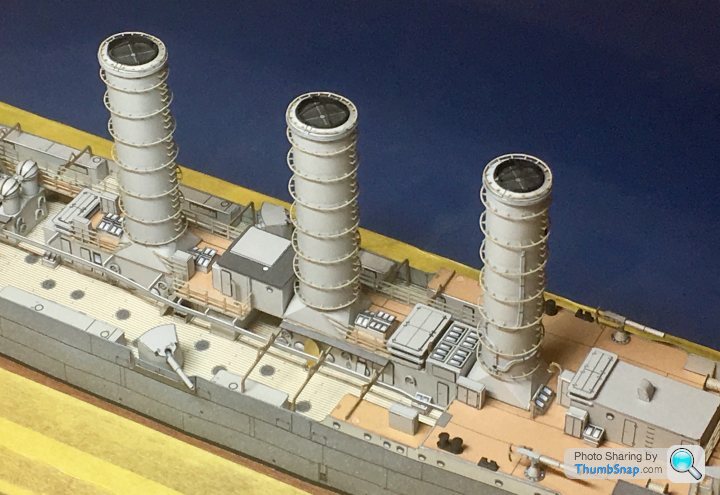
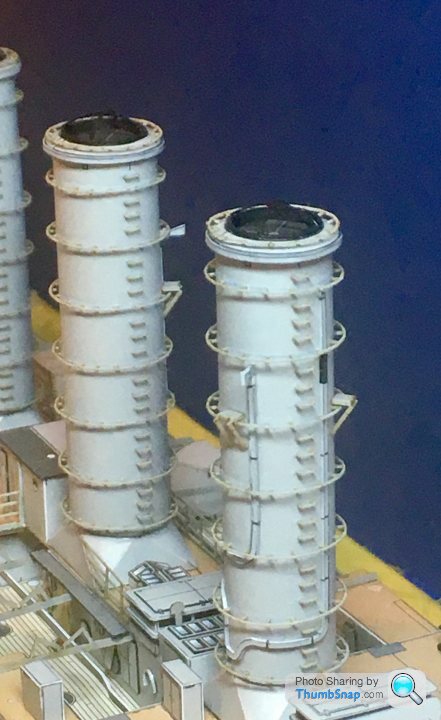
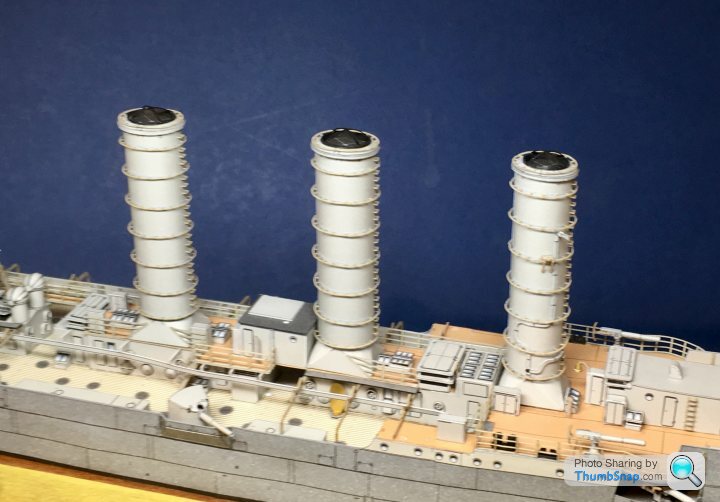
The top of the front funnel was a bit off - at least I thought it was. So I made a fixture to hold the funnel while slicing the top off with a scalpel:
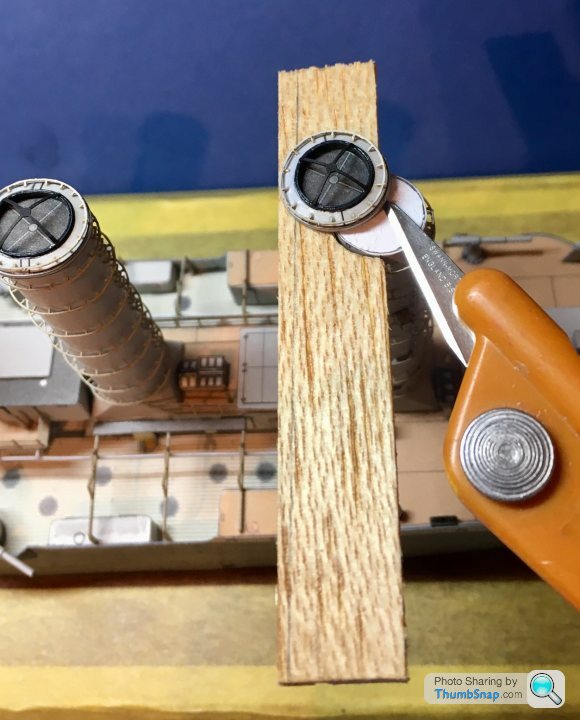
Then repositioned it with the top raised slightly on a blob of PVA. I then wicked PVA mixed with grey paint around the remaining tapered gap:
Then on to the remaining railings. I’d been putting these off because they didn’t fit properly. I ended up cutting the ends off:
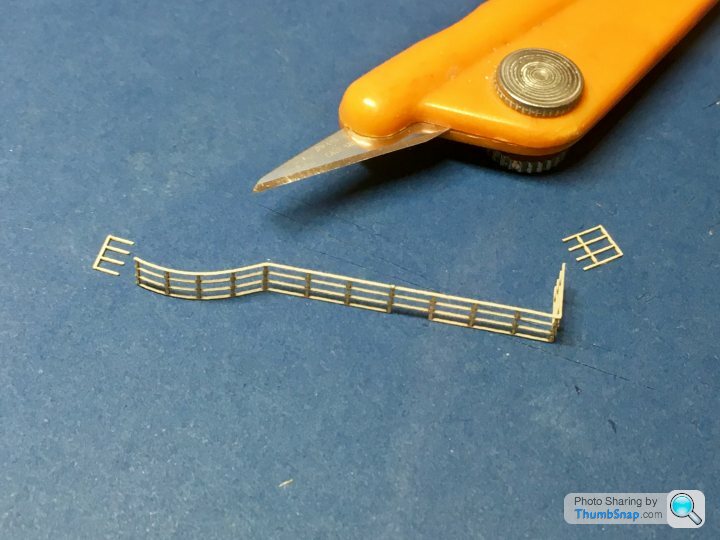
Then trimming the long bits to fit the short ends:
...and cutting the ends of the spare to form new stanchions for the shortened ends. All secured with diluted PVA:
Then repositioned it with the top raised slightly on a blob of PVA. I then wicked PVA mixed with grey paint around the remaining tapered gap:
Then on to the remaining railings. I’d been putting these off because they didn’t fit properly. I ended up cutting the ends off:
Then trimming the long bits to fit the short ends:
...and cutting the ends of the spare to form new stanchions for the shortened ends. All secured with diluted PVA:
dr_gn said:
Then on to the remaining railings. I’d been putting these off because they didn’t fit properly. I ended up cutting the ends off:
you are crazy but I am so impressed with your determination and patience 
And for the pic of the orange knife I had umpteen years ago
A trip to the loft is on the cards but I'll need someone on the other end of a rope to pull me out


Thanks guys - it’s not that small, and I don’t use a magnifier. I’ve tried a few but I find them more trouble than they’re worth. They only focus within a very narrow depth of field (which is often too close for comfort) and so if for example you’re doing fine work on a bit of a model, and your paint pallet or glue is off to one side, it’ll be completely out of focus. I was going to try some of the lens on a stick type, where you can glance to the side or underneath them to pick things up, but I can’t be bothered to find a decent set for a low enough price to potentially never use.
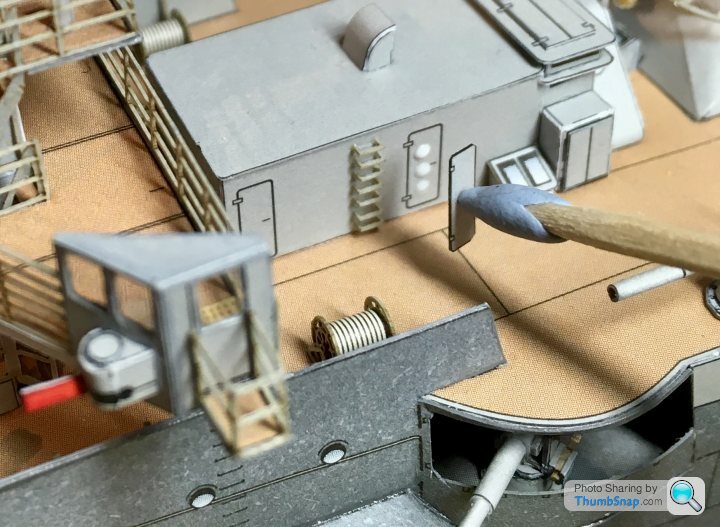
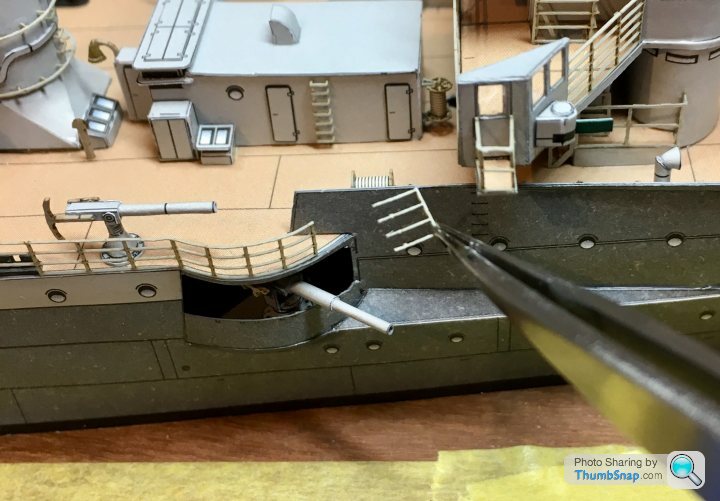
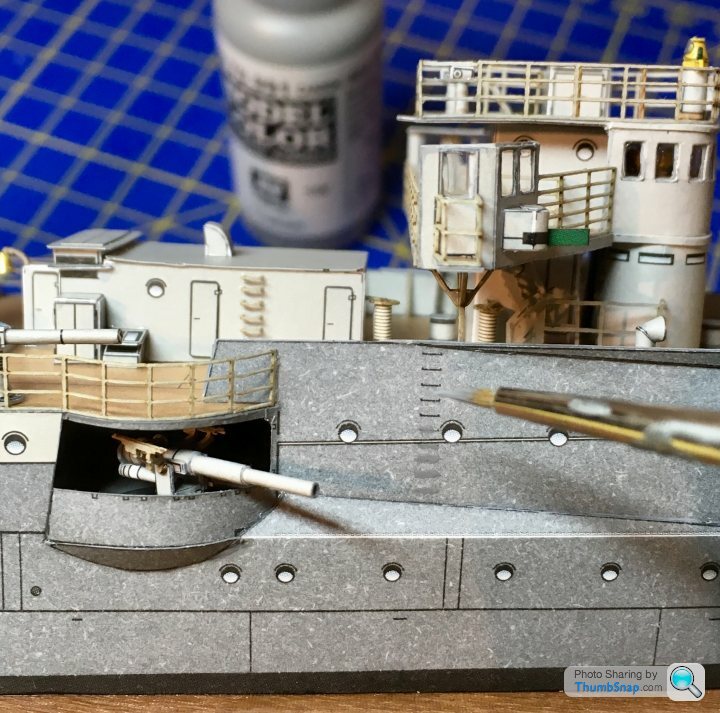
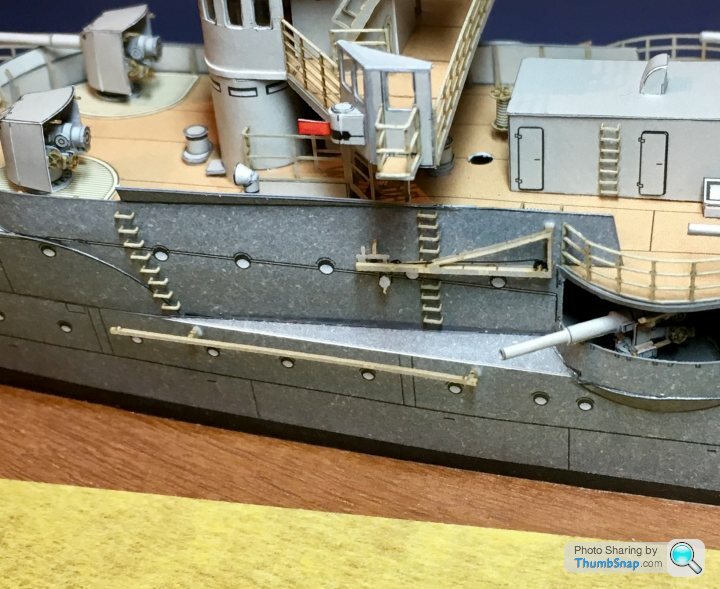
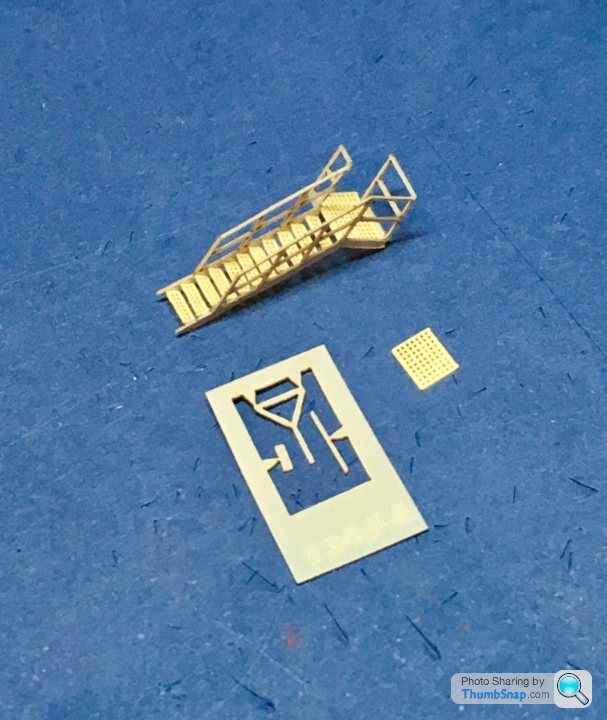
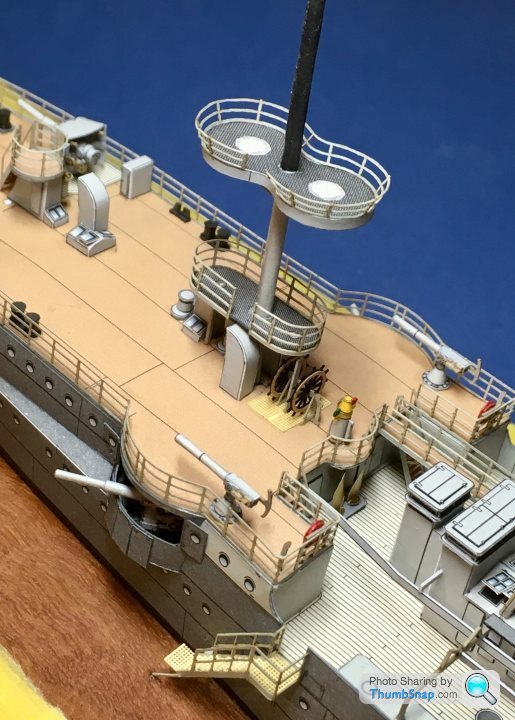
So the hull is nearing completion. I added the steps to the stbd. side:
And cut up the casemate gun port cover panels:
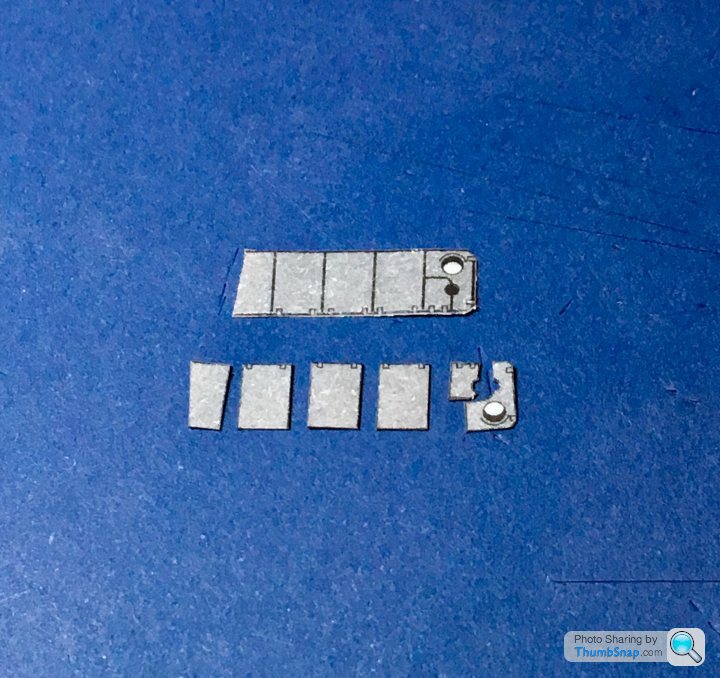
I opted to fix them port on stbd. and vice-versa, in order to retain the porthole and hinge detail that would be missing if the correct sides were used. I understand that they probably should be white on their inner surfaces, but I think on balance, the complete lack of printed detail would look worse than any potential technical inaccuracy.
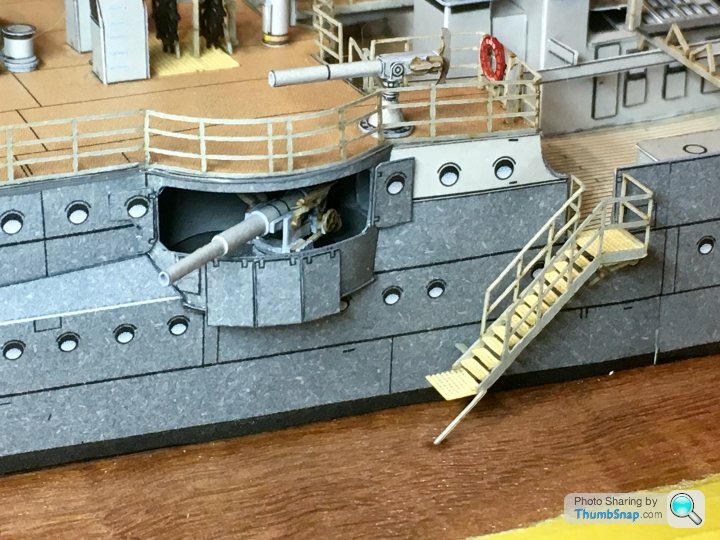
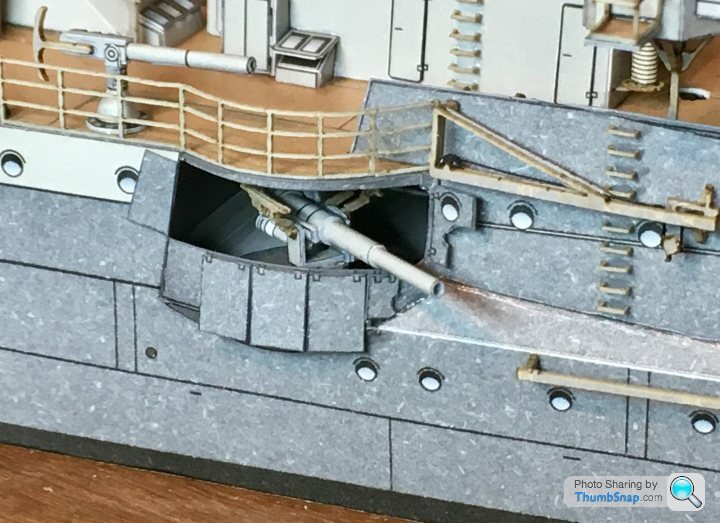
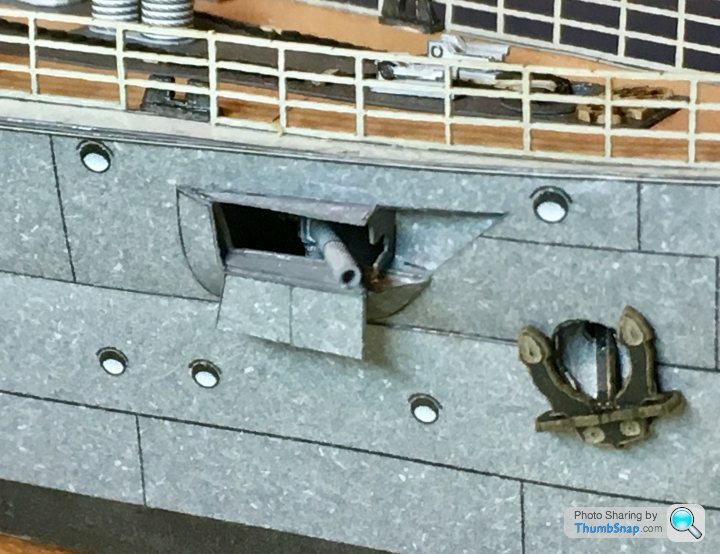
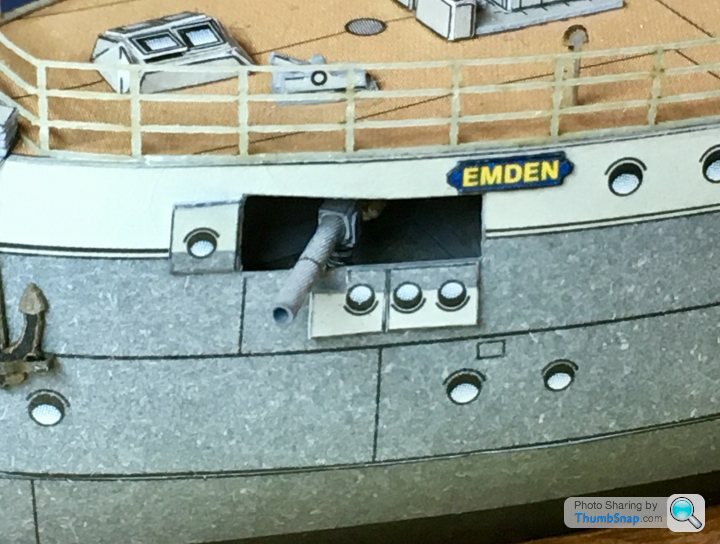
Now I’ve got to do the port side.
And cut up the casemate gun port cover panels:
I opted to fix them port on stbd. and vice-versa, in order to retain the porthole and hinge detail that would be missing if the correct sides were used. I understand that they probably should be white on their inner surfaces, but I think on balance, the complete lack of printed detail would look worse than any potential technical inaccuracy.
Now I’ve got to do the port side.
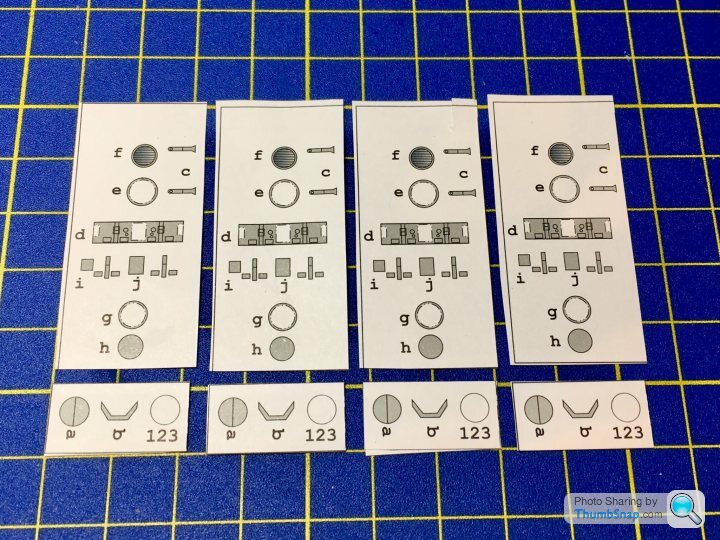
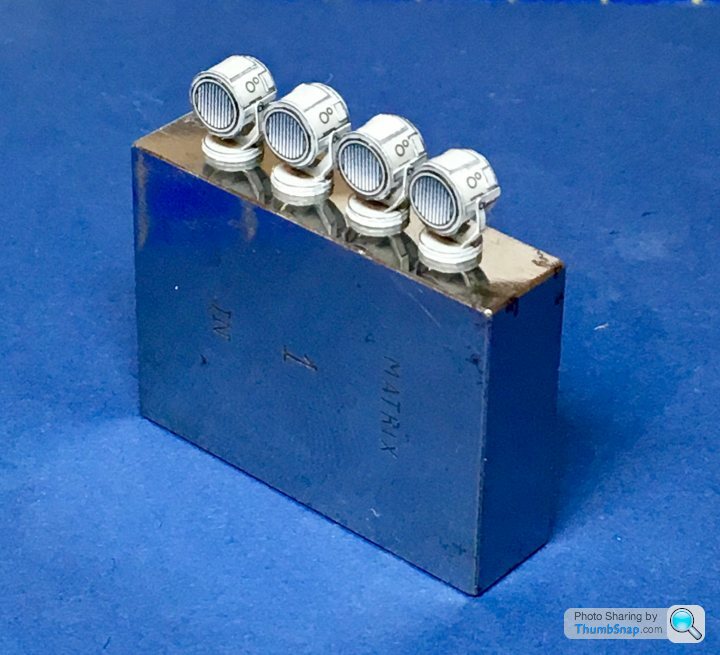
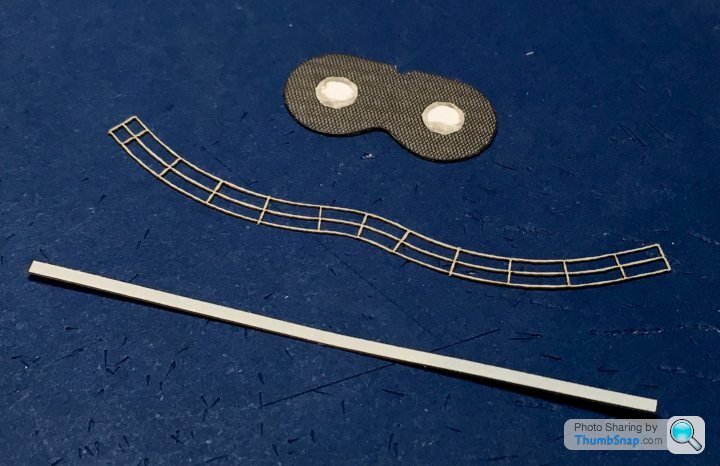
Fixed the two lower masts in place - PVA’d aluminium and brass tube up the middle to stiffen them, and bonded the protruding stubs into the tubes I put in place almost on day 1. Then assembled and fitted the searchlight and sighting (I thing that’s what it is) platform:

Still to fit the front searchlight platform.
Still to fit the front searchlight platform.
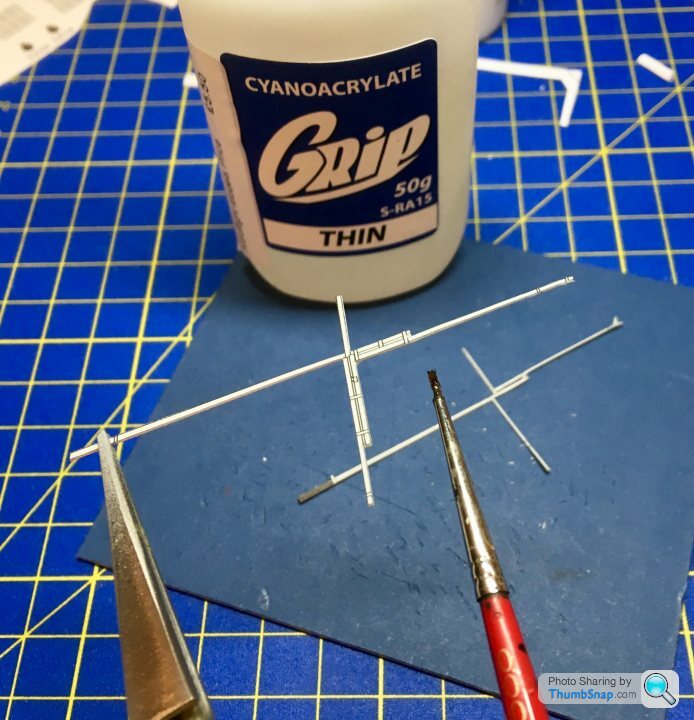
Made some progress on the masts:
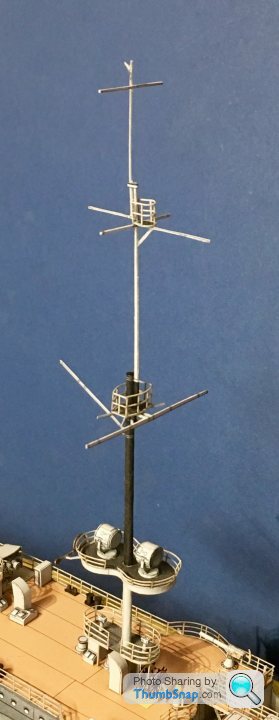
The top pieces are very flexible despite being soaked in cyano. I think the rigging up there will have to be stretched sprue in order to give some extra rigidity. It’ll still be marginal with the amount of rigging that goes between them. Anyway, just need the ladders fitting now.
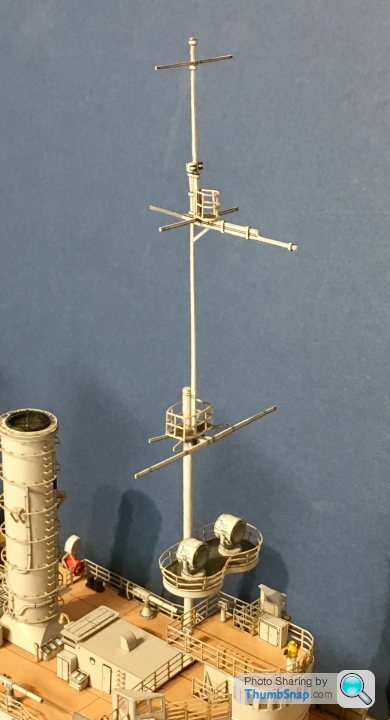
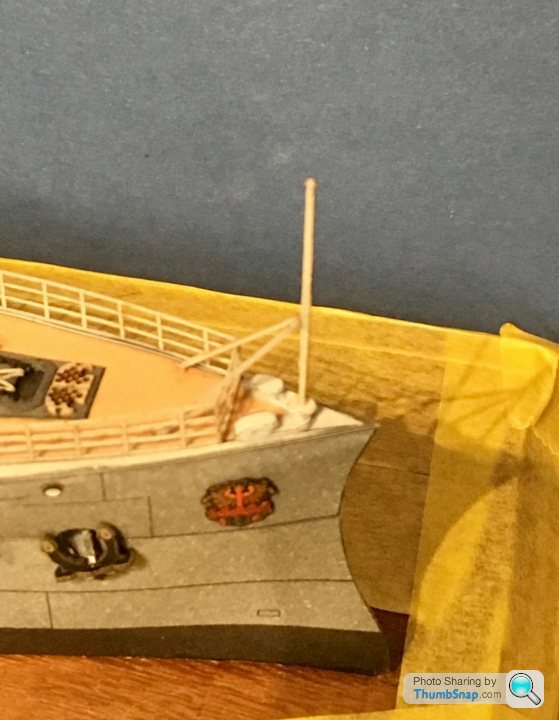
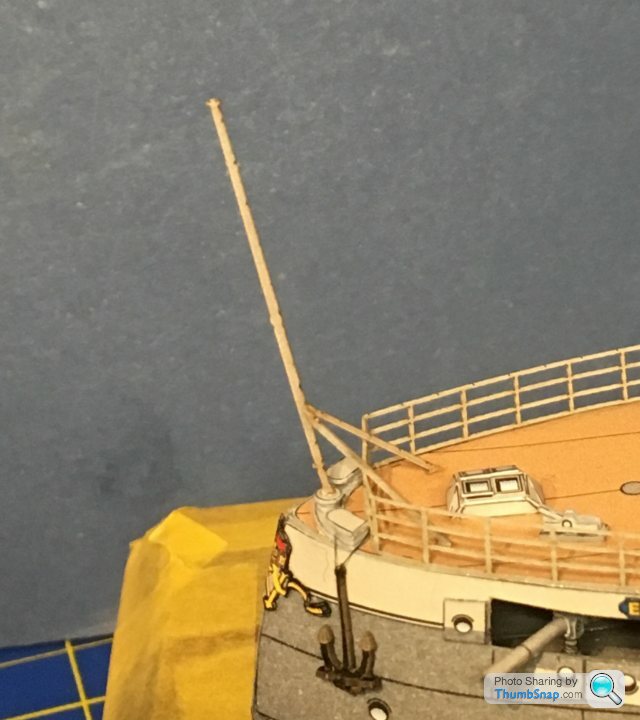
Also fitted the bow and stern flagstaffs:
The top pieces are very flexible despite being soaked in cyano. I think the rigging up there will have to be stretched sprue in order to give some extra rigidity. It’ll still be marginal with the amount of rigging that goes between them. Anyway, just need the ladders fitting now.
Also fitted the bow and stern flagstaffs:
Gassing Station | Scale Models | Top of Page | What's New | My Stuff