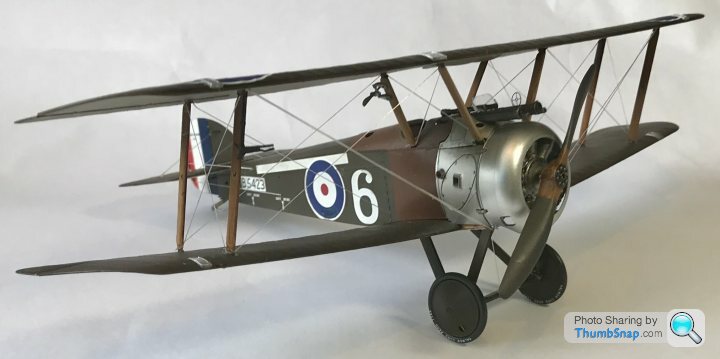
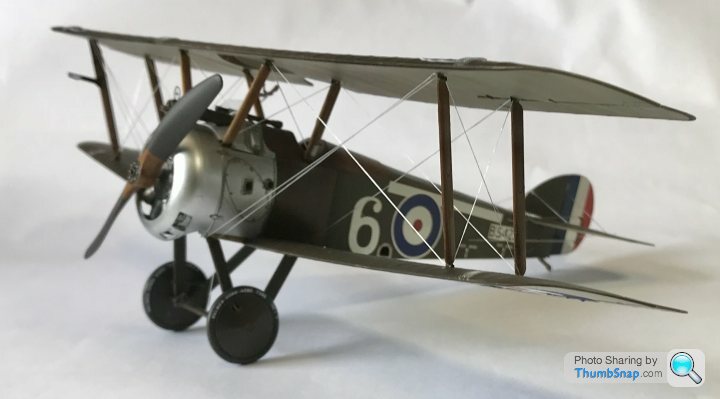
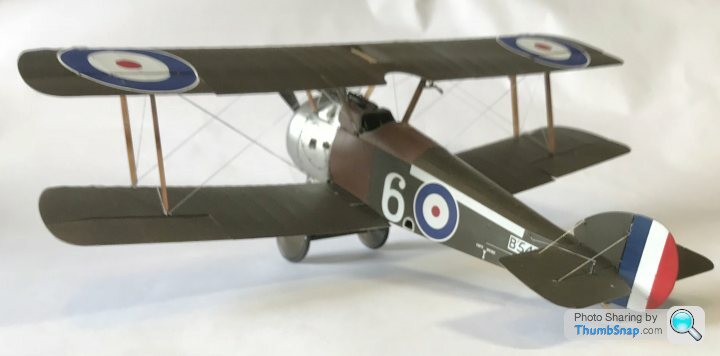
Wingnut wings 1/32 sopwith camel
Discussion


I think it’s actually in the tips section of their website. The decals are a bit rubbish regardless. The smaller stencils are ok though.
The cowl is painted using valejo metal air paint. The front parts is chrome and the back aluminium. The finish is getting better the more I get used to the paints.
The cowl is painted using valejo metal air paint. The front parts is chrome and the back aluminium. The finish is getting better the more I get used to the paints.
Krikkit said:
Regardless of the tricky bits I think that looks brilliant so far - how did you get the wood effect? Lovely.
Thanks very much.The build is on hold now until I work up the courage to do the rigging. Probably a Saturday afternoon job as the kids and wife will be at birthday parties.
The wood effect is fairly straight forward actually. It’s tamiya desert yellow, then a coat of clear gloss (I used the pledge future for this) once that is well and truly dry (I left it a couple of days to be sure) I painted with burnt umber oil paint, then used a clean flat brush in the direction of the grain. You clean the excess paint off the brush with a cloth or kitchen towel and repeat. Keep doing this until you get the desired effect. A final clear coat seals everything in after a couple of days to dry. Top tip: if you put your oil paint onto an absorbent kitchen towel a lot of the oil wicks into the towel. It’s still easy to work with, but cuts the drying time by several days.
It’s okay for smaller panels, but I’d use decals for larger ones like an Albatros (more on that in the future
 )
)robemcdonald said:
Krikkit said:
Regardless of the tricky bits I think that looks brilliant so far - how did you get the wood effect? Lovely.
Thanks very much.The build is on hold now until I work up the courage to do the rigging. Probably a Saturday afternoon job as the kids and wife will be at birthday parties.
The wood effect is fairly straight forward actually. It’s tamiya desert yellow, then a coat of clear gloss (I used the pledge future for this) once that is well and truly dry (I left it a couple of days to be sure) I painted with burnt umber oil paint, then used a clean flat brush in the direction of the grain. You clean the excess paint off the brush with a cloth or kitchen towel and repeat. Keep doing this until you get the desired effect. A final clear coat seals everything in after a couple of days to dry. Top tip: if you put your oil paint onto an absorbent kitchen towel a lot of the oil wicks into the towel. It’s still easy to work with, but cuts the drying time by several days.
It’s okay for smaller panels, but I’d use decals for larger ones like an Albatros (more on that in the future
)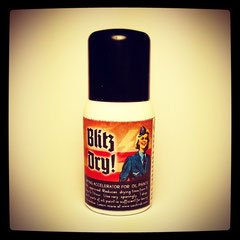
I used Winsor & Newton oils, and they were still wet after a couple of months without using any accelerator.
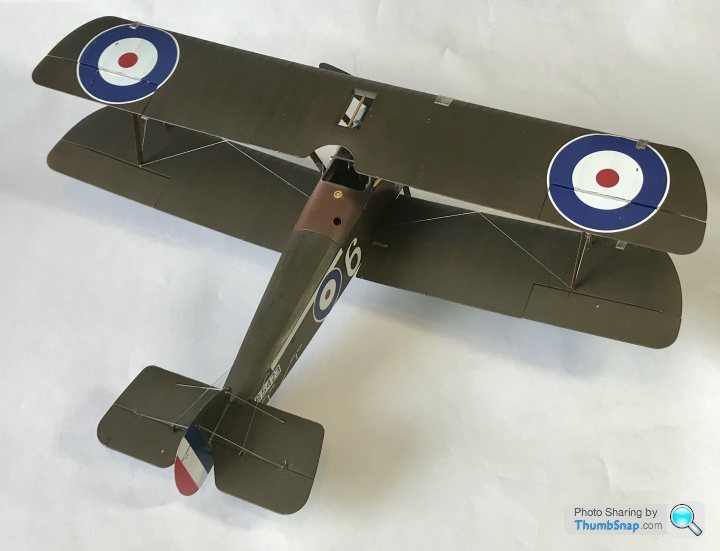
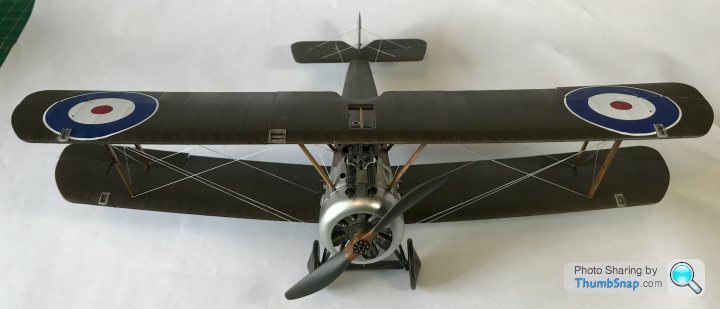
Finally finished this morning. It’s been a real challenge, as it’s my first biplane.
I have to say I’m pleased. There are plenty of things I would do differently if I had to start over though, but that’s what all this is about. We get better with every build.
Anyway I’d be pleased to hear you comments. Nothing too harsh though please.


I have to say I’m pleased. There are plenty of things I would do differently if I had to start over though, but that’s what all this is about. We get better with every build.
Anyway I’d be pleased to hear you comments. Nothing too harsh though please.
So I went to my second meeting with my local modelling club yesterday. Every two months they have a themed mini competition for the members. Last nights theme was camels... naturally I took this kit along (after a bit of dusting) and cake joint first!
To be fair only seven of us entered, but I’m still pretty chuffed.
We have a club stand at the Milton Keynes show next month and I am thinking about entering the competition there to see how I get on.
To be fair only seven of us entered, but I’m still pretty chuffed.
We have a club stand at the Milton Keynes show next month and I am thinking about entering the competition there to see how I get on.
Gassing Station | Scale Models | Top of Page | What's New | My Stuff