48 hour group build thread
Discussion


Great submarine and progress on the Spitfire chaps!
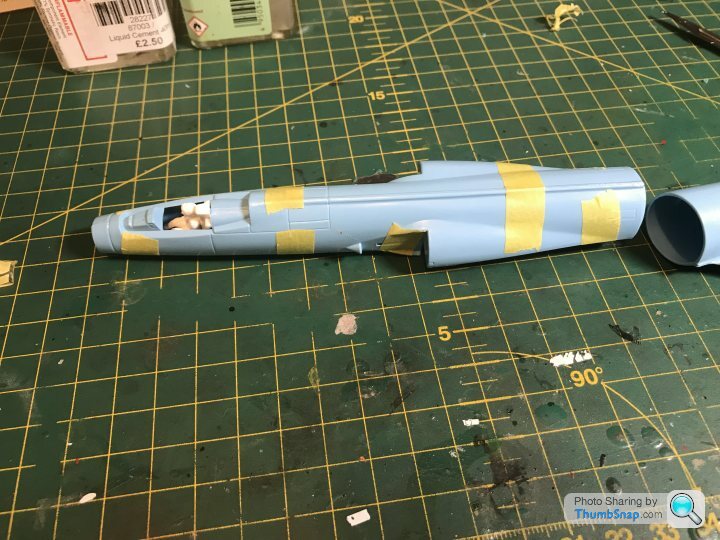
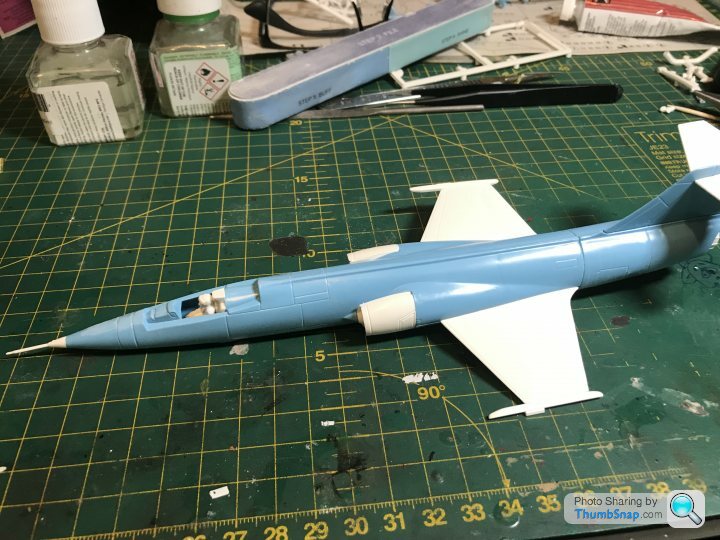
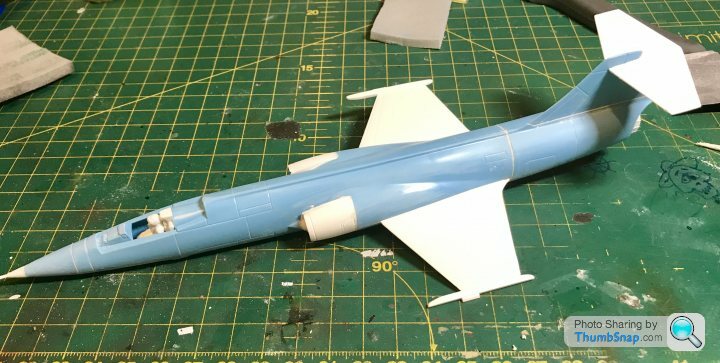
Angular plane update: A bit of shed pottering this pm saw the wheels on and a heavy Halfords primer coat after masking the canopy. A bit gappy around the canopy and root of tails but unwilling to fill and blend so colour scheme will need dark, prob black panels there to disguise.. Pottering time difficult to measure after the event but it doesn't owe much. Educational element of modelling prevails....interest piqued and YouTube docs about it saved for later.


Angular plane update: A bit of shed pottering this pm saw the wheels on and a heavy Halfords primer coat after masking the canopy. A bit gappy around the canopy and root of tails but unwilling to fill and blend so colour scheme will need dark, prob black panels there to disguise.. Pottering time difficult to measure after the event but it doesn't owe much. Educational element of modelling prevails....interest piqued and YouTube docs about it saved for later.
72twink said:
My LidL haul - with the no airbrush rule I can see the Zeke working .......
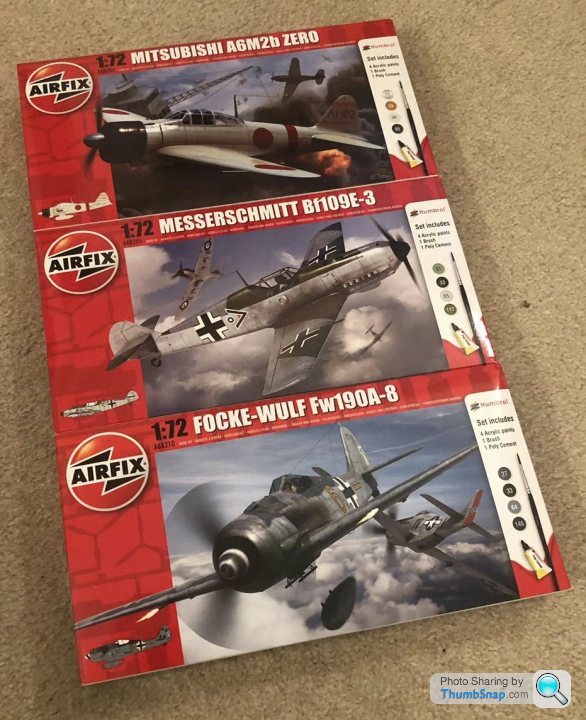
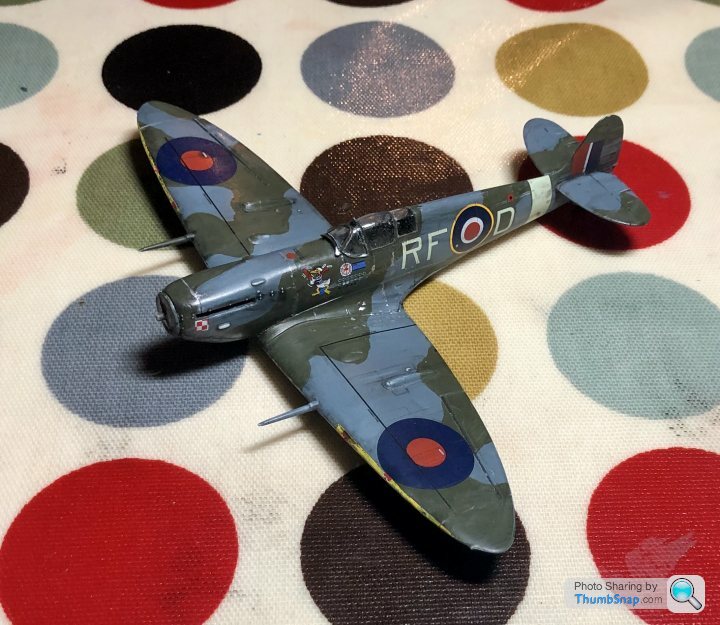
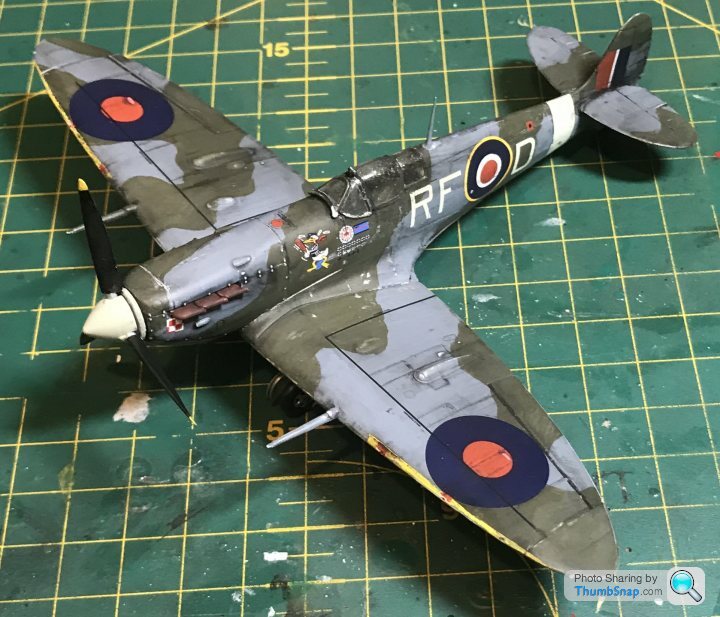
The ‘109 has a more Interesting scheme, and it’s only straight line masking. My son’s been painting his today, but in a different scheme:
The Vallejo Air paint actually brushes really well. So long as you keep calm and use several thin coats it pretty much self-levels. It looks like a disaster after the first coat, but gets better and better.The yellow isn’t masked properly yet, just trying it out.
Went into Lidl yesterday,as I liked the look of the FW 190, no kits at all,a shame as I wanted to try this as I haven't touched a kit (double checking I spelled that correctly!! ) for nigh on 40 years,and I was crap back then too.
They did have a 99 quid Roomba though. Will keep looking.
) for nigh on 40 years,and I was crap back then too. They did have a 99 quid Roomba though. Will keep looking.
kowalski655 said:
Went into Lidl yesterday,as I liked the look of the FW 190, no kits at all,a shame as I wanted to try this as I haven't touched a kit (double checking I spelled that correctly!!) for nigh on 40 years,and I was crap back then too.
They did have a 99 quid Roomba though. Will keep looking.
No excuse get yourself onto eBay and get something you bought back then ) for nigh on 40 years,and I was crap back then too. They did have a 99 quid Roomba though. Will keep looking.

kowalski655 said:
Went into Lidl yesterday,as I liked the look of the FW 190, no kits at all,a shame as I wanted to try this as I haven't touched a kit (double checking I spelled that correctly!!) for nigh on 40 years,and I was crap back then too.
They did have a 99 quid Roomba though. Will keep looking.
They're a bit random, one near me doesn't have any left (i was tempted by another kit) but i was away over the weekend and passed another which did.) for nigh on 40 years,and I was crap back then too. They did have a 99 quid Roomba though. Will keep looking.
I've not completed a kit since my young teenage years – but I got a couple of hours in yesterday (at last) so here we go. I'm building the ex-Frog Kittyhawk. I think this kit was first released in the late 1950's, so the moulds were old even before the Russians got their hands on them in the late '70s. I chose this kit because it was the second 'Airfix' that I made, aged seven, and the first my Grandmother bought me. This she probably regretted because for the next several years no trip to Nan's was complete without me dragging her to one or other of Poole's model shops, usually Setchfields who deserve a link because they're the only reason I still visit the place.
The kit came in a bag, the header featuring the Kittyhawk flying impressively low.
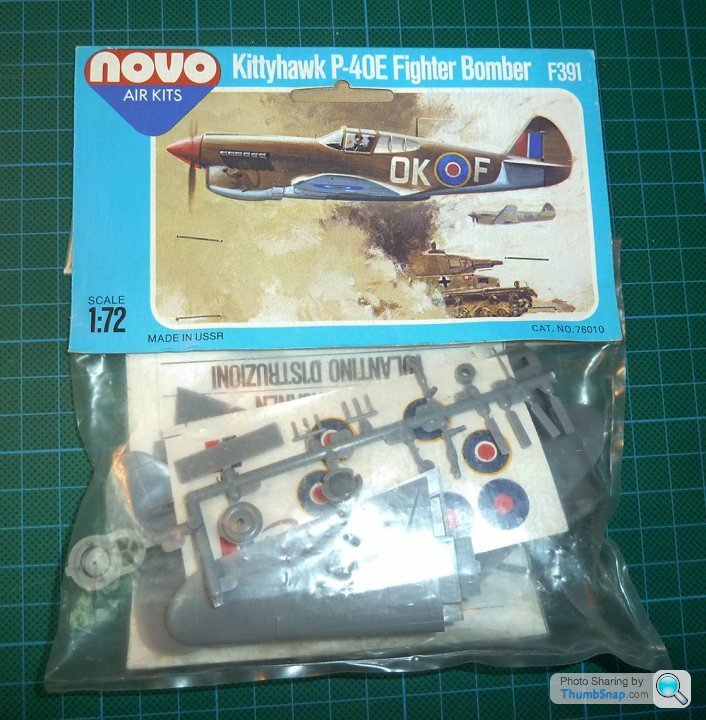
The main components of the kit itself aren't that badly moulded. Panel lines are very fine and raised – I'd rather have these than the trenches engraved all over many recent kits. Trailing edges are very thin. Fit isn't that bad, although the wing roots will need a bit of work because the locating stubs don't align that well. I'm not sure how accurate it is – not very I suspect, having checked details like the exhaust stubs and air-intake above the nose (what's that for? oil cooler?) which will need reshaping.

The transfers – as expected – are out of register. I'll try to use the letters and fin flashes but will need to cadge some roundels from somewhere – I know we're working 'out of the box' but you have to draw the line somewhere
There is no interior detail at all, and I won't be adding any. I could have farted around and fashioned a seat from the flat bit of plastic that says "Made in USSR", with a joystick from stretched sprue, but that would be silly. The exhaust stubs are stuck on the inside of the fuselage halves and poke out through (incorrectly-shaped) slots in the cowling. They're not masterpieces of moulding.

Some while later, squinting through a magnifier perched on top of a vase, I'd needle-filed and drilled them into something that looked a bit more like exhaust stubs. Still needs a little bit of cleaning up with a scalpel.

So that's it for now. The rest should go together quite quickly. The guns are way over scale, like 20mm cannon, so some stretched sprue fun still awaits.
So far I've learned that my eye's ain't what they were (and so I now need to model on some sort of raised surface to prevent hunching up like a medieval scribe) and how the macro-zoom works on my camera.
The kit came in a bag, the header featuring the Kittyhawk flying impressively low.
The main components of the kit itself aren't that badly moulded. Panel lines are very fine and raised – I'd rather have these than the trenches engraved all over many recent kits. Trailing edges are very thin. Fit isn't that bad, although the wing roots will need a bit of work because the locating stubs don't align that well. I'm not sure how accurate it is – not very I suspect, having checked details like the exhaust stubs and air-intake above the nose (what's that for? oil cooler?) which will need reshaping.
The transfers – as expected – are out of register. I'll try to use the letters and fin flashes but will need to cadge some roundels from somewhere – I know we're working 'out of the box' but you have to draw the line somewhere
There is no interior detail at all, and I won't be adding any. I could have farted around and fashioned a seat from the flat bit of plastic that says "Made in USSR", with a joystick from stretched sprue, but that would be silly. The exhaust stubs are stuck on the inside of the fuselage halves and poke out through (incorrectly-shaped) slots in the cowling. They're not masterpieces of moulding.
Some while later, squinting through a magnifier perched on top of a vase, I'd needle-filed and drilled them into something that looked a bit more like exhaust stubs. Still needs a little bit of cleaning up with a scalpel.
So that's it for now. The rest should go together quite quickly. The guns are way over scale, like 20mm cannon, so some stretched sprue fun still awaits.
So far I've learned that my eye's ain't what they were (and so I now need to model on some sort of raised surface to prevent hunching up like a medieval scribe) and how the macro-zoom works on my camera.
Edited by Yertis on Monday 3rd December 16:25
I thought I’d have another try, more within the spirit of the rules.
I bought this kit, one that I must have built ten times as a boy from eBay for £7.

Looking at the simple sprues, I was surprised to see recessed panel lines. They are so deep that they make Airfix’s recent efforts look subtle.
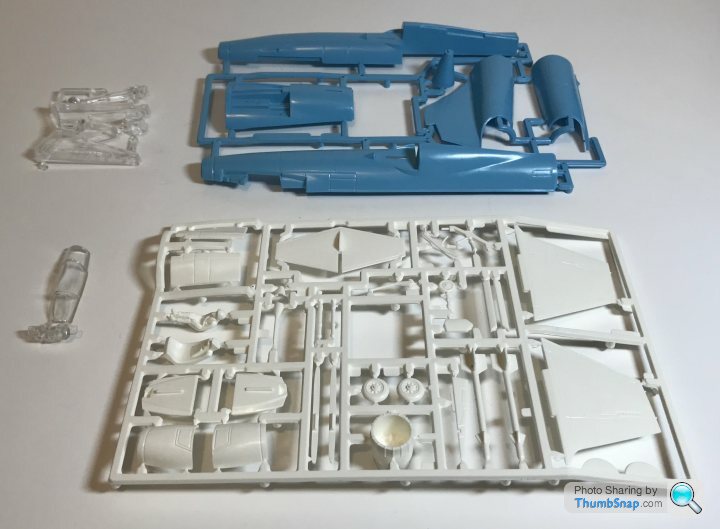
30+ year old decals look like they could be fun.

Dramatic looking fold out instructions bring back memories.

Assembly begins with the cockpit and main fuselage. The fit isn’t too bad, but not up to modern standards. The quality of the styrene is surprisingly good though and Tamiyas extra thin seems to love it.
Then it’s just a case of adding the few extra parts.


Some filing is going to be needed.


Didn’t take to long to make it acceptable.
And bringing me to the end of the first evenings work I gave it a coat of rattle can primer.
I could probably do a better job on the filing, but want to finish the kit in two evenings. So it’s very much “the art of the possible”
I bought this kit, one that I must have built ten times as a boy from eBay for £7.
Looking at the simple sprues, I was surprised to see recessed panel lines. They are so deep that they make Airfix’s recent efforts look subtle.
30+ year old decals look like they could be fun.
Dramatic looking fold out instructions bring back memories.
Assembly begins with the cockpit and main fuselage. The fit isn’t too bad, but not up to modern standards. The quality of the styrene is surprisingly good though and Tamiyas extra thin seems to love it.
Then it’s just a case of adding the few extra parts.
Some filing is going to be needed.
Didn’t take to long to make it acceptable.
And bringing me to the end of the first evenings work I gave it a coat of rattle can primer.
I could probably do a better job on the filing, but want to finish the kit in two evenings. So it’s very much “the art of the possible”
Yertis said:
My Kittyhawk has been stalled, 2.5 hours elapsed, by the need to get me eldest daughter's room redecorated before Christmas.
Also, what filler are you guys using? I bought some stuff made by "Squadron" for this exercise and it has a peculiar consistency I don't entirely like.
I use Milliput, or deluxe materials filler. Both can be smoothed with water. Milliput takes longer to dry, but I find it easier to work with.Also, what filler are you guys using? I bought some stuff made by "Squadron" for this exercise and it has a peculiar consistency I don't entirely like.
robemcdonald said:
I’m not 100% sure I’m going to brush paint this one. I think it’s goong to be an airbrush cheat.
Still an old kit in the timeframe though.
I’m moving away from the brush paint requirement too. I’ve got a Matchbox Boeing P12-E on order for a quick build, which has a lot of yellow in it. I’d far rather airbrush yellow than brush it.Still an old kit in the timeframe though.


Gassing Station | Scale Models | Top of Page | What's New | My Stuff