FORD GT40 MKII 1/12TH TRUMPETER
Discussion


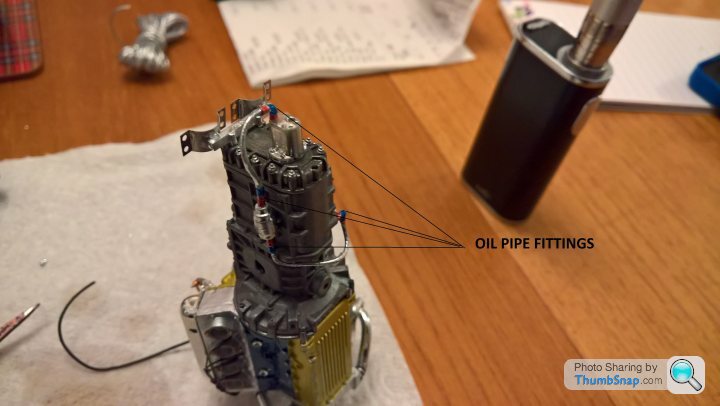

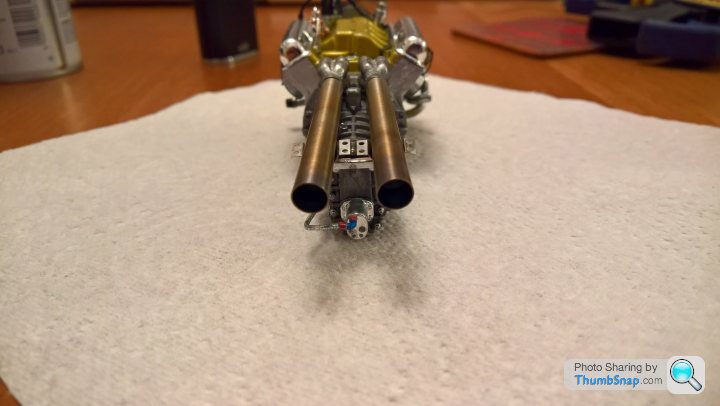
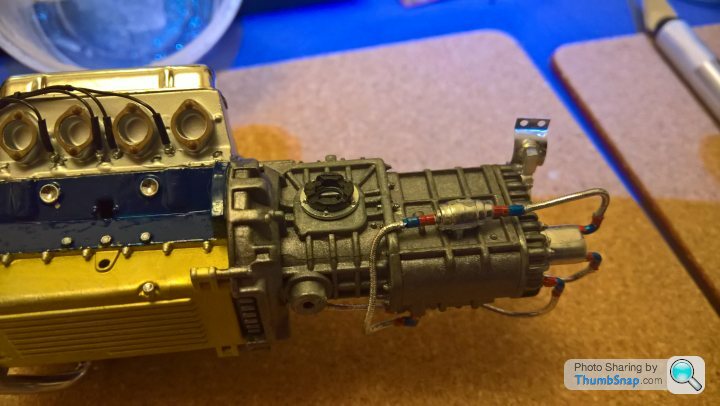
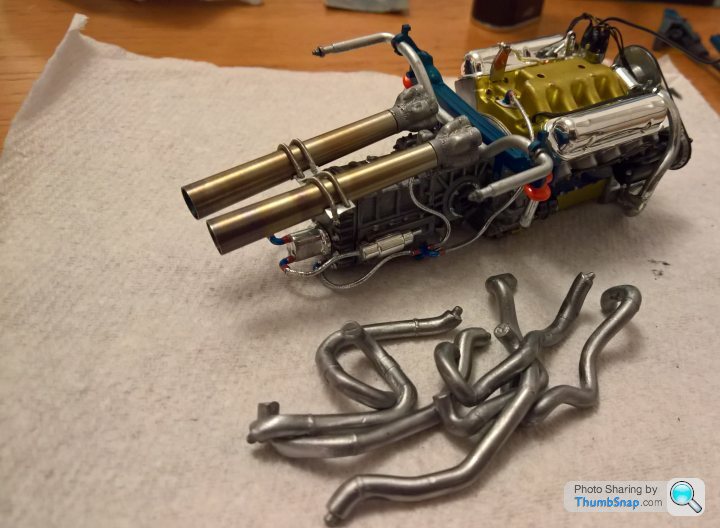
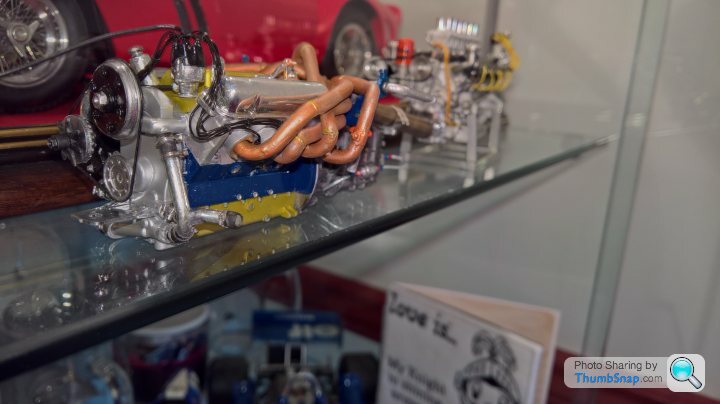
"Bundle of snakes". What a palava.
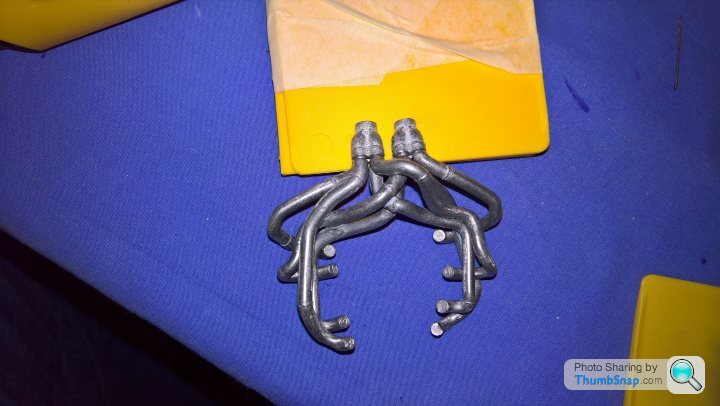
I read somewhere that the KA detail kits exhaust wernt usable, they were quite right to a certain degree as they were all out of shape, probably as they are white metal and would have bounced around in the box from Korea to wherever.I still think the Detail kit is really good. I spent 4 hours today comparing them to the plastic ones, with quite a lot of manipulating,filing. I decided to build them on the table 1st to see if they could be used and i really wanted to use them for the extra brazed detail.A small drop of CA, built up one by one Ive managed to get them to what i think will be a managable state to then do a little bit of fine tweaking.
 .
.
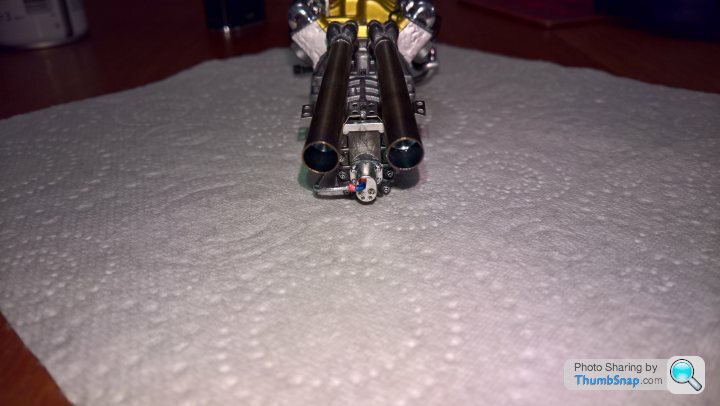
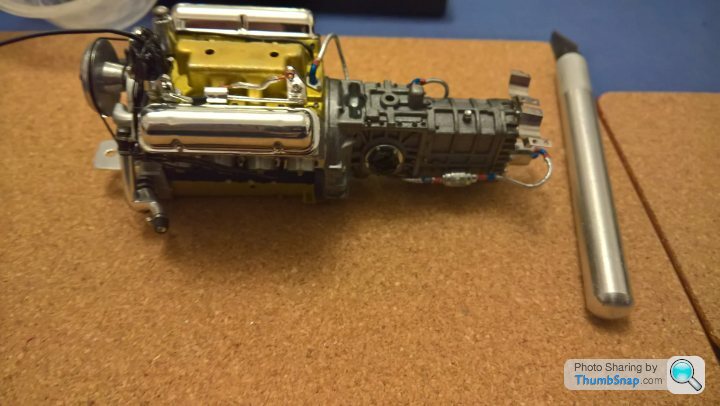
Broken down in parts again and cleaned up ready
Time for a beer or beers
I read somewhere that the KA detail kits exhaust wernt usable, they were quite right to a certain degree as they were all out of shape, probably as they are white metal and would have bounced around in the box from Korea to wherever.I still think the Detail kit is really good. I spent 4 hours today comparing them to the plastic ones, with quite a lot of manipulating,filing. I decided to build them on the table 1st to see if they could be used and i really wanted to use them for the extra brazed detail.A small drop of CA, built up one by one Ive managed to get them to what i think will be a managable state to then do a little bit of fine tweaking.
.Broken down in parts again and cleaned up ready
Time for a beer or beers

Dinoboy said:
Does look very realistic.
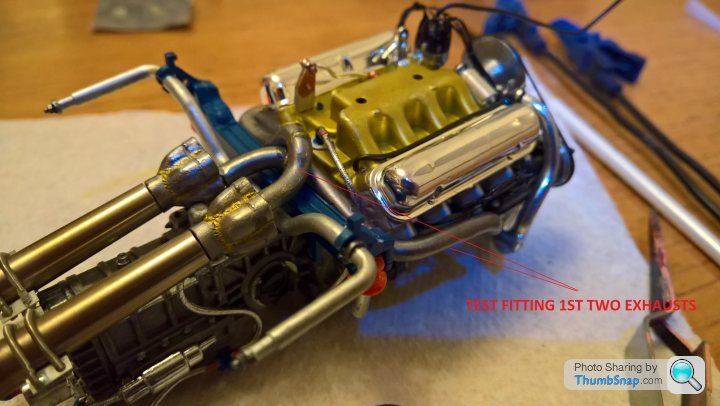
Thanks for the comment, Looks like one of the banks is running weaker than the other (i kept the heat on a bit top long)  . but thats usually the case with a real car anyway.One side always runs hotter than the other
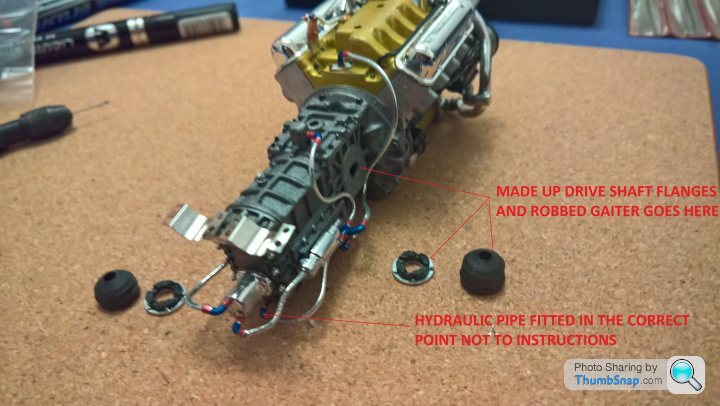
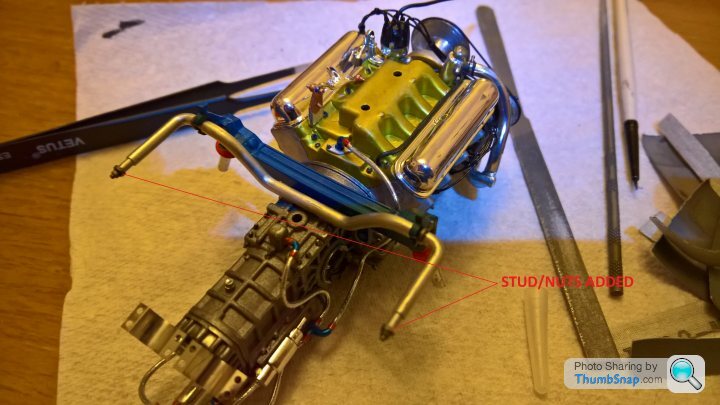
Did some more hydrailics tonight,The pipes arnt from the kit, i used my own stock. Rubbish TV tonight and with manflu (probably why TV is rubbish) had to have a distraction,made up some drive shaft flanges with M3 washers and Meng nuts, robbed a couple of gaiters from a broken model, should look good with the white metal drive shafts in the KA models detail kit.
Some photos.
 .
. .
. .
.
Hi!
Found that the interior paint and chassis was a blue colour as opposed to the outside bodywork, so im using grey primer and
a pearl blue to do the chassi/ interior. The pearl should help to reflect some light, im thinking about going the whole hog and finishing the car near as i can as the real car was rebuilt.For anyone whos interested,heres the website of the real thing. http://gt40.rkmotorscharlotte.com/car/. if you click on the gallary, the photos come up in colour
 .
.
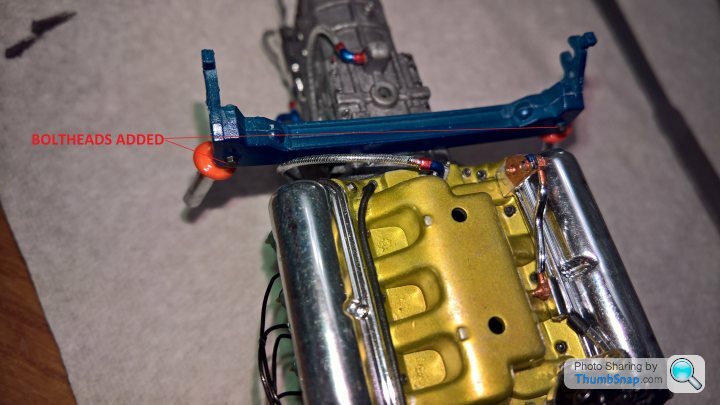
Cut the ends off the anti-rollbar as they were way to big and finished of with stud nuts to cap the ends
 .
.
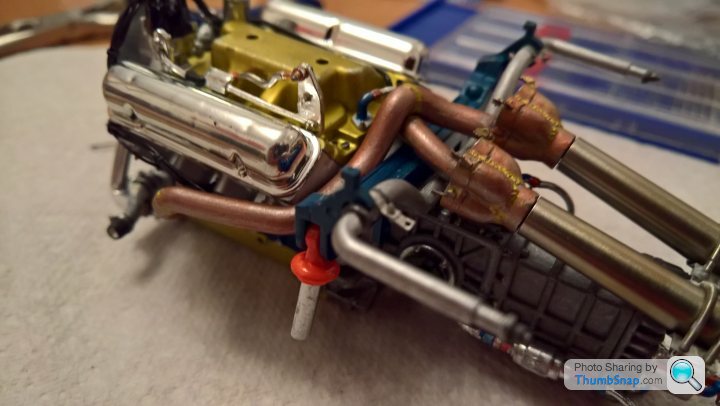
These pipes are testing my patience
 .
.
 .
.
Cheers .
Found that the interior paint and chassis was a blue colour as opposed to the outside bodywork, so im using grey primer and
a pearl blue to do the chassi/ interior. The pearl should help to reflect some light, im thinking about going the whole hog and finishing the car near as i can as the real car was rebuilt.For anyone whos interested,heres the website of the real thing. http://gt40.rkmotorscharlotte.com/car/. if you click on the gallary, the photos come up in colour
.Cut the ends off the anti-rollbar as they were way to big and finished of with stud nuts to cap the ends
.These pipes are testing my patience
..Cheers .
CanAm said:
That's the one!
One thing I only recently found out was that the 'monocoques' were dark blue, not black. Most of the period photos were black and white and you have to be very careful that photos you're using aren't of restored cars. Except this one!
Of course, as a 'What If' car, you could have had it in any finish you liked.
.One thing I only recently found out was that the 'monocoques' were dark blue, not black. Most of the period photos were black and white and you have to be very careful that photos you're using aren't of restored cars. Except this one!
Of course, as a 'What If' car, you could have had it in any finish you liked.
Edited by CanAm on Monday 25th March 18:36
What do you think of the blue ive used on the rear cross member, looks like ive relented to building it this way. Any critisism (good or bad) will be appreciated before i go too far with it. Cheers
henryk001 said:
What do you think of the blue ive used on the rear cross member, looks like ive relented to building it this way. Any critisism (good or bad) will be appreciated before i go too far with it. Cheers
There's some lovely colour photos of a full size tub in THIS THREAD. The builder says the paint code is as per the original. It looks perhaps a touch more grey than the colour which you have used, but it's hard to tell.
CanAm said:
henryk001 said:
What do you think of the blue ive used on the rear cross member, looks like ive relented to building it this way. Any critisism (good or bad) will be appreciated before i go too far with it. Cheers
There's some lovely colour photos of a full size tub in THIS THREAD. The builder says the paint code is as per the original. It looks perhaps a touch more grey than the colour which you have used, but it's hard to tell.
AshVX220 said:
In the car build thread above that looks almost "RAF Uniform" Bluey/Grey to me (but then I'm colour blind, so probably not the best judge).
Yes, to me it looks very like RAF vehicle blue, maybe a bit darker, and that's what I've gone for. I'm building a Fujimi 1/24 GT40, so it's kerbside only. The tub will only be visible inside the cockpit, so being a little bit on the light side should look ok. Im doing it in Grey primer and Tamiya pearl blue TS 89. Reason being smaller scales dont tend to promote the true colour due to lack of light reflection.
The pearl in the paint im using will hopefully counteract the issue. Im concearned that if i use the the true colour code it will end up being too dark on the model.Im sticking to the RK motors web-site for my build,the blue looks lighter to me on there. Might be right, might be wrong but hey anyway its close enough.
The pearl in the paint im using will hopefully counteract the issue. Im concearned that if i use the the true colour code it will end up being too dark on the model.Im sticking to the RK motors web-site for my build,the blue looks lighter to me on there. Might be right, might be wrong but hey anyway its close enough.
Edited by henryk001 on Friday 5th April 13:09
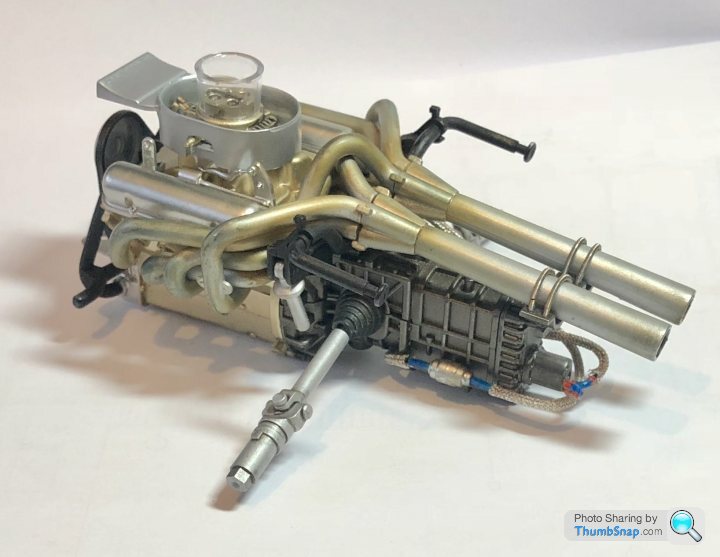
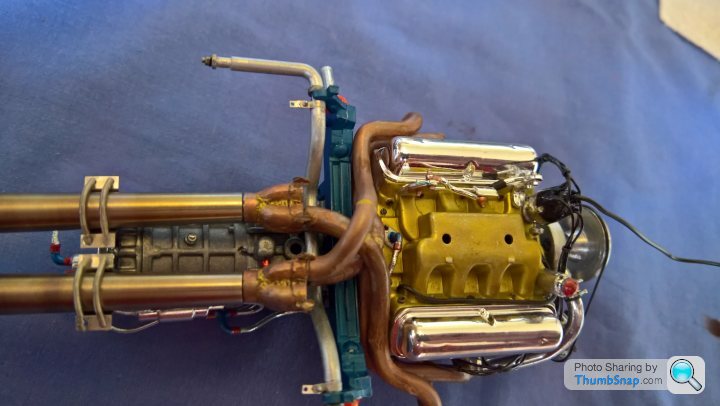
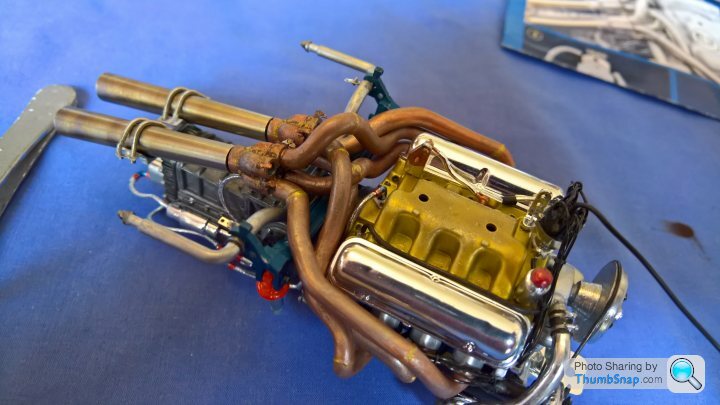
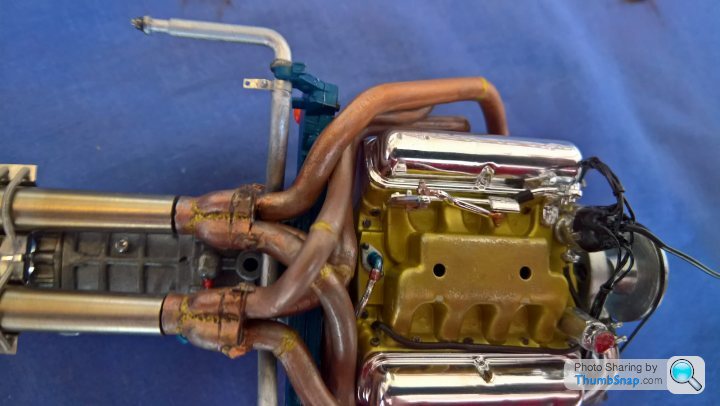
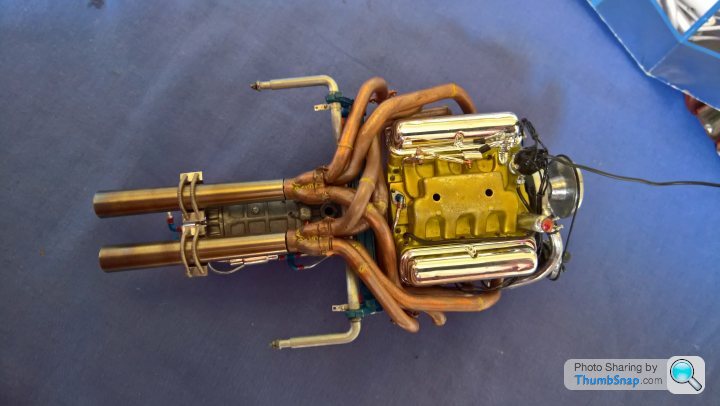
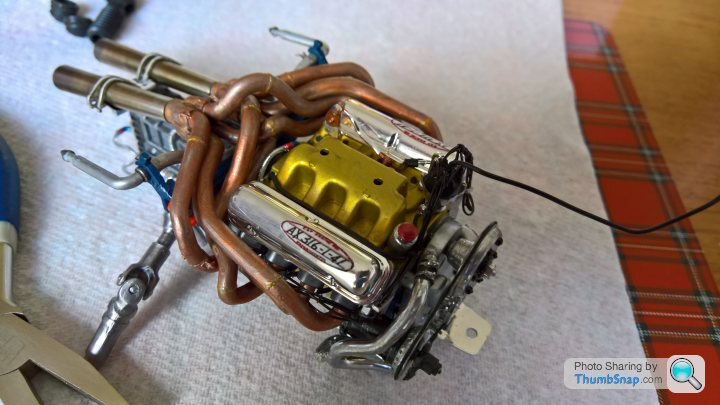
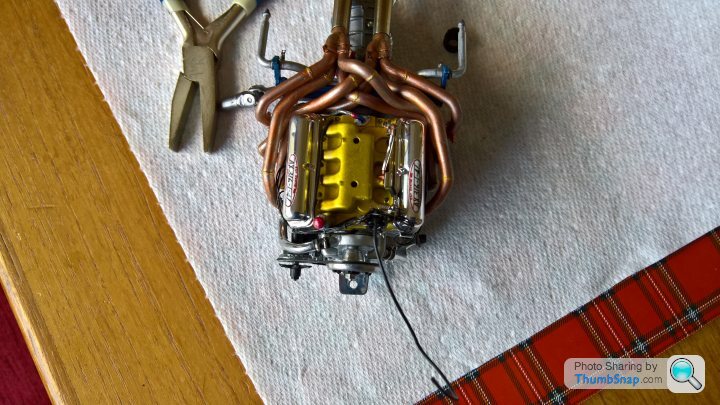
After a lot of manipulating added the bundle of snakes and some more KA detail, i thought to leave the pipes a bit rough and dinged as they would be on a car.
Close up looks rough i think but looks ok to my eyes .Used red gold and black wash for the colour.
Some pics of the build up.Hope it helps anyone.
 .
.
 .
.
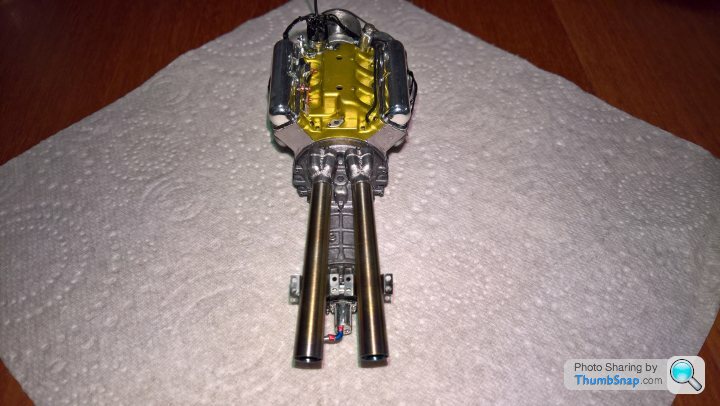
1st + 2nd
 .
.
3rd + 4th.
 .
.
5th + 6th.
 .
.
 .
.
7th + 8th.
 .
.
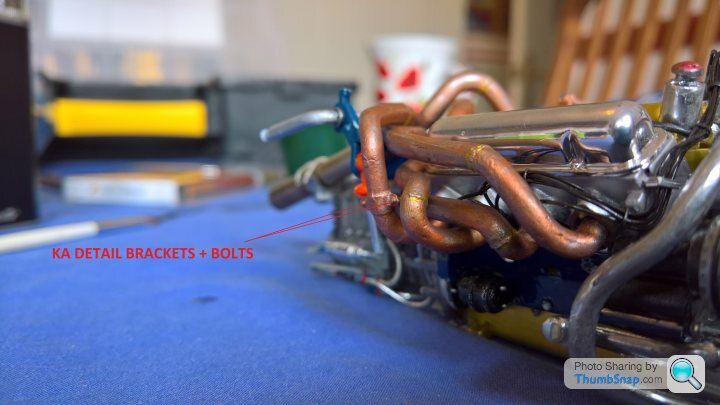
Lastly brackets from KA fitted to the last pipes
 .
.
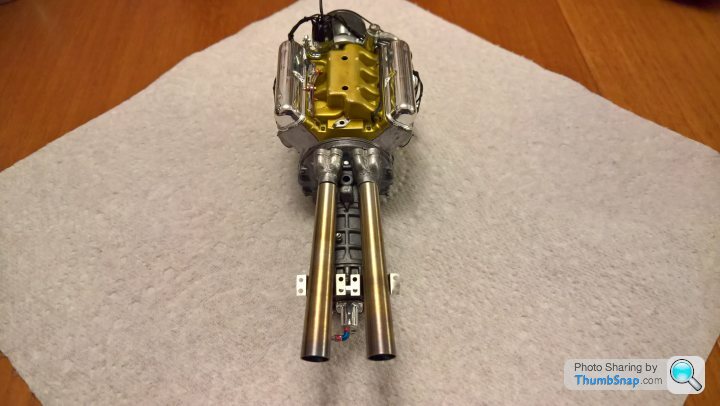
Thank goodness its over.
 .
.
Some finishing up to do. Drive shafts next. I read somewhere that the KA detail kit dropped a clanger on the driveshafts, that they are approx 8mm too long. If thats the case im going to cut them,drill out one end so the other part slides in like the real thing then i wont have any fitting issues.
One hit at this, if i mess up then im going to have to use the plastic ones instead.
Cheers.
Close up looks rough i think but looks ok to my eyes .Used red gold and black wash for the colour.
Some pics of the build up.Hope it helps anyone.
. .1st + 2nd
.3rd + 4th.
.5th + 6th.
..7th + 8th.
.Lastly brackets from KA fitted to the last pipes
.Thank goodness its over.
.Some finishing up to do. Drive shafts next. I read somewhere that the KA detail kit dropped a clanger on the driveshafts, that they are approx 8mm too long. If thats the case im going to cut them,drill out one end so the other part slides in like the real thing then i wont have any fitting issues.
One hit at this, if i mess up then im going to have to use the plastic ones instead.
Cheers.
Edited by henryk001 on Friday 5th April 13:55
henryk001 said:
Im doing it in Grey primer and Tamiya pearl blue TS 89. Reason being smaller scales dont tend to promote the true colour due to lack of light reflection.
The pearl in the paint im using will hopefully counteract the issue. Im concearned that if i use the the true colour code it will end up being too dark on the model.Im sticking to the RK motors web-site for my build,the blue looks lighter to me on there. Might be right, might be wrong but hey anyway its close enough.
My feelings too; even more so on my smaller model. Whatever, yours will be a lot more accurate than the vast majority of models (even expensive commercial ones) over the past 50-odd years. The pearl in the paint im using will hopefully counteract the issue. Im concearned that if i use the the true colour code it will end up being too dark on the model.Im sticking to the RK motors web-site for my build,the blue looks lighter to me on there. Might be right, might be wrong but hey anyway its close enough.
CanAm said:
My feelings too; even more so on my smaller model. Whatever, yours will be a lot more accurate than the vast majority of models (even expensive commercial ones) over the past 50-odd years.
.Fujimi models are very nice in detail on 1/24th scale, pitty they didnt do a 1/12th version.
Wow. Your very encouraging comment on my build makes me feel like im achieving much more than just buildiing a model. Thankyou very much.
Made up the rocker cover waterslides this morning.Good enough i think.
Waterslides.
 .
.
 .
.
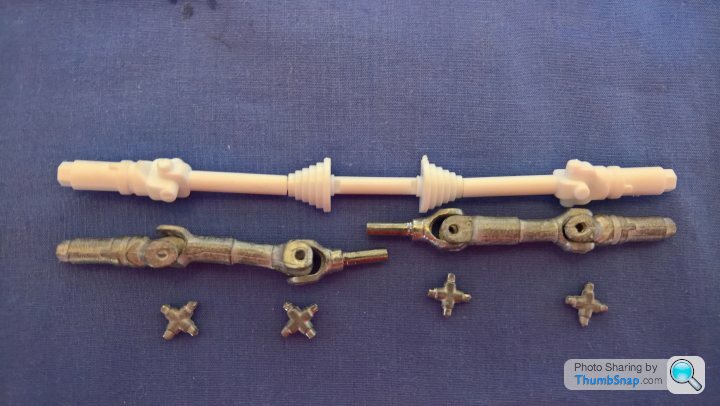
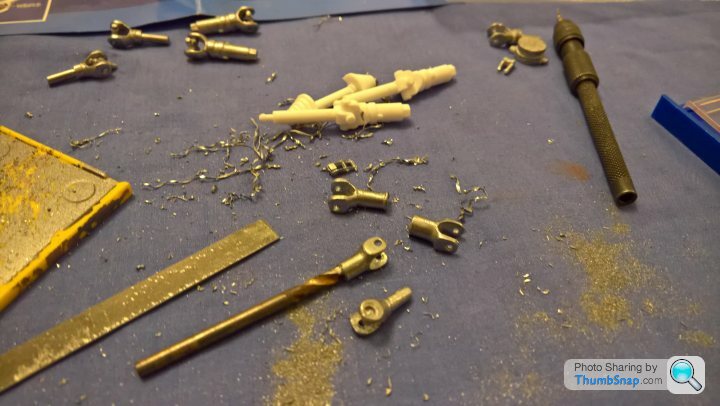
Now onto the drive shafts, had to do some re-engineering as the KA driveshafts were way to long.Had to cut the shafts in half .Even on there instruction sheets they dont show the uprights connected because without major modification it would put the rears on a massive negative camber and would have looked really wierd.
 .
.
 .
.
 .
.
 .
.
One down, one to go. Cheers for now
Waterslides.
..Now onto the drive shafts, had to do some re-engineering as the KA driveshafts were way to long.Had to cut the shafts in half .Even on there instruction sheets they dont show the uprights connected because without major modification it would put the rears on a massive negative camber and would have looked really wierd.
....One down, one to go. Cheers for now


 .
.
Both shafts done and ready to fit later on.
 .
.
What rubbish clunky chromed round bit supposed to be the oil filter that sits on the chassis looks as bad as the picture in the instructions.The rest of the kits ok.
Cut it off the tab and did my own, then stuck it back on the tab.
 .
.
 .
.
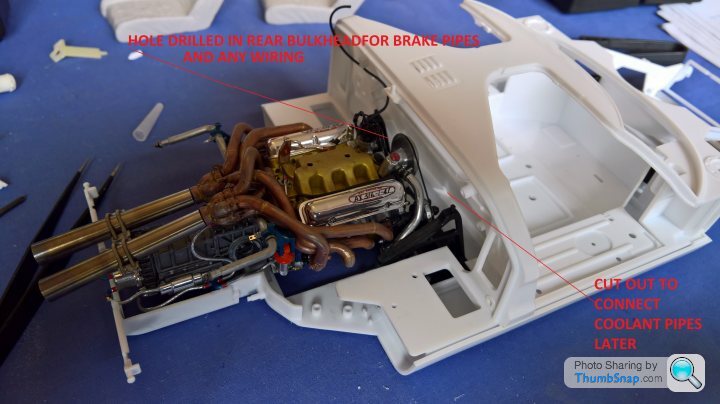
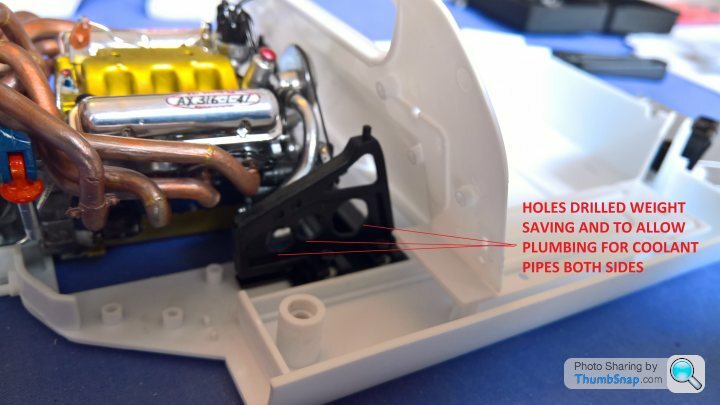
Did some more mods before i start to paint the blue onto the monocoque.Made some extra holes in the bulkhead for some extra detail, like coolant, wiring , brake pipes etc.Started to file off edges and check/correct the fit before gluing, painting.
 .
.
 .
.
Cheers
.What rubbish clunky chromed round bit supposed to be the oil filter that sits on the chassis looks as bad as the picture in the instructions.The rest of the kits ok.
Cut it off the tab and did my own, then stuck it back on the tab.
..Did some more mods before i start to paint the blue onto the monocoque.Made some extra holes in the bulkhead for some extra detail, like coolant, wiring , brake pipes etc.Started to file off edges and check/correct the fit before gluing, painting.
..Cheers
Gassing Station | Scale Models | Top of Page | What's New | My Stuff