FORD GT40 MKII 1/12TH TRUMPETER
Discussion


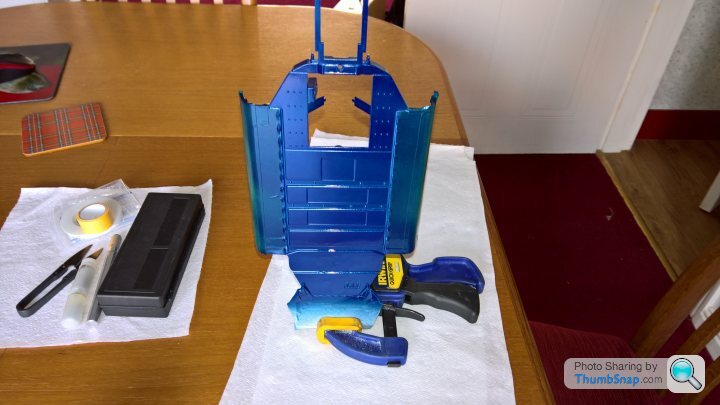
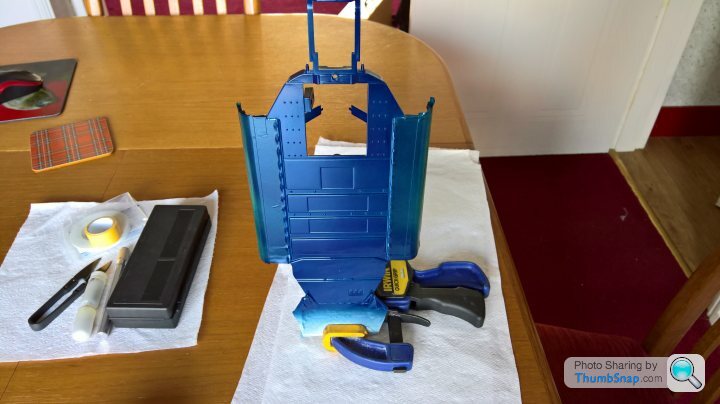
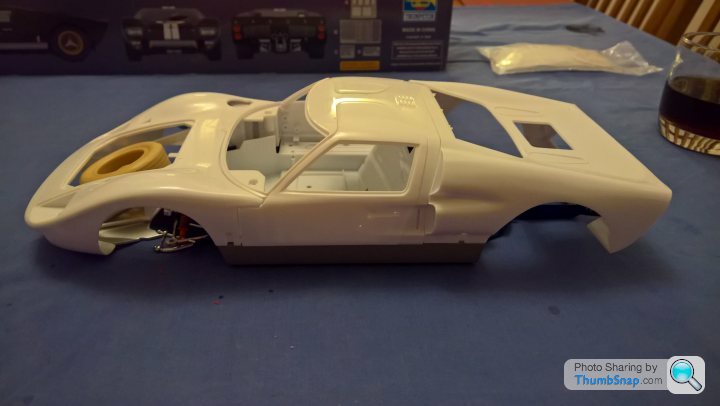
Hi! After a bit of fettling, adding some parts on the 1st stage of build, masked off the front tray and sidepods then primed up ready for the blue i chose.
 .
.
 .
.
Used tamiya pearl blue TS89 an experiment to try and reflect more light at this scale, sprayed loads in areas really not required but wanted to see the overall picture.1st coat Im pleased with the result.So wil leave it there. Just need to touch in some inside edges up.Open to any criticism .
Heres photos with flash and without. Also my dining room lights were on .
WITH FLASH
 .
.
WITHOUT FLASH
 .
.
WITH FLASH
WITHOUT FLASH.
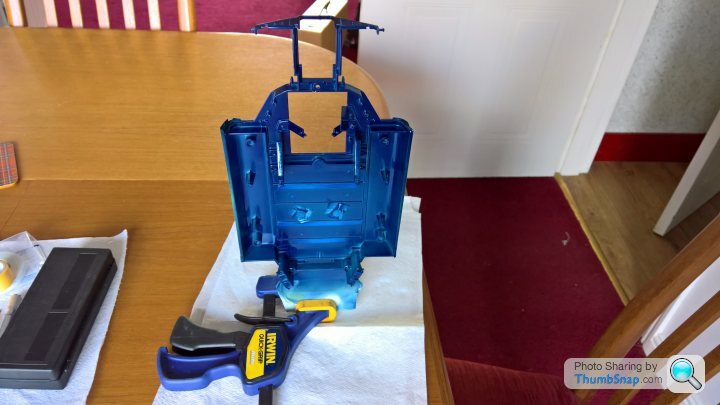
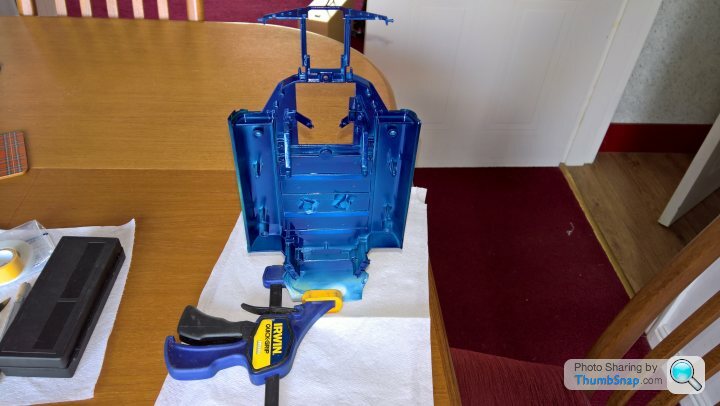
Im pleasantly pleased with the outcome, compared to the real RK motors build pictures. One more coat will make it a bit darker but once everything else is put in place, should dull the colour down i think.
Cheers
..Used tamiya pearl blue TS89 an experiment to try and reflect more light at this scale, sprayed loads in areas really not required but wanted to see the overall picture.1st coat Im pleased with the result.So wil leave it there. Just need to touch in some inside edges up.Open to any criticism .
Heres photos with flash and without. Also my dining room lights were on .
WITH FLASH
.WITHOUT FLASH
.WITH FLASH
WITHOUT FLASH.
Im pleasantly pleased with the outcome, compared to the real RK motors build pictures. One more coat will make it a bit darker but once everything else is put in place, should dull the colour down i think.
Cheers
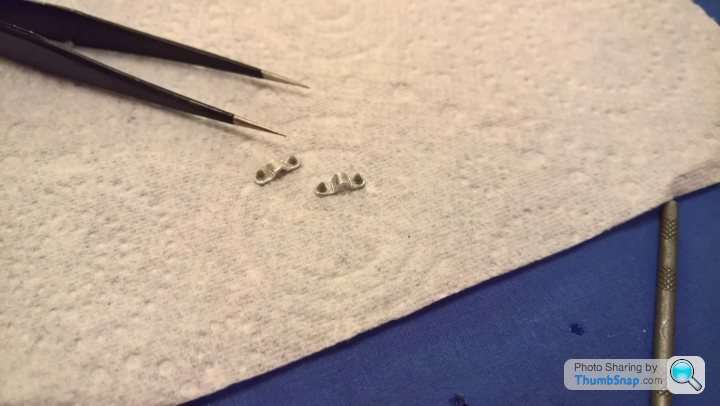
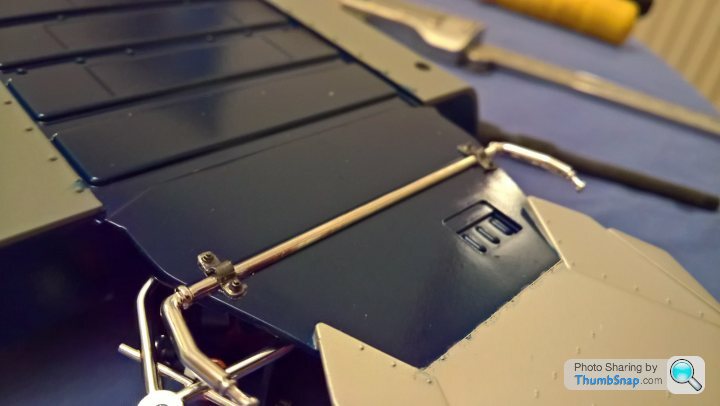
Made up the coolant pipes the other night and pipes from the crankcase to the oil filter and then to the oil cooler .
Some photos.
 .
.
Just need to make some hose clips and paint the pipes
 .
.
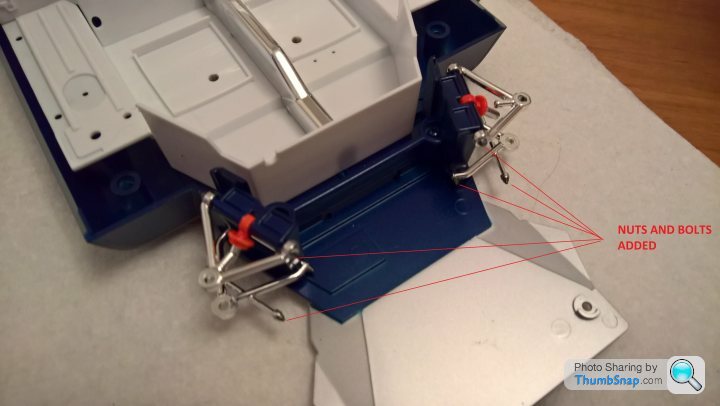
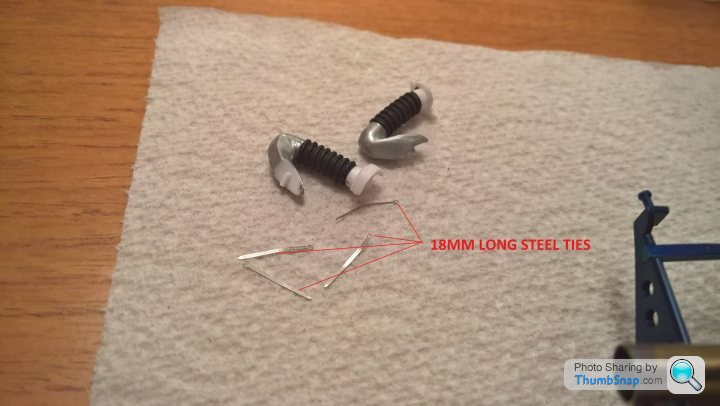
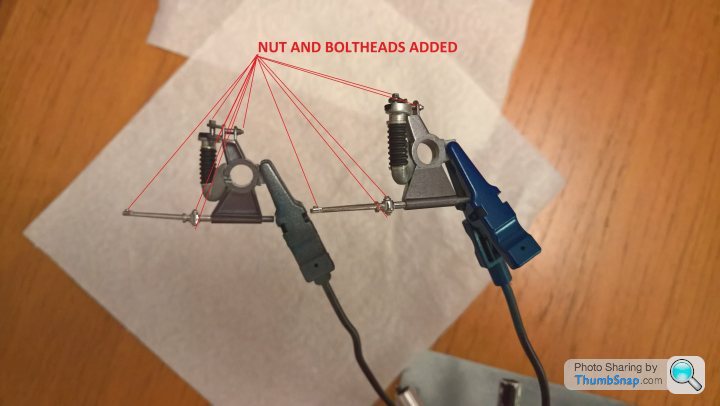
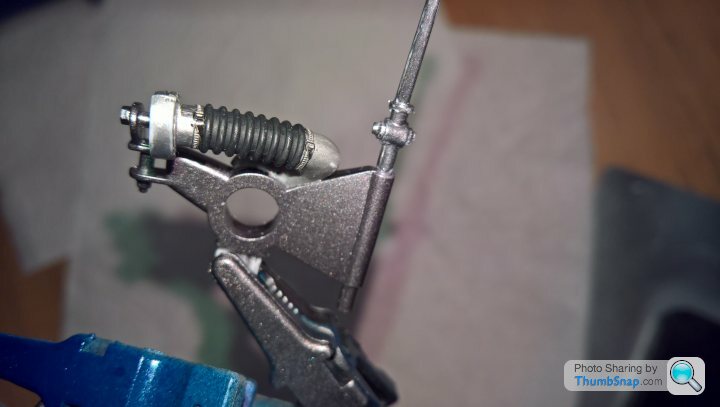
Kept the chrome on the wishbones as this was used in the early days before anodising came around, tried to enhance the toylike look of them by adding nuts
 .
.
 .
.
 .
.
 .
.
All fits ok, ready to move on.
Paint the side pods Black .
Cheers for now.
Some photos.
.Just need to make some hose clips and paint the pipes
.Kept the chrome on the wishbones as this was used in the early days before anodising came around, tried to enhance the toylike look of them by adding nuts
....All fits ok, ready to move on.
Paint the side pods Black .
Cheers for now.
mrkipling said:
Great thread and you are doing a great job. I managed to track down this kit and will be attempting to build 1046 one day...
Did you draw the valve cover decals yourself? They look spot on.
.Did you draw the valve cover decals yourself? They look spot on.
Thank you for your comment. I did the decals myself and printed them onto white water-slide paper, let it dry overnight then sealed them 1 coat with my wife's fingernail acrylic base coat, later on cut them round, dipped in water. Looks OK, slightly blurry on the small red lettering if you look at it with a magnifying glass.
At this scale im happy with the result.I should have left it longer to cure, but how perfect can perfect be?
Im sure ive kept the file,i did a few in a line just in case i messed up,so if you PM me i can e-mail the file over to you, no cost its just a hobby
 .
.PS. The extra detail im doing on this thread isnt in the kit itself, im just adding to it to enhance more detail. There is a couple of mistakes in the instructions so far but easy enough to correct. Cheers
Edited by henryk001 on Friday 12th April 13:52
mrkipling said:
That's a very kind offer, PM sent thank you.
I took this shot of 1046 at LM in 2016 after the RK restoration
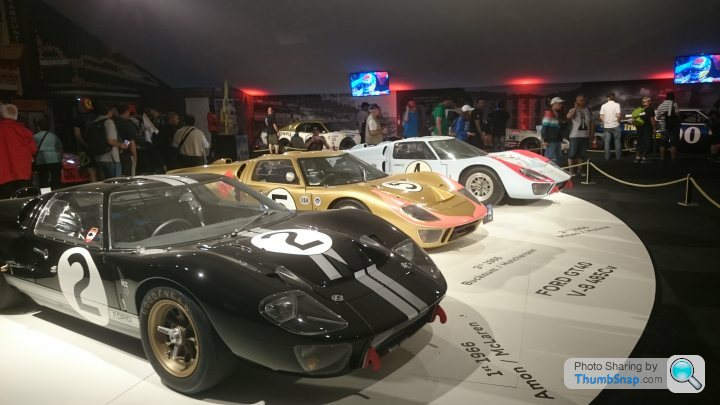
Very nice ,what a fantastic privalige to see all three in a row in real life.Im in admiration. Im due for a track day this year for a drive in whats more than likely a kit version in gulf livery. But anyway as im a V8 petrol head it will do for a experience.I took this shot of 1046 at LM in 2016 after the RK restoration
Cheers
So i did some more today and gave myself a teaser.
Front shocks shortened (cut off approx 2mm off the piston,springs and cylinder, otherwise they wont work and from what ive seen on other threads the ride height is way to high, ive also seen that the toe angle is way off and the rack needs shortening.Front anti rollbar clamps made.Coolant pipes finished off with made up hose clips and then a semi-assembly to see the fit of the bodywork, just the top of the doors need a adjustment and edges need cleaning up
 .
.
 .
.
 .
.
 .
.
 .
.
 .
.
 .
.
Time for Beers Cheers
Front shocks shortened (cut off approx 2mm off the piston,springs and cylinder, otherwise they wont work and from what ive seen on other threads the ride height is way to high, ive also seen that the toe angle is way off and the rack needs shortening.Front anti rollbar clamps made.Coolant pipes finished off with made up hose clips and then a semi-assembly to see the fit of the bodywork, just the top of the doors need a adjustment and edges need cleaning up
.......Time for Beers Cheers


robemcdonald said:
You’re doing a great job on this build and you’re not hanging around either. I completely approve.

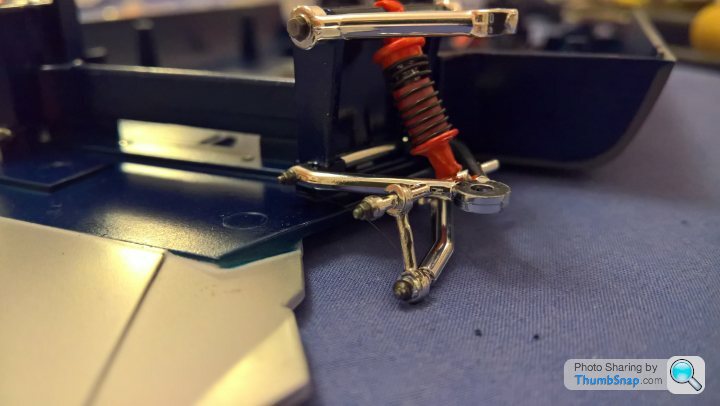
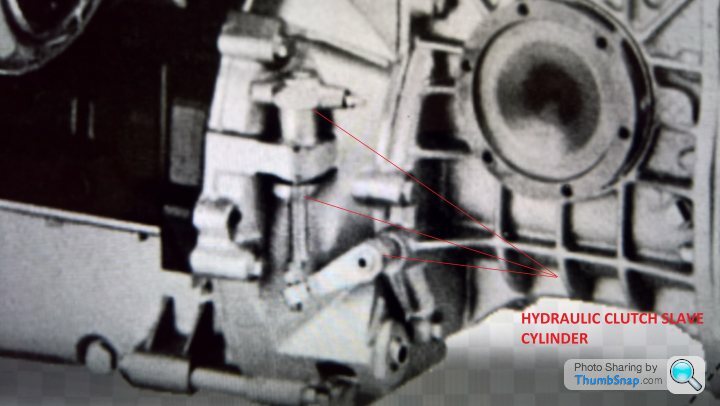
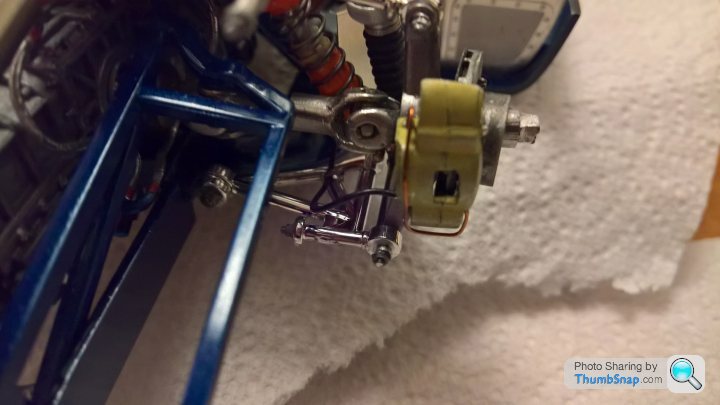
I think its more than likely taking less time to do, due to most parts being made of plastic so reworking and finishing is easier. Really enjoying making the mods and trying to evoke it to the origonal car.Did some more last night. After spraying the side pods Black. Assembled the front supension, shortened the ride height Approx 2mm to suit the real car and made up the clutch slave cylinder to plumb a pipe to later on.
 .
.
The real cars ride height.
 .
.
Mine after shortening the shocks.
 .
.
 .
.
Clutch slave cylinder.
 .
.
Mine.

Back to work. Cheers for now
.The real cars ride height.
. Mine after shortening the shocks.
. .Clutch slave cylinder.
.Mine.
Back to work. Cheers for now
Edited by henryk001 on Wednesday 17th April 12:33
Hi! some more photos of work done over the last week.
 .
.
Test fitted the rack and confirms from what ive read that the part is way too long.Wheels facing out. looked terrible. Cut approx 2mm, sleeved it to get
the wheels slightly towing in
 .
.
 .
.
 .
.
 .
.
 .
.
Some fiddling around now.
After assembling the uprights, realised that the shafts although looks the part, they are far to sloppy 0.5mm play and would cause the wheels to have a
massive negative camber when the wheels are fitted ,also leaving it like this would cause the ride height to be really low so i built up the shafts with CA so they both would fit snuggly in the bores.
 .
.
Rear calipers made up.
 .
.
Finished driveshafts look great compared to the plastic ones.
 .
.

After cleaning up the shafts,all looks ok now and square to the upright bores. What a palava but had to be done so i can get on with the next stage of building.
Cheers for now
.Test fitted the rack and confirms from what ive read that the part is way too long.Wheels facing out. looked terrible. Cut approx 2mm, sleeved it to get
the wheels slightly towing in
.....Some fiddling around now.
After assembling the uprights, realised that the shafts although looks the part, they are far to sloppy 0.5mm play and would cause the wheels to have a
massive negative camber when the wheels are fitted ,also leaving it like this would cause the ride height to be really low so i built up the shafts with CA so they both would fit snuggly in the bores.
.Rear calipers made up.
.Finished driveshafts look great compared to the plastic ones.
.After cleaning up the shafts,all looks ok now and square to the upright bores. What a palava but had to be done so i can get on with the next stage of building.
Cheers for now
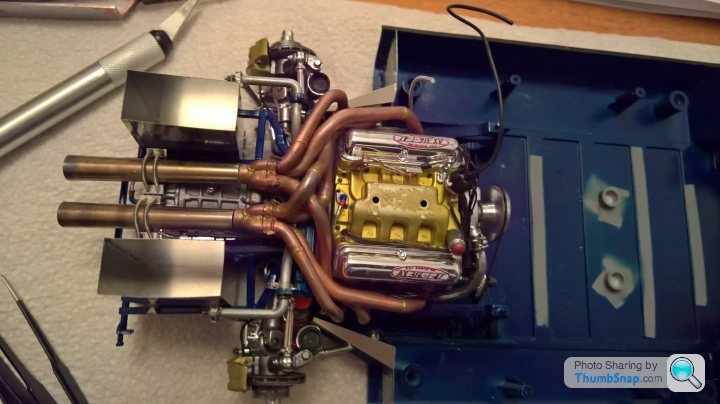
More work the other night.
Finished of fitting the flex brake pipes and cable tied on the rears.
 .
.
 .
.
 .
.
Rear shot looks ok to me.
 .
.
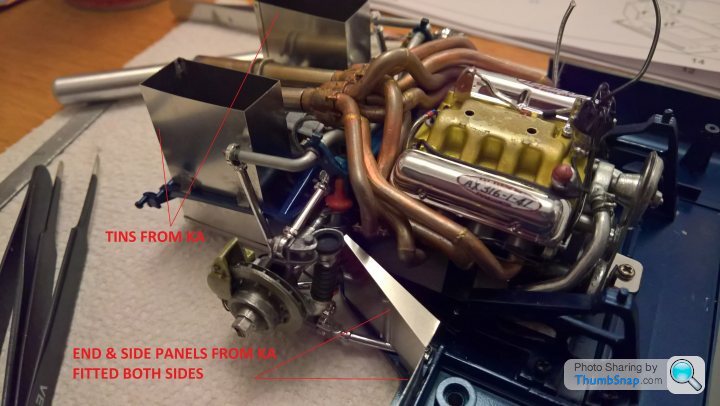
Fitted the photo etched rear end/side plates from KA models without painting them blue, not correct but
prefer to leave them to reflect light into the model. The tins used were a nice touch compared to the plastic ones in the kit. Has really hidden a lot of work but im pleased ive gone this far
 .
.
 .
.
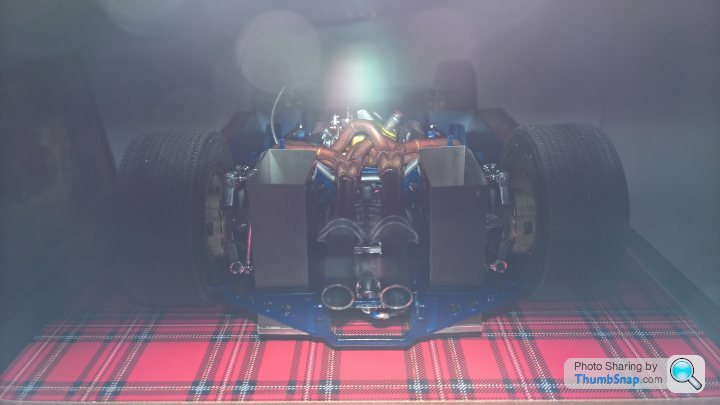
My camera phone went into overload and produced a weird photo, which i actually really like, sort of ghostly/smoky looking.
 .
.
Well thats the rear end done other than some plumbing, and wiring later. Onto the cockpit and rear bulkhead next.
Cheers to anyone watching
Finished of fitting the flex brake pipes and cable tied on the rears.
...Rear shot looks ok to me.
.Fitted the photo etched rear end/side plates from KA models without painting them blue, not correct but
prefer to leave them to reflect light into the model. The tins used were a nice touch compared to the plastic ones in the kit. Has really hidden a lot of work but im pleased ive gone this far
. .My camera phone went into overload and produced a weird photo, which i actually really like, sort of ghostly/smoky looking.
.Well thats the rear end done other than some plumbing, and wiring later. Onto the cockpit and rear bulkhead next.
Cheers to anyone watching
Yes pleased with the blue ive used, its dark but not too much.
The self adhesive Goodyear transfers that came with the kit had rotted to the point that just touching them made them fall apart into fragmants,guess its just the age of the kit. Its probable that the car decals may be in the same condition,so i had to make my own decals instead, laid them on then scalpeled the black bits out as they didnt match the tyre rubber, better on than not on at all i think. Fitted the turned tyre valves and ran a tyre line in blue.
 .
.
Onto the next stage.
Cockpit.Primed and painted
 .
.
Ready for the rest of the parts to be fitted .Cheers
The self adhesive Goodyear transfers that came with the kit had rotted to the point that just touching them made them fall apart into fragmants,guess its just the age of the kit. Its probable that the car decals may be in the same condition,so i had to make my own decals instead, laid them on then scalpeled the black bits out as they didnt match the tyre rubber, better on than not on at all i think. Fitted the turned tyre valves and ran a tyre line in blue.
.Onto the next stage.
Cockpit.Primed and painted
.Ready for the rest of the parts to be fitted .Cheers
robemcdonald said:
Did you paint the wheels? The gold finish out of the box is pretty nice on mine.
.Yes, quite a good match as well, the air valves are very nicely turned. The tyres looked a bit square to the eges to me, so i ran them up on a drill and wore the edges off with a diamond file
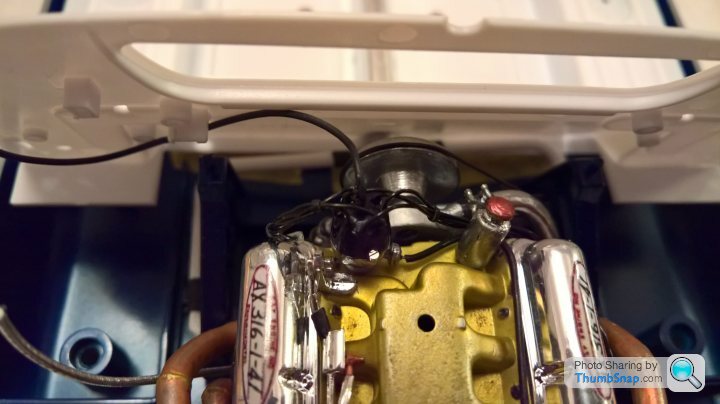
More done in the evenings.
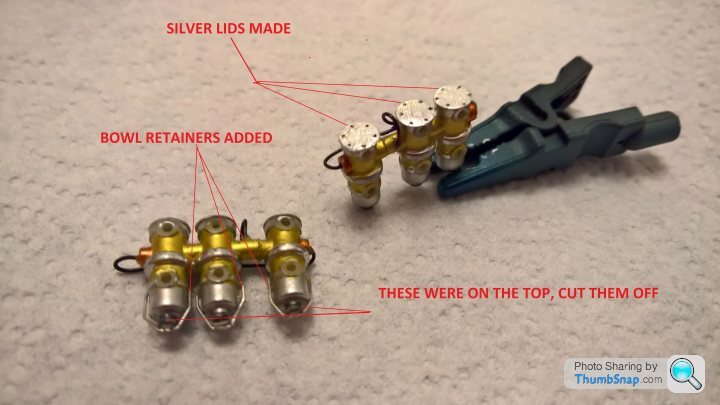
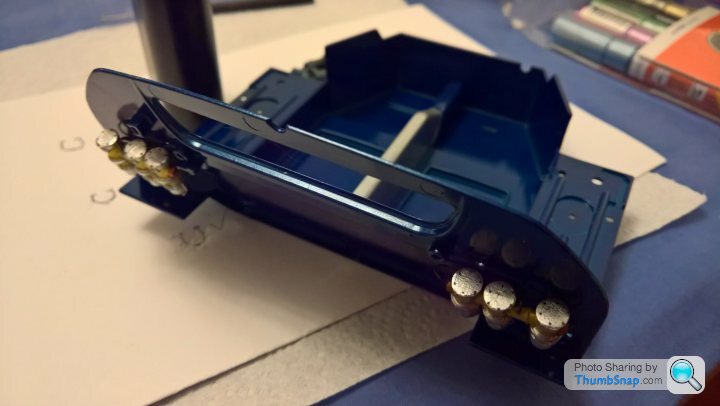
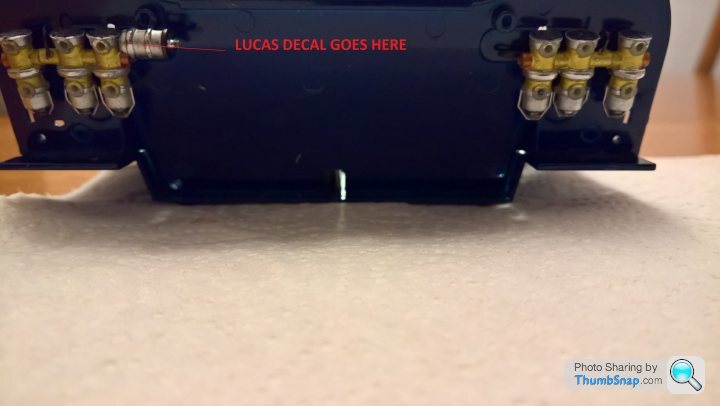
The fuel pumps, fuel filter and coil all dipped to remove the chrome.Had to get rid of the toylike aspects of the pieces
Cut the tops off the pumps as they wernt on the origonal car, added the bottom bowl retaining clasps using nickel silver wire, made the top covers up.Added some wiring and painted.
Looks ok to me. Now up for a nice rest long weekend. A few photos. If ive missed anything out please let me know. Cheers.
THE REAL THING.
 .
.
HERES MY VERSION.
 .
.
 .
.
 .
.
 .
.
The fuel pumps, fuel filter and coil all dipped to remove the chrome.Had to get rid of the toylike aspects of the pieces
Cut the tops off the pumps as they wernt on the origonal car, added the bottom bowl retaining clasps using nickel silver wire, made the top covers up.Added some wiring and painted.
Looks ok to me. Now up for a nice rest long weekend. A few photos. If ive missed anything out please let me know. Cheers.
THE REAL THING.
.HERES MY VERSION.
....Gassing Station | Scale Models | Top of Page | What's New | My Stuff