Hasegawa 1/16 Sopwith Camel F.1
Discussion


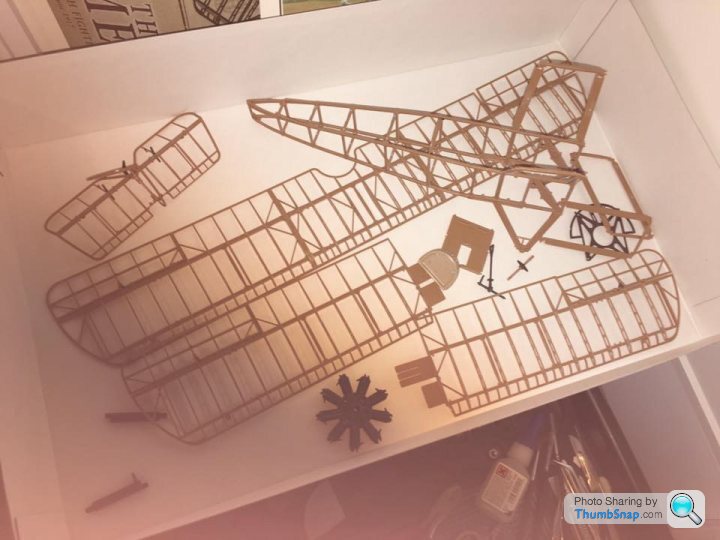
Thought I would share a few pics of my current build.
I’ve always fancied building one of the 1/8 scale wooden versions but they are really expensive and quite huge so decided on taking a punt on the smaller plastic version.
So far I’ve enjoyed everything about the kit and really looking forward to finishing it.
I’ve learnt a lot about how to create wood effect from using oil paints over a base colour. I think it looks like wood in that scale.
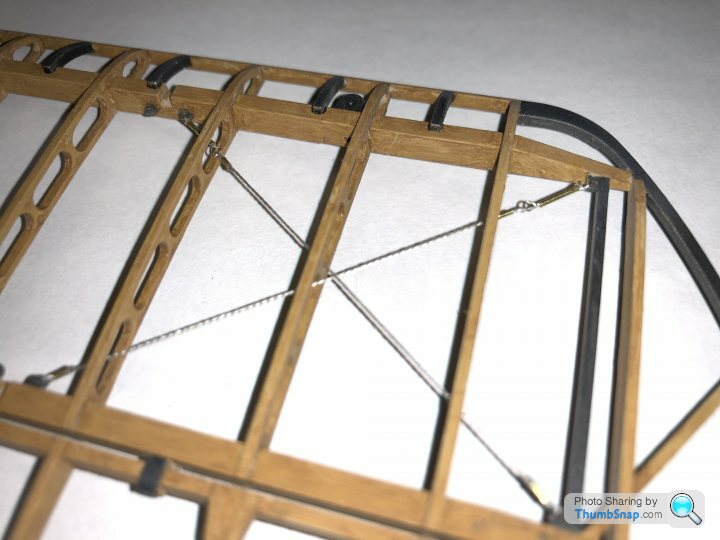
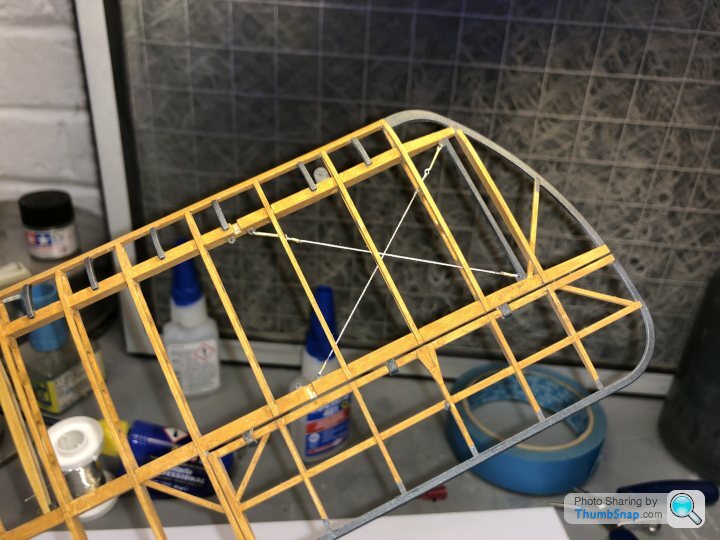
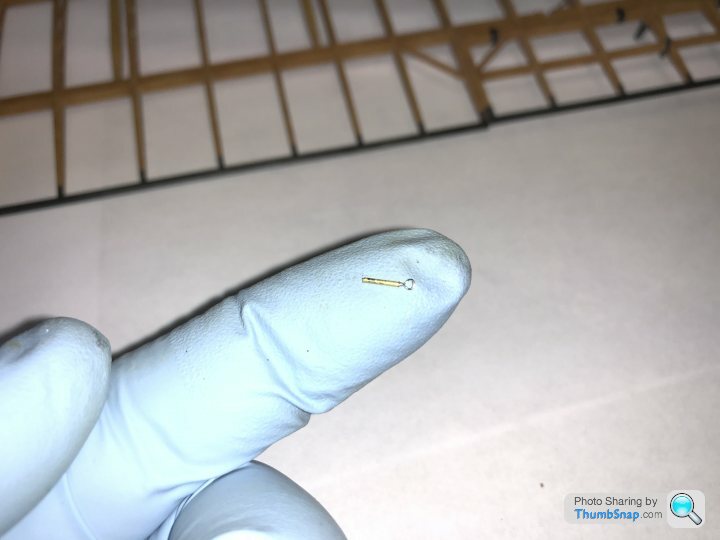
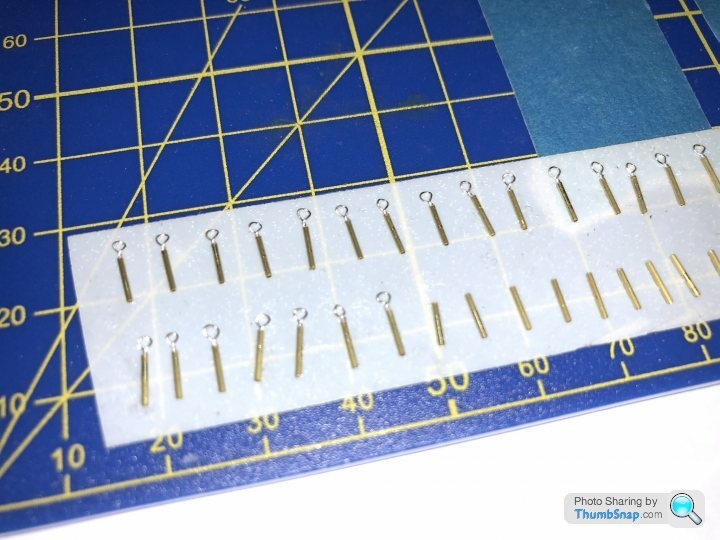
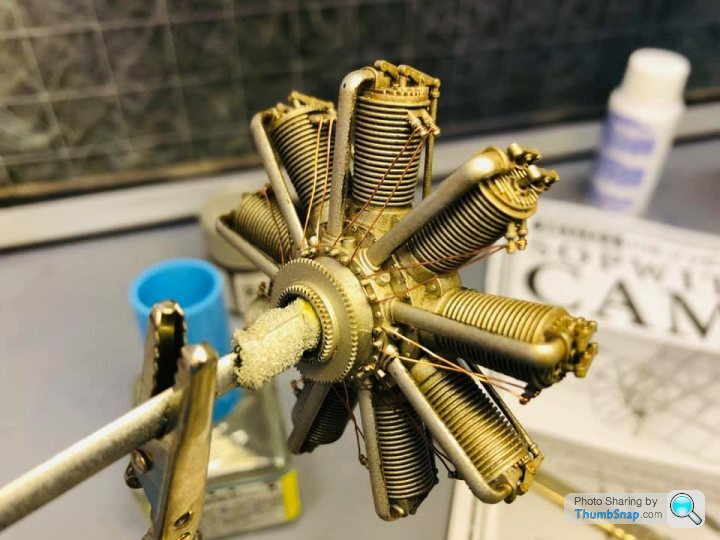
The kit comes with all the rigging but unfortunately it isn’t that accurate as most relies on just tying the cord through loops in the structure.
I’ve decided to hand make all the turnbuckles as you can’t buy 1/16 turnbuckles off the shelf. It’s been fun making them though.
Here are a few pics of the build so far.
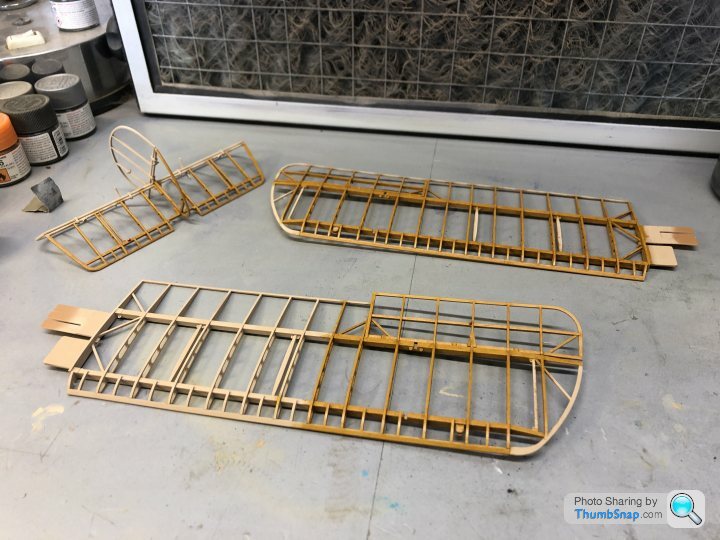

I’ve always fancied building one of the 1/8 scale wooden versions but they are really expensive and quite huge so decided on taking a punt on the smaller plastic version.
So far I’ve enjoyed everything about the kit and really looking forward to finishing it.
I’ve learnt a lot about how to create wood effect from using oil paints over a base colour. I think it looks like wood in that scale.
The kit comes with all the rigging but unfortunately it isn’t that accurate as most relies on just tying the cord through loops in the structure.
I’ve decided to hand make all the turnbuckles as you can’t buy 1/16 turnbuckles off the shelf. It’s been fun making them though.
Here are a few pics of the build so far.
Edited by Composite Guru on Friday 2nd August 11:41
Equus said:
Ooh! Lots of detail, please - this is a kit I've quite fancied myself!
I'm adding it where I can. The kit itself is pretty good. All I can see I need to add is the fuel lines from the various valves moulded in the kit. The rigging is just shown as one continuous piece of wire which is threaded through loads small tabs on the structure. That not correct so I'm doing them all individually.
I'm using the Haynes Camel Manual for my reference and its really useful.
You should get this kit. Its been great fun so far.
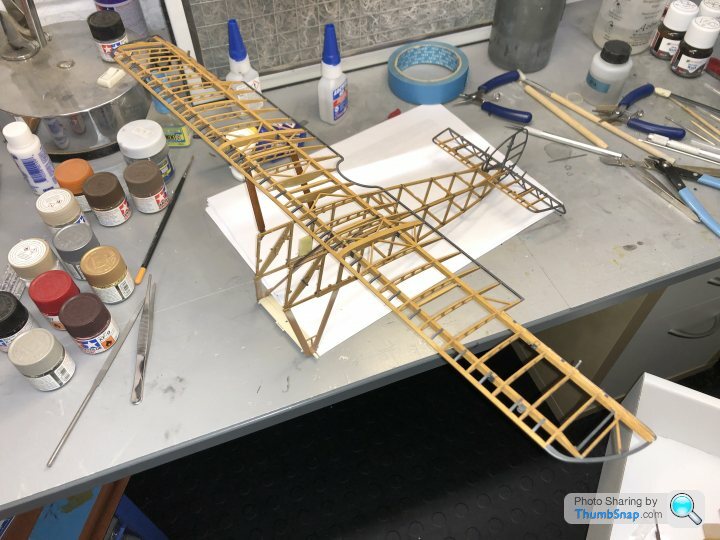
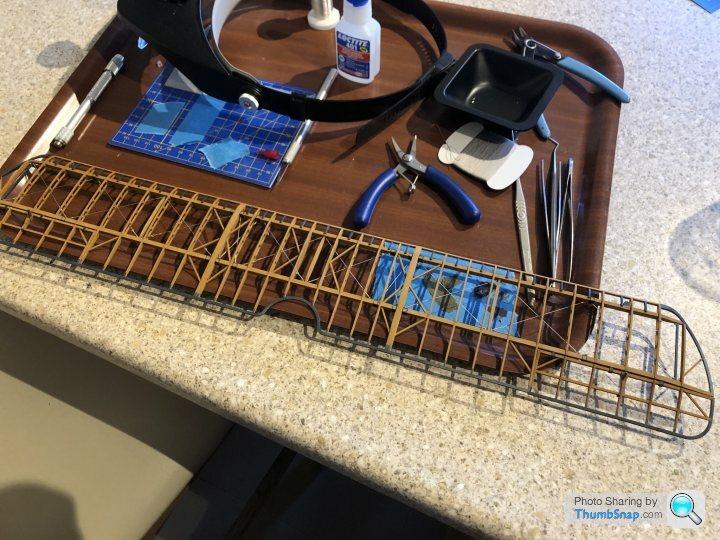
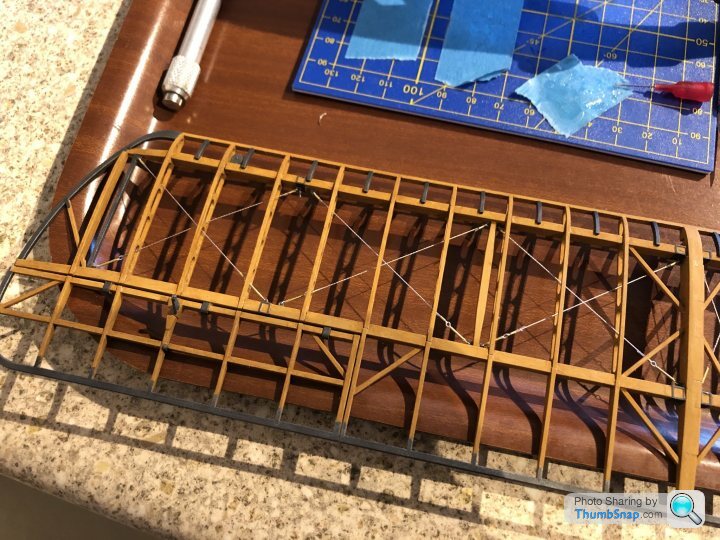
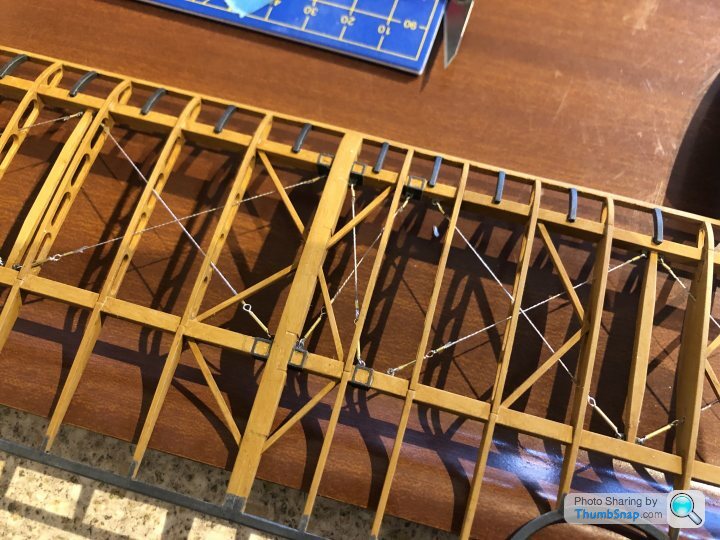
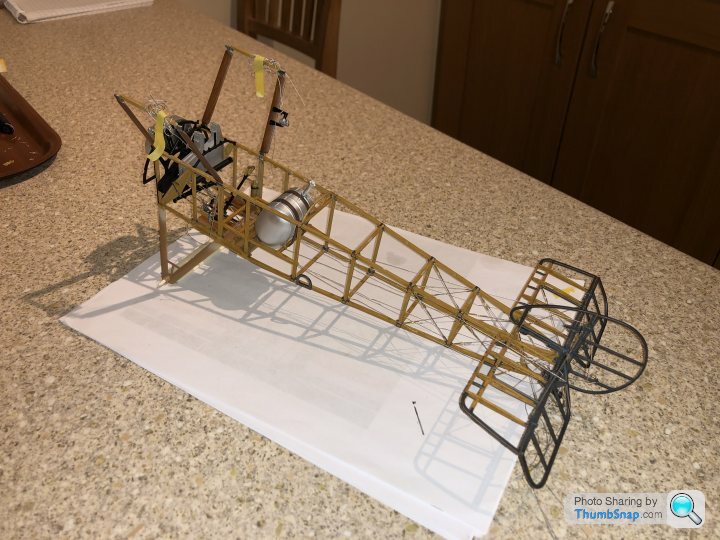
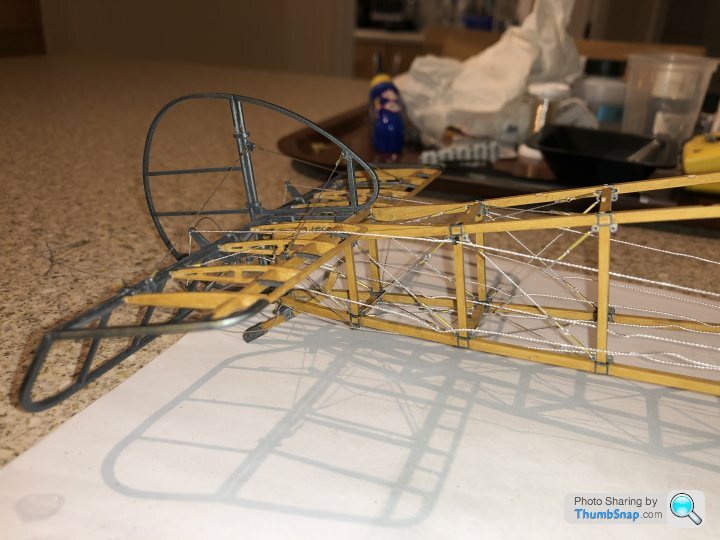
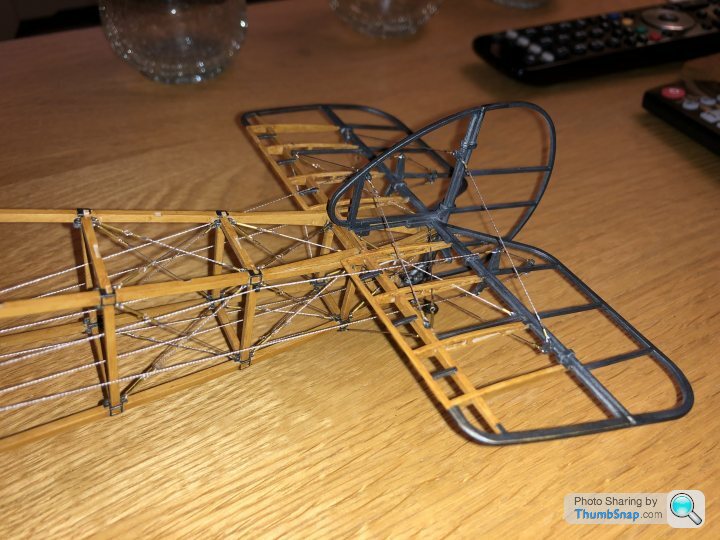
More progress.
Finally finished rigging the Wings. Just got the Fuselage to do now.
Rigging has really been quite enjoyable rather than a chore. Looks pretty realistic I think. The original kit asks to thread one piece of cotton throughout the whole wing. This is not very accurate hence doing what I’ve done.
Not too long until I can start assembling the whole thing.
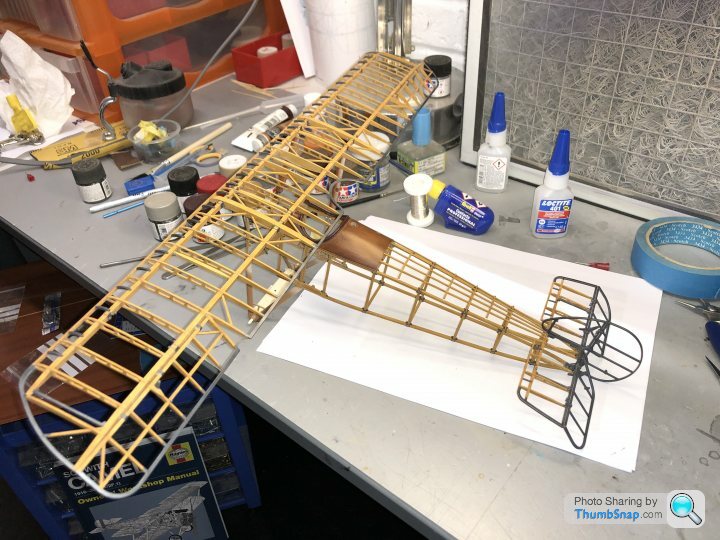
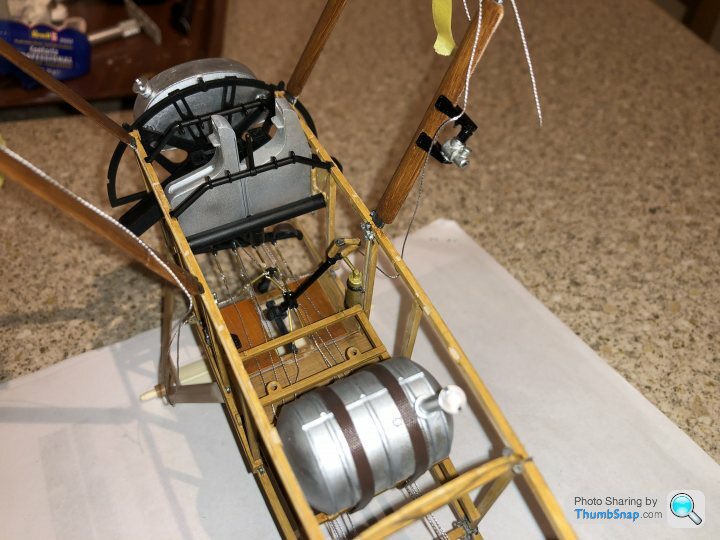
A bit more progress.
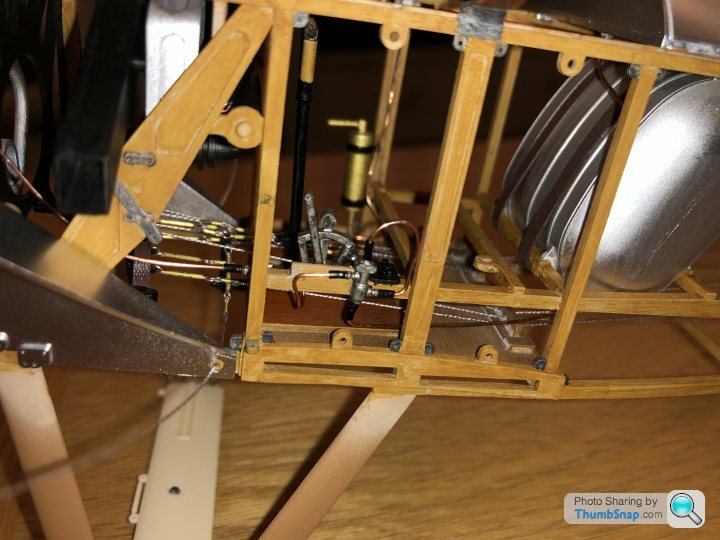
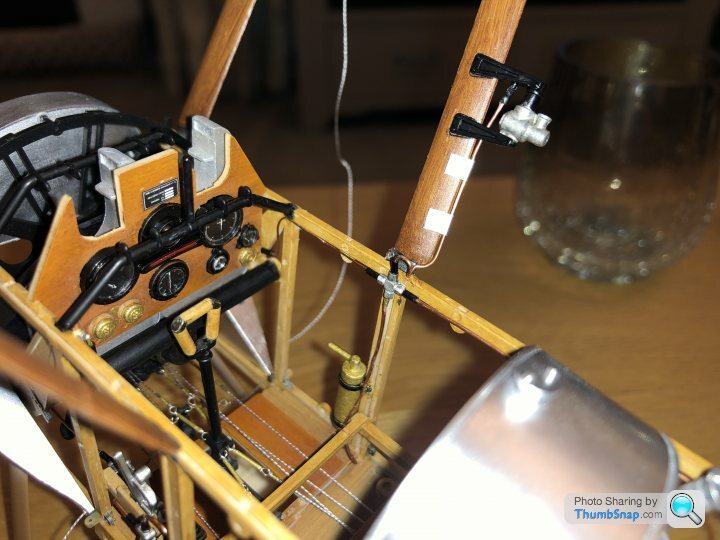
After rigging the tail area I decided to fit the cockpit floor with all the control cables installed.
Treading them all through the Fuselage was fun making sure they didn’t twist around each other.
Just need to temporarily fix the control stick in the centre some how so that I can tension the control cables.
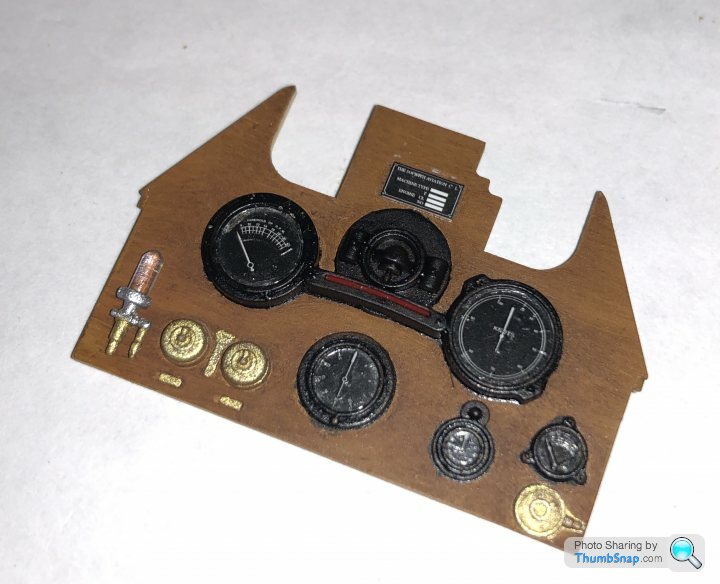
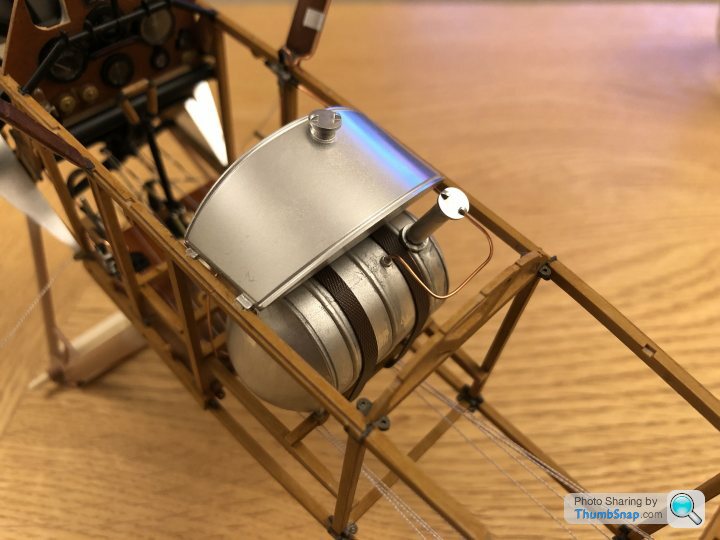
Also installed the magazines and engine oil tank too and then finished off the dashboard.
Next thing to do is add all the fuel pipes from all the various system parts to make it look a bit more realistic.
After rigging the tail area I decided to fit the cockpit floor with all the control cables installed.
Treading them all through the Fuselage was fun making sure they didn’t twist around each other.
Just need to temporarily fix the control stick in the centre some how so that I can tension the control cables.
Also installed the magazines and engine oil tank too and then finished off the dashboard.
Next thing to do is add all the fuel pipes from all the various system parts to make it look a bit more realistic.


Gassing Station | Scale Models | Top of Page | What's New | My Stuff