Paper Ship: Bismarck, HMV, 1:250
Discussion


If you already have the wood, then my little suggestion would be to, plane it flat if its already warped and air dried for a while. profile the edges and base rim to the chosen format. Then dig out the back of the board (long cuts with a circular saw close together should do a quick and easy job then clean up with chisels) leaving around 5mm or 6mm depth in the bottom of the block and say around 25 to 30mm at the edges and ends. Create some inwards voids in the inner sides and edges, then fill the whole void created with resin and sheets of fiber glass. This will stabilise the board and bond it all together with no chance of it ever warping, It should also be lighter and easier to move around. i realise it sounds a bit of a project but that's why it might appeal to you!
You could contact https://www.worktop-express.co.uk/kitchen-worktops and get a quote for a bespoke worktop
AJLintern said:
How about doing it the opposite way and filling a hollowed out piece of dry oak with sea coloured resin and mount the ship on it. Could then add some realistic water effects to the resin 
I like this idea, if you have resin both sides you could mill a boat shaped hole in one side at the correct depth to make it look like it's in the water and keep the other side flat if you want to see the whole model. RedRob67 said:
How about one of the Ikea floating shelves? Lightweight and won't warp.
Yeah that's what I'm using at the moment, and it slots onto two brackets on the wall in the office when I'm not working on it.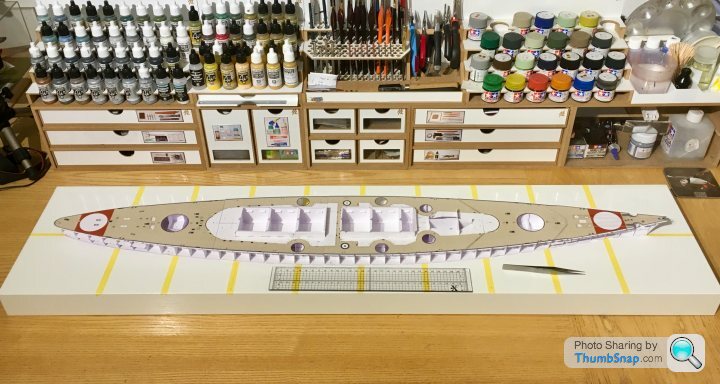
Trouble is, it's just too bulky. I want something a few cm shorter and narrower, and significnatly less deep. Eventually it will sit within the base of a perspex display case, as I've done with the other paper ships.
It's the high aspect ratio and shallow depth that make me think that normal wood will warp at those dimensions. for scale the base will be about 1000mm long, 200mm wide, and 25mm deep.
I've just found a supplier who will cut veneered MDF to size, and edge it. They will also mill out the core. OK, there couldn't be any edge chamfers with that method (short of inlaying solid squares around the upper edge and chamfering them), and I guess it would have to be 18mm, but it would be a quick and fairly cheap option at about £50.
The key is that for wood you need the room to be at a stable humidity level, if the humidity changes then any wood is likely to move, oak is one of the worst.
Even MDF will move with humidity changes, especially if one side is sealed and the other isn't.
If the humidity is stable then store the wood in the room for a month (longer for thicker wood) for it to take on the room humidity level and then finish it. As long as the room humidity doesn't change then the wood should be fine.
IJWS15 said:
The key is that for wood you need the room to be at a stable humidity level, if the humidity changes then any wood is likely to move, oak is one of the worst.
Even MDF will move with humidity changes, especially if one side is sealed and the other isn't.
If the humidity is stable then store the wood in the room for a month (longer for thicker wood) for it to take on the room humidity level and then finish it. As long as the room humidity doesn't change then the wood should be fine.
It seems a trifle odd that humidity has such an effect on the stability of a battleship.Even MDF will move with humidity changes, especially if one side is sealed and the other isn't.
If the humidity is stable then store the wood in the room for a month (longer for thicker wood) for it to take on the room humidity level and then finish it. As long as the room humidity doesn't change then the wood should be fine.
dr_gn said:
Problem with trying to replicate water is that it usually looks wrong. I'd rather stick with plain woodgrain I think.
There are a lot of incredible water effects create using resin. Google some of the dioramas etc. A chap like yourself could no doubt turn their hand to excellent resin water effect which would double as your rigid base.
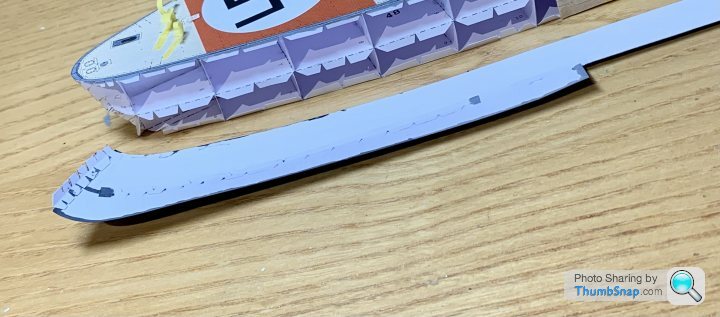
I made some small fillets for the ends of the belts:
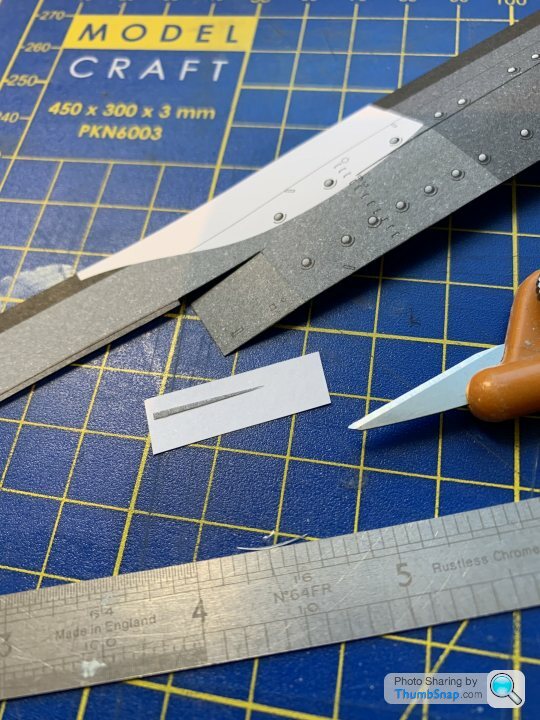
The kit parts are rectangular, but I thought these would fit better.
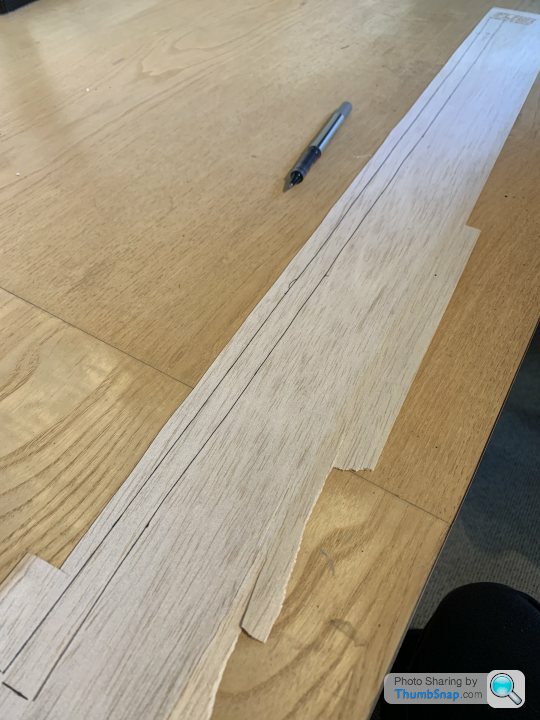
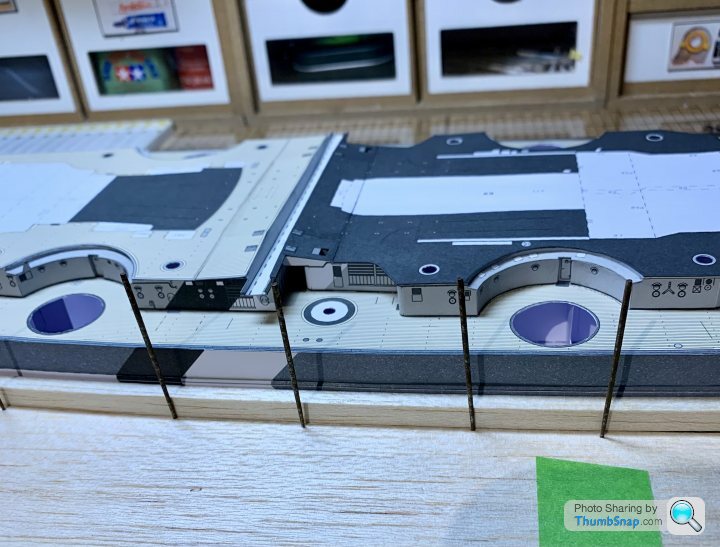
One place I opted to deviate from the 100% paper build was the packing strips for the hull armour. In the kit these are multiple strips of paper lapped and laminated together. I think this may have formed steps and wrinkles, so I thought thin balsa would be better. I began by templating them against the hull with paper:

Then transferring to the wood:
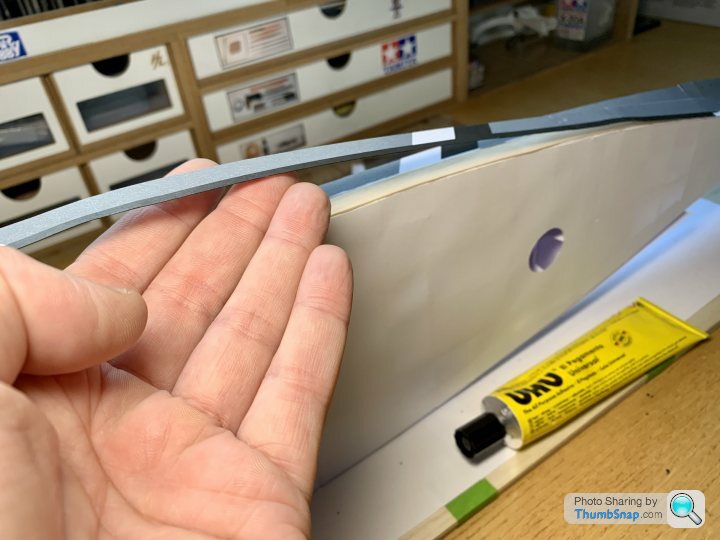
In order to secure the packing piece to the hull, I made a temporary balsa base, and used a thin balsa strip, pinned against the paper sides (with the balsa packing behind) to get a smooth curve, and to give even pressure for bonding:
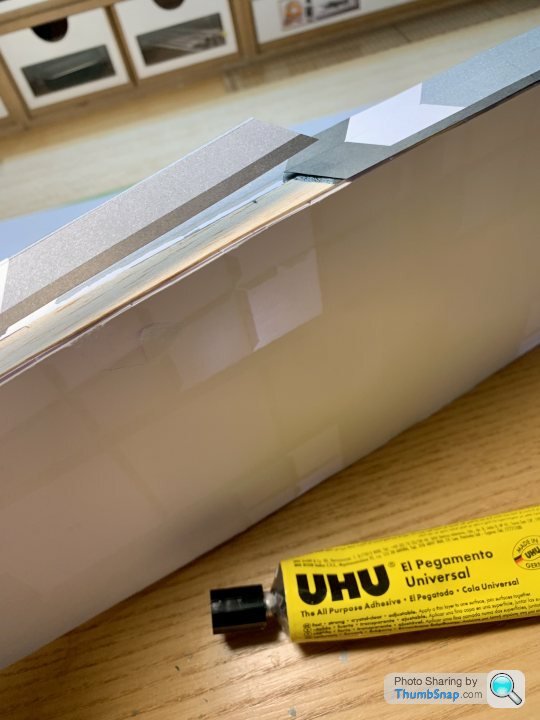
I used UHU for this. I also fitted the stern piece:
The next job is to finally fit the long paper armour outer skins to the balsa, again using the pinned strip method to get a smooth result.
The kit parts are rectangular, but I thought these would fit better.
One place I opted to deviate from the 100% paper build was the packing strips for the hull armour. In the kit these are multiple strips of paper lapped and laminated together. I think this may have formed steps and wrinkles, so I thought thin balsa would be better. I began by templating them against the hull with paper:
Then transferring to the wood:
In order to secure the packing piece to the hull, I made a temporary balsa base, and used a thin balsa strip, pinned against the paper sides (with the balsa packing behind) to get a smooth curve, and to give even pressure for bonding:
I used UHU for this. I also fitted the stern piece:
The next job is to finally fit the long paper armour outer skins to the balsa, again using the pinned strip method to get a smooth result.
Edited by dr_gn on Thursday 6th January 22:03
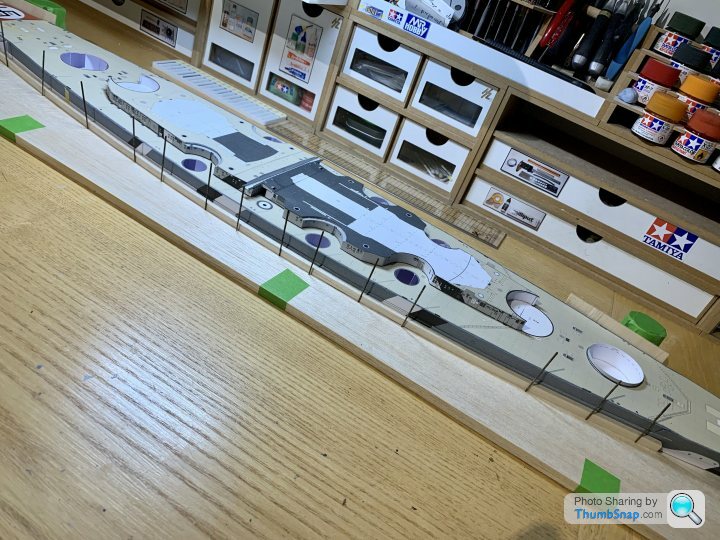
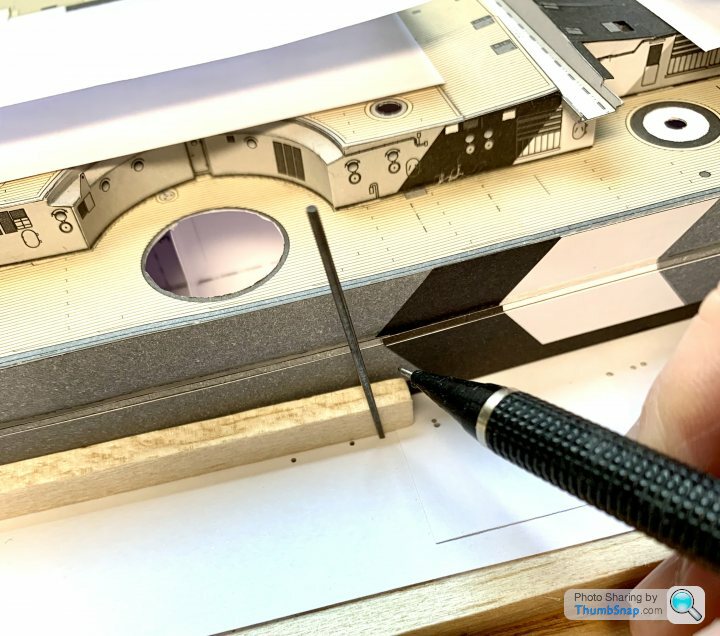
So with the armour balsa set to the paper lower hull, made a start on finally attaching the sides. Front section first:
Then pinned in place with a profile strip:

Then the rear section. I left it long so I could mark it to get a perfect fit to the front:
Then glued that in place onto the balsa:
And pinned the whole length while it sets to get a continuous smooth curve:
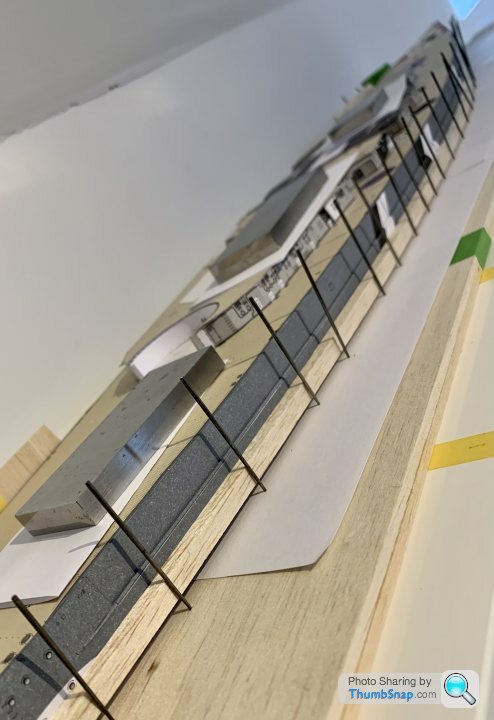
When that’s set, I’ll work on the return at the top of the armour, move the strip up and wick PVA all along it, hopefully to form a smooth, rigid, gap free finish.
Then pinned in place with a profile strip:
Then the rear section. I left it long so I could mark it to get a perfect fit to the front:
Then glued that in place onto the balsa:
And pinned the whole length while it sets to get a continuous smooth curve:
When that’s set, I’ll work on the return at the top of the armour, move the strip up and wick PVA all along it, hopefully to form a smooth, rigid, gap free finish.
Edited by dr_gn on Sunday 9th January 14:39
Gassing Station | Scale Models | Top of Page | What's New | My Stuff