Schumacher CAT XLS build
Discussion


Ooosh - I had an xls and it rocked - 3x19 wet magnet and SCR cells plus a 2 X15 for some reason.
I remember the front gearbox being mounted with self tapping screws - they stripped! I put long bolts all the way through and the clamping effect was almost set and forget.
Brilliant car - I remember the video - Hi I’m Cecil Schumacher , LEGEND
I remember the front gearbox being mounted with self tapping screws - they stripped! I put long bolts all the way through and the clamping effect was almost set and forget.
Brilliant car - I remember the video - Hi I’m Cecil Schumacher , LEGEND
lufbramatt said:
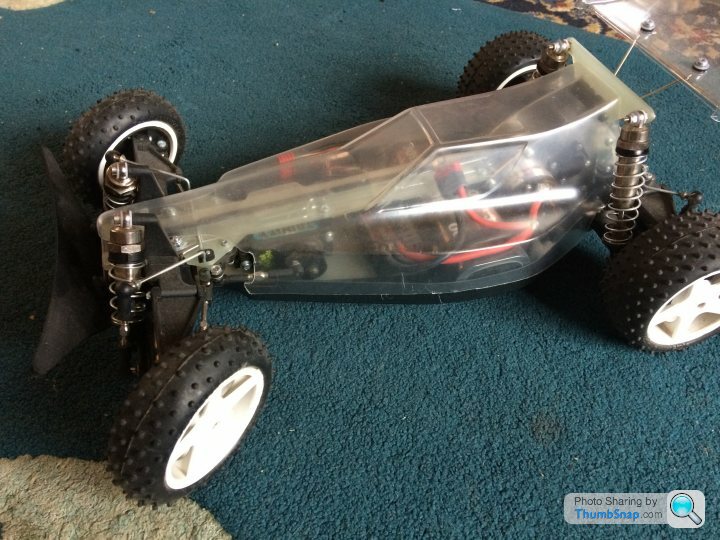
Pics for completeness:
Steering linkage and servo saver:

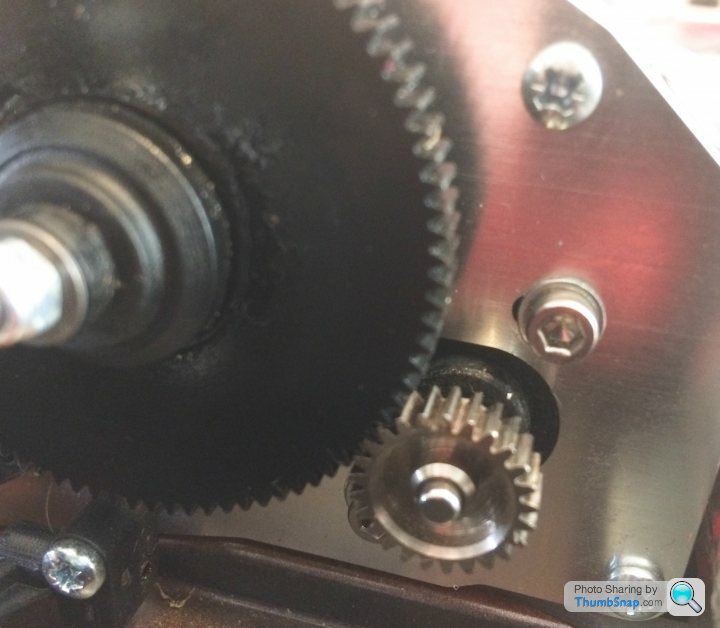
Pinion (the correct one!):
Any tips on setting the toe on the suspension? Have toed in the tears slightly and set the fronts about parallel.
Matt could you mount your motor gear the other way around like I have here, might get the gears closer in alignment.Steering linkage and servo saver:
Pinion (the correct one!):
Any tips on setting the toe on the suspension? Have toed in the tears slightly and set the fronts about parallel.
Wasn’t sure if there is enough length on your motor spindle though?

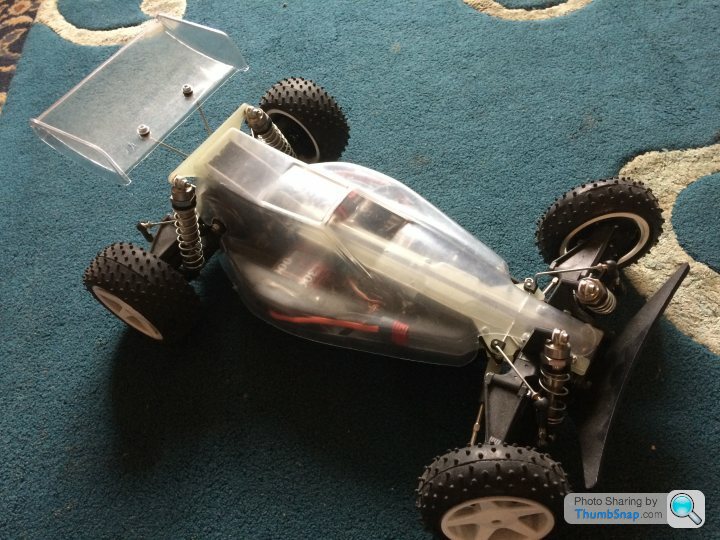
Spent last night soldering Deans connectors on to all our batteries and charger leads, so was able to give the CAT a proper run in the garden today.
Transmission is nice and quiet, happy with that now.
It's a bit pointy compared to my lads 2wd Racing Fighter! don't have to use the brakes to get it to turn in. Full brakes with steering lock will get the back to step out. I know what people mean now when they say the old CATs were fast but tricky to get the best out of.
It's suprizingly quick, even with the brushed motor in, will wheelspin all 4 wheels about 2m up the garden, great fun seeing the back squat down. Does nice drifts too where the lawn is a bit worn out (kids playing in the garden every day during lockdown!). Not sure what the top speed is like as the garden isn't big enough!
Next step is to get the wing and shell cut out and painted.
Kinda stalled on this with just the body shell left to paint, had to do some work on my 1:1 bmw to get it ready for an mot now it looks like we might actually be able to go on holiday in the summer.
One thing that’s been bugging me is the way the body mounts with Velcro. I’d prefer to use R-clips as I’m worried my son might be a bit heavy handed with it and pull the paint off the inside of the shell. Before I CAD something up and get it 3d printed are there any existing Schumacher parts from a later model that will allow me to fit body post mounts to the xls chassis?
One thing that’s been bugging me is the way the body mounts with Velcro. I’d prefer to use R-clips as I’m worried my son might be a bit heavy handed with it and pull the paint off the inside of the shell. Before I CAD something up and get it 3d printed are there any existing Schumacher parts from a later model that will allow me to fit body post mounts to the xls chassis?
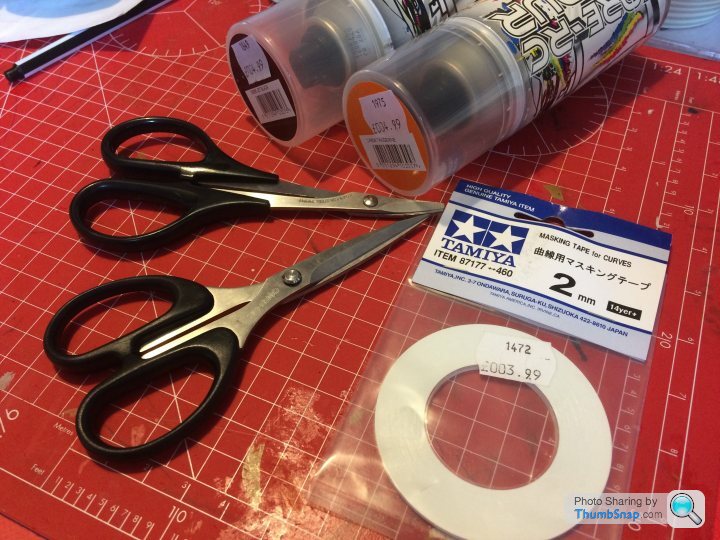
Popped into my little local RC shop yesterday now they have reopened (MWM Warbirds at Rochester Airport https://www.mwmwarbirds.co.uk/ mainly RC aircraft but they do a lot of RC car bits as well) and picked up some lexan scissors and a few bits so I can finally get this finished- my son is bugging me to get it done so we can take both our cars up to the local sports fields and "race" hehe
go the shell cut out last night, really pleased to have that out the way and can get on with the fun bit- just need to finalise the paint scheme. Need to trim a bit more off around the steering linkage as it's catching, and trim the undertray slightly to make some room for the battery wires, but it fits well around the spur gear, kind of clipping into place under the rear shock support.
go the shell cut out last night, really pleased to have that out the way and can get on with the fun bit- just need to finalise the paint scheme. Need to trim a bit more off around the steering linkage as it's catching, and trim the undertray slightly to make some room for the battery wires, but it fits well around the spur gear, kind of clipping into place under the rear shock support.
lufbramatt said:
Popped into my little local RC shop yesterday now they have reopened (MWM Warbirds at Rochester Airport https://www.mwmwarbirds.co.uk/ mainly RC aircraft but they do a lot of RC car bits as well) and picked up some lexan scissors and a few bits so I can finally get this finished- my son is bugging me to get it done so we can take both our cars up to the local sports fields and "race" hehe
go the shell cut out last night, really pleased to have that out the way and can get on with the fun bit- just need to finalise the paint scheme. Need to trim a bit more off around the steering linkage as it's catching, and trim the undertray slightly to make some room for the battery wires, but it fits well around the spur gear, kind of clipping into place under the rear shock support.
Wow two months since your last update bud, and. It’s still not painted yet? Come on man what the hell are you playing at, in the same time period i have finished two other car projects, and written one off racing too! go the shell cut out last night, really pleased to have that out the way and can get on with the fun bit- just need to finalise the paint scheme. Need to trim a bit more off around the steering linkage as it's catching, and trim the undertray slightly to make some room for the battery wires, but it fits well around the spur gear, kind of clipping into place under the rear shock support.


nigelpugh7 said:
Wow two months since your last update bud, and. It’s still not painted yet? Come on man what the hell are you playing at, in the same time period i have finished two other car projects, and written one off racing too!
Oh and a bit late now i know, but its best to paint the body before you trim off the excess as well.It’s not a big issue though, Ive done it that way before too.
I've done shells both ways and personally prefer to trim it first so I can see where it needs to be trimmed  used to spray shells for my mates back in the day so done a few in my time.
I had to get my 1:1 BMW e39 back on the road and MOTed after it had sat on the drive sorned for 6 months so we could go on holiday (and then went on holiday), it needed a new brake caliper, injector seals and a general going over so that took up a bunch of time, been doing a ton of running and cycling in the nice weather, which meant I needed to rebuild all the suspension on my mountain bike as it needed new bearings …and then my road bike needed a load of new drivetrain bits due to the extra miles I've put on that.... so lots been going on!
used to spray shells for my mates back in the day so done a few in my time.I had to get my 1:1 BMW e39 back on the road and MOTed after it had sat on the drive sorned for 6 months so we could go on holiday (and then went on holiday), it needed a new brake caliper, injector seals and a general going over so that took up a bunch of time, been doing a ton of running and cycling in the nice weather, which meant I needed to rebuild all the suspension on my mountain bike as it needed new bearings …and then my road bike needed a load of new drivetrain bits due to the extra miles I've put on that.... so lots been going on!
lufbramatt said:
Popped into my little local RC shop yesterday now they have reopened (MWM Warbirds at Rochester Airport https://www.mwmwarbirds.co.uk/ mainly RC aircraft but they do a lot of RC car bits as well) and picked up some lexan scissors and a few bits so I can finally get this finished- my son is bugging me to get it done so we can take both our cars up to the local sports fields and "race" hehe
go the shell cut out last night, really pleased to have that out the way and can get on with the fun bit- just need to finalise the paint scheme. Need to trim a bit more off around the steering linkage as it's catching, and trim the undertray slightly to make some room for the battery wires, but it fits well around the spur gear, kind of clipping into place under the rear shock support.
I used to have a ProCAT and always remember the noses used to split across were it had to be cut out so much to get clearance.go the shell cut out last night, really pleased to have that out the way and can get on with the fun bit- just need to finalise the paint scheme. Need to trim a bit more off around the steering linkage as it's catching, and trim the undertray slightly to make some room for the battery wires, but it fits well around the spur gear, kind of clipping into place under the rear shock support.
Just started my first build in about 30years with my kids - a Tamiya Sand Viper - kids have loved doing it this afternoon- forgot how quick and easy the Tamiyas are to build! I might move onto either the Top Cat or XLS if they really like using it.
I used to race an old Cat off road when I was a teen, it was quick, even against more modern stuff, won novices and a few trophies over 2 years. I raced in modified for 4wd as stock motors on a clay/mud track were a bit boring (I did dabble in 2wd stocks with a 2nd car I got cheap, but it was unreliable).
Biggest weakness was the front end was a bit fragile, steering bolts working loose (upgraded them somehow), front-rear belt loosing tension (used to wedge some packing in to stop front diff housing slipping back), I used to double up the front arm elastics as they would loose tension too easily. A few glassfibre parts were upgraded to aluminium. Rear wing mount was a naff design, that got upgraded quickly.
In winter we used to race indoors in a sports centre, it was like ice racing in terms of traction, needed the softest spring, narrowest tyres, thinnest damper oil to the point where they were too soft to be jumped, so made for great racing seeing everyone braking last minute for the jumps.
Compared to Tamiya of similar price the Schumachers were simpler designs and far more rigid so could take the abuse of racing far easier.
I always liked that even the very expensive stuff was not a lot quicker, well setup car and not crashing important to good race results.
Great thread. Brought back a lot of memories. I had the RS 4x4 variant that was the last of the ProCAT chassis versions before the BossCAT came out. I recall it had a few nice mods on it over the ProCAT that evolved into the BossCAT.
I used to run (I think) a 13x2 modified motor and 8.4v battery packs. It went like stink. It’s in a box in my parents loft somewhere.
I used to run (I think) a 13x2 modified motor and 8.4v battery packs. It went like stink. It’s in a box in my parents loft somewhere.
Kids went out for dinner with their grandparents tonight so sat and did some masking... inspired by Groomi’s race car influenced bodyshells I’m going for a Martini Porsche 917 look, mainly due to having roughly the right colours kicking around!

Tamiya 2mm flexible masking tape is amazing stuff, never used it before!
Tamiya 2mm flexible masking tape is amazing stuff, never used it before!
Gassing Station | Scale Models | Top of Page | What's New | My Stuff