Tamiya 1:72 Kawasaki Ki-61 “Hien”
Discussion


snowen250 said:
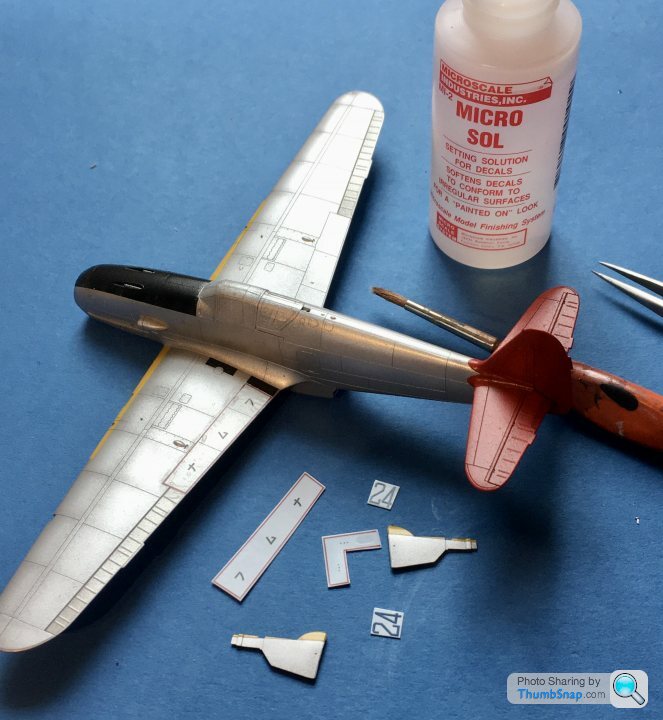
I built one of these and used the mottle decals. They behaved very, very well. Even over the curves and lumps etc.
Simon
Thanks, that's good to know. Did you apply the roundels etc after the camo? In a lot of photos, the roundels aren't centered in the gaps in the camo. I notice some stencil decals should be applied before the camo.Simon
Interesting it says to use enamel paint for the green blotches. I assume it means for airbrushing, to reduce the chance of spattering.
dr_gn said:
Thanks, that's good to know. Did you apply the roundels etc after the camo? In a lot of photos, the roundels aren't centered in the gaps in the camo. I notice some stencil decals should be applied before the camo.
Interesting it says to use enamel paint for the green blotches. I assume it means for airbrushing, to reduce the chance of spattering.
From memory i did all the camo decals, let them set for 24 hours, then did the insignia. I remember the way the decal fitted around the carb intake was for instance, excellent.Interesting it says to use enamel paint for the green blotches. I assume it means for airbrushing, to reduce the chance of spattering.
snowen250 said:
dr_gn said:
Thanks, that's good to know. Did you apply the roundels etc after the camo? In a lot of photos, the roundels aren't centered in the gaps in the camo. I notice some stencil decals should be applied before the camo.
Interesting it says to use enamel paint for the green blotches. I assume it means for airbrushing, to reduce the chance of spattering.
From memory i did all the camo decals, let them set for 24 hours, then did the insignia. I remember the way the decal fitted around the carb intake was for instance, excellent.Interesting it says to use enamel paint for the green blotches. I assume it means for airbrushing, to reduce the chance of spattering.
Feel free to put some pictures up on here.
i don't have an airbrush, so simply painted it Tamiya flat aluminium, did the other panty bits. Popped the decals on, and voila.
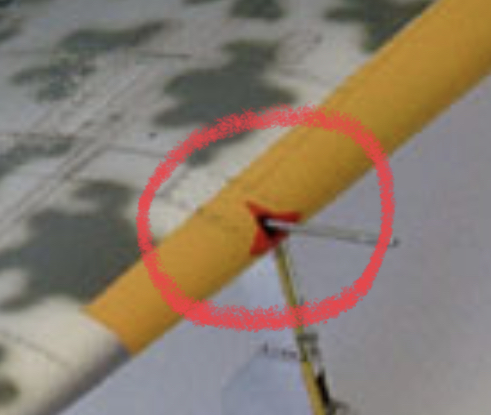
All i have is the attached, the red doesn't look as streaky as that in real life! Think that is a reflection. Also probably should have removed the drop of water....
Did do the stencils before the mottling though. Not sure why.
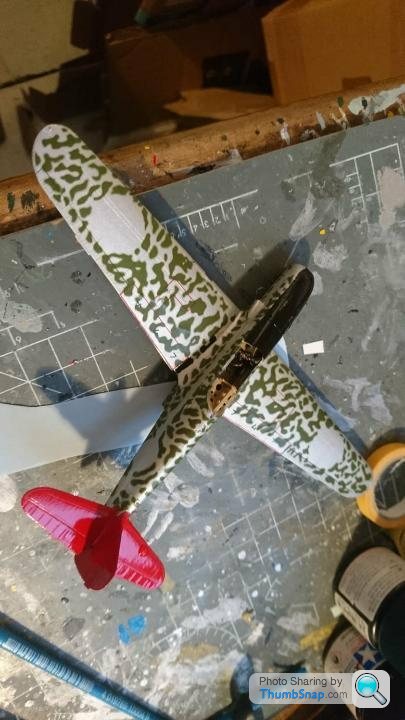
Once all the decals were on i put on a matt varnish
All i have is the attached, the red doesn't look as streaky as that in real life! Think that is a reflection. Also probably should have removed the drop of water....
Did do the stencils before the mottling though. Not sure why.
Once all the decals were on i put on a matt varnish
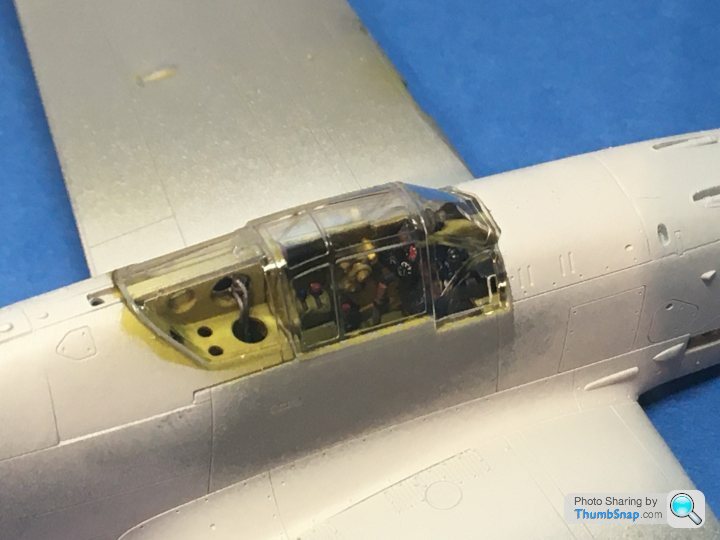
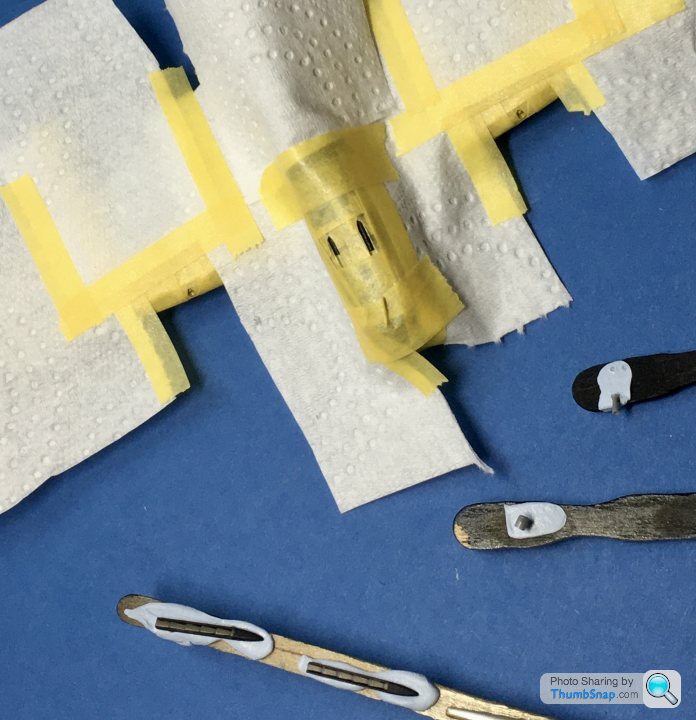
After adding a few lead wire air pipes and instrument wires, I fixed the canopy in place with Formula 560 PVA:
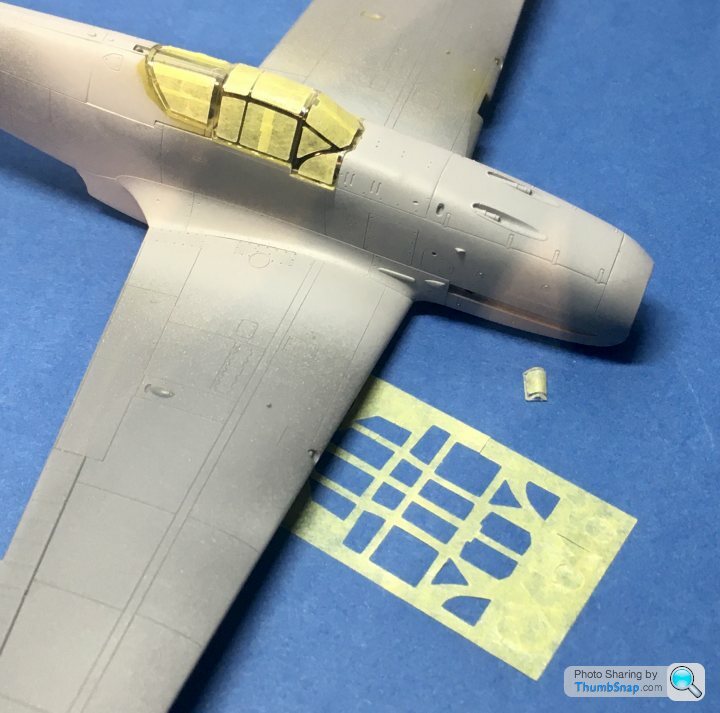
And got an Eduard mask set, which saves a lot of time. Seems like the tape is thinner than the Tamiya stuff, which is another advantage:
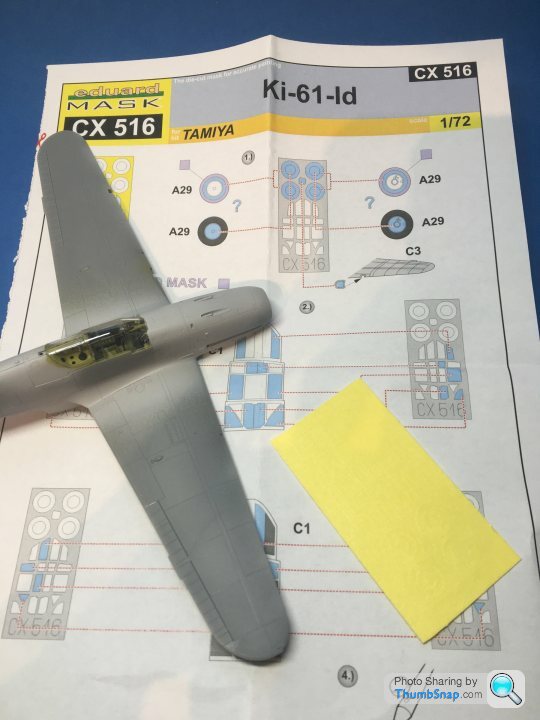
As with most Eduard Masks I’ve used, some needed quartering to get a perfect fit:
Used Blu-Tack to mask the wheel wells and landing light aperture:
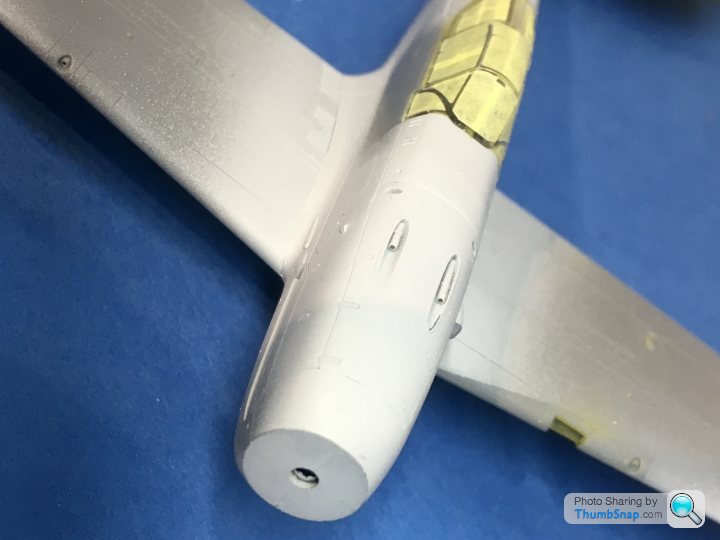
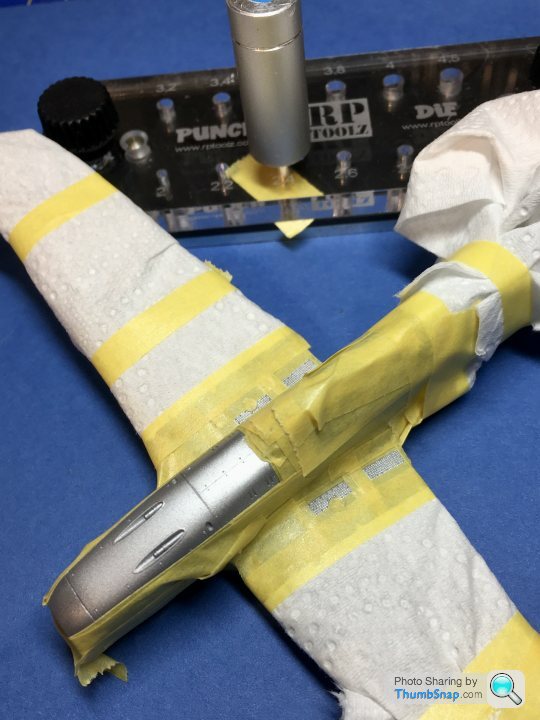
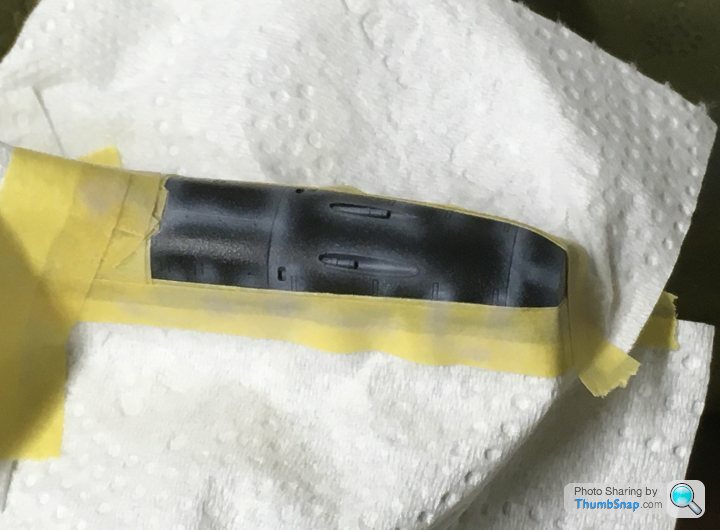
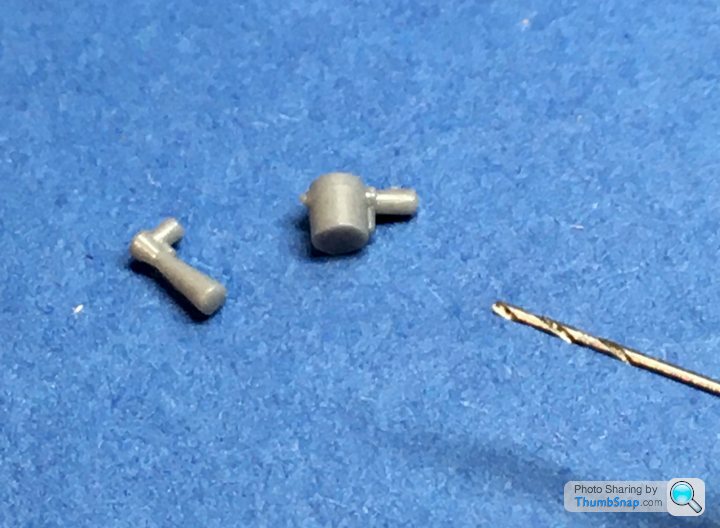
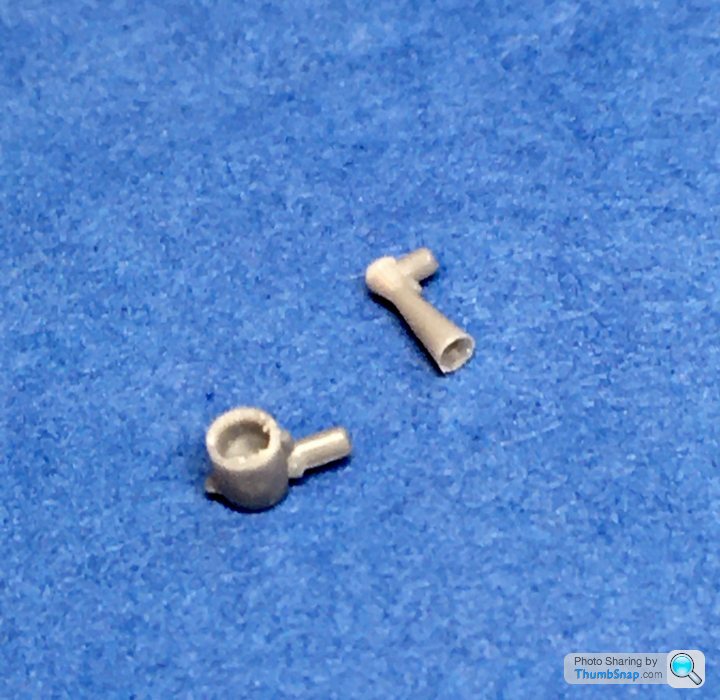
I also drilled out the machine gun and cannon barrels to 0.3mm :

The cowl guns are staggered in order to facilitate ammunition feed and discharge, just like the Bf.109 (although they aren’t derivatives of the German guns).
And got an Eduard mask set, which saves a lot of time. Seems like the tape is thinner than the Tamiya stuff, which is another advantage:
As with most Eduard Masks I’ve used, some needed quartering to get a perfect fit:
Used Blu-Tack to mask the wheel wells and landing light aperture:
I also drilled out the machine gun and cannon barrels to 0.3mm :
The cowl guns are staggered in order to facilitate ammunition feed and discharge, just like the Bf.109 (although they aren’t derivatives of the German guns).
All set for painting:
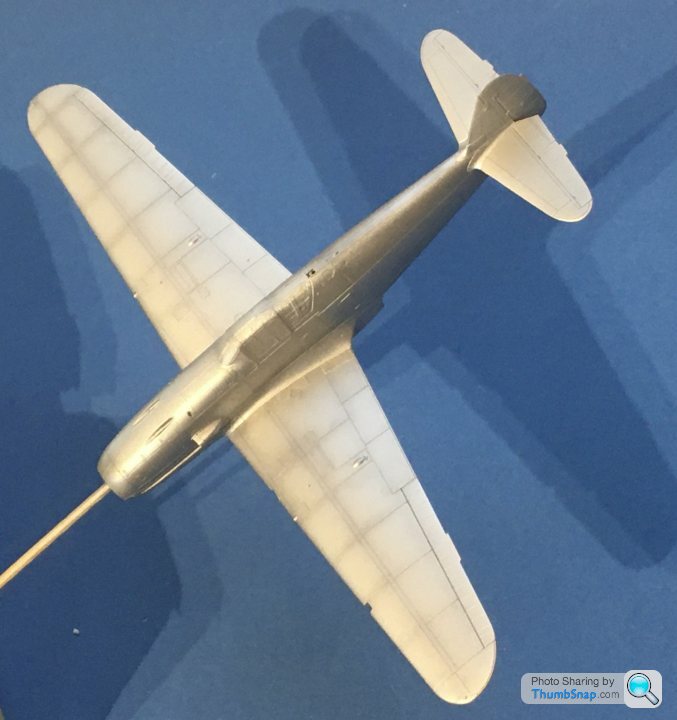
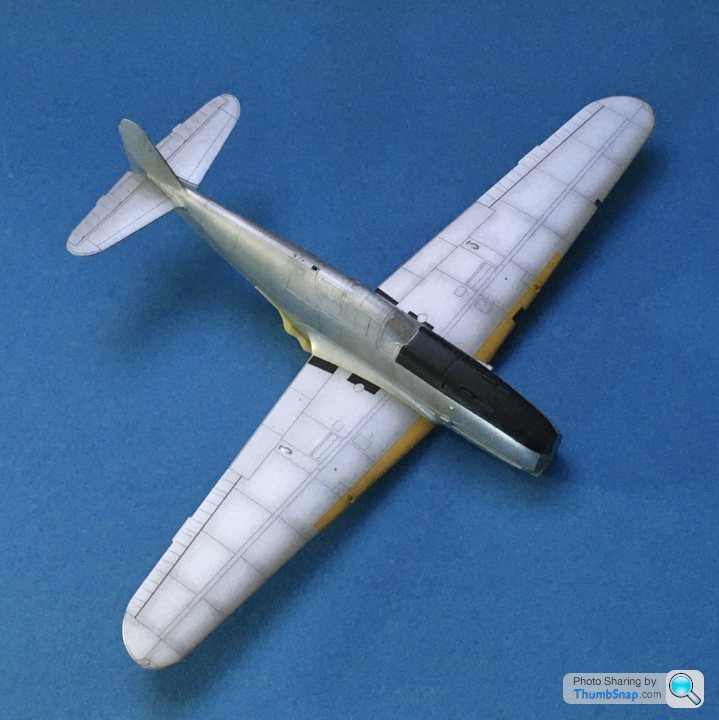
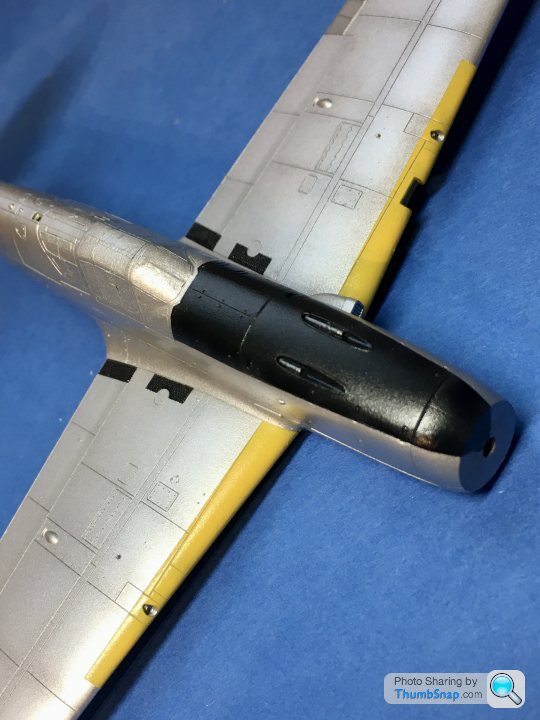
First sprayed the canopy frames with interior colour, then a couple of coats of Vallejo Air Aluminium:
Pre-shaded with Vallejo Basalt Grey:

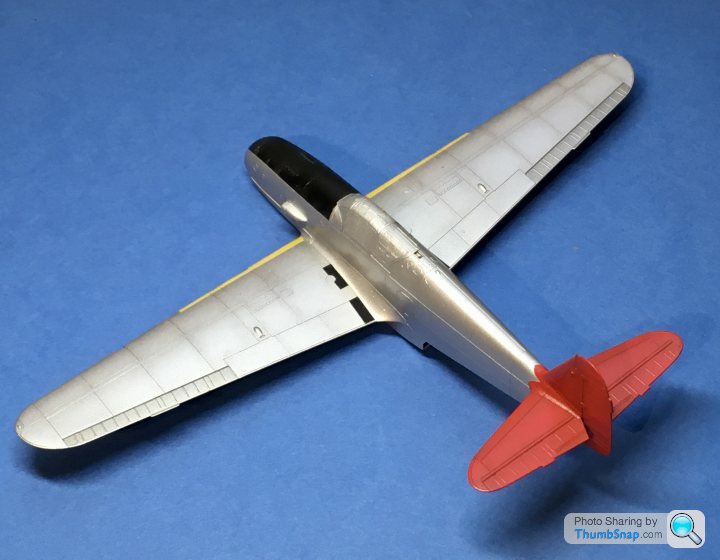
Then over sprayed with several coats of thinned Aluminuim, and a protective coat of Klear:
Once that’s hardened I’ll mask for the red tail feathers, yellow leading edge strips, steel (coloured) ailerons and the black anti-dazzle panel in front of the windscreen.
First sprayed the canopy frames with interior colour, then a couple of coats of Vallejo Air Aluminium:
Pre-shaded with Vallejo Basalt Grey:
Then over sprayed with several coats of thinned Aluminuim, and a protective coat of Klear:
Once that’s hardened I’ll mask for the red tail feathers, yellow leading edge strips, steel (coloured) ailerons and the black anti-dazzle panel in front of the windscreen.
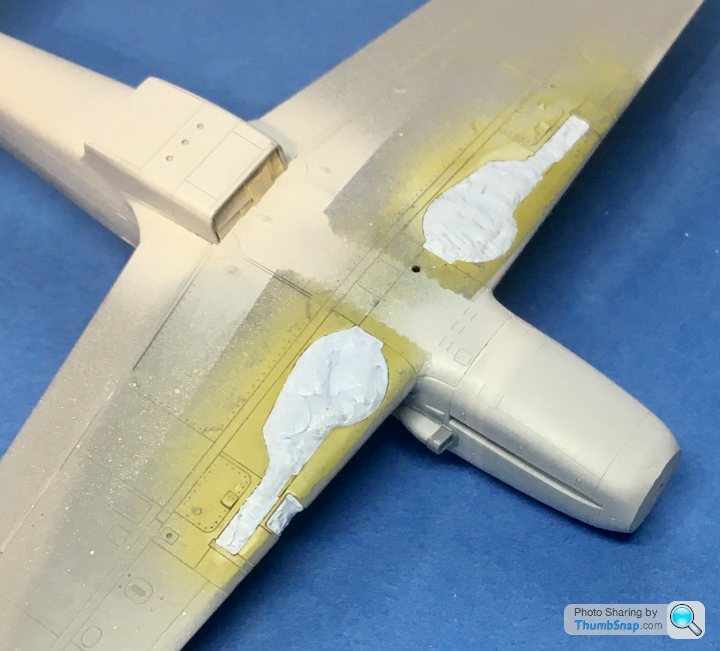
Masked the leading edge strips and u/c doors. I tried to do it as close to the 1:1 plan as I could, because the camo decals have to fit around them. Time will tell if it was accurate enough...Then sprayed yellow, pre-shaded with Basalt Grey:
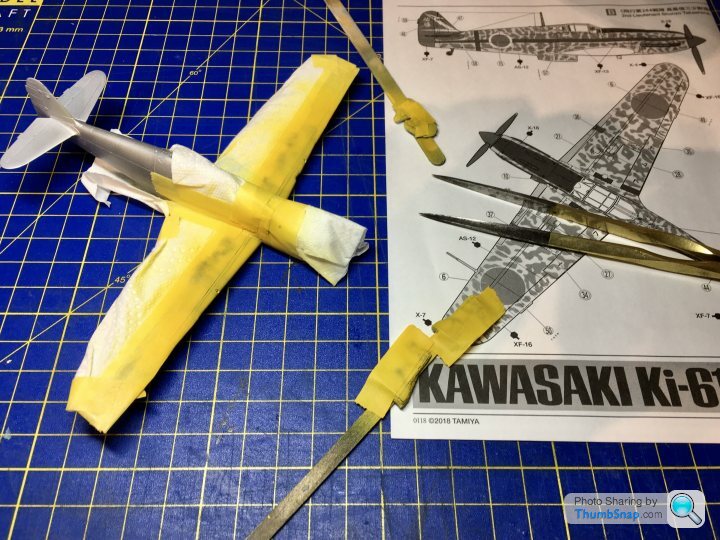
Looks ok, a bit of correction needed around one of the wheel wells though:
Looks ok, a bit of correction needed around one of the wheel wells though:
Next up masking for the anti-glare and wing walk panels:
Black mixed with a touch of light brown to take the edge off, and pre-shaded with light grey:
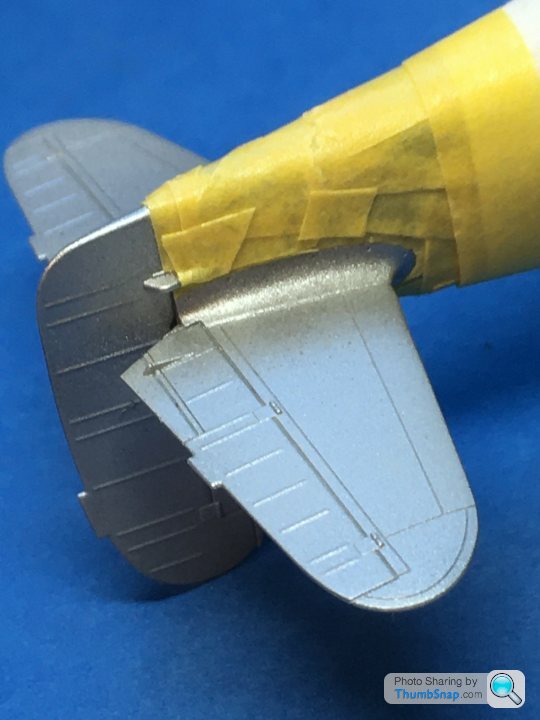
Then masked the tail feathers:
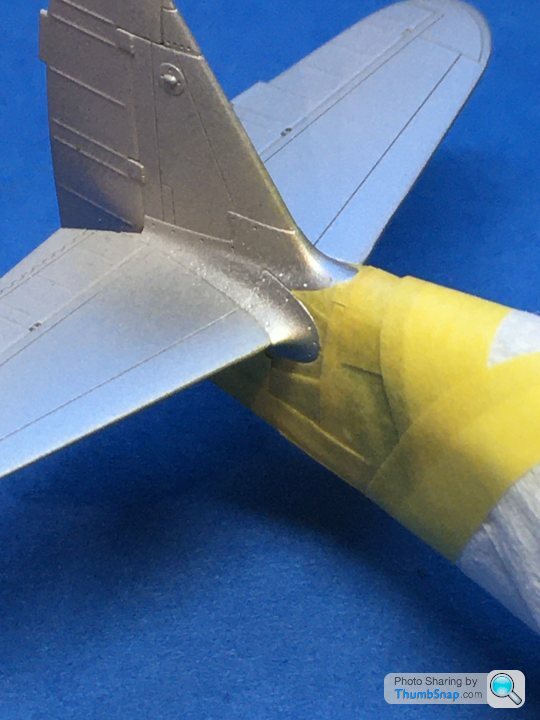
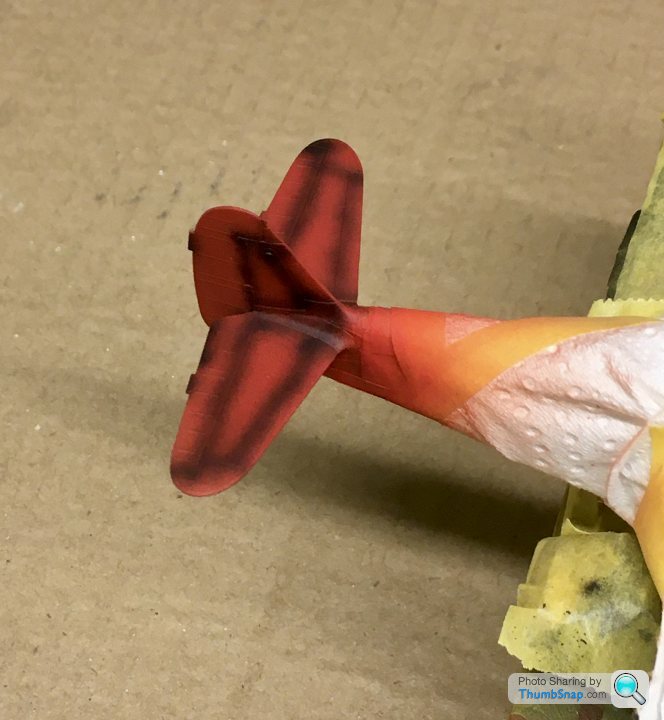
Sprayed Tamiya matt red with NATO black preshading:
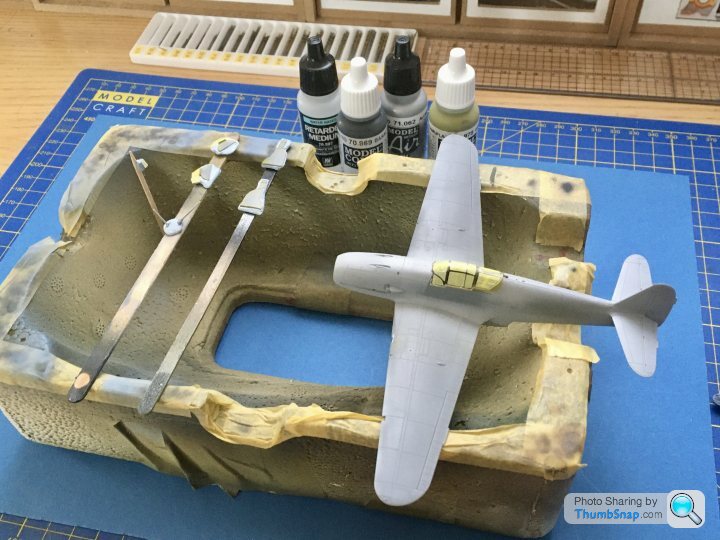
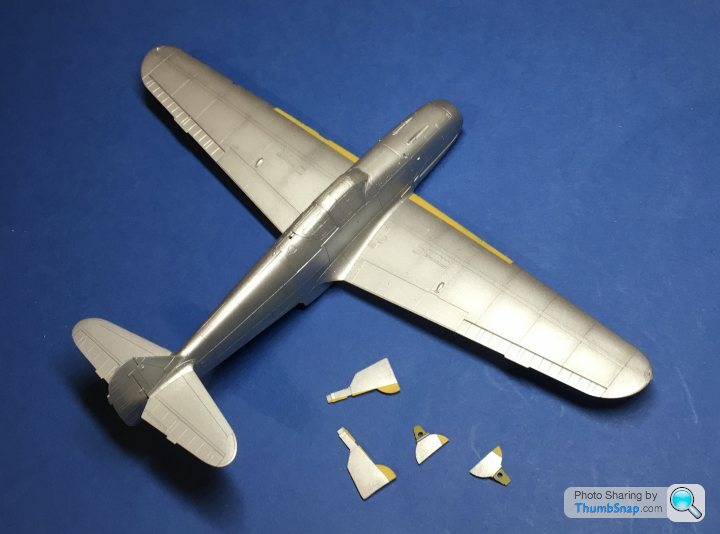
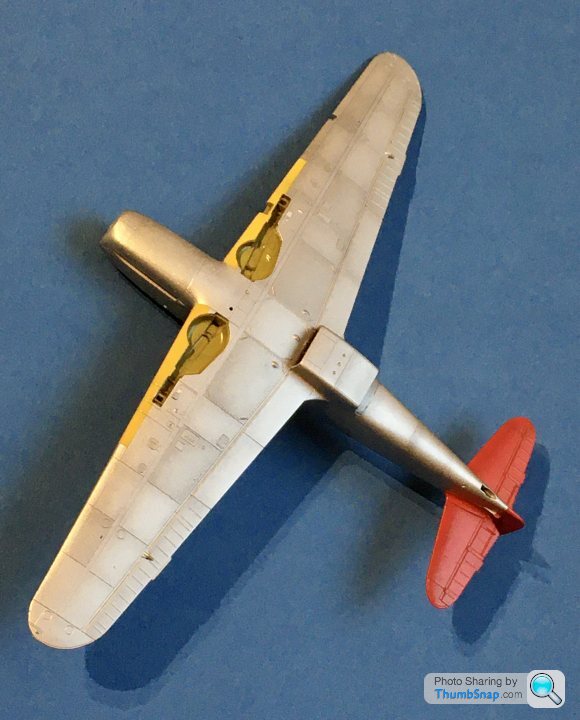
And then masked the ailerons and some random panels on the un-camo’d undersides. The topsides will have more than enough going on with the preshading and green blotches at this scale.

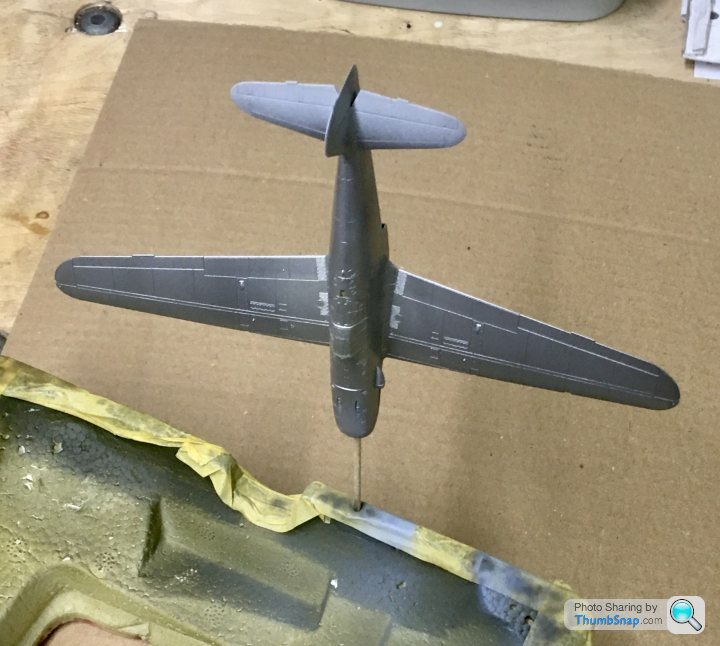
Rather than use another solid metallic, I used thin coats of Tamiya Smoke to give a subtle tone difference:
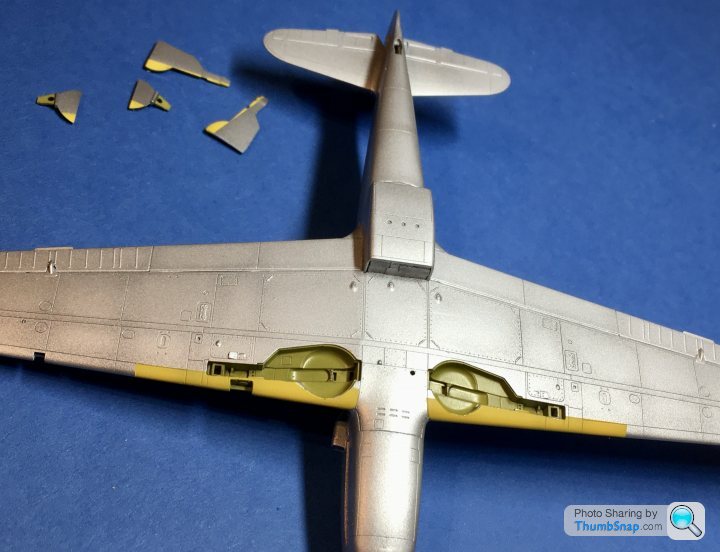
Next job I think is to mask and airbrush the gun muzzles, add some stencil decals then give everything a dark wash.
Black mixed with a touch of light brown to take the edge off, and pre-shaded with light grey:
Then masked the tail feathers:
Sprayed Tamiya matt red with NATO black preshading:
And then masked the ailerons and some random panels on the un-camo’d undersides. The topsides will have more than enough going on with the preshading and green blotches at this scale.
Rather than use another solid metallic, I used thin coats of Tamiya Smoke to give a subtle tone difference:
Next job I think is to mask and airbrush the gun muzzles, add some stencil decals then give everything a dark wash.
robemcdonald said:
Looking superb (as expected) I’m interested to see how you are going to mask the gun muzzles. From memory they are little four point Can’t get my head around how you’d do that at 1/48 let alone 1/72.
Thanks! Might not work out, in which case the brushes would see some use. Thing is on fine details like guns - which have some moulded detail - airbrushing gives a thinner finish.
robemcdonald said:
dr_gn said:
Thanks!
Might not work out, in which case the brushes would see some use. Thing is on fine details like guns - which have some moulded detail - airbrushing gives a thinner finish.
You do know you’re allowed to use decals right?Might not work out, in which case the brushes would see some use. Thing is on fine details like guns - which have some moulded detail - airbrushing gives a thinner finish.
dr_gn said:
robemcdonald said:
dr_gn said:
Thanks!
Might not work out, in which case the brushes would see some use. Thing is on fine details like guns - which have some moulded detail - airbrushing gives a thinner finish.
You do know you’re allowed to use decals right?Might not work out, in which case the brushes would see some use. Thing is on fine details like guns - which have some moulded detail - airbrushing gives a thinner finish.
robemcdonald said:
dr_gn said:
robemcdonald said:
dr_gn said:
Thanks!
Might not work out, in which case the brushes would see some use. Thing is on fine details like guns - which have some moulded detail - airbrushing gives a thinner finish.
You do know you’re allowed to use decals right?Might not work out, in which case the brushes would see some use. Thing is on fine details like guns - which have some moulded detail - airbrushing gives a thinner finish.

Piginapoke said:
Amazing work as always Dr.
That plane looks very similar to an ME109, is it a copy?
Thanks!That plane looks very similar to an ME109, is it a copy?
It’s not a copy, although it uses the same engine design and gun configuration (Albeit without the option of a central cannon firing through the spinner). I guess the forward fuselage will always end up looking like a 109, with the low exhausts. The canopy and windscreen areas are a bit similar looking too. I think it’s a good looking aircraft.
dr_gn said:
Thanks!
It’s not a copy, although it uses the same engine design and gun configuration (Albeit without the option of a central cannon firing through the spinner). I guess the forward fuselage will always end up looking like a 109, with the low exhausts. The canopy and windscreen areas are a bit similar looking too. I think it’s a good looking aircraft.
Thanks- it's a pretty plane, you are really doing it justiceIt’s not a copy, although it uses the same engine design and gun configuration (Albeit without the option of a central cannon firing through the spinner). I guess the forward fuselage will always end up looking like a 109, with the low exhausts. The canopy and windscreen areas are a bit similar looking too. I think it’s a good looking aircraft.
Gassing Station | Scale Models | Top of Page | What's New | My Stuff