Surtees Ferrari 158 tameo wct kit
Discussion


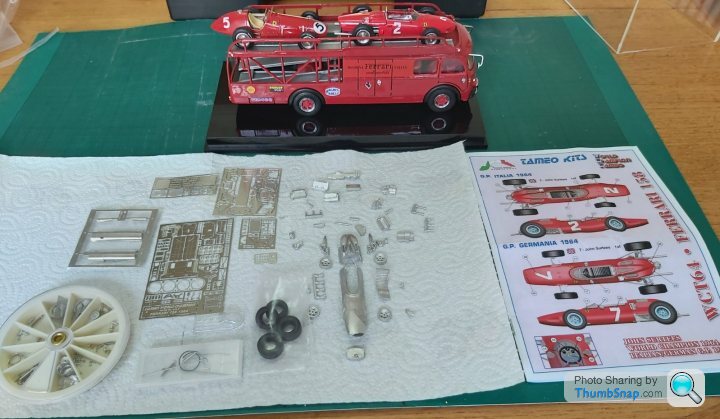
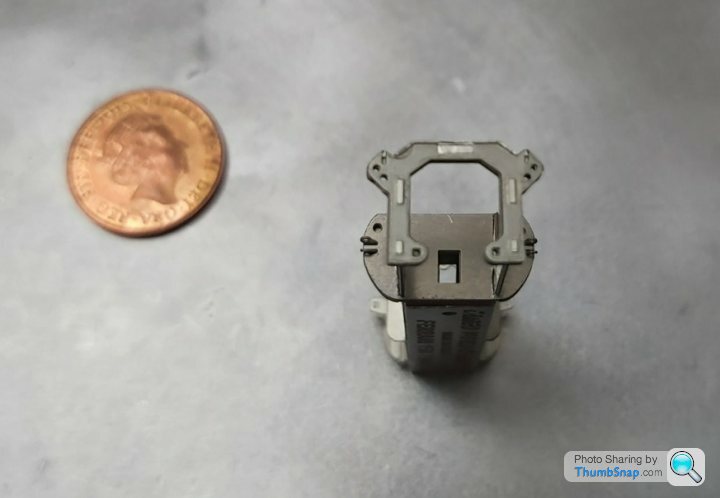
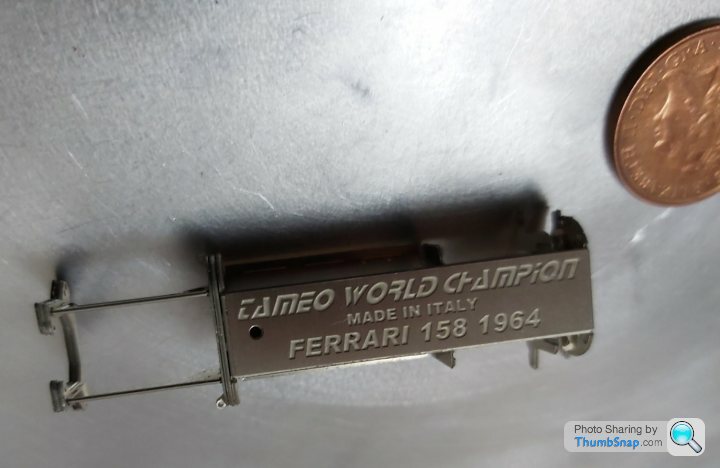
Arrived this week.Decided on this car as the 3rd car to build and go on the transporter along with the 500 and sharknose previously built.
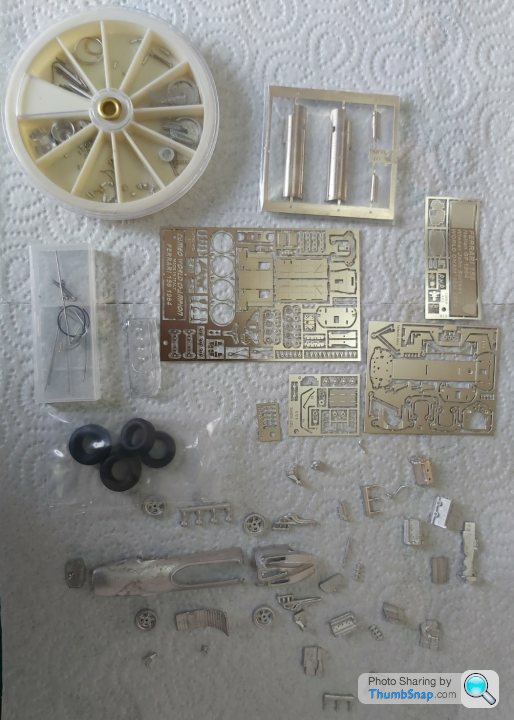
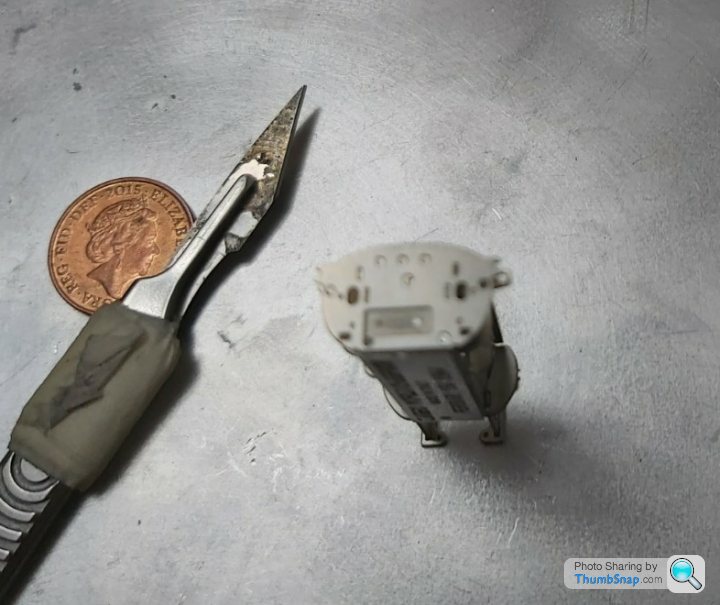
1st things 1st i put all the tiny parts in the jewellers screw case for fear of loosing them
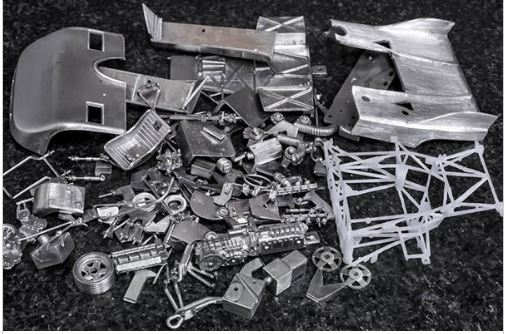
All of the chassis is PE, varying in thickness, white metal casstings, nickel silver, steel, brass, steel mesh, tuned aluminium,rivets, rubber and 2 sets as usual of decals.
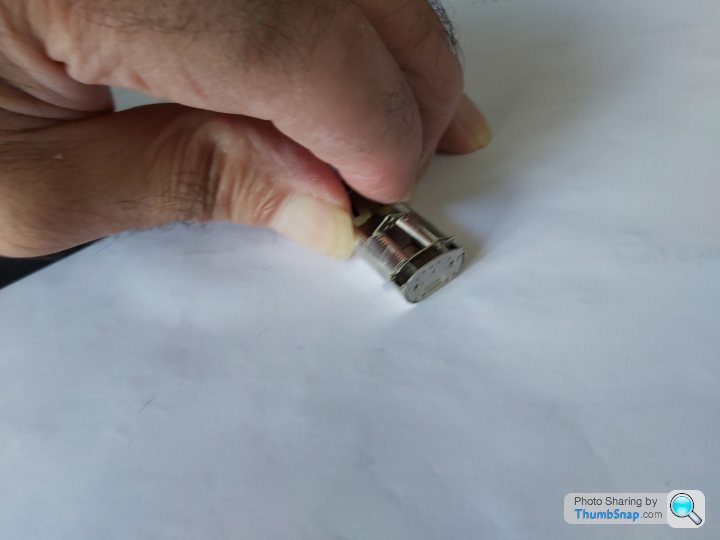
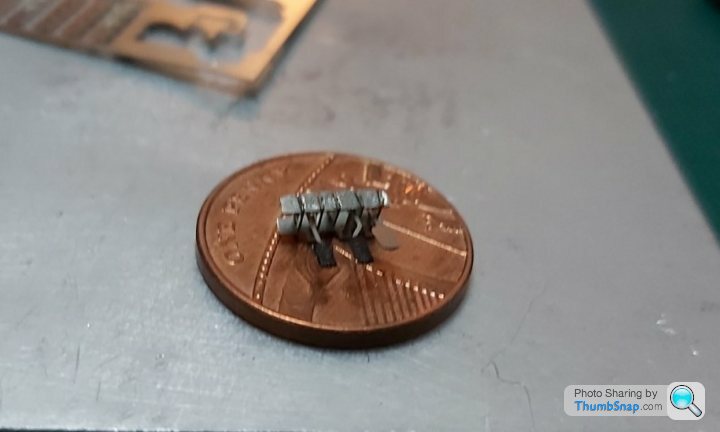
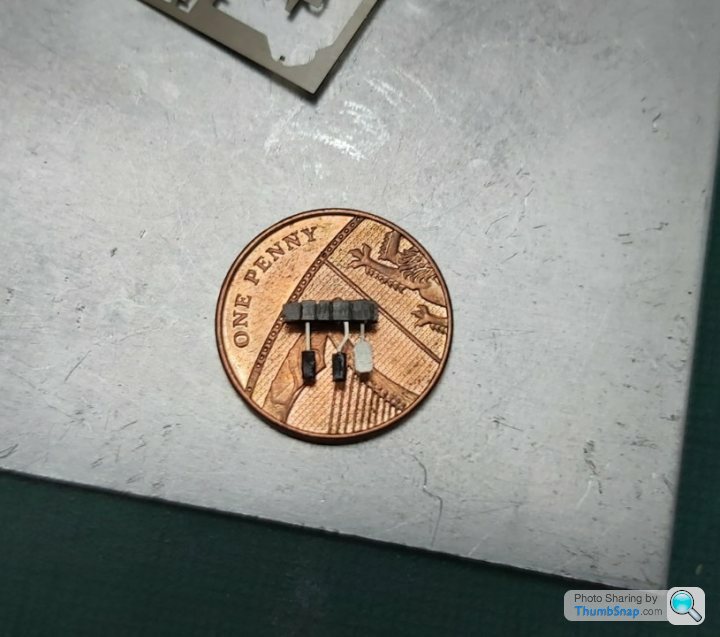
The parts are even smaller than the last build i did, so i suppose it was one of the smallest grandprix cars made. Should see me through Xmas.
Here goes if anyones interested.
 .
.
1st things 1st i put all the tiny parts in the jewellers screw case for fear of loosing them
All of the chassis is PE, varying in thickness, white metal casstings, nickel silver, steel, brass, steel mesh, tuned aluminium,rivets, rubber and 2 sets as usual of decals.
The parts are even smaller than the last build i did, so i suppose it was one of the smallest grandprix cars made. Should see me through Xmas.
Here goes if anyones interested.
.henryk001 said:
Arrived this week.Decided on this car as the 3rd car to build and go on the transporter along with the 500 and sharknose previously built.
1st things 1st i put all the tiny parts in the jewellers screw case for fear of loosing them
All of the chassis is PE, varying in thickness, white metal casstings, nickel silver, steel, brass, steel mesh, tuned aluminium,rivets, rubber and 2 sets as usual of decals.
The parts are even smaller than the last build i did, so i suppose it was one of the smallest grandprix cars made. Should see me through Xmas.
Here goes if anyones interested.
.
Another of your amazing builds is always welcome, and a beautiful subject!1st things 1st i put all the tiny parts in the jewellers screw case for fear of loosing them
All of the chassis is PE, varying in thickness, white metal casstings, nickel silver, steel, brass, steel mesh, tuned aluminium,rivets, rubber and 2 sets as usual of decals.
The parts are even smaller than the last build i did, so i suppose it was one of the smallest grandprix cars made. Should see me through Xmas.
Here goes if anyones interested.
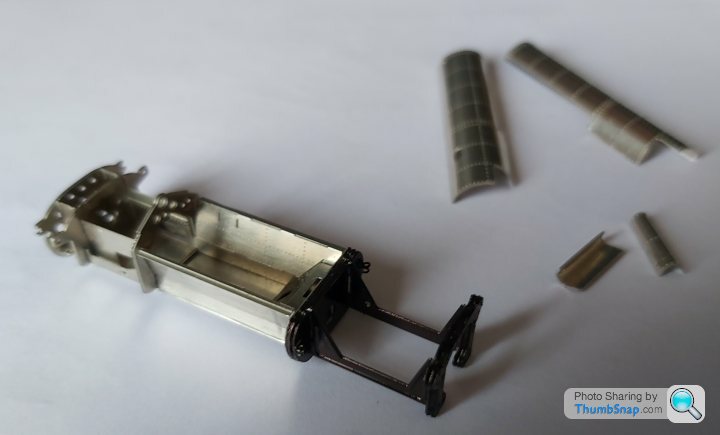
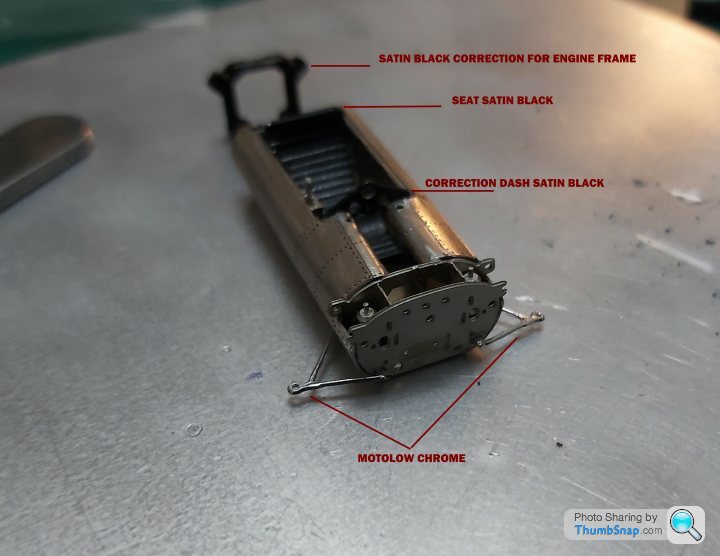
.Thanks Guys!!! and anyone else interested in this subject.
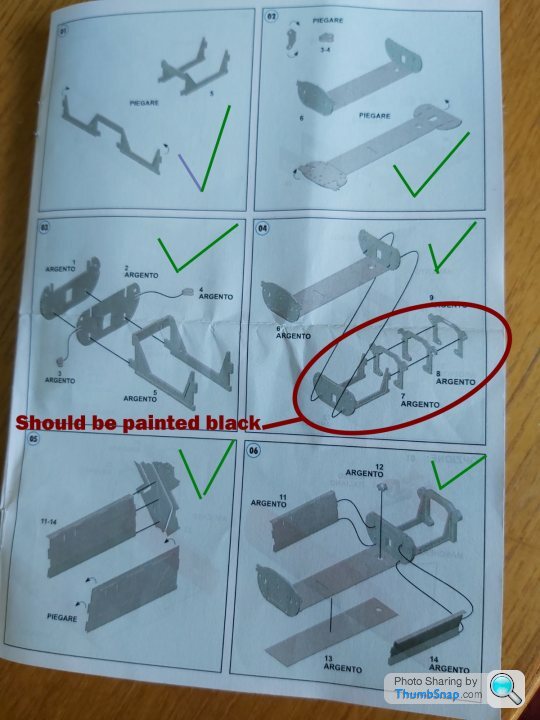
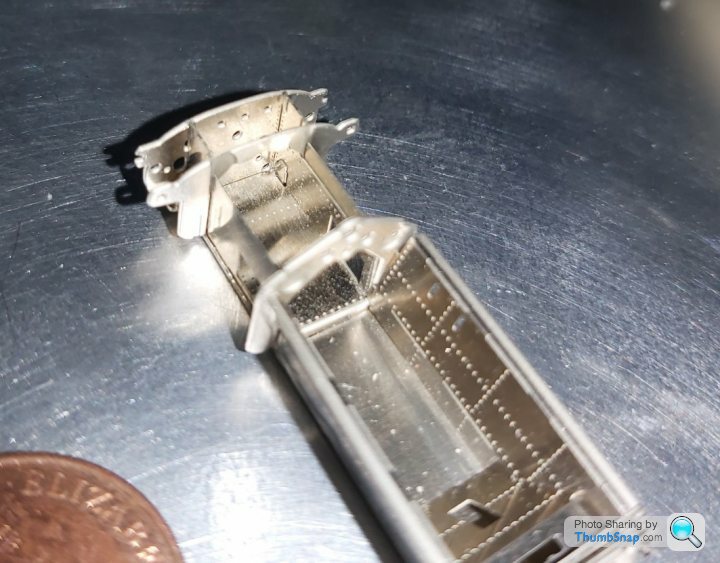
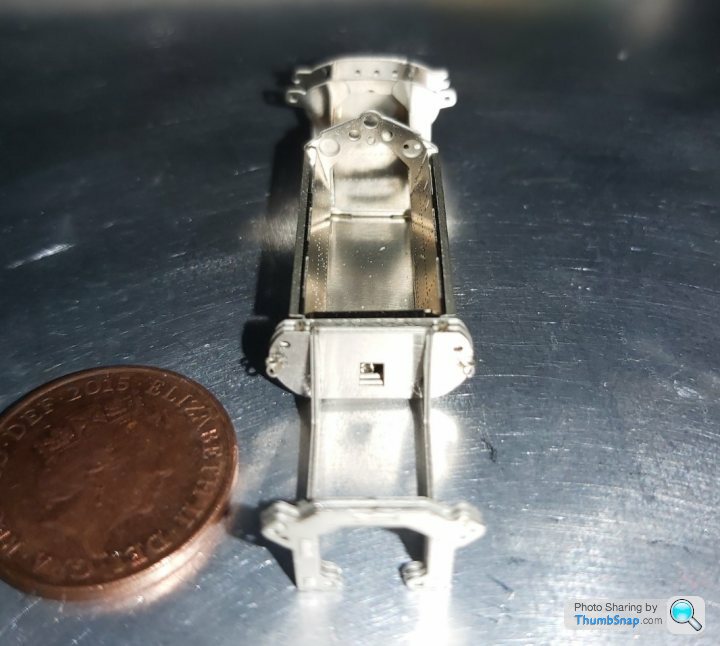
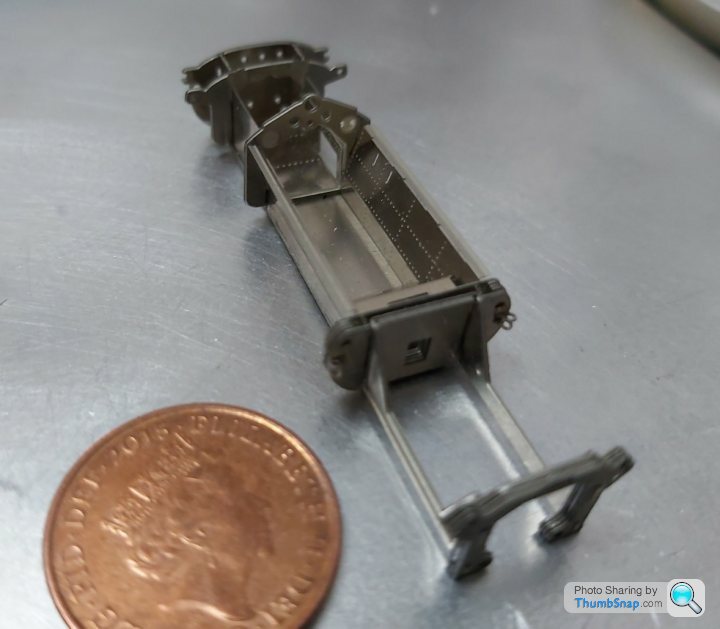
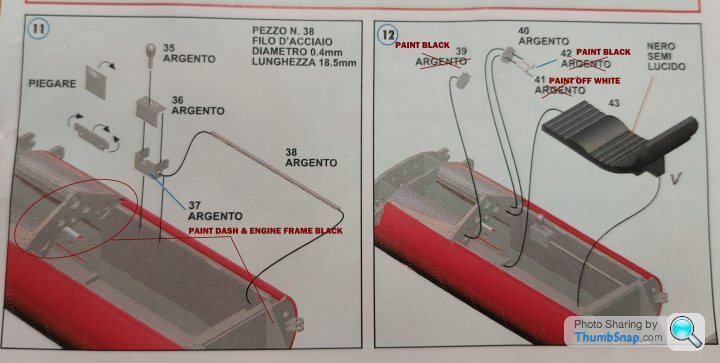
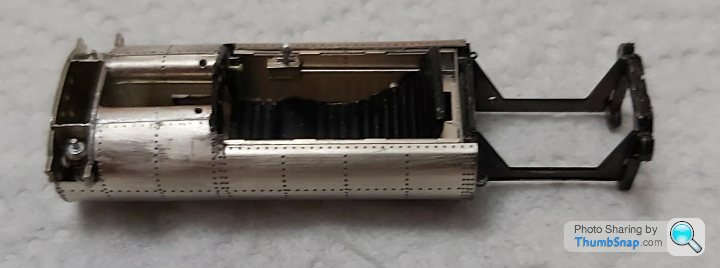
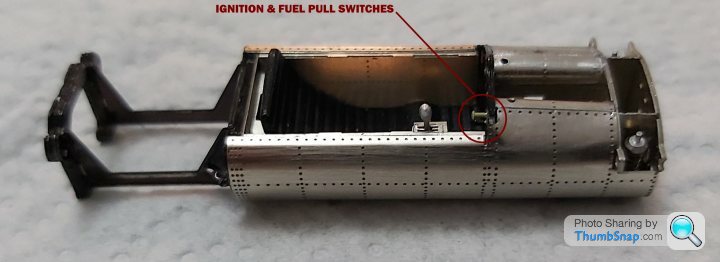
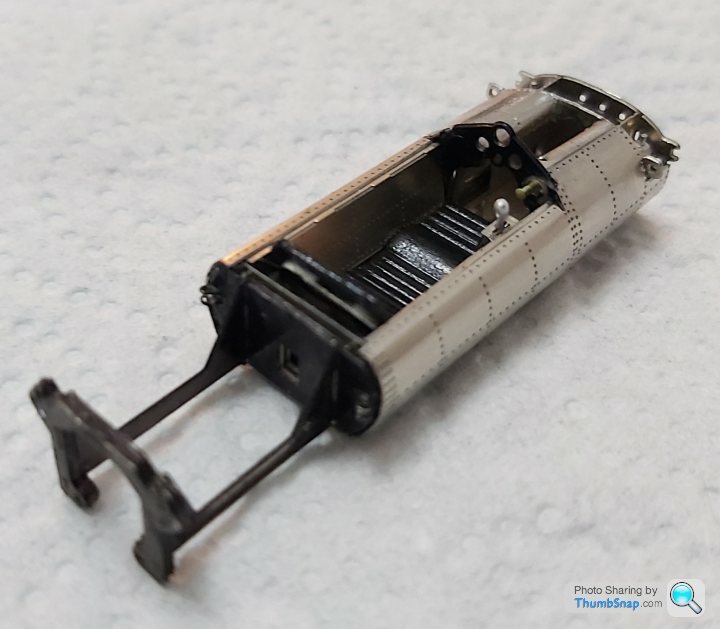
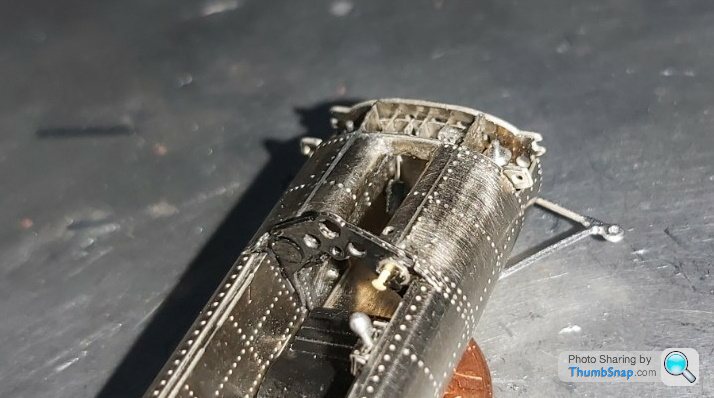
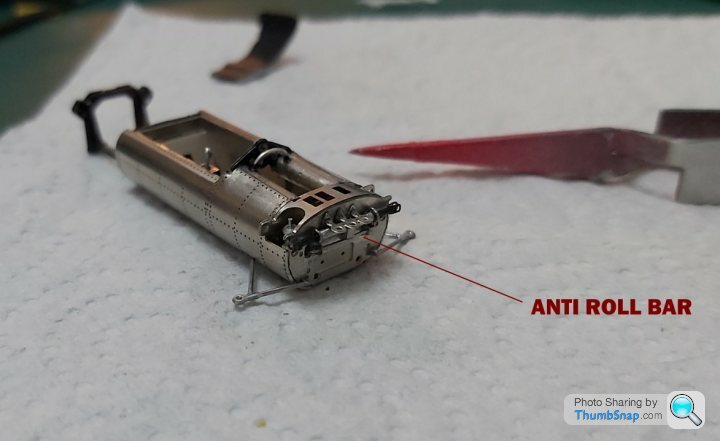
Im really impressed with the way this monocoque chassis has been designed using all PE, impressed with its accuracy albeit the rear engine frame should be painted black.
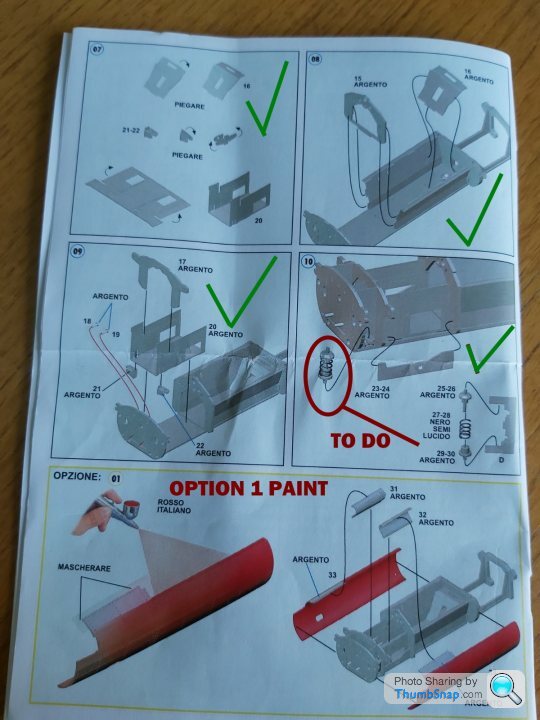
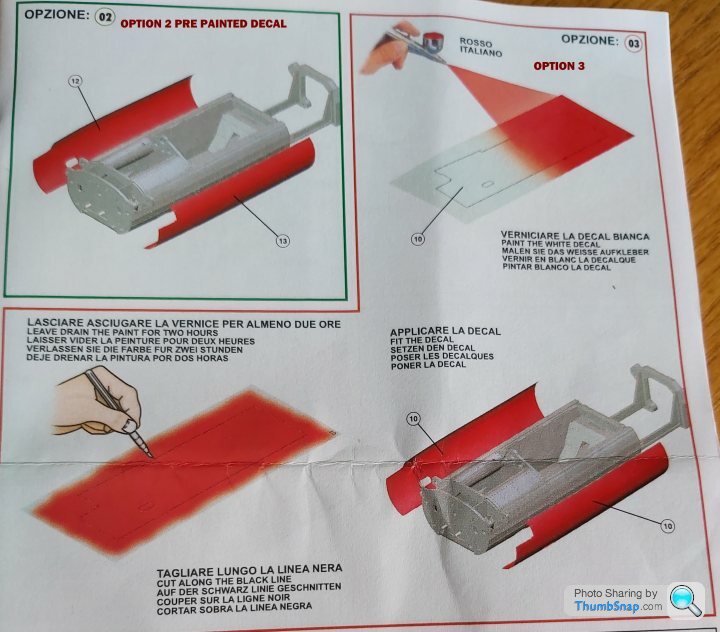
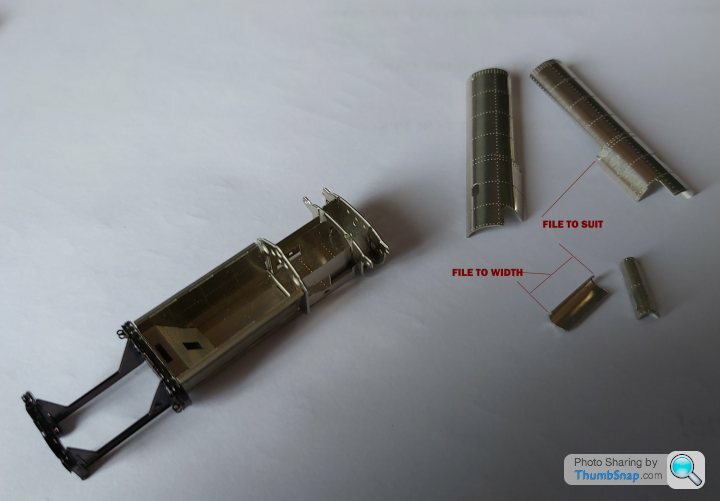
The other thing which is new to me is the 3 options to either spray paint the side panels,use a prepainted deckel or spray and laquer a blank decal and trim
to suit,so im going to try the pre painted decal 1st and hope the Tamiya TS8 matches for the top body and engine cover.If the decal doesnt work i can always remove it.
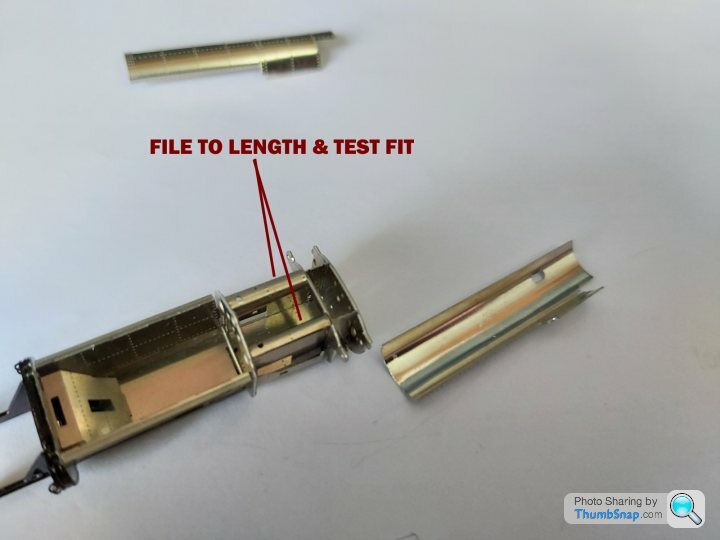
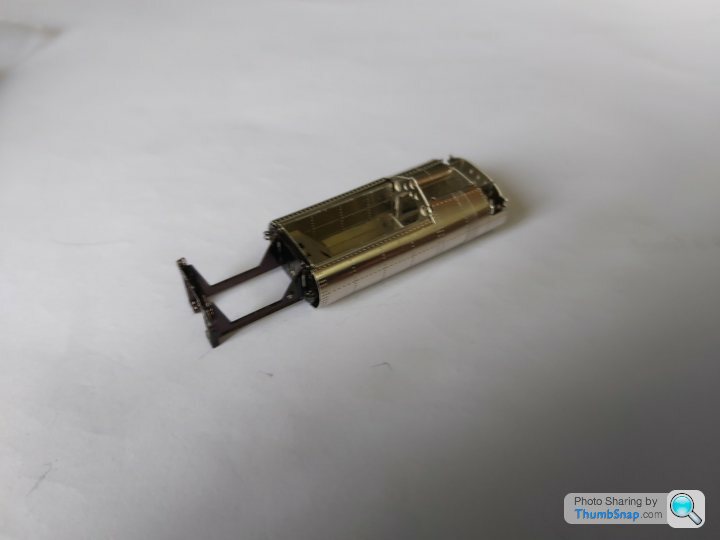
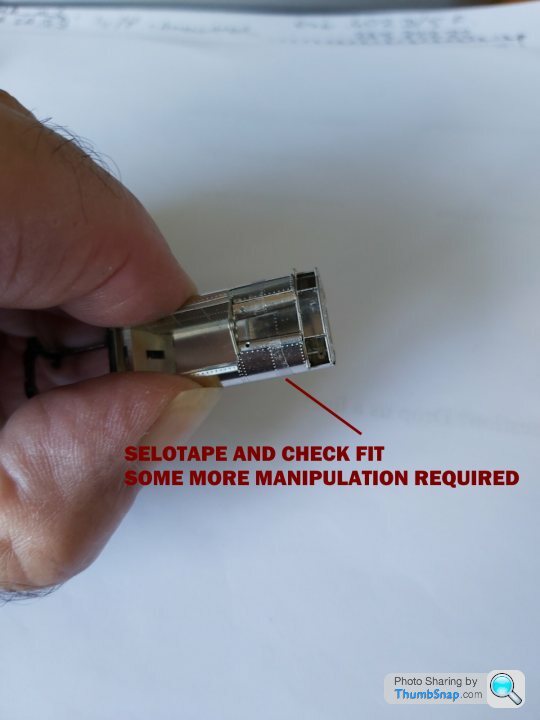
There is some filing and manipulting to do on the side panels to make it all fit. Lots of photos here to show the Photo etch chassis.Actually taking photos do show up any mistakes made better than just looking.
 .
.
 .
.
 .
.
 .
.
 .
.
 .
.
 .
.
 .
.
 .
.
 .
.
 .
.
 .
.
 .
.
 .
.
 .
.
 .
.
 .
.
Thanks for looking
Im really impressed with the way this monocoque chassis has been designed using all PE, impressed with its accuracy albeit the rear engine frame should be painted black.
The other thing which is new to me is the 3 options to either spray paint the side panels,use a prepainted deckel or spray and laquer a blank decal and trim
to suit,so im going to try the pre painted decal 1st and hope the Tamiya TS8 matches for the top body and engine cover.If the decal doesnt work i can always remove it.
There is some filing and manipulting to do on the side panels to make it all fit. Lots of photos here to show the Photo etch chassis.Actually taking photos do show up any mistakes made better than just looking.
.................Thanks for looking

dr_gn said:
Looks like another very nice Tameo kit - looks almost a smaller scale than 1:43.
.Ive read up a lot about this car for details and data.The chassis is quite short in comparrison to the bodywork, so its going to be approx 1/3rd longer than the photos shown.Looking at pictures of the late John Surtees in the car, he was pretty much shoehorned into it which would explain how slim he and the car was.I remember my jedi hillclimb car was similar in size and quite uncomfortable (good times though). Ive purchased the 50,s BRM V16 model kit from STMS which was a monster of a car as ive read to be resurrected by BRM. As a model it is huge by comparrison to this Ferrari .
Ferrari 158. Ferrari. Active: 1964 - 1965. Team: Scuderia Ferrari SpA. Ferrari in blue!!! ... Dimensions. Length: 3,950 mm. Width: 1,697 mm. Height: ...
Height: 768 mm
Width: 1,697 mm
Length: 3,950 mm
Stratovarious said:
Eeuurrgghh!! All that photo etch.
Rather you than me!
Just a challenge for me,ive never made a predominantly PE kit, but impressed with the detail for a very small car and its as far as im concerned a dexterity challenge for my ever aging hands. Really enjoying it. CheersRather you than me!
henryk001 said:
Just a challenge for me,ive never made a predominantly PE kit, but impressed with the detail for a very small car and its as far as im concerned a dexterity challenge for my ever aging hands. Really enjoying it. Cheers
Henryk, it amazes me that you can build things smaller than I can even see.How about this Hiro 1/43rd Porsche 908/03 as a challenge? The good news (compared with their larger scale versions) is that the tubular chassis part comes as a single 3D printed item. Or maybe it's not good news. I think Caterhamnut found it a challenge to get the mechanical parts into his 1/12th 917, and that had all the tubes separate.
CanAm said:
Henryk, it amazes me that you can build things smaller than I can even see.
How about this Hiro 1/43rd Porsche 908/03 as a challenge? The good news (compared with their larger scale versions) is that the tubular chassis part comes as a single 3D printed item. Or maybe it's not good news. I think Caterhamnut found it a challenge to get the mechanical parts into his 1/12th 917, and that had all the tubes separate.
.How about this Hiro 1/43rd Porsche 908/03 as a challenge? The good news (compared with their larger scale versions) is that the tubular chassis part comes as a single 3D printed item. Or maybe it's not good news. I think Caterhamnut found it a challenge to get the mechanical parts into his 1/12th 917, and that had all the tubes separate.
Looking at the photo it would a challenge id be up for. Personally i would think the resin frame wouldnt take the weight of the white metal parts unless being supported by spacers glued to the floor?. Thinking that making the frame out of brass tubing and some soldering would sort that out. Nice kit
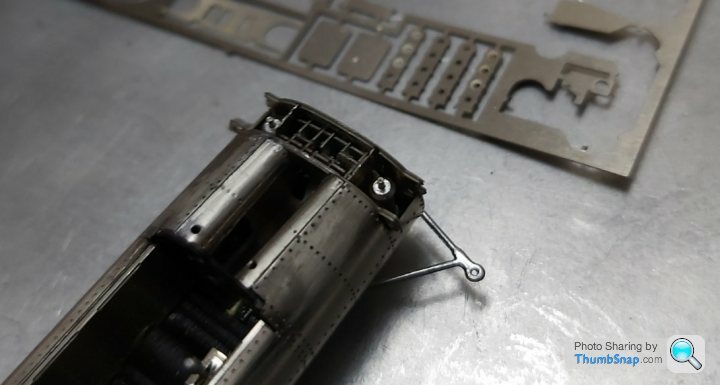
Had another go over a few evenings, went back to level 10 to do the front shocks. Im leaving the red body decals until the end so not to damage them whilst building. The decal will have to be cut to go around the lower wishbones and if that fails i can always paint the panels.
 .
.
 .
.
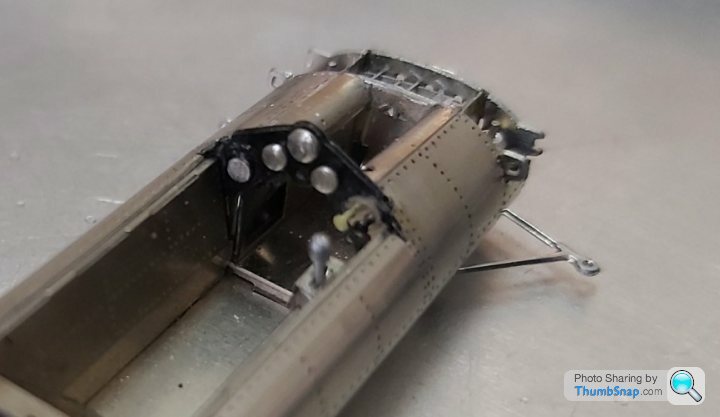
Level 11-12 complete but painted the dash semi gloss black as per photos seen of the car.
 .
.
 .
.
 .
.
 .
.
 .
.
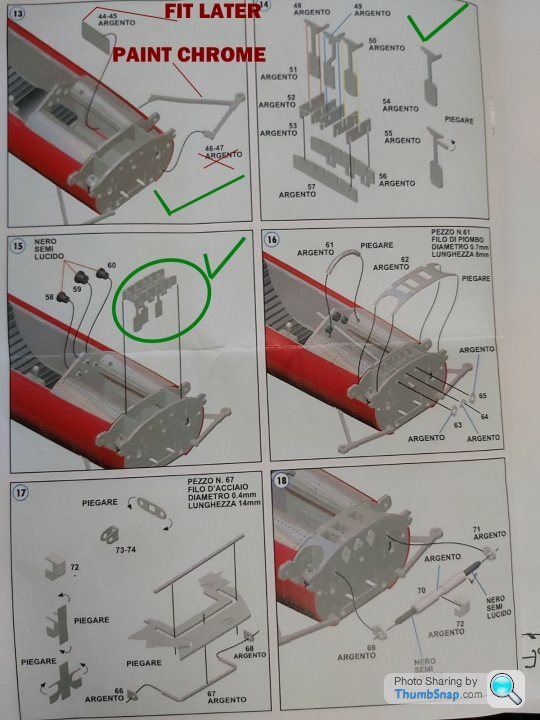
Level 13 -14 complete, leaving off the rectangular inner panels until the front suspension is finished just in case the lower wishbones come loose.
 .
.
 .
.
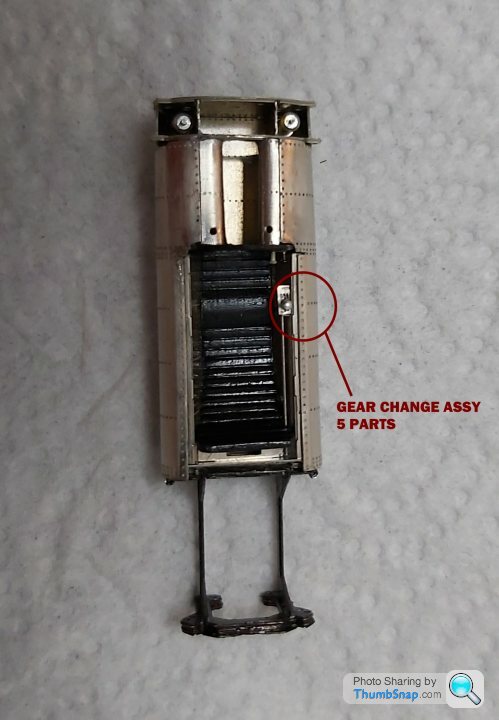
Pedal box frame was quite difficult but got there in the end, Guages on level 15 to finish off, hopefully with some wiring.Then onto 16/17&18
 .
.
 .
.
 .
.
 .
.
..Level 11-12 complete but painted the dash semi gloss black as per photos seen of the car.
.....Level 13 -14 complete, leaving off the rectangular inner panels until the front suspension is finished just in case the lower wishbones come loose.
..Pedal box frame was quite difficult but got there in the end, Guages on level 15 to finish off, hopefully with some wiring.Then onto 16/17&18
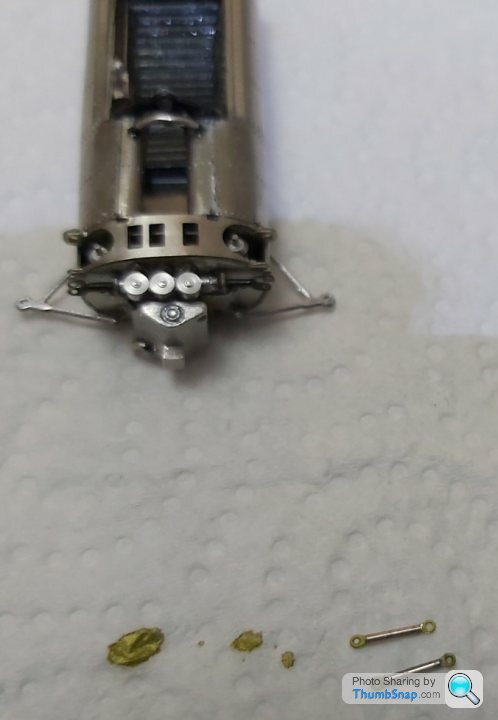
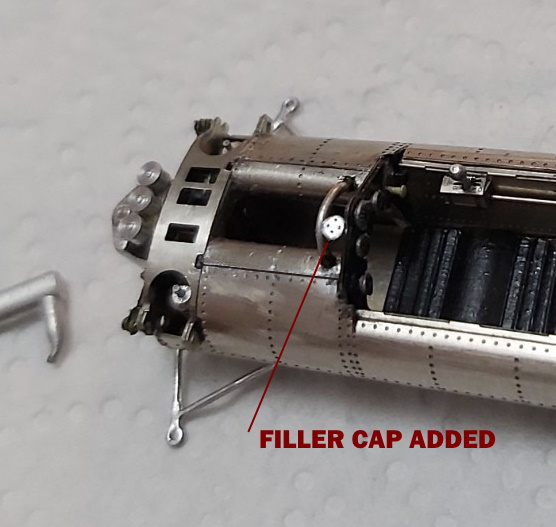
....Levels 16-20.Found that there is no fuel guage for the far left of the dash so made one up and added a decal, also there should be a filler neck on the pipe which joins the 2 tanks in front of the dash i will have to make up.Coming along slowly due to commitments.
 .
.
 .
.
 .
.
 .
.
 .
.
 .
.
 .
.
 .
.
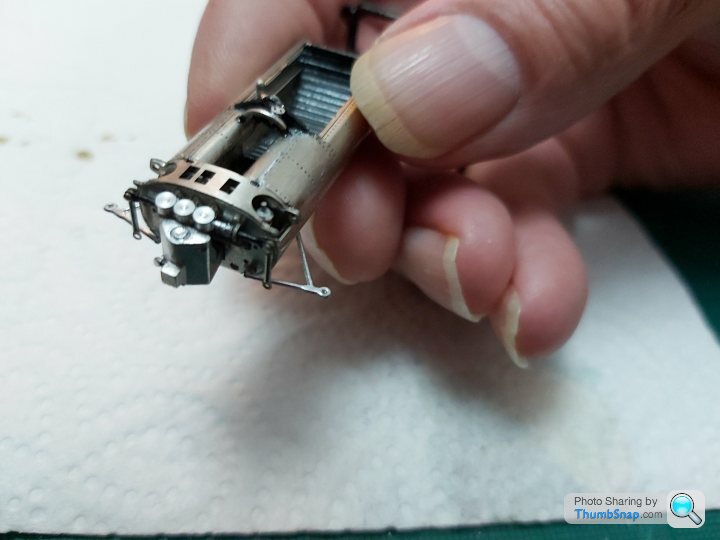
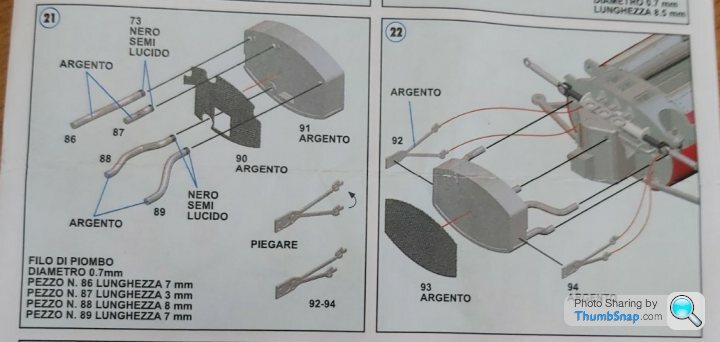
Finish off 20-24. The radiator will be a challenge of trial and error as theres no bending jig for the pipes.
........Finish off 20-24. The radiator will be a challenge of trial and error as theres no bending jig for the pipes.
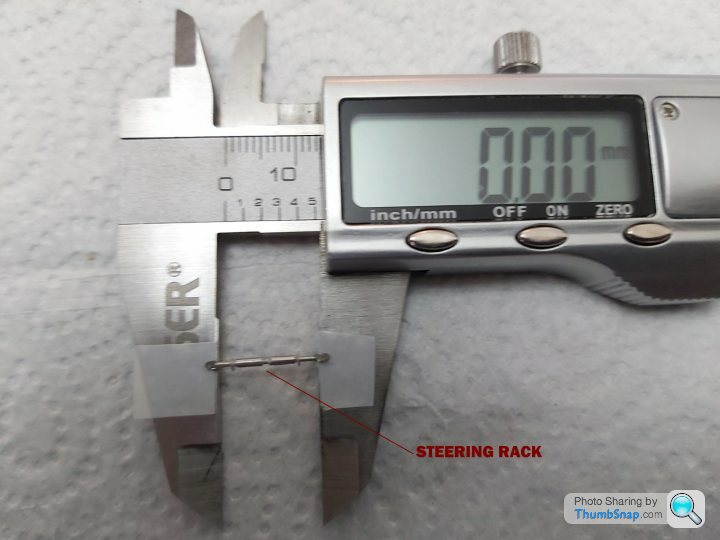
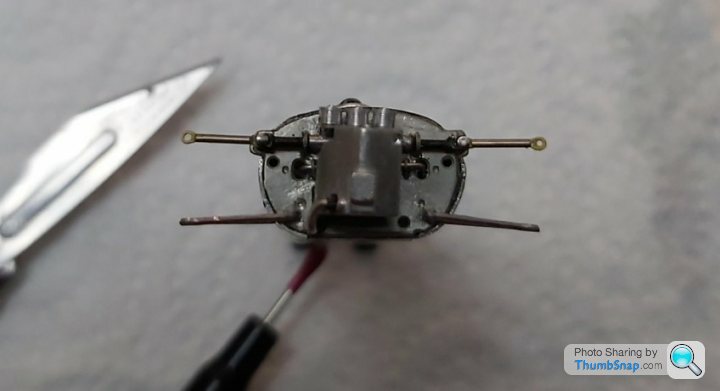
Finished off the front trackrods,I added a filler neck which joins the pipe and sits in front of the dash on the real car.
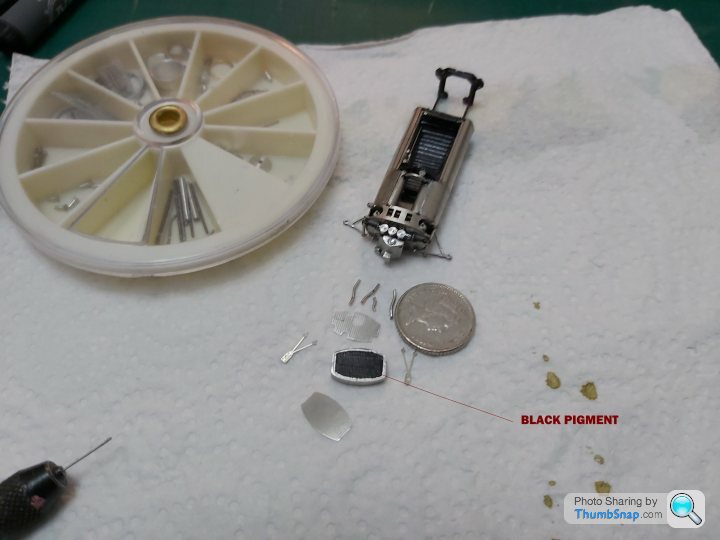
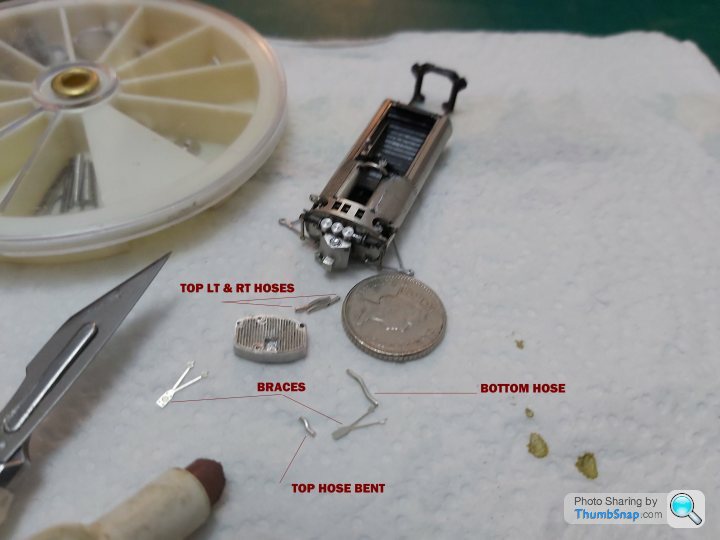
Onto level 21-22, radiator. This will take a bit of time to get right as the hoses 0.7mm dia soft wire needs to be bent and manipulated by trial and error until it looks right.My previous Tameo build had bending jigs which made it easy to do.Used black pigment prior to adding the grill to the rad.
Rubber effect paint will be used to simulate the hose connections
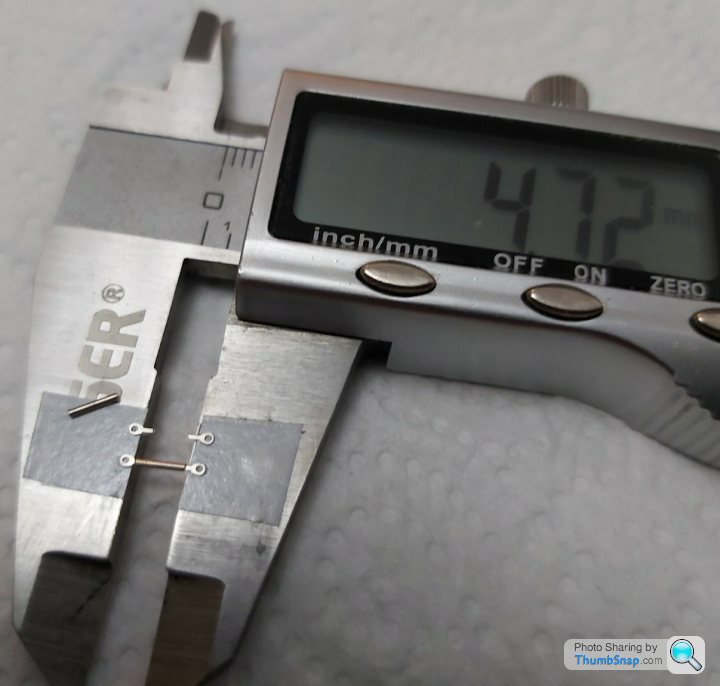
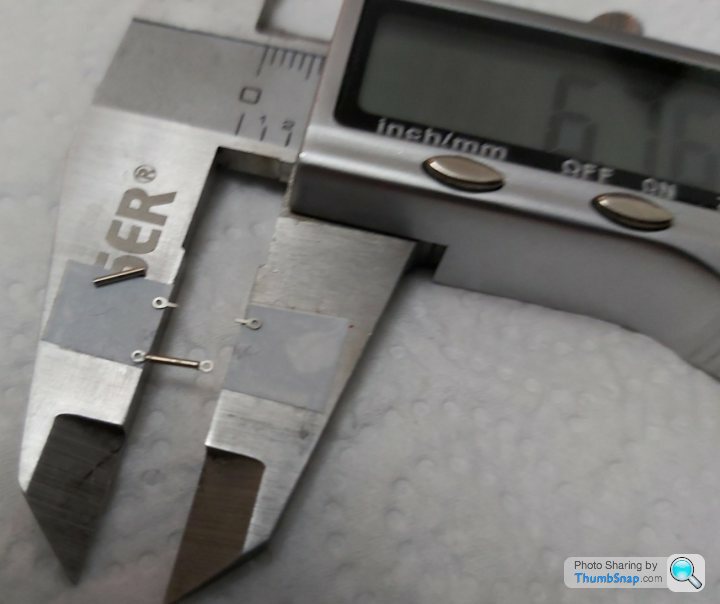
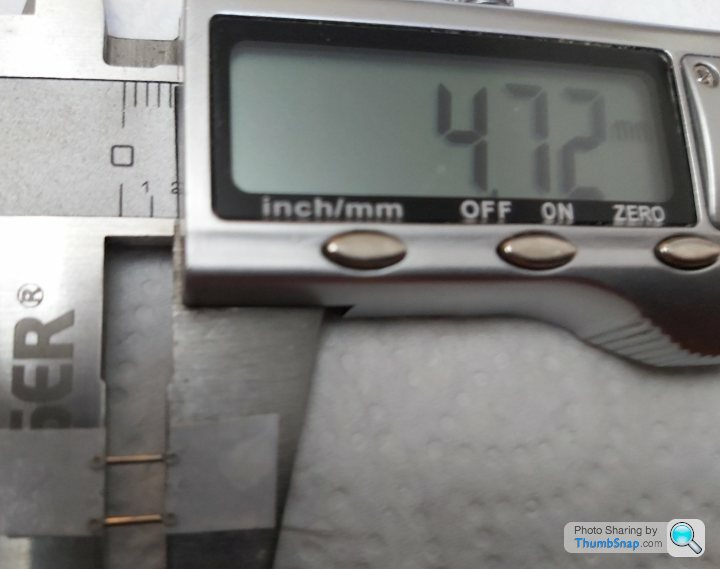
Used double sided tape on a vernier to help make up the trackrods.
 .
.
 .
.
 .
.
 .
.
 .
.
 .
.
 .
.
Radiator.
 .
.
 .
.
 .
.
Onto level 21-22, radiator. This will take a bit of time to get right as the hoses 0.7mm dia soft wire needs to be bent and manipulated by trial and error until it looks right.My previous Tameo build had bending jigs which made it easy to do.Used black pigment prior to adding the grill to the rad.
Rubber effect paint will be used to simulate the hose connections
Used double sided tape on a vernier to help make up the trackrods.
.......Radiator.
...Guiddy said:
How the heck you build stuff this small amazes me!
I built 1/43rd when I was a young lad! It's 1/12 for me nowadays, 1/18 or maybe 1/20 at a push!
The kit itself is easy to follow, its the time spent on each section and care not to loose anything that might ping off somewhere. I dont rush anything as with a model this small, its easy to make a mistake or break something. Im also more prone to 1/12th scale.I built 1/43rd when I was a young lad! It's 1/12 for me nowadays, 1/18 or maybe 1/20 at a push!
Some links of 1/12th cars built over the last couple of years.
https://www.pistonheads.com/gassing/topic.asp?h=0&...
https://www.pistonheads.com/gassing/topic.asp?h=0&...
https://www.pistonheads.com/gassing/topic.asp?h=0&...
I started doing these small kits as a challenge early this year. Keeps the grey matter going and dexterity with my age old hands. Not doing anything for my eyesight though.
Thankyou for looking
Gassing Station | Scale Models | Top of Page | What's New | My Stuff