Schumacher BossCat Comp Rebuild
Discussion


Ash_ said:
Fantastic talent you both have there, do you work well together or does a bit of tension/stress rear it's head?
Thanks, but it's books, trial and error, and advice form the Model Engineering forum that gets us through. I'd say the only talent is not giving up, or compromising.There's no hassle at all with him, some frustration on my part when I've told him something that turns out to be not the best way of doing it. Then again, just admit it, see what he thinks and do it again. He helped with some steam engine beds I'm making, and if fact at one point noticed I'd made an error with an angled fixture plate - saved re-making some parts. I'm not a patient teacher, so I have to be careful because it's easy to make a fool of yourself by rushing or making assumptions....
He's always taking photos of his work to put on whatever social media he's on, and he's clearly proud of the results. He will default to online gaming all day long, but when he decides to do stuff like this, or his Warhammer models, it's 100% concentration. I just let him do what he wants to do at the time (which is why this rebuild is taking so long!).


Very cool project. This very thread has prompted me to dig out one I built when I was a kid! Apparently that was at the age of 11! Going by the fact it’s a Bosscat Touring 4wd 94 spec and I’m sure I got it for Xmas in 95!
I remember mine used to chew through the drive belts and diff cogs so I wound up making it 2wd only by the end as I couldn’t save pocket money fast enough to keep it on the road!
All in bits now but some of the parts appear to be in good enough shape, the shocks actually feel like they still have oil in!
Would love to get it back up and running!
Has an S&K racing “Ironman” 14t motor and some “sci viper” speed controller which made it quite the handful.
Of course all that stuff is massively outdated now but could be a cool retro project!
Also found a Tamiya King cab which I actually got up and running and seems in great shape bar a tatty shell.
And a more recent Kyosho DBX 2.0 nitro Jobbie I bought on a whim when I last dug the Bosscat out and found it in pieces!
Good luck with your project look forward to the finished article!
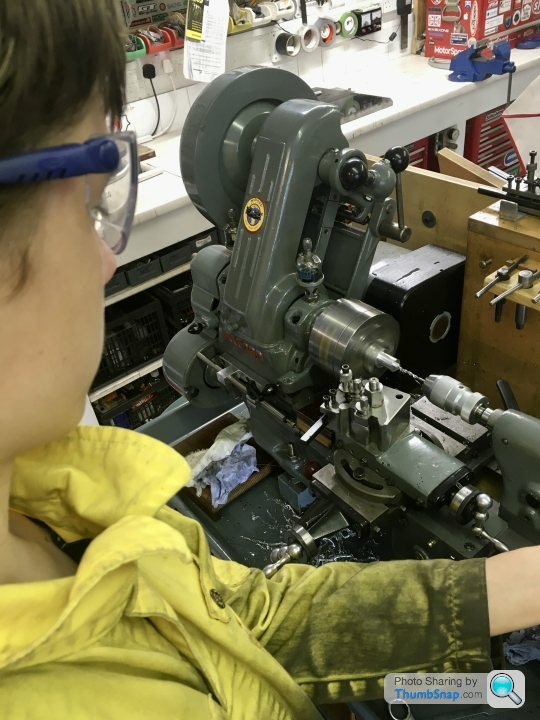
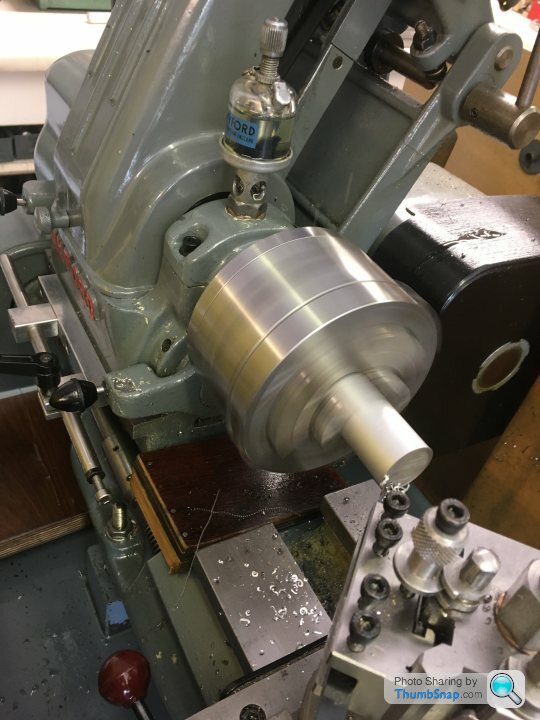
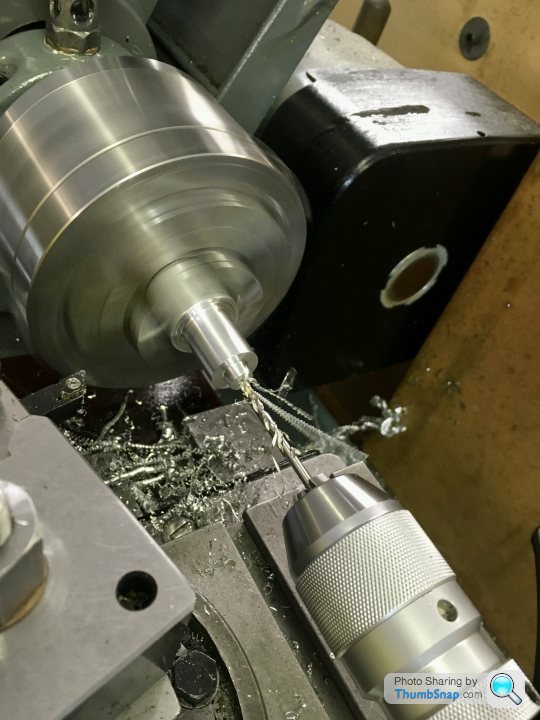
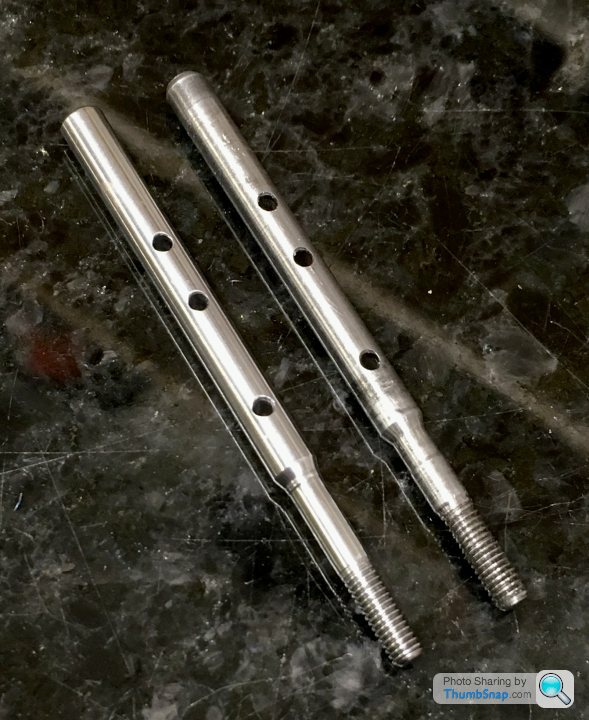
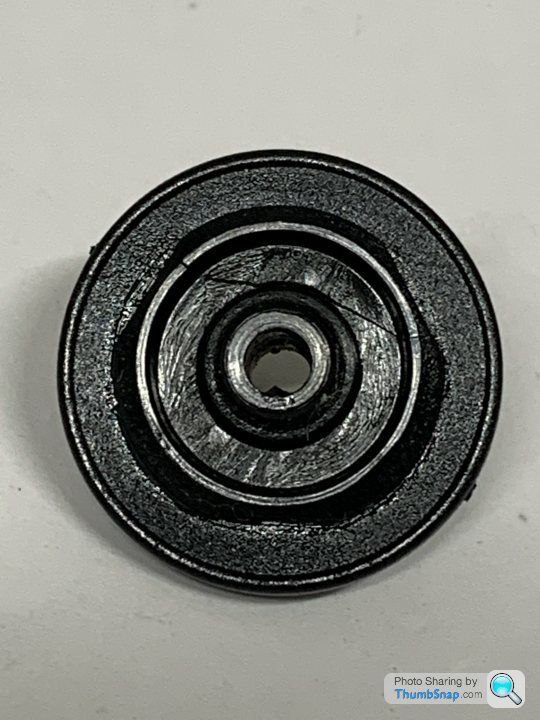
The original layshaft was a bit ropey, so we turned a new one:
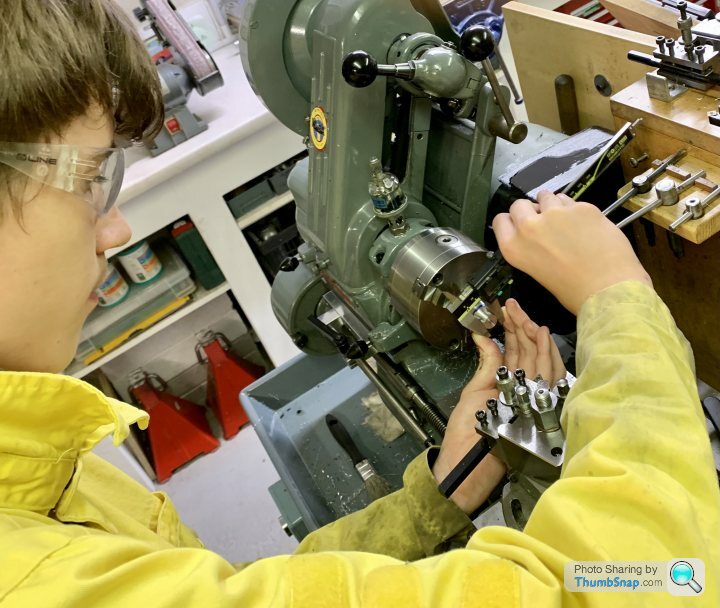
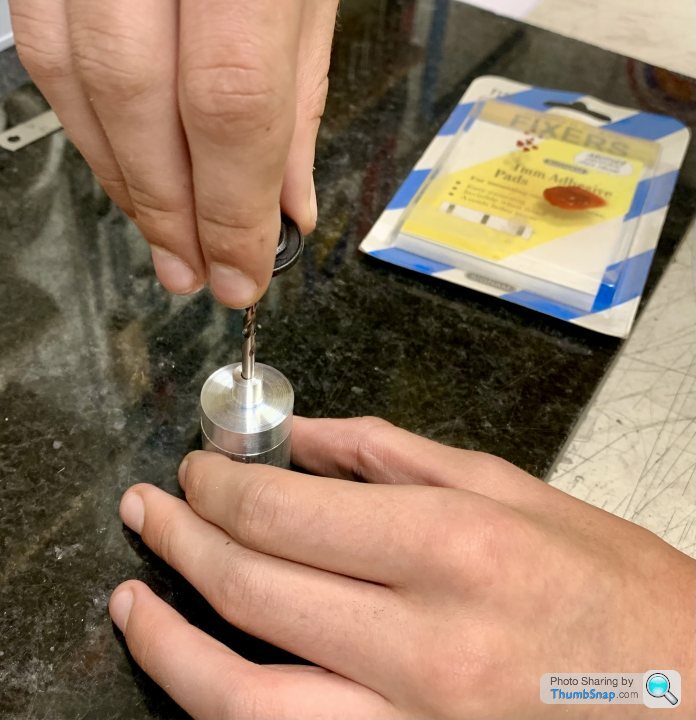
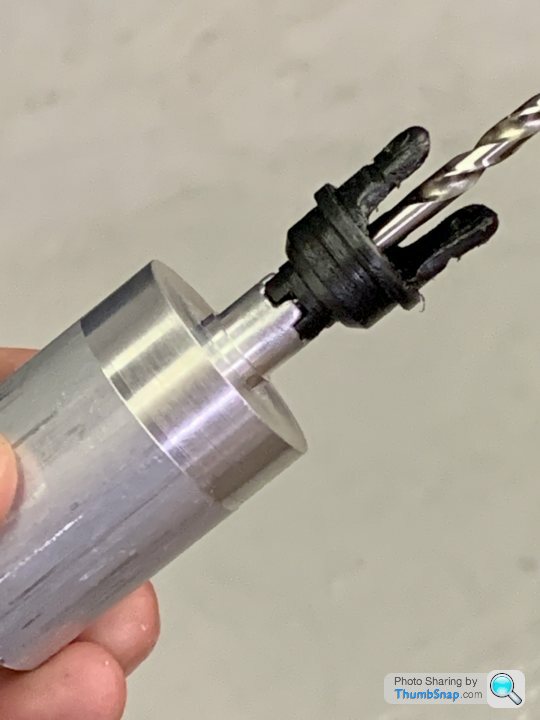
Cross-drilled and made some drive pins out of an old twist drill:
All clicked together quite nicely:
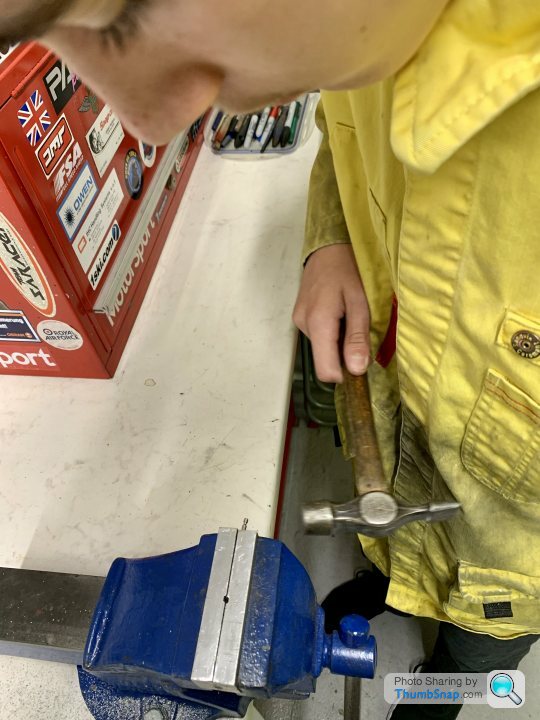
Also straightened a few bent axles:
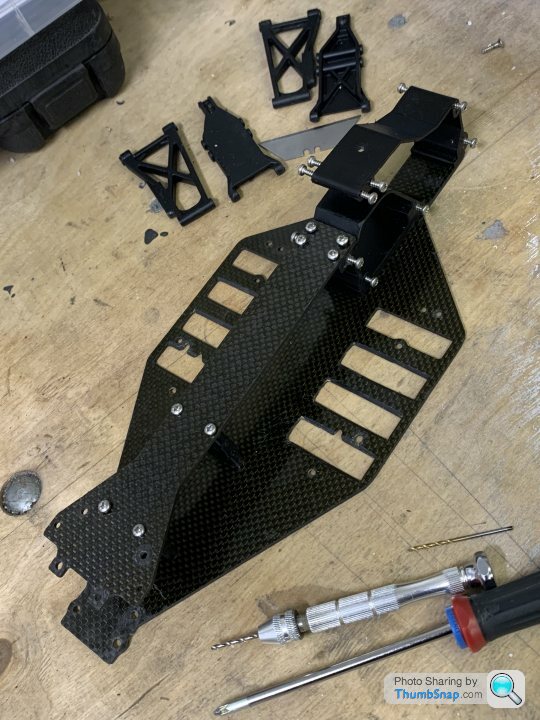
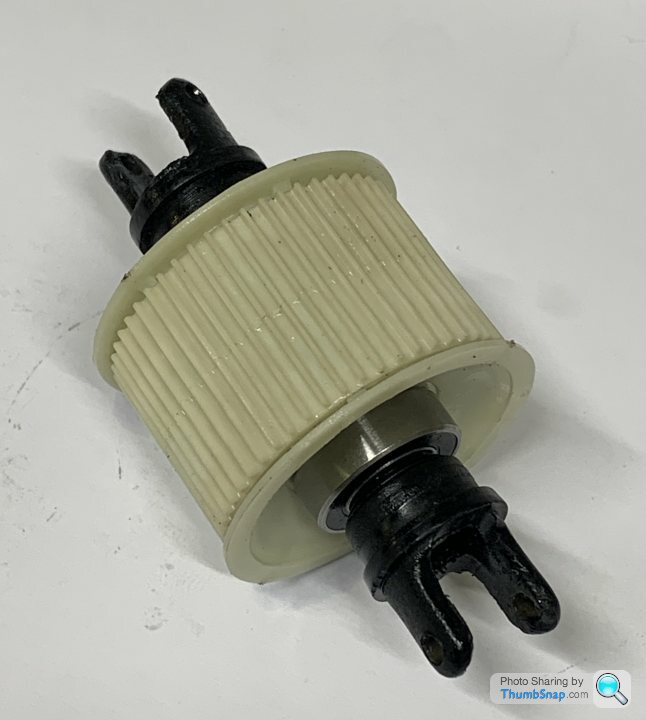
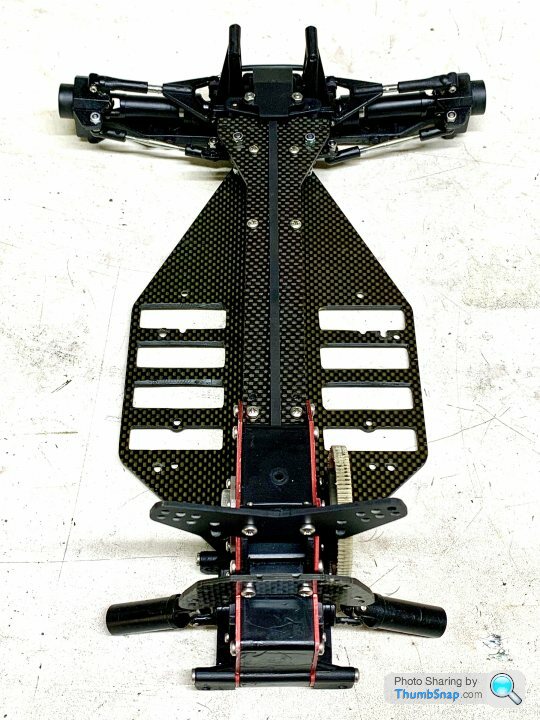
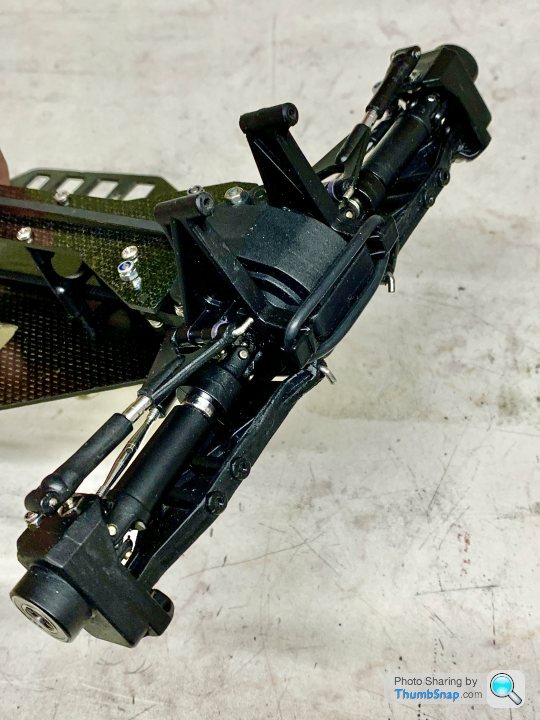
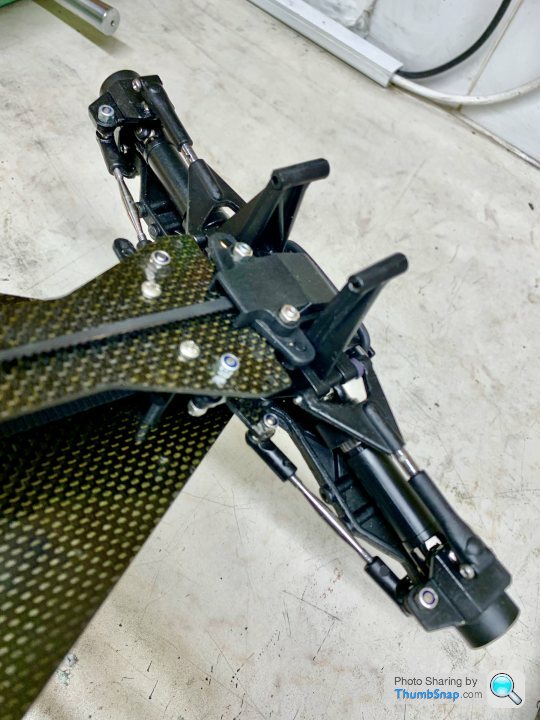
And test-fitted the chassis parts:
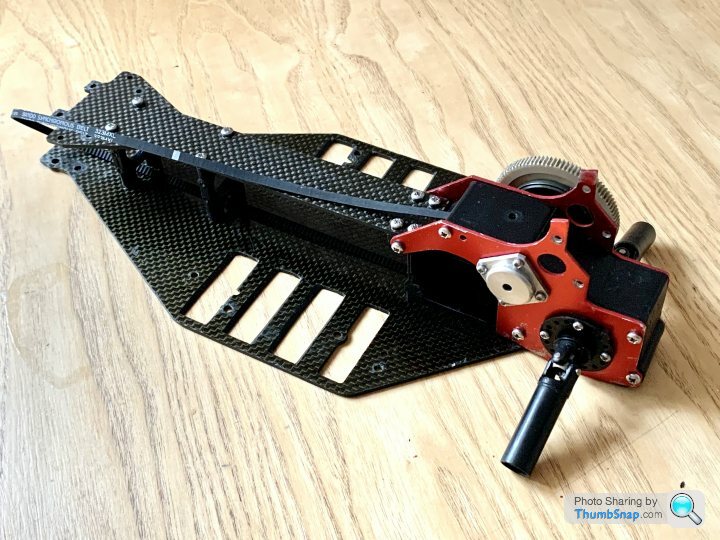
Assembled the gearbox, and fitted to the chassis:
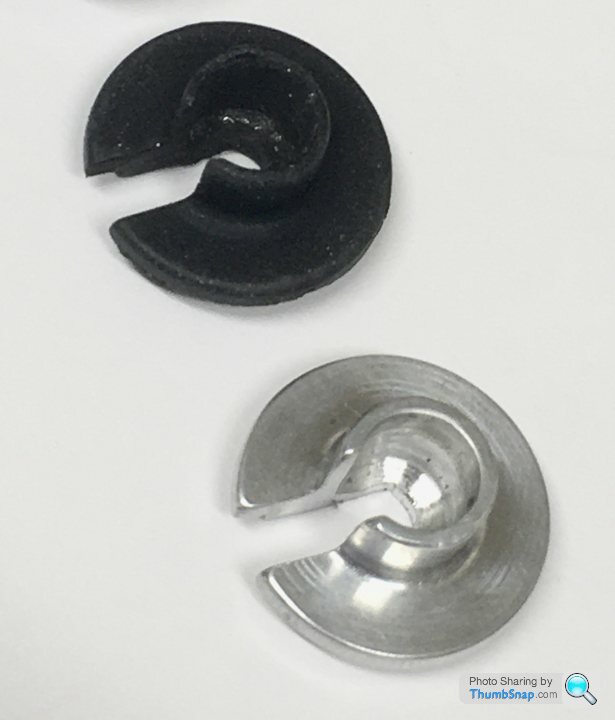
…but something was amiss with the differential. It was solid both in normal and differential rotation when the compression bolt was tightened. So after some stripping we found a cracked washer holder, which must have allowed the central bosses to bind:
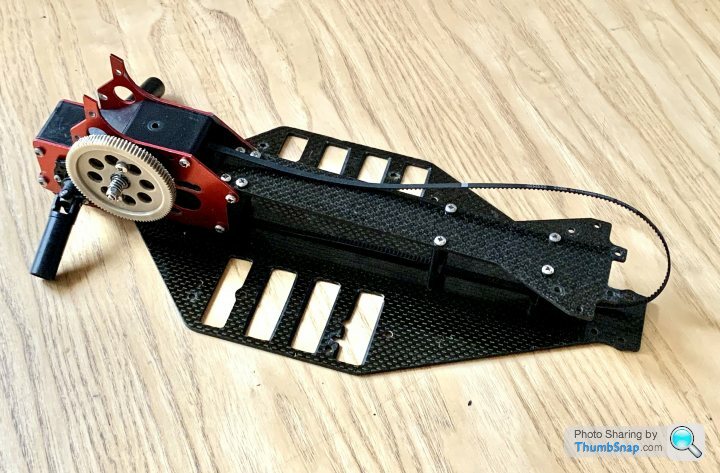
And despite filling any oversized screw holes with Epoxy, and re-drilling, some screws wouldn’t re-tighten. All in all a bit of a disappointing start. Still, the gearbox pulleys and belts all lined up and it turned very smoothly.
So now to source a new male diff washer carrier…
Cross-drilled and made some drive pins out of an old twist drill:
All clicked together quite nicely:
Also straightened a few bent axles:
And test-fitted the chassis parts:
Assembled the gearbox, and fitted to the chassis:
…but something was amiss with the differential. It was solid both in normal and differential rotation when the compression bolt was tightened. So after some stripping we found a cracked washer holder, which must have allowed the central bosses to bind:
And despite filling any oversized screw holes with Epoxy, and re-drilling, some screws wouldn’t re-tighten. All in all a bit of a disappointing start. Still, the gearbox pulleys and belts all lined up and it turned very smoothly.
So now to source a new male diff washer carrier…
Benni said:
Great thread, good job by both of you, would you adopt a 16 year old trapped in a 60s german body ?
If those special washers are that rare, maybe manufacture some more than needed and sell them for budget adjustment ?
Thanks Benni. No I think one teenager is enough!If those special washers are that rare, maybe manufacture some more than needed and sell them for budget adjustment ?
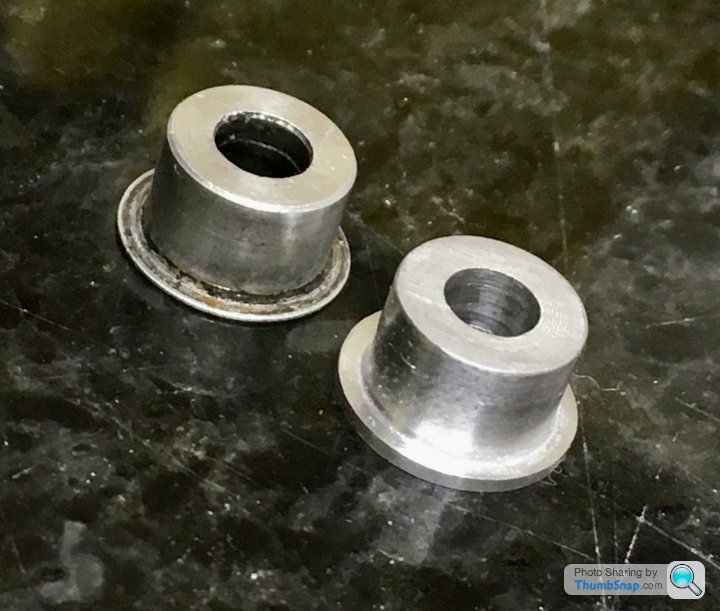
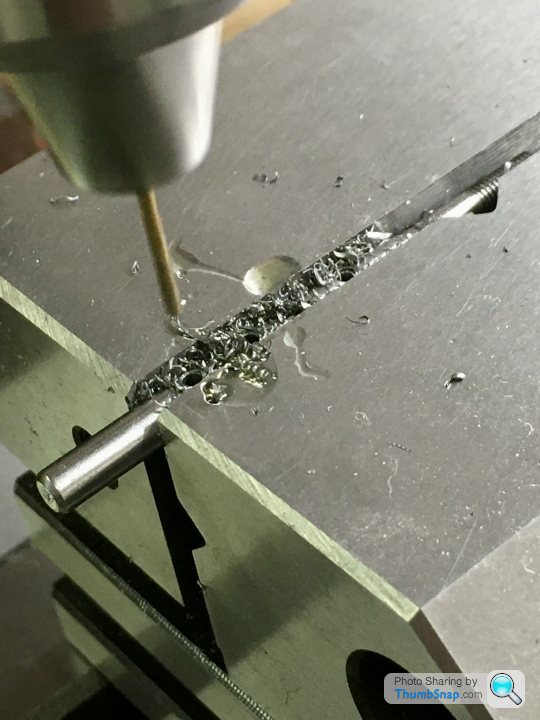
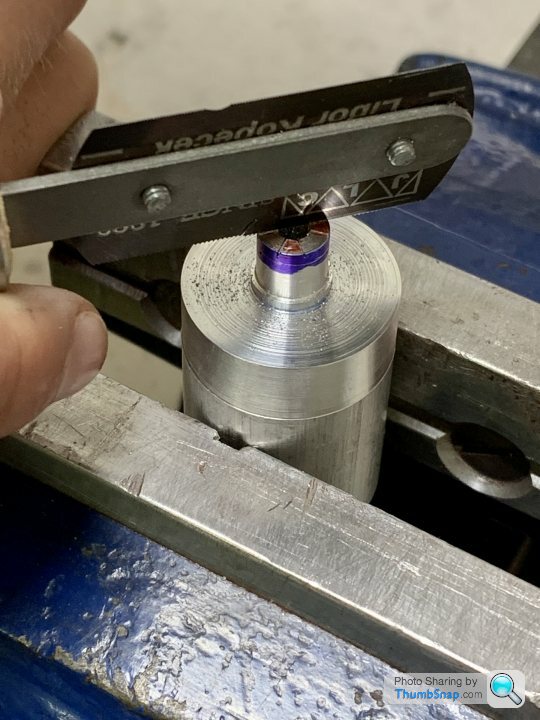
We started machining the holders yesterday. The only issue are the tapered castellations on the output stubs. We tried marking them out using an original as a printing block, then razor-sawing the vertical bits and then snapping the stubs by working with a wood chisel (I know, it’s poor). The castellations really need wire eroding, or the whole thing casting, but that’s beyond our capabilities at home.
No way good enough to even think about selling, but I do believe we will end up with a pair of useable items which will at least get us running. Progress so far:
Thanks!
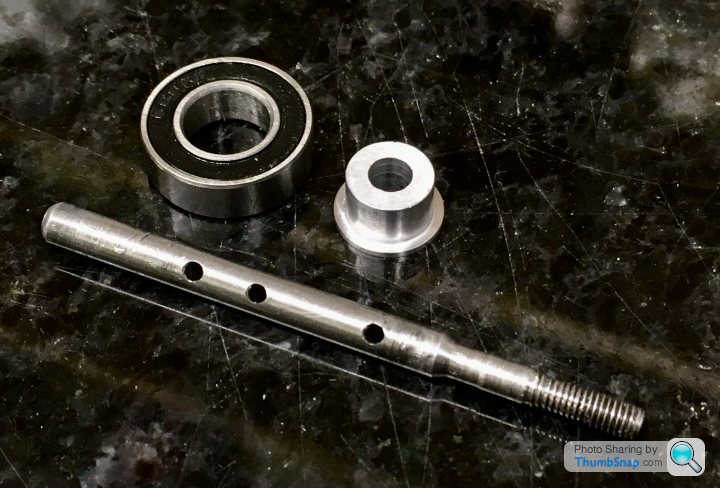
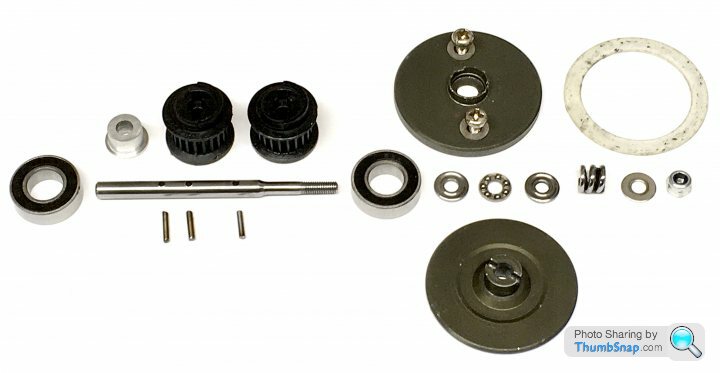
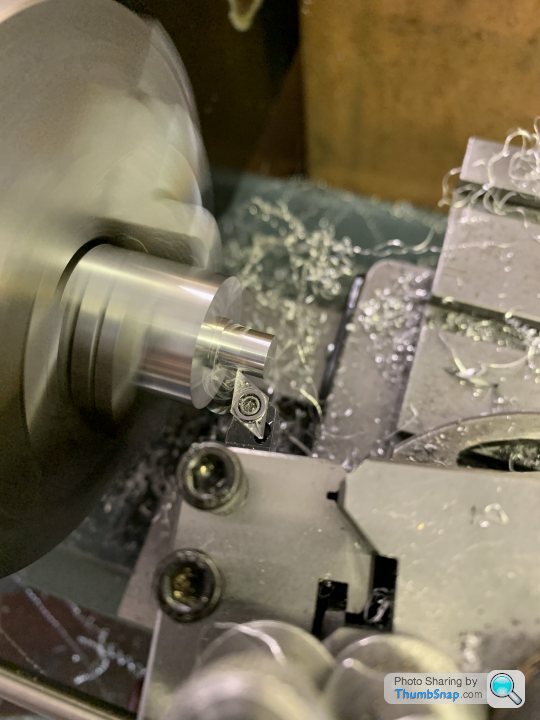
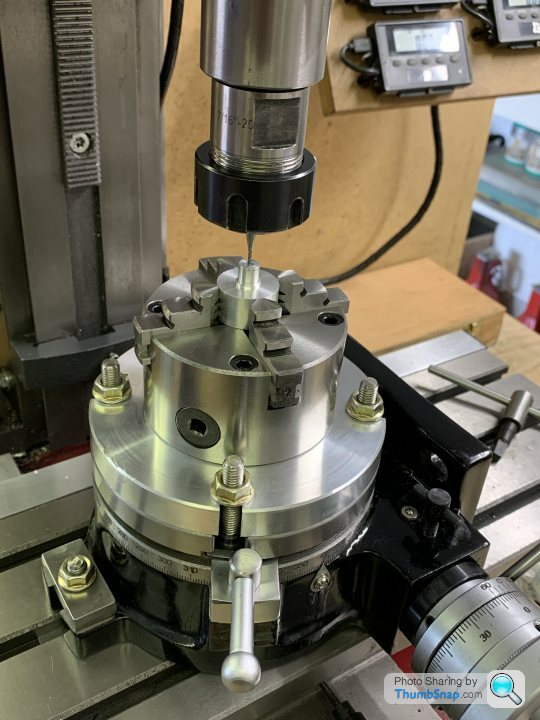
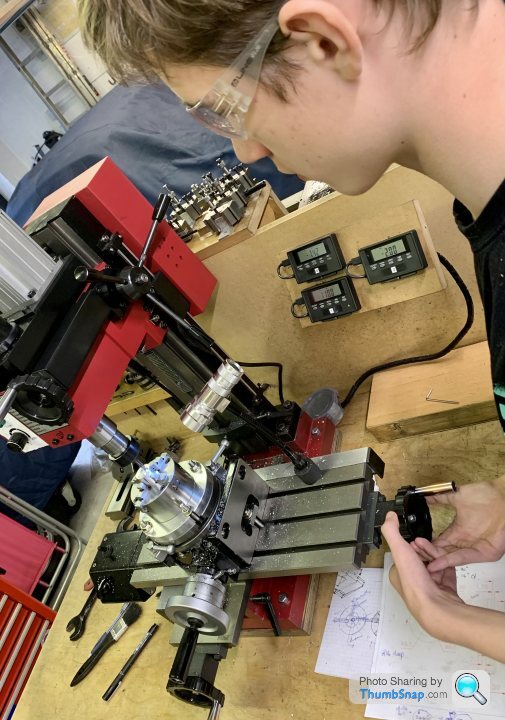
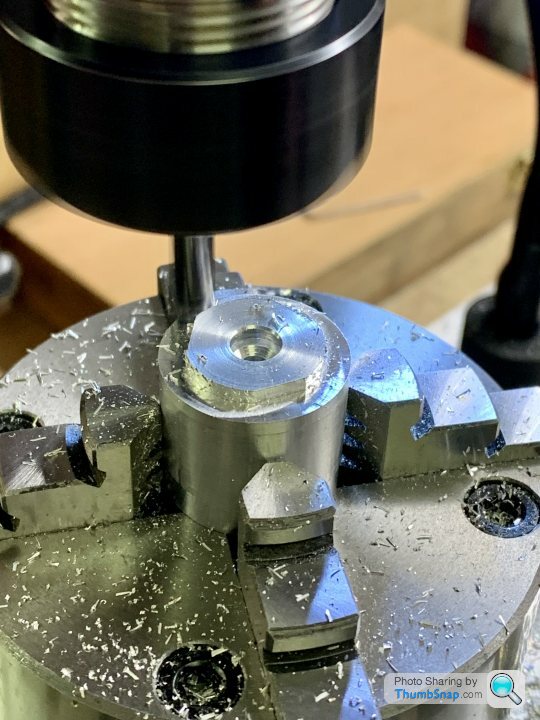
Hit a bit of a wall with this due to the broken diff parts, but I recently got a rotary table, and so these were the first bits we tried on it. Started by turning the spigots for the bearings and castellations:
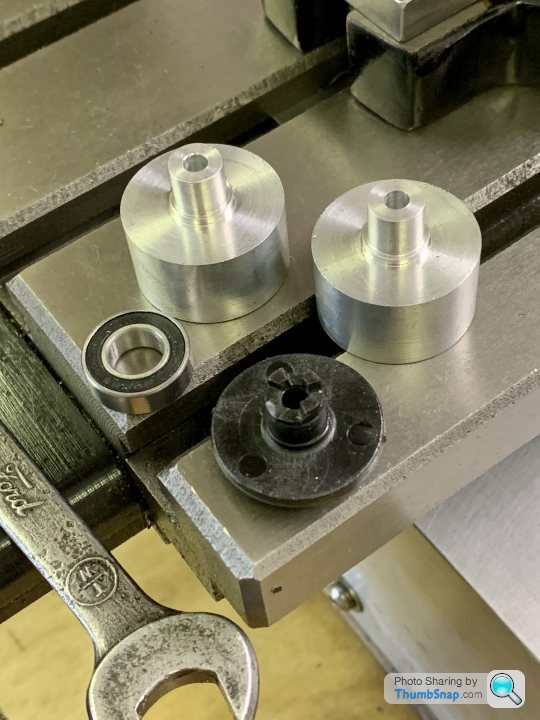
Made two blanks:
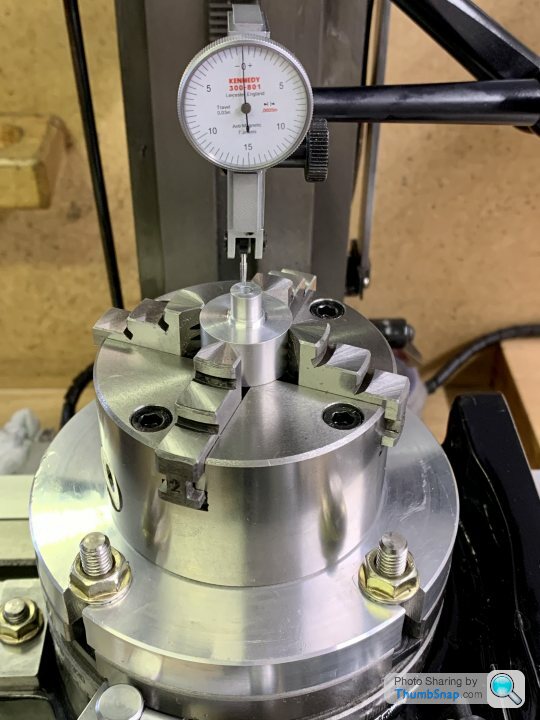
Clocked up in the R/T:
Then milled the castellations with a 1.5mm end mill:
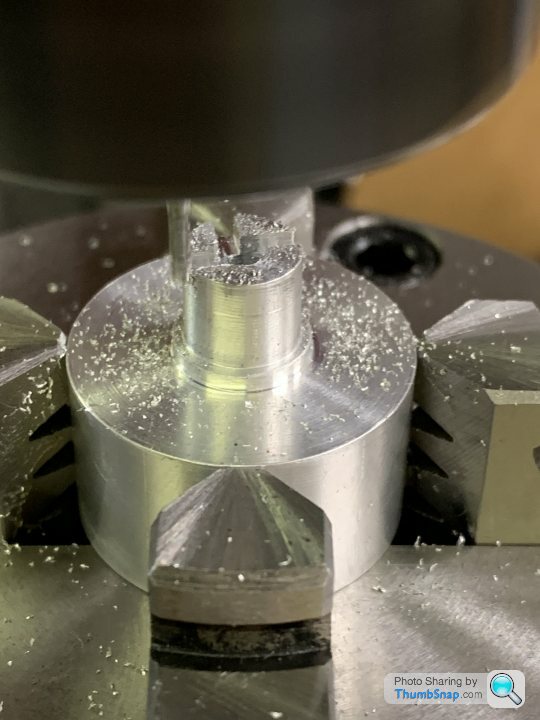
Took three angles to mill all the slots clean: 0, 22.5 and 45 degrees, with the cutter offset to half the diameter:
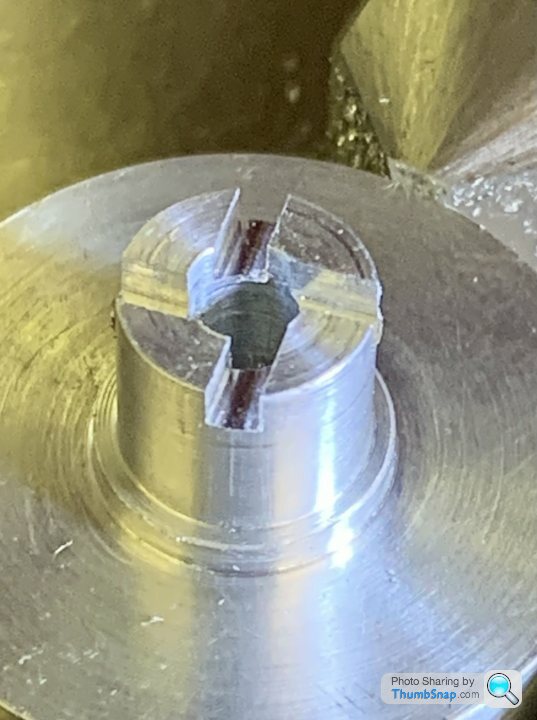
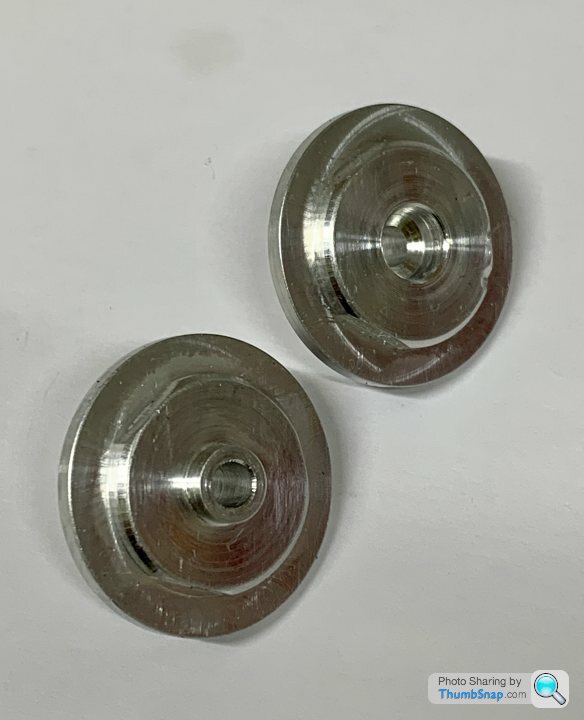
Finished:
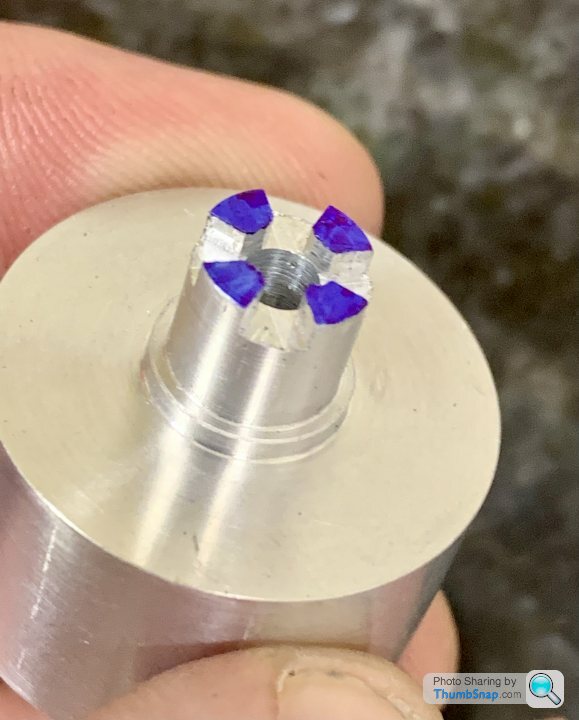
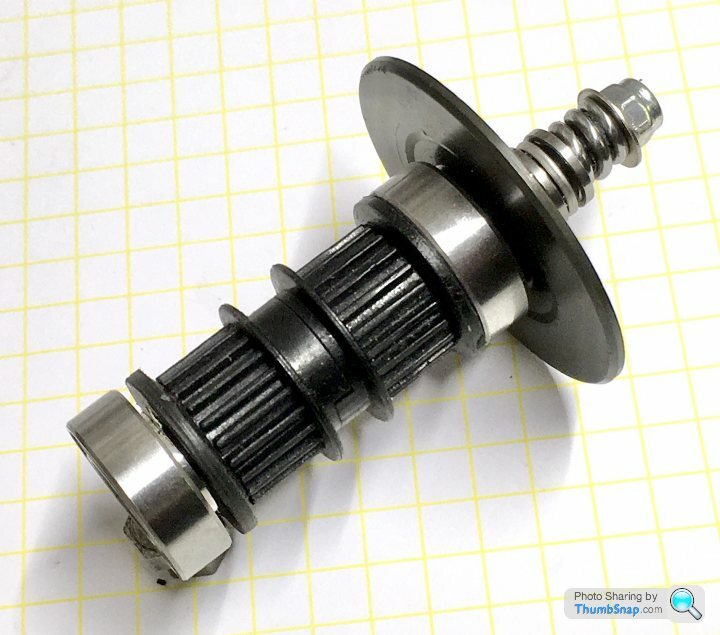
Very nice fit on the output shafts and bearings:
Then made a split bush to hold the part to mill the other side:
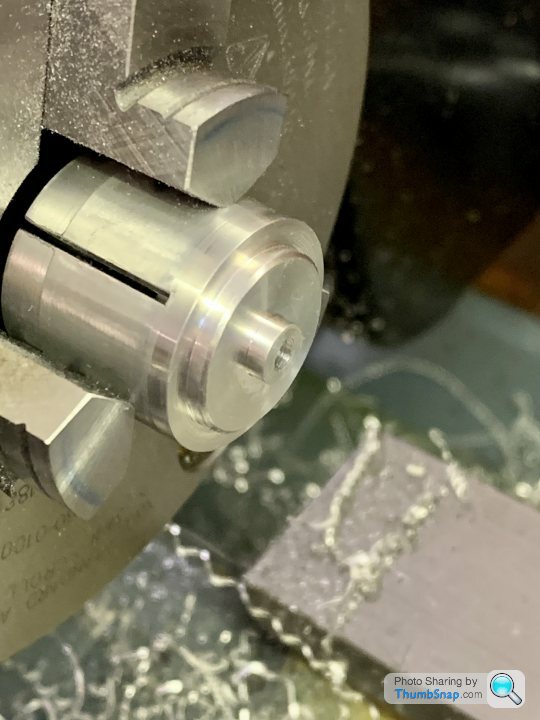
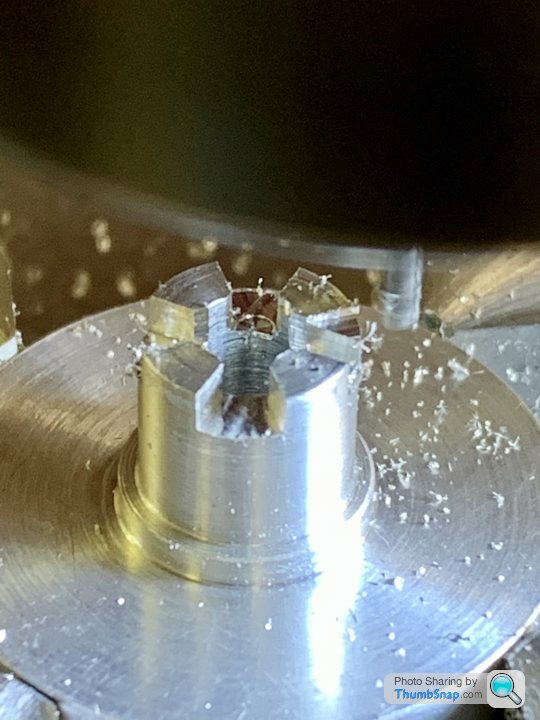
Started by turning the basic shapes, then transferred to the mill for the lobed features:
Three flats, 120 degrees apart:
They are different side-to-side, spigot and socket:
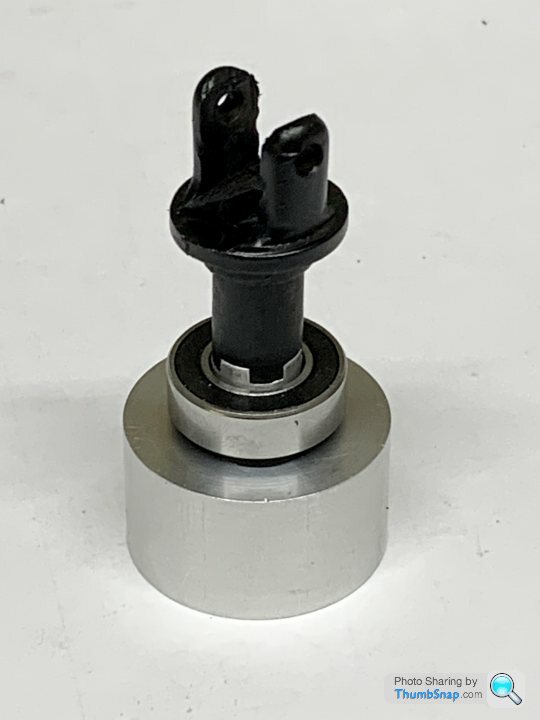
With the hardened washers fitted:
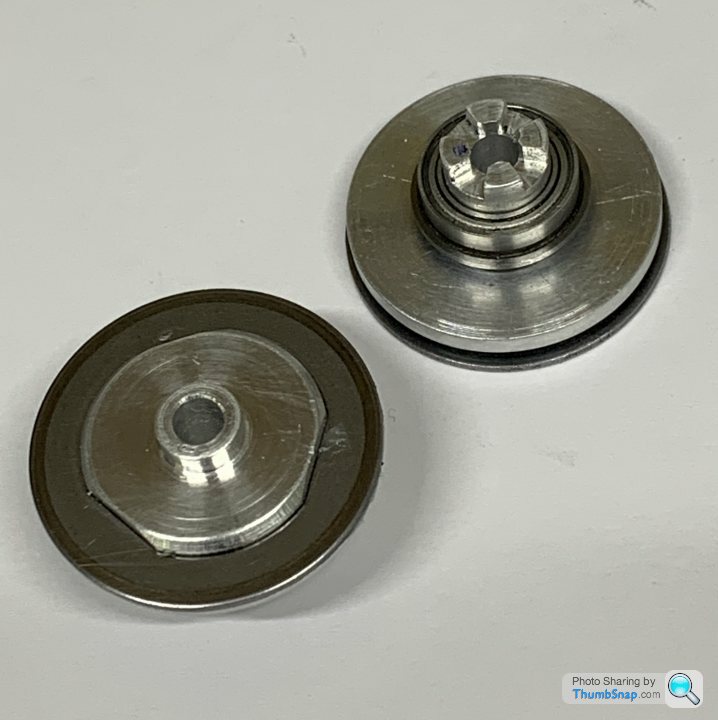
And the assembly with bearings and output shafts:
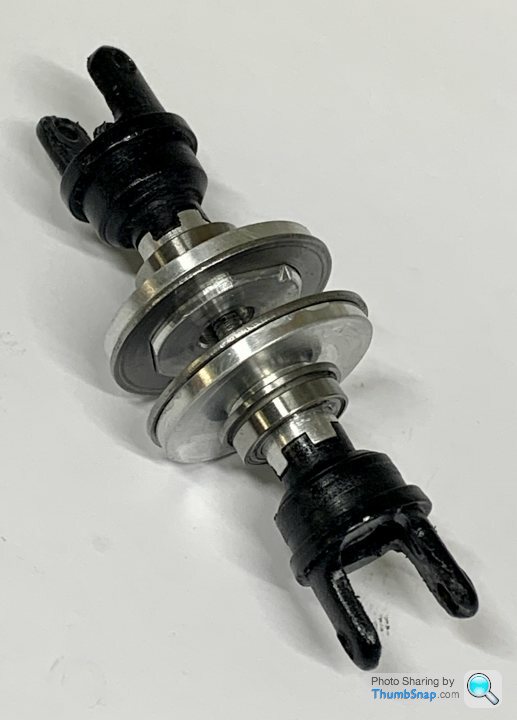
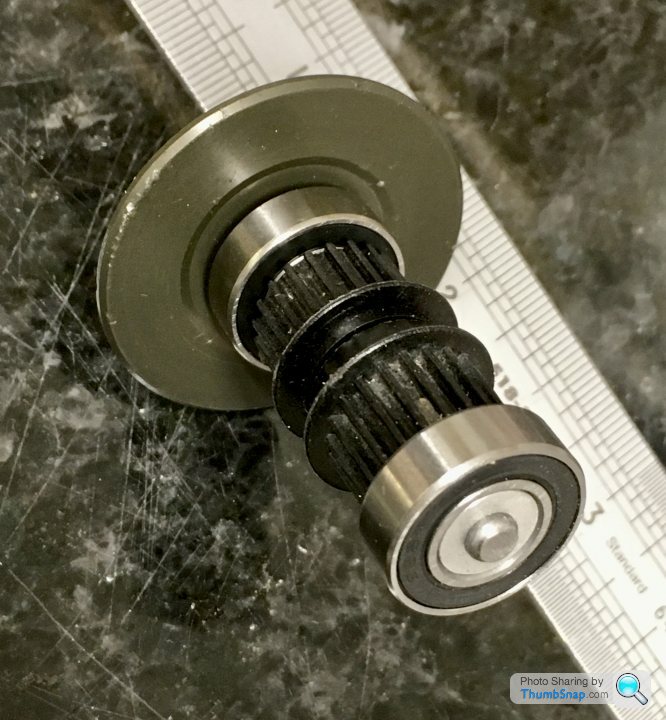
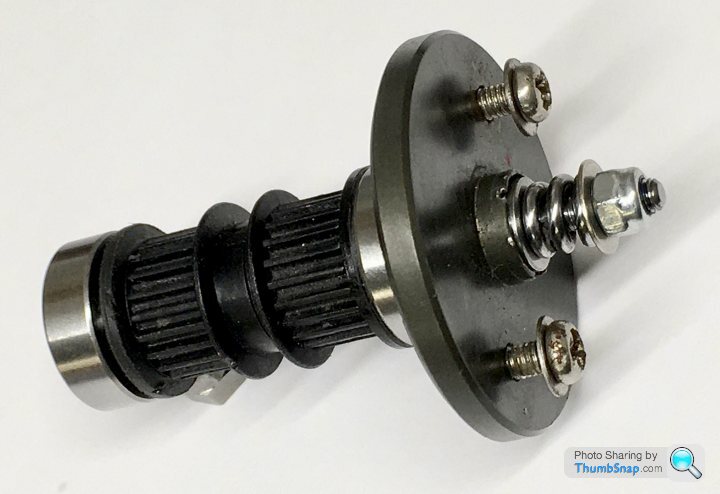
And fitted to the ball retainer/pulley:
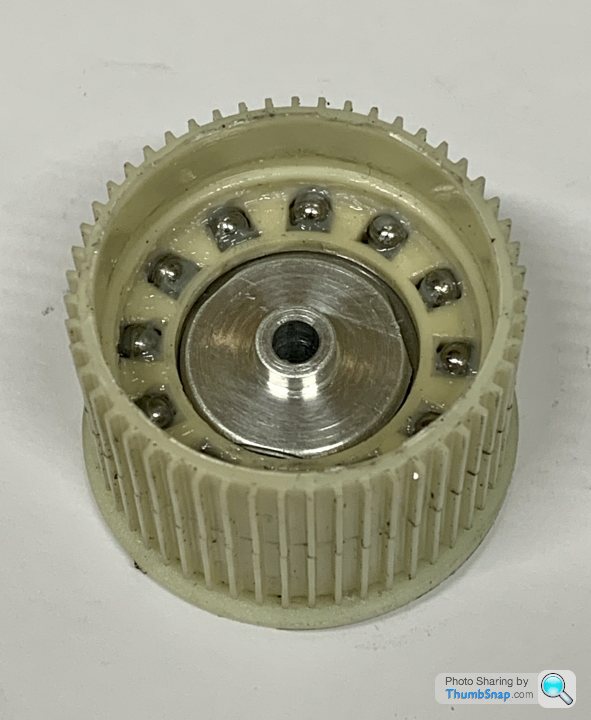
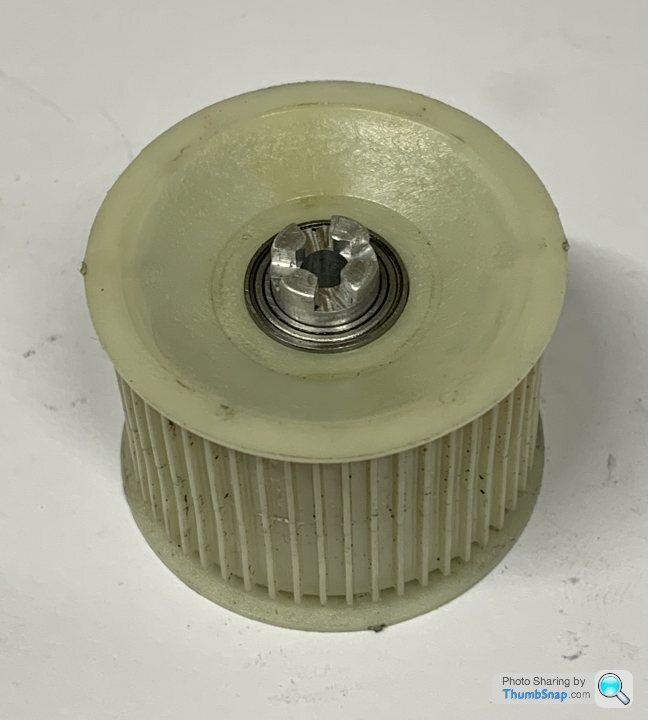
Assembled within the pulley:
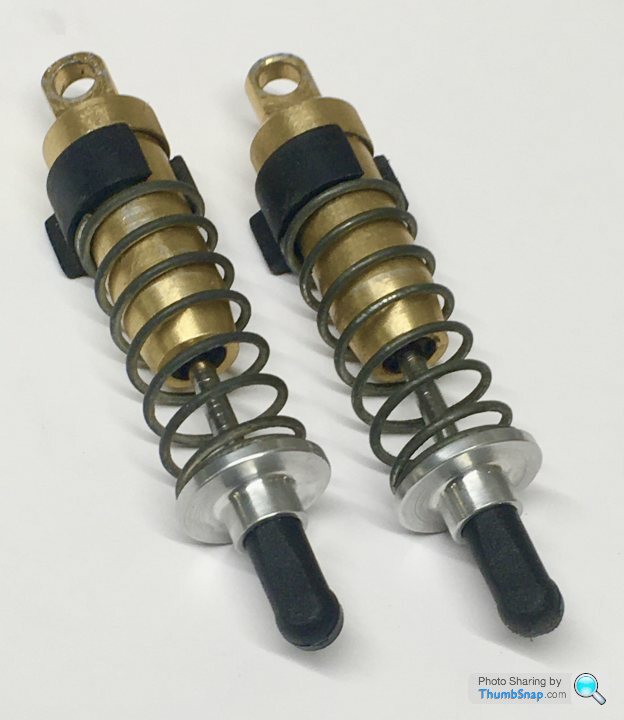
Works fine, smooth as silk. So that’s the rear done, there’s another pair at the front, but we’ve salvaged a good pair of plastic ones for now.
Made two blanks:
Clocked up in the R/T:
Then milled the castellations with a 1.5mm end mill:
Took three angles to mill all the slots clean: 0, 22.5 and 45 degrees, with the cutter offset to half the diameter:
Finished:
Very nice fit on the output shafts and bearings:
Then made a split bush to hold the part to mill the other side:
Started by turning the basic shapes, then transferred to the mill for the lobed features:
Three flats, 120 degrees apart:
They are different side-to-side, spigot and socket:
With the hardened washers fitted:
And the assembly with bearings and output shafts:
And fitted to the ball retainer/pulley:
Assembled within the pulley:
Works fine, smooth as silk. So that’s the rear done, there’s another pair at the front, but we’ve salvaged a good pair of plastic ones for now.
dr_gn said:
Not Steve, just someone who wastes many, many hours on the obviously uneconomical repair of anything repairable.
Do you come from an engineering background as the stuff you are both turning out is way beyond any DIY enthusiast?Brilliant work though. A bit triggers broom but fascinating read.
Promised Land said:
dr_gn said:
Not Steve, just someone who wastes many, many hours on the obviously uneconomical repair of anything repairable.
Do you come from an engineering background as the stuff you are both turning out is way beyond any DIY enthusiast?Brilliant work though. A bit triggers broom but fascinating read.
Gassing Station | Scale Models | Top of Page | What's New | My Stuff