My '96 E36 M3 Evo Saloon
Discussion


ArmaghMan said:
Hi Neil, I have a nice, tidy 98 AMG Merc but it pales into insignificance when compared to your "project"
Simply stunning level of perfection on absolutely everything.
Hopefully we'll get a run organised next year and you can show her off.
Any pics of the wagon sir?Simply stunning level of perfection on absolutely everything.
Hopefully we'll get a run organised next year and you can show her off.
I was always taught to do things properly, I may have taken that to extremes haha!
I'll be at the RMS BBQ on Sunday if you are?
I bought new o-rings for both cam sensors. The exhaust cam sensor seemed to be weeping a little oil, so time to get that sorted. Naturally new uprated bolts were fitted too, high tensile for these of course.
Exhaust cam sensor, you can see the two cuts / pinches on the o-ring.


Innuendo city!

New bolt vs old bolt.

Exhaust side done, now to the inlet side.

There isn't much clearance between the injector and inlet cam sensor bolt. So a hex key was cut down to size (it suprisingly worked a treat). The magical tool and new bolt...

All fitted with a new o-ring. I'm glad to get that job out of the way...

I also gave the vanos unit a quick "wipe down"...

Exhaust cam sensor, you can see the two cuts / pinches on the o-ring.
Innuendo city!
New bolt vs old bolt.
Exhaust side done, now to the inlet side.
There isn't much clearance between the injector and inlet cam sensor bolt. So a hex key was cut down to size (it suprisingly worked a treat). The magical tool and new bolt...
All fitted with a new o-ring. I'm glad to get that job out of the way...
I also gave the vanos unit a quick "wipe down"...
I decided the original exhaust needed a bit of a restoration... Sitting in primer here.

Brand new exhaust brackets sitting in primer too. They have been painted silver.

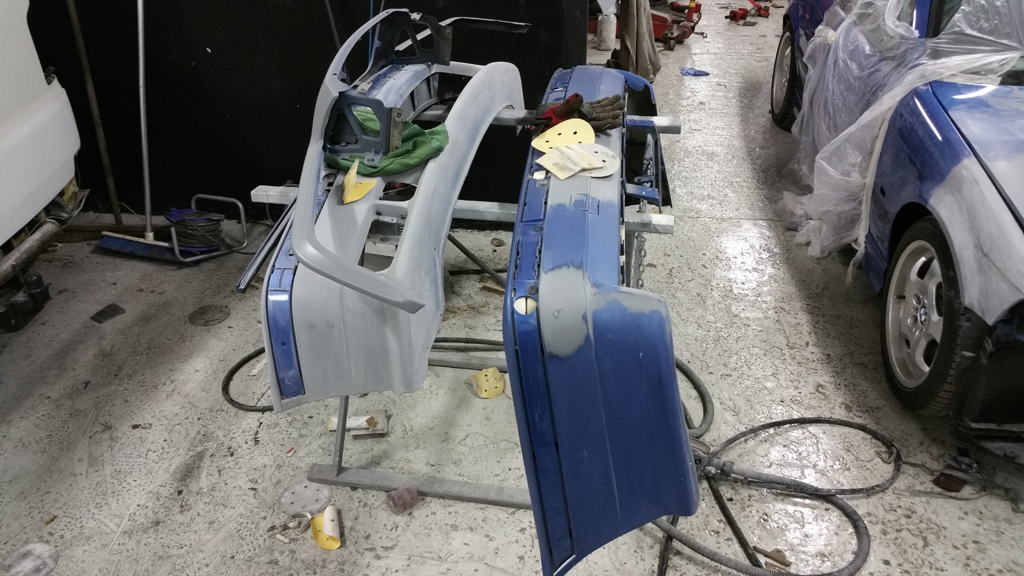
Then this happened... The car was stripped of it's trim to get some paint work tidied up.
I enquired about a full respray but was told the car didn't need it. So really to remove the stone chips and marks, the front bumper, bonnet, front wings, rear bumper, wheel well and a new sunroof panel would be painted.

Not too many body shops invite you in to see the car, take photos and ask 101 questions.
It's great to see what goes into the painting process, never mind seeing the car in bits!
I'm glad to say no sign of rust or accident damage were found.
Actually they discovered the original build sheet for the car on the underside of the bonnet. It can only be a good sign!


.jpg)
I decided to get a photobook made from the shots taken by Sonny from the previous update.


The car back from the body shop, it was a pretty bad day.

The wheel well painted, it had a few marks from the spare wheel being removed over its life...

The car washed, dried and put back into the garage.
A few quick photos to show the quality of the paint job / match.


As Christmas is a family reunion time, a distant relative popped round, so the M3 was wheeled out.

I'll get some better shots uploaded of the car since being painted. I have to say I'm very impressed with WJ Blair in Doagh, Andy, Bill and the guys couldn't have been more helpful. The standard of work is excellent, I can see why the workshop was full of some very tasty motors (three door Cossies, Mk2 Escorts, 911s, M5s etc etc). The paint match is perfect, I can't find any paint lines, so absolutely what I was after.
Brand new exhaust brackets sitting in primer too. They have been painted silver.
Then this happened... The car was stripped of it's trim to get some paint work tidied up.
I enquired about a full respray but was told the car didn't need it. So really to remove the stone chips and marks, the front bumper, bonnet, front wings, rear bumper, wheel well and a new sunroof panel would be painted.
Not too many body shops invite you in to see the car, take photos and ask 101 questions.
It's great to see what goes into the painting process, never mind seeing the car in bits!
I'm glad to say no sign of rust or accident damage were found.
Actually they discovered the original build sheet for the car on the underside of the bonnet. It can only be a good sign!
I decided to get a photobook made from the shots taken by Sonny from the previous update.
The car back from the body shop, it was a pretty bad day.
The wheel well painted, it had a few marks from the spare wheel being removed over its life...
The car washed, dried and put back into the garage.
A few quick photos to show the quality of the paint job / match.
As Christmas is a family reunion time, a distant relative popped round, so the M3 was wheeled out.
I'll get some better shots uploaded of the car since being painted. I have to say I'm very impressed with WJ Blair in Doagh, Andy, Bill and the guys couldn't have been more helpful. The standard of work is excellent, I can see why the workshop was full of some very tasty motors (three door Cossies, Mk2 Escorts, 911s, M5s etc etc). The paint match is perfect, I can't find any paint lines, so absolutely what I was after.
bobbyjoe77 said:
Really great work on that E36, lovely to see these cars being cherished and kept for those young now to appreciate when they're older. Where did you get that photobook done/from? I have had similar done to my E39 M5 and would love to get some photos in a book like that!
Thanks very much  . It's very much a case of any job is done right .
That was from PhotoBox.
Some better photos from the DSLR as promised. Really chuffed with the paint job. You pay for what you get as they say...
This photo also shows off the rear muffler well, or well it shows how discreet it is when painted.


The sun roof panel ready to fit. That's on the to do list, along with a new gasket.
I'm laughing as I type this... The jack was a little scuffed and showing signs of use. So it was stripped, primed and painted, looks good as new.


I used Ed China's favourite Satin Black, as I felt it looked a little fresher than the OE matt black.


Fitted in the boot, never to be seen again haha!


I also picked up a set of new carpet mats. I'll fit these after giving the inside a good clean (it's still a little dusty from the body shop).

This photo also shows off the rear muffler well, or well it shows how discreet it is when painted.
The sun roof panel ready to fit. That's on the to do list, along with a new gasket.
I'm laughing as I type this... The jack was a little scuffed and showing signs of use. So it was stripped, primed and painted, looks good as new.
I used Ed China's favourite Satin Black, as I felt it looked a little fresher than the OE matt black.
Fitted in the boot, never to be seen again haha!
I also picked up a set of new carpet mats. I'll fit these after giving the inside a good clean (it's still a little dusty from the body shop).
A few people have asked to hear what the gutted muffler sounds like. Here is a brief video...
https://www.youtube.com/watch?v=-iJoP4QPwsk
Lack of time hasn't allowed me to do much to the car...
Hand brake leather gaiter replaced.

Radio button and screw covers replaced (must clean the LCD screen).

BMW lead sound insulation applied to the wheel well and wheel put back into place (makes a little more space in the garage).

My next port of call is the under bonnet seals and fit the new sunroof panel.
https://www.youtube.com/watch?v=-iJoP4QPwsk
Lack of time hasn't allowed me to do much to the car...
Hand brake leather gaiter replaced.
Radio button and screw covers replaced (must clean the LCD screen).
BMW lead sound insulation applied to the wheel well and wheel put back into place (makes a little more space in the garage).
My next port of call is the under bonnet seals and fit the new sunroof panel.

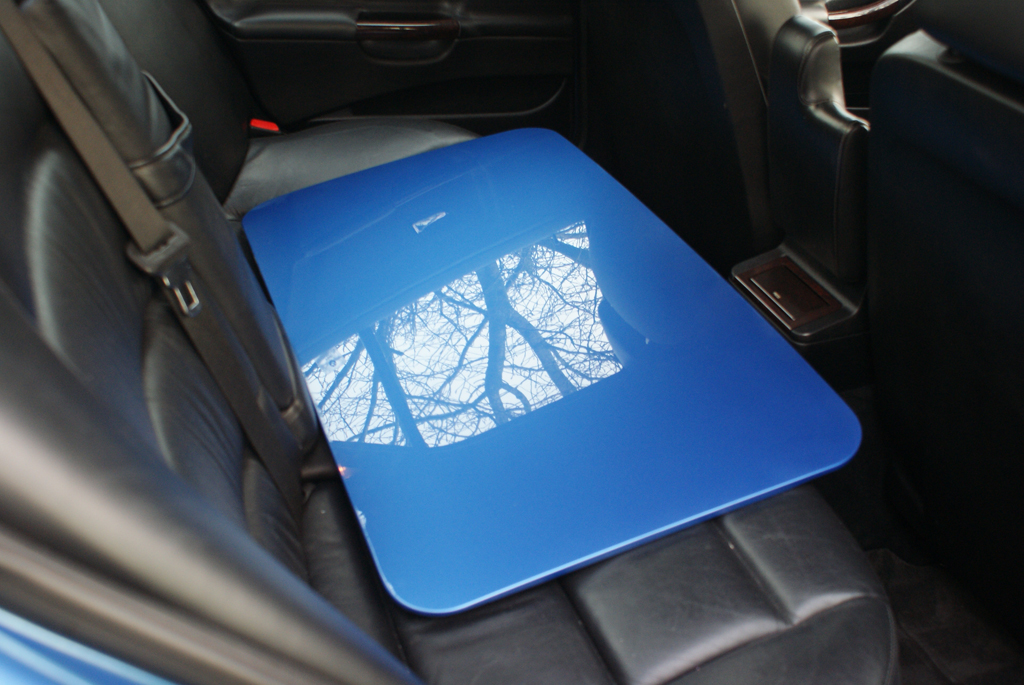
Time to lob in the sunroof panel. The brand new BMW panel was painted when the car was done. It's been sat on the back seat for too long!
The new panel after a quick machine polish and wax.

The sunroof motor being manually turned to give more control of opening the roof, so I can gain access to the securing nuts and bolts.

The sunroof headlining pushed back revealing some of the three retaining nuts (see black metal strip).

The panel removed.

The underside of the old panel. This is for sale if anyone is interested?

Note the original sticker, showing build date and chassis number of the car.

Air deflector painted up (well I did have to).

Sound deadening attached to the new sunroof with contact adhesive.

New sunroof with build sticker transferred over.

Air deflectors attached to the side of the sunroof panel.

A closer view of the air deflectors. Naturally these were thoroughly cleaned up, treated and sealed.

Weather seal starting to be removed.

The new sunroof panel is installed along with a new weather seal. It needs a little adjustment to perfect it's resting height, but the mechanism works fine and it has full movement (phew). The adjustment is fairly straight forward, and allows me to raise and lower the front and rear of the panel.

The new panel after a quick machine polish and wax.
The sunroof motor being manually turned to give more control of opening the roof, so I can gain access to the securing nuts and bolts.
The sunroof headlining pushed back revealing some of the three retaining nuts (see black metal strip).
The panel removed.
The underside of the old panel. This is for sale if anyone is interested?
Note the original sticker, showing build date and chassis number of the car.
Air deflector painted up (well I did have to).
Sound deadening attached to the new sunroof with contact adhesive.
New sunroof with build sticker transferred over.
Air deflectors attached to the side of the sunroof panel.
A closer view of the air deflectors. Naturally these were thoroughly cleaned up, treated and sealed.
Weather seal starting to be removed.
The new sunroof panel is installed along with a new weather seal. It needs a little adjustment to perfect it's resting height, but the mechanism works fine and it has full movement (phew). The adjustment is fairly straight forward, and allows me to raise and lower the front and rear of the panel.


Gassing Station | M Power | Top of Page | What's New | My Stuff