BMW E36 M3 - Reckless Restoration
Discussion


Hi All
So firstly a bit about the car and it’s owner. The car: it’s a 1998 E36 M3 Evolution, manual in Estoril Blue with Silver grey leather and has covered 103k in the last 20 years. I bought it as as a thoroughly usable example about two and a half years ago for a shade over 3 grand.
Me: well, it’s my second E36 M3 in 7 years after a 3 year affair with a Porsche 911. When I started my apprenticeship with BMW in 1998, the E36 M3 was the first M car I PDI’d and drove - so these things have special place in my heart despite being rather unloved by the rest of the world. That engine especially.
So after 6 months of reliable use, I decided to take it off the road to do “a few jobs”..... 2 Years later; I’m not even close to being finished underneath.
Kinda sums it up:

Anyway on with the story and my apologies for being a precious iPhone - I don’t wanna touch my precious device with oily mitts - sort of loser. In other words: no photos of the oily works ??.
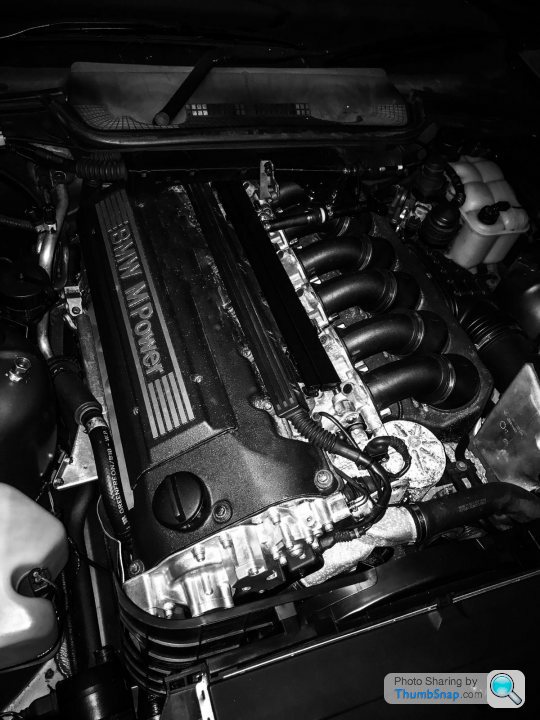
Engine work:
1. Remove inlet manifold and replace every piece of (decaying) rubber under there - damn there’s a lot.

2. Replace knock sensor as cracked and give it all a jolly good clean.
3. Whip the VANOS solenoids out, test, replace the seals and cover bolts & gaskets.
4. Cam cover off next and check valve clearances - only 2x out of spec, new shims sourced and replaced. Apply extra selant to rear of new cam cover gasket and refit. New water pump and thermostat:

5. Next, s t got serious! Drop the front axle. In a single garage. On my own. In winter. The start of the illness you might say.
6. Sump & oil pump removed (wipe oil out of eyes, ears etc.), inspect crank, measure clearances are to spec, replace big end bearing shells and fit uprated ARP bolts. Reassemble. Bathe in swarfega, explain oily marks on pillow case to the wife.
7. Pull front axle apart and paint, powder coat or replace everything that wasn’t perfect (that is everything). Update ARB bushes and wishbone mounts. Also I decided to test my hydraulic press on pushing the ball joints out of the lower arms - Reading 15t before they moved; a very squeaky trouser moment!!! Yay more images found:
Hi ho it’s off to the powdercoaters we go!

Sub frame

One side assembled

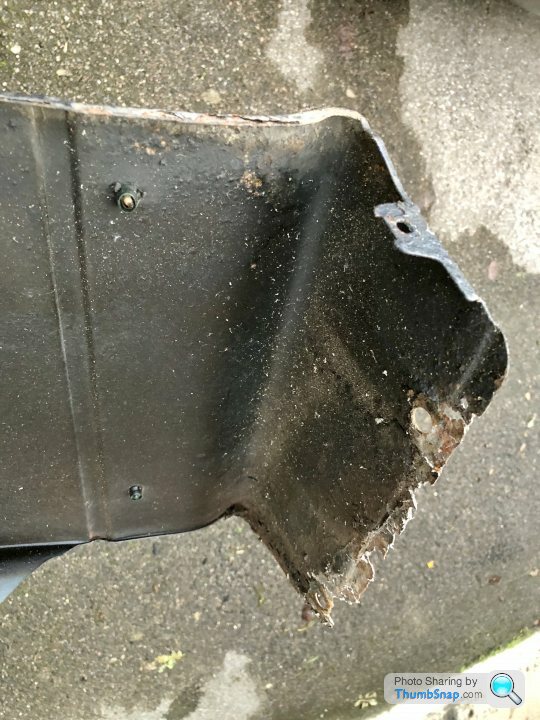
8. Front wheel arches cleaned back, rust treated and coated with Bilt Hamber products (excellent stuff IMO) and fresh stonechip applied. new arch liners fitted as the old ones were smashed to bits:

9. The car came with a Bilstein B12 kit fitted, which had covered only a few thousand miles but god was the yellow paint in poor shape! Shocking really as they really enhance the car over the standard equipment. So rub back and repaint was in order - even found some replacement Bilstein stickers
Painted, rebuilt with new spring rubbers, topmounts and hardware.
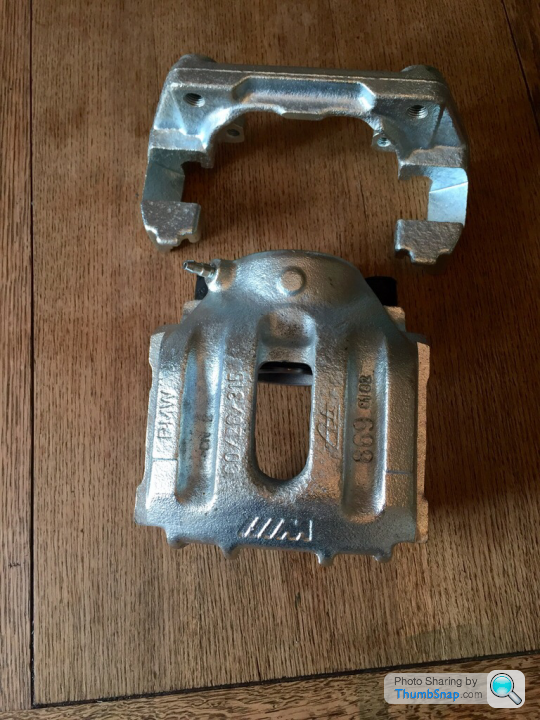
10. So struts onto the car along with new bearings, tie rods, discs and brake hoses:

And those calipers? Are they New you might ask, well no, but the guys at BigRed did a phenomenal job in rebuilding them with new seals and apply the factory zinc coating for than original look.
Before:
After ??:
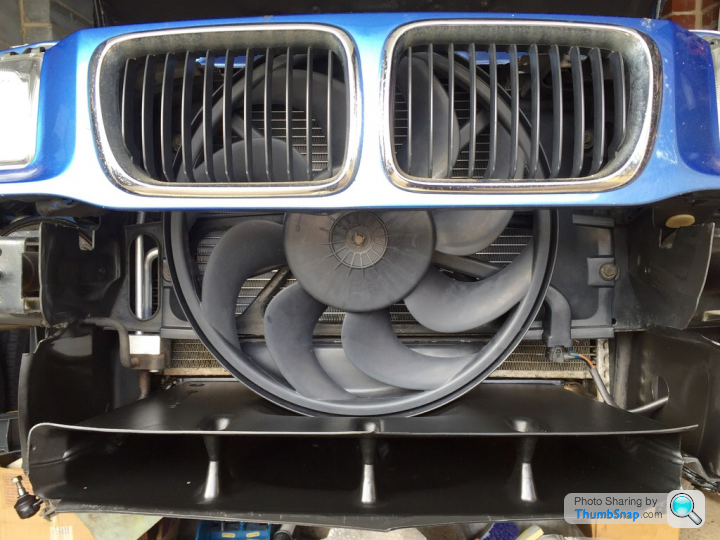
11. Another couple of random jobs whilst the front bumper was off (crack in bracket repaired). Condenser replaced as it was rotten and leaking AC oil, drier replaced (open to the atmosphere due to leaking condenser), electrical fan completely disassembled, cleaned, bearings greased and rebuilt, missing outside temp sensor and wiring replaced with scrapyard donor parts, everything thoroughly cleaned and coated with Bilt Hamber Dynax to keep the water out:

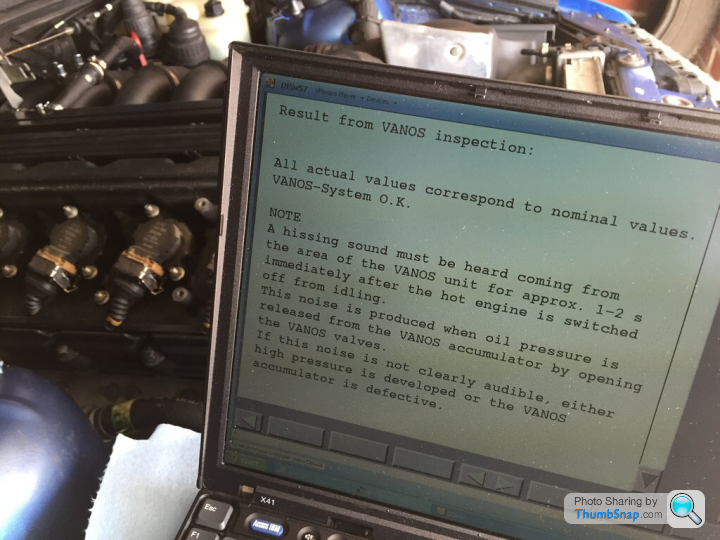
12. Run Car up to temp and check everything! With heart in mouth, listening for the slighted mechanical whimper! Like an expectant father...
VANOS Test passed!
Back down on her wheels after what seemed like an eternity.
Nice day for a drive? Nah, have you seen under the back of this thing! Time to spin her around and get on with everything that needs doing from the A-post back....

TBC (assuming anyone is interested of course).
So firstly a bit about the car and it’s owner. The car: it’s a 1998 E36 M3 Evolution, manual in Estoril Blue with Silver grey leather and has covered 103k in the last 20 years. I bought it as as a thoroughly usable example about two and a half years ago for a shade over 3 grand.
Me: well, it’s my second E36 M3 in 7 years after a 3 year affair with a Porsche 911. When I started my apprenticeship with BMW in 1998, the E36 M3 was the first M car I PDI’d and drove - so these things have special place in my heart despite being rather unloved by the rest of the world. That engine especially.
So after 6 months of reliable use, I decided to take it off the road to do “a few jobs”..... 2 Years later; I’m not even close to being finished underneath.
Kinda sums it up:
Anyway on with the story and my apologies for being a precious iPhone - I don’t wanna touch my precious device with oily mitts - sort of loser. In other words: no photos of the oily works ??.
Engine work:
1. Remove inlet manifold and replace every piece of (decaying) rubber under there - damn there’s a lot.
2. Replace knock sensor as cracked and give it all a jolly good clean.
3. Whip the VANOS solenoids out, test, replace the seals and cover bolts & gaskets.
4. Cam cover off next and check valve clearances - only 2x out of spec, new shims sourced and replaced. Apply extra selant to rear of new cam cover gasket and refit. New water pump and thermostat:
5. Next, s
t got serious! Drop the front axle. In a single garage. On my own. In winter. The start of the illness you might say.6. Sump & oil pump removed (wipe oil out of eyes, ears etc.), inspect crank, measure clearances are to spec, replace big end bearing shells and fit uprated ARP bolts. Reassemble. Bathe in swarfega, explain oily marks on pillow case to the wife.
7. Pull front axle apart and paint, powder coat or replace everything that wasn’t perfect (that is everything). Update ARB bushes and wishbone mounts. Also I decided to test my hydraulic press on pushing the ball joints out of the lower arms - Reading 15t before they moved; a very squeaky trouser moment!!! Yay more images found:
Hi ho it’s off to the powdercoaters we go!
Sub frame
One side assembled
8. Front wheel arches cleaned back, rust treated and coated with Bilt Hamber products (excellent stuff IMO) and fresh stonechip applied. new arch liners fitted as the old ones were smashed to bits:
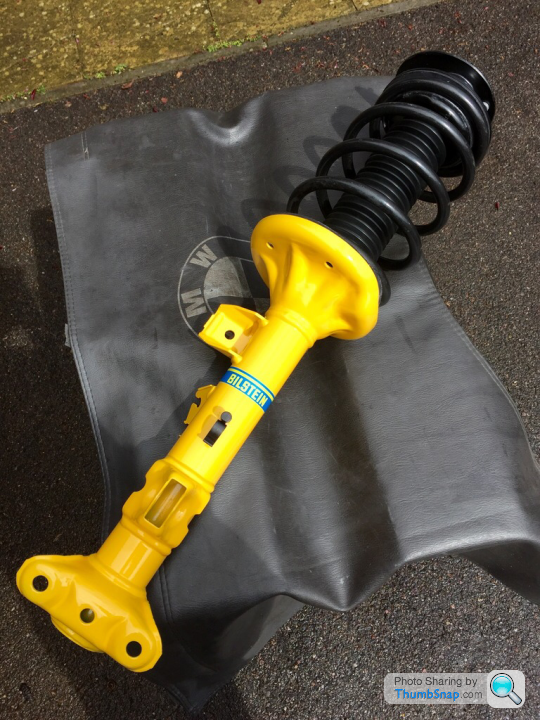
9. The car came with a Bilstein B12 kit fitted, which had covered only a few thousand miles but god was the yellow paint in poor shape! Shocking really as they really enhance the car over the standard equipment. So rub back and repaint was in order - even found some replacement Bilstein stickers
Painted, rebuilt with new spring rubbers, topmounts and hardware.
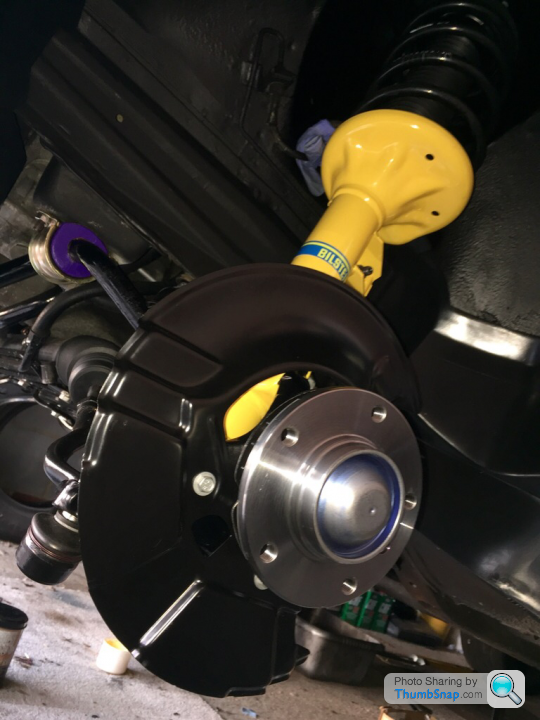
10. So struts onto the car along with new bearings, tie rods, discs and brake hoses:
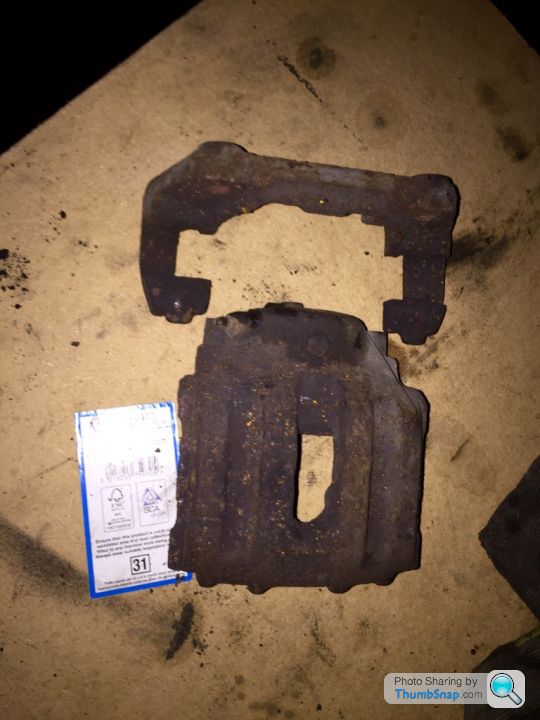
And those calipers? Are they New you might ask, well no, but the guys at BigRed did a phenomenal job in rebuilding them with new seals and apply the factory zinc coating for than original look.
Before:
After ??:
11. Another couple of random jobs whilst the front bumper was off (crack in bracket repaired). Condenser replaced as it was rotten and leaking AC oil, drier replaced (open to the atmosphere due to leaking condenser), electrical fan completely disassembled, cleaned, bearings greased and rebuilt, missing outside temp sensor and wiring replaced with scrapyard donor parts, everything thoroughly cleaned and coated with Bilt Hamber Dynax to keep the water out:
12. Run Car up to temp and check everything! With heart in mouth, listening for the slighted mechanical whimper! Like an expectant father...
VANOS Test passed!
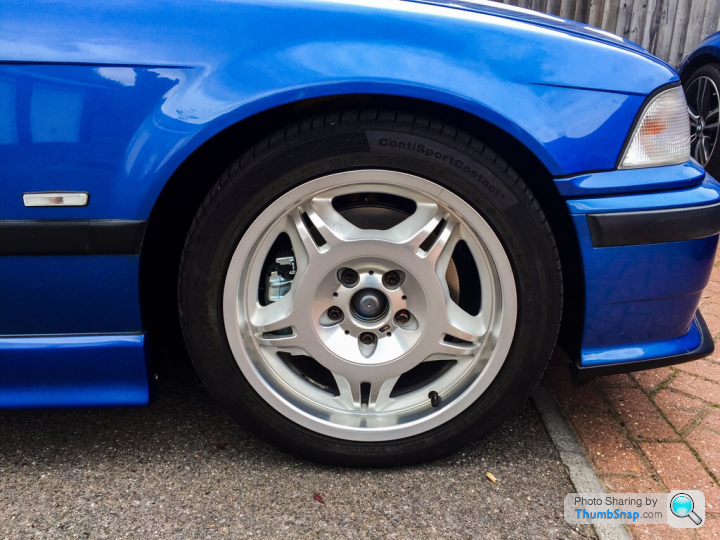
Back down on her wheels after what seemed like an eternity.
Nice day for a drive? Nah, have you seen under the back of this thing! Time to spin her around and get on with everything that needs doing from the A-post back....
TBC (assuming anyone is interested of course).
Edited by T-bagger on Wednesday 14th February 00:45

Some very nice resto work there, looking great so far. Personally I can't have a project car off the road for such an extended period, I lose motivation. But I admire your patience, it's well worth doing a car like this to a high standard. I can see the value of this having appreciated significantly once finished.

Brilliant. Mine has been on stands 2 and a half years now and no closer to being finished but I am still planning to do so 
I now need to get it rolling soon thanks to a relationship break down meaning it will need to be moveable. Nothing like a good bit of motivation eh?
Best of luck with yours. How's the tail panel on yours under the plastic that covers the area around the boot latch? Mine's rusted to bits and is one of the bigger jobs it needs...
TroubledSoul said:
Brilliant. Mine has been on stands 2 and a half years now and no closer to being finished but I am still planning to do so
I now need to get it rolling soon thanks to a relationship break down meaning it will need to be moveable. Nothing like a good bit of motivation eh?
Best of luck with yours. How's the tail panel on yours under the plastic that covers the area around the boot latch? Mine's rusted to bits and is one of the bigger jobs it needs...
Thanks everyone for your kind comments and encouragement! I now need to get it rolling soon thanks to a relationship break down meaning it will need to be moveable. Nothing like a good bit of motivation eh?
Best of luck with yours. How's the tail panel on yours under the plastic that covers the area around the boot latch? Mine's rusted to bits and is one of the bigger jobs it needs...
Regarding the the area around the boot catch, yes that all stripped out and is fortunately fine - will be getting a good coat of cavity wax though!
Owned a '96 E36 M3 for a couple of years; spent a couple of grand refreshing the suspension, rebuilt the diff, rebuilt the brakes and did a few other bits and pieces. And then sold it to help with getting on the property ladder. Instantly regretted it. Don't do what I did.
Bookmarked, watching with interest
Bookmarked, watching with interest
And so to the rest of the car.....
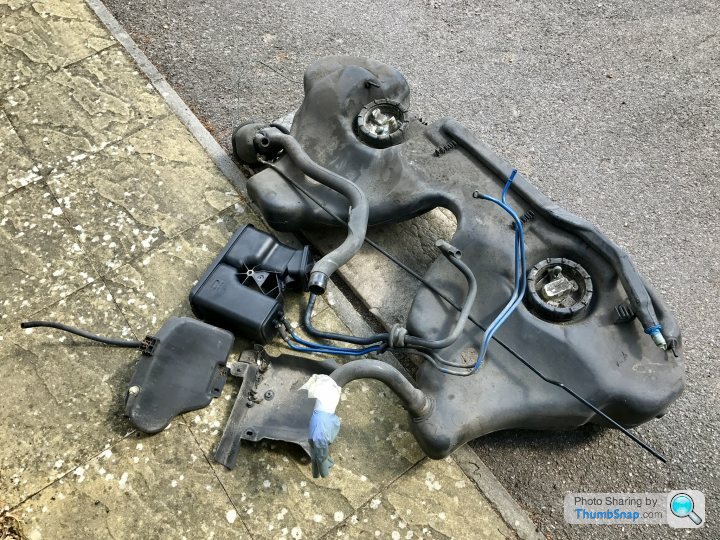
First job was the remove the rear axle and the fuel tank, aswell as all of the gubbins inbetween. The boot was stripped and the tank venting system removed aswell.
You see; E36s although fine in appearance underneath, rot under the rubberised underseal. The body seams expand and contract over a period of years and so gradually cause delamination between the undeseal and the body. Water creeps in along the seams through capillary action and the rot sets in. I was lucky enough to catch the rust before any major damage was caused, but it could have been much worse.
View of the underside, underseal reasonable, diff output shaft seals leaking and causing residue.

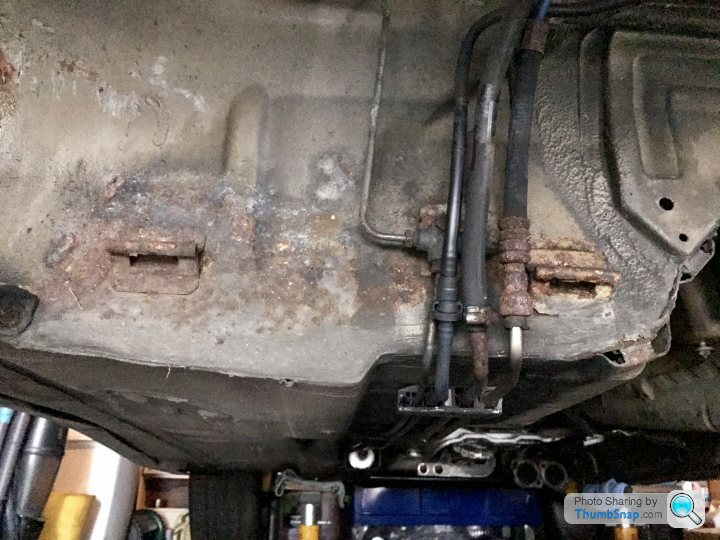
A sorry state but not unsalvageable.
14: time to disassemble the rear axle components and send them off for powdercoating. Not before drilling, hammering, burning and swearing at every piece of nasty split rubber. A serious test of stamina. In addition the wheel bearings were removed from each trailing arm and the drive shafts stripped, cleaned and inspected.
Parts of the rear axle:

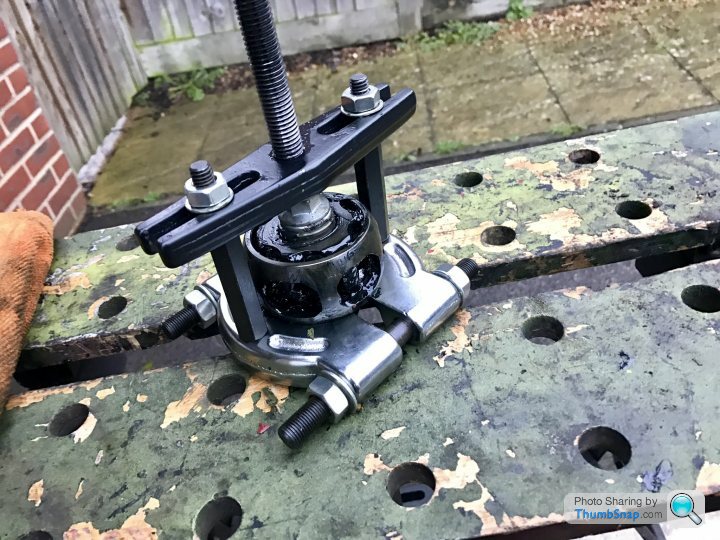
Subframe mounting bushes removed:

Pesky wheel bearings freed:

Removing the CV joint inners from the shafts:
15: again off we go to the powdercoaters:

16: now whilst the parts are away being rejuvenated, it was time for the serious work to begin. Exploratory scraping of the under body had revealed unpredictability unstable areas, so biting the metaphorical bullet, I decided to strip the lot back to bare metal. Yep, the lot.
Armed with no small amount of PPE, a large angle grinder and several (8 in total) wire wheels.
In progress:
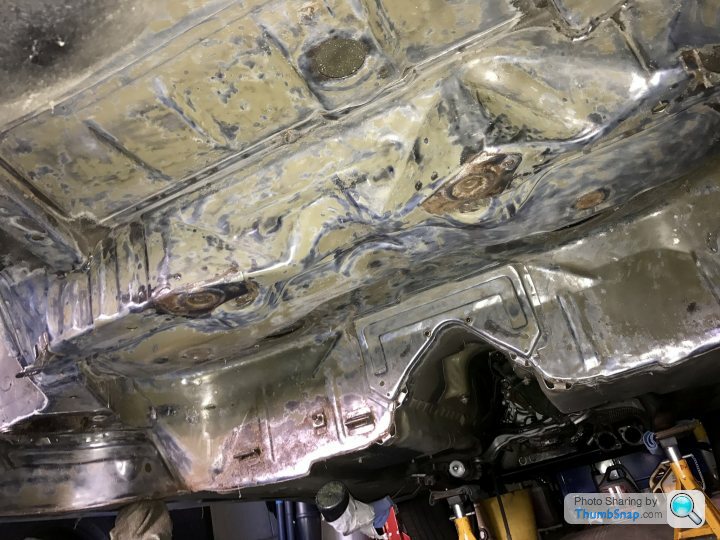
Getting there

Rear left wheel arch:

Jacking points not too bad:
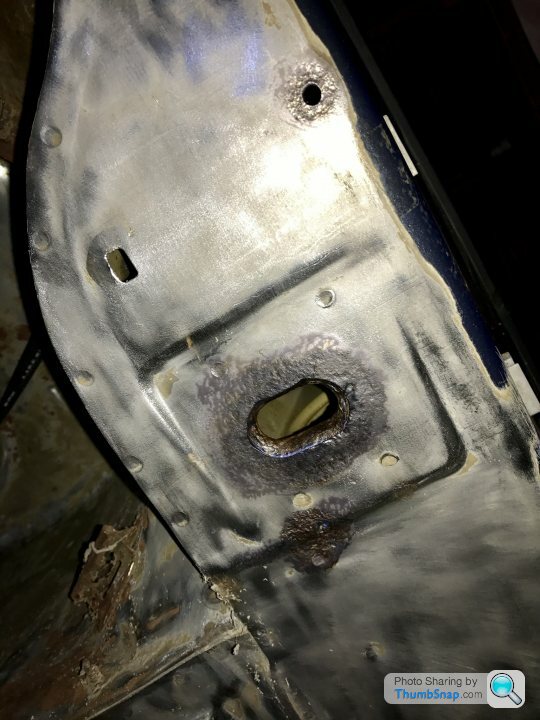
Not just the underside:

The front left wing, too perforated to save, was replaced with a genuine BMW part. I get a good discount on genuine parts through my current employer
Inner wing rust proofing:
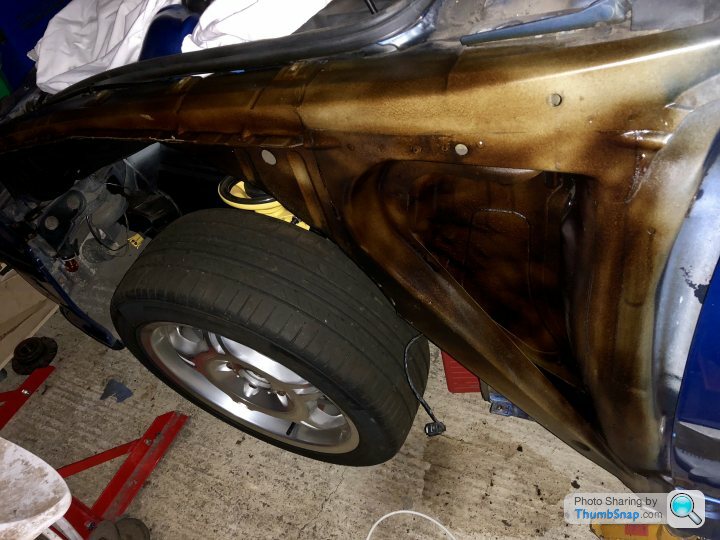
New wing hung, aligned and fettled for best possible fitment (it came down another couple of mm after this photo):

Next; prep that bare metal for the 4 stage protection process. Stay tuned!
First job was the remove the rear axle and the fuel tank, aswell as all of the gubbins inbetween. The boot was stripped and the tank venting system removed aswell.
You see; E36s although fine in appearance underneath, rot under the rubberised underseal. The body seams expand and contract over a period of years and so gradually cause delamination between the undeseal and the body. Water creeps in along the seams through capillary action and the rot sets in. I was lucky enough to catch the rust before any major damage was caused, but it could have been much worse.
View of the underside, underseal reasonable, diff output shaft seals leaking and causing residue.
A sorry state but not unsalvageable.
14: time to disassemble the rear axle components and send them off for powdercoating. Not before drilling, hammering, burning and swearing at every piece of nasty split rubber. A serious test of stamina. In addition the wheel bearings were removed from each trailing arm and the drive shafts stripped, cleaned and inspected.
Parts of the rear axle:
Subframe mounting bushes removed:
Pesky wheel bearings freed:
Removing the CV joint inners from the shafts:
15: again off we go to the powdercoaters:
16: now whilst the parts are away being rejuvenated, it was time for the serious work to begin. Exploratory scraping of the under body had revealed unpredictability unstable areas, so biting the metaphorical bullet, I decided to strip the lot back to bare metal. Yep, the lot.
Armed with no small amount of PPE, a large angle grinder and several (8 in total) wire wheels.
In progress:
Getting there
Rear left wheel arch:
Jacking points not too bad:
Not just the underside:
The front left wing, too perforated to save, was replaced with a genuine BMW part. I get a good discount on genuine parts through my current employer
Inner wing rust proofing:
New wing hung, aligned and fettled for best possible fitment (it came down another couple of mm after this photo):
Next; prep that bare metal for the 4 stage protection process. Stay tuned!
Edited by T-bagger on Wednesday 14th February 23:03
Edited by T-bagger on Wednesday 14th February 23:05
Edited by T-bagger on Wednesday 14th February 23:06
Great work so far. I've given up the idea of full restoration because of my situation so I'm going back to my original idea of track car.
I'm going to get on with the underside although I've stripped most of the paint and underseal from the area above the rear axle. I plan to get onto it with some BH Deox gel next then get one and start seam sealing and applying epoxy primer then some Upol Gravitex or Raptor.
How much are the new front wings for a saloon, out of interest? I've seen pattern parts but I'm not sure I want those.... I will probably go for a pattern tail panel though.
Keep it up though. I need to see someone else doing this as it reminds me I can finish mine
Gassing Station | Readers' Cars | Top of Page | What's New | My Stuff