Any 'shoestring' sailors?
Discussion


D1bram said:
What became clear is how much I have under estimated how long everything is going to take!
You can absolutely guarantee that the particular tool you need to do a job with will either be left at home or disappear over the side with a splash just when you need it more than once as well.
It's the law.

Jaguar steve said:
D1bram said:
What became clear is how much I have under estimated how long everything is going to take!
You can absolutely guarantee that the particular tool you need to do a job with will either be left at home or disappear over the side with a splash just when you need it more than once as well.
It's the law.

The process of restoring a boat/car/property which is worth the effort is not to be taken lightly but, when completed, is something to be proud of and, despite the cost in time and materials, will always be a part of one's life and to be enjoyed.
pequod said:
Jaguar steve said:
D1bram said:
What became clear is how much I have under estimated how long everything is going to take!
You can absolutely guarantee that the particular tool you need to do a job with will either be left at home or disappear over the side with a splash just when you need it more than once as well.
It's the law.
The process of restoring a boat/car/property which is worth the effort is not to be taken lightly but, when completed, is something to be proud of and, despite the cost in time and materials, will always be a part of one's life and to be enjoyed.
Went to B&Q earlier for some screws and bought a cheap orbital sander which I think will speed things up a little.
Edited by D1bram on Thursday 17th March 18:53
My stepfather had a Hurley 22 in the 1980s; he’d previously had a share in an LM30 berthed in Chichester Harbour but sold it to buy a holiday house in Flushing which came with a tidal mooring. The Hurley gave him back the yachting element.
We never stayed on the Hurley, just used it as a day boat to go over to Roseland or Helford River but I have very fond memories of it. So I’m enjoying your updates, thank you
We never stayed on the Hurley, just used it as a day boat to go over to Roseland or Helford River but I have very fond memories of it. So I’m enjoying your updates, thank you
Apologies for the lack of updates, but happily this has been partly down to spending much of my free time on the bost.
Since I last updated I spent one long weekend and one short working on her.
Firstly, the orbital sander was a revelation! The hull is now sanded properly, which still took some time. Below the water line has been primed and had a couple of coats of antifouling. Logic would usually say work top to bottom, but it’s partly down to timing around paint and also partly thinking that prioritising anything below the water line means she can at least go in!

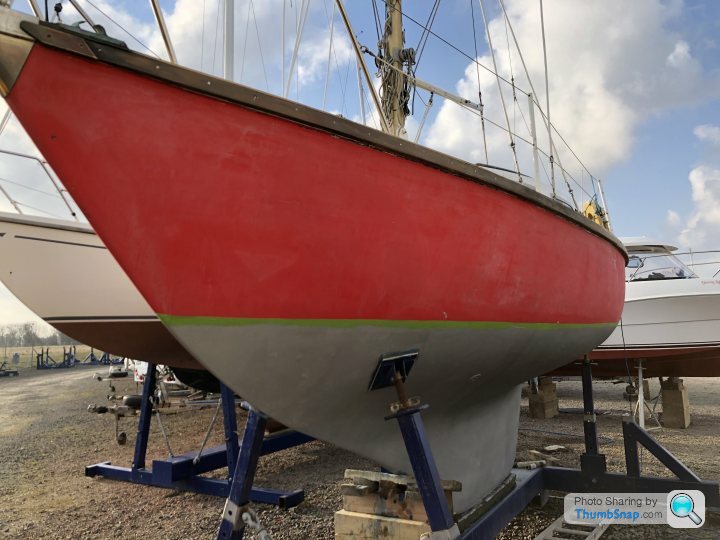


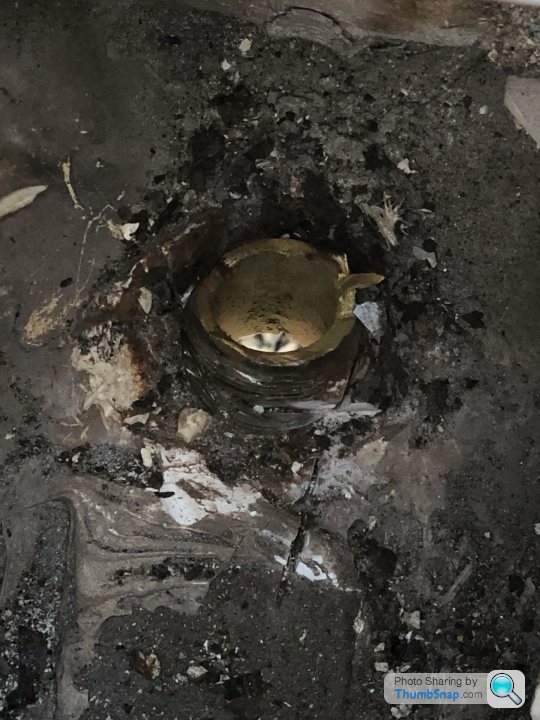
The eagle eyed will probably note the rudder is still off… progress has been made though. Firstly, the old tube is out; this was no mean feat. I’d equate it to every awkward nut I’ve ever had on a car added together and multiplied by 15.
I angle ground, junior hacksawed, hammered and swore until all that was left was a small section where it passed through the hull.
So my brother and I went off for a sandwich, a beer and to peruse the very old school but incredibly useful local hardware store. Ending up with a really simple hacksaw (basically a blade with a plastic handle which clamped around it) for about £3 which enabled me to cut a slither out and then pull it clear with a set of molegrips


Since I last updated I spent one long weekend and one short working on her.
Firstly, the orbital sander was a revelation! The hull is now sanded properly, which still took some time. Below the water line has been primed and had a couple of coats of antifouling. Logic would usually say work top to bottom, but it’s partly down to timing around paint and also partly thinking that prioritising anything below the water line means she can at least go in!
The eagle eyed will probably note the rudder is still off… progress has been made though. Firstly, the old tube is out; this was no mean feat. I’d equate it to every awkward nut I’ve ever had on a car added together and multiplied by 15.
I angle ground, junior hacksawed, hammered and swore until all that was left was a small section where it passed through the hull.
So my brother and I went off for a sandwich, a beer and to peruse the very old school but incredibly useful local hardware store. Ending up with a really simple hacksaw (basically a blade with a plastic handle which clamped around it) for about £3 which enabled me to cut a slither out and then pull it clear with a set of molegrips
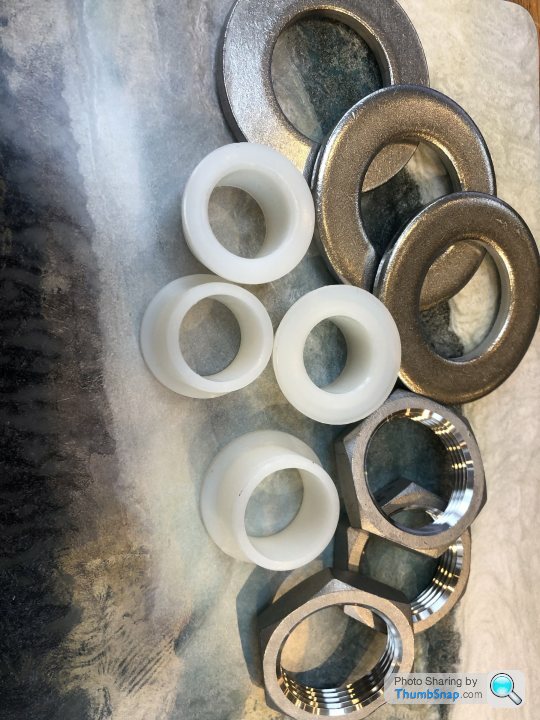
Meanwhile my stainless tube, nuts, washers and nylon bushes (not completely convinced by these yet) arrived.
There was an issue though… I had forgotten to spec a length on the threads and it only came with about 20mm at each end, fine for the top but not sufficient to fix each side of the hull at the bottom.
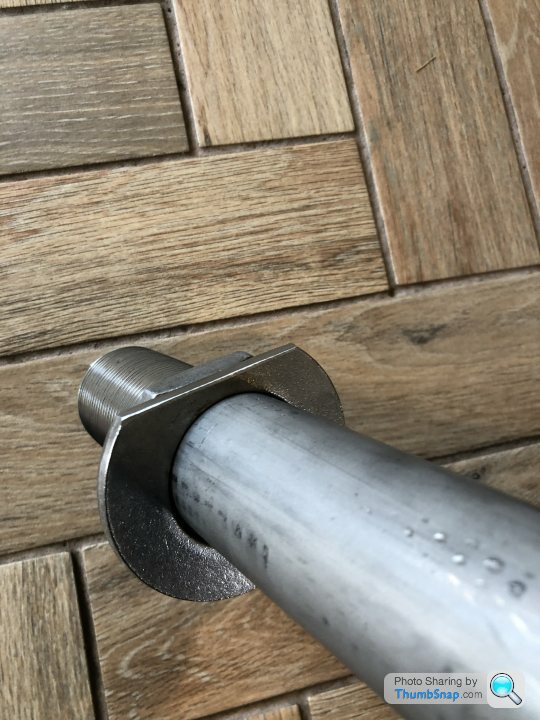
I decided though to have a test fit (after shaping the gel coat a touch with a flap disc) before I invested any time in modifying this tube.
Fit looks good to me!


So I’ve had a local engineering workshop extend the thread, and also cut a flat into one of the washers so it fits the recess in the hull behind the skeg.
In preparation I cleaned out the inside of the hull and laminated a pad of fibre glass to overlay and flatten up the profile so the inner washer will lay nice and flat.
It’s my first time working with fibreglass, I watched plenty of how to videos and read around the subject. Settling on woven roving and polyester resin I built my patch up by overlaying alternately cut layers of cloth, with a half piece every other layer to give it a wedge shape (compensating for the shape on the inside of the hull). I quite enjoyed it.


Aside from this, there’s been an ongoing process of sanding, cleaning and more sanding. She is definitely emerging nicely.
Bec, my other half is progressively painting out lockers and sections of red cabin, I’m leaving her to that but it’s certainly feeling better down below.
A mate who live local to the boat popped over for a coffee and remembering he used to be a joiner I got him busy fixing the loose section of toenail :-)
A quick rub down and the rubbing strake / toe rail is showing some real promise

We’re really enjoying the process though and making the most of our weekends away, eating well and enjoying our new ‘local’ of an evening
Plan at the moment is for a 22nd April launch.
There was an issue though… I had forgotten to spec a length on the threads and it only came with about 20mm at each end, fine for the top but not sufficient to fix each side of the hull at the bottom.
I decided though to have a test fit (after shaping the gel coat a touch with a flap disc) before I invested any time in modifying this tube.
Fit looks good to me!
So I’ve had a local engineering workshop extend the thread, and also cut a flat into one of the washers so it fits the recess in the hull behind the skeg.
In preparation I cleaned out the inside of the hull and laminated a pad of fibre glass to overlay and flatten up the profile so the inner washer will lay nice and flat.
It’s my first time working with fibreglass, I watched plenty of how to videos and read around the subject. Settling on woven roving and polyester resin I built my patch up by overlaying alternately cut layers of cloth, with a half piece every other layer to give it a wedge shape (compensating for the shape on the inside of the hull). I quite enjoyed it.
Aside from this, there’s been an ongoing process of sanding, cleaning and more sanding. She is definitely emerging nicely.
Bec, my other half is progressively painting out lockers and sections of red cabin, I’m leaving her to that but it’s certainly feeling better down below.
A mate who live local to the boat popped over for a coffee and remembering he used to be a joiner I got him busy fixing the loose section of toenail :-)
A quick rub down and the rubbing strake / toe rail is showing some real promise
We’re really enjoying the process though and making the most of our weekends away, eating well and enjoying our new ‘local’ of an evening
Plan at the moment is for a 22nd April launch.
D1bram said:
Meanwhile my ... nuts...
It’s my first time working with fibreglass, I watched plenty of how to videos and read around the subject. Settling on woven roving and polyester resin I
Don't underestimate chopped strand. It's great under compression, better than woven, and will mould to fit almost any shape.It’s my first time working with fibreglass, I watched plenty of how to videos and read around the subject. Settling on woven roving and polyester resin I
It's my "go to" for general repair work like this. Whereas woven doesn't always want to conform to a shape very well - which then means you start looking at biaxial instead, which is great, but also not what you want on a surface that flexes.
So in your repair, I'd have chopped standed it on the bottom layers to fill all the gaps and level things out. And then "maybe" a bit of woven on top - with potentially a chopped border just to keep all the edges tidy.
Not a criticism of your work - just saying don't over think it.
Bill said:
+1 Looks great, wish I had the time (and courage TBH! )
I honestly don't have the time... I am busy at work, with the family and have stacks of jobs needed around the house. However I've decided for a short while I will prioritise this (not over the family of course and I still need to go to work!) and I'm putting a lot of things on hold. )As for the courage, I find I procrastinate, plan and research for ages, often going in circles. If in doubt, just make a start; most jobs can be tackled in more than a couple of ways I find
Arnold Cunningham said:
D1bram said:
Meanwhile my ... nuts...
It’s my first time working with fibreglass, I watched plenty of how to videos and read around the subject. Settling on woven roving and polyester resin I
Don't underestimate chopped strand. It's great under compression, better than woven, and will mould to fit almost any shape.It’s my first time working with fibreglass, I watched plenty of how to videos and read around the subject. Settling on woven roving and polyester resin I
It's my "go to" for general repair work like this. Whereas woven doesn't always want to conform to a shape very well - which then means you start looking at biaxial instead, which is great, but also not what you want on a surface that flexes.
So in your repair, I'd have chopped standed it on the bottom layers to fill all the gaps and level things out. And then "maybe" a bit of woven on top - with potentially a chopped border just to keep all the edges tidy.
Not a criticism of your work - just saying don't over think it.
Arnold Cunningham said:
Don't underestimate chopped strand.....
.....Not a criticism of your work - just saying don't over think it.
Agree with that......Not a criticism of your work - just saying don't over think it.
I did two years working in a high performance industrial RIB manufacture and a mechanical engineer, mainly working on anything but the hull, but clearly got involved there too. They did use cloth for certain things, but lots of csm as well, and repairs and miss-drilled holes etc where often filled with 'hairy bog' aka chopped up fibred mixed into resin.
D1bram said:
Thanks and no criticism taken, I am certainly on a learning curve with this! It does seem that when it comes to fibre glass opinions and methods vary widely - what you say makes a lot of sense though.
Yeah, and a lot of those opinions aren't usually very good. Sorry. Been around boats and "experts" too long. Spent my whole life around boats, did a degree in marine engineering, built my last boat from scratch and have rebuilt 2 boats prior to that. Some of the boatyard advice you get is shocking! Although also, sometimes you find a real gem of a chap who really knows his stuff. You have to learn who's who.I was in cowes for the powerboat weekend last august and one of the 3C boats had had the bottom fall out of it. The experienced builder had used biaxial on the impact zone of the running surface. Exactly the wrong layup, meaning a small crack in the biaxial, because that's what it does, opened up and quickly hydraulicked a large piece of the bottom of the boat off. I felt very sorry for the owner.
And then everyone gets very excited by carbon and kevlar too - withouth appreciating it provides almost no benefit unless you vacuum bag and autoclave.
For your boat, I would just say do a dockyard job on it. 99% of any laminating you do, chopped strand will be better than fine. And if you're not sure, just pop another couple of layers on! Only area I can think of on a yacht like this would be if I was repairing chain plates - they take all the loads off the shrouds. So I'd probably use a couple of layers of combi (which is woven and chopped combined) in those type of areas.
If you've not got one, I would recommend a consolidating roller. Probably just a 40 or 50mm wide one, but really helps bed the glass down and minimise the amount of resin you use (you only want the "right amount" of resin) - enough to wet it out, but not so it's slopping around. Helps make the job both tidy & strong.
Arnold Cunningham said:
Yeah, and a lot of those opinions aren't usually very good. Sorry. Been around boats and "experts" too long. Spent my whole life around boats, did a degree in marine engineering, built my last boat from scratch and have rebuilt 2 boats prior to that. Some of the boatyard advice you get is shocking! Although also, sometimes you find a real gem of a chap who really knows his stuff. You have to learn who's who.
Yeah - that’s all well and good but there’s always someone with a keyboard who’s never owned a boat but knows more than you 
Gassing Station | Boats, Planes & Trains | Top of Page | What's New | My Stuff