Our Little Durham Restoration Project...
Discussion


Well put it this way over the last few mild days I've been opening the windows! But to be fair we did the conversion just over 10 years ago so probably been some big gains in insulation... not that's its cold just gets hot. Could just fit an air con unit at the same time which would stop any heat issues.
I used to live in a flat that was built into the roof and built about 12 years ago. It did get hot in the summer, but wasn't problematic when the windows were left open. It did get too hot if I was out all day at work as the windows were left closed, but I worked on site so I usually had them open.
Thanks for reminding me about it, it's something to look at at least. It's still going to be a useful space though, more useful than having it as storeage anyway as I've loads of that outside.
Cheers.
Thanks for reminding me about it, it's something to look at at least. It's still going to be a useful space though, more useful than having it as storeage anyway as I've loads of that outside.
Cheers.
Had a really productive three days on the project. Have had loads of help from my Dad and brother getting stuff done, with my Mum and girlfriend tidying up after us and keeping us fed and watered. My parents bring their campervan over and camp in the garden, which is a massive help with meals etc. Next door brought a huge caravan out of storage today, so I'm wondering if they'd like to park it on my drive for a month or two.
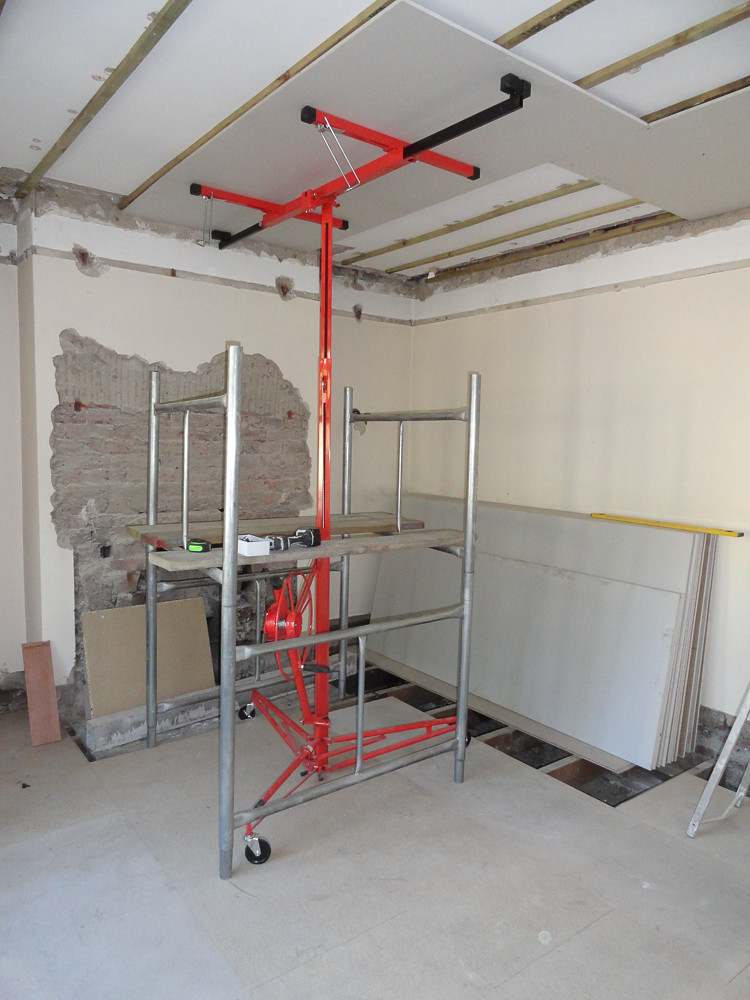
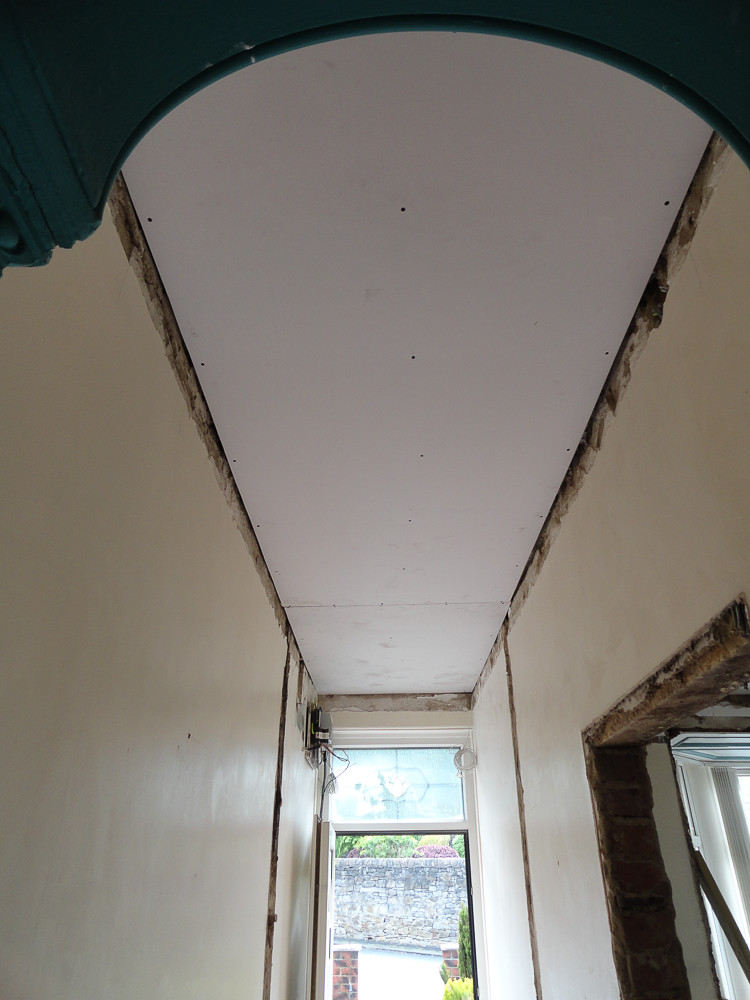
We've managed to batten and plasterboard all the ceilings that needed doing, living room and hallway. This was a big job made much easier by the purchase of a 4' square x 21' scaffold tower and a board lift, took best part of a day, but would have been two days easily without the board lift.
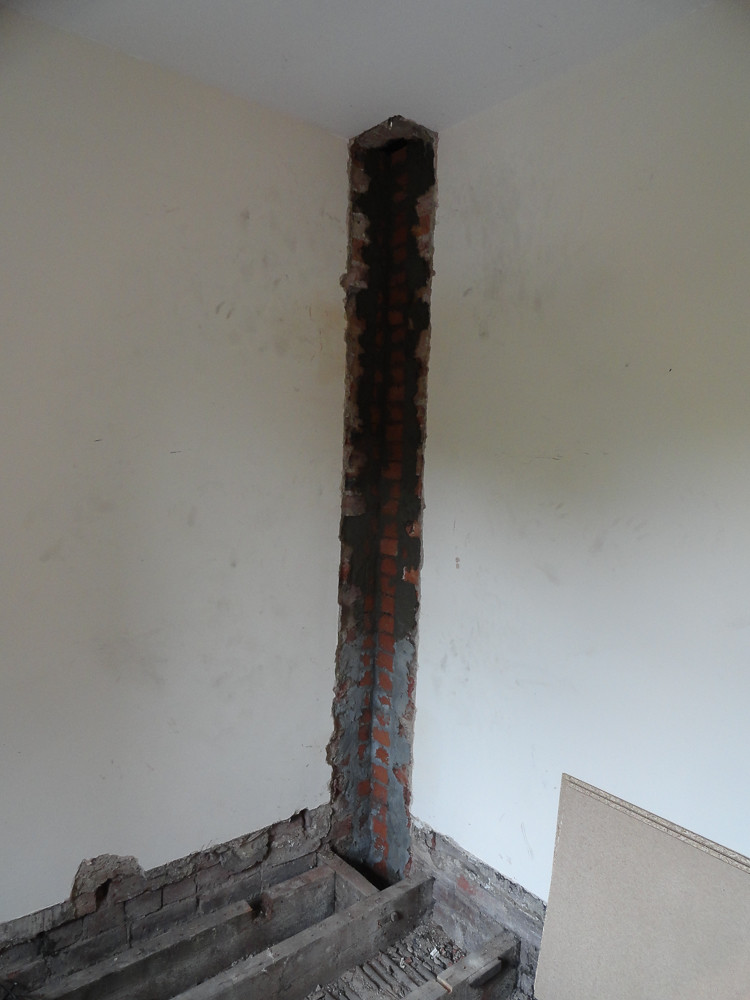
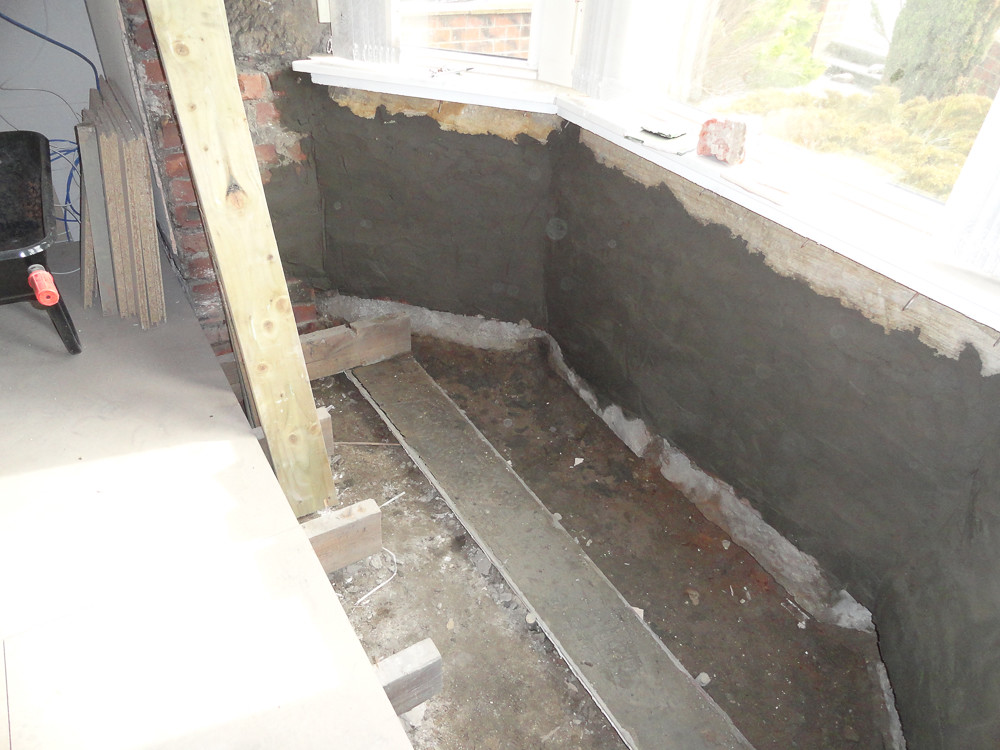
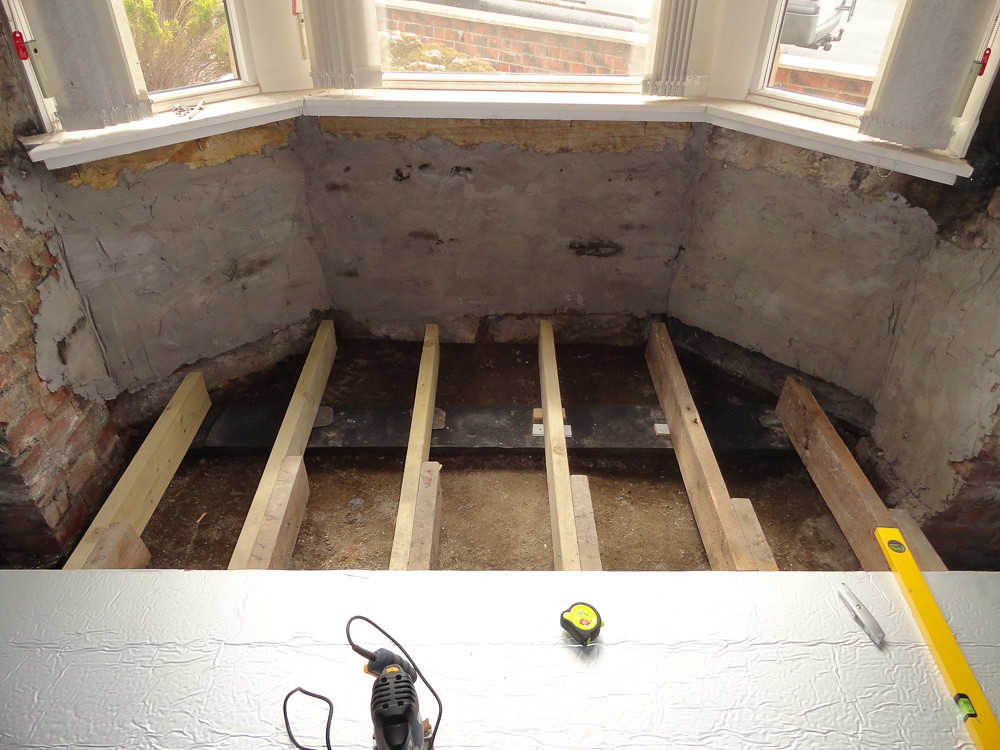
We've pointed/rendered the bay window and concreted in a little wall to rest the joists on (DPM on first) and we've bricked up the hole in the bathroom wall.
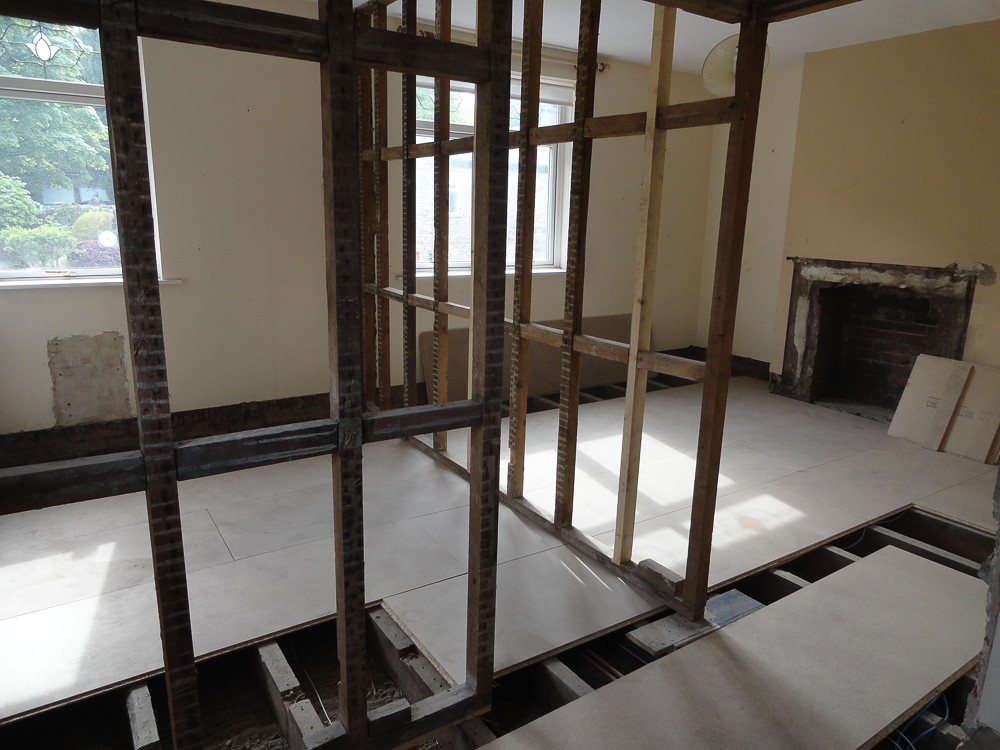
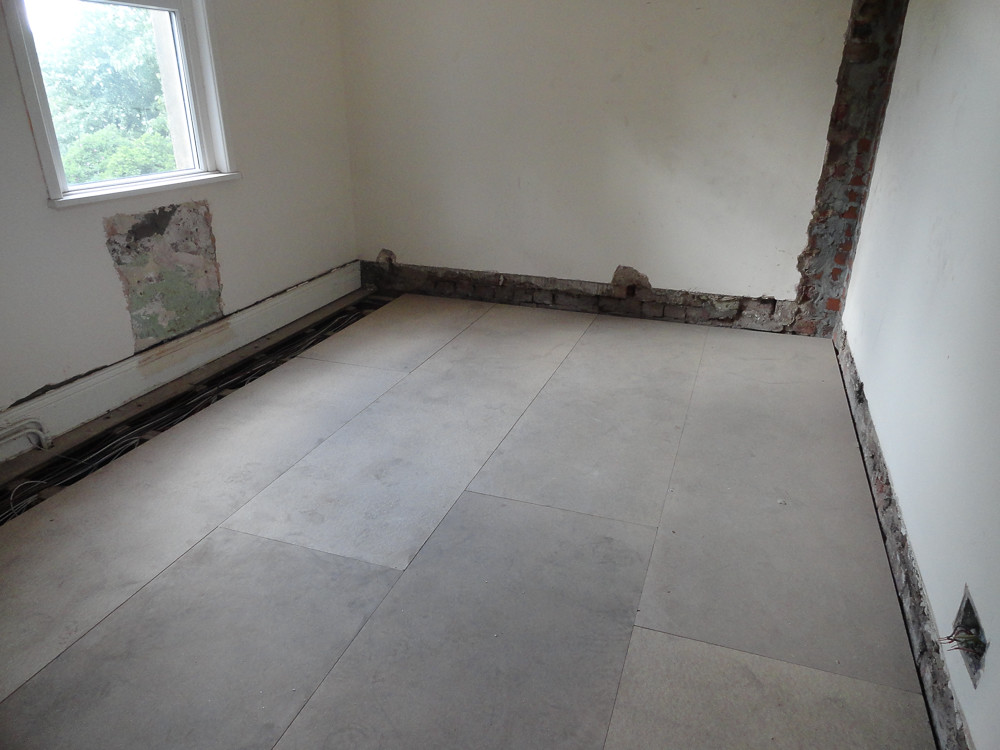
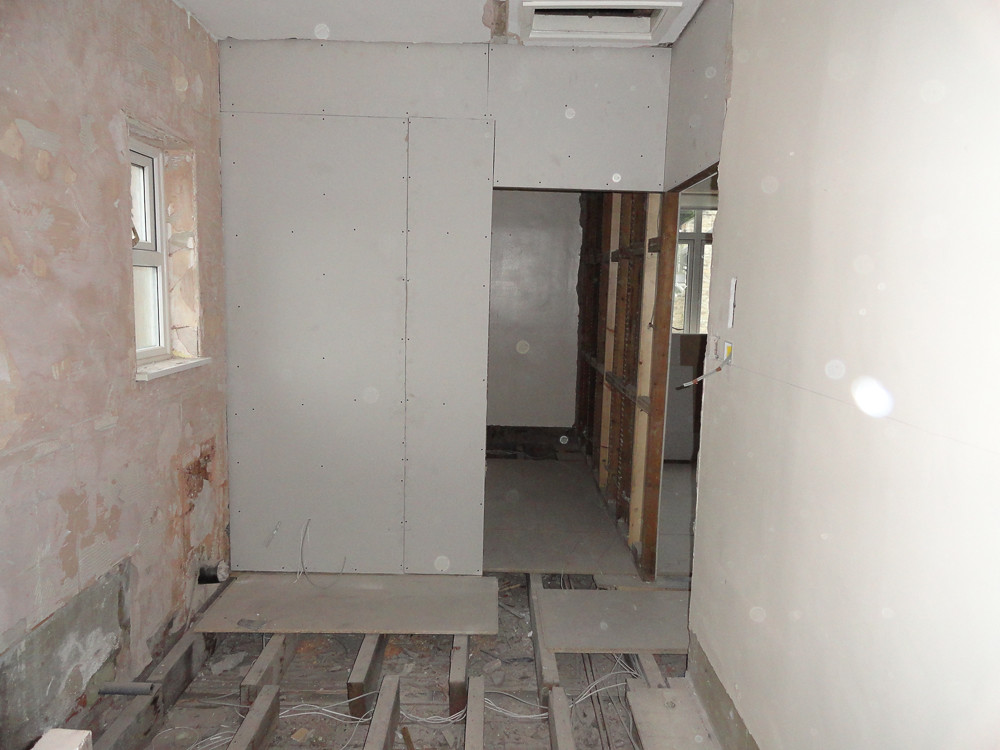
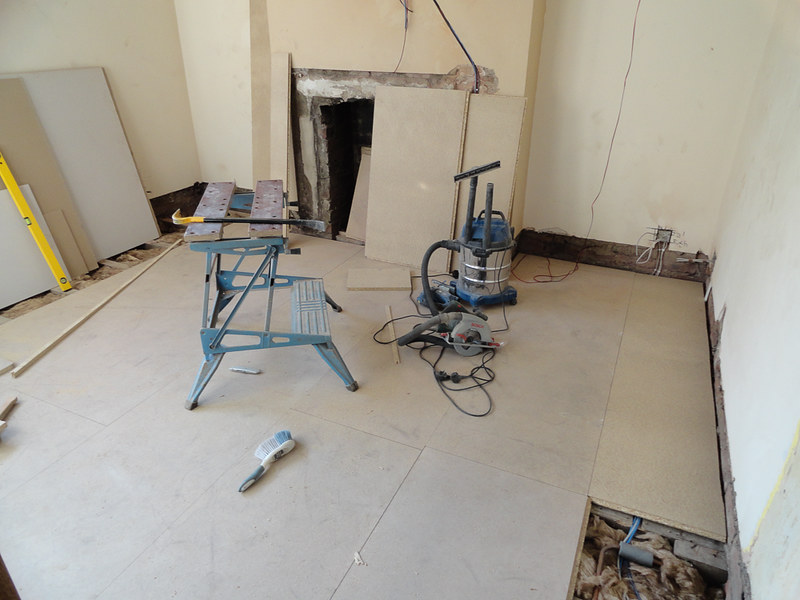
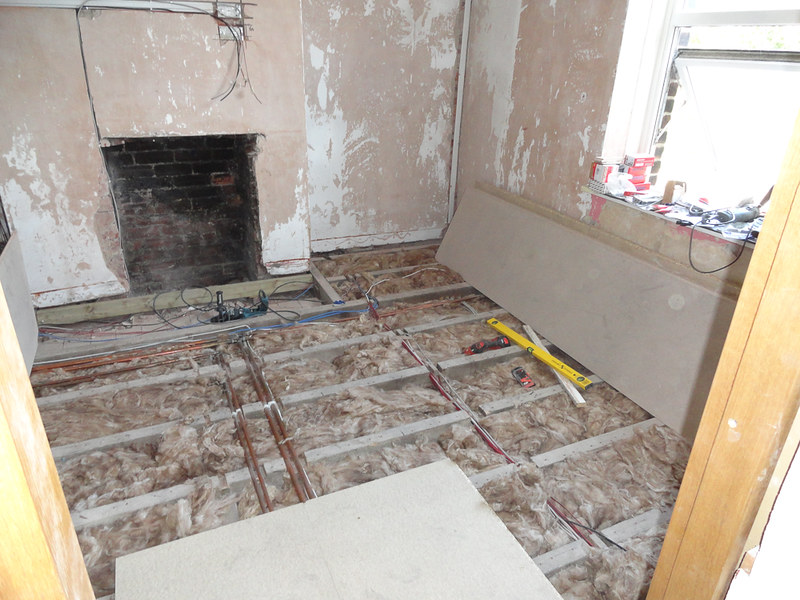
We've cut 95% of the floorboards downstairs, so that's ready to insulate and lay once I've sized up the new radiators and had a few pipes moved to fit. We started doing upstairs too, but didn't do it all as it all needs to come up for the electrician anyway, we tackled the fiddly bit under the stud wall and replaced a couple of bent uprights in the wall too.
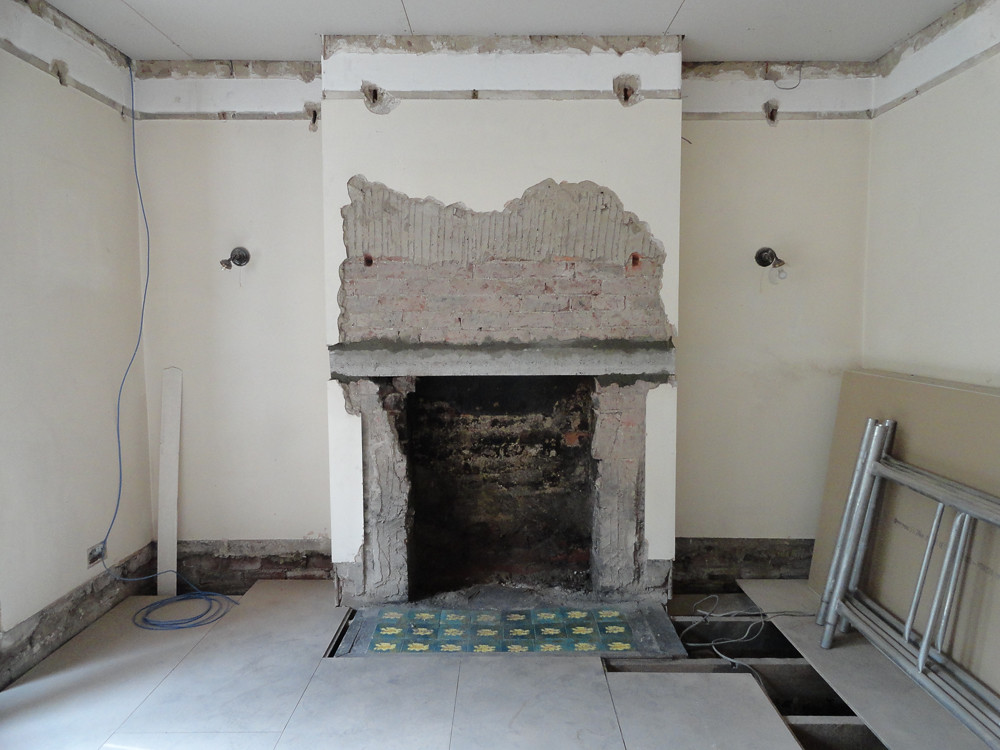
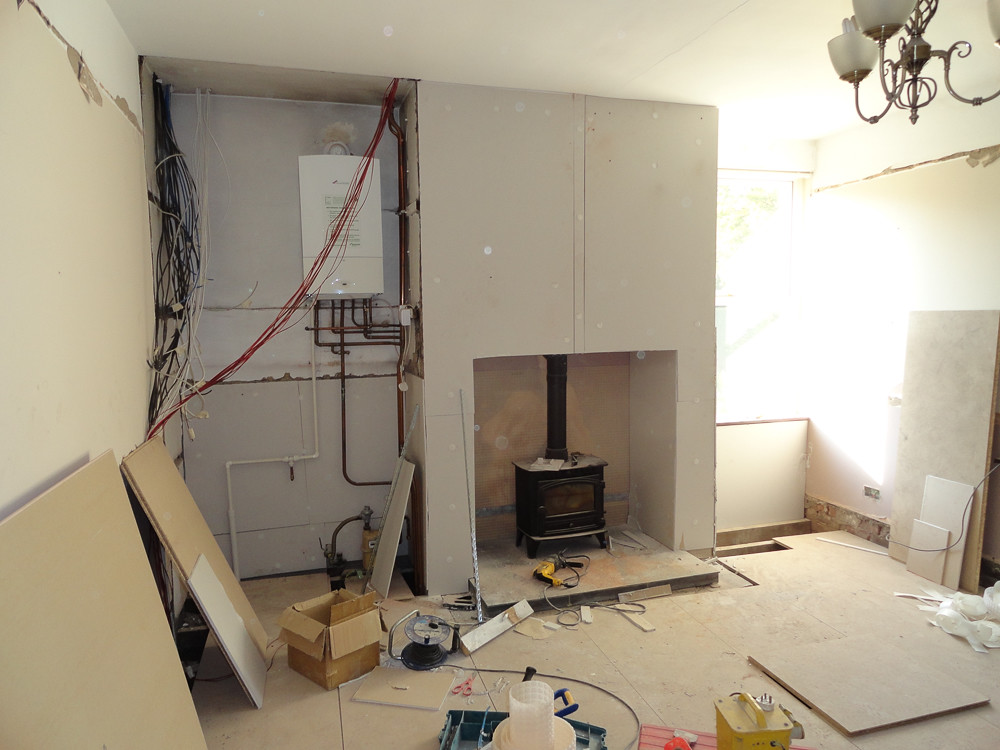
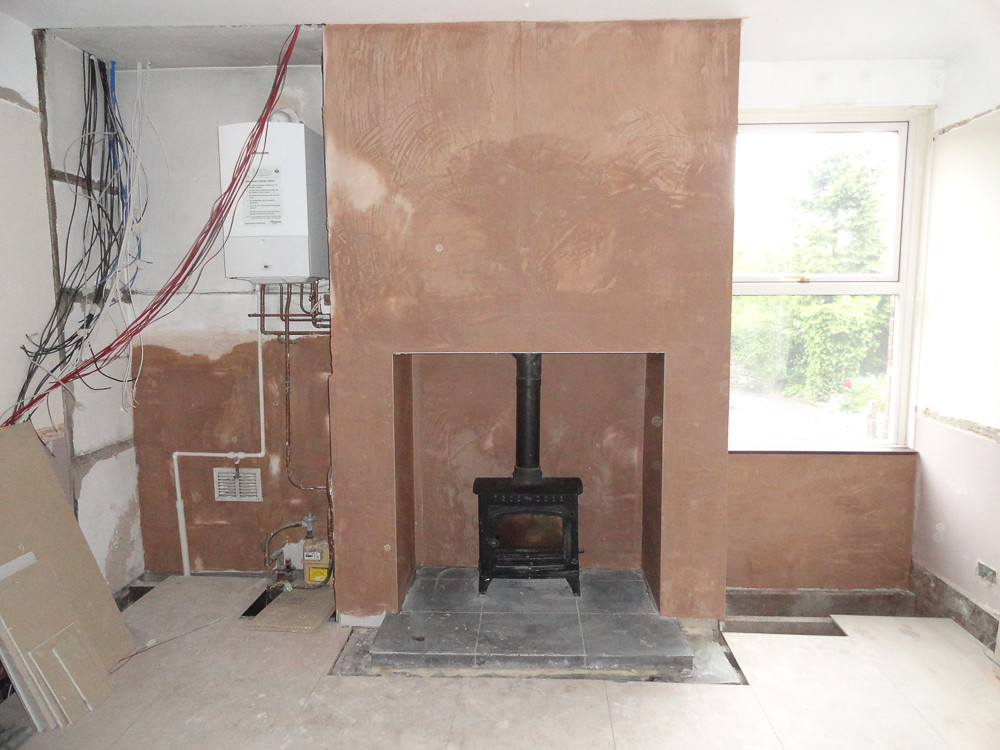
We've fitted the lintel in the fireplace and cleared out the old stuff, so that just needs a bit of tidying up and we can start getting a few people in to quote for fitting the stove and liner etc. Need to find a design we both like too and sort out the hearth.
My Mum made a start on clearing the garden, so some more black plastic is going down in a couple of weeks time.
I've got a couple of weeks away from the house now, then I'm there for 8 days straight, so hoping to get a lot of stuff done then and be close to being able to move in before we go away on holiday. I have an electrician good to go, so while he's wiring up I need to get some bits of plumbing done, sort out my air bricks and insulate and lay the floor downstairs. Door frames need to be ordered for the plasterer and I need to get the bathroom design finalised and all the bits bought ready for plumbing and fitting. Hopefully he'll be done towards the middle of my week off and I can get the floor done upstairs too, then the plasterer can make a start while I get the door frames in.
I'm pretty tired now, have just driven back to Manchester, so not looking forward to getting up for work tomorrow! Anyway, here's some pics.
Living Room ceiling and AWESOME tool:
Hallway Ceiling:
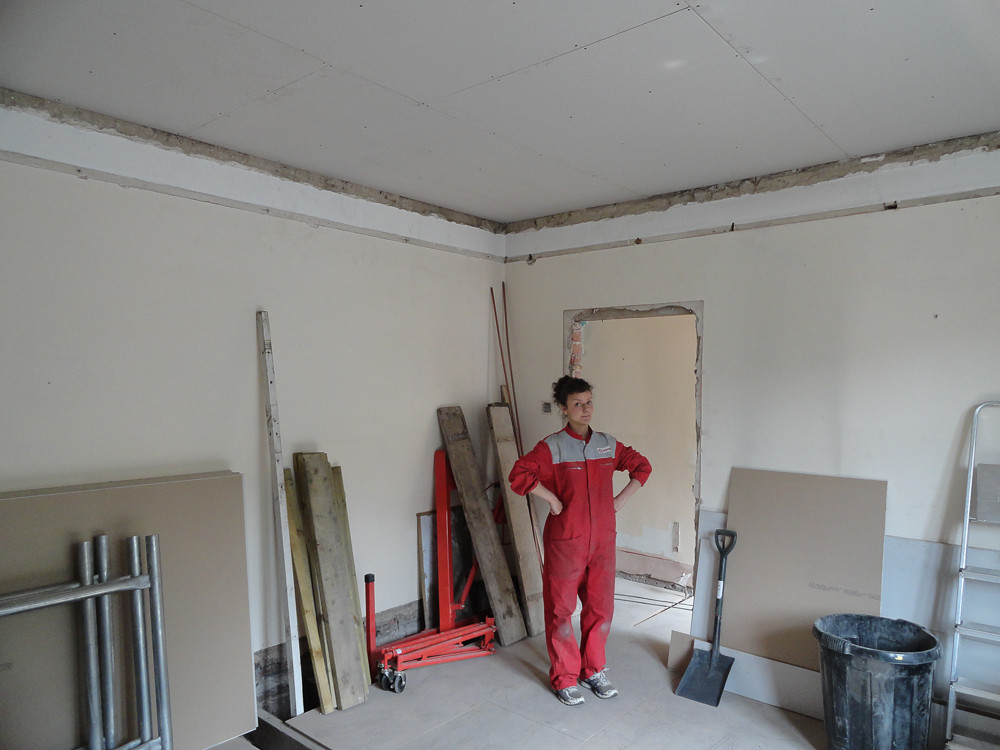
Financial Director and finished ceiling:
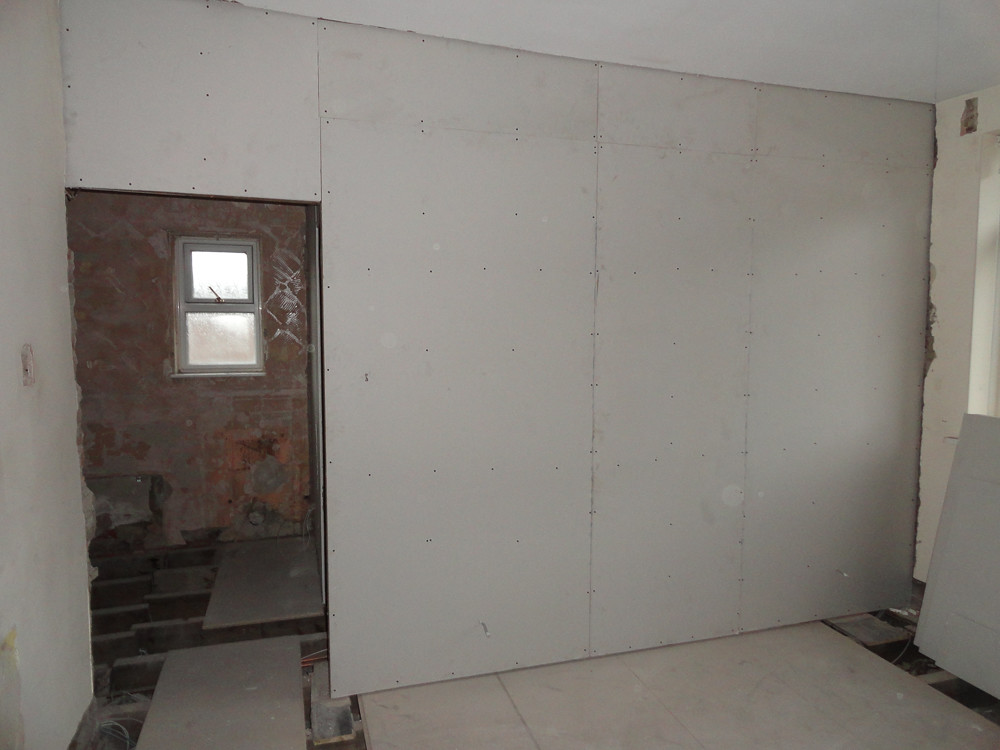
No hole in the wall!
New concrete support for joists and wall repointed:
Lintel in, fireplace cleared:
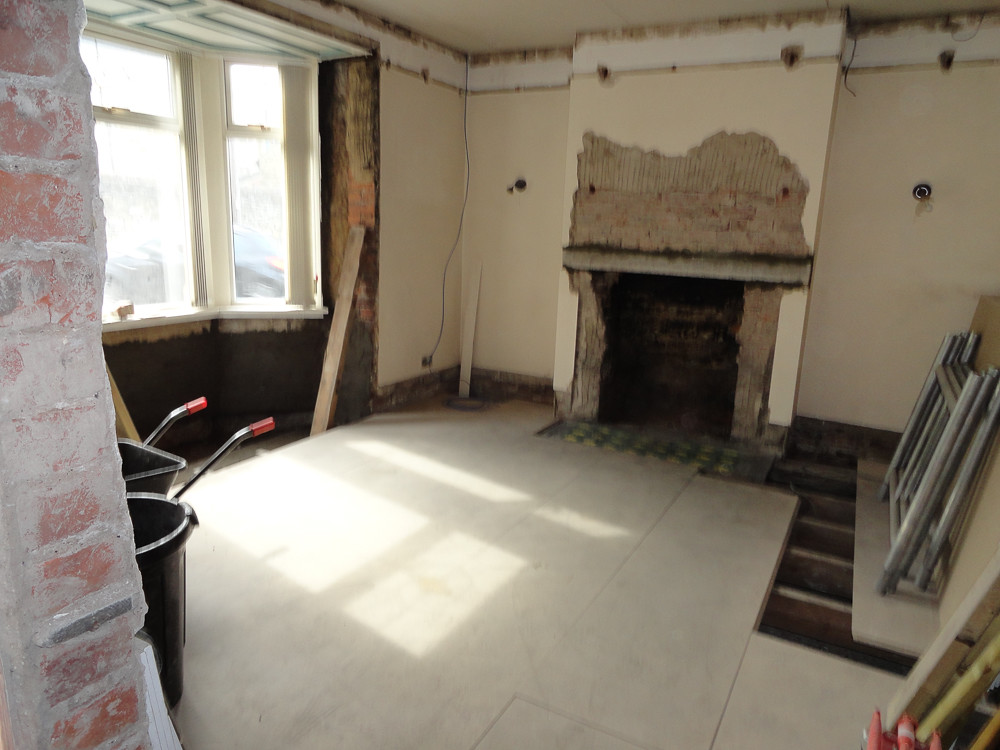
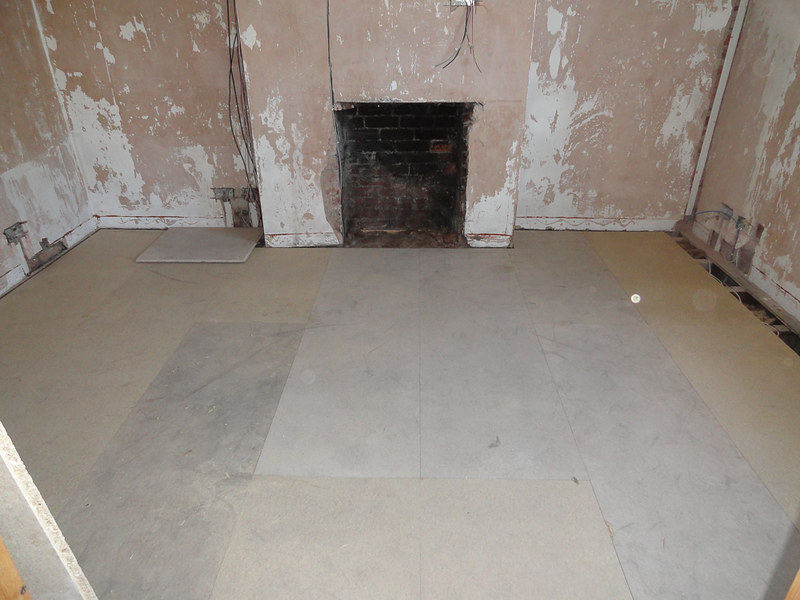
Floorboards cut and rough-laid:
More floor boards and stud-wall repaired:
Bit of gardening: (big weeds have been poisoned to get the roots)

Motorhome!

We've managed to batten and plasterboard all the ceilings that needed doing, living room and hallway. This was a big job made much easier by the purchase of a 4' square x 21' scaffold tower and a board lift, took best part of a day, but would have been two days easily without the board lift.
We've pointed/rendered the bay window and concreted in a little wall to rest the joists on (DPM on first) and we've bricked up the hole in the bathroom wall.
We've cut 95% of the floorboards downstairs, so that's ready to insulate and lay once I've sized up the new radiators and had a few pipes moved to fit. We started doing upstairs too, but didn't do it all as it all needs to come up for the electrician anyway, we tackled the fiddly bit under the stud wall and replaced a couple of bent uprights in the wall too.
We've fitted the lintel in the fireplace and cleared out the old stuff, so that just needs a bit of tidying up and we can start getting a few people in to quote for fitting the stove and liner etc. Need to find a design we both like too and sort out the hearth.
My Mum made a start on clearing the garden, so some more black plastic is going down in a couple of weeks time.
I've got a couple of weeks away from the house now, then I'm there for 8 days straight, so hoping to get a lot of stuff done then and be close to being able to move in before we go away on holiday. I have an electrician good to go, so while he's wiring up I need to get some bits of plumbing done, sort out my air bricks and insulate and lay the floor downstairs. Door frames need to be ordered for the plasterer and I need to get the bathroom design finalised and all the bits bought ready for plumbing and fitting. Hopefully he'll be done towards the middle of my week off and I can get the floor done upstairs too, then the plasterer can make a start while I get the door frames in.
I'm pretty tired now, have just driven back to Manchester, so not looking forward to getting up for work tomorrow! Anyway, here's some pics.
Living Room ceiling and AWESOME tool:
Hallway Ceiling:
Financial Director and finished ceiling:
No hole in the wall!
New concrete support for joists and wall repointed:
Lintel in, fireplace cleared:
Floorboards cut and rough-laid:
More floor boards and stud-wall repaired:
Bit of gardening: (big weeds have been poisoned to get the roots)
Motorhome!
Thanks, we'll definitely be in by Christmas!
Plan is to get the bathroom plumbed, electrics in, plastering done, floors down and door frames in then move in. We're hoping to be moving in in around 6 weeks time as we have tradesmen ready to go on the big stuff and I've got enough time off to get through the rest around a holiday in that timeframe.
I've got a couple of weeks to get everything planned, bought and aranged with tradesmen to be able to get as much as possible done in my week off and then we'll see from there....
Mini-update:
I had last weekend off the project in the Lakes at my parent's house. Although we didn't get any physical work done, we made good progress and have sorted out and ordered all the door frames and doors, the woodburner for the living room, the bathroom (apart from tiles) and the radiators. The woodburner is going to be a month or so, but the rest should all be delivered next week.
I'm off work for a couple of weeks from tomorrow afternoon, though I'm in Cornwall for the second week. I've got a damp contractor in on Monday, the electrician in all week and (hopefully) a plumber coming to move a few radiator pipes ready for my floor to go down.
The Woodman is sorting my door frames, my Dad is collecting them, my Mum is staining and varnishing them and then they're bringing them across in time for fitting on the Sunday at the end of my holiday.
So if all goes to plan we should be looking at getting a plasterer in in a couple of weeks time and moving on to plumbing the bathroom. Will try to update next week, but the likelihood is it'll be after my holiday as I'm going to work my fingers to the bone and be too tired for photos!
Sorry I've not managed to update the thread for a few weeks, I ended up getting pretty ill last week so have mostly been in bed since getting back from holiday and as a result I didn't do anything on the house at all last weekend!
Anyway, progress was decent during my week off, though now that I've started putting things back it's become much clearer that nothing is straight! There's no point trying to get anything level or square because it won't look right, everything has to be done level and then adjusted so it fits in with the quirks that surround it. So things are taking longer than hoped, but we're getting somewhere still.
Electrician should be finished in the house this week, so I'll be looking to get various tidying up jobs done and a plasterer to start in a couple of weeks time or so. I've decided not to get the floor properly fixed down until that's all dealt with as it'll mean I can do all my own plumbing and leak-test it properly, rather than rushing it and hoping everything's right. It's been a complete pain getting a reliable plumber and what quotes I've had have been a bit ridiculous for the work I was asking to have done, so I'm happy to learn a new skill and leave the floor up a while longer.
Anyway, progress I have made:
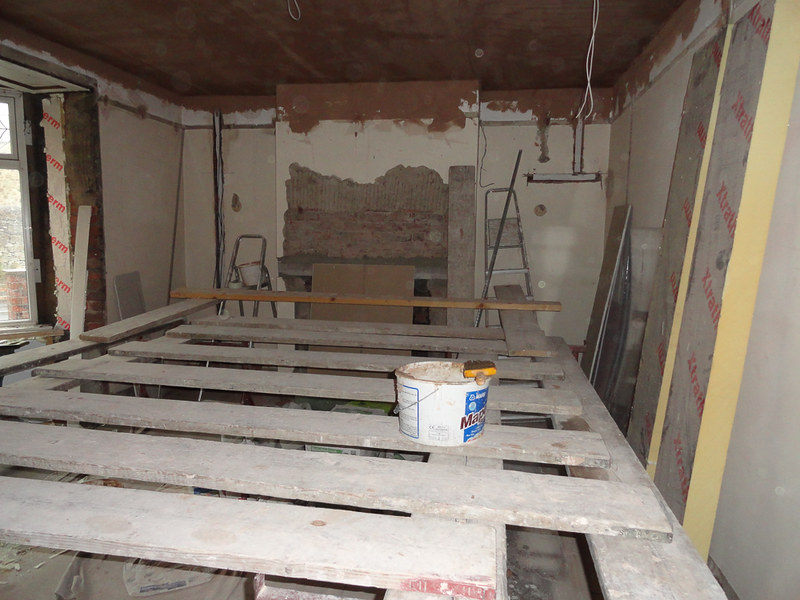
Bay window joists replaced and level:
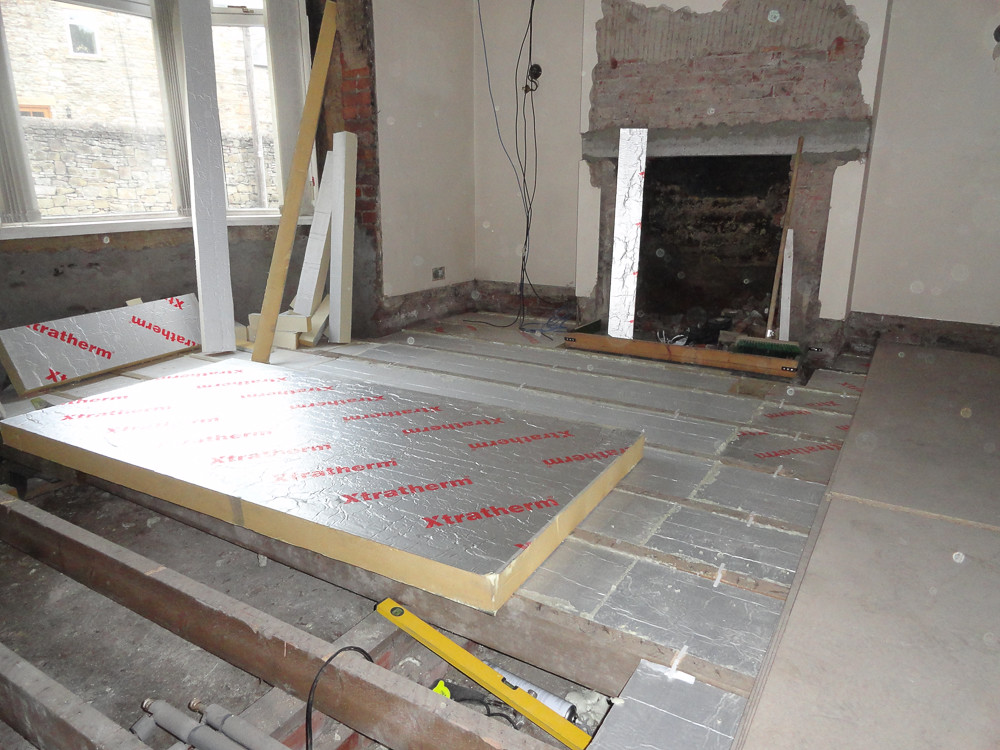
Rubbish between the joists cleared, insulation fitted. This was a bit of a learning curve, took a while until I'd sussed out the best way of doing it and ended up being fairly quick. I used a fine-toothed saw to cut the sheets so that they'd fit through the (bent and out of square!) joists, then I used these little clip things to hold them in place. These are supposed to be suitable on their own, but I found it was impossible to fit them without breaking the insulation unless there was a big gap. In the end I used the clips to locate the sheets, but they're now held in with the expanding foam that I've used to seal them properly, they aren't going anywhere. That foam's a complete b d to get off your hands isn't it!

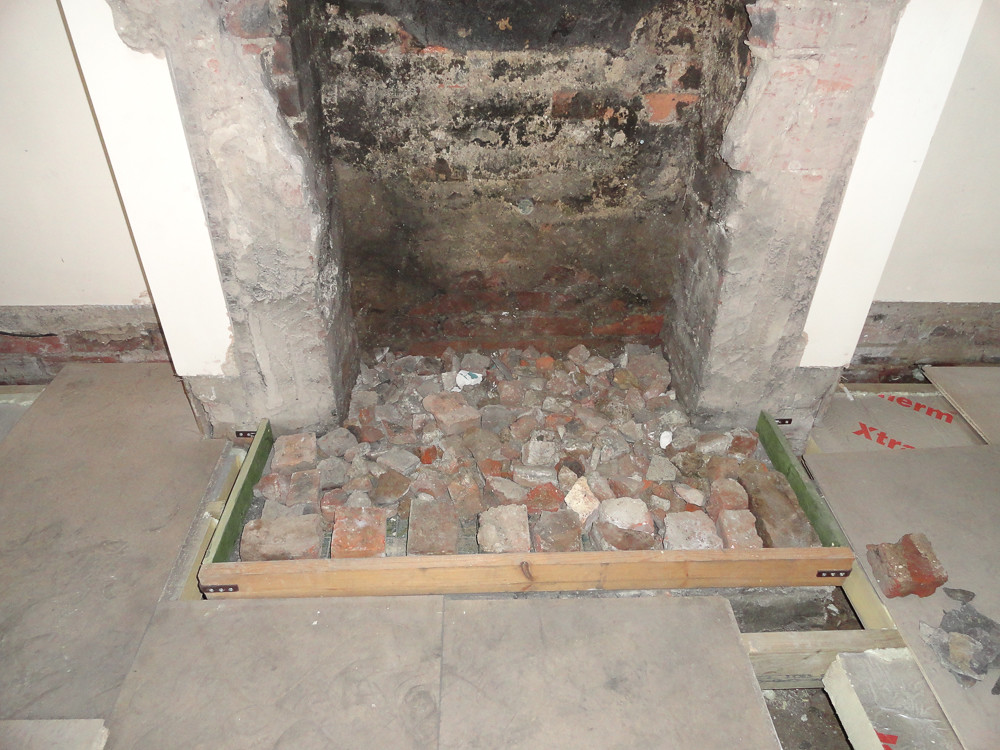
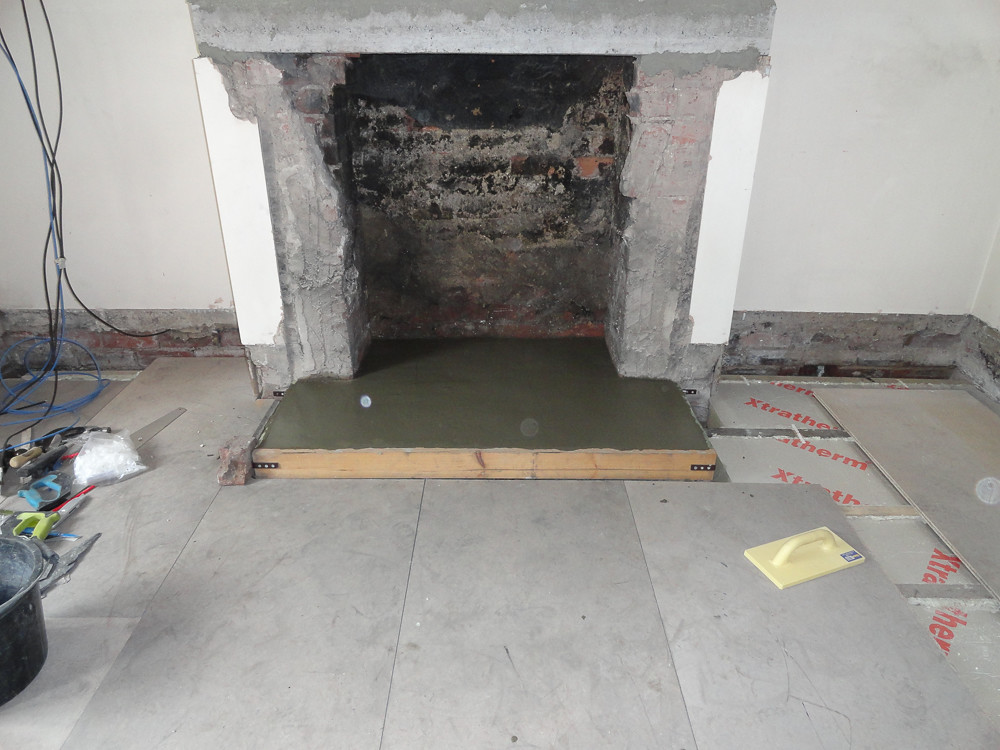
Shuttering for the new raised hearth. You can't see underneath, but the existing hearth has been re-supported using mortar and bricks to stop it moving again. The hearth had dropped at the front and was lower than floor level as it was, so needed to be raised a fair bit. This was the first job that I struggled with because once it was levelled it was clear that it would sit about 1500 higher than the floor at one corner compared with the other, I had to compromise the level and judge what would look right by eye.

Rubble in
Cement in on top and hand levelled
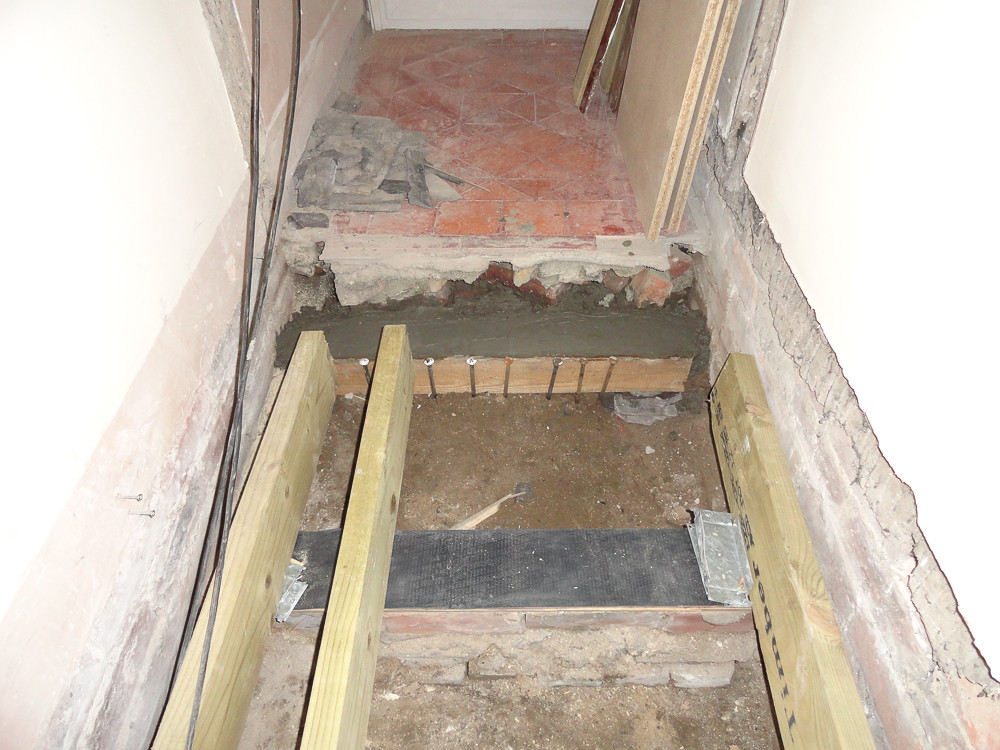
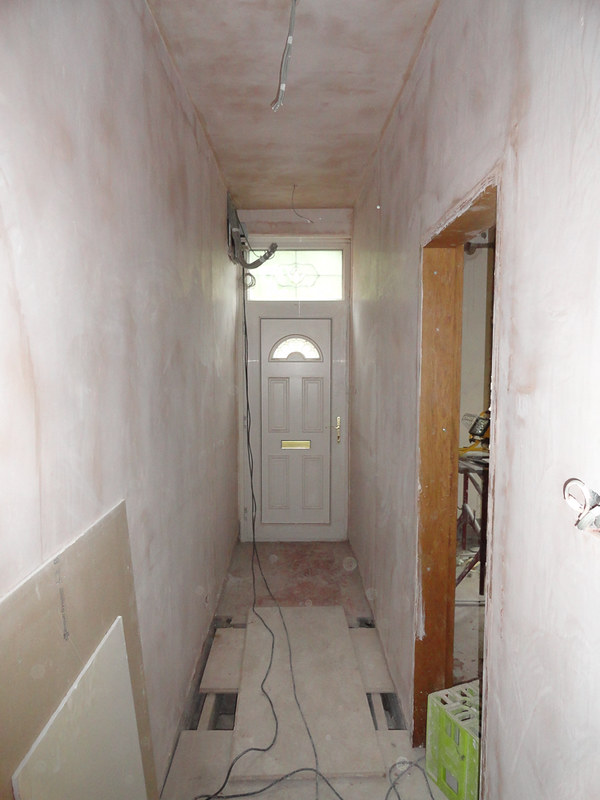
Rotten joists in the hallway removed, new end support built ready for the new joists
Bathroom delivered
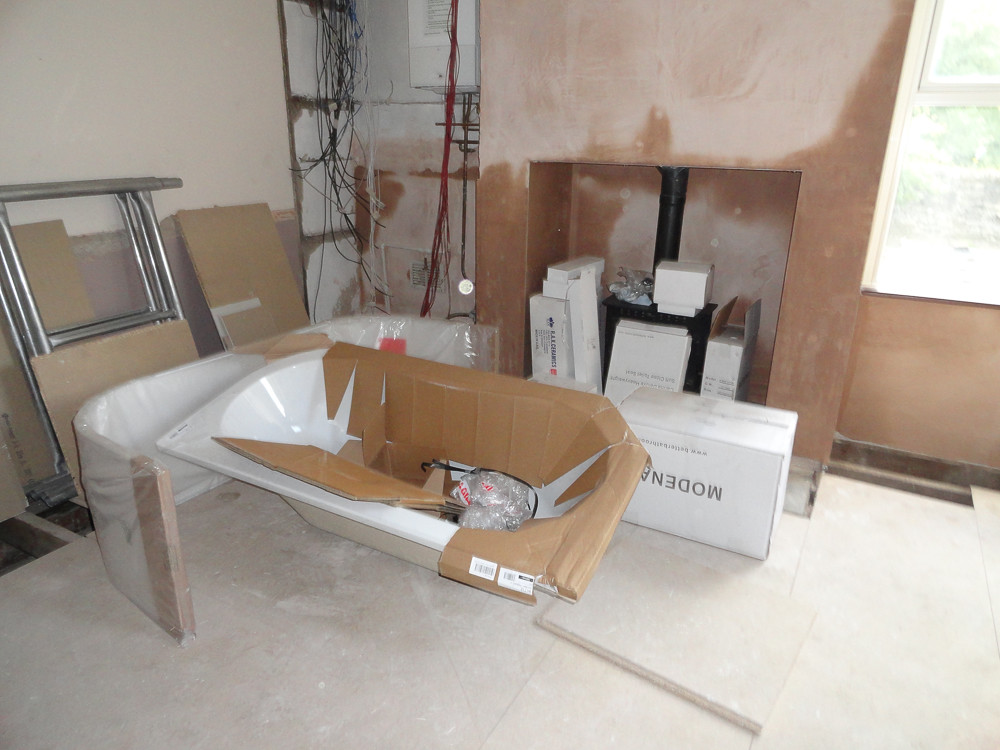
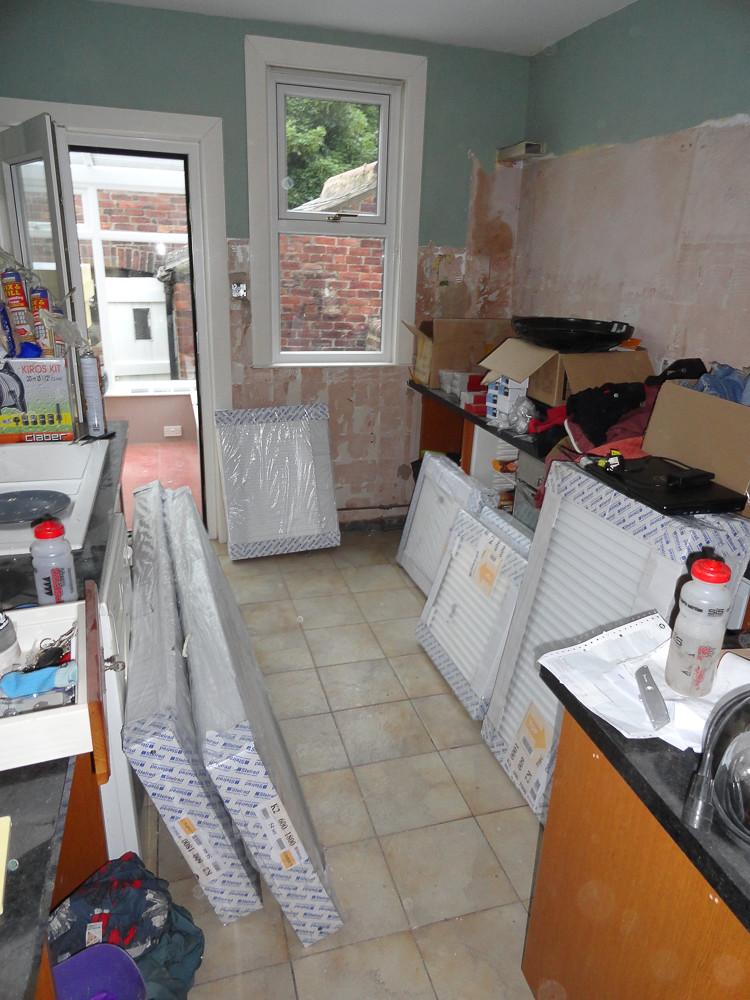
Radiators delivered
Bathroom floor cut and temporarily laid. One joist is slightly higher than the others and full of old nails, so any tips for levelling it appreciated. I'm planning to put 22mm chipboard down, then tile onto that so any input into that would be appreciated. Concerned that the slight curve that the wonky joist will create might cause problems.
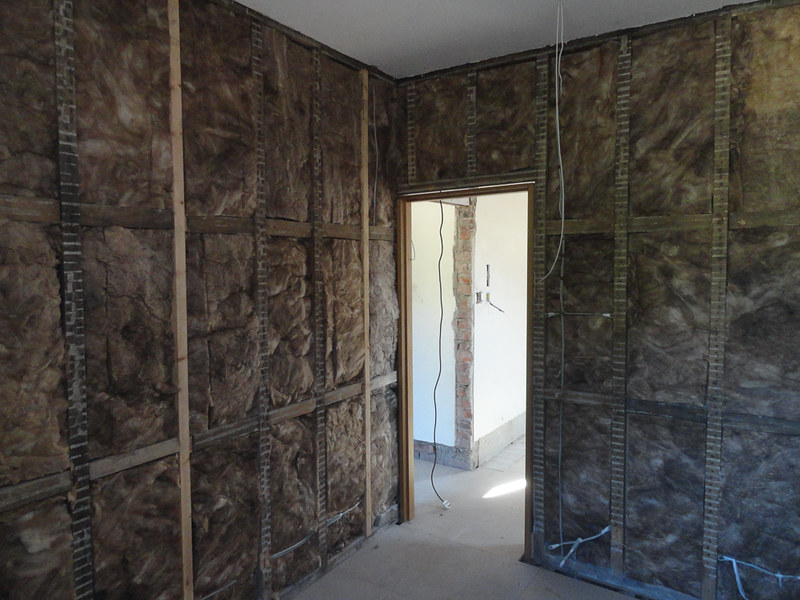
Half of my walls plasterboarded. I haven't done the otherside yet as I needed to check my electrician didn't need to run more wires and I didn't have insulation ready.
Damp proof membrane applied and plasterboarded over
All skimmed and finished, shame my electrician has to make a mess of it putting a socket in, but there was no way around that!
Since the pictures were taken my Dad fitted three of the door frames upstairs. They were a complete pig again as nothing is straight, but the ones that are in look great and we know what we're doing a bit better now so the next lot should be faster! I'll get pics of those at the weekend and hopefully have some more progress to report!
![]()
![]()
Anyway, progress was decent during my week off, though now that I've started putting things back it's become much clearer that nothing is straight! There's no point trying to get anything level or square because it won't look right, everything has to be done level and then adjusted so it fits in with the quirks that surround it. So things are taking longer than hoped, but we're getting somewhere still.
Electrician should be finished in the house this week, so I'll be looking to get various tidying up jobs done and a plasterer to start in a couple of weeks time or so. I've decided not to get the floor properly fixed down until that's all dealt with as it'll mean I can do all my own plumbing and leak-test it properly, rather than rushing it and hoping everything's right. It's been a complete pain getting a reliable plumber and what quotes I've had have been a bit ridiculous for the work I was asking to have done, so I'm happy to learn a new skill and leave the floor up a while longer.
Anyway, progress I have made:
Bay window joists replaced and level:
Rubbish between the joists cleared, insulation fitted. This was a bit of a learning curve, took a while until I'd sussed out the best way of doing it and ended up being fairly quick. I used a fine-toothed saw to cut the sheets so that they'd fit through the (bent and out of square!) joists, then I used these little clip things to hold them in place. These are supposed to be suitable on their own, but I found it was impossible to fit them without breaking the insulation unless there was a big gap. In the end I used the clips to locate the sheets, but they're now held in with the expanding foam that I've used to seal them properly, they aren't going anywhere. That foam's a complete b
d to get off your hands isn't it!Shuttering for the new raised hearth. You can't see underneath, but the existing hearth has been re-supported using mortar and bricks to stop it moving again. The hearth had dropped at the front and was lower than floor level as it was, so needed to be raised a fair bit. This was the first job that I struggled with because once it was levelled it was clear that it would sit about 1500 higher than the floor at one corner compared with the other, I had to compromise the level and judge what would look right by eye.
Rubble in
Cement in on top and hand levelled
Rotten joists in the hallway removed, new end support built ready for the new joists
Bathroom delivered
Radiators delivered
Bathroom floor cut and temporarily laid. One joist is slightly higher than the others and full of old nails, so any tips for levelling it appreciated. I'm planning to put 22mm chipboard down, then tile onto that so any input into that would be appreciated. Concerned that the slight curve that the wonky joist will create might cause problems.
Half of my walls plasterboarded. I haven't done the otherside yet as I needed to check my electrician didn't need to run more wires and I didn't have insulation ready.
Damp proof membrane applied and plasterboarded over
All skimmed and finished, shame my electrician has to make a mess of it putting a socket in, but there was no way around that!
Since the pictures were taken my Dad fitted three of the door frames upstairs. They were a complete pig again as nothing is straight, but the ones that are in look great and we know what we're doing a bit better now so the next lot should be faster! I'll get pics of those at the weekend and hopefully have some more progress to report!
Hello, that was my concern as well, but I can’t see it being a problem. There’s 150mm of joist and the space below is 100mm at one end of the house and rises to about 500mm at the other end fo the house. There’s good circulation of air throughout the cavity space with gaps between the joist supporting walls and also the walls between rooms have air gaps.
What really confirmed that it will be fine was that every airbrick that supplies air to the cavity has been blocked for at least the last 50 years, probably longer given the amount of rubbish I removed from each. So there was no airflow to speak of before the insulation went in and only minimal rot to the joists in all that time.
There’s a vapour barrier going over the top and both the subfloor and the top floor will be pretty impermeable too, so the cavity shouldn’t draw in much in the way of moisture or condensation, so I’m pretty confident that it’ll be fine indefinitely.
I think I removed about three bucket fulls of rubbish from most of the airbricks, which given the holes are a single brick sized is pretty impressive. Although I’ve had one wall treated for damp, I now know that if I have any damp issues in the future the first thing to do is to remove a few bricks on the outside wall and clear out the cavity. I’ll probably work my way around the house doing just that as a preventative measure eventually.
Sorry I've not updated for a while, internet here in my Rochdale bedsit has been out and then it came back but too slow to upload photos, then my PC broke so that Windows Explorer crashed when I plugged my camera in, so I've not been able to get a proper update done.
We've managed to get through a lot in the last month since my last post, my electrician has finished in the house apart from the light switch and socket under the stairs and he should be starting outside in the Blacksmiths this week. Just a basic two lights and a few sockets in there for now, which will all be redone when that project starts in earnest. Plasterers have been in for a couple of weeks and should have finished upstairs today! We've painted a couple of rooms over the weekend and I've got through a lot of little jobs that needed sorting sooner rather than later.
I've spent a lot of time preping for the plaster, there were so many channels to cut for wires and holes for getting wires outside and backboxes for media and speaker and alarm cable in the ceilings to drop down. Completely misjudged how long that would all take! I ended up on the loft for the first time, filthy place full of dirt and heat! Great space for converting though.
Anyway, I'm sure yo'd rather look at pictures than listen to me ramble on:
150mm of insulation between the joists upstairs. You can see the cutting in I've done for my media stuff on the chimney - Angle grinder and a diamond-tipped blade, lots of dust but takes seconds. Chiselling the brick was strangely therapeutic!

Boards cut and down:
More boards and insulation:

Landing boards cut and down, banister removed ready for plaster. Just the newell post remains and my wood man is working on a solution that'll let us either keep or replace the post with the new banister depending on how well it cleans up.

More insulation:
More boards!
Plaster started!
70mm of Acoustic insulation in the new stud wall. Surprisingly this only took half an hour to fit!
Bathroom Plastered!
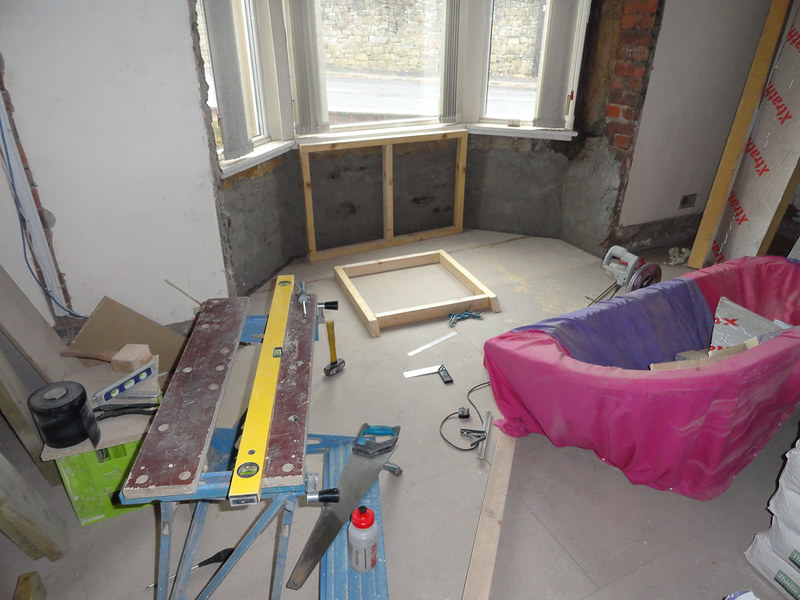
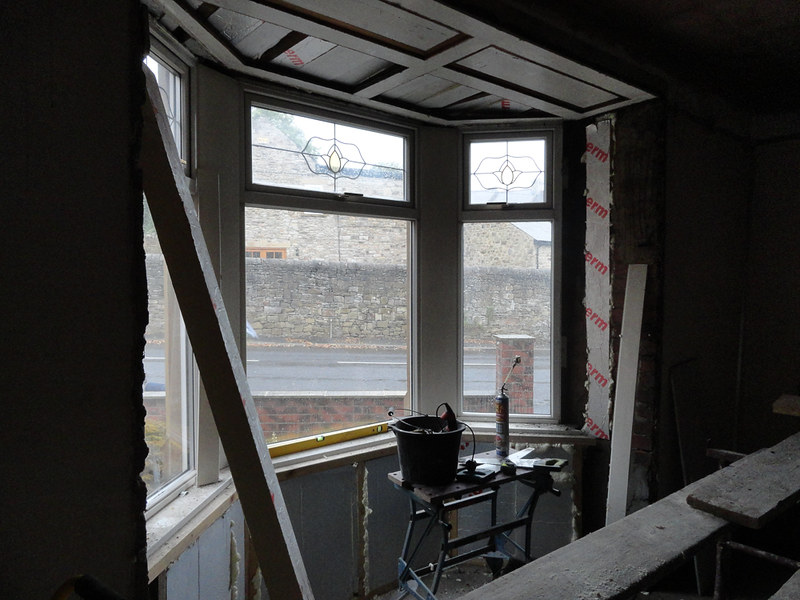
Stud wall started in the bay window. This is so that I can insulate the brick. I've also popped off most of the ceiling board so that I can get insulation into the cavity, but that's revealed a minor issue so I need to get my Dad's advice on how best to proceed with that. Sills will be replaced with longer ones in Oak. Pretty chuffed with my first foray into carpentry, especially as Travis Perkins sent me some bent wood:
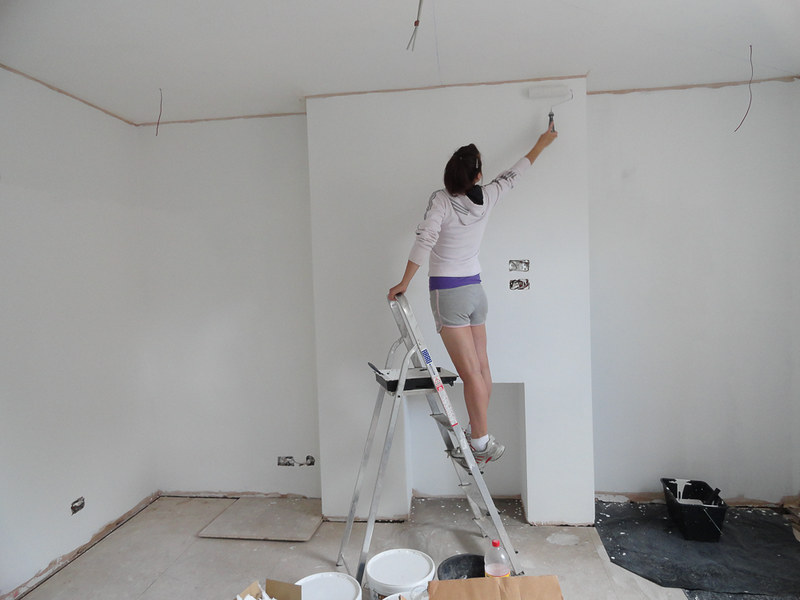
Now we're talking! Not only is someone else getting dirty for a change, but that's the second coat being finished which leaves not all that much to do in that room to get it ready to move in. The Boss needs to pick her final colours, the radiator needs fitting and a door hanging and it's good to go. I did a mist coat of 5l paint and 4l water, using Travis Perkin's Contract Matt, then a coat of paint undiluted. I sprayed the walls with water before applying the mist coat to control the paint drying time. Seems to have worked great!
Bathroom done!
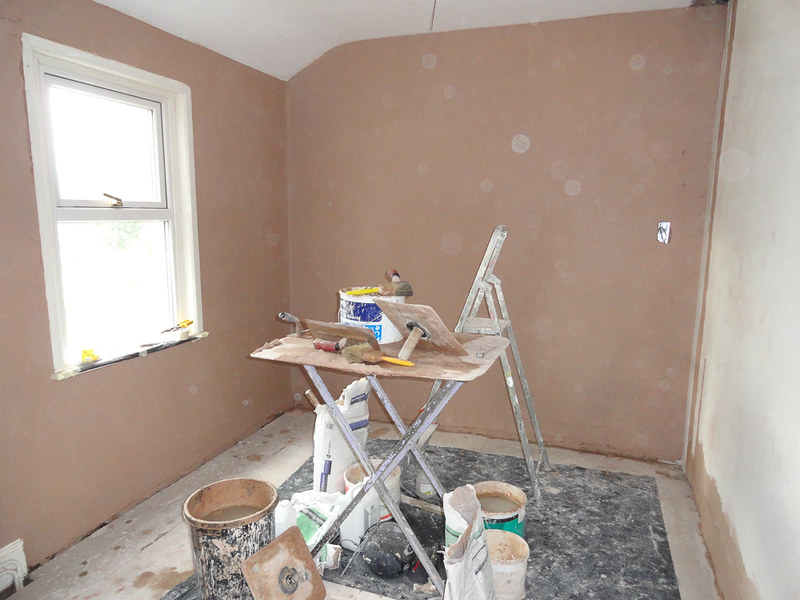
Front bedroom ready for paint:
Little bedroom boarded and skimmed:

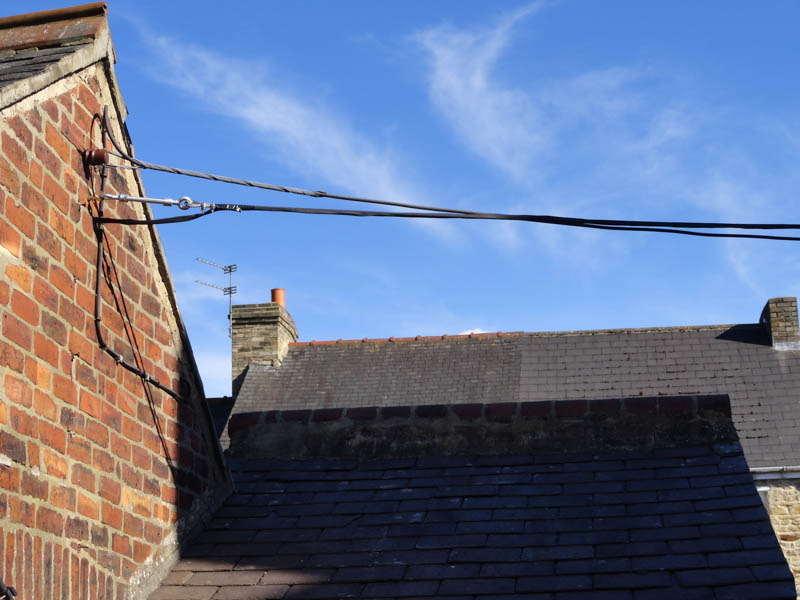
As part of getting the wires sorted for plastering I've sorted my service cable to the garage. This is a TV feed, ethernet cable and 2 alarm cables. There's already a mains wire going to the Blacksmiths that supports itself. My electrician pointed out that my feed to the garden is hanging off it and if the weight buggers the mains I'll get a random bill of around 4 figures to fix it. So my wires are not going to hang off the mains wire and the feed to the garden has come down and will be wired into the Blacksmiths supply instead of the house.
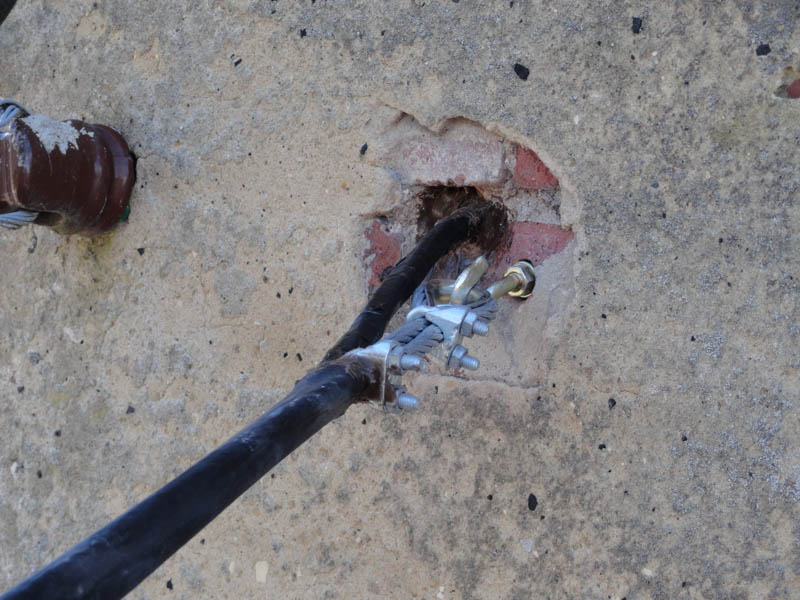
So far, this is the job I'm most proud of; 8mm steel wire with turnbuckle to tension it and the 4 cables all threaded through a length of 38mm shrinkwrap. I did this by jetting water through the wrap to lubricate and expand the wrap, I used the steel to draw the rest through and once I could pull and push at once it went through fairly easily. It's 6m long so there was a lot of friction to overcome!
Expansionbolt-thing with hook fixed to wall, cable hooked over with wrap ready to be sealed:
Turnbuckle installed and cable tensioned, you can see how the mains feed is run across here:
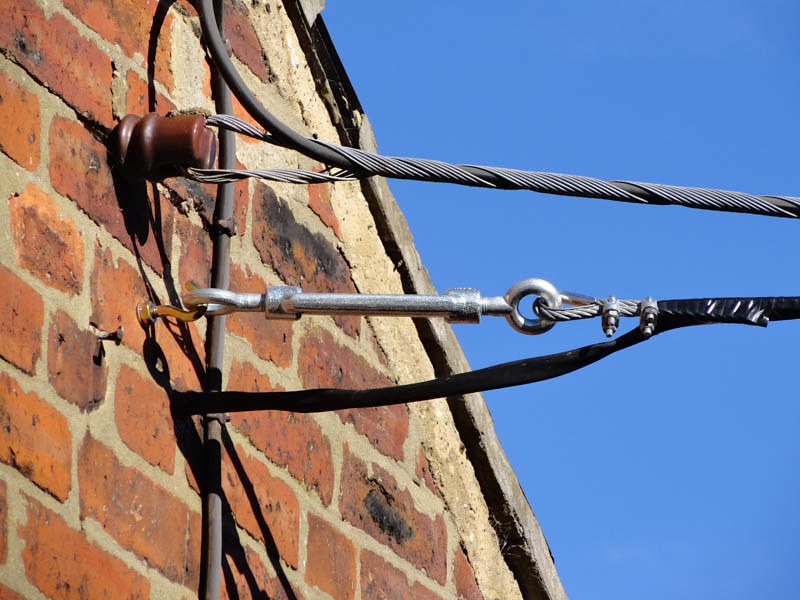
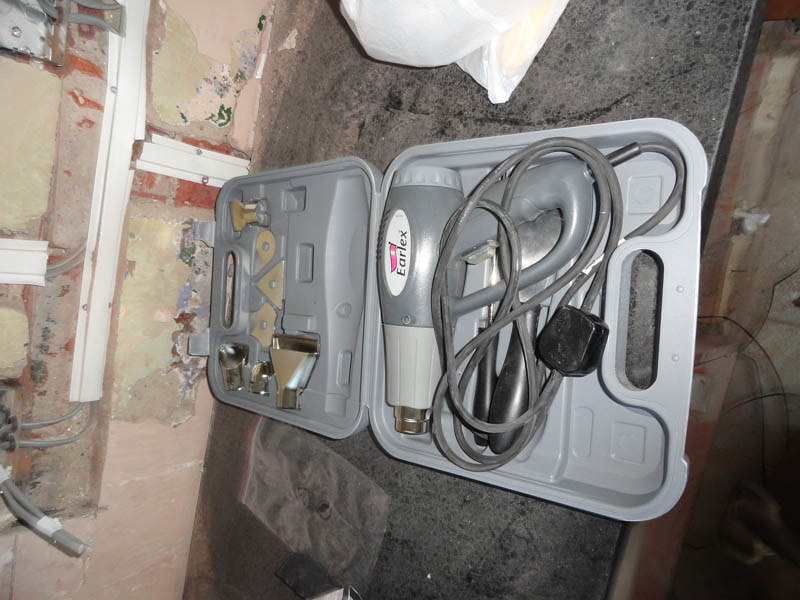
I attempted the shrinkwrap with a hairdryer and it sort of worked, but not very well and it took 15 minutes to do 6 inches, so I now have a new tool. I'm sure it'll come in very handy. Handy like the scaffold tower and the plasterboard lift and the workbench cutter etc...
It did a great job anyway, whizzed along it and shrank perfectly to the cables inside. Silicone in both ends and sealed intot he brick and we're done:
I love it when a plan comes together!
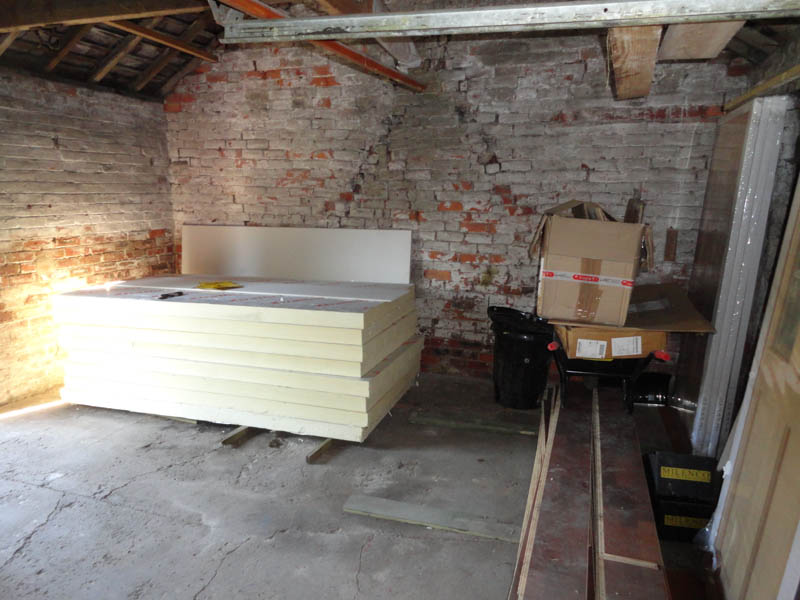
The only other thing I have to report is that I've tided the Blacksmiths up so you can see what it's like inside now. I've also firmed up my plans for the building and the outside long-term, here's a look at what we have now:
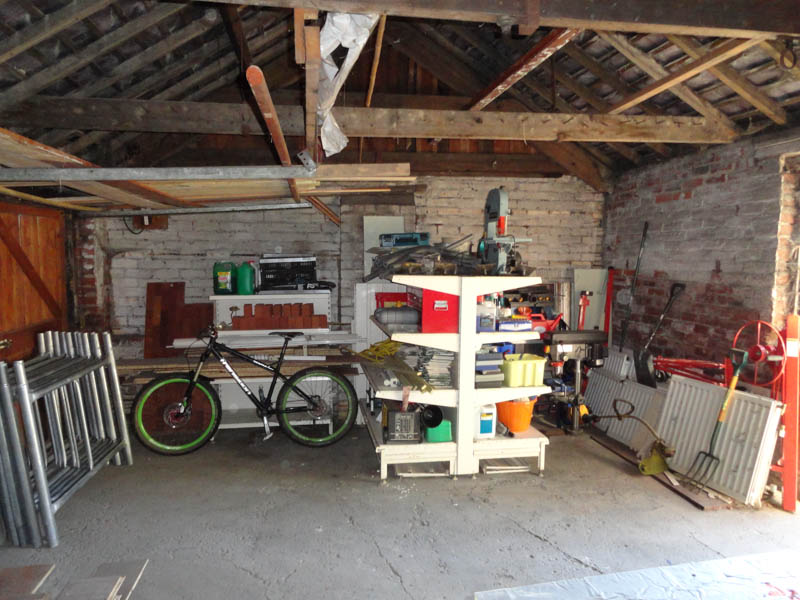

Briefly the plan is to knock through to the garage, brick up the doors to the street and fit a double roller door instead of the single to the garden. (Or the grounds as one neighbour referred to them last week!). Door to the little shed will be bricked up, new door to the street side and pedestrian door into the workshop. This will give me a massive space for my workshop and space to park two cars if necessary as well as a 'dirty' room to keep all the messy stuff in out of the way until there's a Mini parked in there. Mezzanine storage above the existing garage and proper insulation etc so that it can easily be converted into a standalone flat if a future buyer prefers and to give me somewhere to escape from it all :-) Velux windows in the roof and vaulted ceiling in the main bit of the workshop.
The outside toilet is to come down and that rubble plus the wall that's coming out and the crap that's in my front garden will make a great base to level the area outside the building with ready for a patio that'll allow cars to access the garage as well. The workshop then becomes a great space to stage garden parties from etc. Lawn to be levelled to match and top garden to house a green house and vegetable plot.
Eventually the conservatory might go and the space between workshop and house will be filled to give a much larger kitchen a study and a downstairs bathroom.
Should all keep me entertained for a good while yet!
We've managed to get through a lot in the last month since my last post, my electrician has finished in the house apart from the light switch and socket under the stairs and he should be starting outside in the Blacksmiths this week. Just a basic two lights and a few sockets in there for now, which will all be redone when that project starts in earnest. Plasterers have been in for a couple of weeks and should have finished upstairs today! We've painted a couple of rooms over the weekend and I've got through a lot of little jobs that needed sorting sooner rather than later.
I've spent a lot of time preping for the plaster, there were so many channels to cut for wires and holes for getting wires outside and backboxes for media and speaker and alarm cable in the ceilings to drop down. Completely misjudged how long that would all take! I ended up on the loft for the first time, filthy place full of dirt and heat! Great space for converting though.
Anyway, I'm sure yo'd rather look at pictures than listen to me ramble on:
150mm of insulation between the joists upstairs. You can see the cutting in I've done for my media stuff on the chimney - Angle grinder and a diamond-tipped blade, lots of dust but takes seconds. Chiselling the brick was strangely therapeutic!
Boards cut and down:
More boards and insulation:
Landing boards cut and down, banister removed ready for plaster. Just the newell post remains and my wood man is working on a solution that'll let us either keep or replace the post with the new banister depending on how well it cleans up.
More insulation:
More boards!
Plaster started!
70mm of Acoustic insulation in the new stud wall. Surprisingly this only took half an hour to fit!
Bathroom Plastered!
Stud wall started in the bay window. This is so that I can insulate the brick. I've also popped off most of the ceiling board so that I can get insulation into the cavity, but that's revealed a minor issue so I need to get my Dad's advice on how best to proceed with that. Sills will be replaced with longer ones in Oak. Pretty chuffed with my first foray into carpentry, especially as Travis Perkins sent me some bent wood:
Now we're talking! Not only is someone else getting dirty for a change, but that's the second coat being finished which leaves not all that much to do in that room to get it ready to move in. The Boss needs to pick her final colours, the radiator needs fitting and a door hanging and it's good to go. I did a mist coat of 5l paint and 4l water, using Travis Perkin's Contract Matt, then a coat of paint undiluted. I sprayed the walls with water before applying the mist coat to control the paint drying time. Seems to have worked great!
Bathroom done!
Front bedroom ready for paint:
Little bedroom boarded and skimmed:
As part of getting the wires sorted for plastering I've sorted my service cable to the garage. This is a TV feed, ethernet cable and 2 alarm cables. There's already a mains wire going to the Blacksmiths that supports itself. My electrician pointed out that my feed to the garden is hanging off it and if the weight buggers the mains I'll get a random bill of around 4 figures to fix it. So my wires are not going to hang off the mains wire and the feed to the garden has come down and will be wired into the Blacksmiths supply instead of the house.
So far, this is the job I'm most proud of; 8mm steel wire with turnbuckle to tension it and the 4 cables all threaded through a length of 38mm shrinkwrap. I did this by jetting water through the wrap to lubricate and expand the wrap, I used the steel to draw the rest through and once I could pull and push at once it went through fairly easily. It's 6m long so there was a lot of friction to overcome!
Expansionbolt-thing with hook fixed to wall, cable hooked over with wrap ready to be sealed:
Turnbuckle installed and cable tensioned, you can see how the mains feed is run across here:
I attempted the shrinkwrap with a hairdryer and it sort of worked, but not very well and it took 15 minutes to do 6 inches, so I now have a new tool. I'm sure it'll come in very handy. Handy like the scaffold tower and the plasterboard lift and the workbench cutter etc...
It did a great job anyway, whizzed along it and shrank perfectly to the cables inside. Silicone in both ends and sealed intot he brick and we're done:
I love it when a plan comes together!
The only other thing I have to report is that I've tided the Blacksmiths up so you can see what it's like inside now. I've also firmed up my plans for the building and the outside long-term, here's a look at what we have now:
Briefly the plan is to knock through to the garage, brick up the doors to the street and fit a double roller door instead of the single to the garden. (Or the grounds as one neighbour referred to them last week!). Door to the little shed will be bricked up, new door to the street side and pedestrian door into the workshop. This will give me a massive space for my workshop and space to park two cars if necessary as well as a 'dirty' room to keep all the messy stuff in out of the way until there's a Mini parked in there. Mezzanine storage above the existing garage and proper insulation etc so that it can easily be converted into a standalone flat if a future buyer prefers and to give me somewhere to escape from it all :-) Velux windows in the roof and vaulted ceiling in the main bit of the workshop.
The outside toilet is to come down and that rubble plus the wall that's coming out and the crap that's in my front garden will make a great base to level the area outside the building with ready for a patio that'll allow cars to access the garage as well. The workshop then becomes a great space to stage garden parties from etc. Lawn to be levelled to match and top garden to house a green house and vegetable plot.
Eventually the conservatory might go and the space between workshop and house will be filled to give a much larger kitchen a study and a downstairs bathroom.
Should all keep me entertained for a good while yet!
Craikeybaby said:
Wow! Great progress - it sounds like the out buildings are going to be good too!
Thanks, it's started to come together over the last couple of weeks and there should be a massive change over the next few weeks. After that there'll be less big jobs and a huge list of little jobs and progress might appear to slow a bit, but I think we're well on track for being pretty much fully sorted for Christmas.The outbuilding isn't much smaller than the house, so will be the biggest 'room' we own, so I'm going to maximise it's potential.
Quick update; this weekend was mostly painting, though I did get a few other jobs done too.
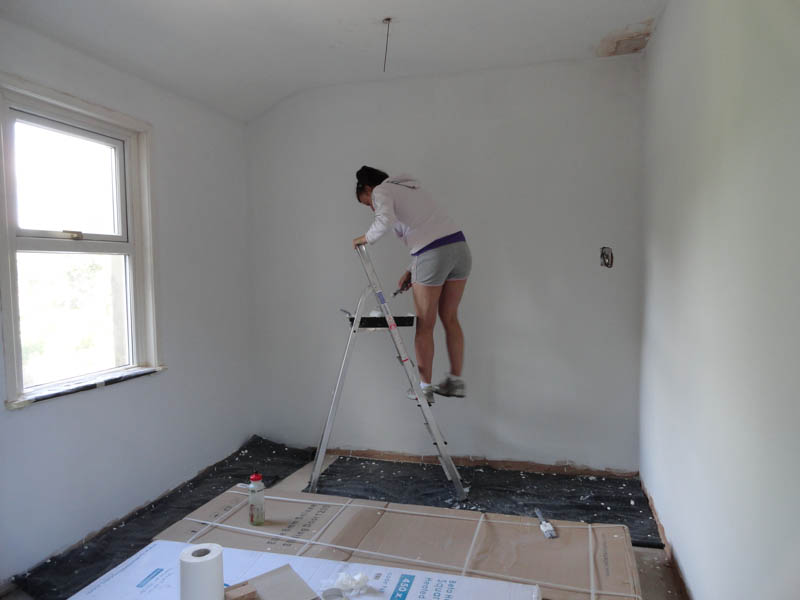
Landing mist-coated walls:

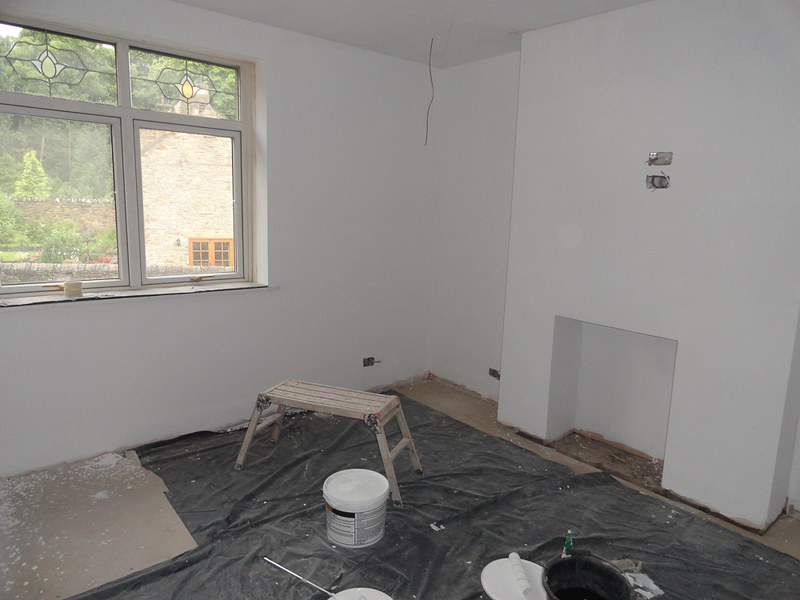
Front bedroom second coat:
I also hung a radiator and the towel rails for the bathroom. This was a) to get them out of my way and b) so I can sort out the locations for the pipes that I need to plumb in.
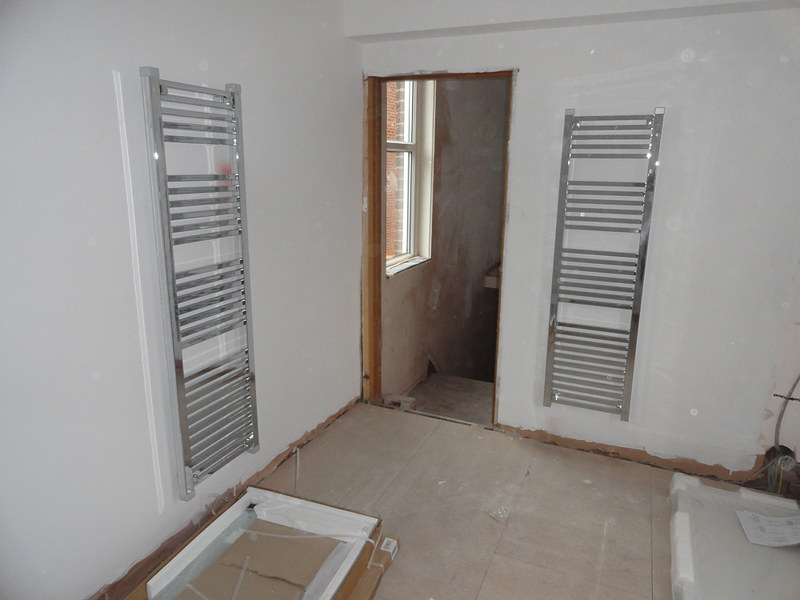
Towel rails:
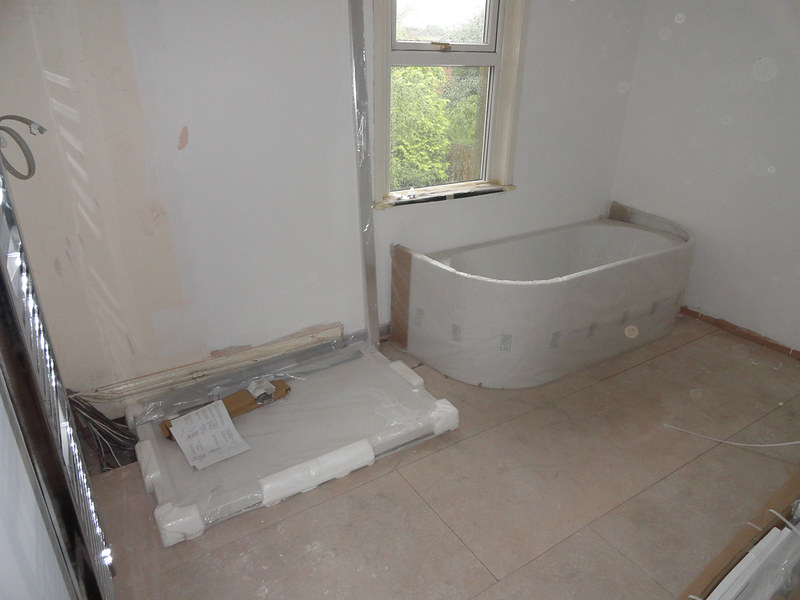
Bath and shower 'in place':
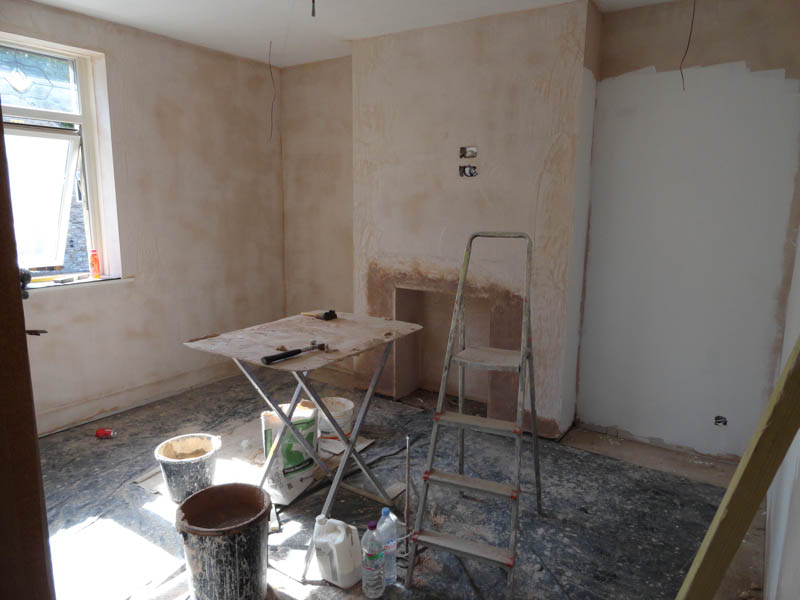
I finally got around to finishing off my studwork in the bay window and insulating what could be insulated. This bit caused me a few issues in terms of getting it insulated and ready to be plastered. With a bit of help from my plasterer we worked out the best way to do it and, after running a few repairs to the ceiling, filling the ceiling with insulation and removing trim from the windows, it's all ready to be finished off. Looks like this now, but should be transformed next time I see it:
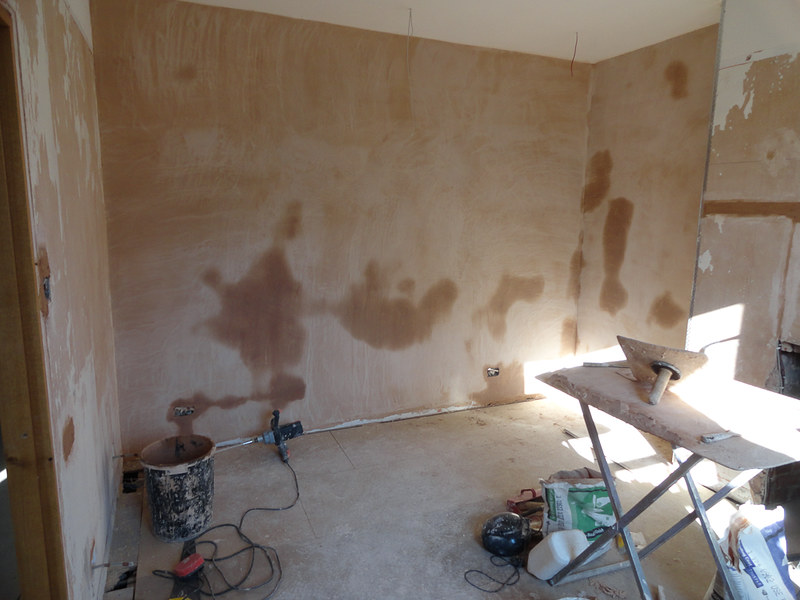
Hallway plastered out:
Living room ceiling done:
I've sorted out the last few bits and pieces in the kitchen so that's ready to be plastered too now. I'm back on Friday evening and by then everything should be plastered and hopefully my electrician will have managed to get the Blacksmiths electrified again. My parents are here at the weekend, so we should get a lot of plumbing done in the bathroom and hopefully my Mum will get upstairs spotless and a load of the painting done. My girlfriend is supposed to be working out final colours this week, so some colour should be going on in the next few weeks if all goes to plan. I need to crack on with plumbing in radiators and getting the bathroom sorted out as the sooner that's done, the sooner we can move in.
Landing mist-coated walls:
Front bedroom second coat:
I also hung a radiator and the towel rails for the bathroom. This was a) to get them out of my way and b) so I can sort out the locations for the pipes that I need to plumb in.
Towel rails:
Bath and shower 'in place':
I finally got around to finishing off my studwork in the bay window and insulating what could be insulated. This bit caused me a few issues in terms of getting it insulated and ready to be plastered. With a bit of help from my plasterer we worked out the best way to do it and, after running a few repairs to the ceiling, filling the ceiling with insulation and removing trim from the windows, it's all ready to be finished off. Looks like this now, but should be transformed next time I see it:
Hallway plastered out:
Living room ceiling done:
I've sorted out the last few bits and pieces in the kitchen so that's ready to be plastered too now. I'm back on Friday evening and by then everything should be plastered and hopefully my electrician will have managed to get the Blacksmiths electrified again. My parents are here at the weekend, so we should get a lot of plumbing done in the bathroom and hopefully my Mum will get upstairs spotless and a load of the painting done. My girlfriend is supposed to be working out final colours this week, so some colour should be going on in the next few weeks if all goes to plan. I need to crack on with plumbing in radiators and getting the bathroom sorted out as the sooner that's done, the sooner we can move in.
Gassing Station | Homes, Gardens and DIY | Top of Page | What's New | My Stuff