Toylander build thread!
Discussion


This went for £400 last night
I lost my bottel at around £380
http://www.ebay.co.uk/itm/Toylander-Electric-Ride-...
I lost my bottel at around £380
http://www.ebay.co.uk/itm/Toylander-Electric-Ride-...
Al Murphy said:
What tools have you been using for cutting the wood, I've got a jigsaw and a circualr saw but am wonering whether I should get a router for cutting the shapes out and rounding off the corners.
Thanks,
Al
Router is useful for the rolled bodysides, plus makes a much nicer job of the tailgate and grill panel cut outs. Cut off saw is useful for trimming the batten down. I have a table saw too which was certainly helpful cutting the bigger pieces.Thanks,
Al
Too Late said:
This went for £400 last night
I lost my bottel at around £380
http://www.ebay.co.uk/itm/Toylander-Electric-Ride-...
Seems an anwful lot to me, and to be honest I think the build is very shabby, on an old model that really doesn't look anything like a Jeep and doesn't even run. I'm going to start running a spreadsheet for all of my build costs, but I think it will be much less than a "normal" build cost with a bit of ingenuity here and there...I lost my bottel at around £380
http://www.ebay.co.uk/itm/Toylander-Electric-Ride-...
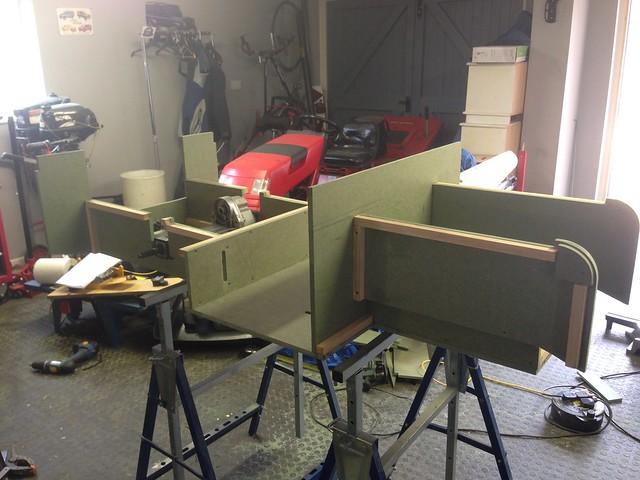
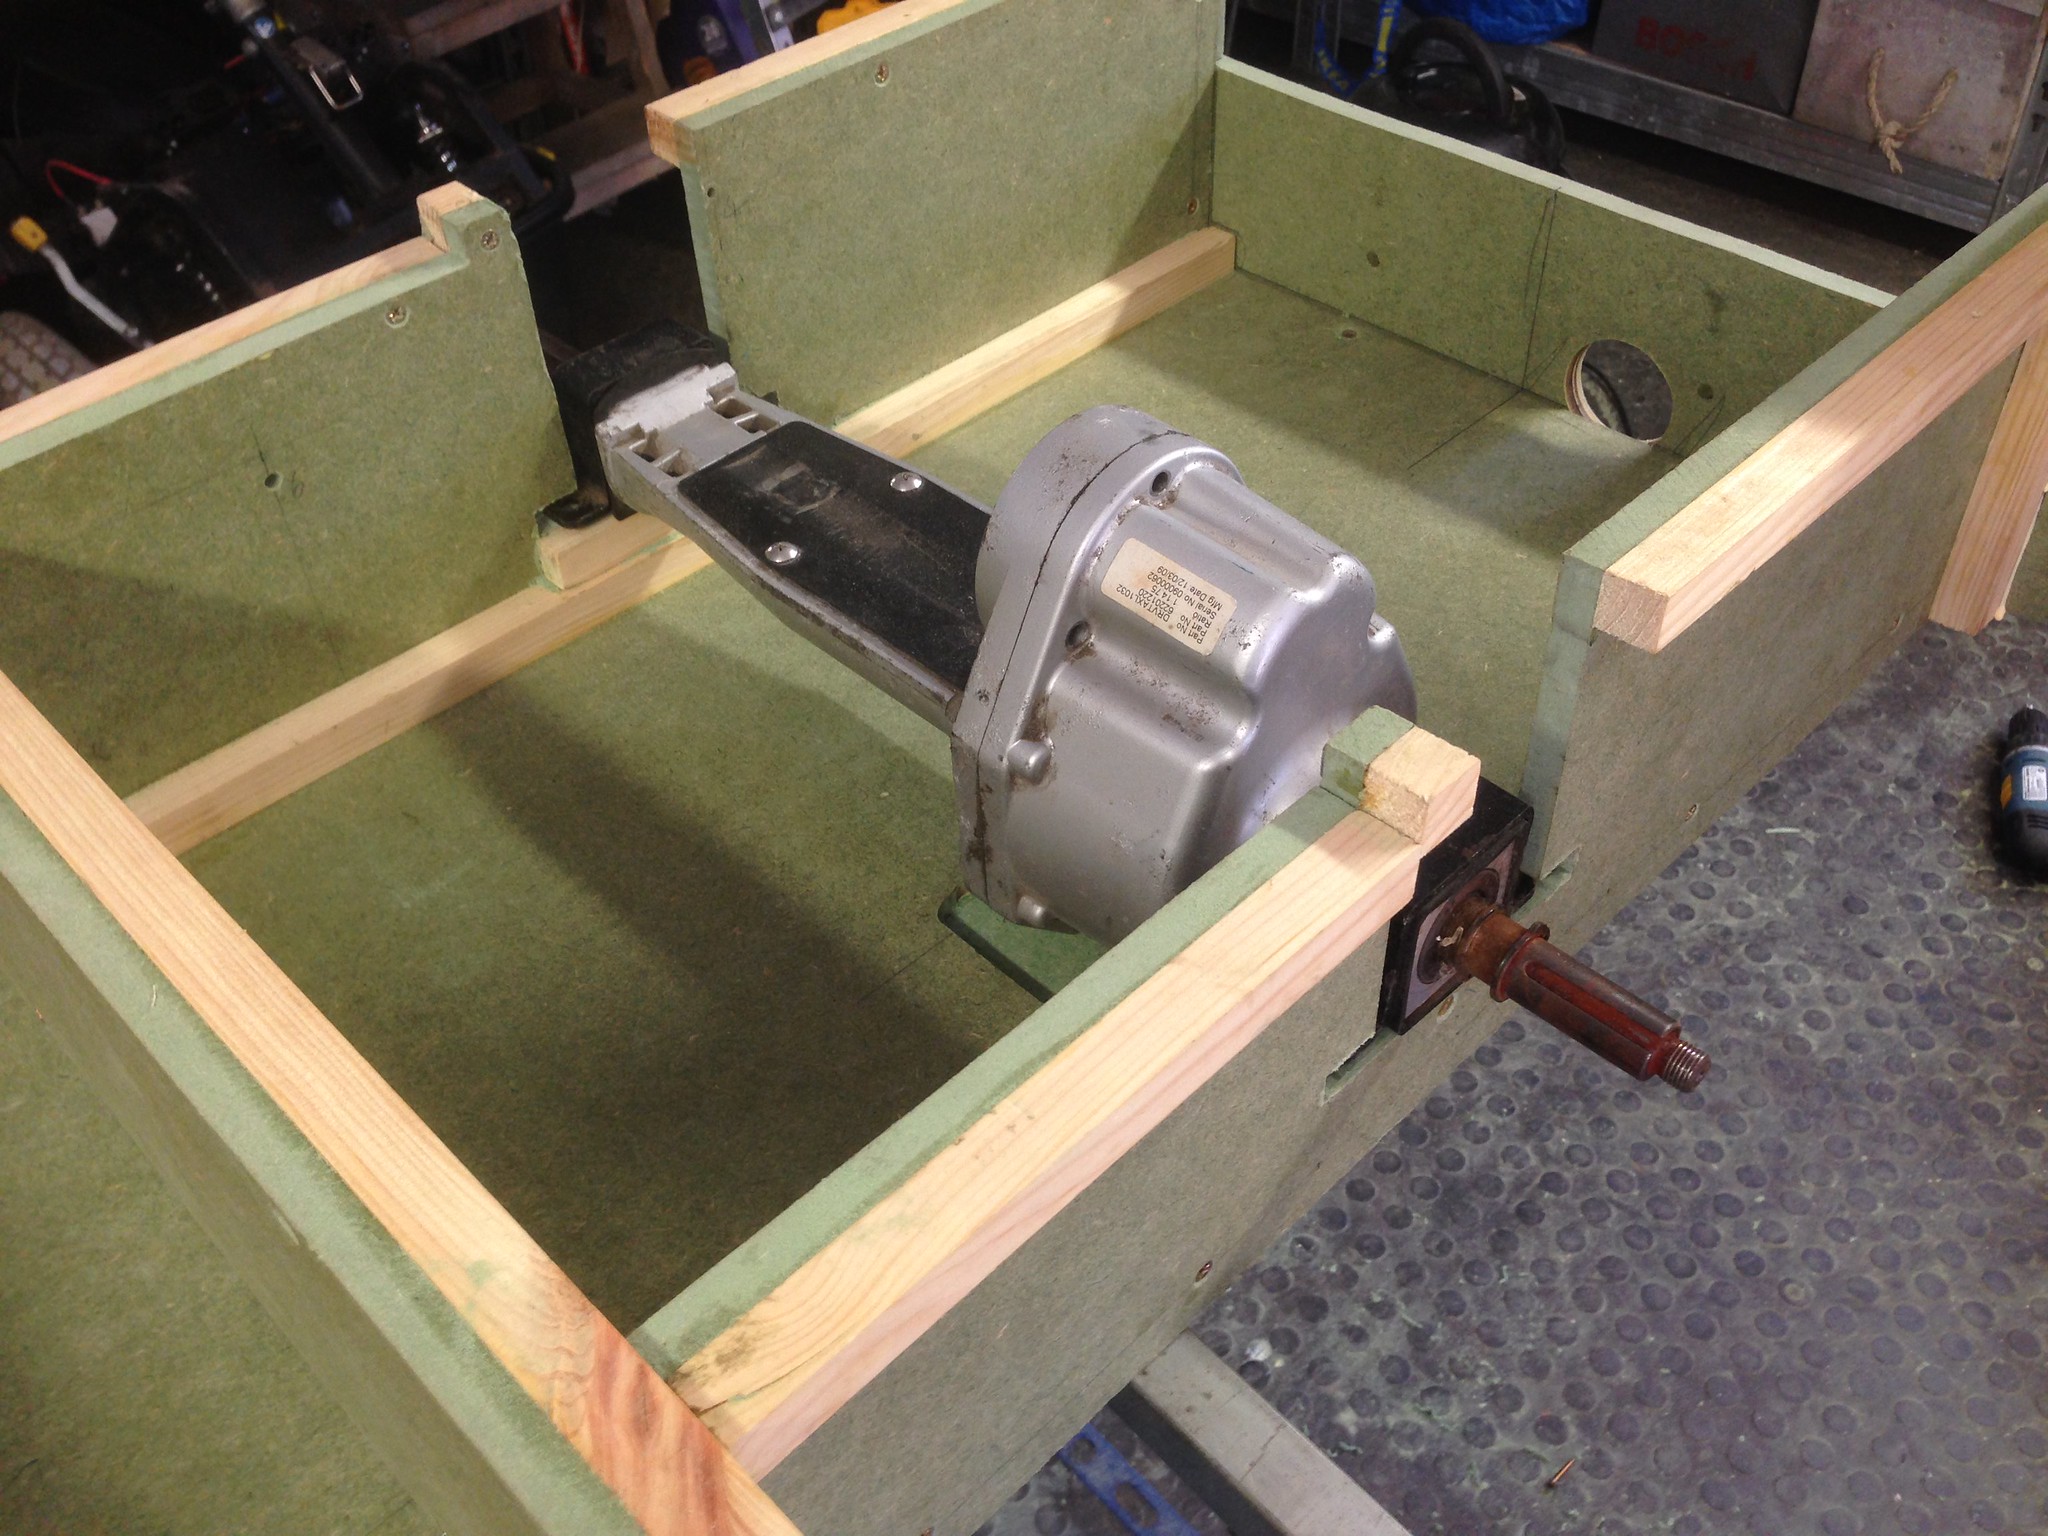
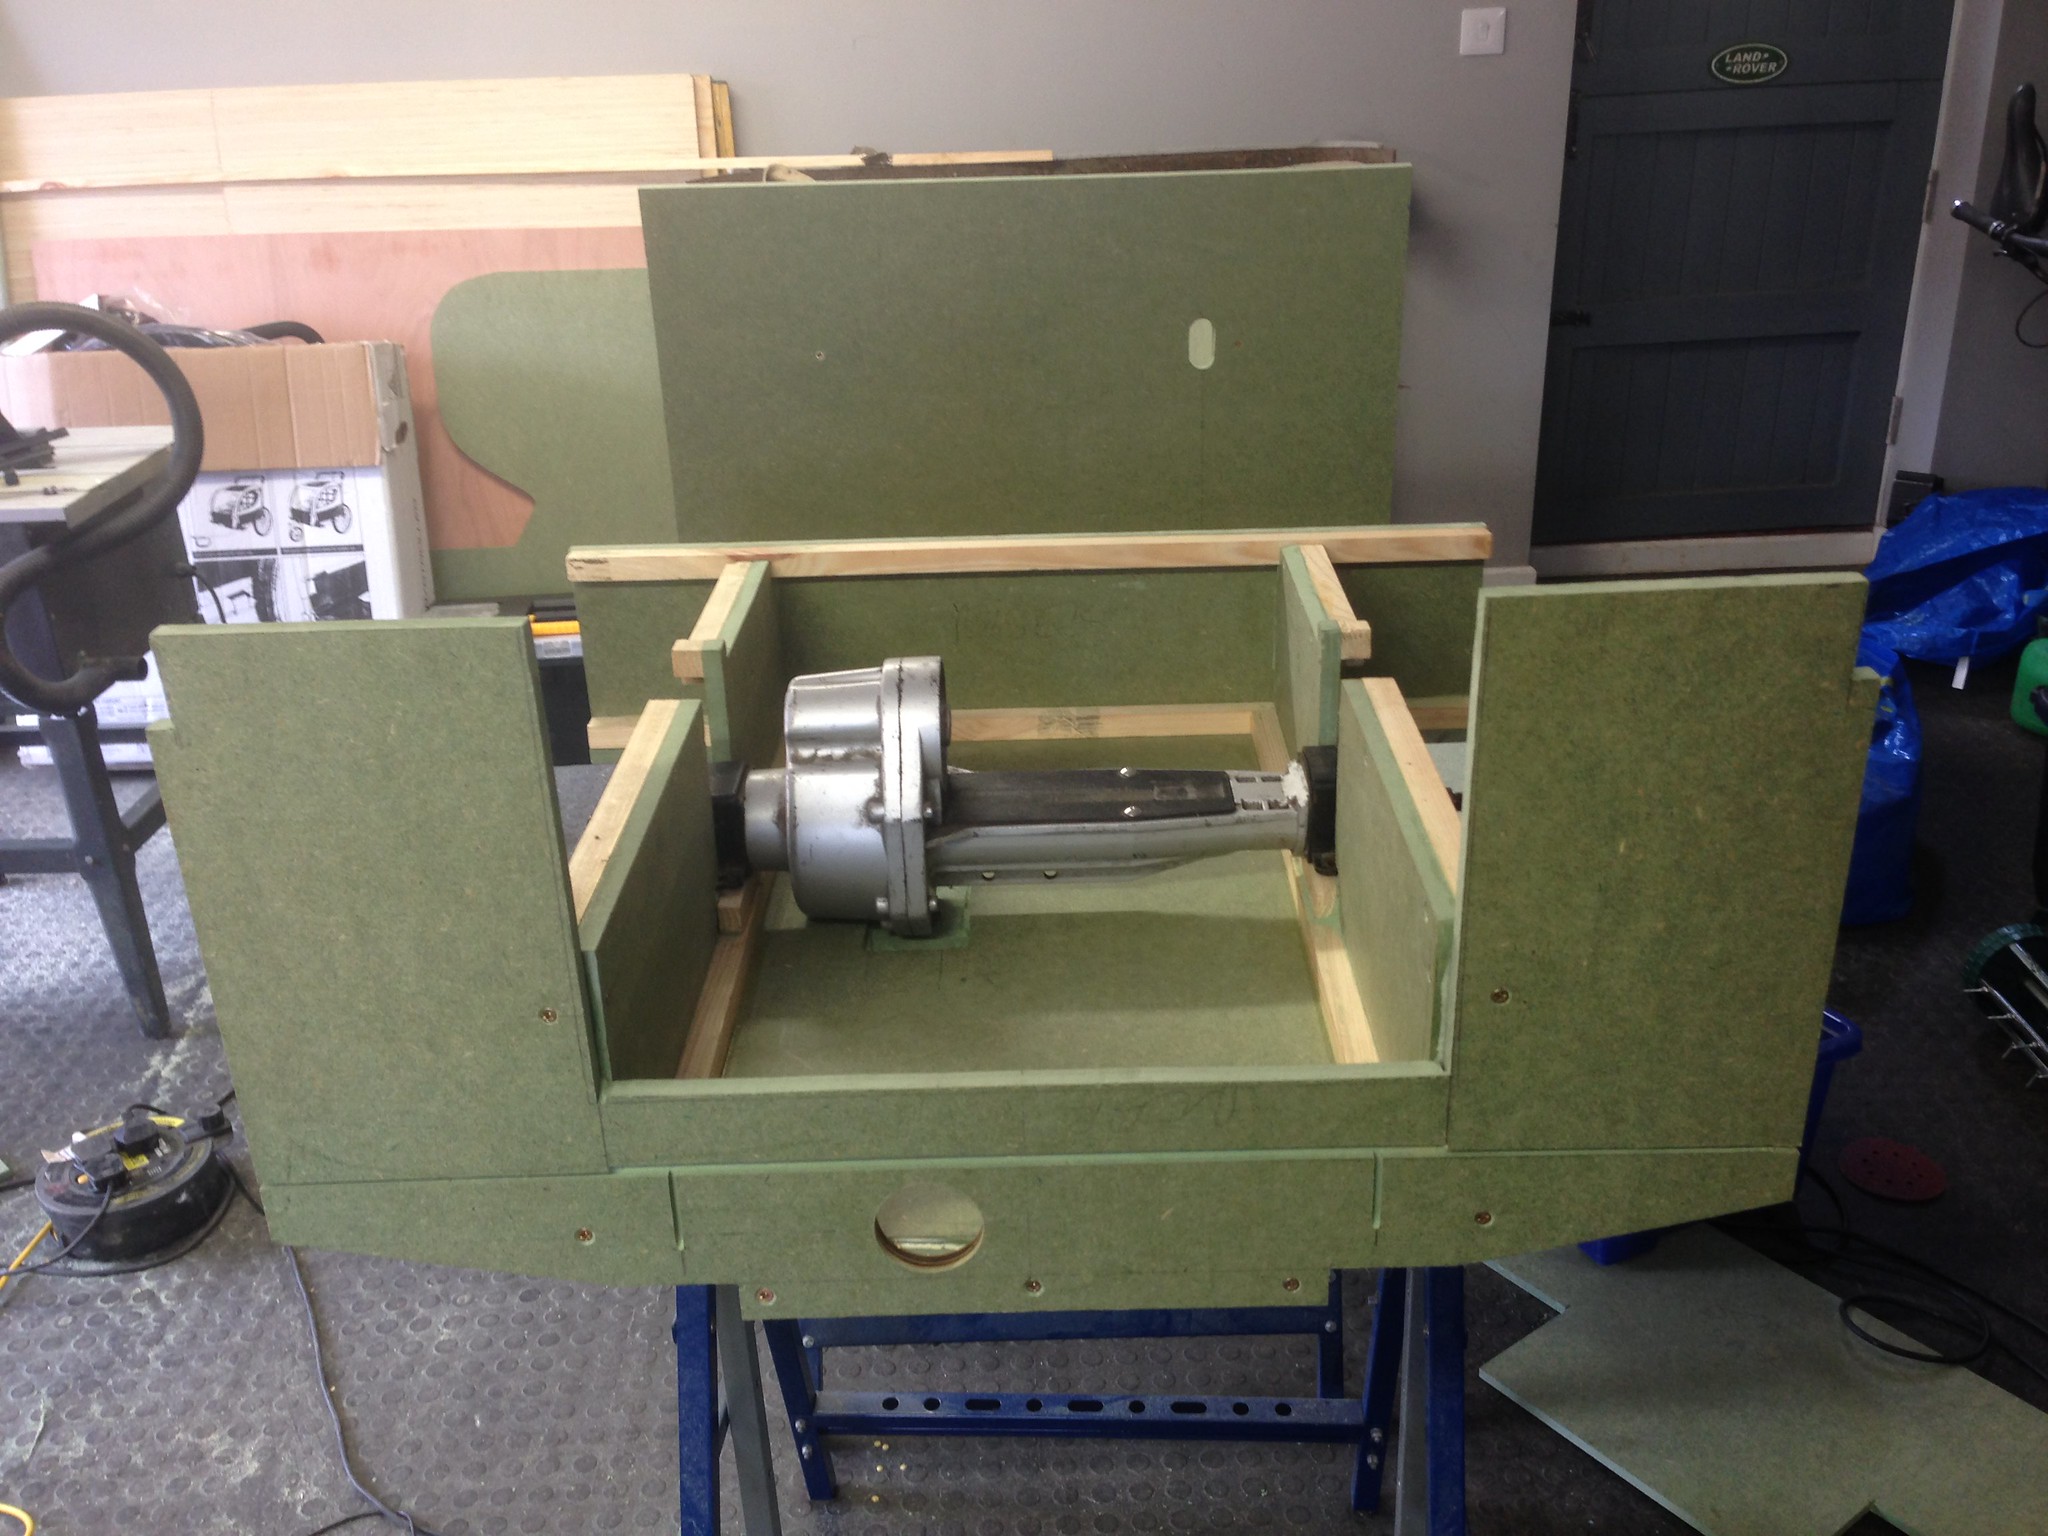
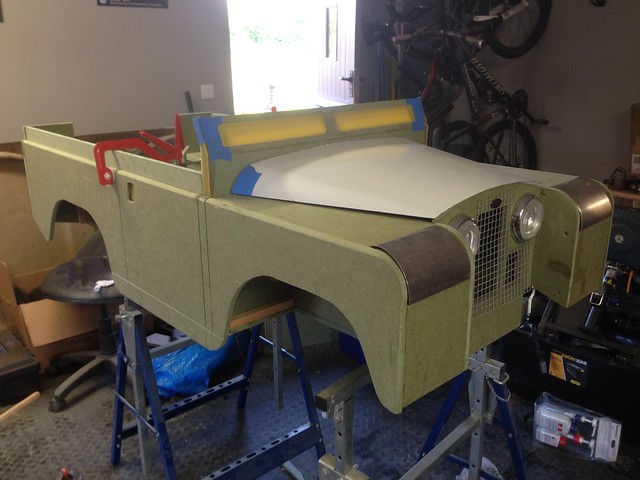
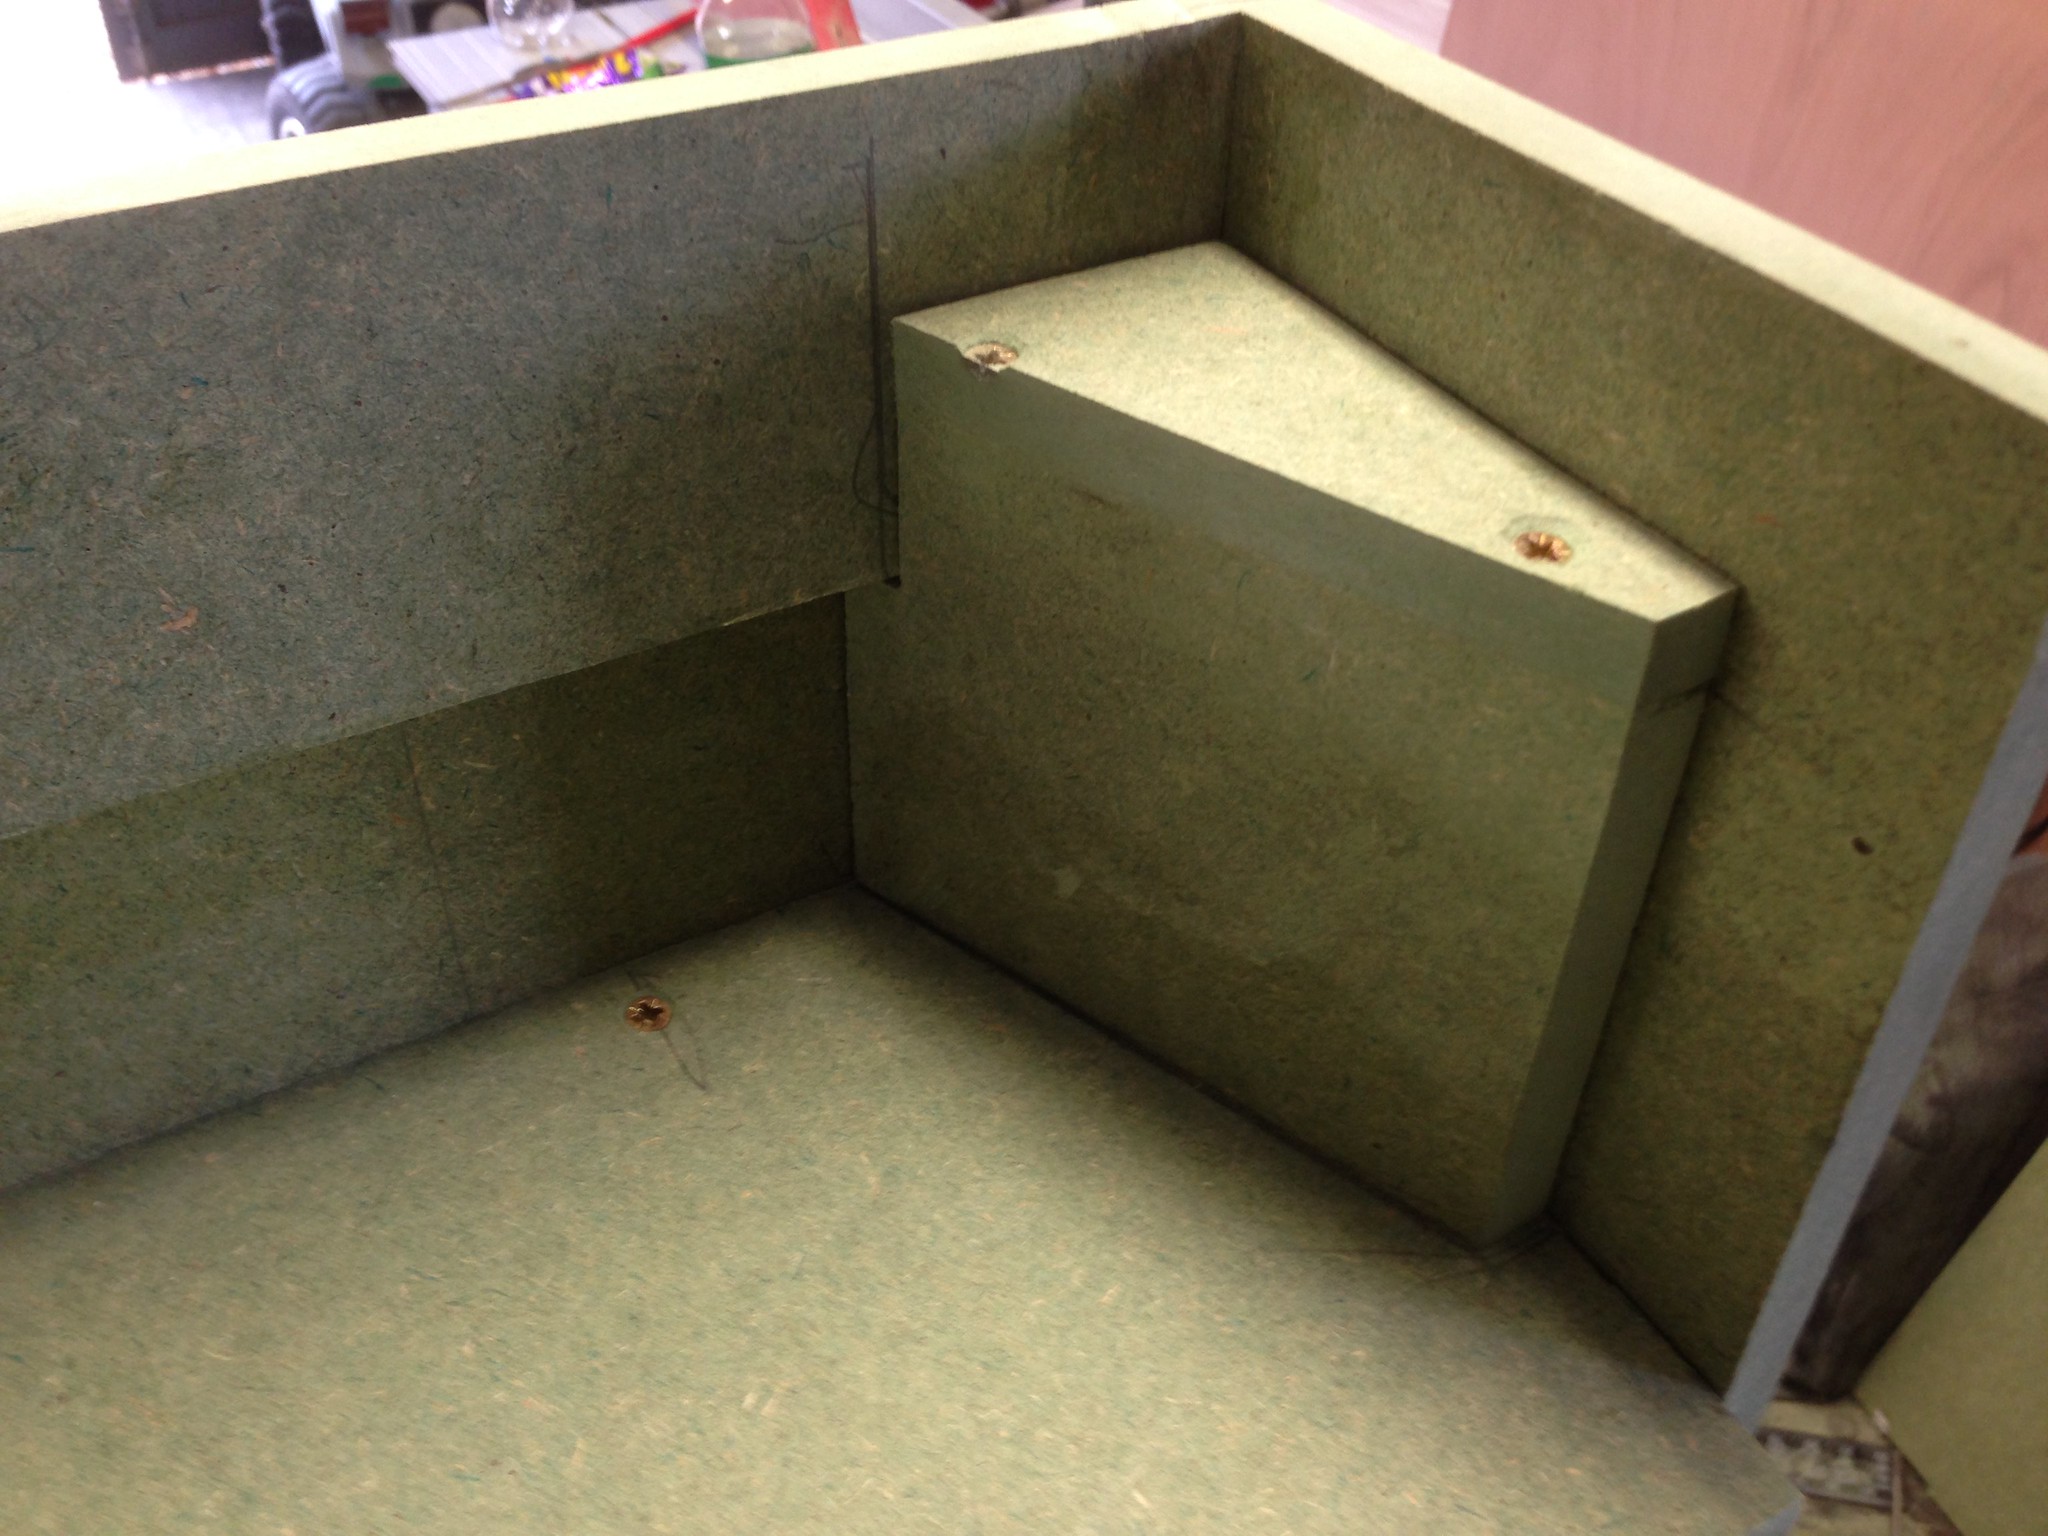
Bit more progress. This is the bit where we depart from the plans to install the scooter transaxle/diff assembly. The transaxle will live inside the rear tub, although clearance is very tight so I had to rout out a bit of the floor to make room for the bottom of the gearbox, and I'll need to do some sort of slightly raised cover to clear the top of the motor, but it will probably only need to be 10-15mm high.
The rear axle will be as per plan and bolted underneath the body. There will be chain drive down from the transaxle to each wheel, although I'll need to do the maths and gear it down a bit to compensate for the bigger wheels. The slots in the rear sides are oversize so I can remove the transaxle if needed, and also to allow a bit of fore and aft movement to get the tension on the chains right.
Rear panel on, you can see some of the additional routing to make the back end look a bit more landy-like.
Re the flooring, yes it is from there. It works very well indeed. I'll be honest, when I built the house/garage I had visions of this Zen-like, surgically clean, F1 factory style shrine, with a plasma on the wall and a few pot plants, and, erm, well you can see what happened. But the flooring shrugs off the oil incontinence of my ageing Land Rover very well and it's fine to use a jack/axle stands on too. If I do occasionally get carried away with the garage spring cleaning it cleans up very nicely too. If you are local and want a look before buying, PM me.
The only thing that got me our of my peddle car as a kid was when i learnt to ride a bike. The only thing that got me off my pushbike was when i got a petrol off road kart. The only thing that got me out of my off road kart was when I passed my driving test.
I suspect that the OPs time and effort are being well spent. I might have skipped the push bike part of my life if i had had one of these bad boys
I suspect that the OPs time and effort are being well spent. I might have skipped the push bike part of my life if i had had one of these bad boys
A bit more...
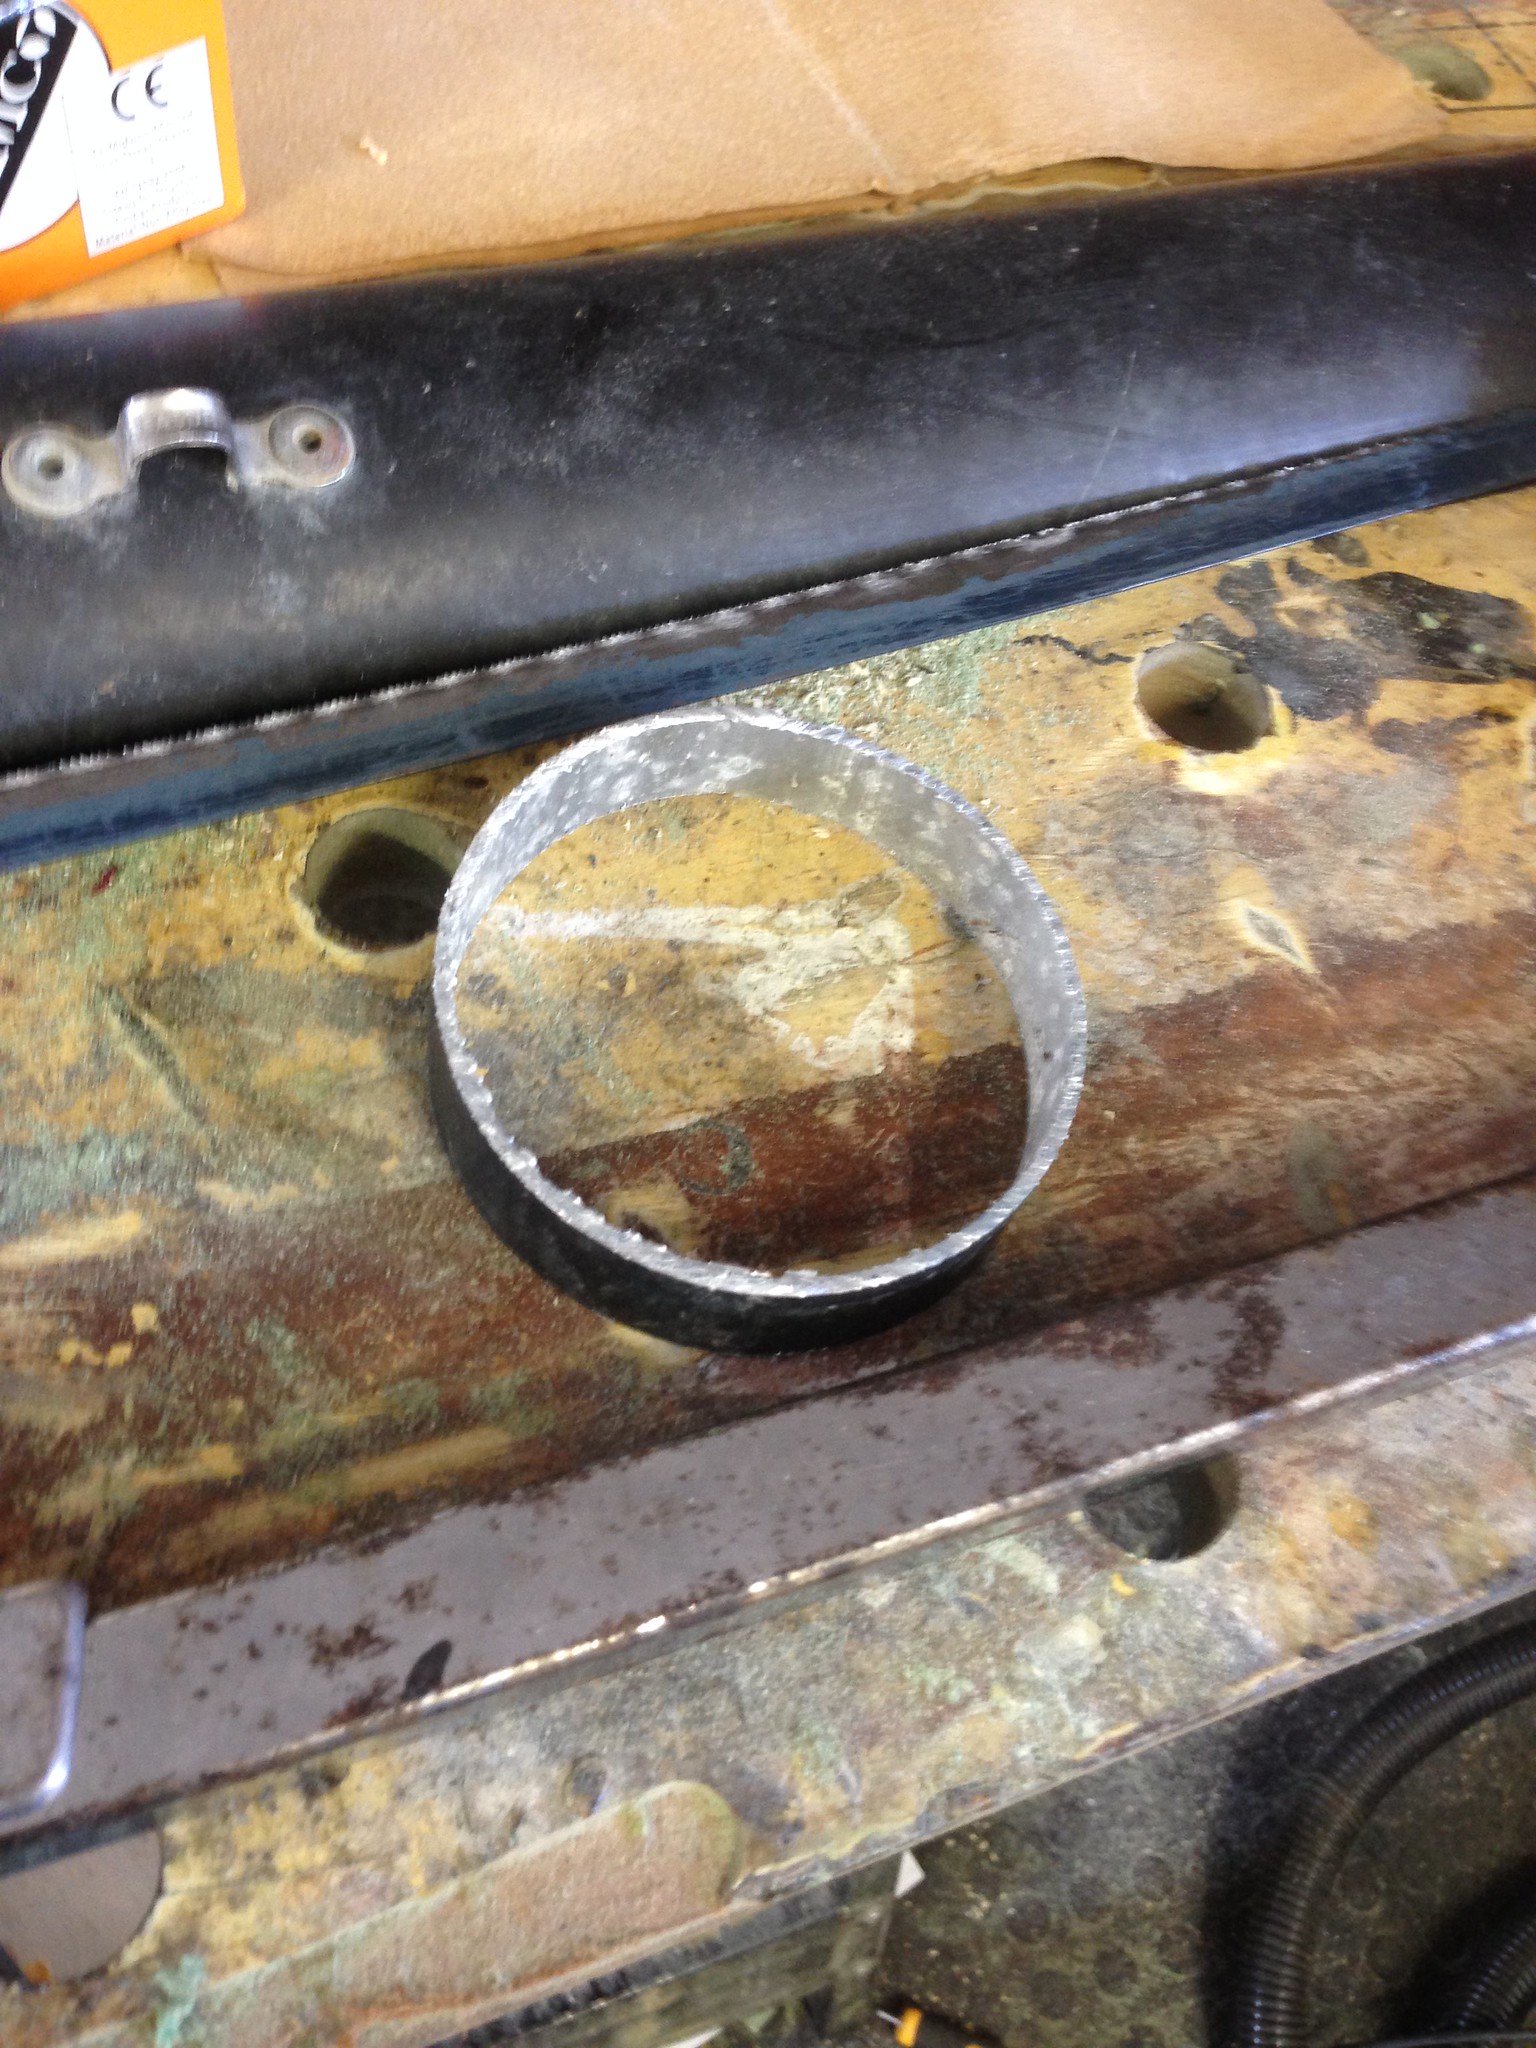
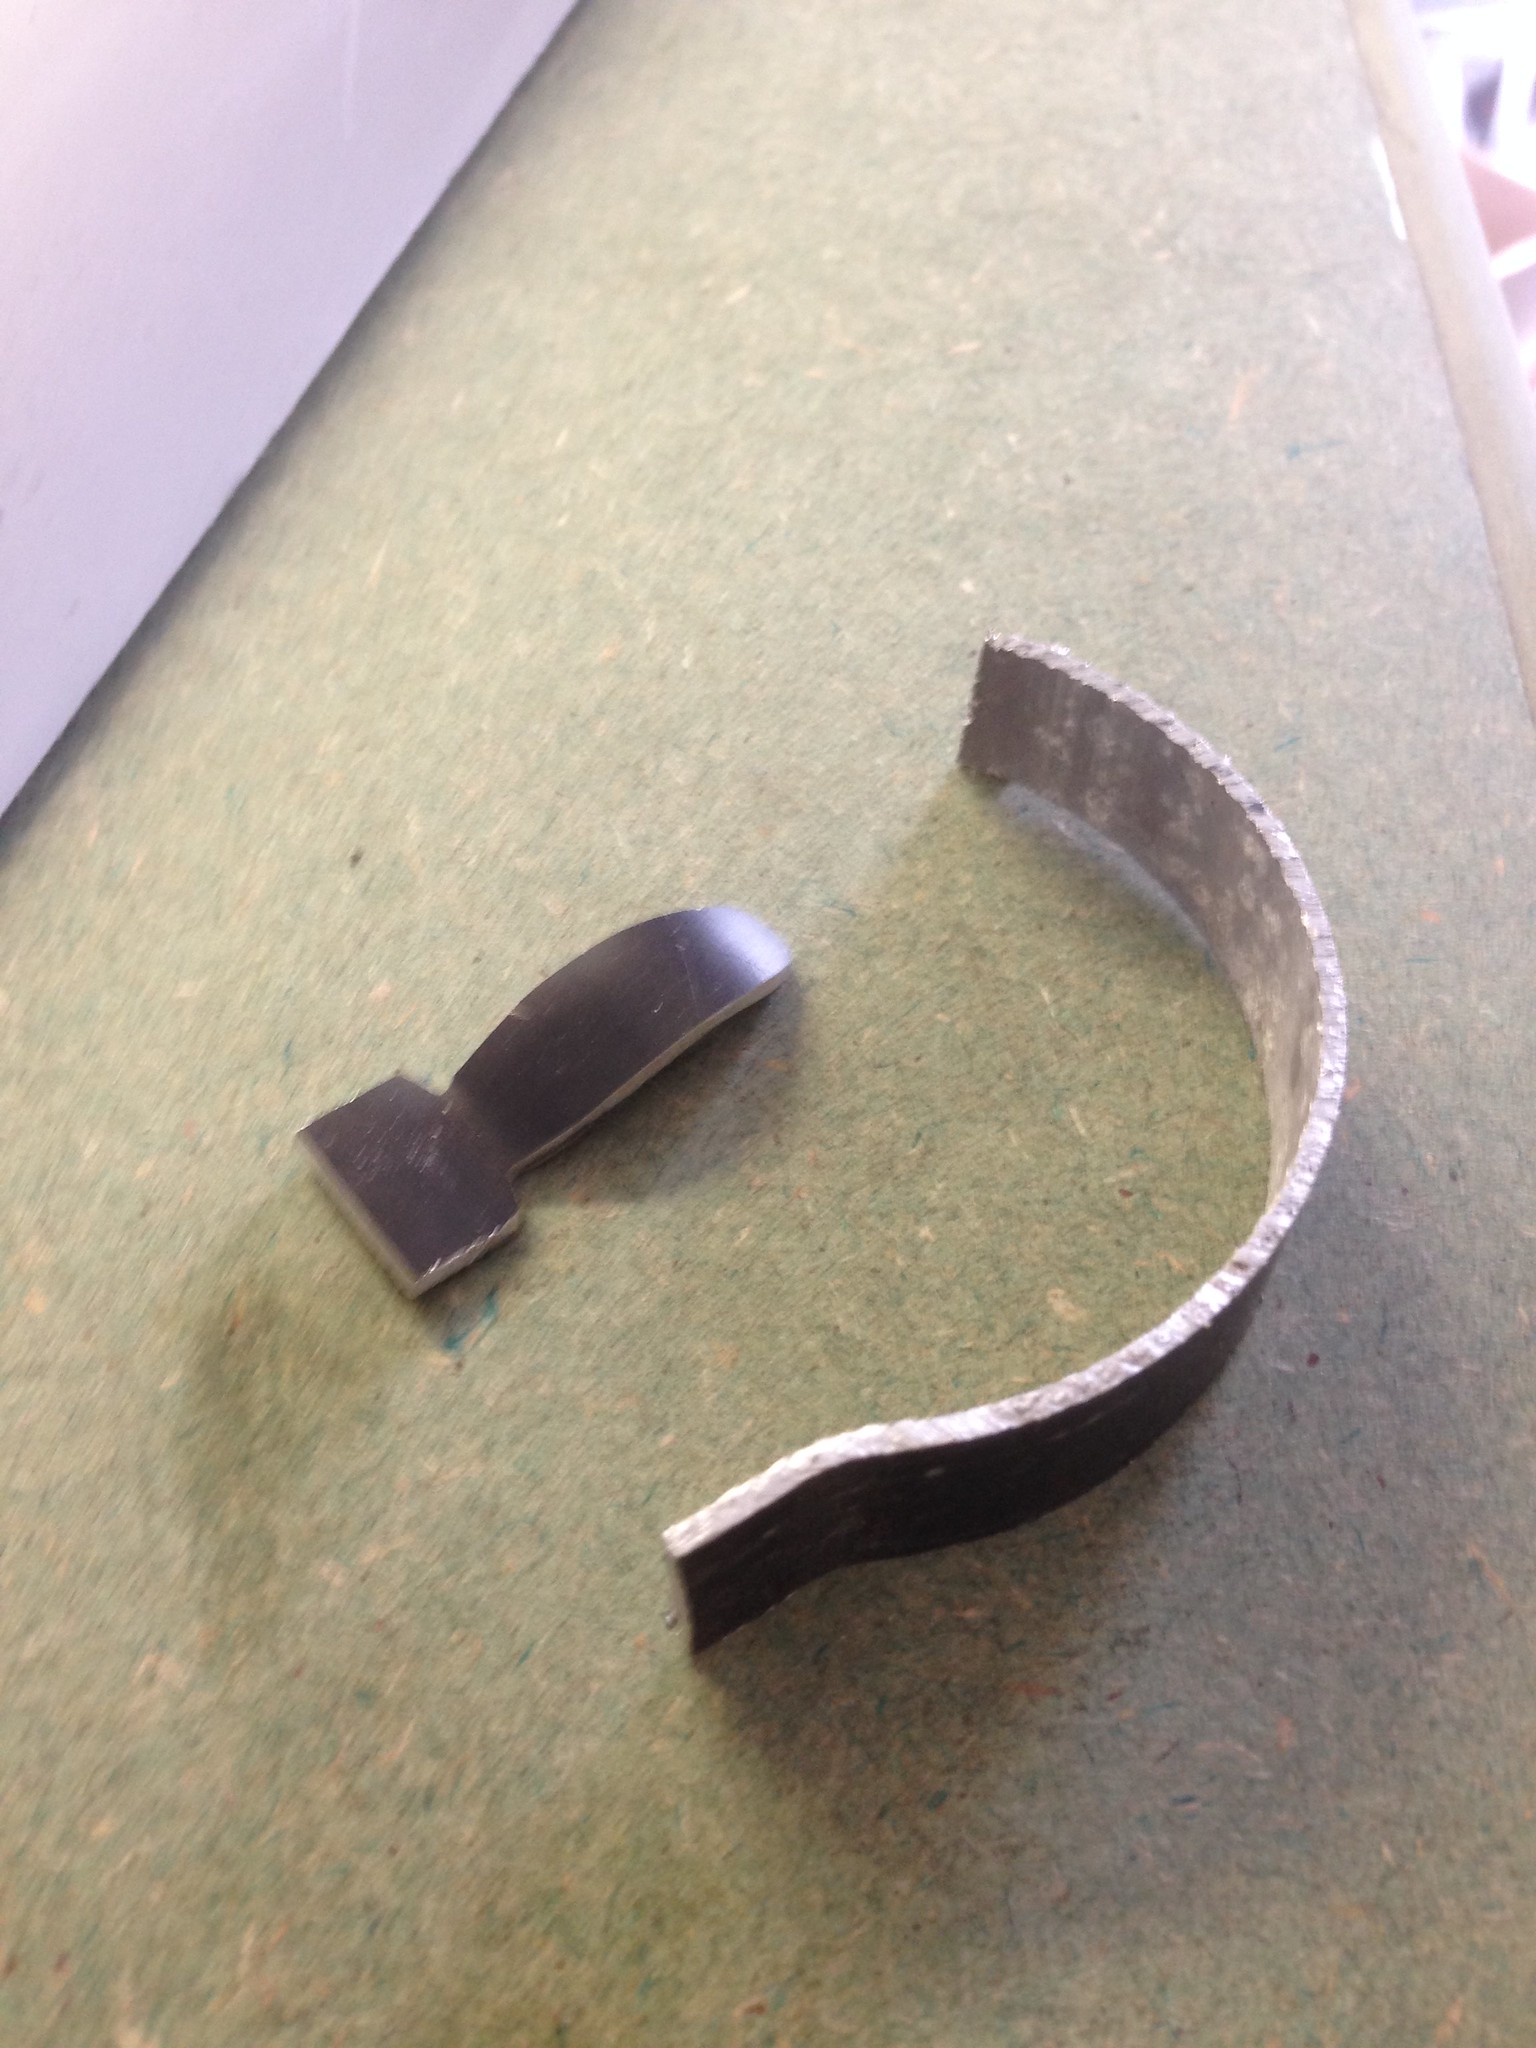
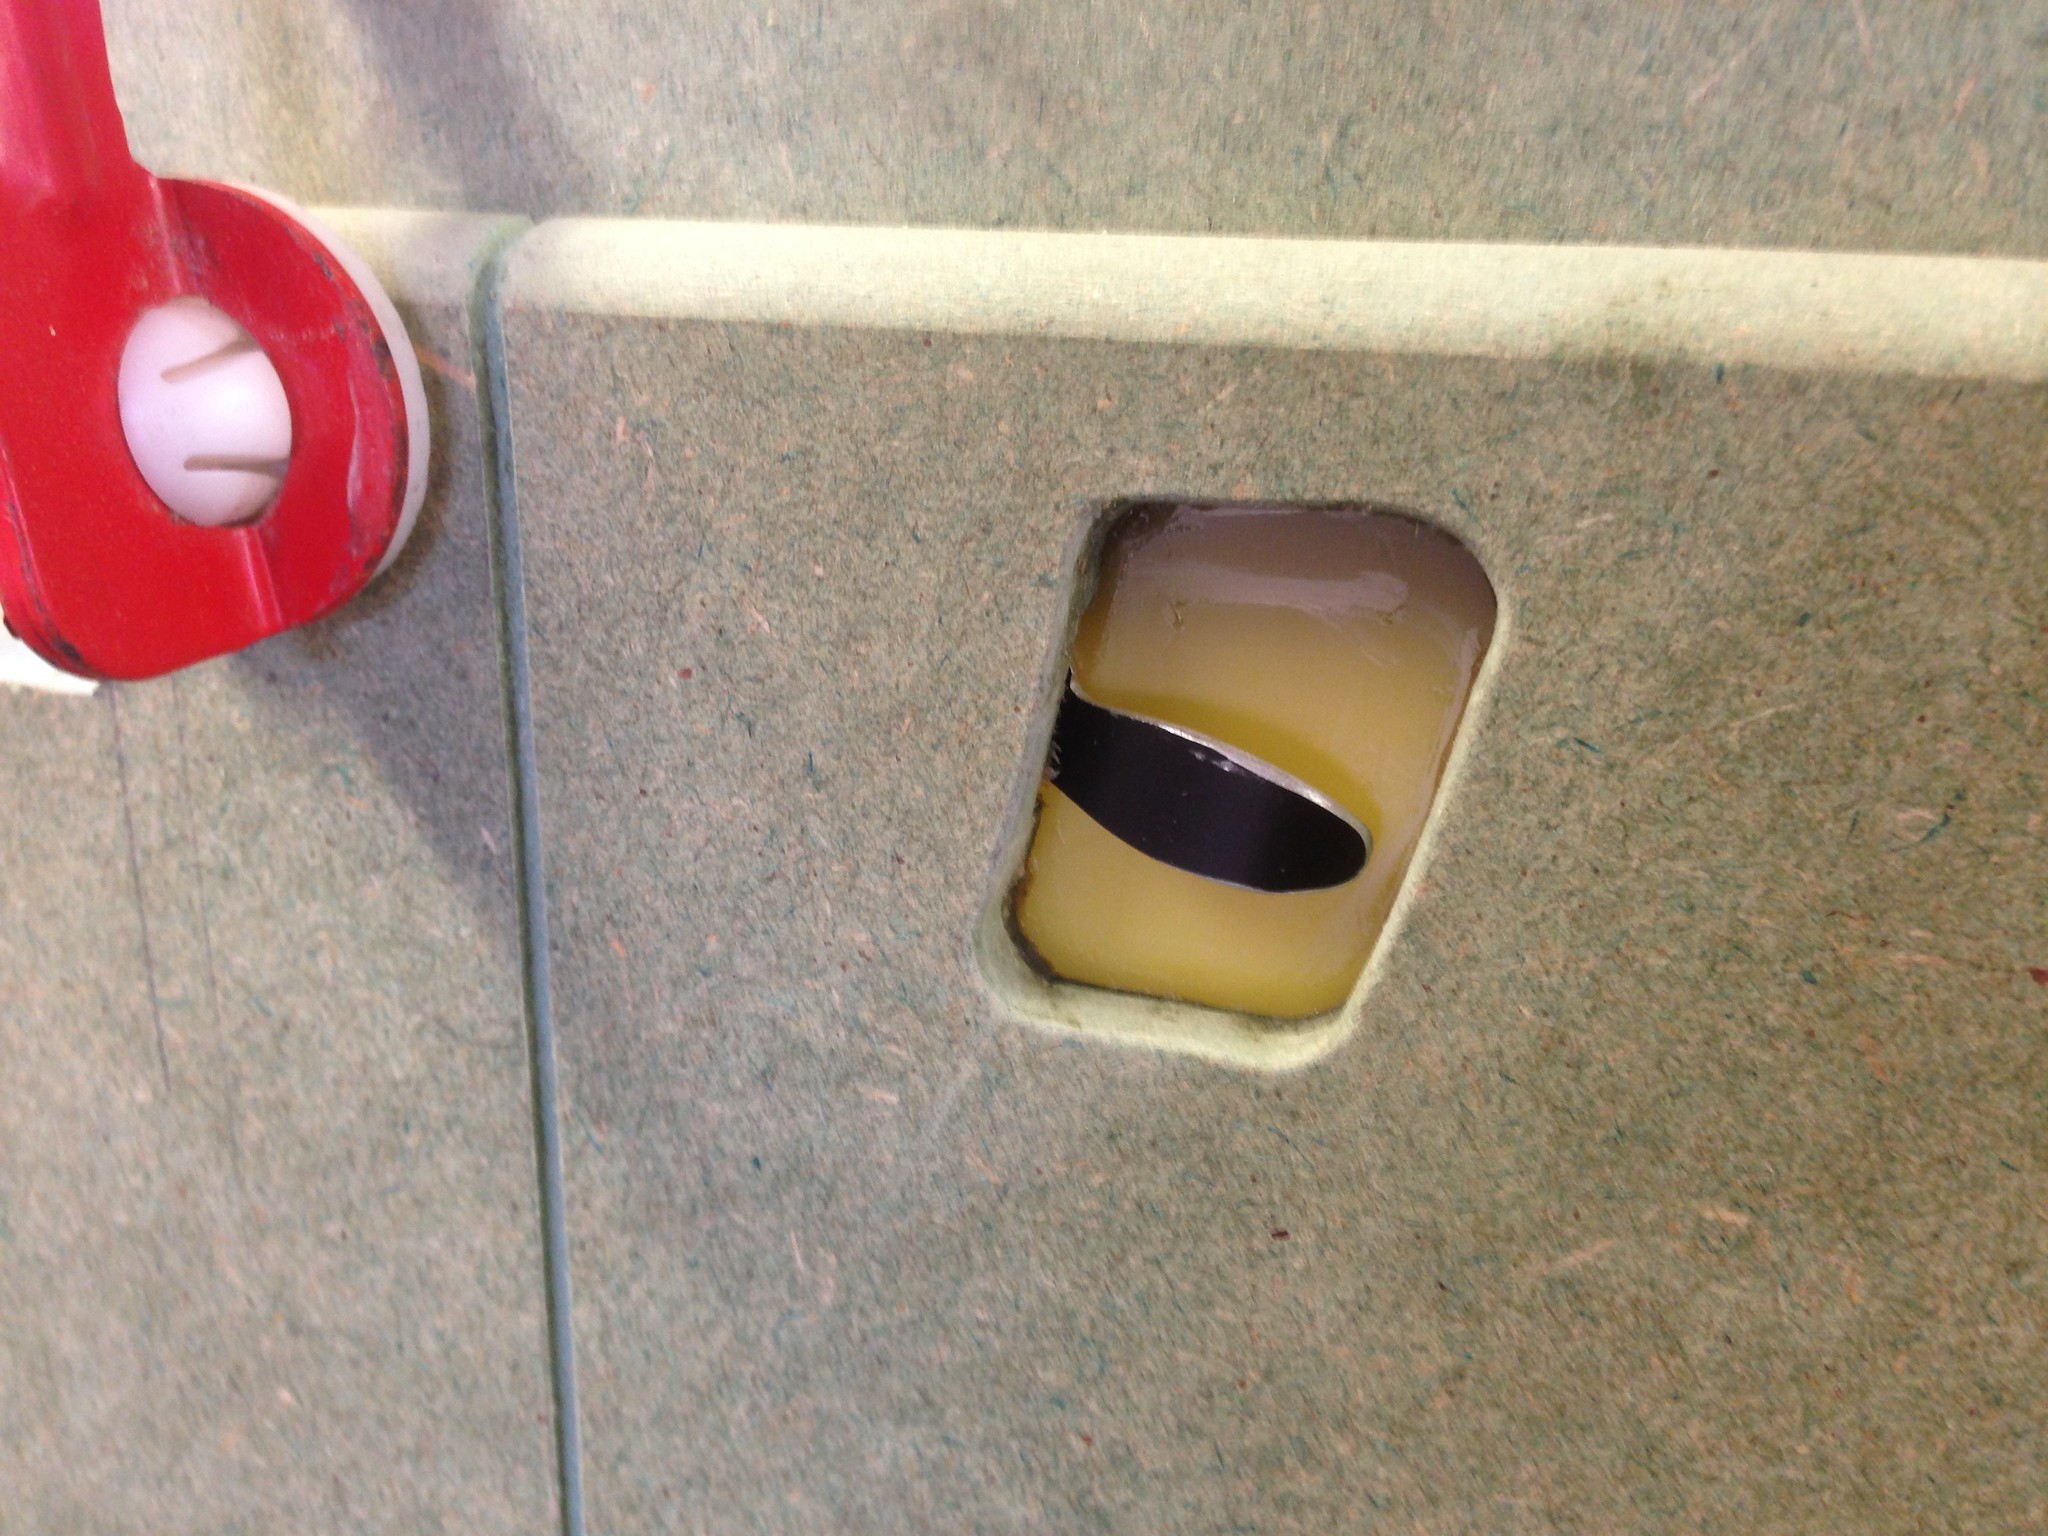
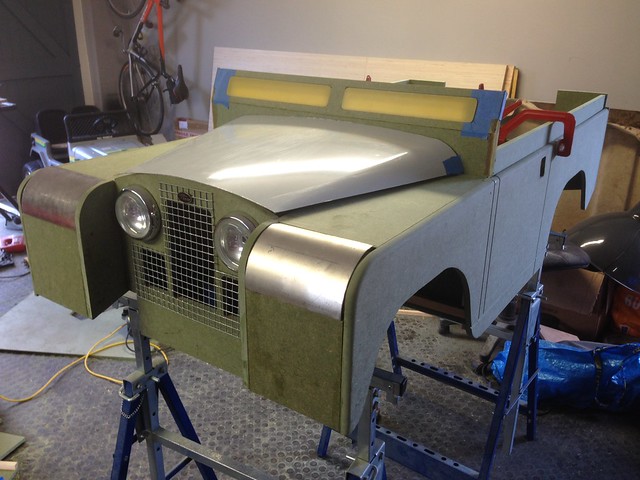
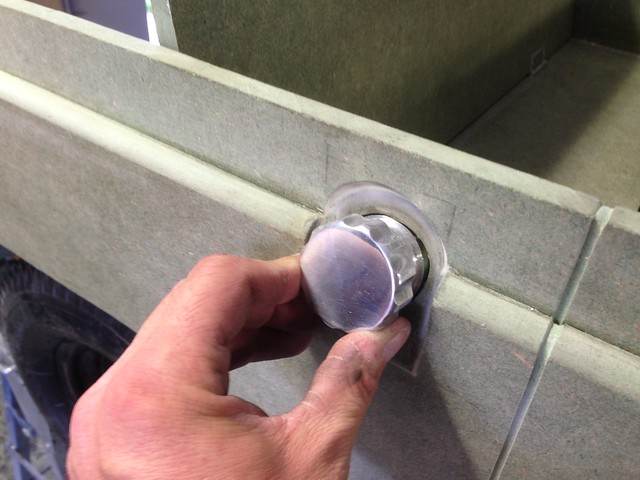
As I mentioned before, I wanted a bit more detail than the standard plans, so with some full scale measurements I've started the beginnings of the fuel filler/cap, and I've routed out the insides of the door handle recesses from inside the body, ready to fit the handles which I shall fabricate, and then blank it off with the yellow GRP plate material so it's smooth inside.
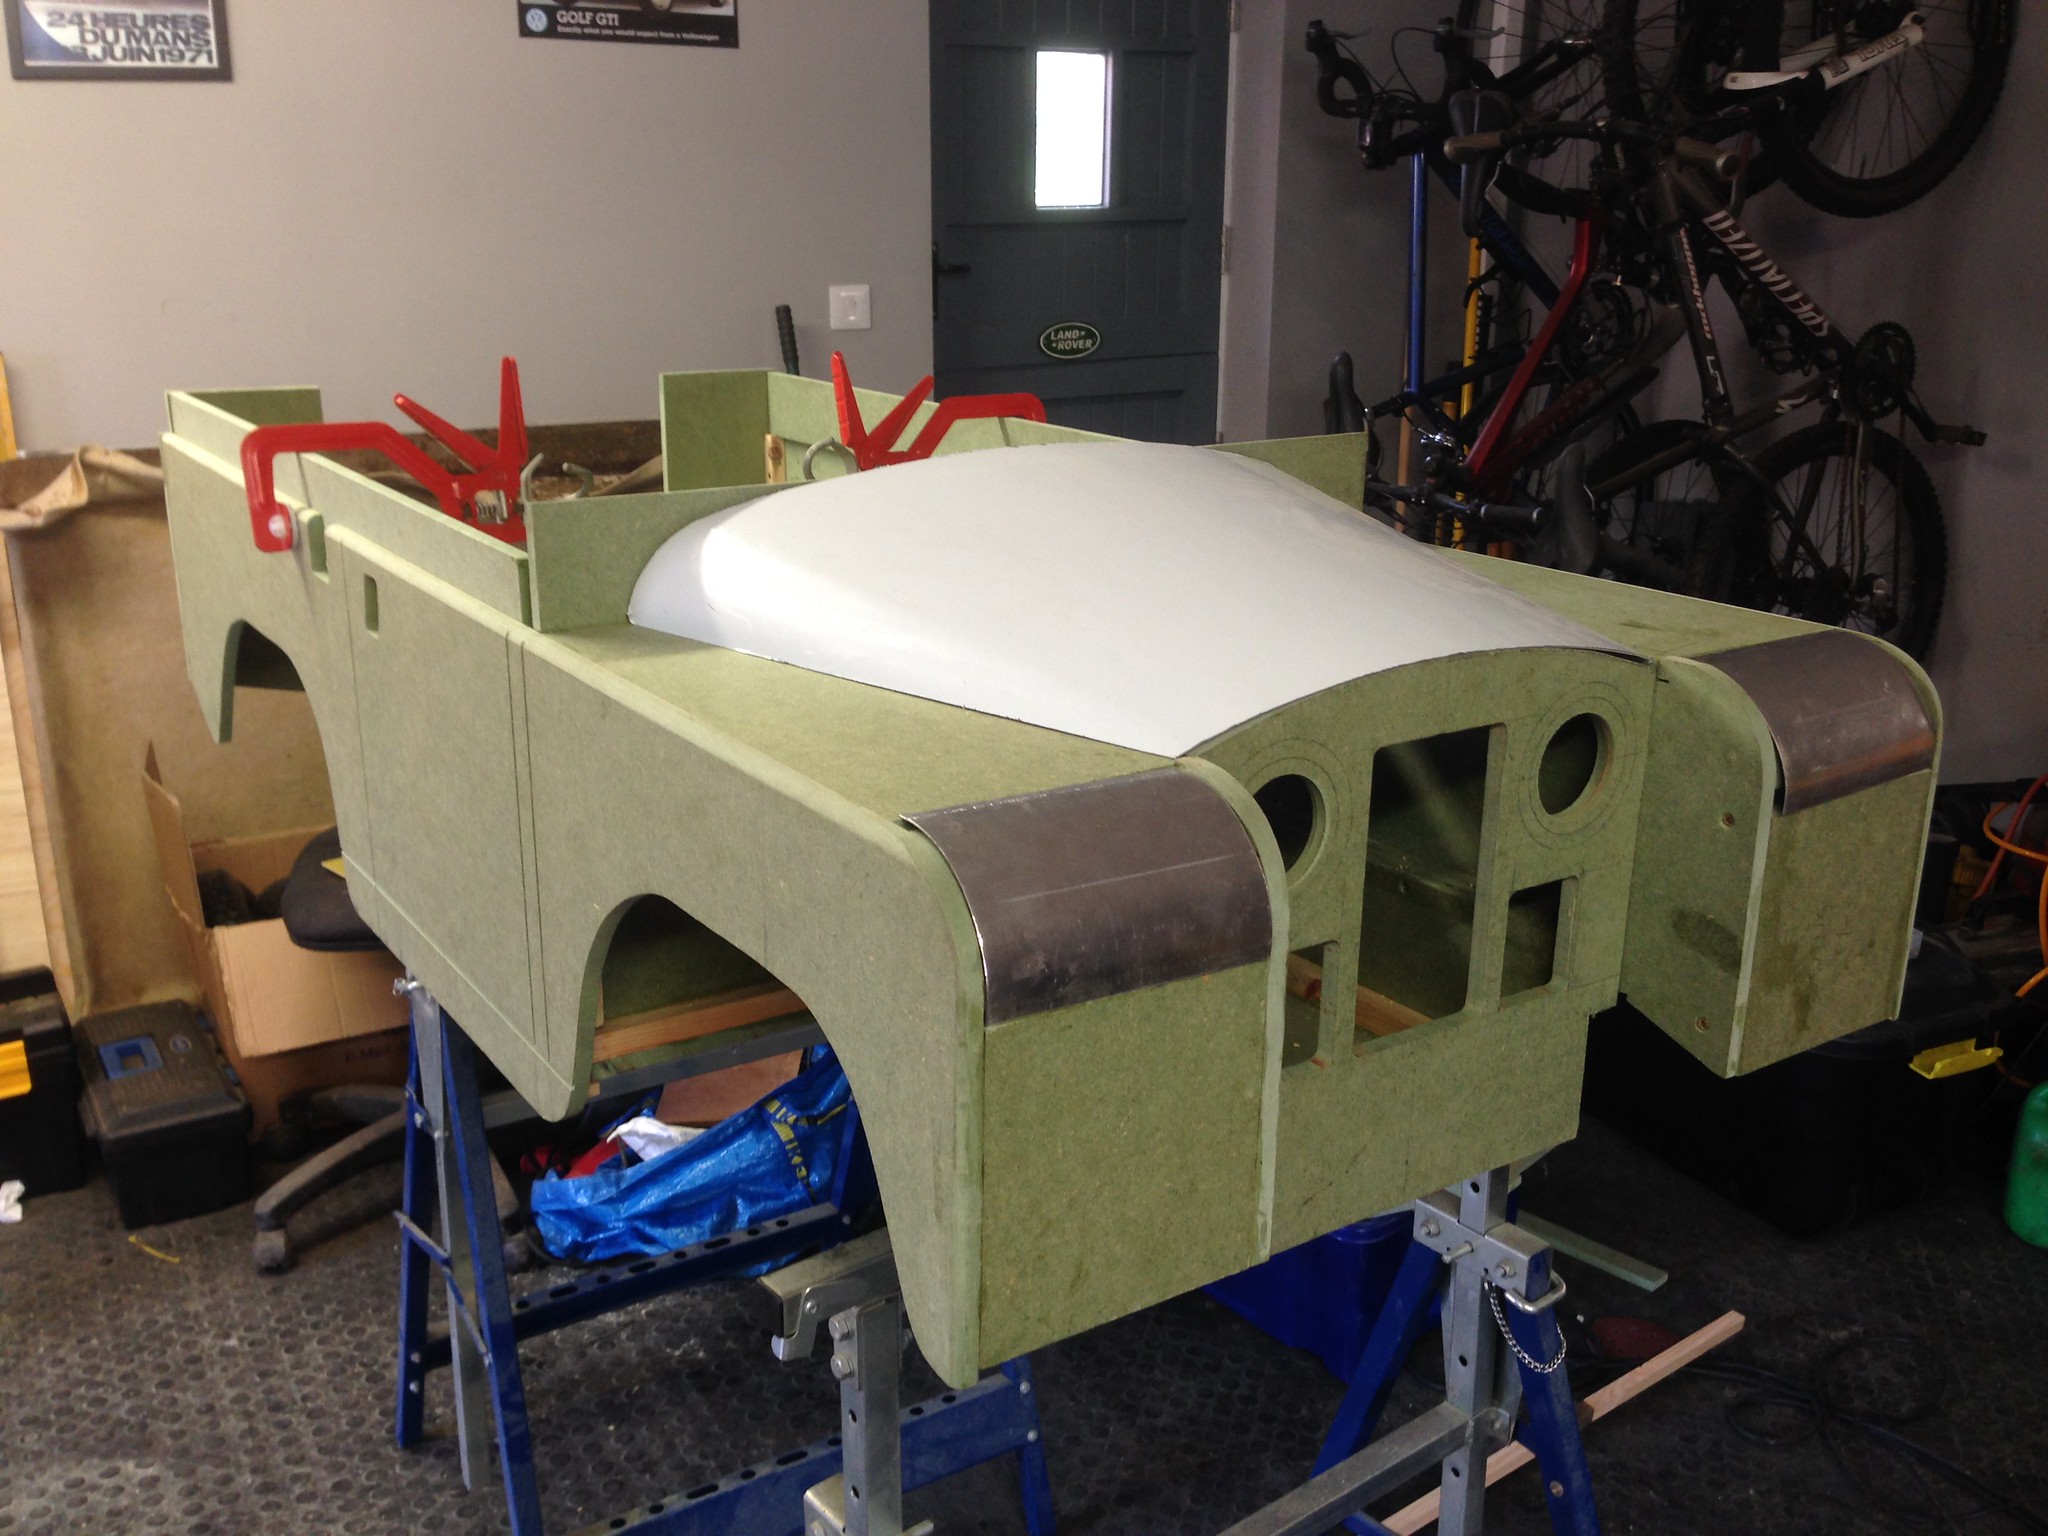
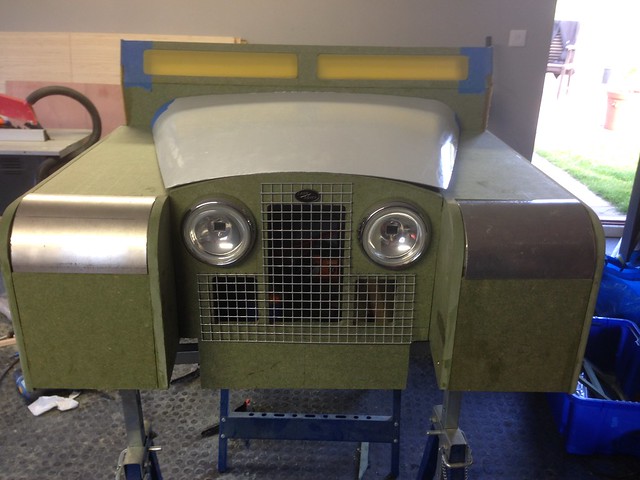
Body sides on was a very satisfying moment...no mistaking what it is now, especially with the aluminium bonnet placed in situ. The bonnet profile is a bit high in the pic, and will site lower once on it's ribs. The whole thing seems to have gone together very square and hopefully there won't be too much filling and sanding involved (although the ally front wing caps will need a fair bit of work)
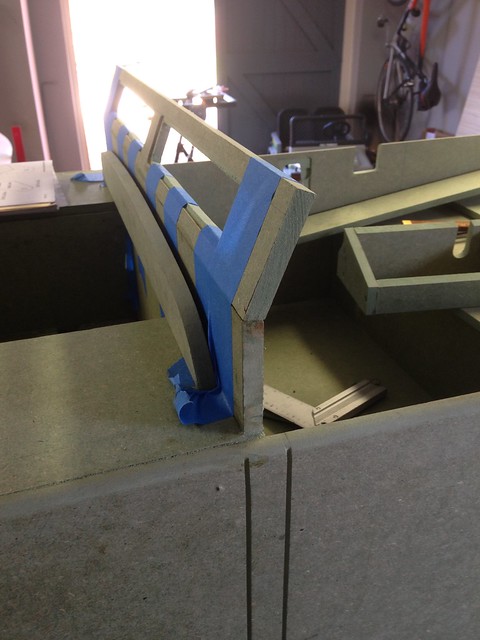
Next will be the bulkhead (the angled top is not yet on) which will have opening vents, a real Landy hallmark (sadly dropped on the last line of TDCi models!)
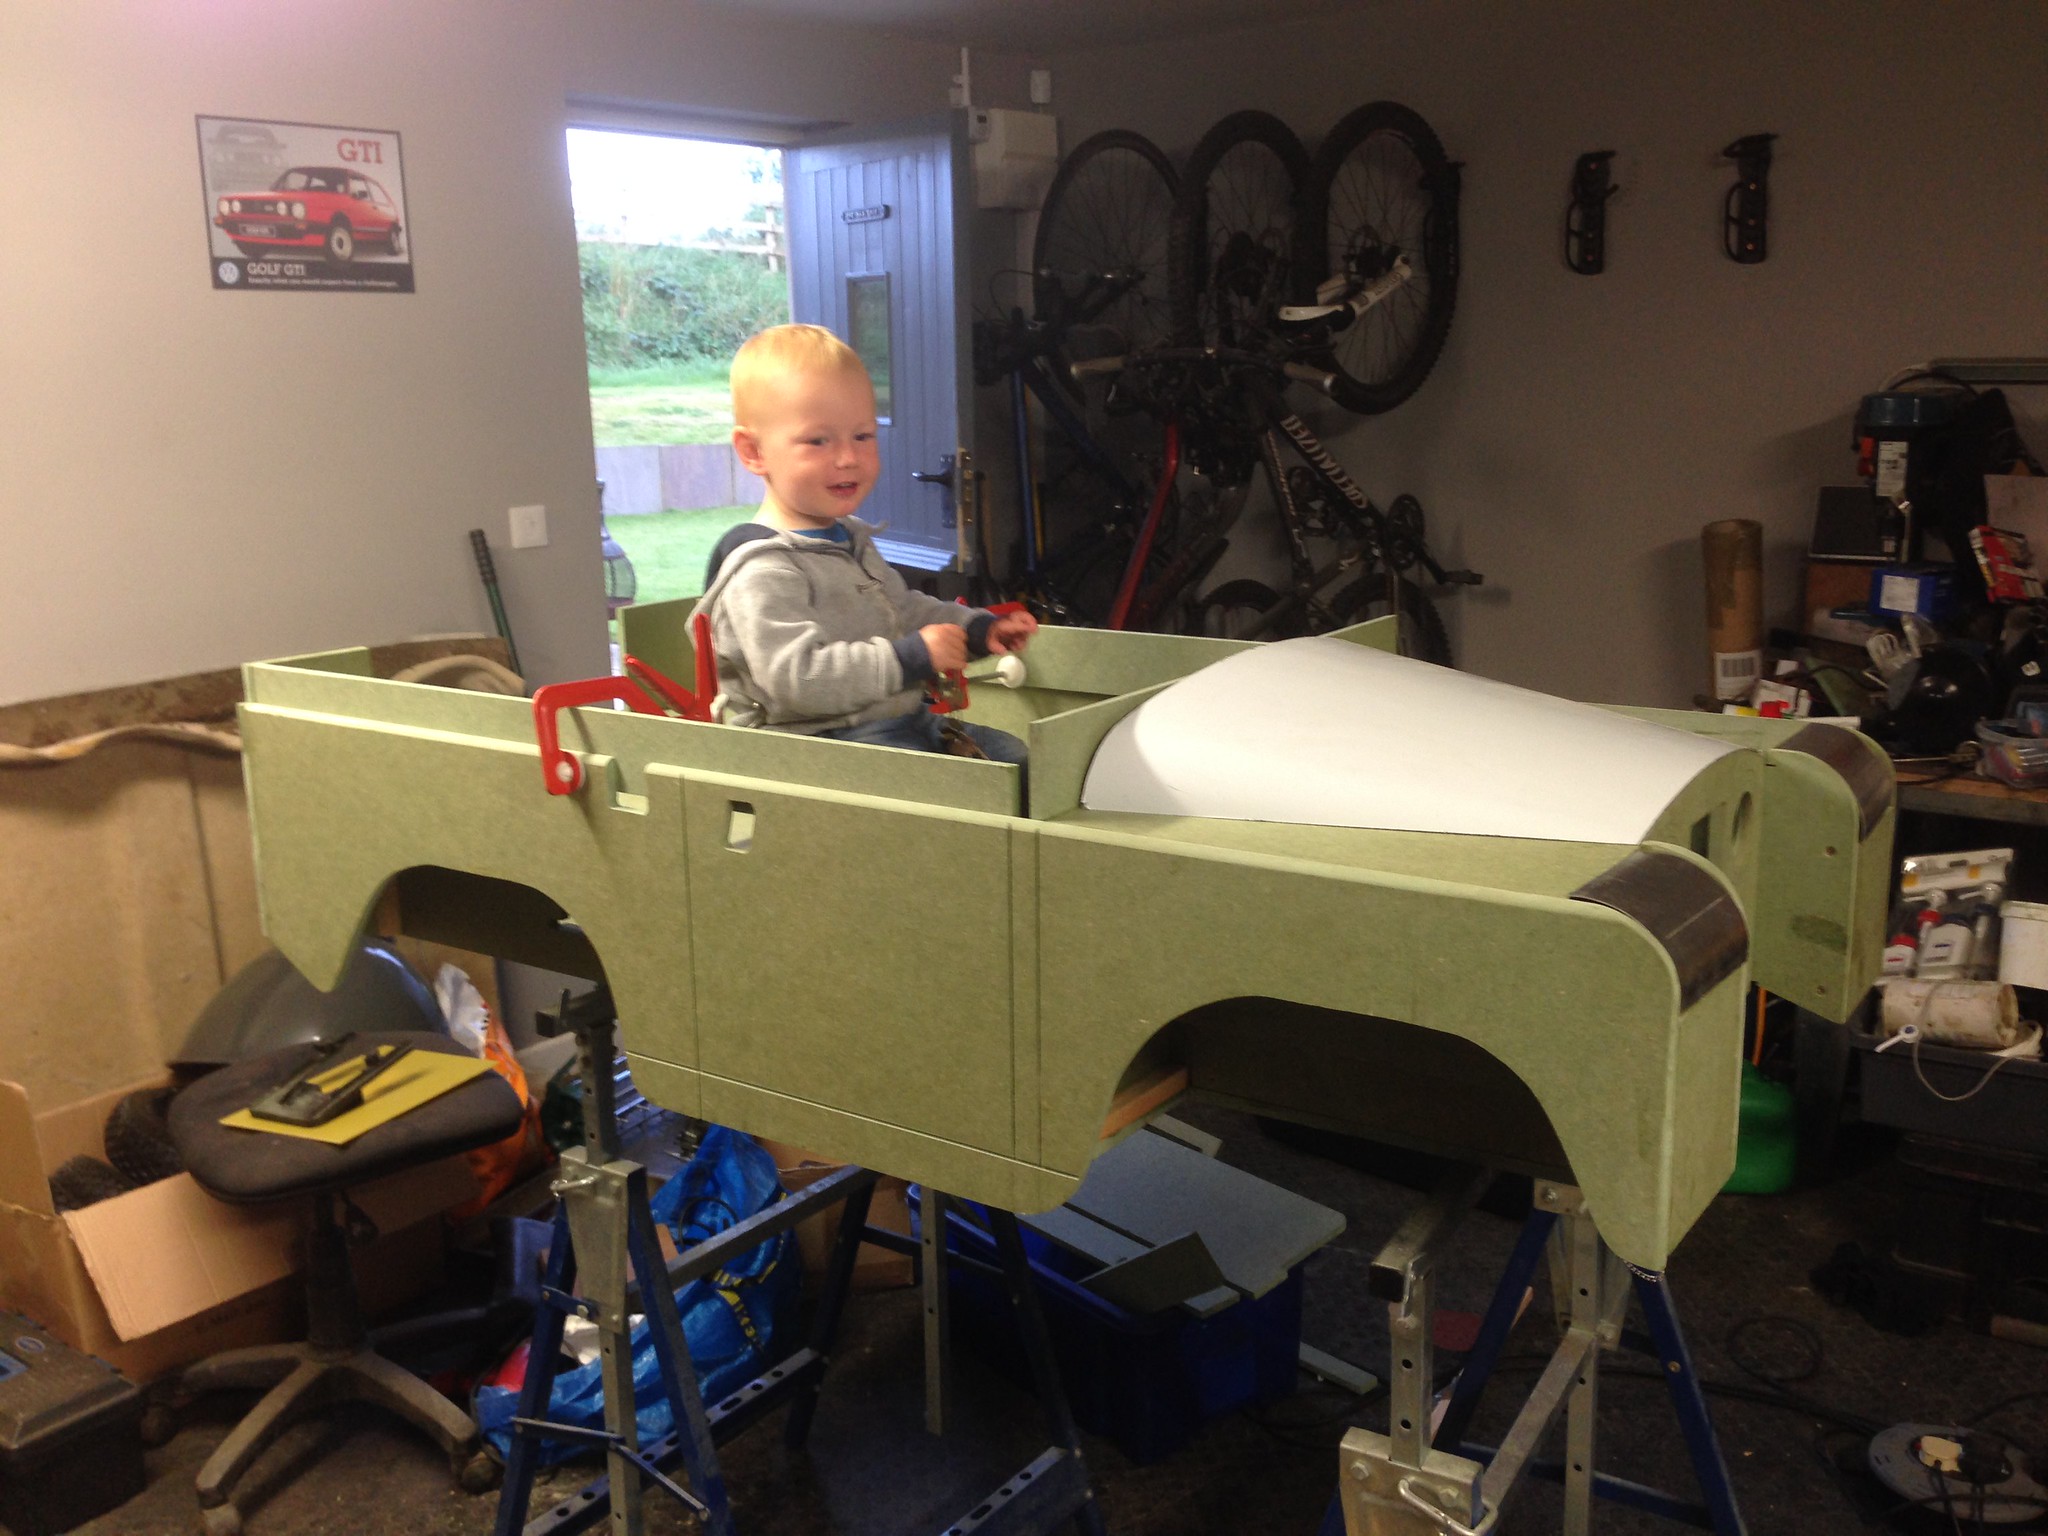
And someone saw their new car for the first time, pointed at it and shouted...
"Hammer!"

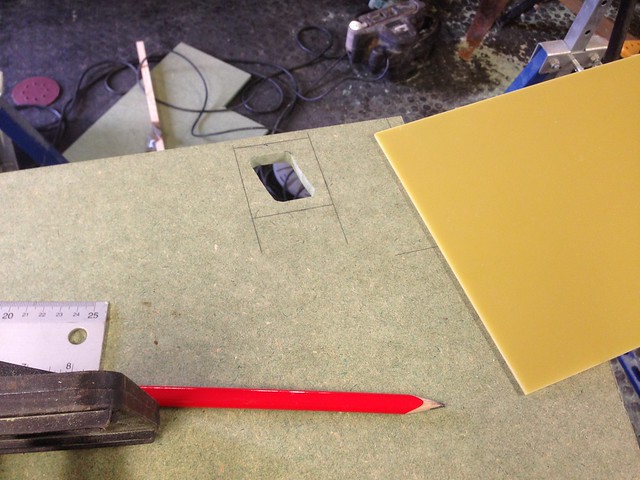
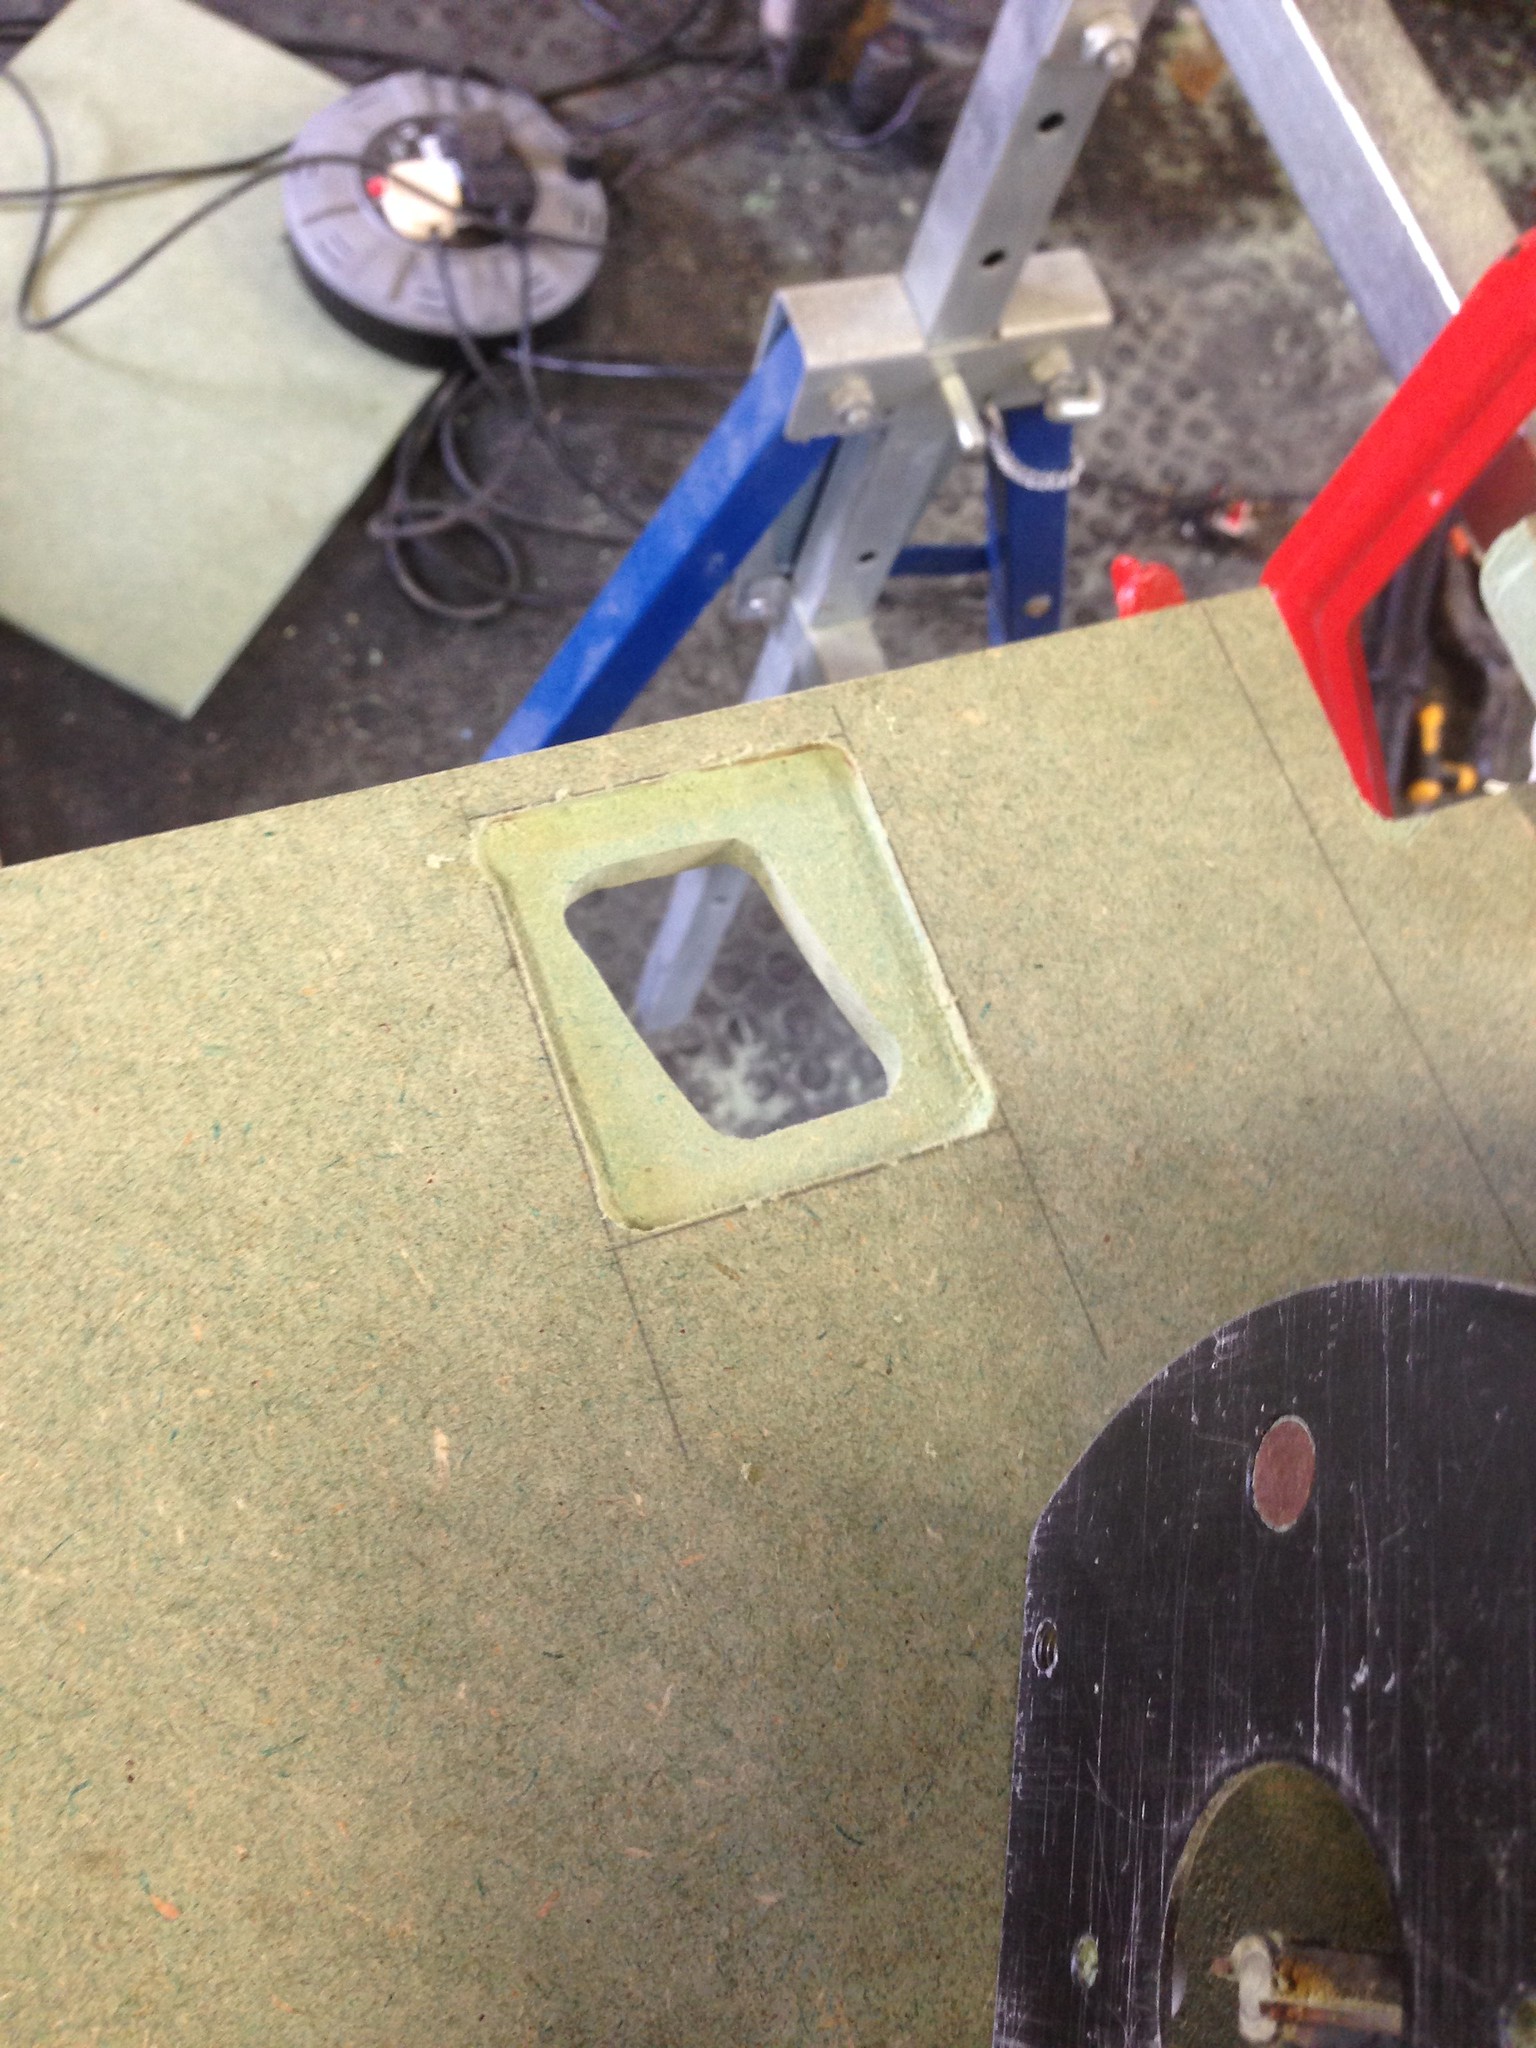

As I mentioned before, I wanted a bit more detail than the standard plans, so with some full scale measurements I've started the beginnings of the fuel filler/cap, and I've routed out the insides of the door handle recesses from inside the body, ready to fit the handles which I shall fabricate, and then blank it off with the yellow GRP plate material so it's smooth inside.
Body sides on was a very satisfying moment...no mistaking what it is now, especially with the aluminium bonnet placed in situ. The bonnet profile is a bit high in the pic, and will site lower once on it's ribs. The whole thing seems to have gone together very square and hopefully there won't be too much filling and sanding involved (although the ally front wing caps will need a fair bit of work)
Next will be the bulkhead (the angled top is not yet on) which will have opening vents, a real Landy hallmark (sadly dropped on the last line of TDCi models!)
And someone saw their new car for the first time, pointed at it and shouted...
"Hammer!"
 k on with building mine.
 Thanks guys! 
Miniman...go for it...TBH it was your original thread that made me think "if I ever have kids, I want to build one of those". Be great to see you pick yours up again...why did you stop?
More to follow...need to start thinking about steel bits soon and wielding the welding torch!
Miniman...go for it...TBH it was your original thread that made me think "if I ever have kids, I want to build one of those". Be great to see you pick yours up again...why did you stop?
anonymous said:
[redacted]
Ha...it will use the mobility scooter wiring harness which includes a 4mph/8mph switch and limiter potentiometer (working separate to the "throttle" which will both be under the bonnet away from little fingers! TBH 8mph is quite quick, and remember a mobility scooter is designed to carry some, erm, quite large people...so with just him in it, it should whizz along...hmmm...More to follow...need to start thinking about steel bits soon and wielding the welding torch!
Hard-Drive said:
Thanks guys!
Miniman...go for it...TBH it was your original thread that made me think "if I ever have kids, I want to build one of those". Be great to see you pick yours up again...why did you stop?
Time really, plus I'm really bad at finishing projects. Hence the half-rebuilt Lister stationary engine and the half-built train set in the garage along with the Toylander body. But who knows, I may get it done!Miniman...go for it...TBH it was your original thread that made me think "if I ever have kids, I want to build one of those". Be great to see you pick yours up again...why did you stop?
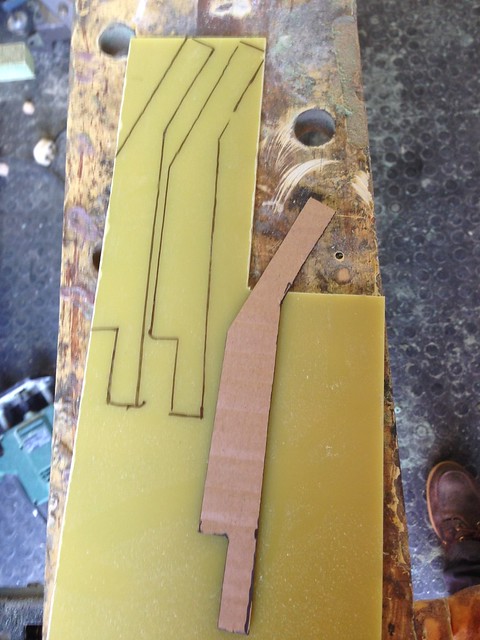
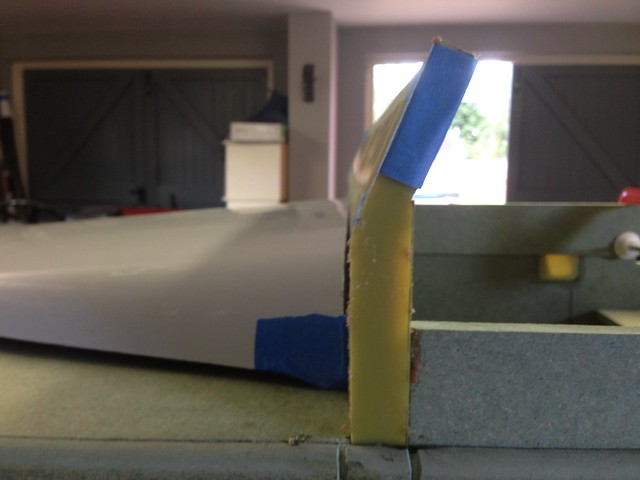
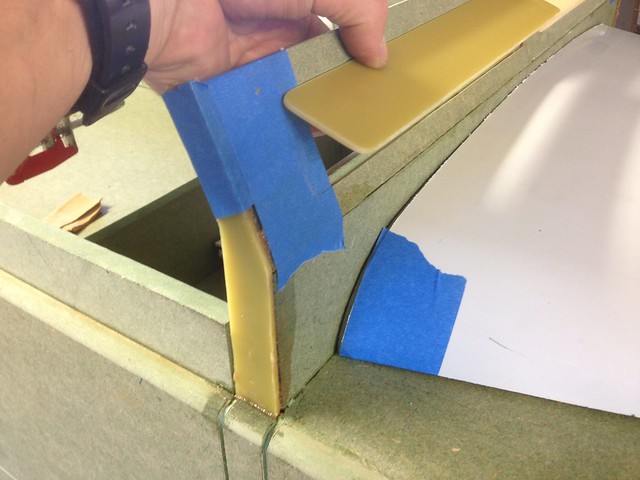
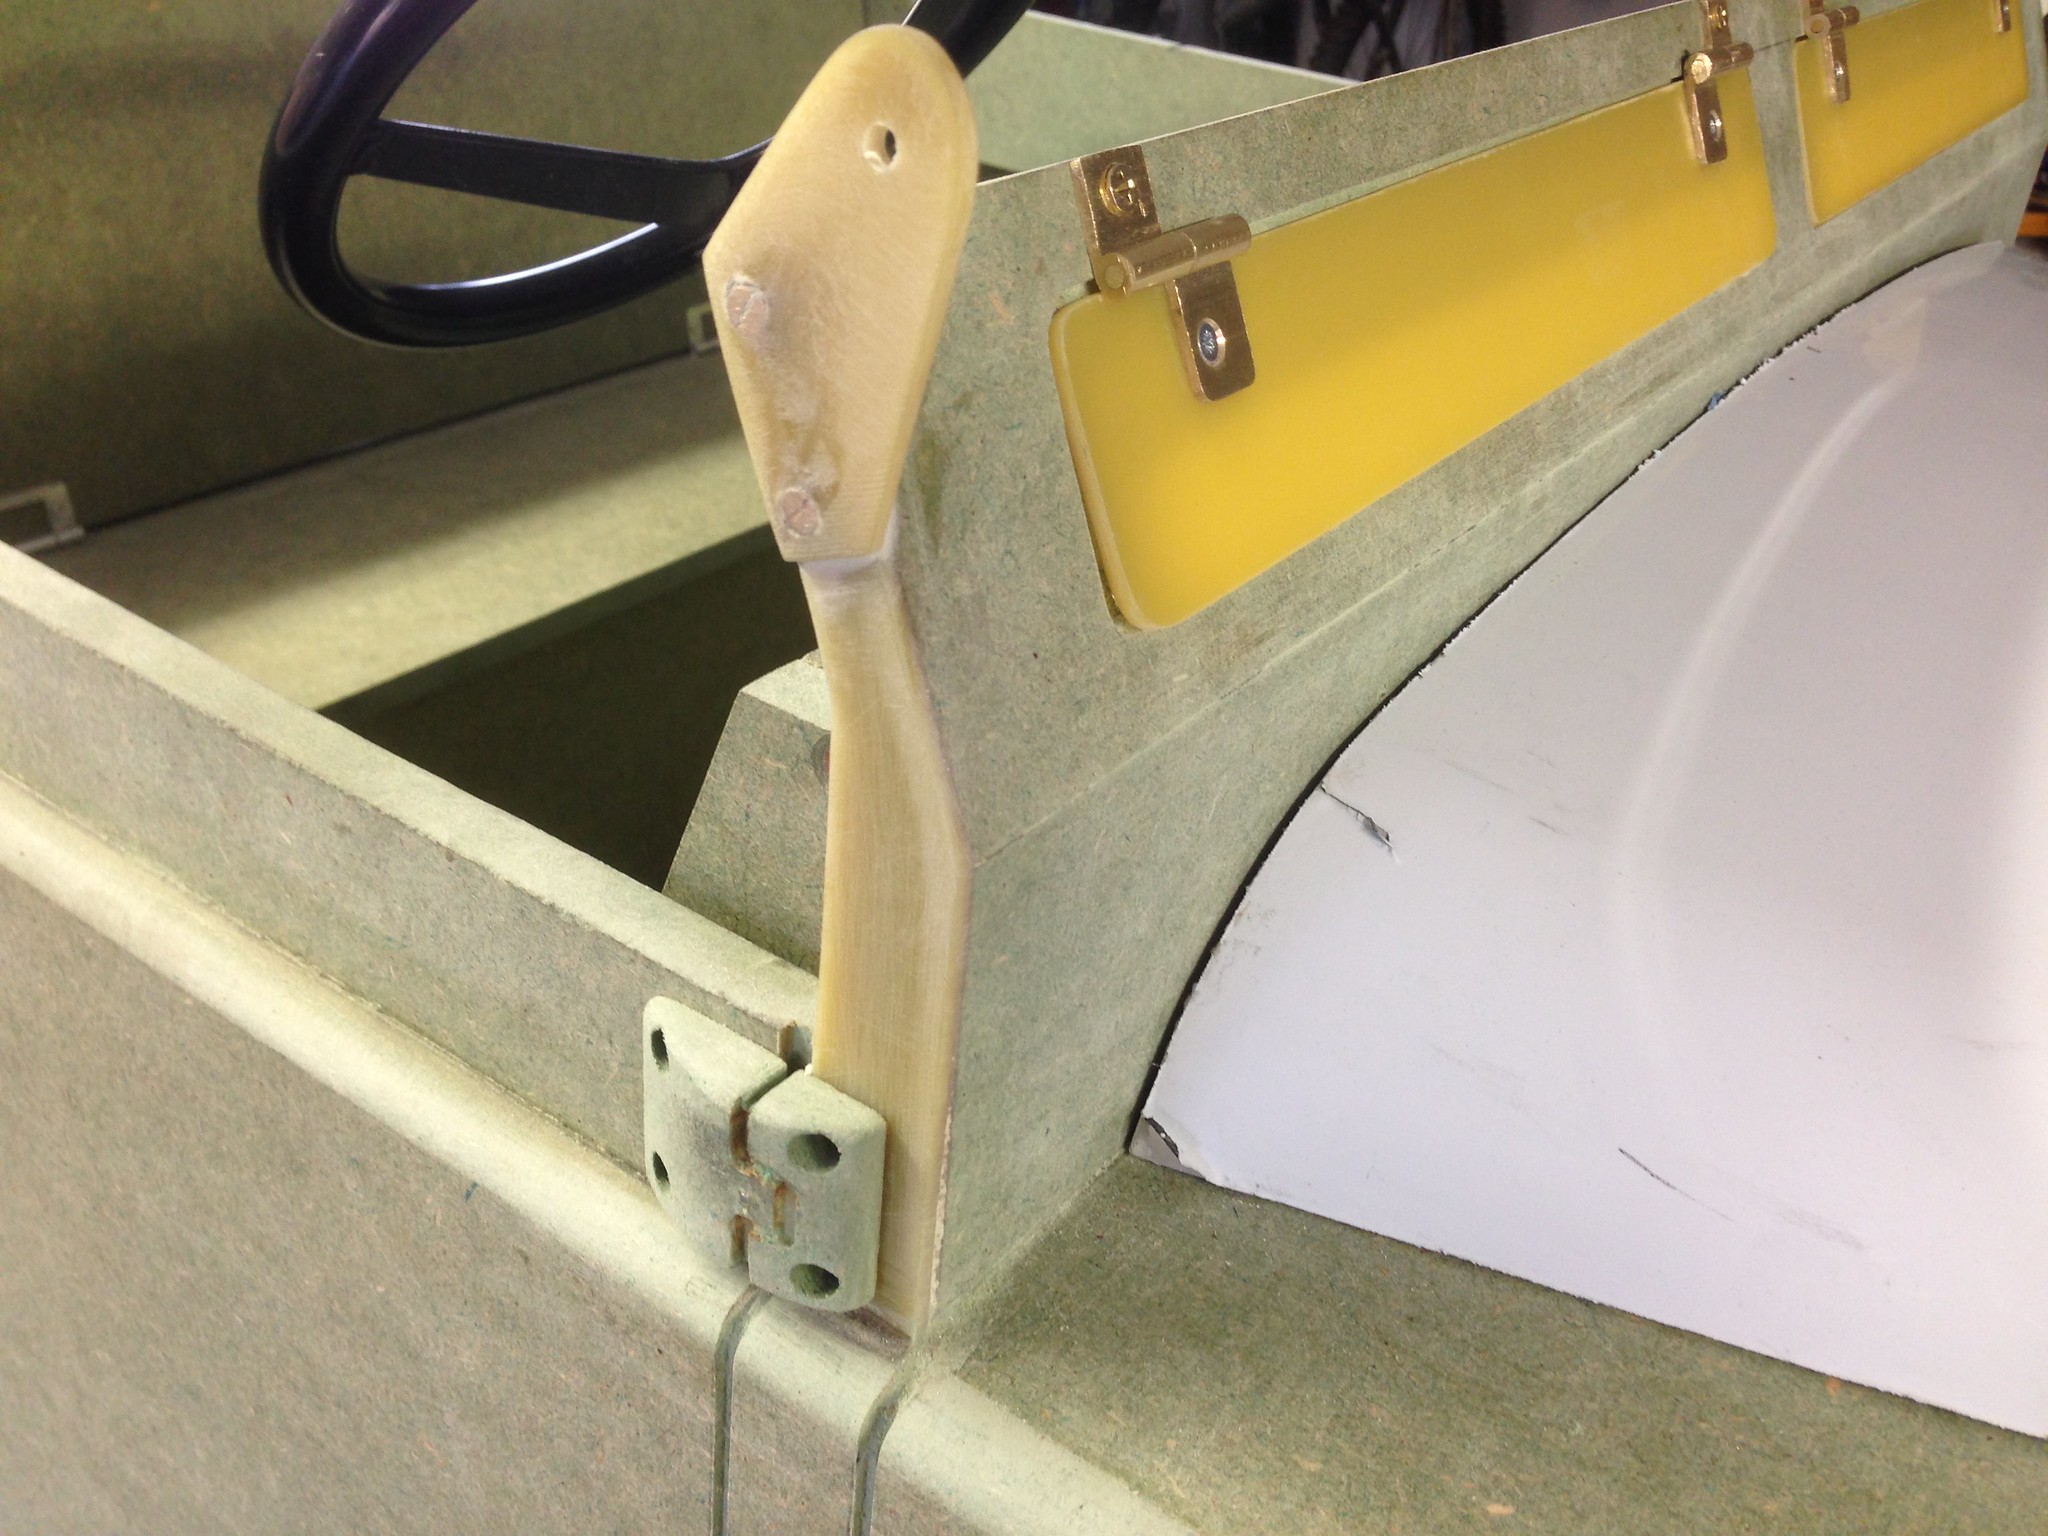
Gah!! Typed out a long post about going "off piste" and making door handles out of broken dinghy booms, changing the angle of the top bulkhead to be more accurate, coming up with an alternative to the horrible Toylander screen hinges, GRP plate and SP106 marine epoxy being used in various areas, and having proper opening scuttle vents instead of drawn on lines, and then lost the post. Booger. So instead here are just the pics...worth 1000 words and all that...
More progress. Sorry, but I cheated and ordered all of the fabricated steel parts from Toylander...for some parts it was debatable whether making them would actually be any cheaper than just buying them, and it does mean that I've cut a load of time from the build. The exception is the front axle, which will use a lot of the scooter parts, as the swivels/stub axles are much better than the Toylander solution.
So we have a rear axle test fitted in position...really looking like a Landy now!
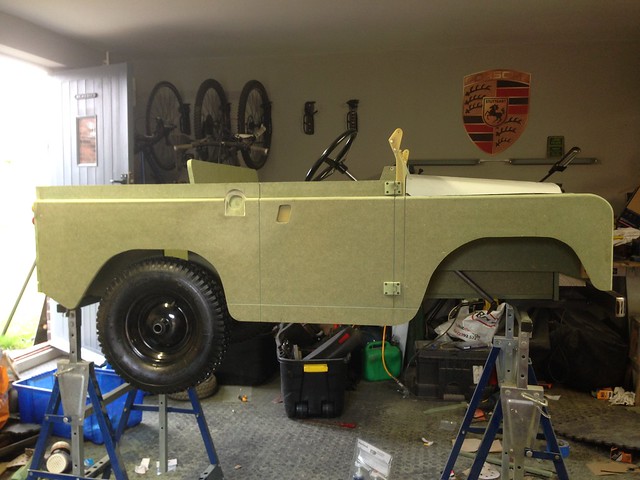
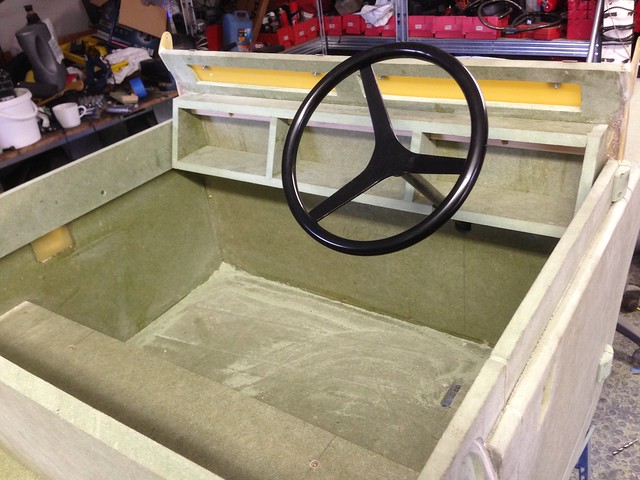
I really wanted to use the traditional steering wheel from an Austin J40 pedal car, would have been more in keeping, however it was too big at 9.5" so I went for the standard Toylander part, and will modify the boss to look a bit more convincing.
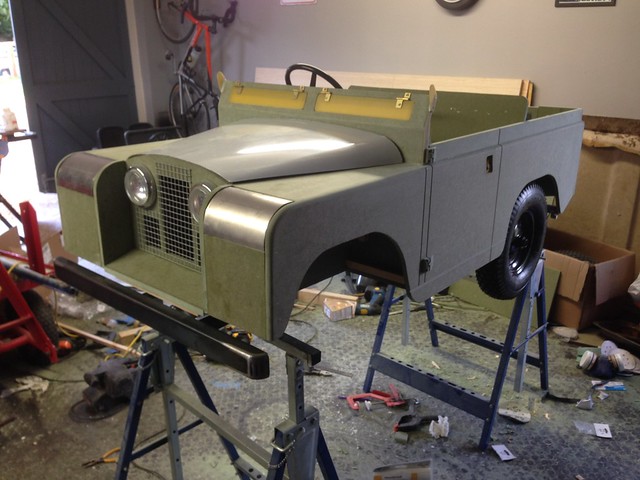
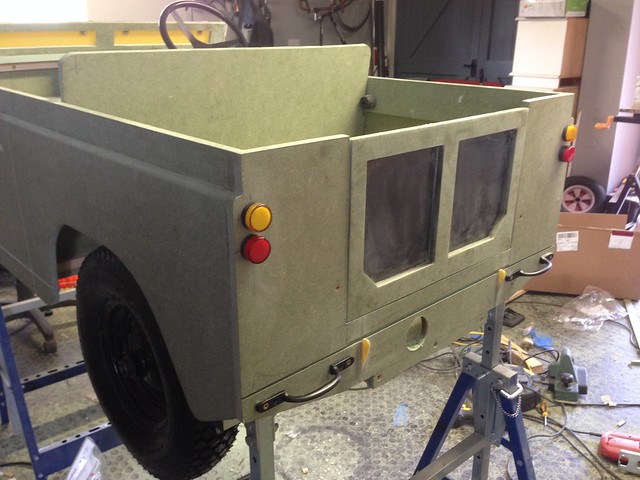
Rear lights, grab handles, and tailgate test fitted. Black stuff on the tailgate is 1.5 mm GRP plate routed in flush from behind.
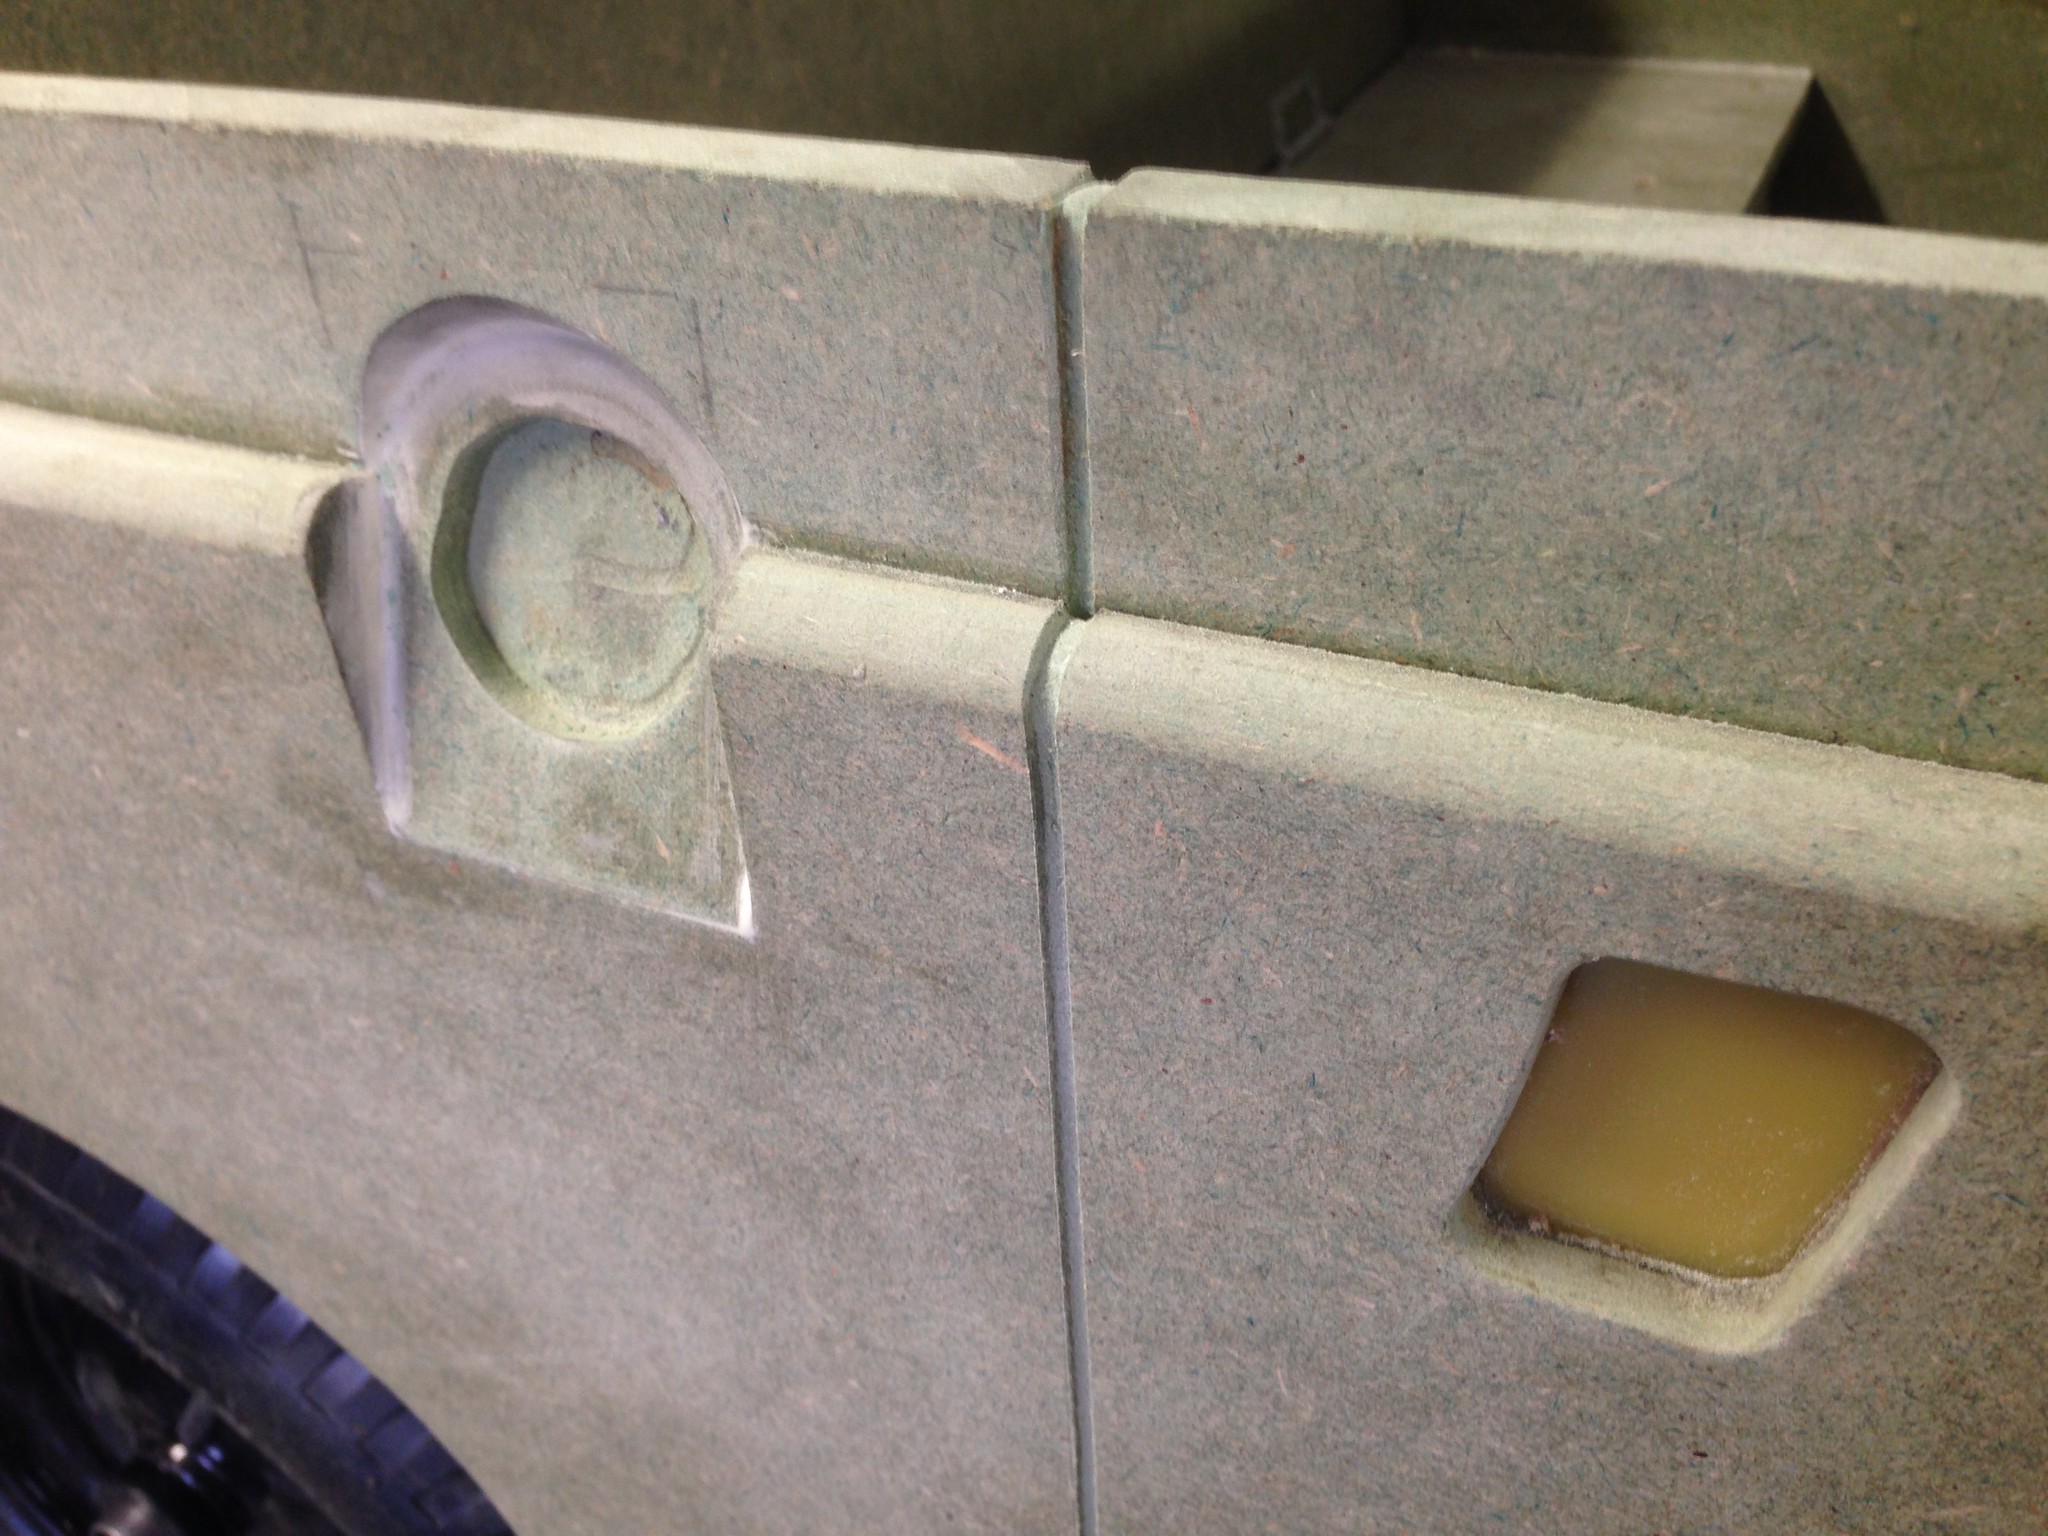
Bit of detail not on the plans, including fuel filler, opening scuttle vents, scale wiring covers, a much improved bulkhead end, and door hinges. Proper Landy geeks may spot they are Series 3/Defender hinges rather than the correct Series 2a ones, but were much easier to make and less likely to catch on things and do damage.
So that's the body pretty much done for now...I'll leave as is and get firstly a rolling chassis, then get the electrics up and running. Then I'll take the whole thing apart again and paint it...lots of prep work needed here, for example hiding those screw heads on the vent hinges, but no point in spraying it until every last screw hole has been drilled!
So we have a rear axle test fitted in position...really looking like a Landy now!
I really wanted to use the traditional steering wheel from an Austin J40 pedal car, would have been more in keeping, however it was too big at 9.5" so I went for the standard Toylander part, and will modify the boss to look a bit more convincing.
Rear lights, grab handles, and tailgate test fitted. Black stuff on the tailgate is 1.5 mm GRP plate routed in flush from behind.
Bit of detail not on the plans, including fuel filler, opening scuttle vents, scale wiring covers, a much improved bulkhead end, and door hinges. Proper Landy geeks may spot they are Series 3/Defender hinges rather than the correct Series 2a ones, but were much easier to make and less likely to catch on things and do damage.
So that's the body pretty much done for now...I'll leave as is and get firstly a rolling chassis, then get the electrics up and running. Then I'll take the whole thing apart again and paint it...lots of prep work needed here, for example hiding those screw heads on the vent hinges, but no point in spraying it until every last screw hole has been drilled!
Edited by Hard-Drive on Tuesday 12th September 17:17
Gassing Station | Homes, Gardens and DIY | Top of Page | What's New | My Stuff