Edwardian North Yorkshire Renovation
Discussion


Next Update, Trying to bring this up to date as fast as possible
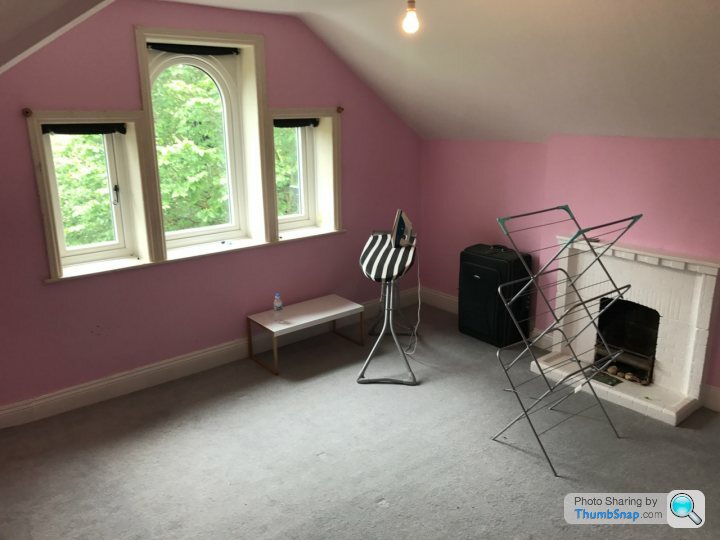
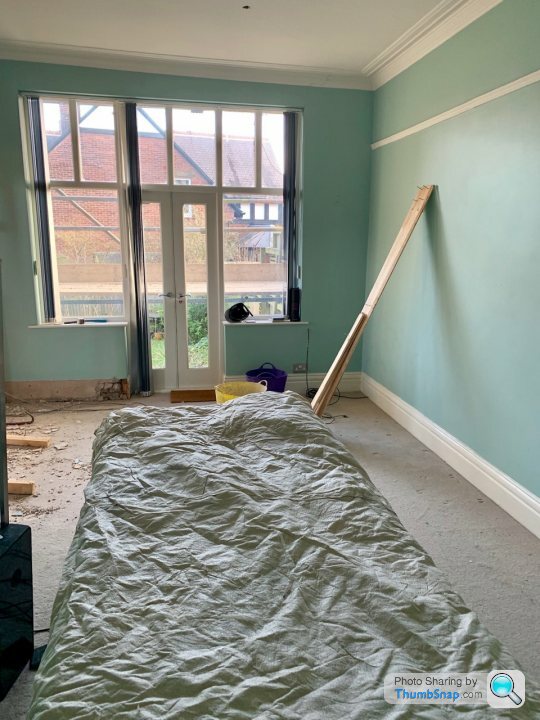
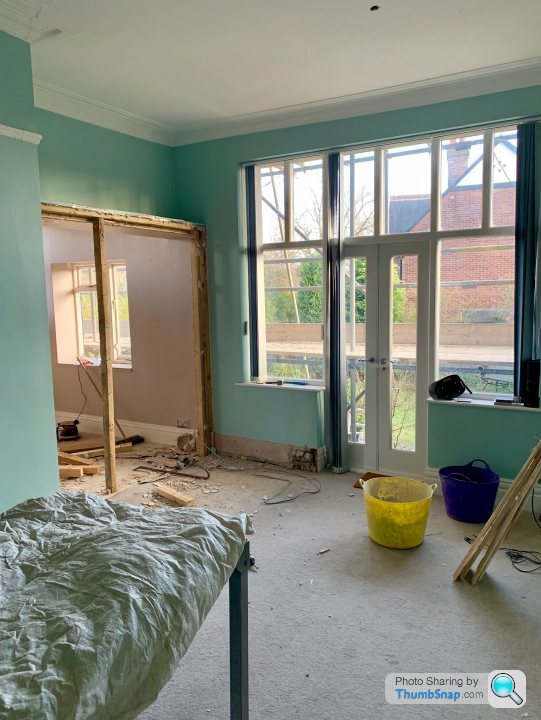
Top floor (2nd) front bedroom
This is another front of the house bedroom so another inky dark room. Ultimately this will end up being a kids room but at the moment its another guest room (my wife is from west London and we tent to have several of her friends up at a time several times a year).
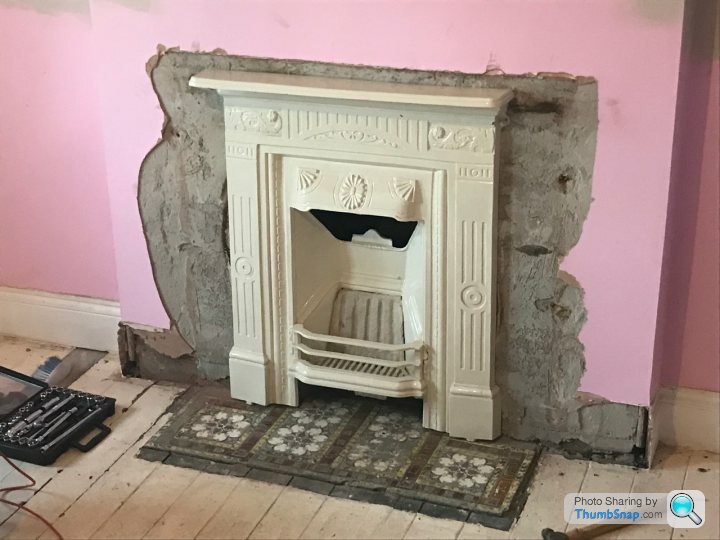
This is how the room started. it was another Pink room with a faux fireplace that was made to look like painted brick but was actually cast concrete! There was also a home made cupboard in the corner which also had to go!
 [url]
[url]
 |https://thumbsnap.com/du2GIGeG[/url]

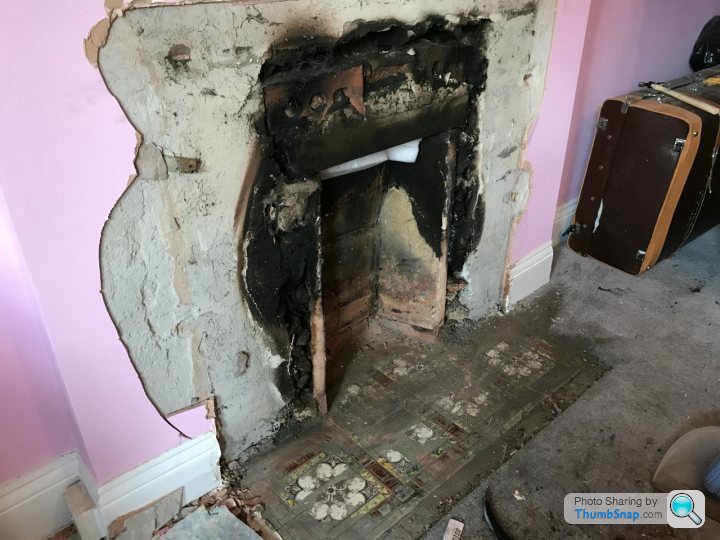
Simple job with a big hammer and a crowbar to get rid of both the fire place and the cupboard in one swoop!
Under the hideous fireplace there were some really nice tiles with the Yorkshire white rose, god knows why these were covered up!
 [url]
[url]
 |https://thumbsnap.com/xVqFR7d0[/url]
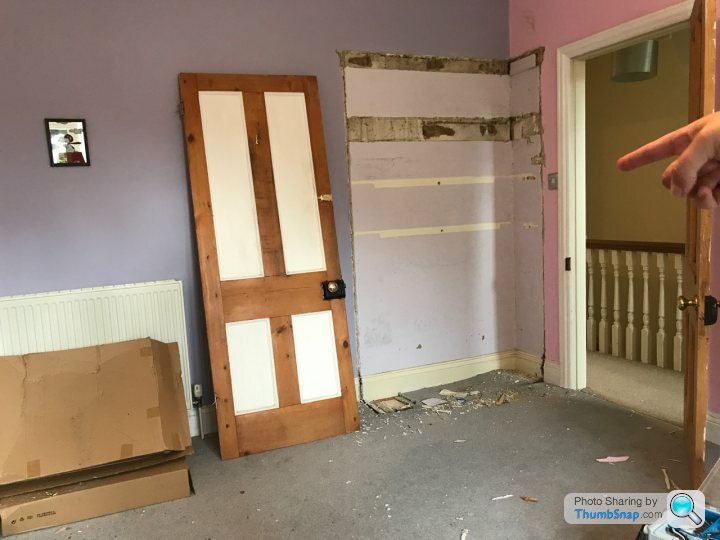
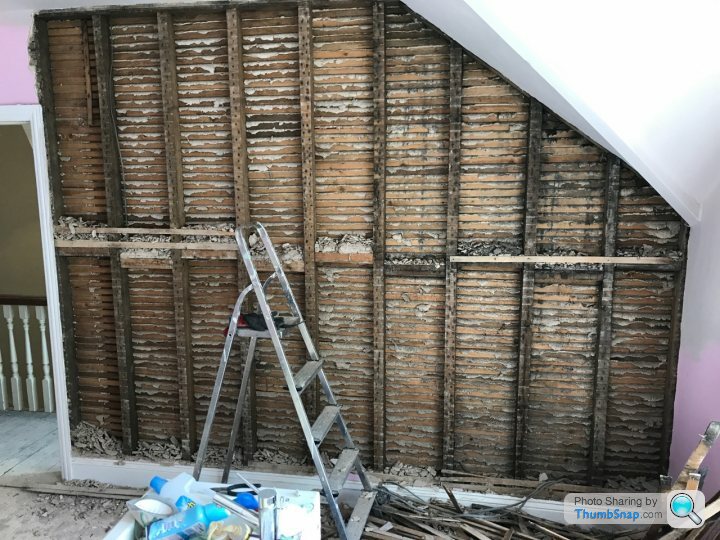
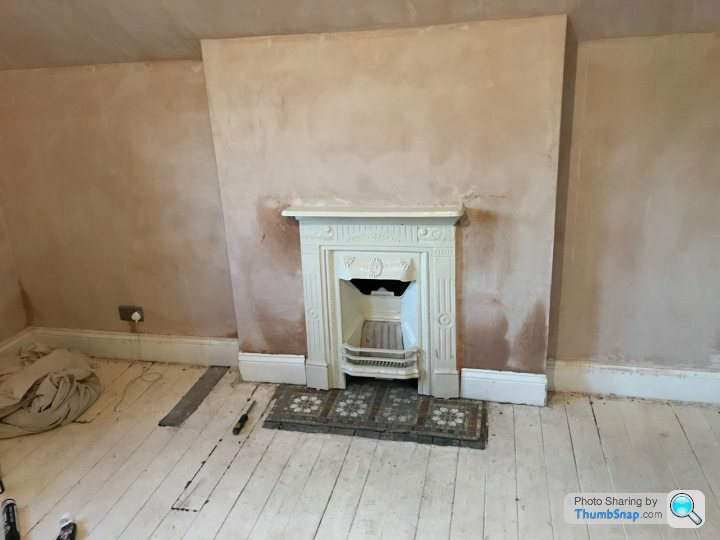
After doing some investigating the plaster on the back wall had to go, it was cracked un even and we wanted to swap the handing on the door over (so we had to move the switch and we also wanted to add some sockets to this wall. It was simpler to get rid of the old lat and plaster and board this up then skim.

Before the room was re skimmed we needed to replace the fireplace so we found this one on Ebay that fitted perfectly (the tiles also cleaned up ok
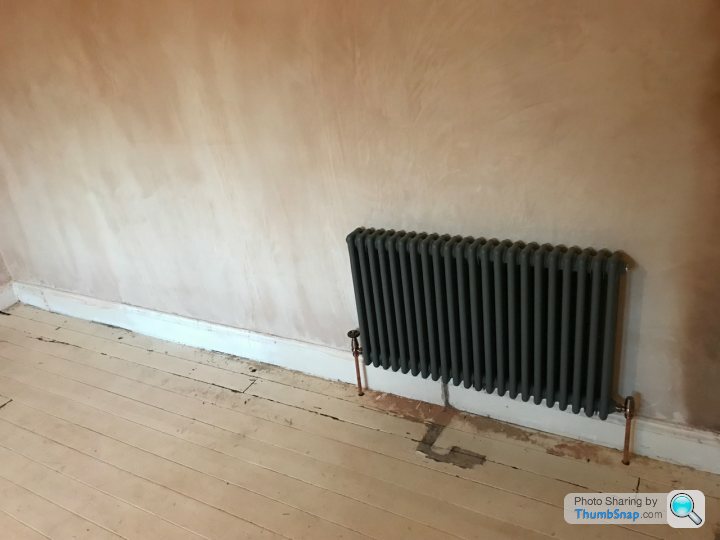
New Rad fitted
More Dark paint, and light fitting in

Floor painted

We then found this cool effect to create some custom headboard artwork using a metallic copper paint and a liquid that "rusts" the copper instantly to create a cool unique piece of art

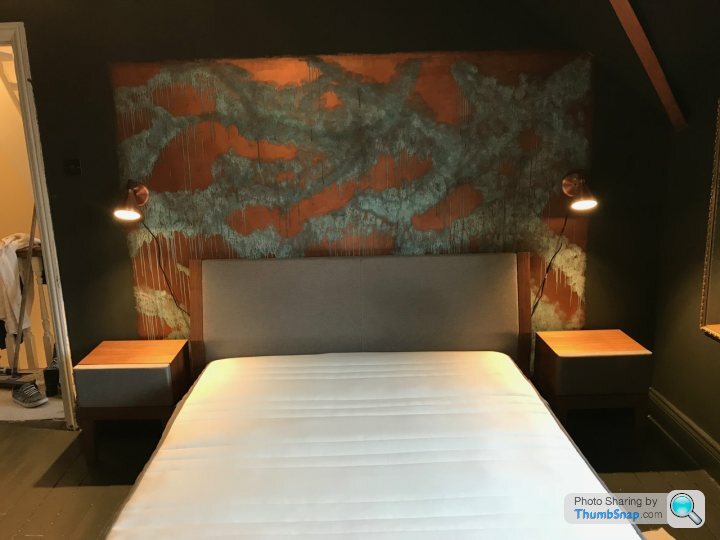
The final room looks like this

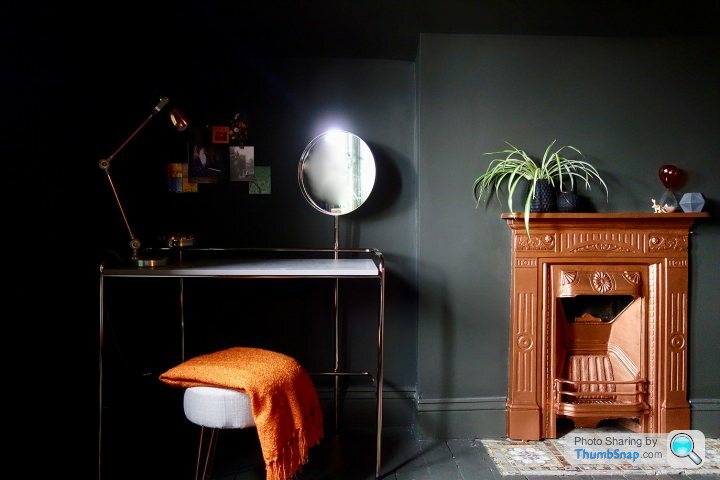
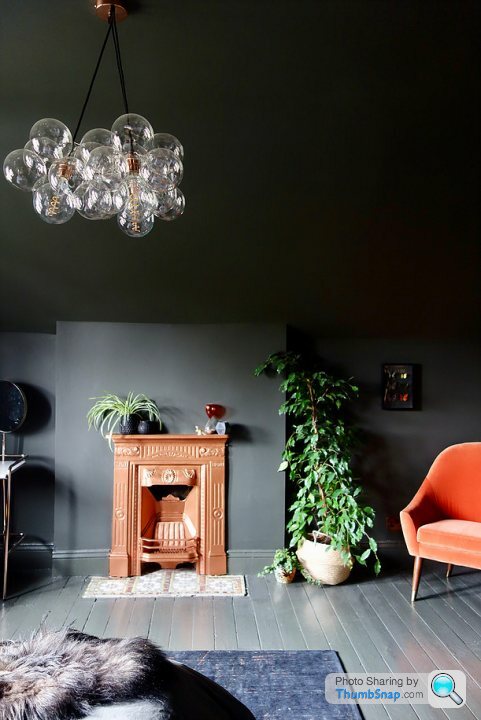


Our designer friend helped style this room in terms of picking our the dressing table, chair, lighting and placement of all the furniture. She again helped us make bold design decisions in colours and the awesome copper backdrop!
In addition to the cosmetic work on this floor there was a step in-between where I stripped out all the electrics on the whole floor and re-wired the lot. We found some "shocking" work like live cables buried in plaster with our tape over the ends loads of dead legs etc.
This concludes all the rooms at the front of the house. Our idea was to keep these all dark (due to the lighting) and try and keep these semi traditional.
The back of the house we are wanting to make slightly modern whilst nodding to the roots of the house!
Top floor (2nd) front bedroom
This is another front of the house bedroom so another inky dark room. Ultimately this will end up being a kids room but at the moment its another guest room (my wife is from west London and we tent to have several of her friends up at a time several times a year).
This is how the room started. it was another Pink room with a faux fireplace that was made to look like painted brick but was actually cast concrete! There was also a home made cupboard in the corner which also had to go!
[url]|https://thumbsnap.com/du2GIGeG[/url]Simple job with a big hammer and a crowbar to get rid of both the fire place and the cupboard in one swoop!
Under the hideous fireplace there were some really nice tiles with the Yorkshire white rose, god knows why these were covered up!
[url]|https://thumbsnap.com/xVqFR7d0[/url]After doing some investigating the plaster on the back wall had to go, it was cracked un even and we wanted to swap the handing on the door over (so we had to move the switch and we also wanted to add some sockets to this wall. It was simpler to get rid of the old lat and plaster and board this up then skim.
Before the room was re skimmed we needed to replace the fireplace so we found this one on Ebay that fitted perfectly (the tiles also cleaned up ok
New Rad fitted
More Dark paint, and light fitting in
Floor painted
We then found this cool effect to create some custom headboard artwork using a metallic copper paint and a liquid that "rusts" the copper instantly to create a cool unique piece of art
The final room looks like this
Our designer friend helped style this room in terms of picking our the dressing table, chair, lighting and placement of all the furniture. She again helped us make bold design decisions in colours and the awesome copper backdrop!
In addition to the cosmetic work on this floor there was a step in-between where I stripped out all the electrics on the whole floor and re-wired the lot. We found some "shocking" work like live cables buried in plaster with our tape over the ends loads of dead legs etc.
This concludes all the rooms at the front of the house. Our idea was to keep these all dark (due to the lighting) and try and keep these semi traditional.
The back of the house we are wanting to make slightly modern whilst nodding to the roots of the house!
Edited by andrewjamesroberts on Friday 22 March 06:39
Hi not sure on forum advertising rules but her site is
https://www.making-spaces.net
There are a few other rooms that we have completed but I will put them up later. I have a sleeping child and a sick (and sleeping wife) so I can start updating on the structural parts the this project!
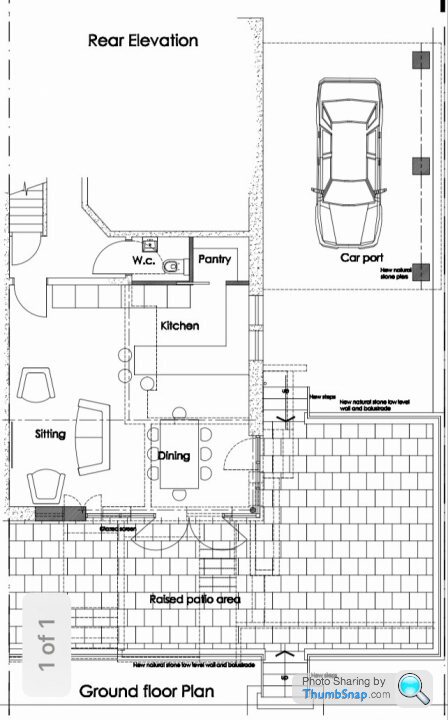
The starting Point (Ground Floor)
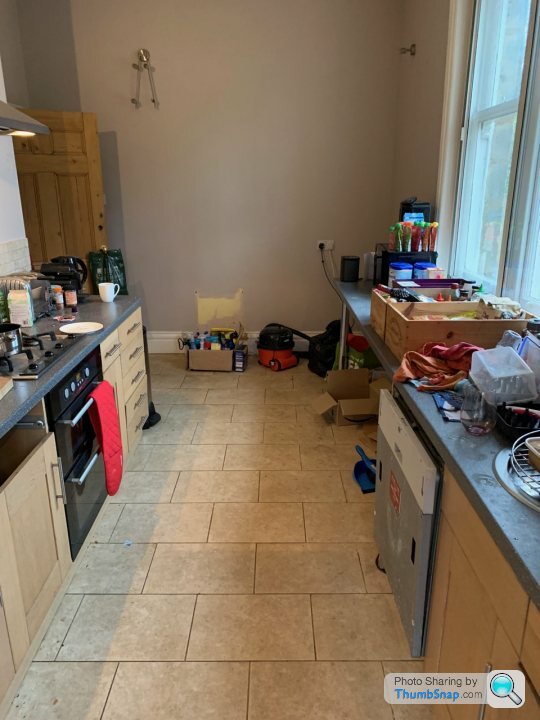
There was a gally kitchen and a dining room / living room separated by a massive thick wall (which turns out to be an old earth and chimney, more on this later)
The kitchen was old and tired but functional. The chap who had the house before us had never spent any time cleaning it or fixing minor leaks so it was a mess!
The weird stairs at the back of the house in the plans below were odd levels that the garden existed on and the stairs down into the cellar.


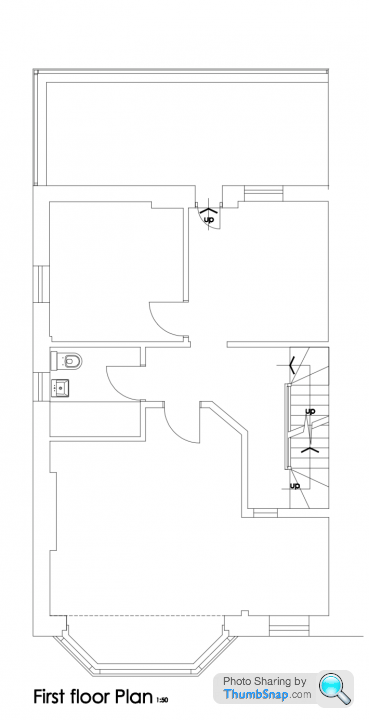
First Floor
The rooms we are tackling on this part were the top three in the image below. Originally 2 bedrooms and the weird ass first floor conservatory

I don't have pics of the 2 bedrooms for some reason . . . they were fairly non descript and about 3m x 3m big. Above is the conservatory when we took ownership of the house, the previous owner left the foosball table (which I gave to a friend with 2 young boys who were football crazy)
The Plans


The plans!
We are going to be knocking lots of wall down downstairs to create a open plan area with new kitchen and family room. We also are going to form a new downstairs toilet and a pantry for the kitchen. French doors will open onto a massive patio area with stairs down to the garden (these have changed since the pics were done but I will update later)
Upstairs we are going to create a new master suite with dressing area, ensuite and bedroom overlooking the garden.
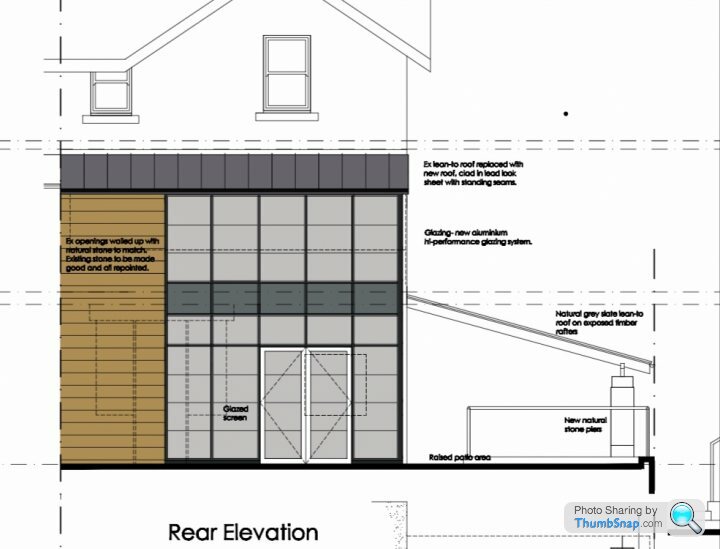
Looking at the back of the house we are having the stone that will be taken from knocking down the rear of the house to build a new wall (to the left of the elevation) and then a big 6.5m wrap around glazing system (matt black) that will extend down the side of the house.
The new roof will be finished in anthracite standing seam aluminium.
This will gain us minimal Sq footage but create some new spaces to live in. The Car port won't be done for a while if at all but we wanted to ensure that we had the option with planning to build in the future!
https://www.making-spaces.net
There are a few other rooms that we have completed but I will put them up later. I have a sleeping child and a sick (and sleeping wife) so I can start updating on the structural parts the this project!
The starting Point (Ground Floor)
There was a gally kitchen and a dining room / living room separated by a massive thick wall (which turns out to be an old earth and chimney, more on this later)
The kitchen was old and tired but functional. The chap who had the house before us had never spent any time cleaning it or fixing minor leaks so it was a mess!
The weird stairs at the back of the house in the plans below were odd levels that the garden existed on and the stairs down into the cellar.
First Floor
The rooms we are tackling on this part were the top three in the image below. Originally 2 bedrooms and the weird ass first floor conservatory
I don't have pics of the 2 bedrooms for some reason . . . they were fairly non descript and about 3m x 3m big. Above is the conservatory when we took ownership of the house, the previous owner left the foosball table (which I gave to a friend with 2 young boys who were football crazy)
The Plans
The plans!
We are going to be knocking lots of wall down downstairs to create a open plan area with new kitchen and family room. We also are going to form a new downstairs toilet and a pantry for the kitchen. French doors will open onto a massive patio area with stairs down to the garden (these have changed since the pics were done but I will update later)
Upstairs we are going to create a new master suite with dressing area, ensuite and bedroom overlooking the garden.
Looking at the back of the house we are having the stone that will be taken from knocking down the rear of the house to build a new wall (to the left of the elevation) and then a big 6.5m wrap around glazing system (matt black) that will extend down the side of the house.
The new roof will be finished in anthracite standing seam aluminium.
This will gain us minimal Sq footage but create some new spaces to live in. The Car port won't be done for a while if at all but we wanted to ensure that we had the option with planning to build in the future!
Edited by andrewjamesroberts on Sunday 24th March 13:57
Here we go!
There are about three months of renovations to get through (the work started Jan 4th and is still ongoing)
The demolition!
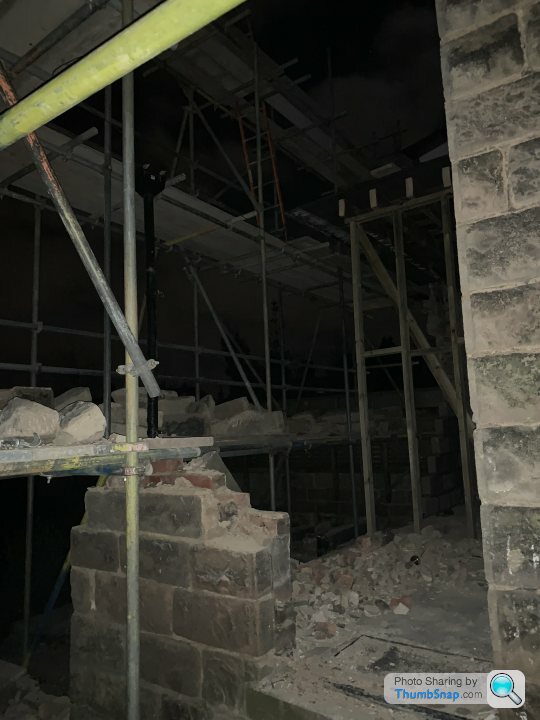
Scaffolding up!
[url |https://thumbsnap.com/91fInely[/url]
This was a stud wall that connects the dining room to the kitchen.
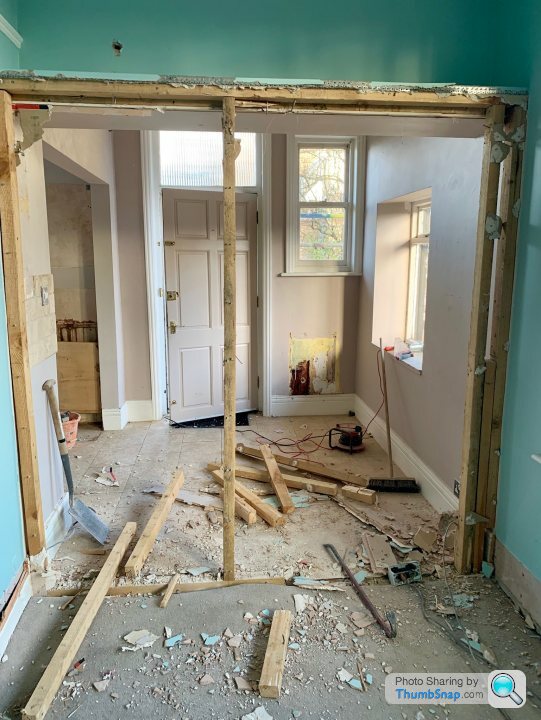
Next job - take the kitchen out

In taking the kitchen out they uncovered an old fireplace which was probably the main heating source to the house when it was build. This is going to cause us issues later on (probably a later post).
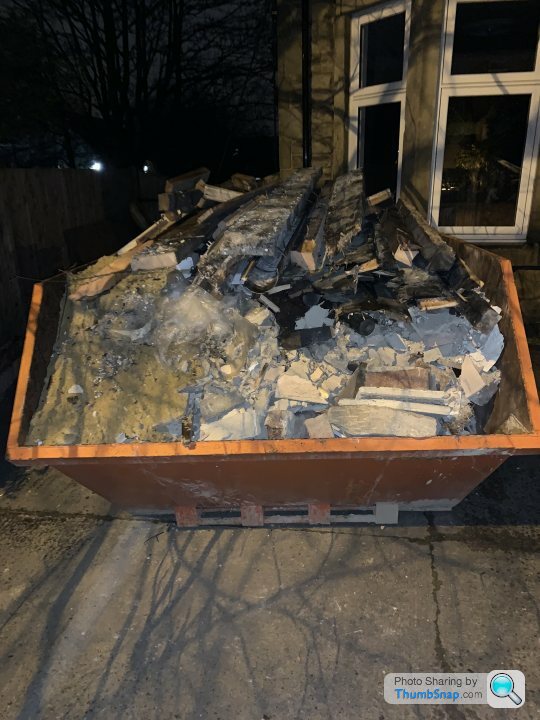
First skip of many!!
Loo’s arrived!

My wife and 6 month old son moved down to her dads as she was still On maternity it worked quite well. This means that most photos are taken in the dark as I only saw the house after work and not on the weekends as I was down in London visiting them.
All internal doors that led to these spaces were covered in dust guards and OSB sheets. However this did not contain the dust at all. That stuff gets everywhere! The house was daily secure during this and it was fairly warm although I’m scared to do a meter reading as the heating was on most of the time!!
There are about three months of renovations to get through (the work started Jan 4th and is still ongoing)
The demolition!
Scaffolding up!
[url
|https://thumbsnap.com/91fInely[/url]This was a stud wall that connects the dining room to the kitchen.
Next job - take the kitchen out
In taking the kitchen out they uncovered an old fireplace which was probably the main heating source to the house when it was build. This is going to cause us issues later on (probably a later post).
First skip of many!!
Loo’s arrived!
My wife and 6 month old son moved down to her dads as she was still On maternity it worked quite well. This means that most photos are taken in the dark as I only saw the house after work and not on the weekends as I was down in London visiting them.
All internal doors that led to these spaces were covered in dust guards and OSB sheets. However this did not contain the dust at all. That stuff gets everywhere! The house was daily secure during this and it was fairly warm although I’m scared to do a meter reading as the heating was on most of the time!!
 Bookmarked for inspiration.
 Ace-T said:
Very nice indeed! The walls look a very dark green, is that the colour, or just my device? More info on that fabulous copper paint effect would be gratefully received too.
Thanks again for sharing this.
Hi sorry I missed this question!Thanks again for sharing this.
The copper effect was simple and really cheep to do.
We used the copper paint that we had left over from painting the fireplace then sponged this stuff on top
https://www.craigandrose.com/artisan-copper-patina
Within seconds it starts to oxidise the copper and leave the cool Patina effect
Wow! I have been absolutely terrible with updates!
It’s been a crazy few months with work and the house plus a demanding 8 month old!
We are entering the end of the big works so I should be able to go through this in a few updates
Demolition post 2
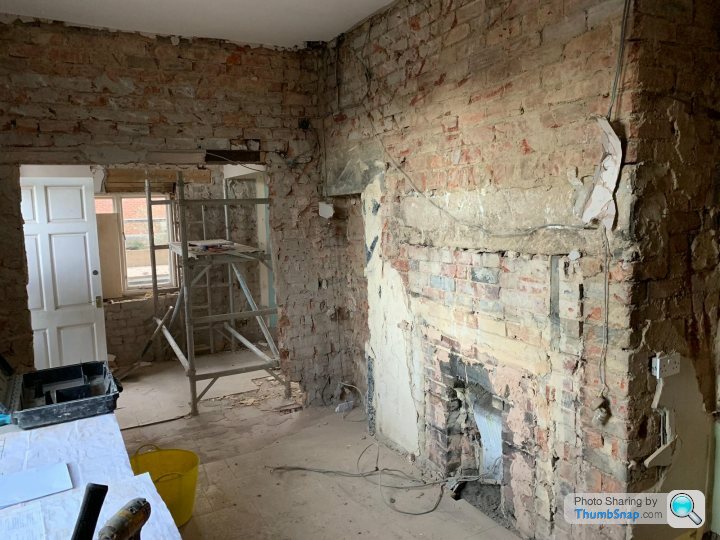
Filling up from the last post the kitchen was completely stripped out revealing an old chimney breast which will cause is issues later. This was not picked up by any parties along the architect, structural and builder process. Every one had taken a look and discounted it as been taken out years ago due to the make up of the walls etc.
We are now in the dead of winter January 2019, my wife and then. 6 month old boy had moved out to her parents 200 miles away (she was still on mat leave) as I had to still work and being the right northerner was adamant to stay in the house open to the winter elements the builder had given Me less than a week before I moved out (which I didn’t)
Apologies for the dark images. I was working 11 hour days so didn’t see the house in day light and was seeing my wife and son at weekend (straight from
Work Thursday night)

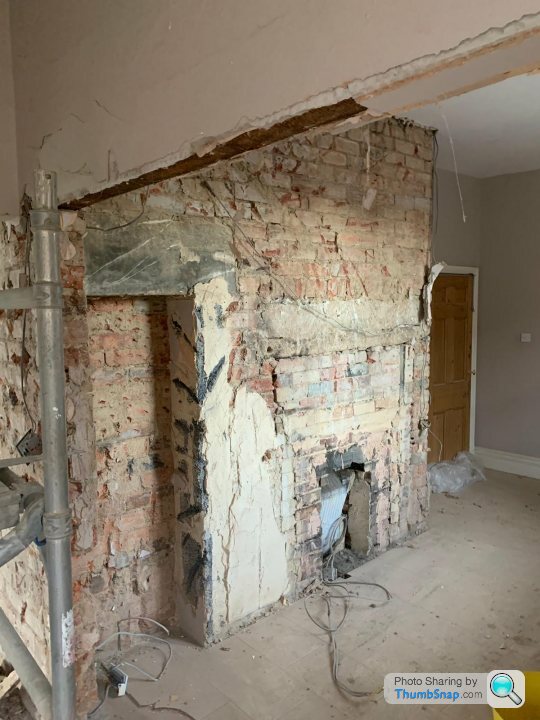
Where the patio doors were (previous post)
No going back now as the external Walls were starting to come down.
I had the builder board up all doors through to the exposed areas of the house more for security than warmth.
Back corner of the house
Outside looking in
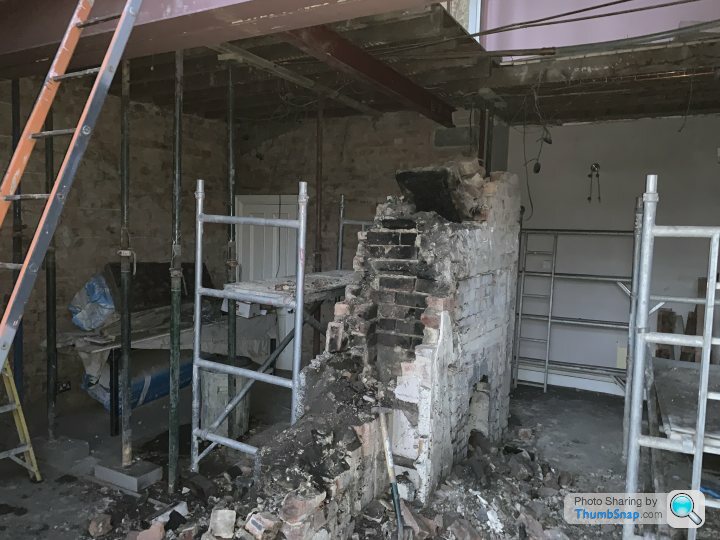
First major issue
This pic was taken by the builder once the s tty first floor conservatory had been taken out and this was what they uncovered. I received a call which still gives me nightmares!
Basically over the years there had been many bodge job pieces of work which we were lucky that the house was still standing.
Firstly if you take a look at first pic the steel on the left hand side it’s badly bowed this was mainly down to A) being wrongly specced and B) missing the webbing between the flanges that were located in the party wall.
Secondly the brick stack to the right of the first pic and left of the second was holding up the back of the house (including the chimney stack as previously mentioned. All of the mortar had disintegrated out of the bricks and it was a strong guts of wind from the house coming down.
At this point the steel work plan was tossed out the window (slow and steady) to JFDI, quadruple the props were put in and the steel work outsourced to a specialist.
The result was 6 extra small steels were added in to bolster up the chimney stack adding small cost to the final bill.
It’s been a crazy few months with work and the house plus a demanding 8 month old!
We are entering the end of the big works so I should be able to go through this in a few updates
Demolition post 2
Filling up from the last post the kitchen was completely stripped out revealing an old chimney breast which will cause is issues later. This was not picked up by any parties along the architect, structural and builder process. Every one had taken a look and discounted it as been taken out years ago due to the make up of the walls etc.
We are now in the dead of winter January 2019, my wife and then. 6 month old boy had moved out to her parents 200 miles away (she was still on mat leave) as I had to still work and being the right northerner was adamant to stay in the house open to the winter elements the builder had given Me less than a week before I moved out (which I didn’t)
Apologies for the dark images. I was working 11 hour days so didn’t see the house in day light and was seeing my wife and son at weekend (straight from
Work Thursday night)
Where the patio doors were (previous post)
No going back now as the external Walls were starting to come down.
I had the builder board up all doors through to the exposed areas of the house more for security than warmth.
Back corner of the house
Outside looking in
First major issue
This pic was taken by the builder once the s
tty first floor conservatory had been taken out and this was what they uncovered. I received a call which still gives me nightmares!Basically over the years there had been many bodge job pieces of work which we were lucky that the house was still standing.
Firstly if you take a look at first pic the steel on the left hand side it’s badly bowed this was mainly down to A) being wrongly specced and B) missing the webbing between the flanges that were located in the party wall.
Secondly the brick stack to the right of the first pic and left of the second was holding up the back of the house (including the chimney stack as previously mentioned. All of the mortar had disintegrated out of the bricks and it was a strong guts of wind from the house coming down.
At this point the steel work plan was tossed out the window (slow and steady) to JFDI, quadruple the props were put in and the steel work outsourced to a specialist.
The result was 6 extra small steels were added in to bolster up the chimney stack adding small cost to the final bill.
Edited by andrewjamesroberts on Wednesday 15th May 23:32
Edited by andrewjamesroberts on Wednesday 15th May 23:34
The steel
All in there were 13 pieces of steel (plus the extra 6) specced for the house
The first to go in effectively replaced what had been taken down plus a big ring to hold the main load baring wall and a smaller one that was in place of the room dividing wall (this is how it went down)
The Ring

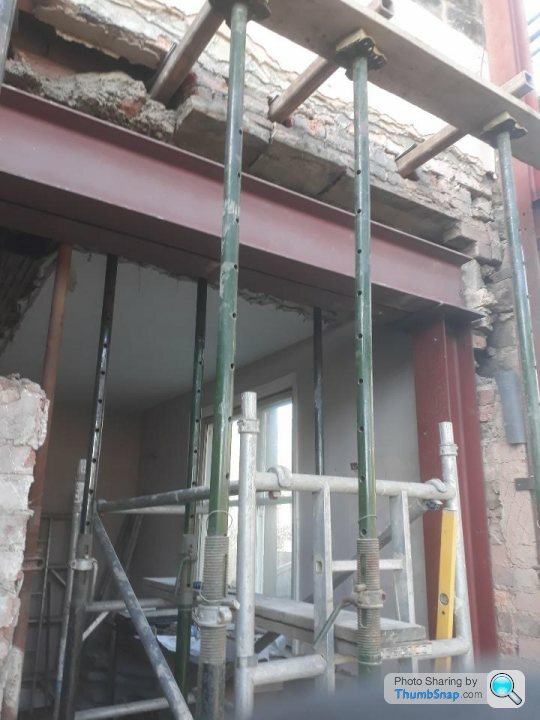

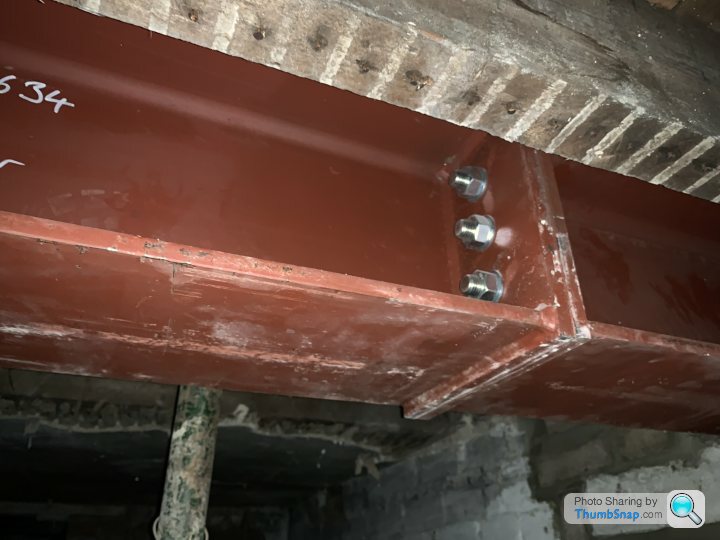
The 2 above are the bottom beam across the house (in the cellar) which is fairly chunky!
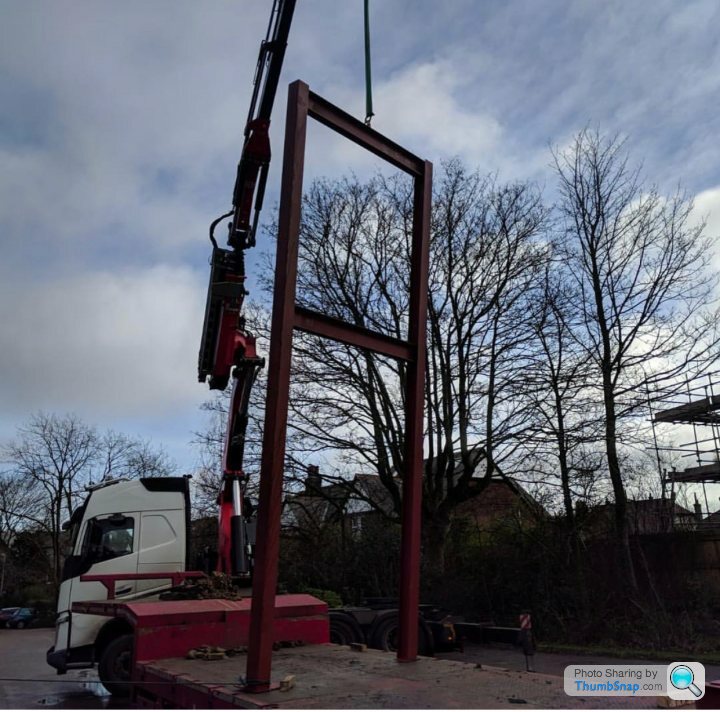
The extension
The whole back of the house is effectively being rebuild from load baring stone to a steel frame with stone and glass infill. I wish I had been on site for this but had to rely on builder pics!


All this steel then Allowed the room separating wall (which was nearly a meter thick to be taken down
Issue 2 joists
Once all the steel was in place and supporting the structure everyone could the. Evaluate what we were playing with. One of the issues (there were many) with the first floor conservatory was that there was a minor step up into caused by the bodge steel being in the floor cavity and part of the scope of works was we wanted level floors throughout. On evaluation all the joists in the back half of the house were knackered. They were over 100 years old and had twisted and warped due to movement in the house caused by settlement and bodge building work. They all had to go and be replaced with new ones.
That’s enough for tonight. Next update will follow shortly with the rebuild!
All in there were 13 pieces of steel (plus the extra 6) specced for the house
The first to go in effectively replaced what had been taken down plus a big ring to hold the main load baring wall and a smaller one that was in place of the room dividing wall (this is how it went down)
The Ring
The 2 above are the bottom beam across the house (in the cellar) which is fairly chunky!
The extension
The whole back of the house is effectively being rebuild from load baring stone to a steel frame with stone and glass infill. I wish I had been on site for this but had to rely on builder pics!
All this steel then Allowed the room separating wall (which was nearly a meter thick to be taken down
Issue 2 joists
Once all the steel was in place and supporting the structure everyone could the. Evaluate what we were playing with. One of the issues (there were many) with the first floor conservatory was that there was a minor step up into caused by the bodge steel being in the floor cavity and part of the scope of works was we wanted level floors throughout. On evaluation all the joists in the back half of the house were knackered. They were over 100 years old and had twisted and warped due to movement in the house caused by settlement and bodge building work. They all had to go and be replaced with new ones.
That’s enough for tonight. Next update will follow shortly with the rebuild!
Wow, fantastic!
We bought a similar house at the top of Franklin Rd, Harrogate in 1998. It too was 3 flats over 3 floors with a basement and loft. Fantastically rewarding to finish it, even if we did not do anything structurally. We will follow with interest.
Keep us posted please.
We bought a similar house at the top of Franklin Rd, Harrogate in 1998. It too was 3 flats over 3 floors with a basement and loft. Fantastically rewarding to finish it, even if we did not do anything structurally. We will follow with interest.
Keep us posted please.
Edited by gf15 on Friday 17th May 15:00
richatnort said:
Wow well that was a shocker and that amount of steel is just madness!
I have to admit being from Leeds I realised I follow your interior designer friend (makingspaces) for a few yeas and from her instagram I have seen a few more bits that have happened but the house is looking great!
Haha she is great some bold ideas but we are open to most things!I have to admit being from Leeds I realised I follow your interior designer friend (makingspaces) for a few yeas and from her instagram I have seen a few more bits that have happened but the house is looking great!
You have seen spoilers then! She is round tomorrow to talk through finishing a in the new kitchen / living area.
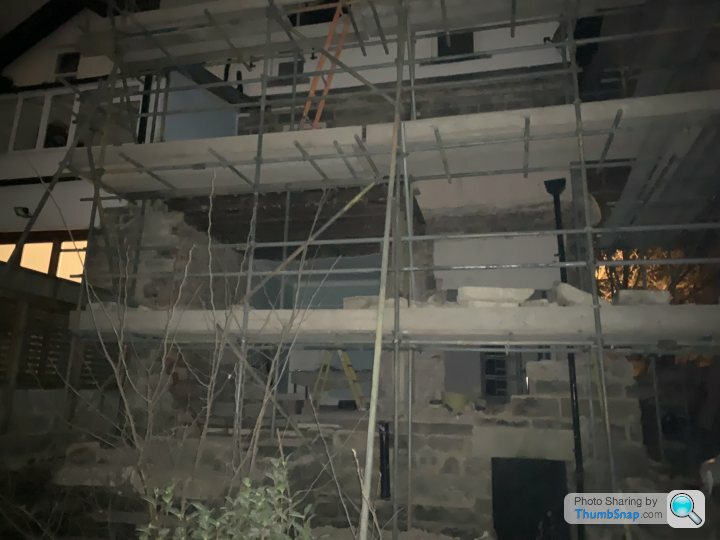
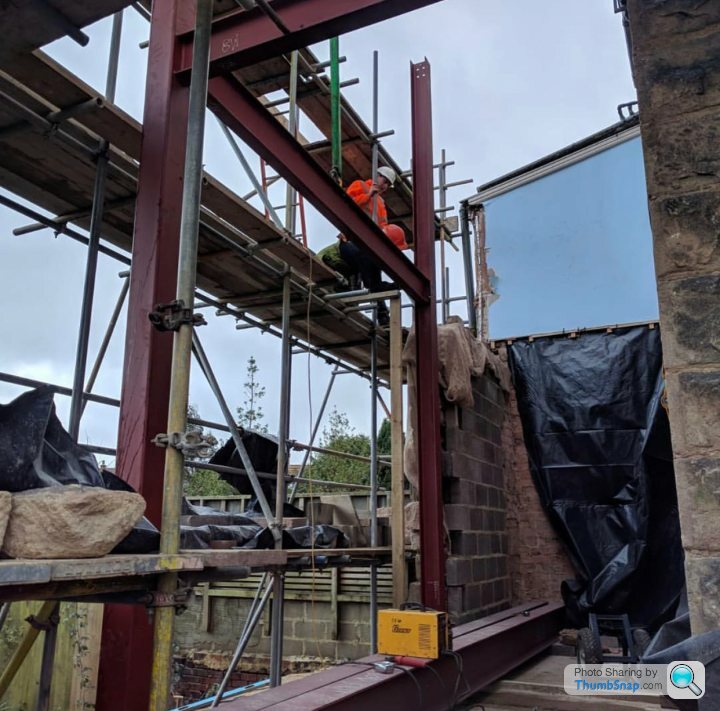
The rebuild!
What comes down must go up ...... or something like that!
Once all the stress of my house (and maybe next door) collapsing has subsided (no pun intended) it was time to start the rebuild.

The builders were doing a awesome job of the stonework

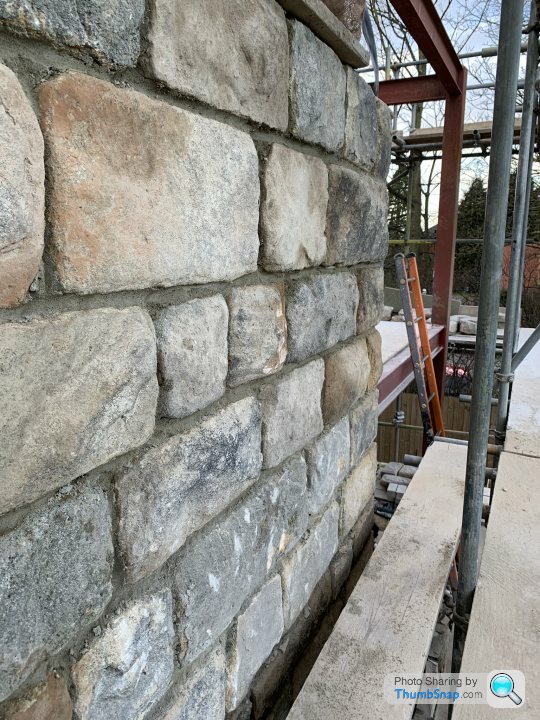
One of the old boys on the job is really good with stone and has made a fantastic job of using the old stone, some lime mortar and patience to rebuild the new wall so it looks like it was always there.
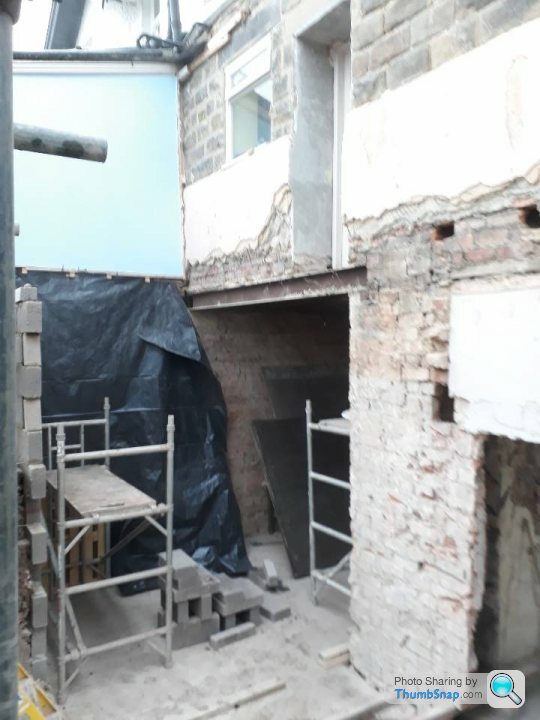
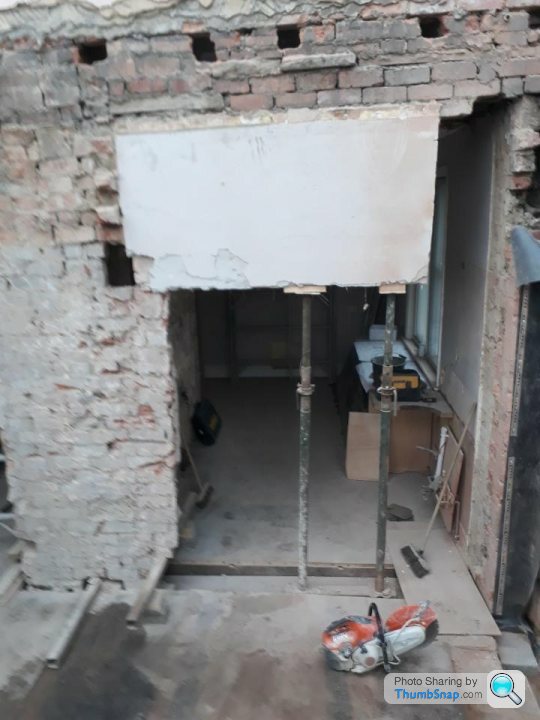
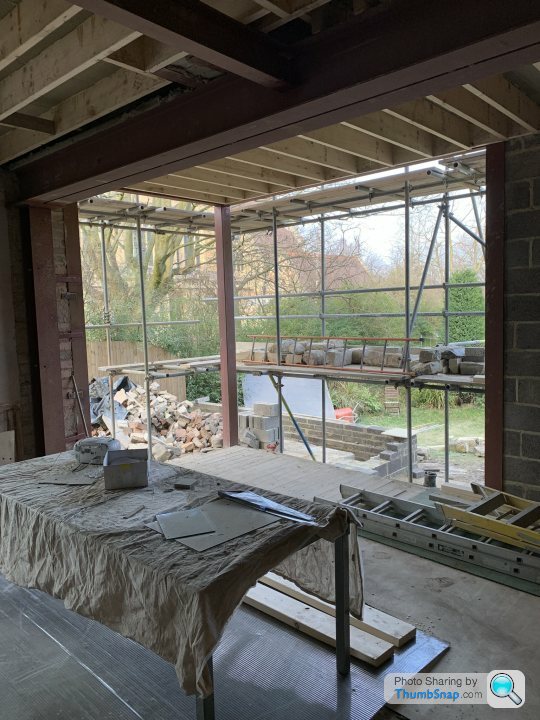
Inside the dimensions of the room were starting to take place


After inspection we made the call to re-joist the whole lot as many of the old ones were warped. This was not in the original budget but it was well worth the small investment to ensure that the floor was going to last!
The wall was now complete

Here is a preview of the inside out view which is shaping up to be amazing!
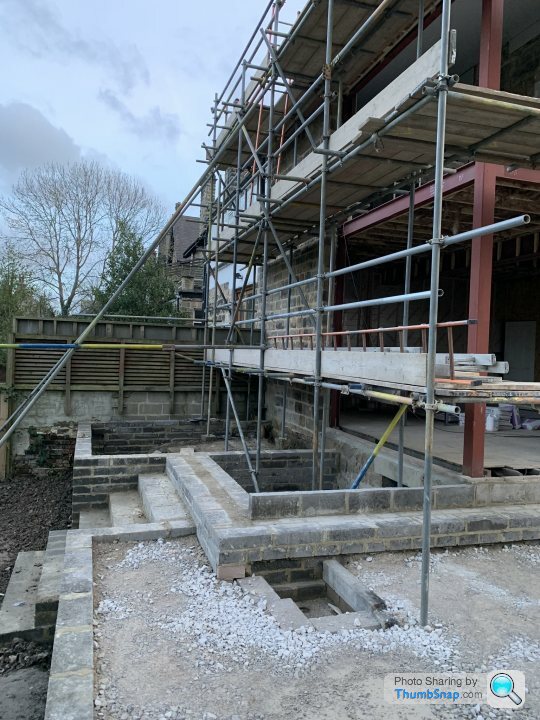
Whilst this was going on the patio space was taking shape. The below drawing was done after a couple of bottles of wine way over the scope that we had originally agreed on but the builders were happy to go with it.

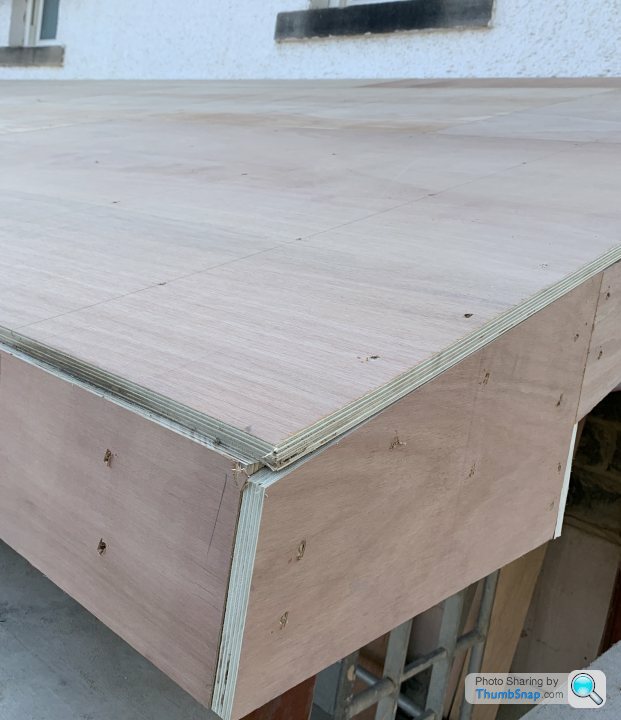
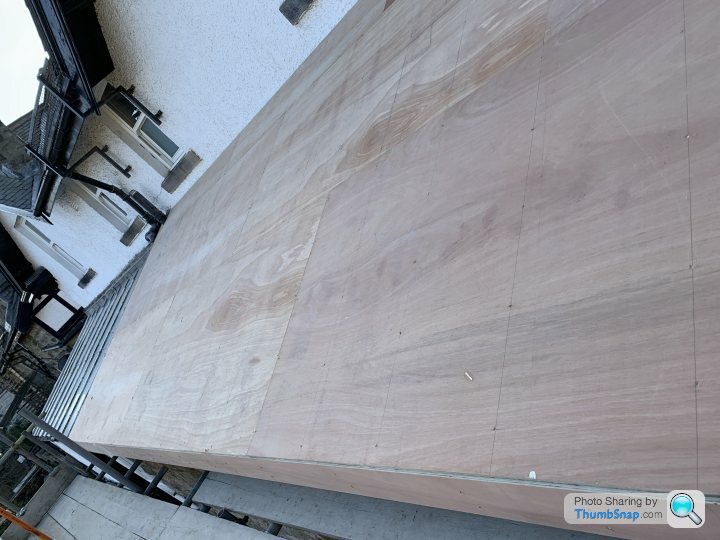
Apologies for the terrible pics but the new roof was also taking shape
Next post will look at roofs, the bedroom and maybe glass!!
What comes down must go up ...... or something like that!
Once all the stress of my house (and maybe next door) collapsing has subsided (no pun intended) it was time to start the rebuild.
The builders were doing a awesome job of the stonework
One of the old boys on the job is really good with stone and has made a fantastic job of using the old stone, some lime mortar and patience to rebuild the new wall so it looks like it was always there.
Inside the dimensions of the room were starting to take place
After inspection we made the call to re-joist the whole lot as many of the old ones were warped. This was not in the original budget but it was well worth the small investment to ensure that the floor was going to last!
The wall was now complete
Here is a preview of the inside out view which is shaping up to be amazing!
Whilst this was going on the patio space was taking shape. The below drawing was done after a couple of bottles of wine way over the scope that we had originally agreed on but the builders were happy to go with it.
Apologies for the terrible pics but the new roof was also taking shape
Next post will look at roofs, the bedroom and maybe glass!!
Gassing Station | Homes, Gardens and DIY | Top of Page | What's New | My Stuff