Our Citroen Relay Van Conversion
Discussion


As promised from the caravan or motor home thread, here’s a bit more information on my van build.
It’s definitely not a layout that would suit many but we couldn’t find what we needed from commercial motor homes so decided to build a camper instead. Our priorities were;
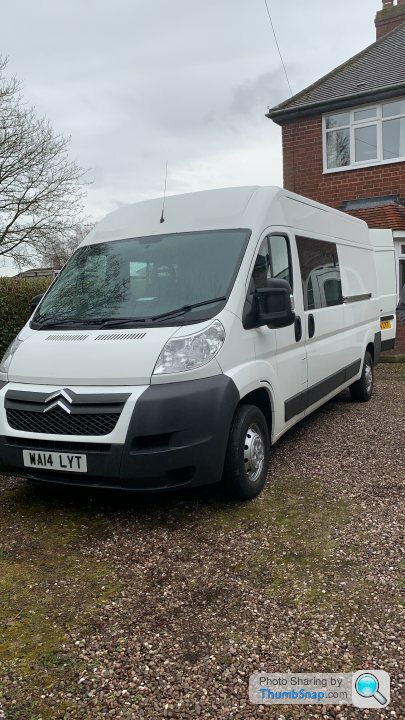
After a huge search we finally found a neat ex MOD Citroen Relay with 92,000 miles and loads of history. It had been converted into a combi van so had two windows and a load of seats. It’s wasn’t registered for the road after leaving the RAF but had been sorted by the dealer. We haggled £500 off and got it for £10,300. It was already a good price but it’d save some money in not having to fit windows and then had a bonus of selling the seats to a nice chap from Dorset for £350.

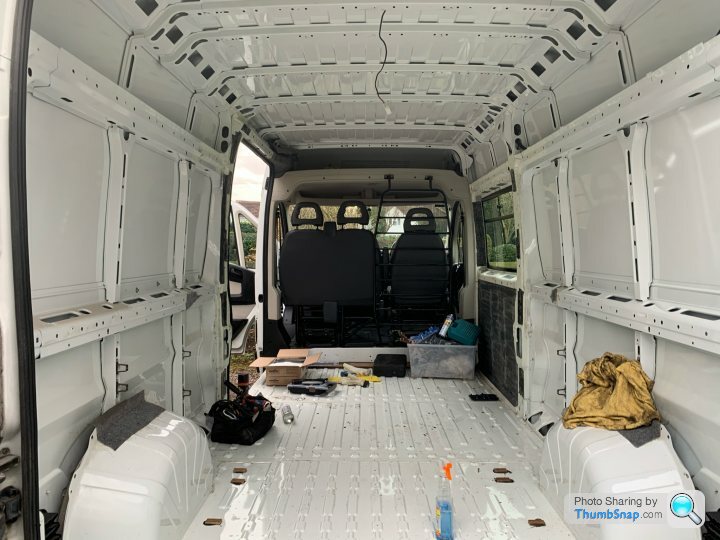
Removing the seats left a load of holes through the chassis which I filled with fibreglass. Then got to work removing the ply and cleaning off the squaddie sweat from behind.
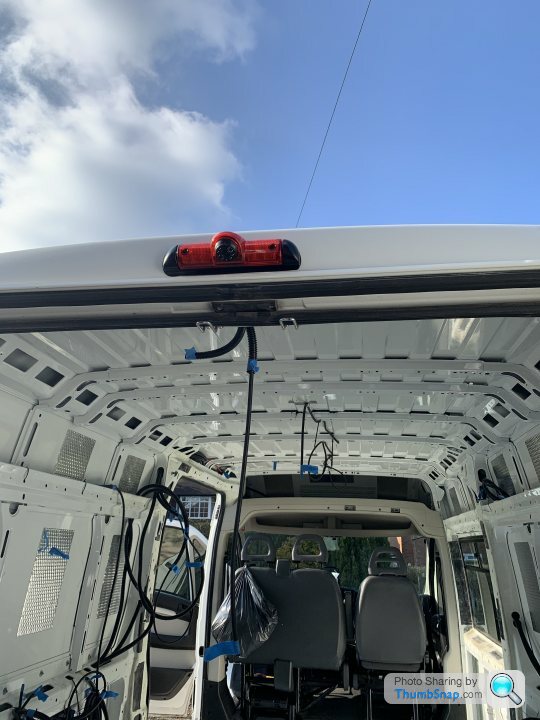
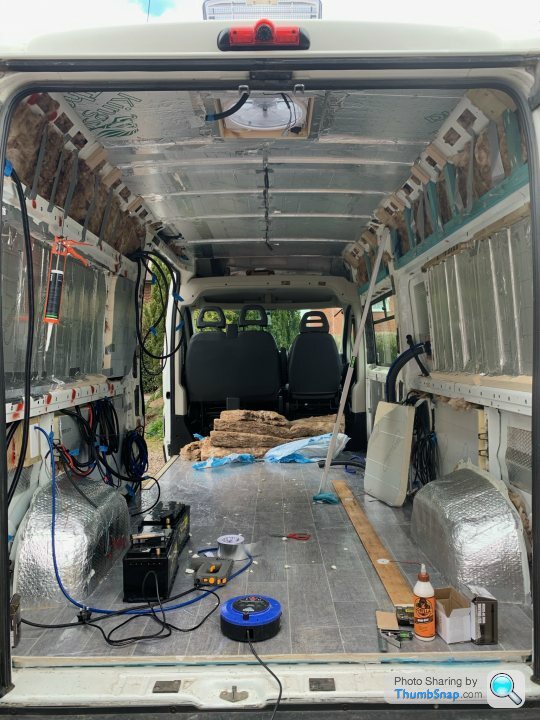
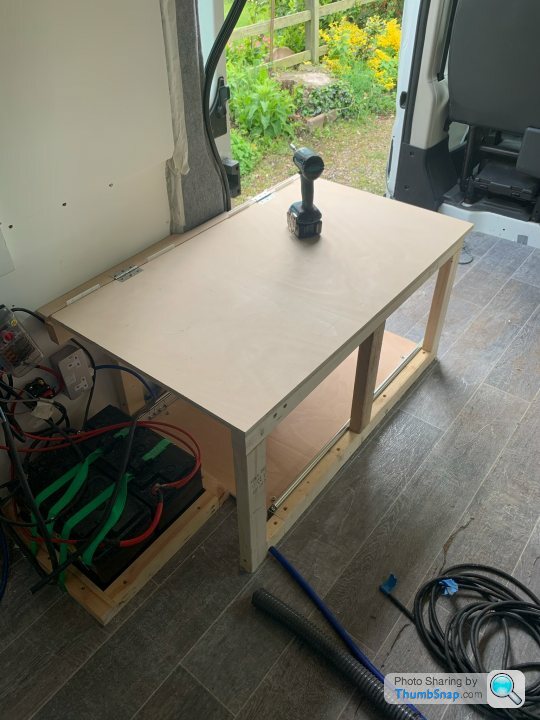
From here I fitted the reversing camera and awning light and started the first fix electrical. For the 230v I used arctic blue and for the 12v I used rubberised 2 core both in conduit. It’s a bit overkill but at least I know it’s all good quality cable and well protected. I think in total about 120 meters of cable went in!

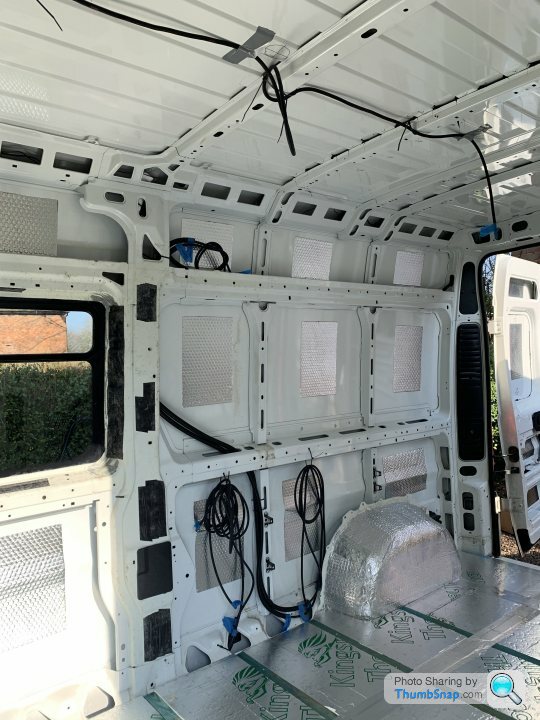
I then got some sound deadening on the panels and got a start on the floor.

I used 25mm pressure treated roofing batten with self tapping screws and sikaflex to hold them in place. I placed the battens at 400mm centres and put 25mm PIR kingspan down between them. I took this opportunity to get underneath and wax oil the floor and screw heads from underneath.
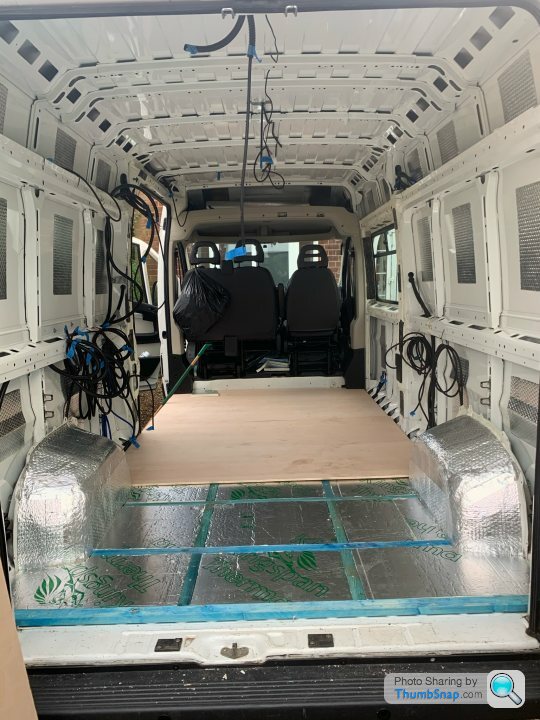
Going with 400mm centres meant I could use 12mm ply for the floor with no flex. Only 5mm less than 18mm but I wanted to maximise internal height and minimise weight from the off. I also biscuit joined the sheets. This was pointless as it didn’t flex anyway but I’m happy I did it.
It’s definitely not a layout that would suit many but we couldn’t find what we needed from commercial motor homes so decided to build a camper instead. Our priorities were;
- Ability to be off grid for extended periods
- Good levels of insulation for high altitude
- Plenty of power storage for dodgy weather/winter use
- Biggest fridge we can fit
- Prioritise kitchen space over lounging space
- Full size bed
- Huge garage for our kit
After a huge search we finally found a neat ex MOD Citroen Relay with 92,000 miles and loads of history. It had been converted into a combi van so had two windows and a load of seats. It’s wasn’t registered for the road after leaving the RAF but had been sorted by the dealer. We haggled £500 off and got it for £10,300. It was already a good price but it’d save some money in not having to fit windows and then had a bonus of selling the seats to a nice chap from Dorset for £350.
Removing the seats left a load of holes through the chassis which I filled with fibreglass. Then got to work removing the ply and cleaning off the squaddie sweat from behind.
From here I fitted the reversing camera and awning light and started the first fix electrical. For the 230v I used arctic blue and for the 12v I used rubberised 2 core both in conduit. It’s a bit overkill but at least I know it’s all good quality cable and well protected. I think in total about 120 meters of cable went in!
I then got some sound deadening on the panels and got a start on the floor.
I used 25mm pressure treated roofing batten with self tapping screws and sikaflex to hold them in place. I placed the battens at 400mm centres and put 25mm PIR kingspan down between them. I took this opportunity to get underneath and wax oil the floor and screw heads from underneath.
Going with 400mm centres meant I could use 12mm ply for the floor with no flex. Only 5mm less than 18mm but I wanted to maximise internal height and minimise weight from the off. I also biscuit joined the sheets. This was pointless as it didn’t flex anyway but I’m happy I did it.
Next up was making a start on the insulation. As I said in the OP, we’ll use the van at high altitude in extremes of weather so we needed to get as much insulation into the van as possible and get a solid vapour barrier in, even more important for our type of usage.
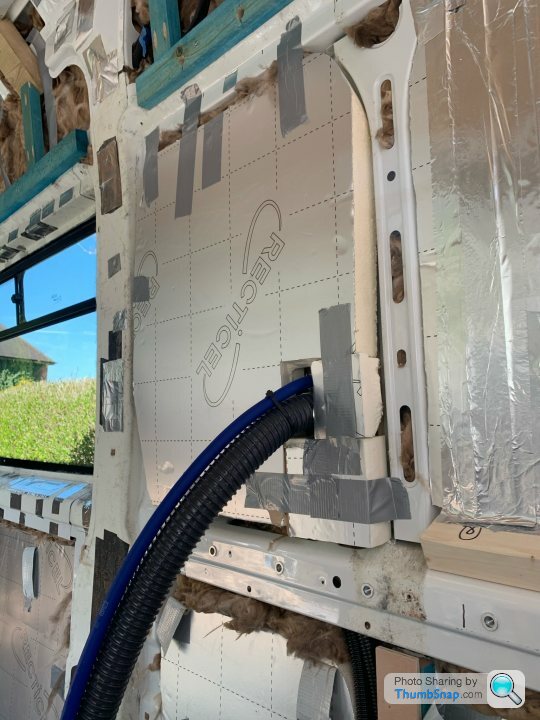
We tried to get 50mm PIR in as much as possible and where that wouldn’t fit some soft insulation or expanding foam into the nooks and crannies. 25mm went into the floor and roof.
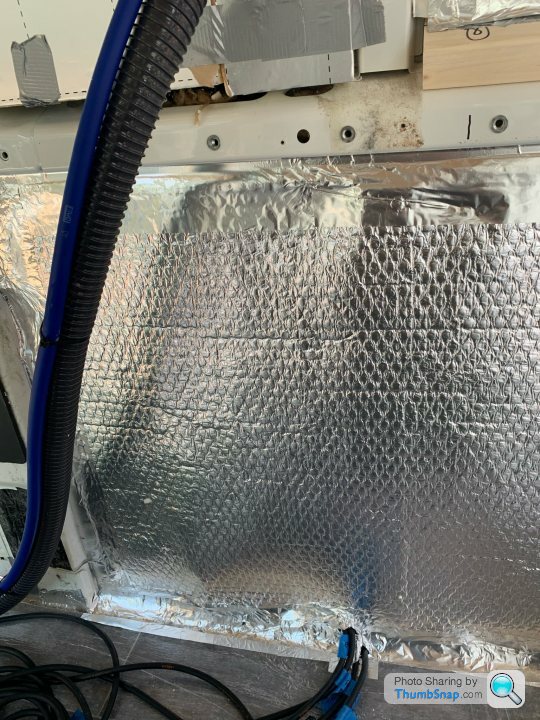
I went over the insulation with a vapour barrier and joined and overlaps with aluminium tape.
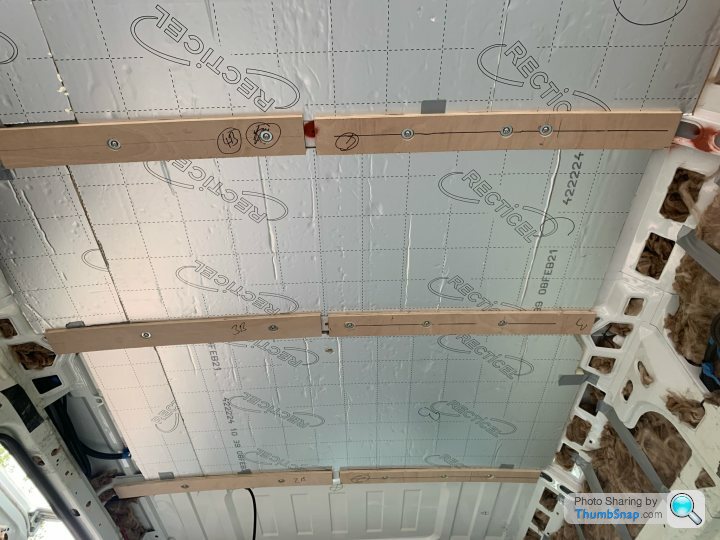
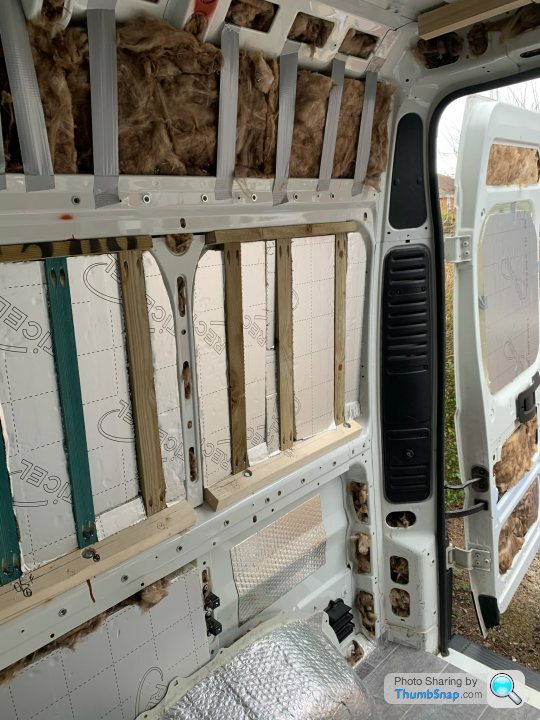
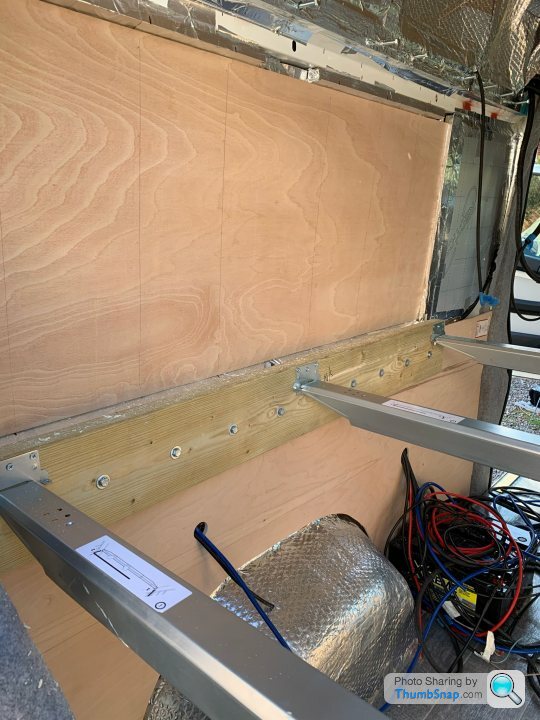
Trying to think ahead at how I’d fix cabinetry to the van I took this opportunity to put some rivnuts into the van structural members so I could eventually bolt the heavy cabinets into those.
I cut 100mm wide strips of 12mm ply and fixed these across the van ceiling where the structural members were. To fix them I used sikaflex and rivnuts. This helped to hold the 25mm PIR to the roof of the van, gave me something solid to fix the ceiling cladding too and gave me rivnuts in the right place for the overhead lockers. In reality this was stupidly excessive to fix these strips with rivnuts. It took ages and cost about £30 in rivnuts when some self tappers and sikaflex would have done the job really well.
During the insulation we also then needed to cut holes in the van for the water fill point, electric hook up and roof fan. We were torn around having the electric hook up as we couldn’t really see us using it much but we decided fitting it now would give options later even if we don’t use it. For the fan, we decided on a Maxx Air Fan. These are a really clever design with a kind of hood smirky on the cover so they can still be used to ventilate in the rain. From our experience, condensation builds up much worse in colder rainy conditions so you need the fan on in the rain but then rain gets inside the van, this fan solves that. I was nervous about making cuts into a perfectly good van. I’m not a skilled tradesmen and I have absolutely no experience of any building a van or even using most of the tools required.
That being said, we couldn’t move on with the build until the holes were done so I bought new saw blades and got on with it. I filed and treated the raw edge with red oxide primer to protect it. The fittings were then secured with sikaflex and self tappers. I also made a wooden insert to go on the inside of the van to accept screws and sandwich everything together.
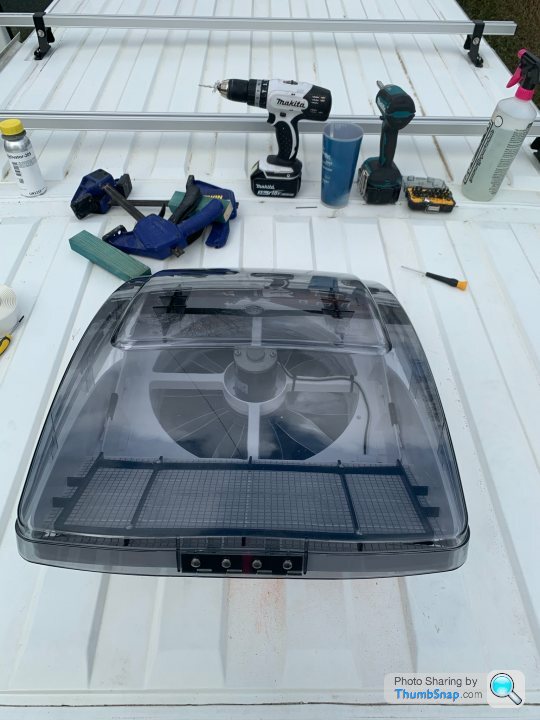
The roof needed building up because of the ribs on it so I used some thick mastic tape for caravans to fill the valleys.
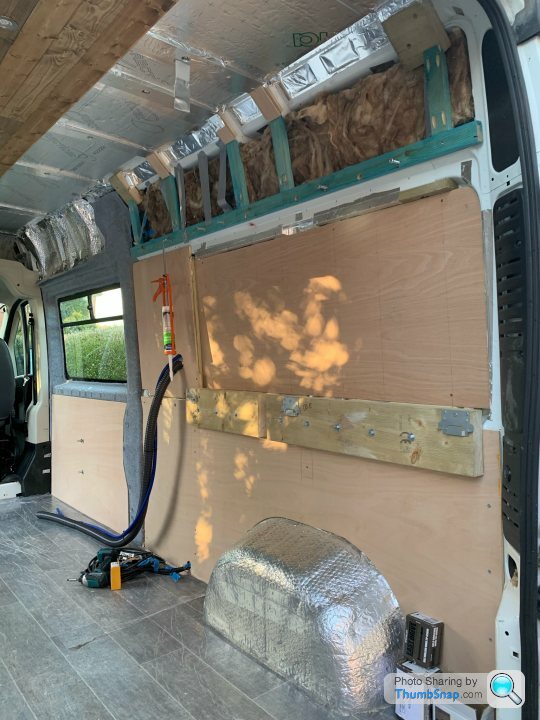
At this point I laid the 12mm floor and the lino. I made plenty of mistakes here as I’m just not very good at it. Most are hidden behind other stuff fortunately. I covered the lino with a self adhesive protection that decorators us. Huge mistake! It stuck fast and took weeks to remove later!

ApexCult said:
Looks great so far! I love the idea of doing this myself, but I think most folk gloss over where to go for No. 2s and how to shower (not standing outside the back of the van)
Thankyou, the skill runs out very quickly though! We have a loo onboard. Just a cassette toilet but it does the job. We decided a bathroom was a waste of space for us albeit a drying area would be useful. Our shower is (will be) outside though. Again, we’re comfortable having a wash at the sink or jumping in a mountain lake for a swim so the extra option of a good hot shower is nice, even if we’re outside. More pics coming up.
As I mentioned earlier we really wanted a full size bed and the Relay, being slightly wider means you can get about 6’ across the back. Being 6’3” this wasn’t any benefit to me but my Mrs. wanted a big kitchen space more than she wanted me to be comfortable in bed so it (she) was then decided we are having the bed transverse. As well as being big I also struggle to sleep on memory foam so I really needed to make the space across the back big enough for me and also big enough for a full size double pocket sprung mattress. No matter how much research I did, everyone who’d fitted a bed transversely had needed to cut down the mattress to fit it in.
This was a problem. The widest point across the van at the height we wanted the bed was 1936mm, the minimum insulation I was comfortable putting in is 25mm and 9mm ply lining was only just strong enough. This meant the space would be 1868 or just over 3cm to short for a double.
Instead I decided my only option was to insulate behind the widest point but to do this would leave us pressing on the outer skin of the van when sitting up in bed so it needed to be reinforced. At least with reinforcement I might get away with thinner ply.
I put in a batten top and bottom and then cut vertical battens with just the right angle to meet the top and bottom horizontal timber. These were then pocket hole screwed and glued in.
I put 25mm PIR in between and then taped over the wood to maintain the vapour barrier. This took ages!! It was necessary though and meant I could use 5mm ply leaving us a length of 1926mm for the bed. 6mm to spare!
This picture shows the bump out compared to the ply lining around it.
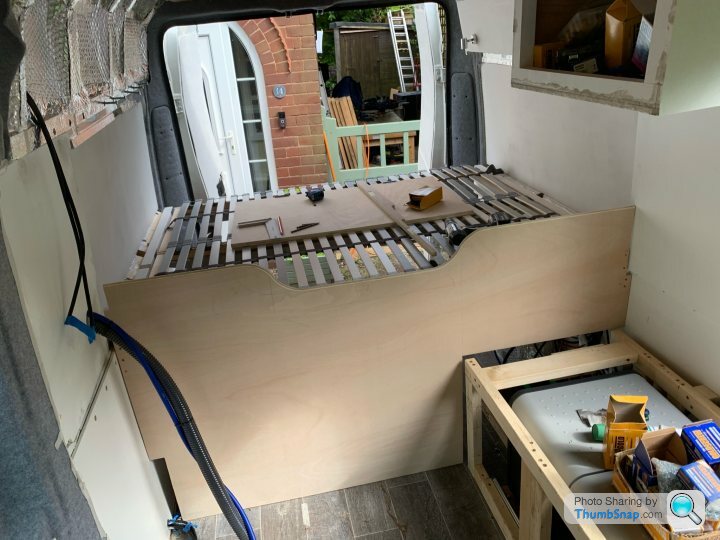
At this point I’ve also added a 9x2 timber at the foot and head of the bed read to accept the bed frame I intended to get fabricated. I fixed it to the van with rivnuts so it’s bolted to the chassis with M8 bolts.
I initially wanted some framework welded up for the bed base to give plenty of air circulation but removable so we can lug big stuff. At that point I recalled building an IKEA bed with a huge telescopic metal beam giving central support. I contacted IKEA and they sold me three of them for £10 each! These then fit into the bed plates IKEA also stock which they gave me for free and I have a removable bed frame with the added benefit of it accepting a sprung bed base with minimal modification.
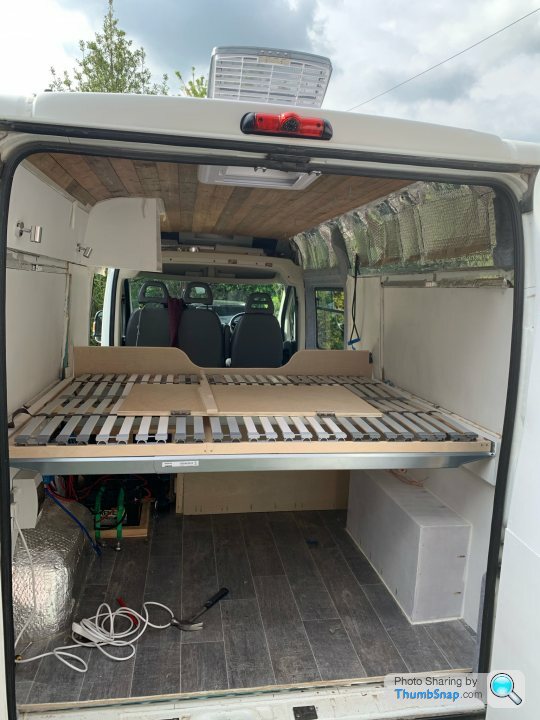
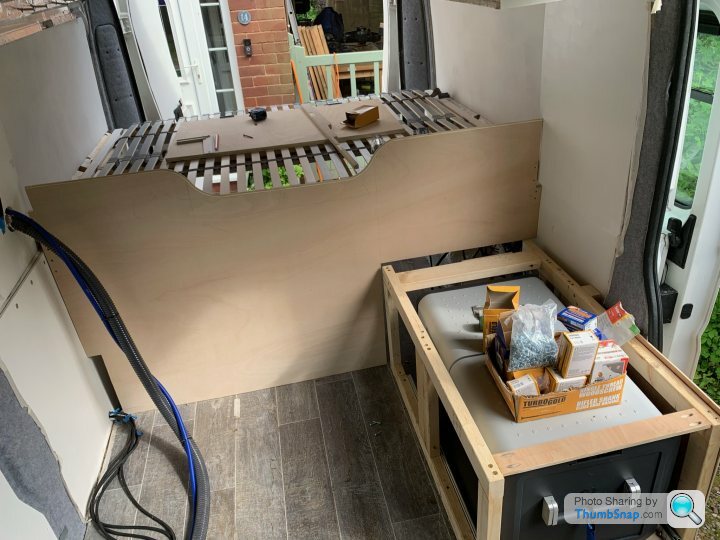
Then added the bulkhead out of 12mm ply with a nice ergonomic shape so we don’t scrape legs getting in and out of bed. Used a round over bit in the router to make it nice and smooth. This then took about 5 hours to get into the van and scribed into both sides!
I'm converting a Relay at the moment, very similar requirements except I need to carry a motorbike and I also want an indoor shower. I'm using 2020 aluminium profile for the cabinets.
I meant to add, looking forward to the progress, it's looking good already and it's always interesting to see how others tackle the same challenges.
I meant to add, looking forward to the progress, it's looking good already and it's always interesting to see how others tackle the same challenges.
Edited by Alex@POD on Monday 23 August 18:07
Sorry for the delay! I’ve been really as Dad ended up in hospital on Friday so updates haven’t been a priority.
Next thing on the list was trying to work out how to fit in the huge fridge my partner insisted on. She was adamant that it would be big enough to cope with not being near shops or civilisation for as long as possible, to us that’s the point of the van. It needed to have a fridge and freezer unit, not just a small freezer compartment. It would also be a bonus if it was accessible easily, she hates those fridges under cabinets that you have to kneel down to access. And a further bonus if it meant it could be accessed from outside the van when cooking or drinking outside. I was left with trying to work out how to run something like this from our leisure battery as gas wasn’t an option due to them being much less efficient when run on electric and even then geared for 230v which all being well we’ll very rarely be on. This was a bit of a pickle.
After a bit of planning we decided on incorporating a cool box type fridge with a flip up lid on top into a bench seat. For added accessibility I decided to fit it to drawer slides so it can be accessed when we’re using the bench by just sliding it out at which point it becomes accessible outside. We then ended up getting a Dometic CFX3 75DZ. It runs really efficiently on 12v and 230v and being a proper compressor fridge it cools to a set temperature regardless of being in 40° heat as opposed to a set amount below ambient. It has two fully independent zones so we can have a fridge and freezer, two fridges or two freezers in whichever arrangement we wanted.
It’s a bit of a beast though at 75 litres in volume and 33kg empty, appx 100kg full of food and drink. Here’s a border terrier called Neville to demonstrate scale.

I needed to then devise a way to get this monster fitted onto a drawer slide robust enough to cope with the weight when fully extended but precise enough to be able to not deflect so much it doesn’t foul on the floor when extended. I did plenty of research and found that ATMs are generally fitted in huge industrial ball bearing slides so they can be moved back and forth when loading with money. I contacted the company and found they could supply me with drawer slides rated to cope with 536kg with a profile small enough that I could mount them without raising the height of the cooler so much we can’t sit on the bench above it.
I then fabricated a low profile drawer out of some 50mmx50mm aluminium angle which was 3mm thick and some 12mm ply for the cooler to sit on. This was attached to the drawer slides by drilling the angle and bolting through the slides. The whole assembly was then bolted to a large timber frame which was in turn bolted through the van.
Then it was the simple case of building the bench seat around the cooler and adding in a USB power supply accessible from outside.
The electrics in the image are rigged up to test the 12v system before I got too far to rectify anything. It’s not stayed like that.
Next thing on the list was trying to work out how to fit in the huge fridge my partner insisted on. She was adamant that it would be big enough to cope with not being near shops or civilisation for as long as possible, to us that’s the point of the van. It needed to have a fridge and freezer unit, not just a small freezer compartment. It would also be a bonus if it was accessible easily, she hates those fridges under cabinets that you have to kneel down to access. And a further bonus if it meant it could be accessed from outside the van when cooking or drinking outside. I was left with trying to work out how to run something like this from our leisure battery as gas wasn’t an option due to them being much less efficient when run on electric and even then geared for 230v which all being well we’ll very rarely be on. This was a bit of a pickle.
After a bit of planning we decided on incorporating a cool box type fridge with a flip up lid on top into a bench seat. For added accessibility I decided to fit it to drawer slides so it can be accessed when we’re using the bench by just sliding it out at which point it becomes accessible outside. We then ended up getting a Dometic CFX3 75DZ. It runs really efficiently on 12v and 230v and being a proper compressor fridge it cools to a set temperature regardless of being in 40° heat as opposed to a set amount below ambient. It has two fully independent zones so we can have a fridge and freezer, two fridges or two freezers in whichever arrangement we wanted.
It’s a bit of a beast though at 75 litres in volume and 33kg empty, appx 100kg full of food and drink. Here’s a border terrier called Neville to demonstrate scale.
I needed to then devise a way to get this monster fitted onto a drawer slide robust enough to cope with the weight when fully extended but precise enough to be able to not deflect so much it doesn’t foul on the floor when extended. I did plenty of research and found that ATMs are generally fitted in huge industrial ball bearing slides so they can be moved back and forth when loading with money. I contacted the company and found they could supply me with drawer slides rated to cope with 536kg with a profile small enough that I could mount them without raising the height of the cooler so much we can’t sit on the bench above it.
I then fabricated a low profile drawer out of some 50mmx50mm aluminium angle which was 3mm thick and some 12mm ply for the cooler to sit on. This was attached to the drawer slides by drilling the angle and bolting through the slides. The whole assembly was then bolted to a large timber frame which was in turn bolted through the van.
Then it was the simple case of building the bench seat around the cooler and adding in a USB power supply accessible from outside.
The electrics in the image are rigged up to test the 12v system before I got too far to rectify anything. It’s not stayed like that.
Alex@POD said:
Nice setup with the fridge, I have similar size requirements but I'm going for a more conventional upright fridge.
Interesting comment about your drawer slides, I'll be looking for 150cm slides that can support 150-200kgs, I was hoping to find something suitable on ebay!
You'll definitely find something on ebay that'll do the job. I'd had a recent bad experience with poor quality on there so for mine I got nervous and went with a company I know https://www.eurofitdirect.co.uk/collections/slide-...Interesting comment about your drawer slides, I'll be looking for 150cm slides that can support 150-200kgs, I was hoping to find something suitable on ebay!
I'm interested in what your plan is for such heavy duty slides assuming it's not to fit an upright fridge?
sebdangerfield said:
I'm interested in what your plan is for such heavy duty slides assuming it's not to fit an upright fridge?
Just a big drawer that goes all the way under the bed, I'll fit some stackable boxes to it so I can store all sorts of gear (hiking, climbing, motorbike gear, etc). The idea is that I can open one rear door and pull the storage out so it's easily accessible, hopefully I can make it work as I imagine! I shouldn't need it to hold that much weight, but I'd rather overspec just in case...Alex@POD said:
Just a big drawer that goes all the way under the bed, I'll fit some stackable boxes to it so I can store all sorts of gear (hiking, climbing, motorbike gear, etc). The idea is that I can open one rear door and pull the storage out so it's easily accessible, hopefully I can make it work as I imagine! I shouldn't need it to hold that much weight, but I'd rather overspec just in case...
Ah yes, I'm thinking of similar for my bikes. Those Eurofit direct ones would be great for that, albeit you'd get them much cheaper on ebay.Gassing Station | Tents, Caravans & Motorhomes | Top of Page | What's New | My Stuff