DIY audio install in my R8
Discussion


Without wanting to spark the usual debate about whether the R8 is a supercar or not... here is the little project I've been working on recently to fully upgrade the diabolical audio system in the R8. It had B&O and it is a disgrace that Audi charged £1800 for this. I spent under £2k doing all this. I knwo the head ujnit won't be to everyone's taste but the hole if you remove the audi system is not a standard size and as the car is low volume noone has made a surround for it. So only option is to have one fabricated & most places charge about £500+ for this. Or do what I did below...
I've done it all now apart from neaten up the wires a bit and put the sub box in. With the exception of the head unit it is all OEM looking with nothing visible to show that the system is all replaced
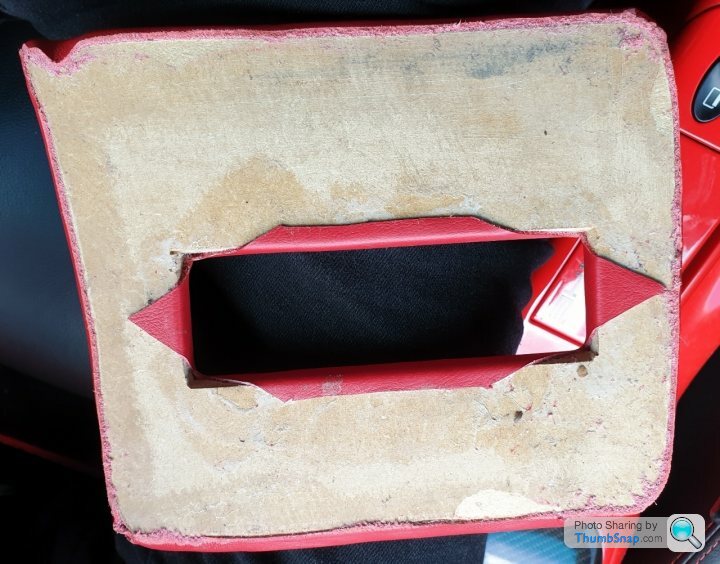
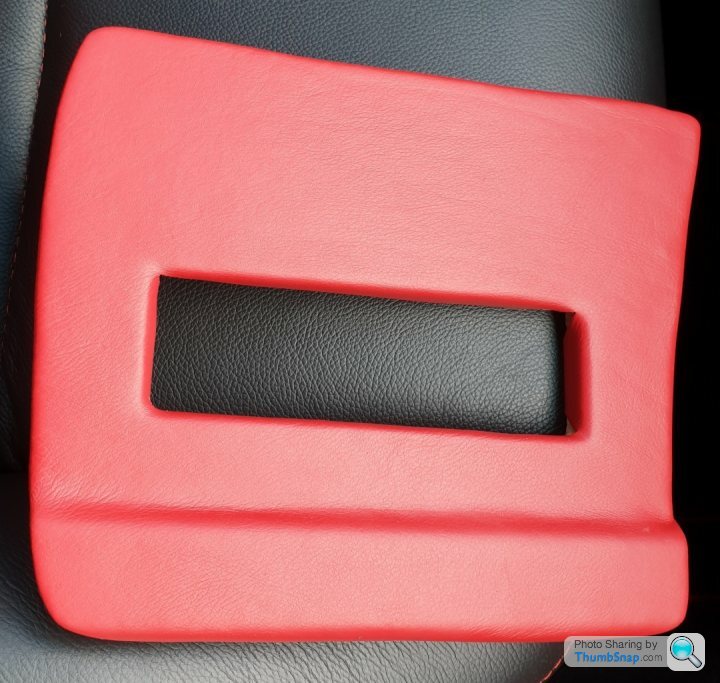
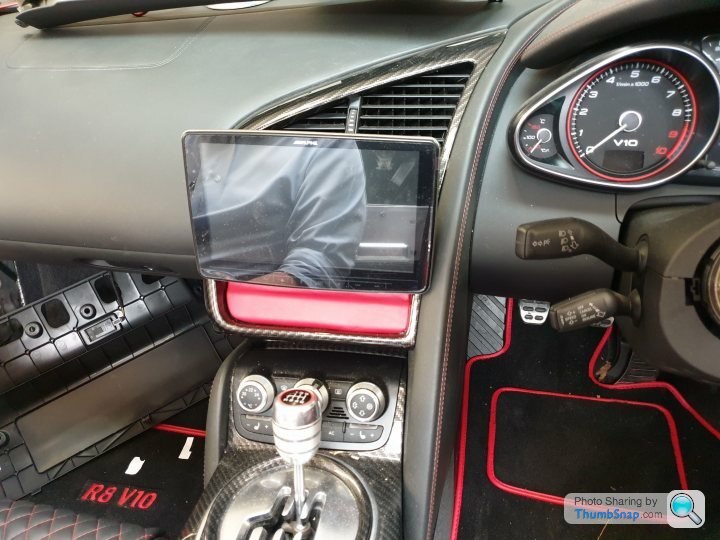
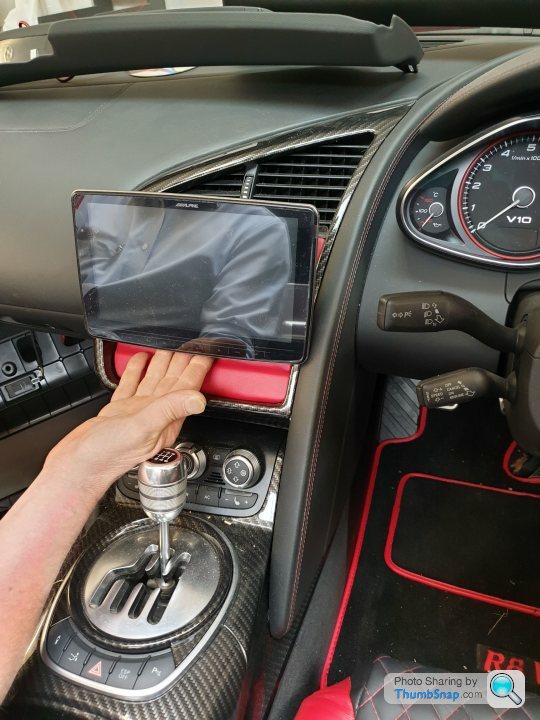
Head unit is the Alpine Halo9 with a very homemade bezel. it has a 9" screen and supports Deezer, Spotify, Google Maps via Apple Carplay - a fantastic system. The bezel really does look fine once the unit is in. I am going to get a better one CNC-ed and carbon skinned when I get round to it but it looks fine for now. The head unit itself is good - installing that alone was a big step up in sound quality


Took the door cards off - it is exceptionally easy and the doors are a better design than the Porsche 987 I did last year. Very easy to get the door cards off without breaking anything - all you need is a plastic trim tool set and a T25 & T30 torx driver. There are about 3-4 screws on each door & the rest is poppers that, unlike the Porsche, you can take off without breaking them, I bought x10 spares but didn't need them. On the Pork I took 20 off and needed 10 new ones.
Applied loads of Silent Coat 2mm deadening inside the doors - they do block out a load of road noise & hopefully prevent vibration in the door. I only needed x6 sheets per door. Porsche was more like 15 sheets per door, because the R8 has a load of sound deadening on it already. It is designed in a way that doesn't leave lots of space to put the sheets on the inner card. The Porsche has 3 surfaces to mount it to - the inner, outer and the metal membrane


Anyway, took the B&O speakers off and boy do they look like cheap crap when you get them off the car. Lightweight, paper cones. When you take them off they do not leave a standard mounting pattern of course. I simply do not know why car makers do this. It is a pain to replace them but anyone willing to take a door card off will be more than able to fabricate an MDF mount - see photos
I bought Rainbow Soundline Pro 3 way components for about £400 they are substantially better than the B&O speakers and sit well above basic ALpine type stuff. Obviously you can spend a lot more but this is the sweet spot for me - a big step up in quality without spending £1000's. I can't see the point in spending a lot more in a sports car, the fine detail would be lost in that environment
I know the Rainbow speakers aren't all the right way around but it doesn't make any difference to the sound and they are positioned so that there is minimal cabling in the car


Here's the crappy B&O amp. 3 screws to get out. Only issue is the huge multipin connector - it is not proprietory though & is shared with Bose in the Porsche. So I ordered a plug with every pin cabled from the US (am in the UK) which cost £60!! The thing is it lets you tap into all the car's speaker lines without cutting anything -so when I sell I can put it back to stock easily.
Replaced it with a Hertz Power 5 amp that does 4x 100W and 1x 550W for the sub - ample power. Got the Rainbow speakers running off 4 channels of the amp - 2 channels run the 6.5" woofers, 2 channels run the crossovers which in turn drive the 3" mid ranges and the tweeters in the A pillars which are also very easy to get off & on - didn't get a photo but the tweeters pop out easily and loads of space to put new ones in
I used the car's B&O sub as I'm waiting for my custom box to come for my subs. It is OK but lacks clarity
I did take the time to wrap all the cable runs in tesa tape to prevent any vibration, rattling etc. Ran the power cables up one side of the car under the sill plate. Ran the speaker lines & RCAs up the other side to prevent interference. Forgot to take any snaps but you can see it wrapped up on the bench
Tested every speaker line with a multimeter to make sure all the speakers had correct polarity


I've ordered a sub box - was going to make it myself but can't be bothered! It's £65 carpeted to match the car and is only 14cm deep, will sit on the rear shelf with the subs visible, I bought 2x 8" Hertx subs to run in parallel off the amp. Will update photos when that comes next week
I need to tidy up the wires on the back bench - shorten them where possible and wrap up - but my tesa tape ran out - got another one coming to finish the job
It has taken about 4 days -
Day 1 - remove & replace head unit, set up canbus adapter for steering buttons, fabricate bezel
Day 2 - run power from battery to passenger compartment - involves removing wiper arms and all the front trunk trim, passing it through the front firewall, then remove B&O amp, grind off nut that is in the way, make new looms & run all up the sides of the car
Day 3 - strip door cards & old speakers off. soundproof doors, fabricate new speaker mounts, fit speakers
Day 4 - make up amp connection loom, install, test, put amp in, connect & test all, replace door cards, set up system
Day 5 (to be done) - will be a morning's work - neaten up cables, fine tune system, put sub box in
I have done a basic setup of the head units crossovers, amp's crossovers and gains, time alignment, fader etc. Need to drive around in it for a bit and understand what I need to tweak... but the sound is simply ridiculous compared to the B&O - volume, control and quality are all in a different league
All in it has cost me £1850. I have really enjoyed it & done the whole thing without breaking anything and it all worked first time. You would need to pay an installer a fair bit to put all this in. It is not a difficult project.
I've done it all now apart from neaten up the wires a bit and put the sub box in. With the exception of the head unit it is all OEM looking with nothing visible to show that the system is all replaced
Head unit is the Alpine Halo9 with a very homemade bezel. it has a 9" screen and supports Deezer, Spotify, Google Maps via Apple Carplay - a fantastic system. The bezel really does look fine once the unit is in. I am going to get a better one CNC-ed and carbon skinned when I get round to it but it looks fine for now. The head unit itself is good - installing that alone was a big step up in sound quality
Took the door cards off - it is exceptionally easy and the doors are a better design than the Porsche 987 I did last year. Very easy to get the door cards off without breaking anything - all you need is a plastic trim tool set and a T25 & T30 torx driver. There are about 3-4 screws on each door & the rest is poppers that, unlike the Porsche, you can take off without breaking them, I bought x10 spares but didn't need them. On the Pork I took 20 off and needed 10 new ones.
Applied loads of Silent Coat 2mm deadening inside the doors - they do block out a load of road noise & hopefully prevent vibration in the door. I only needed x6 sheets per door. Porsche was more like 15 sheets per door, because the R8 has a load of sound deadening on it already. It is designed in a way that doesn't leave lots of space to put the sheets on the inner card. The Porsche has 3 surfaces to mount it to - the inner, outer and the metal membrane
Anyway, took the B&O speakers off and boy do they look like cheap crap when you get them off the car. Lightweight, paper cones. When you take them off they do not leave a standard mounting pattern of course. I simply do not know why car makers do this. It is a pain to replace them but anyone willing to take a door card off will be more than able to fabricate an MDF mount - see photos
I bought Rainbow Soundline Pro 3 way components for about £400 they are substantially better than the B&O speakers and sit well above basic ALpine type stuff. Obviously you can spend a lot more but this is the sweet spot for me - a big step up in quality without spending £1000's. I can't see the point in spending a lot more in a sports car, the fine detail would be lost in that environment
I know the Rainbow speakers aren't all the right way around but it doesn't make any difference to the sound and they are positioned so that there is minimal cabling in the car
Here's the crappy B&O amp. 3 screws to get out. Only issue is the huge multipin connector - it is not proprietory though & is shared with Bose in the Porsche. So I ordered a plug with every pin cabled from the US (am in the UK) which cost £60!! The thing is it lets you tap into all the car's speaker lines without cutting anything -so when I sell I can put it back to stock easily.
Replaced it with a Hertz Power 5 amp that does 4x 100W and 1x 550W for the sub - ample power. Got the Rainbow speakers running off 4 channels of the amp - 2 channels run the 6.5" woofers, 2 channels run the crossovers which in turn drive the 3" mid ranges and the tweeters in the A pillars which are also very easy to get off & on - didn't get a photo but the tweeters pop out easily and loads of space to put new ones in
I used the car's B&O sub as I'm waiting for my custom box to come for my subs. It is OK but lacks clarity
I did take the time to wrap all the cable runs in tesa tape to prevent any vibration, rattling etc. Ran the power cables up one side of the car under the sill plate. Ran the speaker lines & RCAs up the other side to prevent interference. Forgot to take any snaps but you can see it wrapped up on the bench
Tested every speaker line with a multimeter to make sure all the speakers had correct polarity
I've ordered a sub box - was going to make it myself but can't be bothered! It's £65 carpeted to match the car and is only 14cm deep, will sit on the rear shelf with the subs visible, I bought 2x 8" Hertx subs to run in parallel off the amp. Will update photos when that comes next week
I need to tidy up the wires on the back bench - shorten them where possible and wrap up - but my tesa tape ran out - got another one coming to finish the job
It has taken about 4 days -
Day 1 - remove & replace head unit, set up canbus adapter for steering buttons, fabricate bezel
Day 2 - run power from battery to passenger compartment - involves removing wiper arms and all the front trunk trim, passing it through the front firewall, then remove B&O amp, grind off nut that is in the way, make new looms & run all up the sides of the car
Day 3 - strip door cards & old speakers off. soundproof doors, fabricate new speaker mounts, fit speakers
Day 4 - make up amp connection loom, install, test, put amp in, connect & test all, replace door cards, set up system
Day 5 (to be done) - will be a morning's work - neaten up cables, fine tune system, put sub box in
I have done a basic setup of the head units crossovers, amp's crossovers and gains, time alignment, fader etc. Need to drive around in it for a bit and understand what I need to tweak... but the sound is simply ridiculous compared to the B&O - volume, control and quality are all in a different league
All in it has cost me £1850. I have really enjoyed it & done the whole thing without breaking anything and it all worked first time. You would need to pay an installer a fair bit to put all this in. It is not a difficult project.
130iTrack said:
This is great, good work! Where did you get the CF made?
The radio never worked in my V10 much to my annoyance, the infotainment was a joke in that car.
I thought the speaker quality was quite good though. Maybe it's because all my other cars are such beaters...
Thanks & thanks for the positive comments The radio never worked in my V10 much to my annoyance, the infotainment was a joke in that car.
I thought the speaker quality was quite good though. Maybe it's because all my other cars are such beaters...

I bought the wrap for £3 off eBay it is sticky back plastic, whilst it looks naff up close, due to its positioning inside the apparture you really can't see it hardly at all. I will however replace with something better if it bothers me!


Just finishing this off... done the last few bits of tidying up. The sub box actually has a good colour match in person but looks a little light in the pictures as the carpet is different. It doesn't bother me. I made one like that as the rear speakers are on either side. A more 'integrated' solution would have been to make one that fits the whole bench with integrated rear speakers but that's a whole new ball game of fibreglass fabrication
It really does sound excellent after a lot of setting up & tweaking. Really nice clear sound, goes easily loud enough for my needs, great integration with Deezer via CarPlay
Whole project cost me £1900 start to end. A similar system installed by a shop would be more like £3200-£3400. The R8 interior is beautifully put together and very easy to strip out / work on / put back together
The Surveyor said:
Nice job that. I really like the screen installation and the neat amp under the rear shelf. It does seam a shame to put that massive sub on the shelf though, could that have been more integrated so you still have a usable shelf?
Thanks I couldn't work out where to put it though - there is the footwell but then that's fibreglass fabrication which I have never done. It's not my only car so it doesn't really matter TBH and this way at least the sound isn't compromised. FOr this vehicle the sound is more important than the practicality132 said:
Well done you! Particularly like the Rainbow kit; I used to be their UK distributor many years ago.
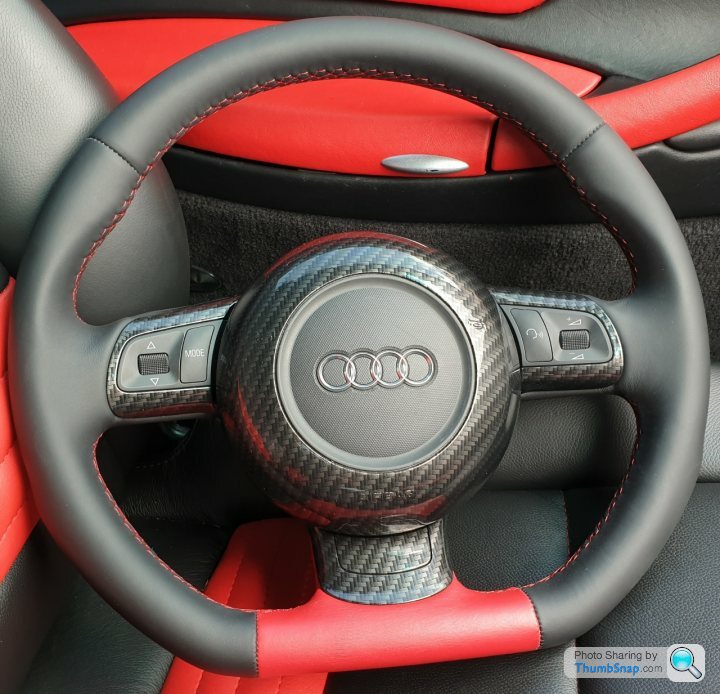
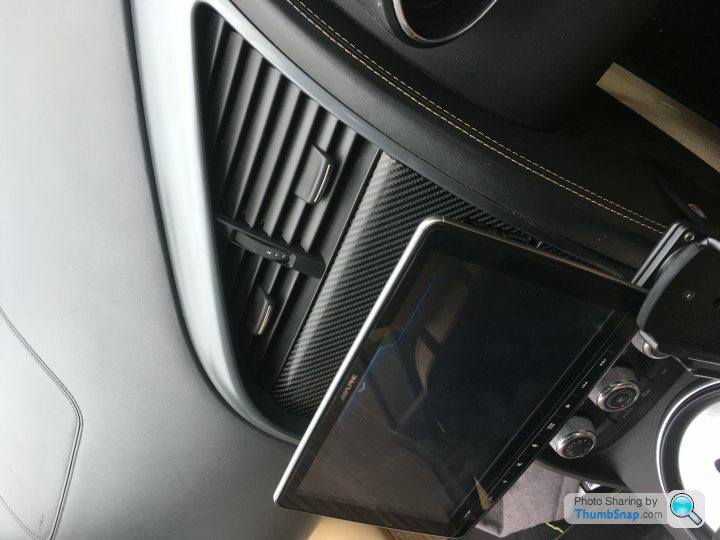
Thanks It sounds awesomeAfter reading this and others on R8talk I've gone down the same route. I cut some MDF to fit the aperture and covered it with some red leather I had left over. I also just had my steering wheel recovered plus the silver bits carbon dipped. I am having the air vents and my rear cubby dipped as well, it really does look good and so much cheaper than real carbon. Hopefully I should have it all done by Monday. Many thanks for posting all the pics and info for fitting it.


https://www.thingiverse.com/thing:3551747/zip
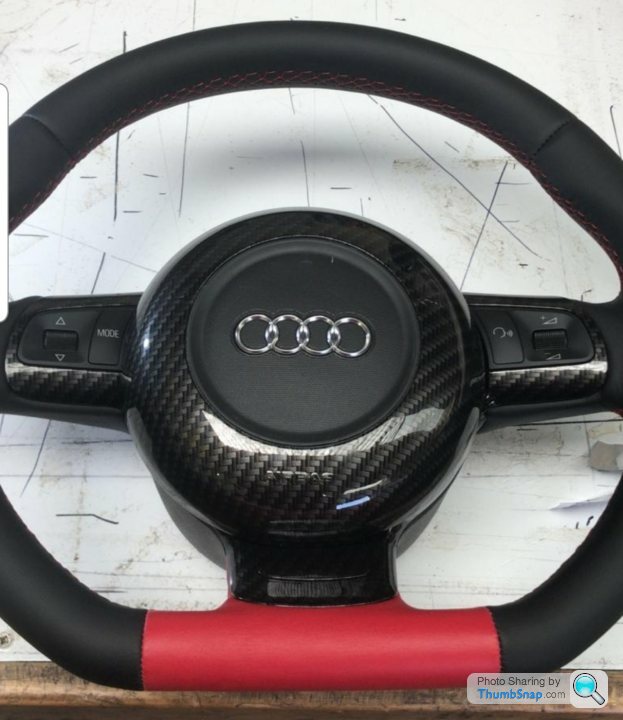
Download this zip file & the archive contains LHD & RHD versions of single & double DIN bezels, I paid £50 to have it 3D printed.
For best results get it hydrodipped - even if you're just going with gloss black or whatever - they hydrodippers should sand it for you for an extra charge. The 3D printing leaves little ridges. I wrapped mine. Not perfect but good enough for me
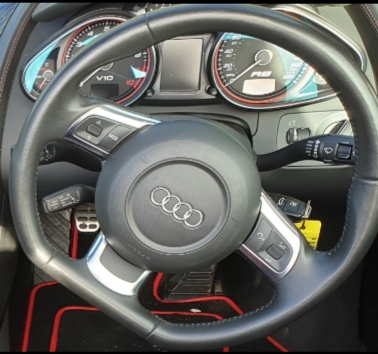
I got RTA to upgrade my head unit. They have a copy of the Audi Japan OE fascia and have fabricated all of the replacement looms so not a single wire is cut.
It's my car (with the diamond seats) in the photos on their website. https://rtacaraudio.co.uk/products/audi-r8-stereo-... The quality of the job was first class.
The sound is better than the standard head unit puts out and the louder it goes, the better it sounds.
I could replace the speakers and amps but feel just the additional functionality of the head unit (Carplay, Spotify, Waze etc) is all I actually need. Being a Spyder, I am never going to get the conditions for listening to perfect audio and I have a '5.2 litre sound generator' just behind my seat.
Gassing Station | Supercar General | Top of Page | What's New | My Stuff