Mev exocet build
Discussion


robcollingridge said:
MG CHRIS said:
It may sound a lot of work but due to my choice of colour for the frame gold i was adviced to build it first drilling out the holes in the frame etc then strip apart then paint it to prevent scratching to the frame.
Mev only does black powder coating so any scracthes in the frame that occurs when building it can be touched in and wouldn't notice it after with gold it's harder to match the colour if you need to touch it up if it gets scratched when drilling holes etc.
How are you going to remove things that are rivetted to the chassis such as panels and brake pipes?Mev only does black powder coating so any scracthes in the frame that occurs when building it can be touched in and wouldn't notice it after with gold it's harder to match the colour if you need to touch it up if it gets scratched when drilling holes etc.
Rob
Day 7
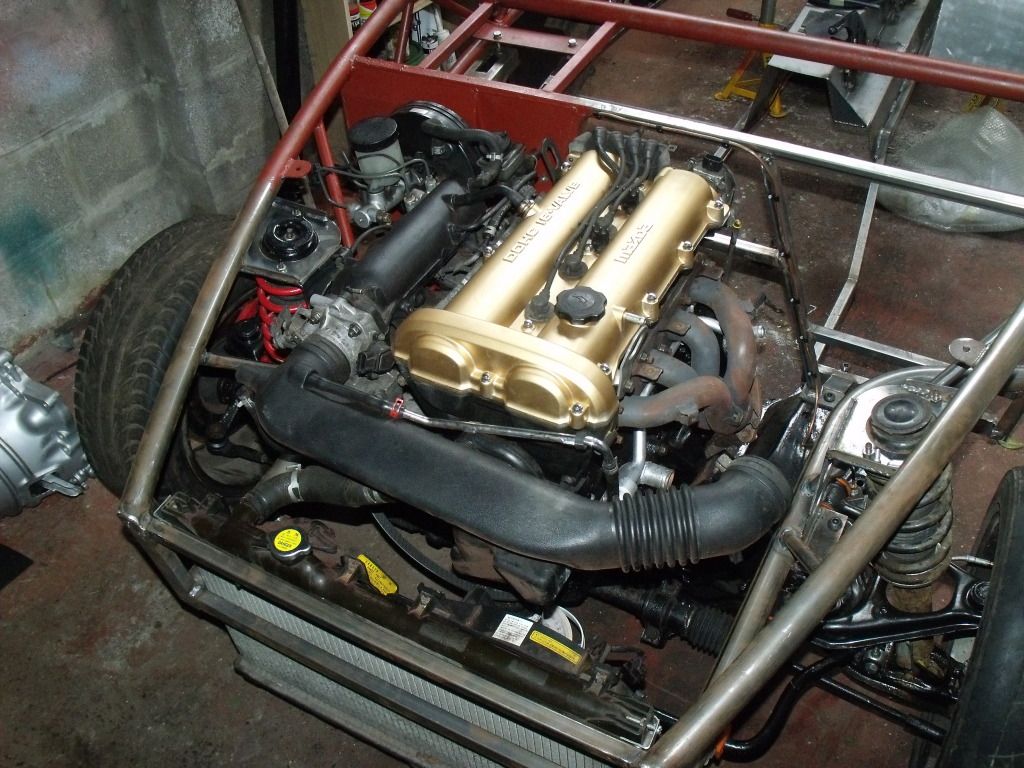
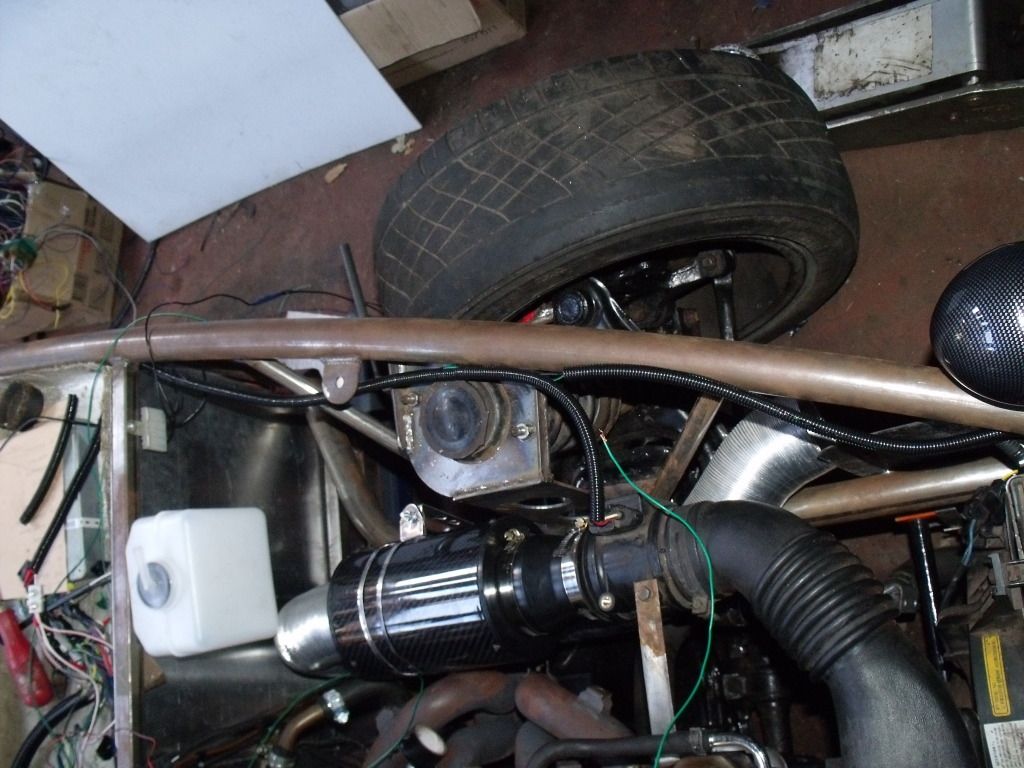
Was going to put the engine in but my mate who was going to bring a engine hoist down couldn't come over to play :'( so decided to fit the radiator.
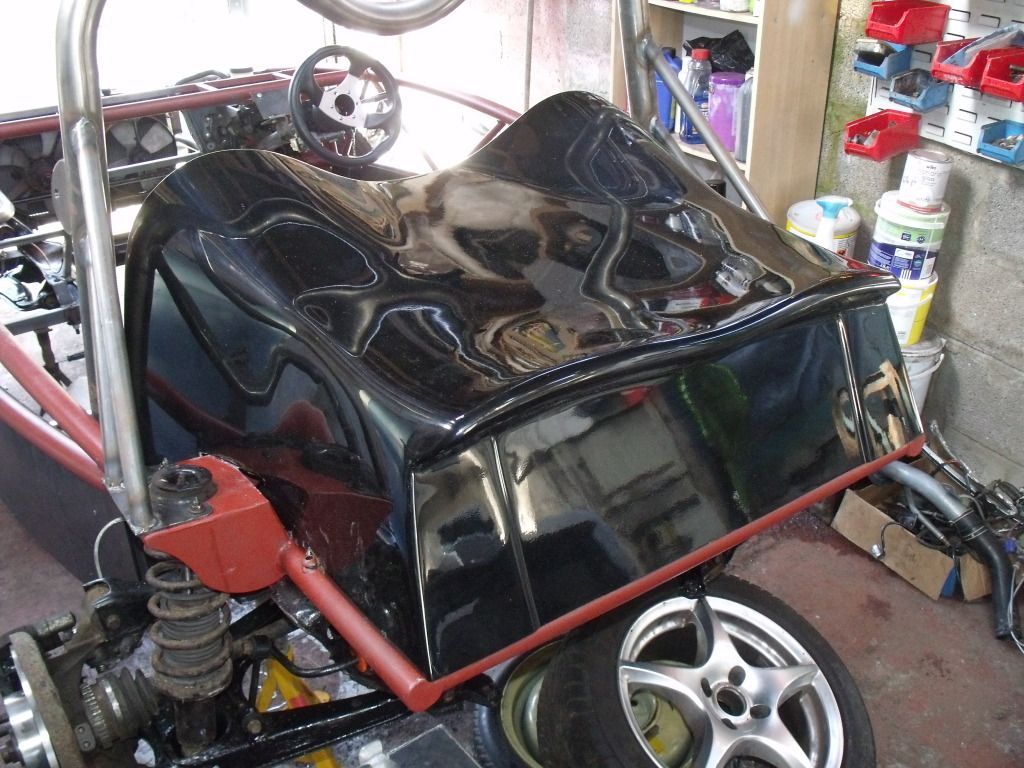
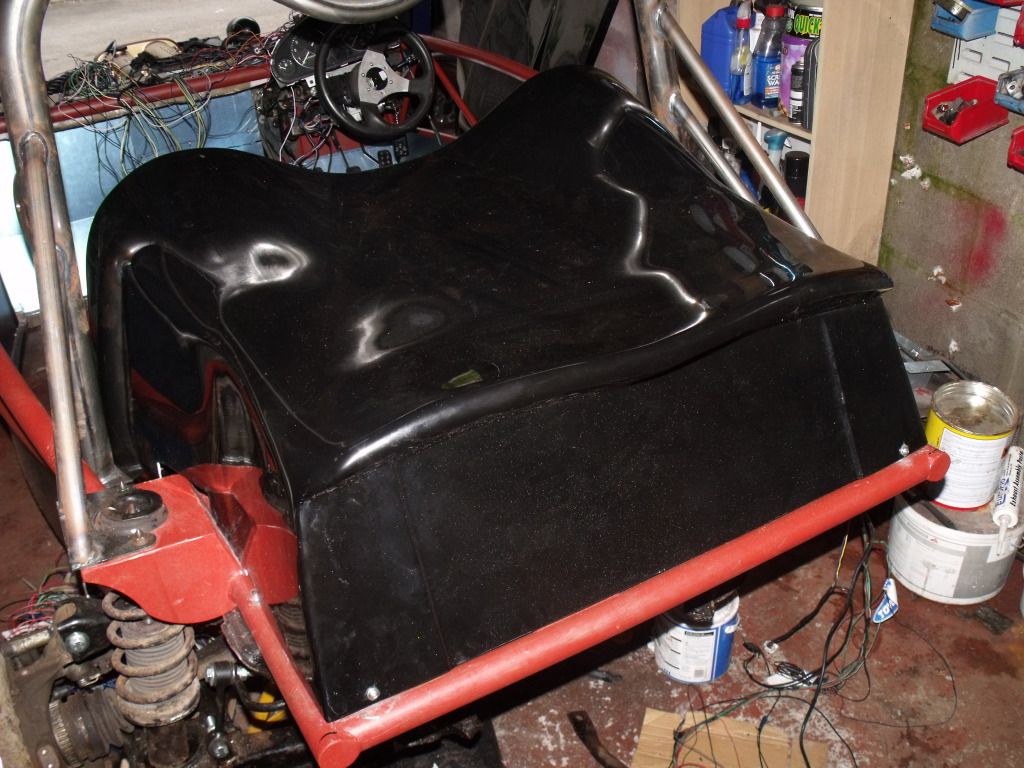
Trim the rear fuel tank cover allthough mine doesn't have a fuel tank under it will be making a boot and putting the ally fuel tank behind the passenger seat and started on making brackets for the instrument cluster.
Fuel tank cover trimmed will be getting some quick release bonnet catches to use to make getting under it easier
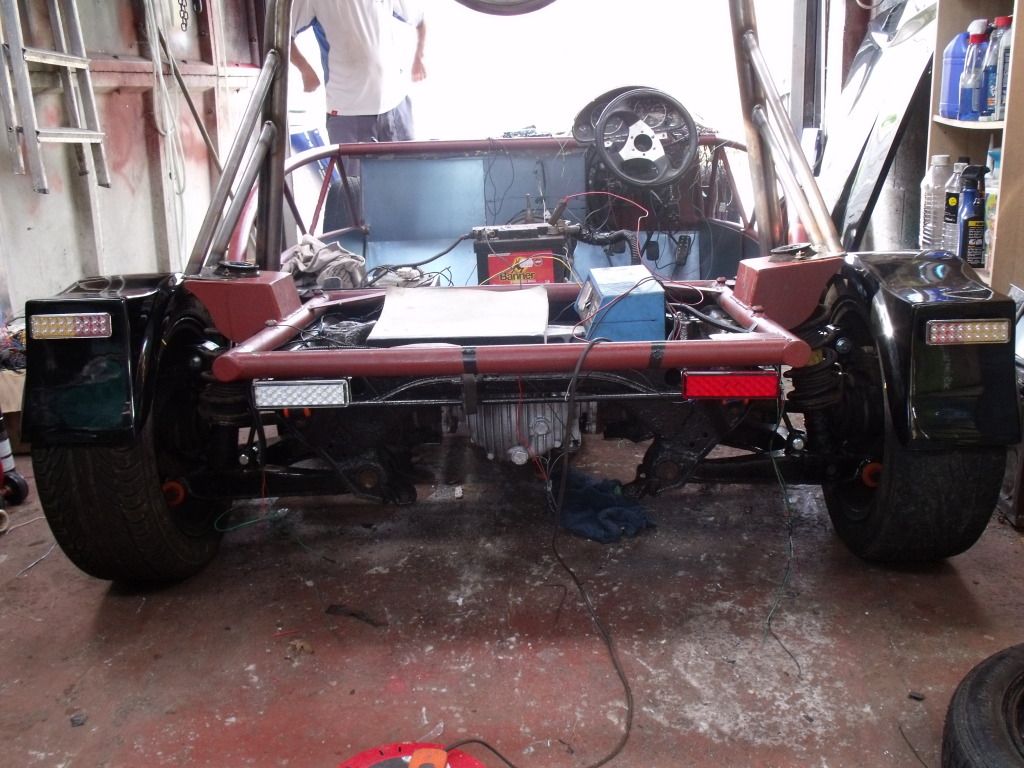
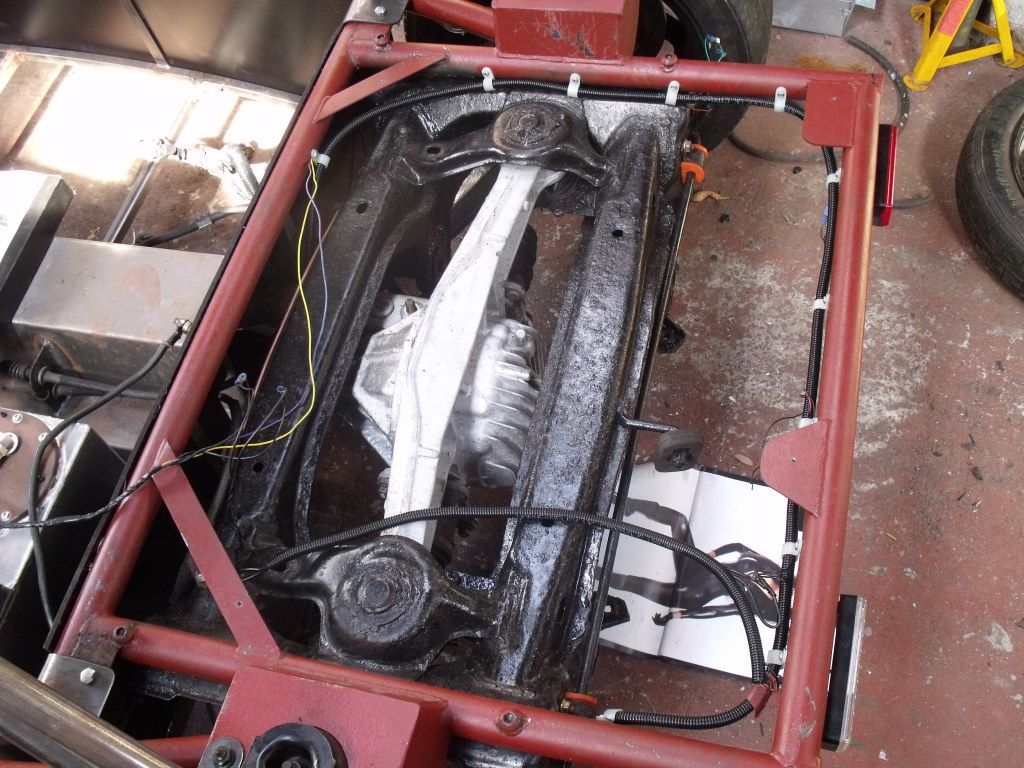
Rad mounted
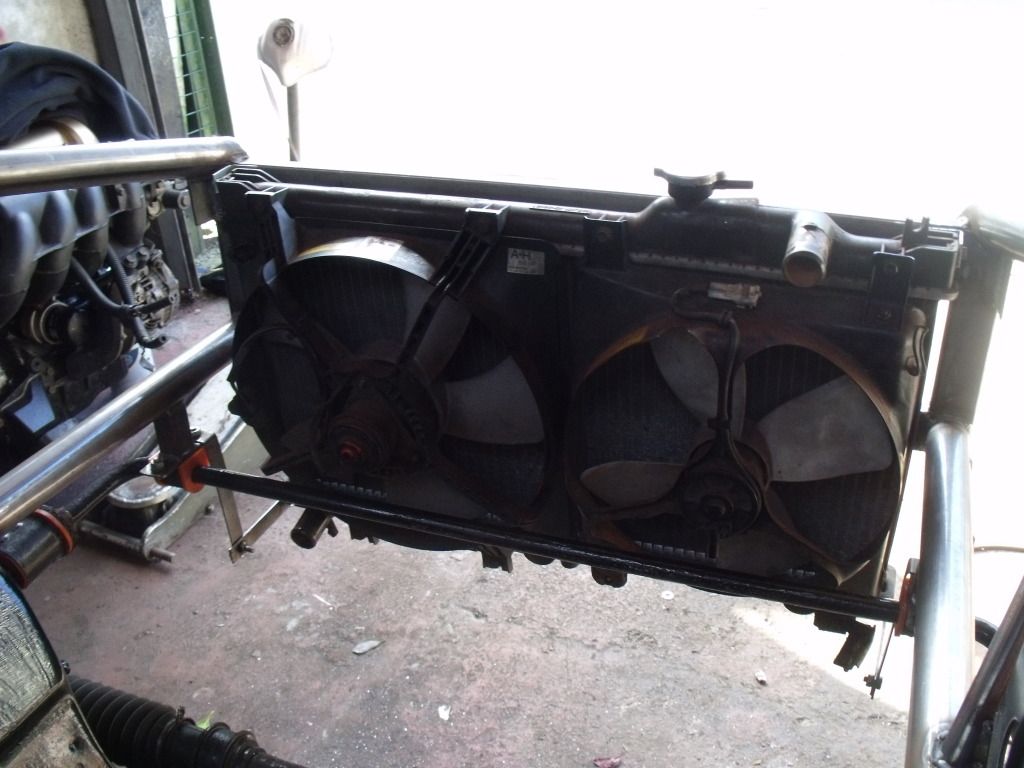
Rad brackets bottom
top bracket
Also got to use my new rivnut tool i ordered on wednesday to attach the brackets did a great job to. Did mount the front nose cone but will have to modify it to fit past the bottom rad mount not to much needed though.
Edited by MG CHRIS on Saturday 9th June 19:53
Steve_D said:
MG CHRIS said:
......putting the ally fuel tank behind the passenger seat
If you do that don't forget the filler has to be outside the passenger compartment and you will have to build a separate, sealed, compartment around the tank. IVA rules I'm afraid.Steve
Thanks for the heads up anyway.
Day 8
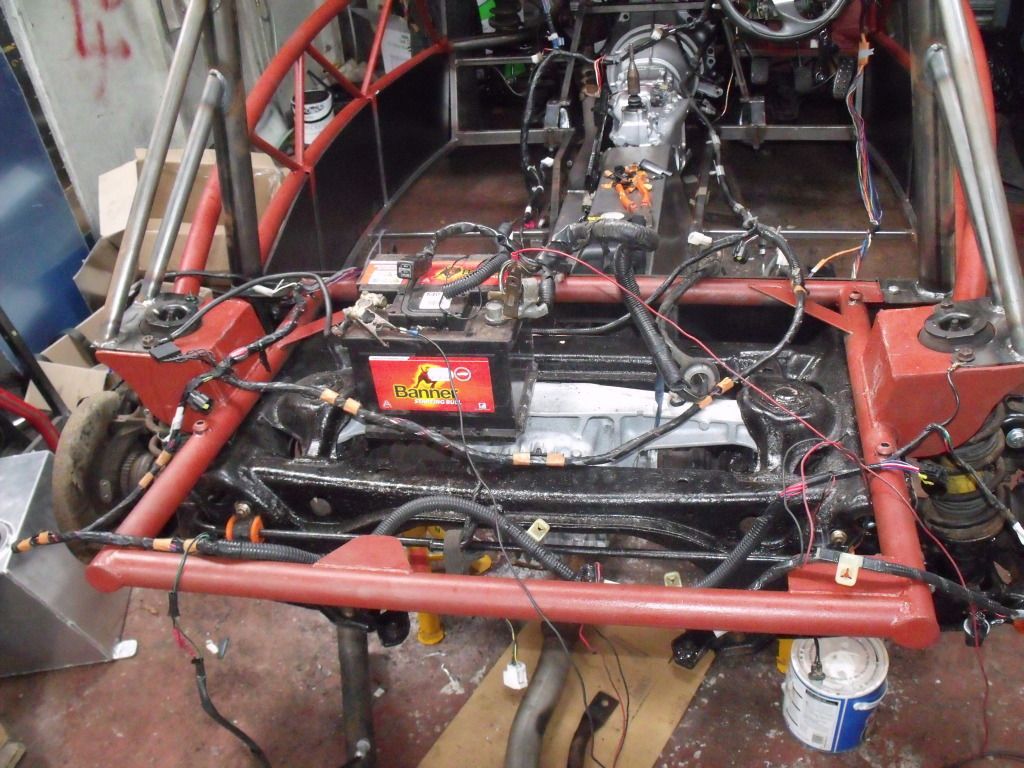
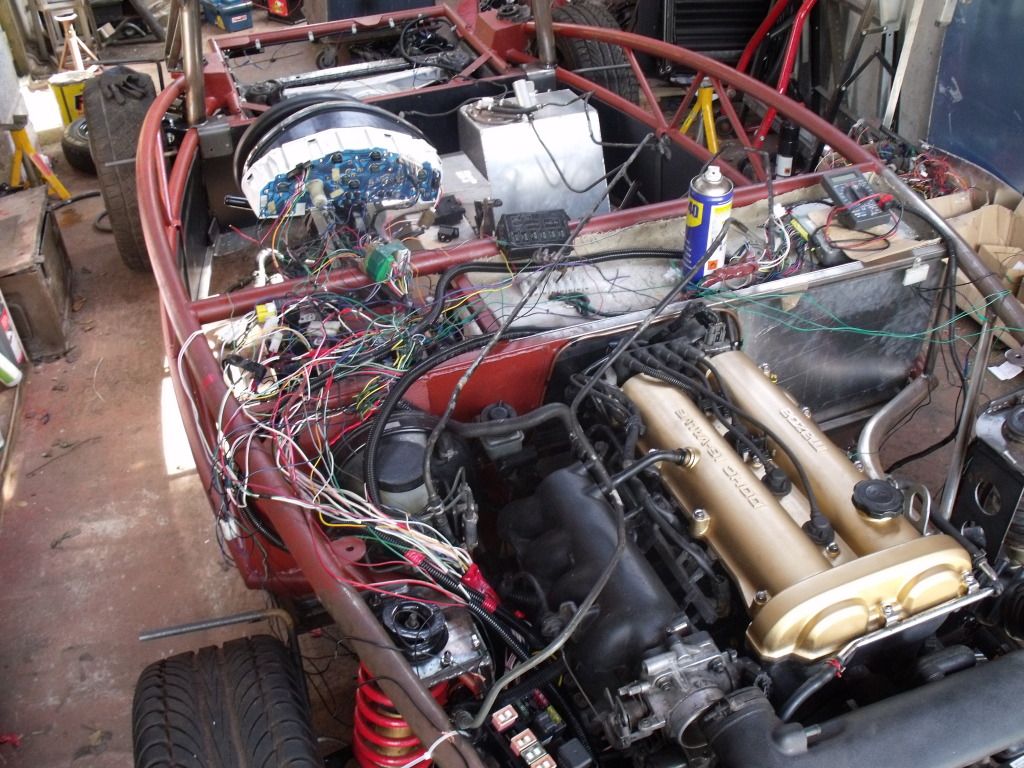
Managed to borrow the engine hoist from work to get the engine in so 2 of my mates help to get it in after a early finish from colege.
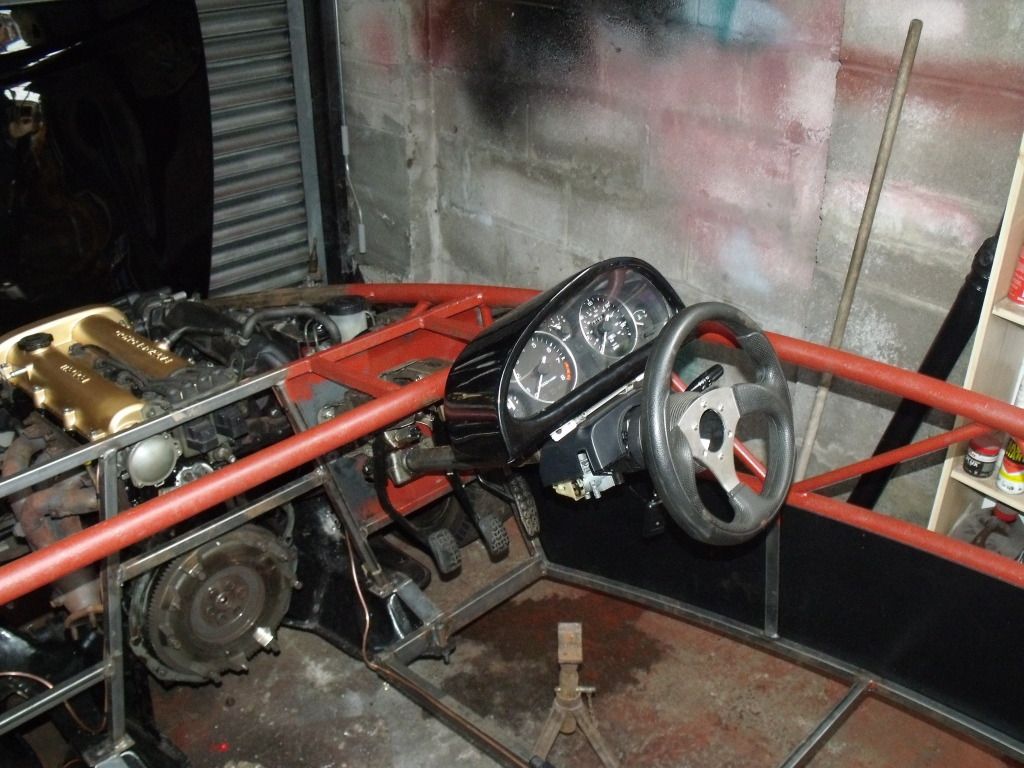
Also mounted the dash pod not ideal but will modify it when i get the correct steering wheel on etc
Pics
Still waiting for the clutch as the one sent was to small, note to anyone with an import mx5 the clutch is 225mm the normal mx5s are 220mm.
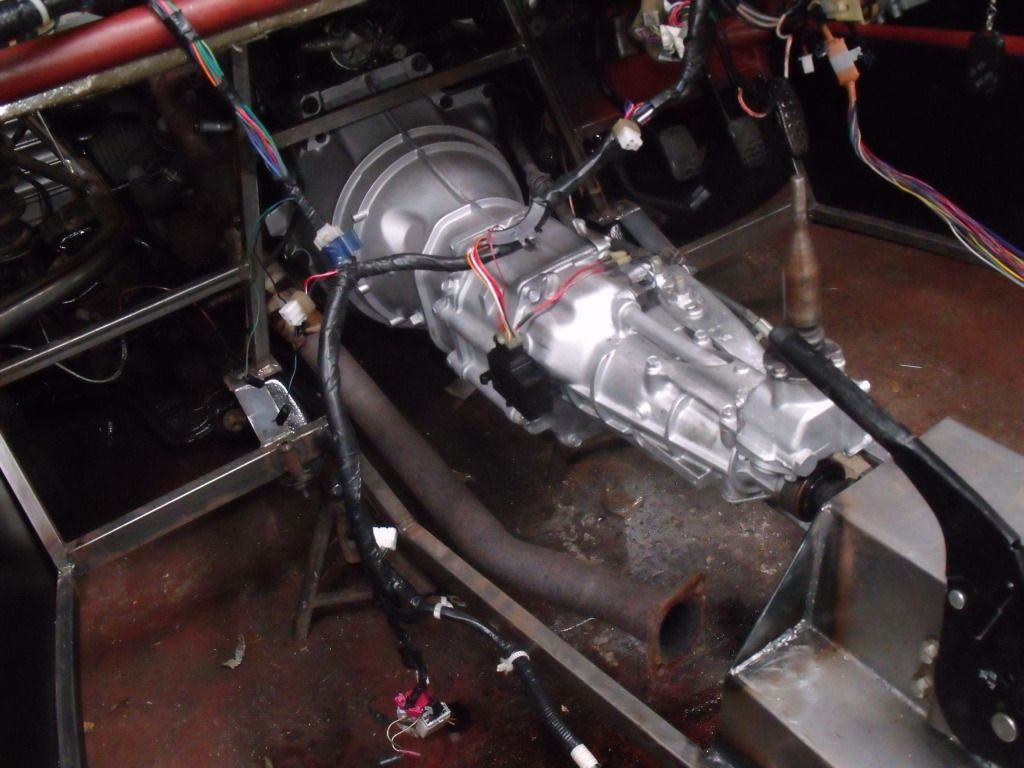
So will put the gearbox in without the clutch so i can start on running the wiring loom and getting it in place. Not a job im perticaly looking forward too but my 2 mates who helped strip it down will be giving me a hand too.
Managed to borrow the engine hoist from work to get the engine in so 2 of my mates help to get it in after a early finish from colege.
Also mounted the dash pod not ideal but will modify it when i get the correct steering wheel on etc
Pics
Still waiting for the clutch as the one sent was to small, note to anyone with an import mx5 the clutch is 225mm the normal mx5s are 220mm.
So will put the gearbox in without the clutch so i can start on running the wiring loom and getting it in place. Not a job im perticaly looking forward too but my 2 mates who helped strip it down will be giving me a hand too.
Andy888 said:
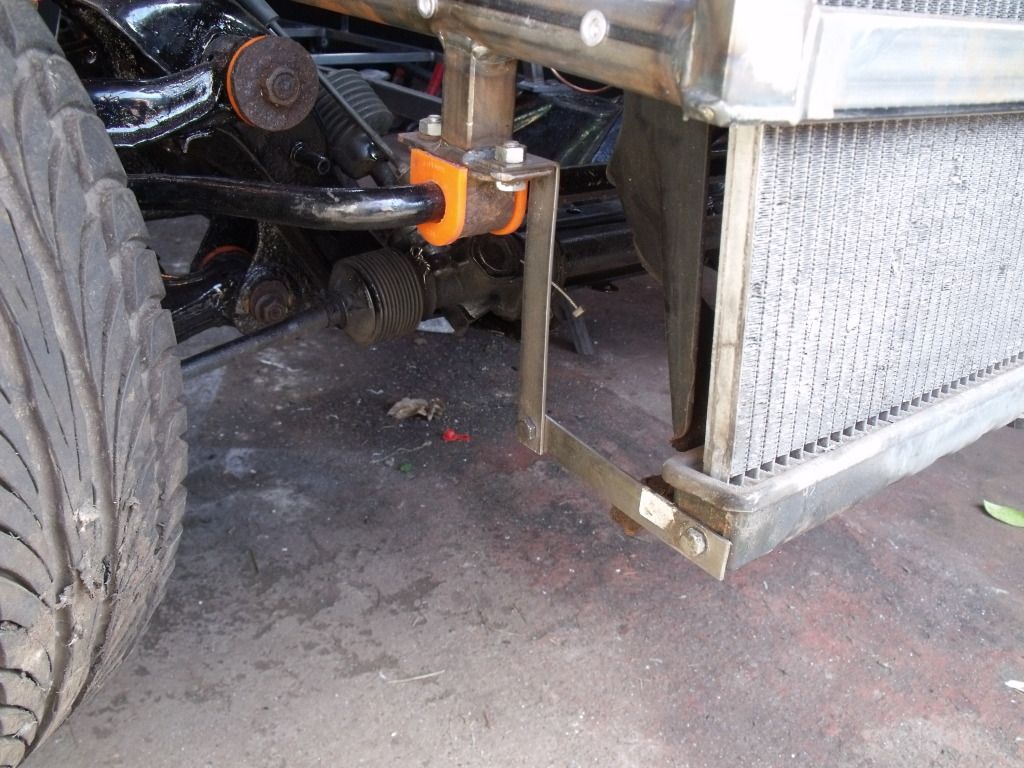
I tried to mount the radiator exactly the same way as you, but it doesn't clear the bottom of the nose cone. You might like to check yours and see.
I noticed that to but have modified the nose cone slightly to allow it to fit.pidsy said:
OP - following this with huge interest. Would love to follow in your steps. Just got to fix my other cars first lol
Can i ask what you have budgeted for the project?
And - have you had any luck selling the parts you dont need on ebay?
No real budget i have set myself spent around 3.8k so far which includes the donor car not expecting to spend no more than 5k but still have to buy lights, paint the frame, mirrors, battery box, seats and harness, catches and planing on getting a set of GAS coilovers. On the selling front got back around 300 quid so far on only a few parts roof, roll bar, seats, window motors, electric arial, some of the lights and also the bonent so still have plenty left to sell only paid 400 for the car.Can i ask what you have budgeted for the project?
And - have you had any luck selling the parts you dont need on ebay?
Edited by MG CHRIS on Thursday 28th June 20:33
Edited by MG CHRIS on Thursday 28th June 21:41
Update days 9 and 10 on the build.
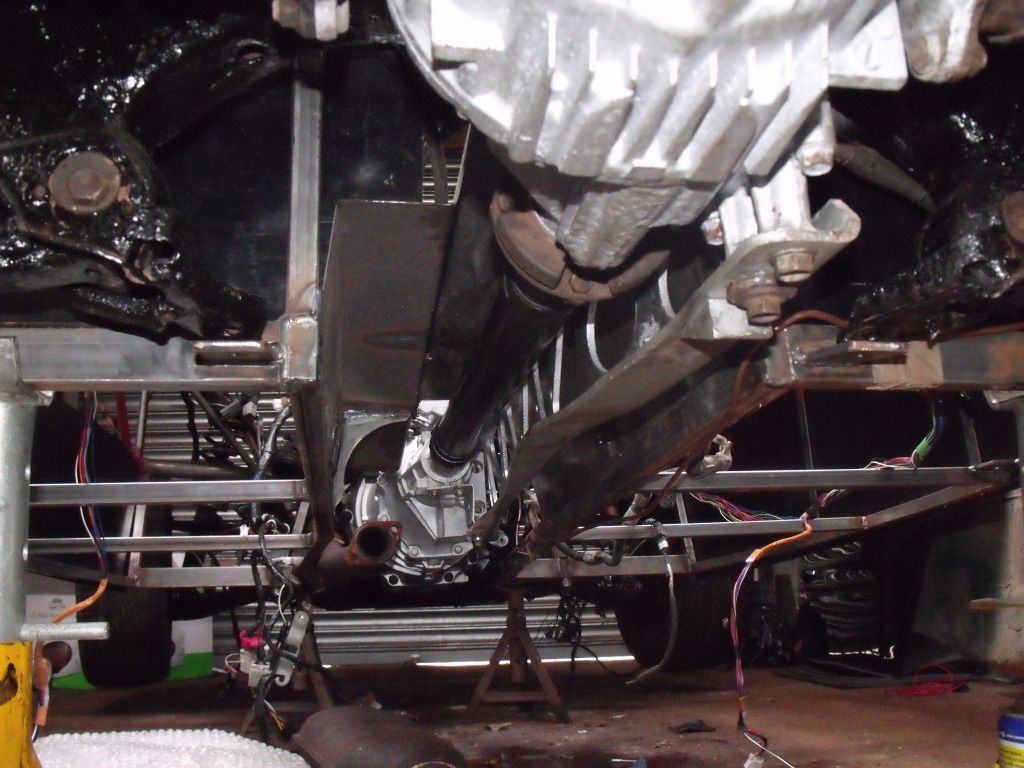
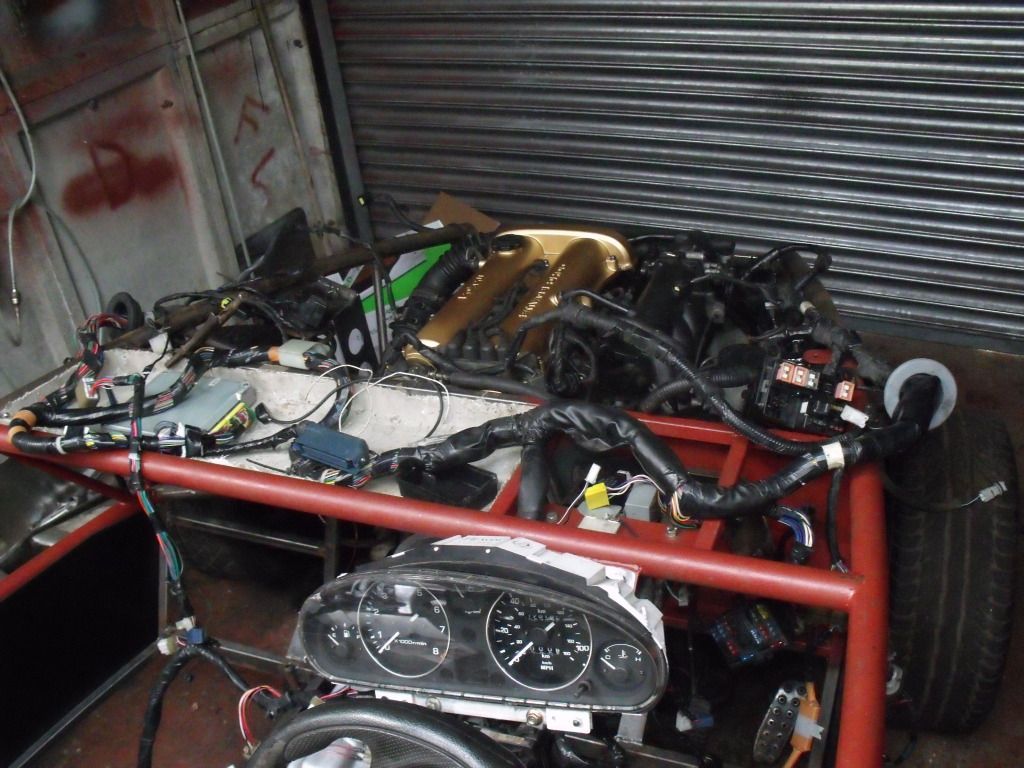
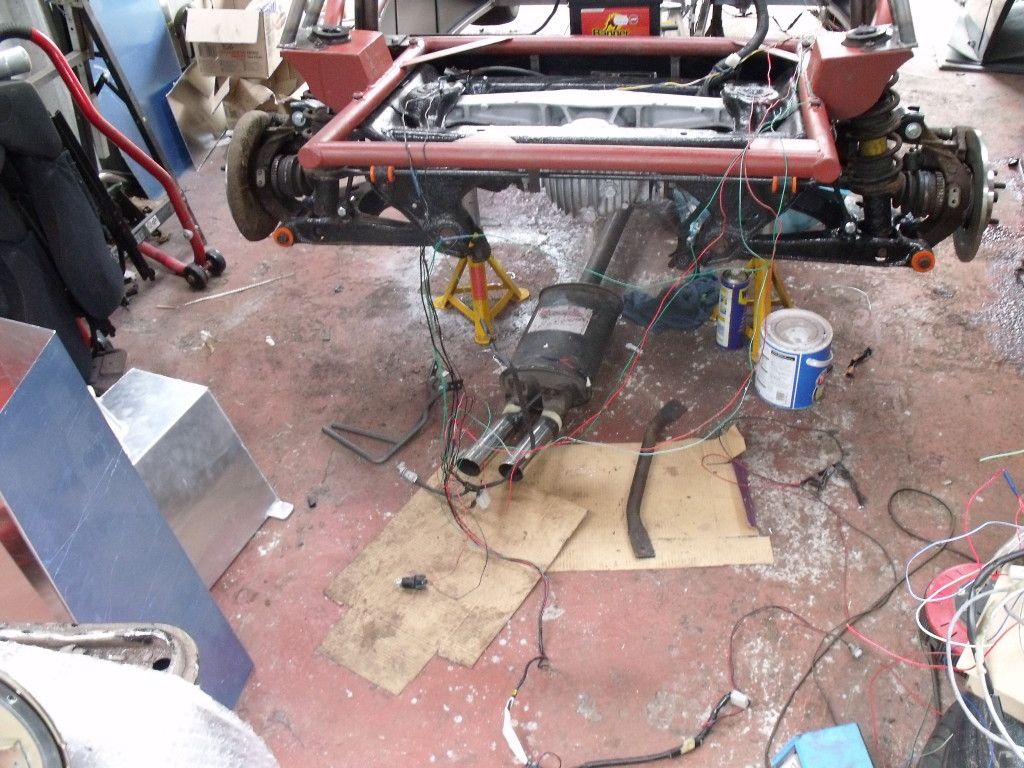
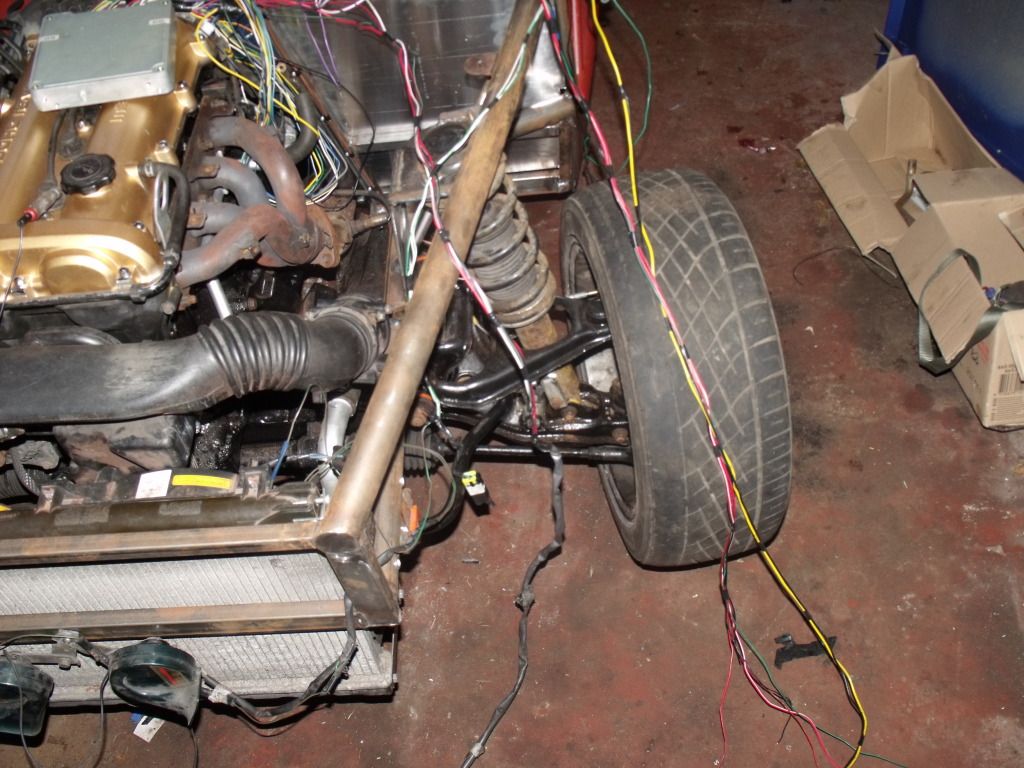
Day 9 after an age of waiting for my clutch it finaly arrived so got it fitted and after my 2 mates came over to lend a hand fitted the gearbox, prop, torque tube, starter motor and slave cylinder for the clutch.
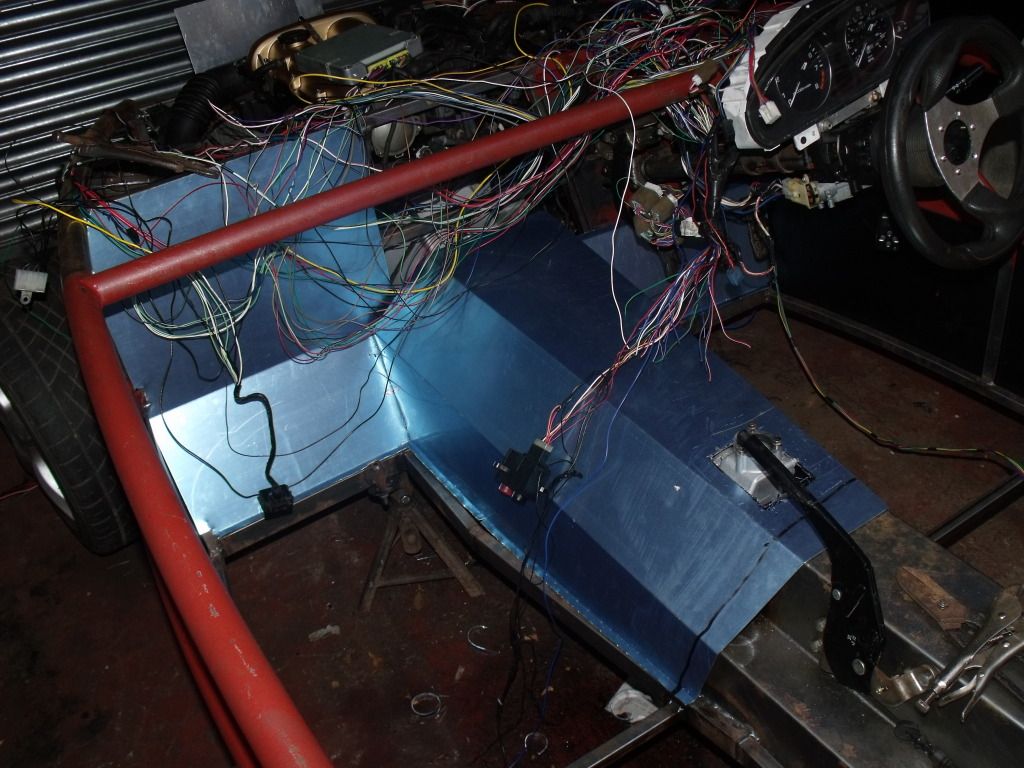
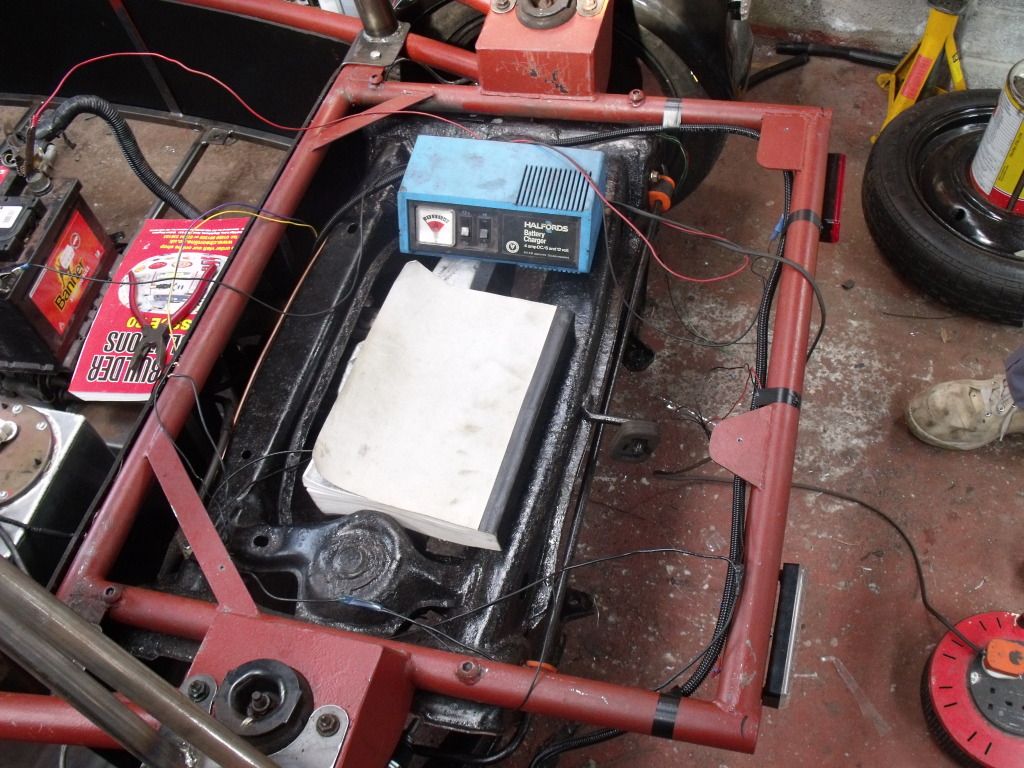
I also made up a template out of 2 serial boxes to hold the ecu and wiring loom. After it was cut to shape layed it with fiberglass and left it to harden. Give it a layer of filler will smooth it up nice later and fixed it to the frame using 4 5mm rivnuts.
pics
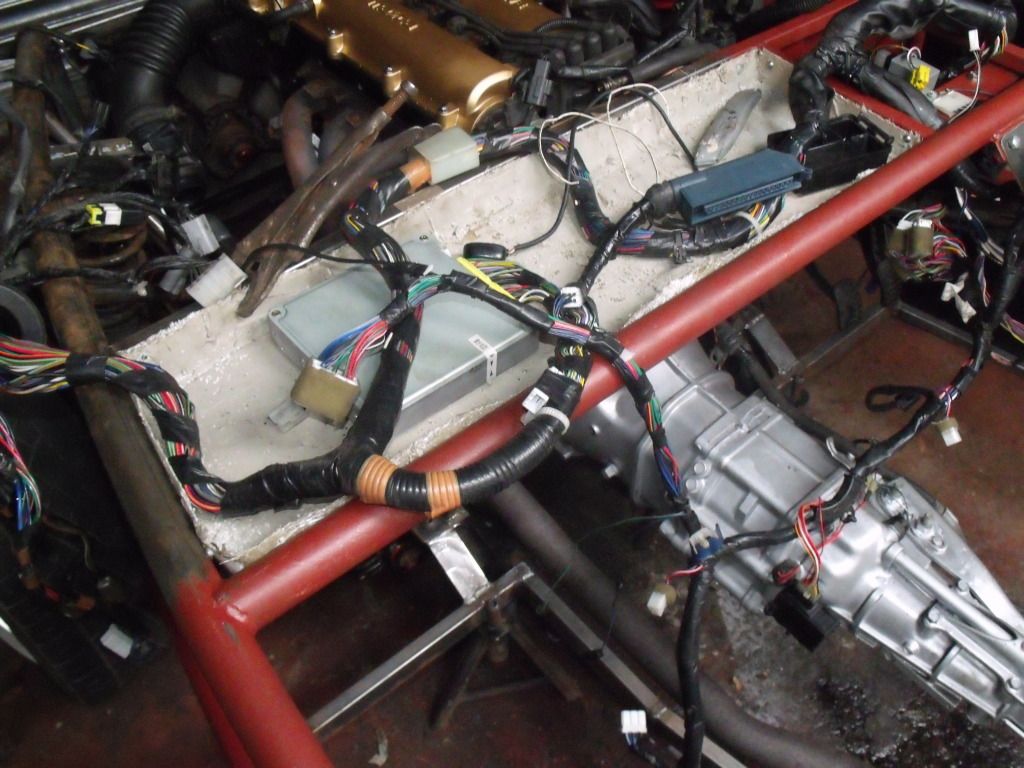
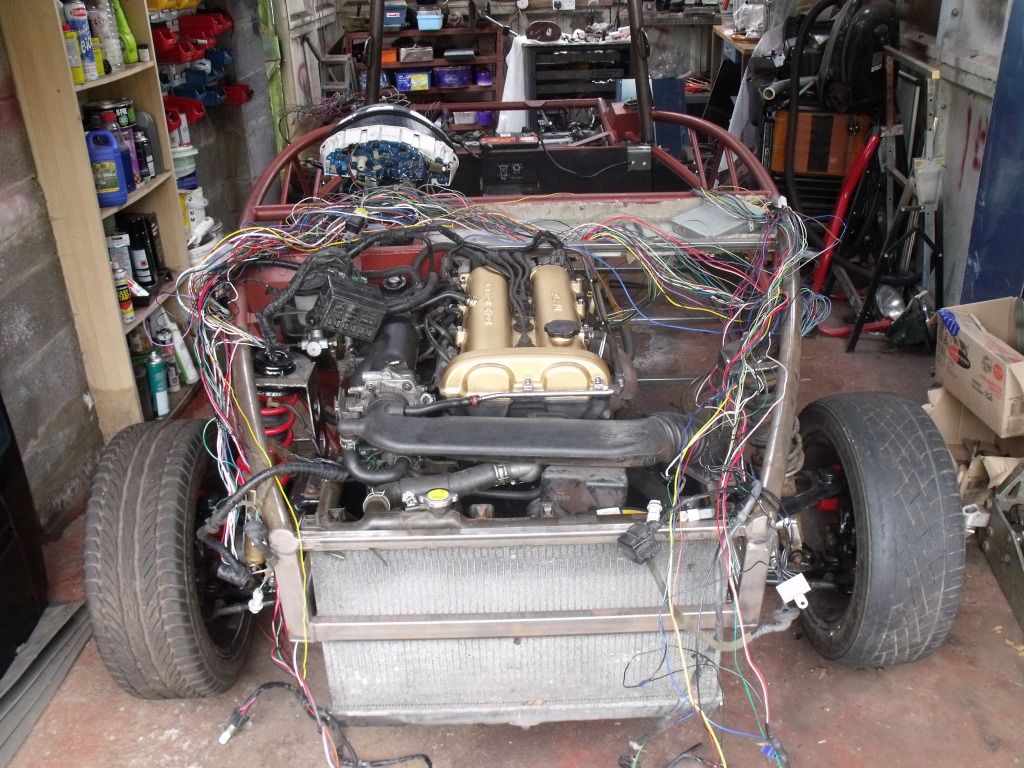
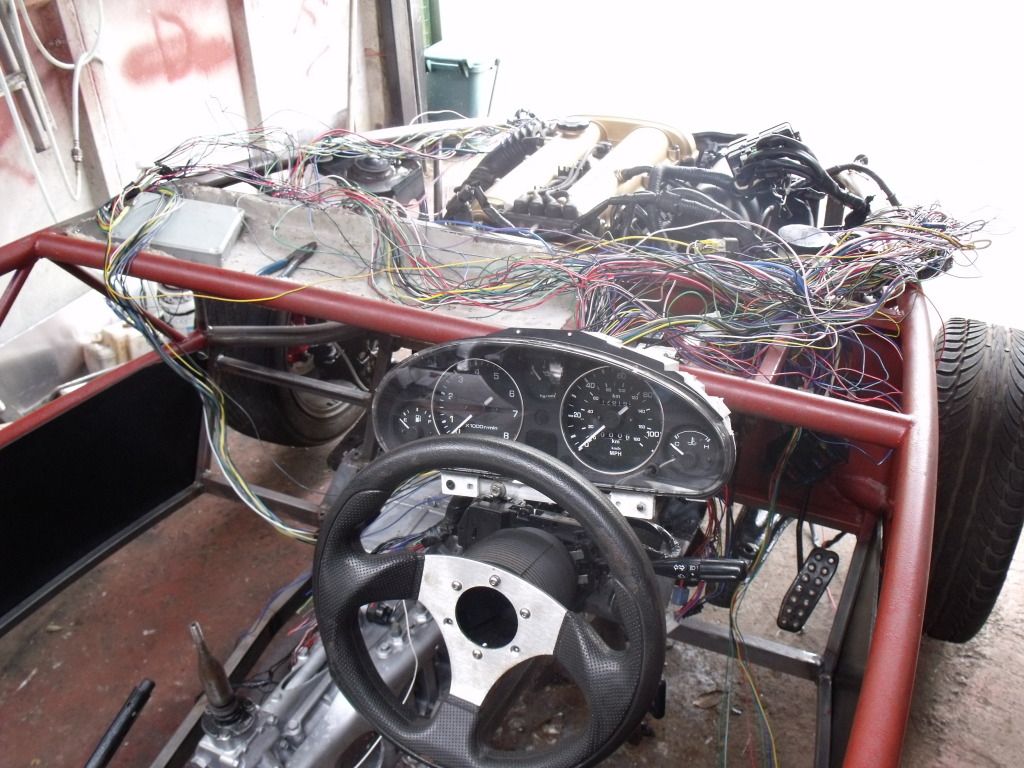
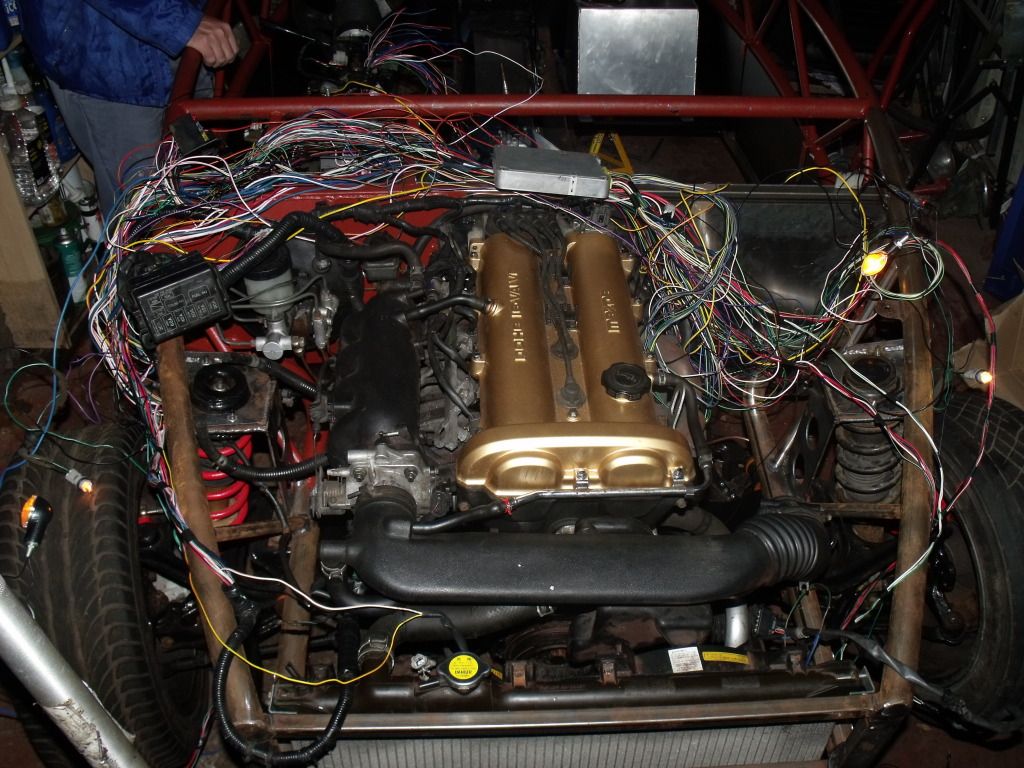
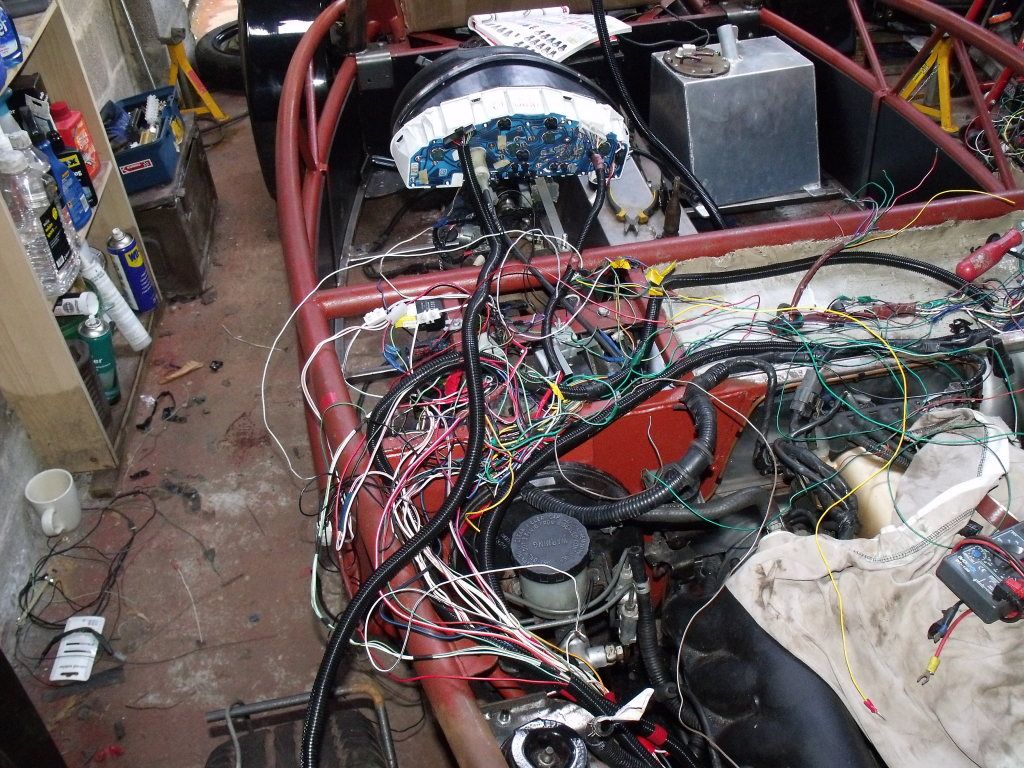
Day 10 was spent getting the wiring loom in place reconecting the main fues box back to the main part of the wiring loom, connecting all the plugs back onto the various engine components and working out wher everything plugs back into.
After a couple of hours (more like a day) i have dash lights, side headlights and main beam working and also the engine cranks aswel but as there is no fuel tank yet cant start it but am happy it cranks after ripping out the aftermarket alarm.
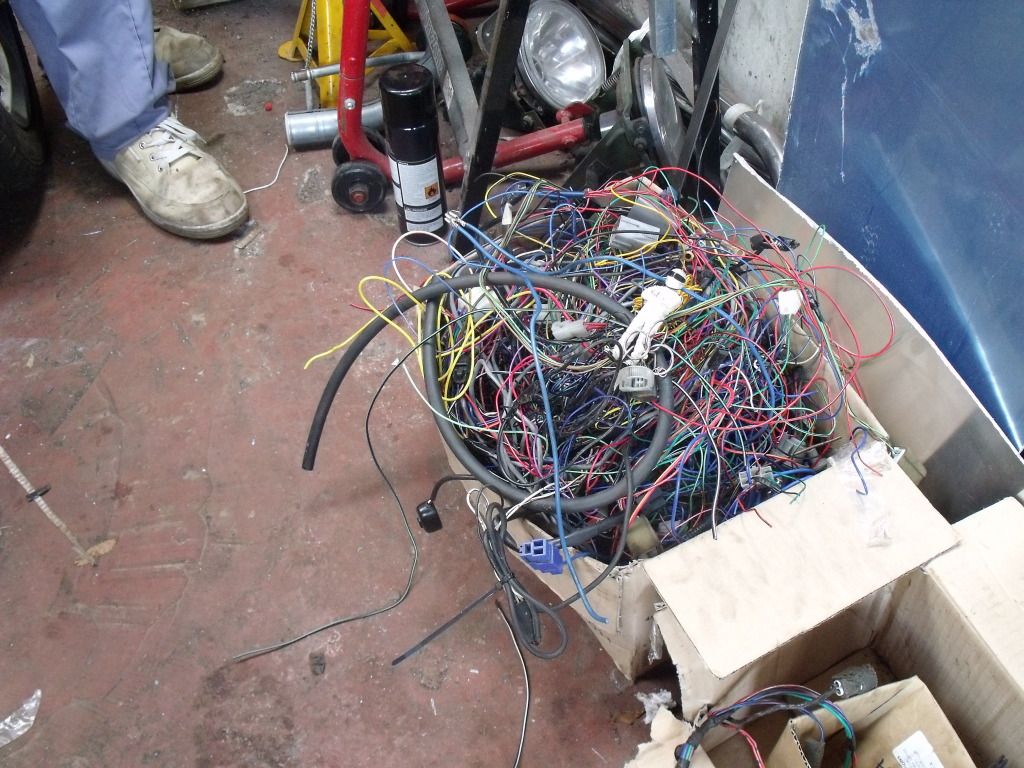
Pics of the mess of a modern day wiring harness

Next jobs are to order my lights get them mounted and working then start on stripping back any unecessery wiries that i don't need which will include the abs wiring , pop up headlights wiring, most of the interior wiring and any others i don't need oh the joys.
Day 9 after an age of waiting for my clutch it finaly arrived so got it fitted and after my 2 mates came over to lend a hand fitted the gearbox, prop, torque tube, starter motor and slave cylinder for the clutch.
I also made up a template out of 2 serial boxes to hold the ecu and wiring loom. After it was cut to shape layed it with fiberglass and left it to harden. Give it a layer of filler will smooth it up nice later and fixed it to the frame using 4 5mm rivnuts.
pics
Day 10 was spent getting the wiring loom in place reconecting the main fues box back to the main part of the wiring loom, connecting all the plugs back onto the various engine components and working out wher everything plugs back into.
After a couple of hours (more like a day) i have dash lights, side headlights and main beam working and also the engine cranks aswel
but as there is no fuel tank yet cant start it but am happy it cranks after ripping out the aftermarket alarm.Pics of the mess of a modern day wiring harness
Next jobs are to order my lights get them mounted and working then start on stripping back any unecessery wiries that i don't need which will include the abs wiring , pop up headlights wiring, most of the interior wiring and any others i don't need oh the joys.
So day 11-12-13
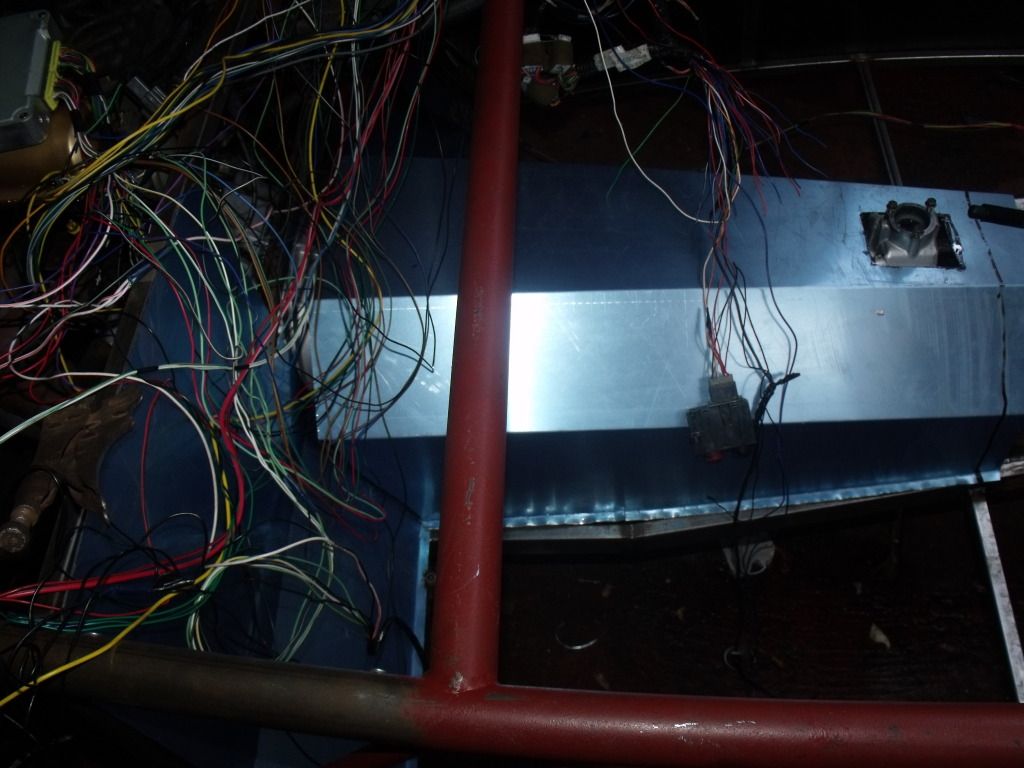
Was spent pretty much stripping back the insulation and removing any unwanted wires which in the end turned out to be a lot of wires. Also as im using the ally fuel tank fitted the fuel pump and sender into the tank
Pics
Had to cut a bit of the bottom of the metal bracket and cut the fuel pipe feed and refit the pump. Fitted back in the tank and used some fuel proff sealent and 8 self tapping screws to secure it to the tank
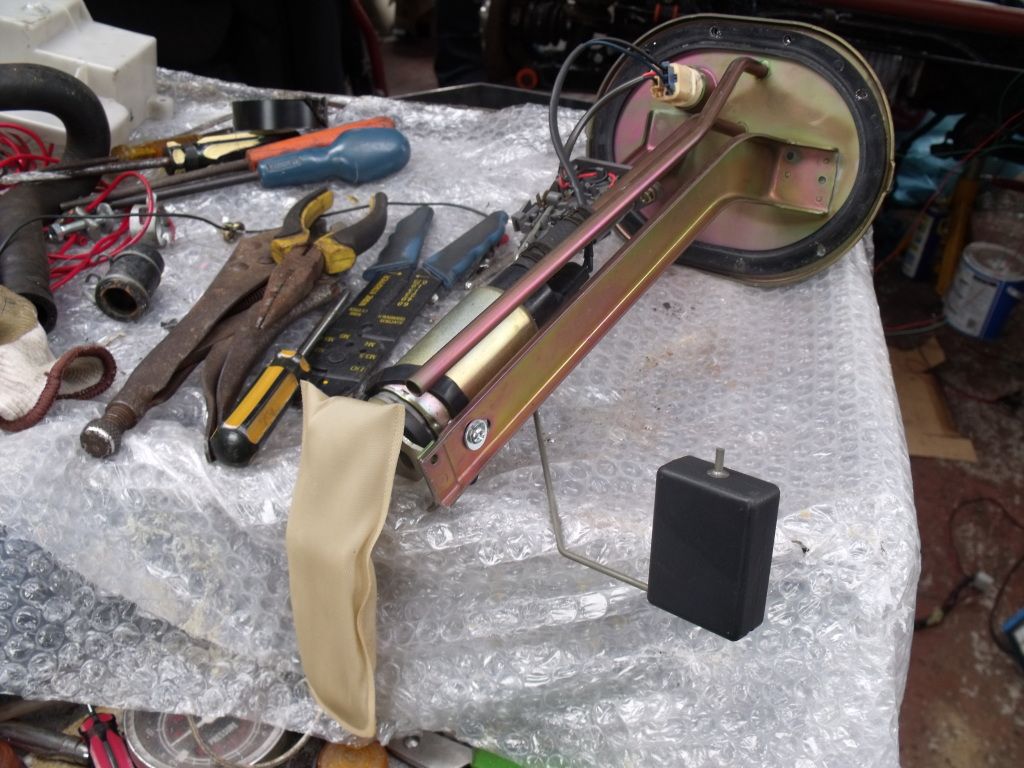
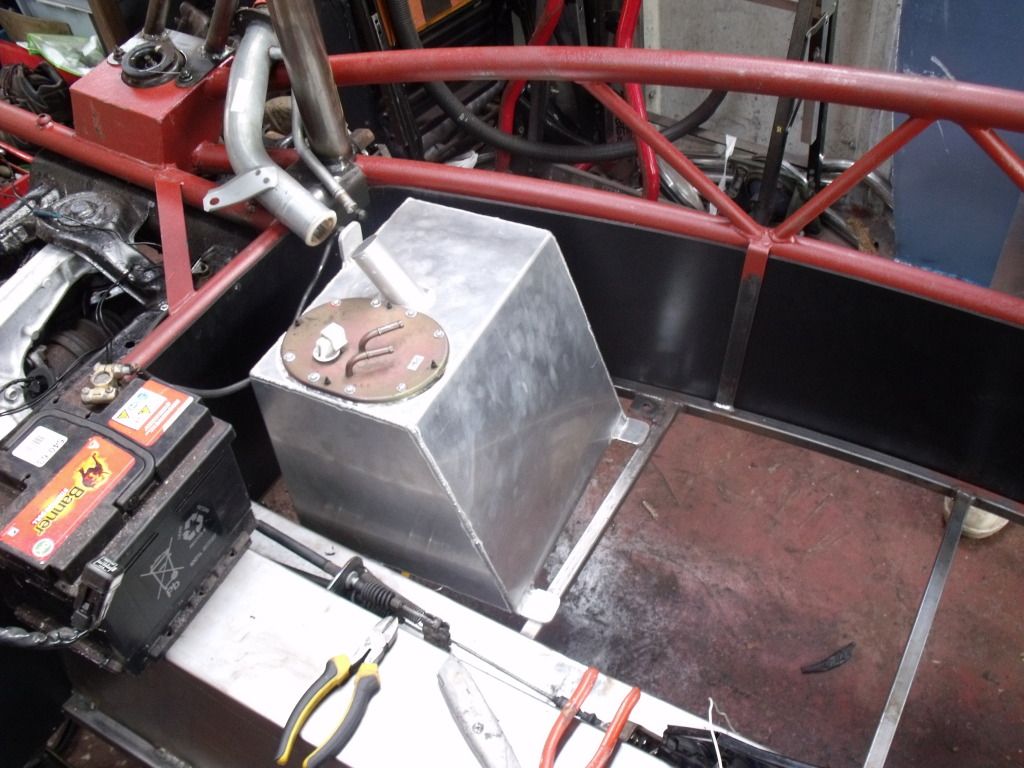
Would the fuel pipe position by there would be ok for iva as it is outside of the passenger compartment
On to the wiring stripped back the majority of the unwanted wiring loom and it has reduced a hell of a lot of wires and loom size and will sort the wires out shorten where i need to and buy some of the plastic spiral wire stuff to make it look neat and tidy
and after all that i still have working lights and still the engine cranks aswel so im doing something right.
So day 14
Got most of the ally panels trimmed to shape a little bit more fettling required to get it spot on though
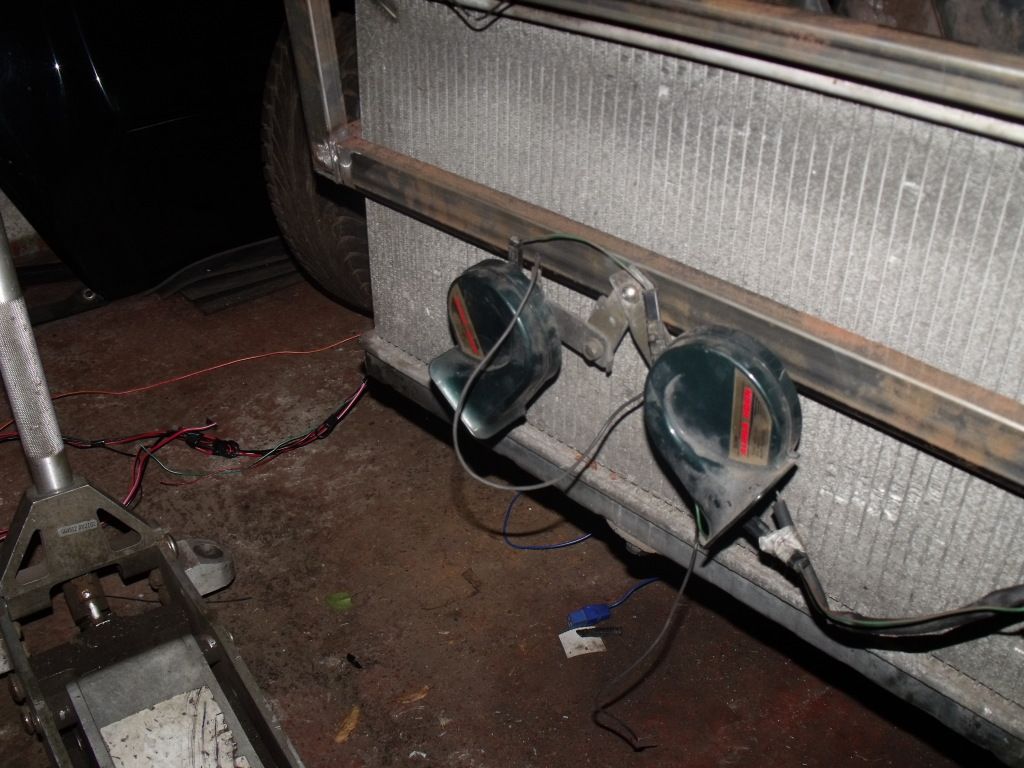
Mounted the twin horns using a single m6 rivnut
Sorted the n/s wiring for mass air flow, lights and horn
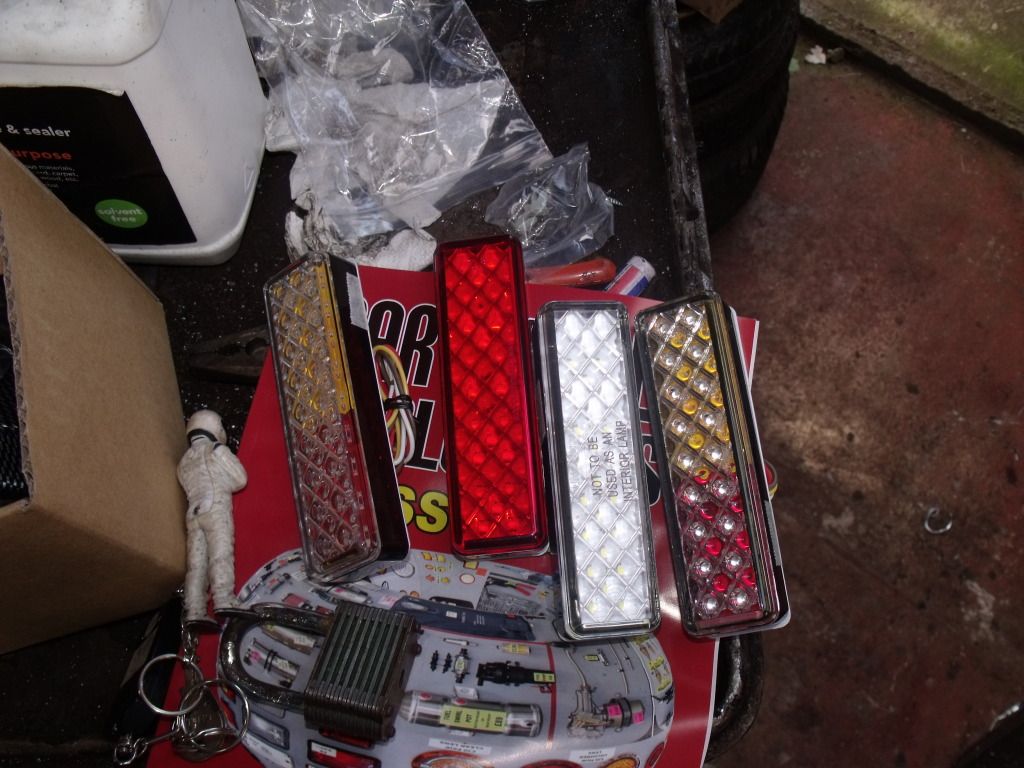
And yesterday my lights arrived and a few other bits and peices from car builders solutions looks very nice too
Headlights and indicator
Rear lights LED stop/tail and indicator in one, fog and reverse
Next jobs are to finish the ally panels, mount the lights wire them up and rap the loom in plastic spiral stuff i ordered with the lights.
Got most of the ally panels trimmed to shape a little bit more fettling required to get it spot on though
Mounted the twin horns using a single m6 rivnut
Sorted the n/s wiring for mass air flow, lights and horn
And yesterday my lights arrived and a few other bits and peices from car builders solutions looks very nice too
Headlights and indicator
Rear lights LED stop/tail and indicator in one, fog and reverse
Next jobs are to finish the ally panels, mount the lights wire them up and rap the loom in plastic spiral stuff i ordered with the lights.
So day 15 mostly done by my father was to temperoy wire in the lights to see what they look like
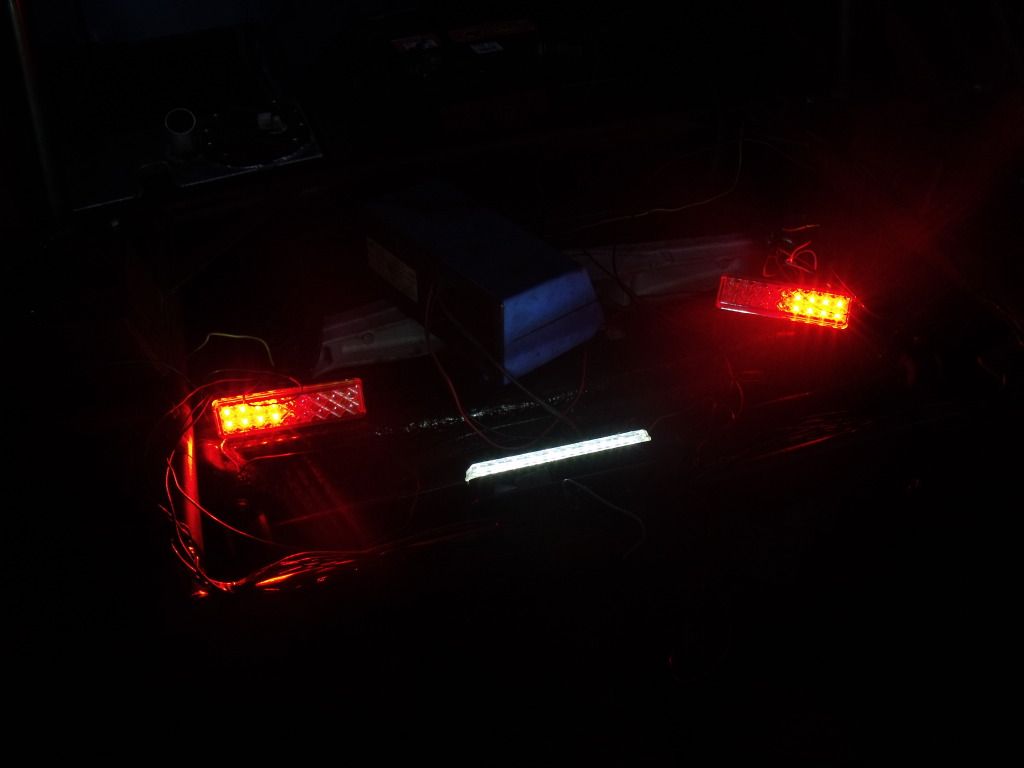
tail lights and reverse very bright going to have to wire in my own fog light as i can't find any wiring for it
rear indicators
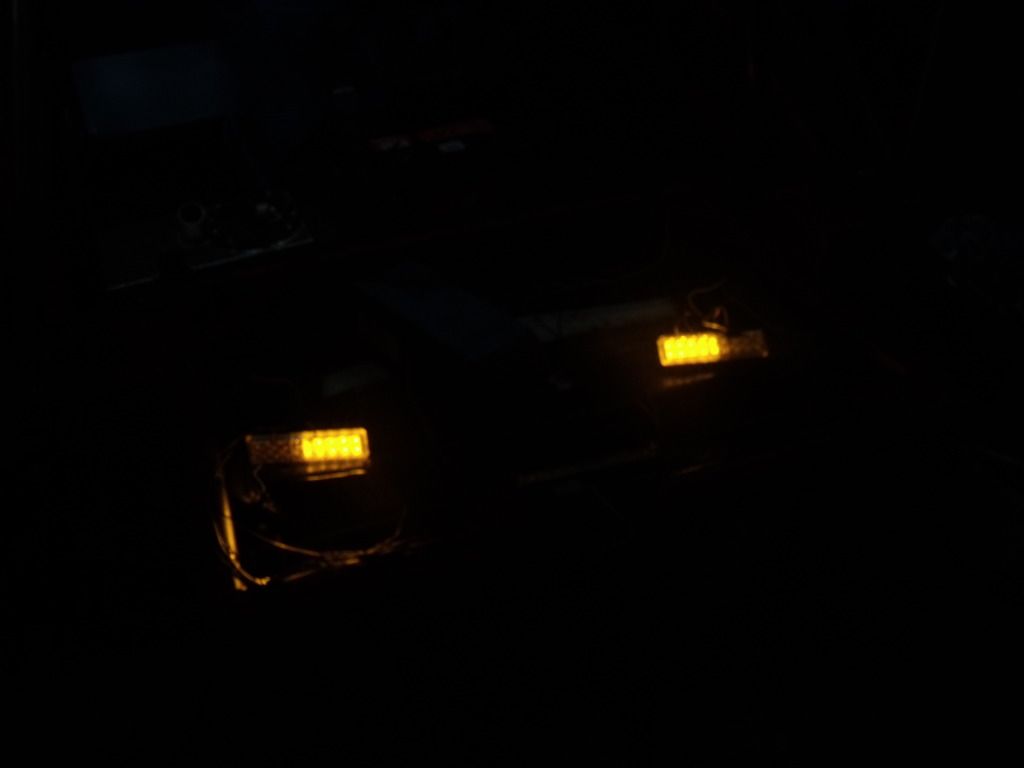
front indicators and side repeaters

So this weekend will finish of the wiring route it to the way i want it and mount the fuse boxes, mount the lights and hopefuly try to get it running.
tail lights and reverse very bright going to have to wire in my own fog light as i can't find any wiring for it
rear indicators
front indicators and side repeaters
So this weekend will finish of the wiring route it to the way i want it and mount the fuse boxes, mount the lights and hopefuly try to get it running.
Day 16
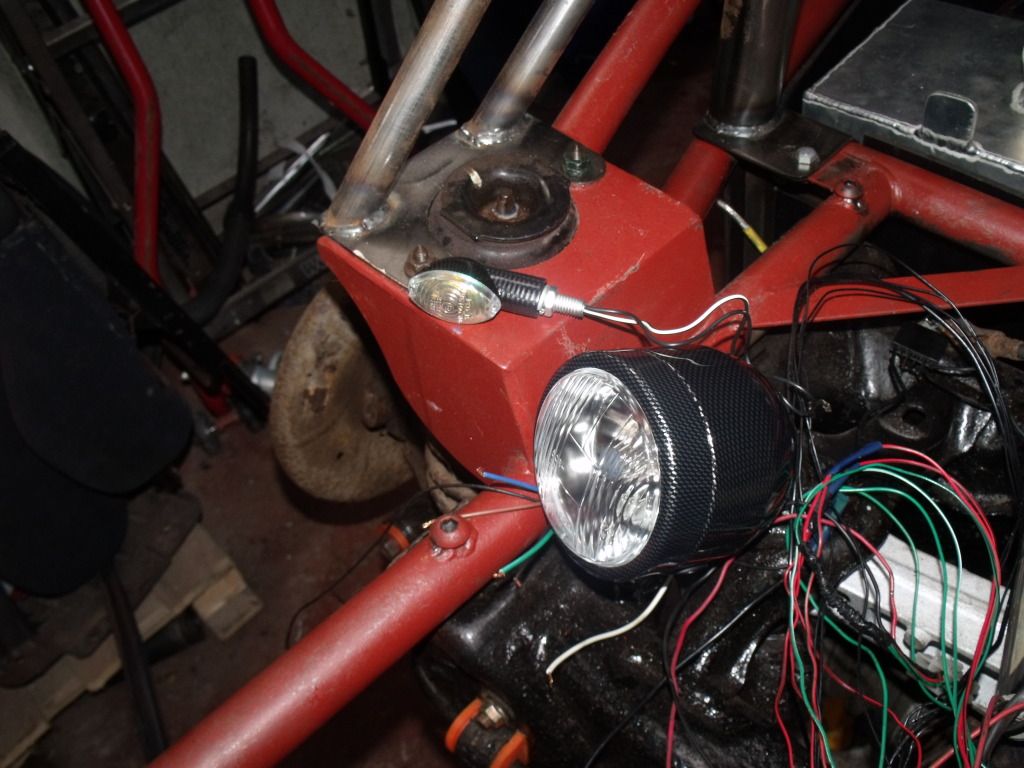
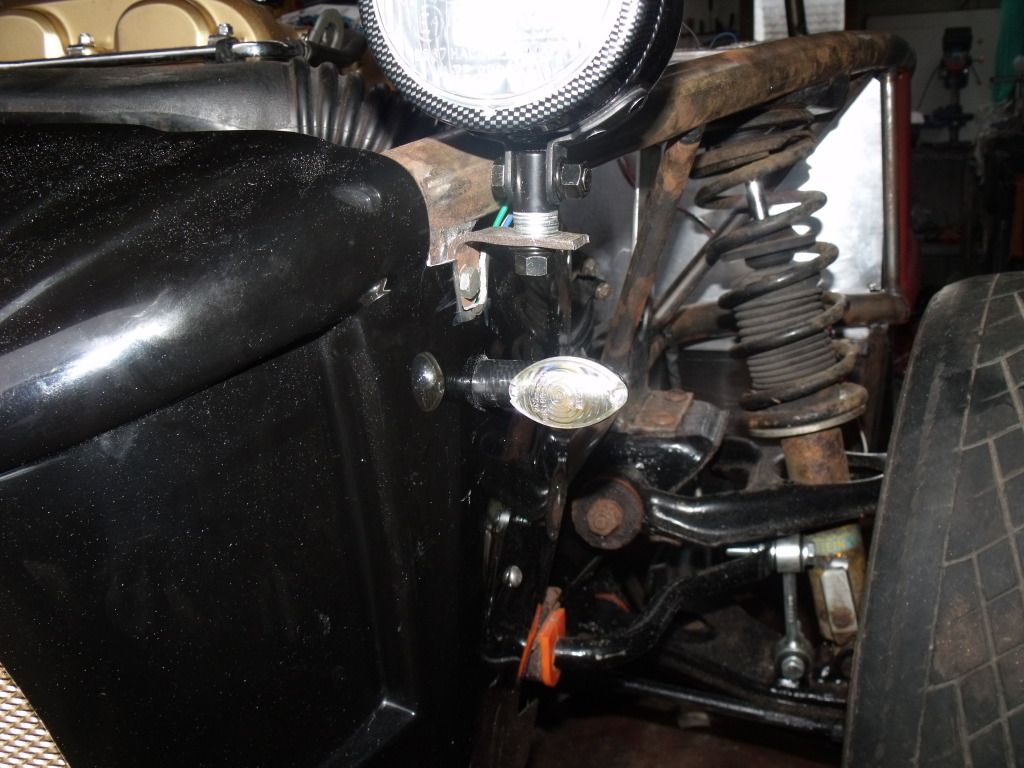
After my lights arrived decided to get the front lights fixed. For the headlight i cut a bit scrap metal i had laying around the garage bent to shape and cut the nose slightly to mount the brackets. The inidcators bolted straight onto the nose cone
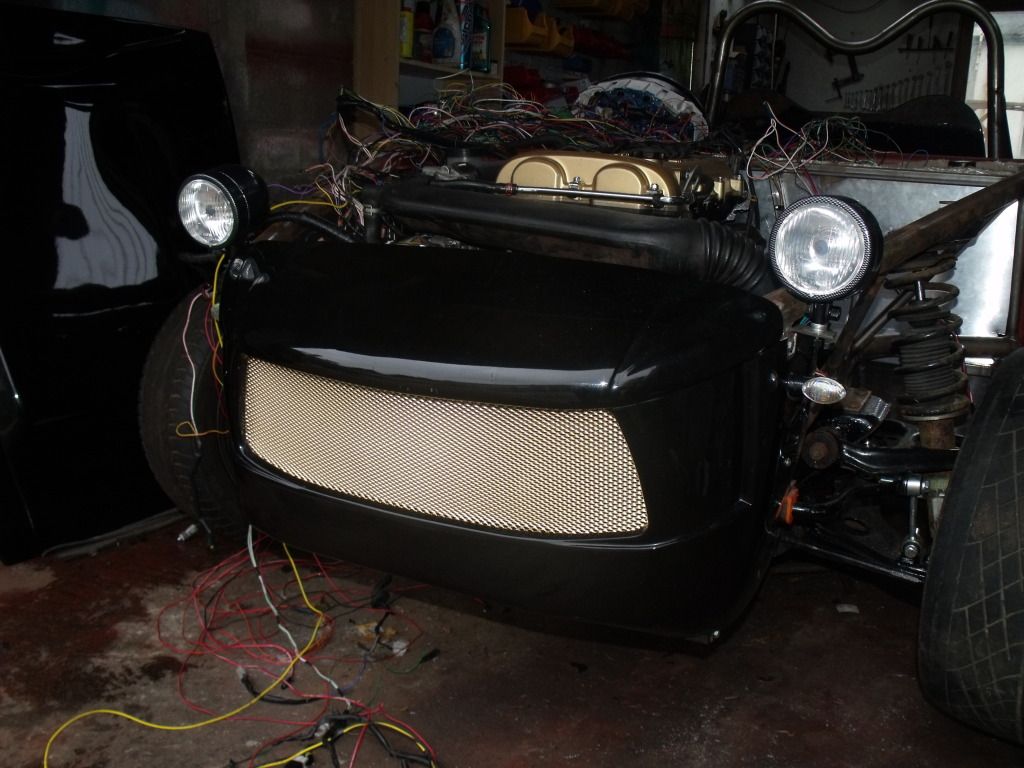
Close up of the lights
Also started to make brackets for the back lights

will mount the fog and reverse under the back frame by the edges and the stop/tail and indicator on the cylce wings.
As im using the ally fuel tank i decided to cover the area where the mx5 tank would go with a used sign where my father works
screwed directly to the plates for where the tank would bolt onto the plate has edges on it so used that to bolt the rear cover to it use 4 m6 rivnuts with it like this i have a bit of a boot too
 .
.
After my lights arrived decided to get the front lights fixed. For the headlight i cut a bit scrap metal i had laying around the garage bent to shape and cut the nose slightly to mount the brackets. The inidcators bolted straight onto the nose cone
Close up of the lights
Also started to make brackets for the back lights
will mount the fog and reverse under the back frame by the edges and the stop/tail and indicator on the cylce wings.
As im using the ally fuel tank i decided to cover the area where the mx5 tank would go with a used sign where my father works
screwed directly to the plates for where the tank would bolt onto the plate has edges on it so used that to bolt the rear cover to it use 4 m6 rivnuts with it like this i have a bit of a boot too
.Day 17
Finally mounted the rear lights made 4 L brackets mounted from the frame for the fog and reverse. With them done mounted the stop/tail indicator on the back of the cycle wings
With that done tempory routed the wiring to the back lights will have to get some clips to secure them
Also the wires i cut out should save some weight just in wiring
 .
.
Finally mounted the rear lights made 4 L brackets mounted from the frame for the fog and reverse. With them done mounted the stop/tail indicator on the back of the cycle wings
With that done tempory routed the wiring to the back lights will have to get some clips to secure them
Also the wires i cut out should save some weight just in wiring
.Day18
Made a bracket that bolts to the abs sensor holes then bolted the wing stay to it and with this way you could still retain the abs

Found a packet of large p clips and routed the loom for the lights
With that done attempteed to start the car. Tempory fitted some fuel lines which were from the donor.
First thing check for fuel no fuel swapped pipes around and fixed that.
Then check for a live to the coil packs no live trace it back to a dodgy ignition connections with that fixed tryed to start it no luck.
Check for a spark ok removed sparks plugs 2 covered in oil cleaned them up still not firing. Adjust the crank angle sensor and
bingo engine started straight up and runs sweet as it did 4 months ago.
With is starting now and a proper manual for the mx5 managed to get the fuel gauage, rev clock, most of the instrument symbols but oil pressure and backing light not working thing the oil pressure switch is faulty.
Got to finish the front loom, fit a few more things like mirros, header tank and a few other things then strip it down to paint the frame.
Made a bracket that bolts to the abs sensor holes then bolted the wing stay to it and with this way you could still retain the abs
Found a packet of large p clips and routed the loom for the lights
With that done attempteed to start the car. Tempory fitted some fuel lines which were from the donor.
First thing check for fuel no fuel swapped pipes around and fixed that.
Then check for a live to the coil packs no live trace it back to a dodgy ignition connections with that fixed tryed to start it no luck.
Check for a spark ok removed sparks plugs 2 covered in oil cleaned them up still not firing. Adjust the crank angle sensor and
bingo engine started straight up and runs sweet as it did 4 months ago.
With is starting now and a proper manual for the mx5 managed to get the fuel gauage, rev clock, most of the instrument symbols but oil pressure and backing light not working thing the oil pressure switch is faulty.
Got to finish the front loom, fit a few more things like mirros, header tank and a few other things then strip it down to paint the frame.
Turn7 said:
Interesting build, looking good so far - good luck with IVA.
Thank you hopefully be on the road for spring next year.Day 19
Another order to car builders solution turned up on thursday so had plenty to get on with.
Mounted the header tank, air filter and cold air feed
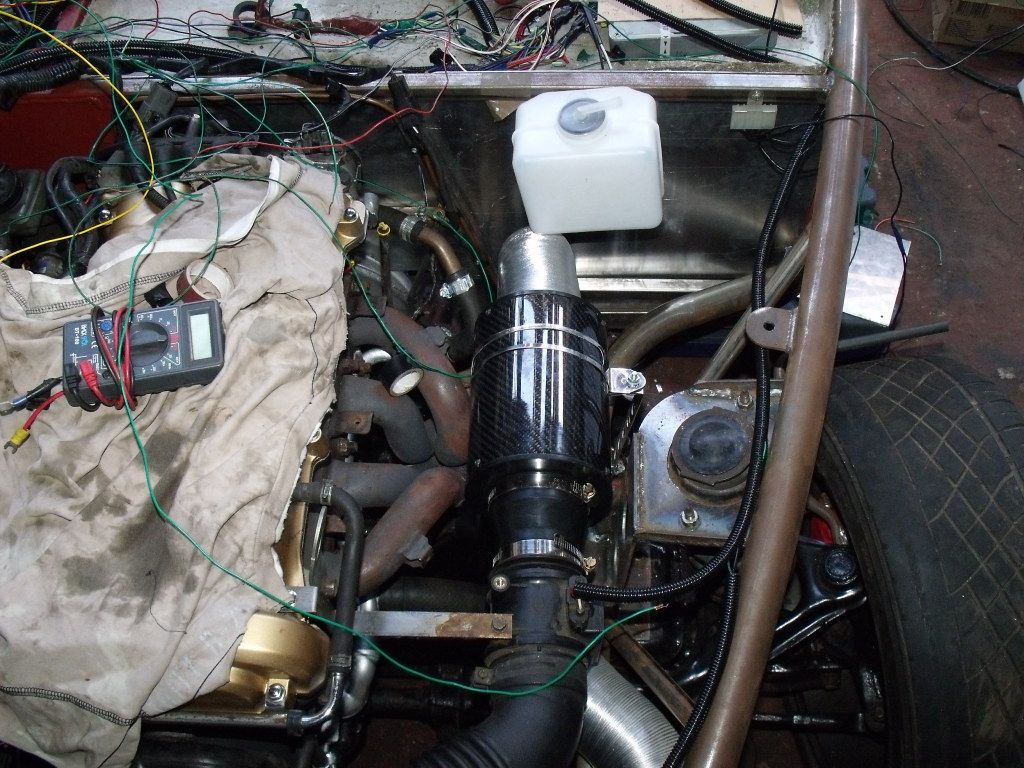
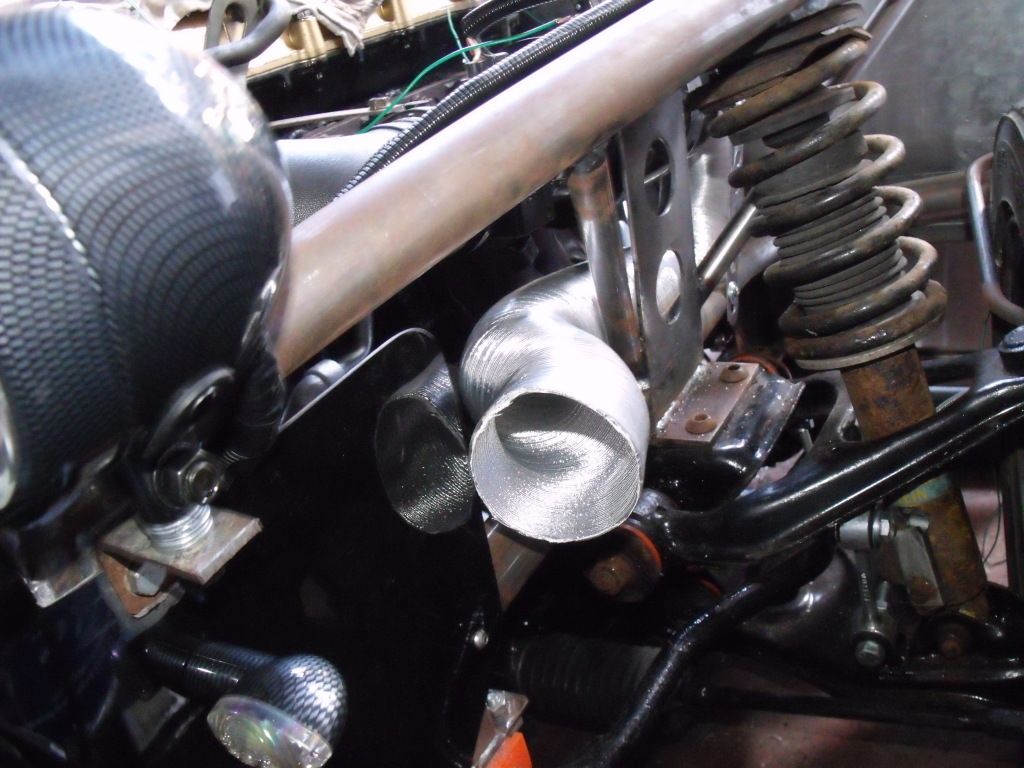
Will make a bracket up to attach the end of the cold air feed pipe to it.
Then got on with the wiring and bolted the ecu in to place
only wires going down the n/s are the indicators and map sensor wires everything else will run down the o/s
Just the o/s to finish to finish of the wiring, then mount fuel tank and exhaust then ready to strip back down to paint the frame.
Day 20
Finished of the wiring welded 2 plates up for mouting the side repeaters on and finished up some odds and sods then stripped it all apart and got the frame of the car in less than a hour shame it doesn't take an hour to put it together ;D.
Got to finish of drilling the holes for floor and fuel and brake pipes then can get on with preping the frame for paint hoping to get it done by the end of august then put it backtogether and do a couple of track days hoping to be able to go to llandow for the ckc track day.
Stuart Mills said:
Great build story Chris, if you push on and get it drivable you could always trailer it to the "Bring em home" weekend on the 25th Aug at MEV HQ
Thanks. I very much doubt i will be able to paint it by them let alone rebuild it. Will deffo go next year.Just one question can you show me a picture of how you mounted the ally fuel tank on the lightweight exocet. Ive got an idea how to do it but will requires the floor to be on first.
Gassing Station | Kit Cars | Top of Page | What's New | My Stuff