Mac#1 Motorsport Worx Build
Discussion


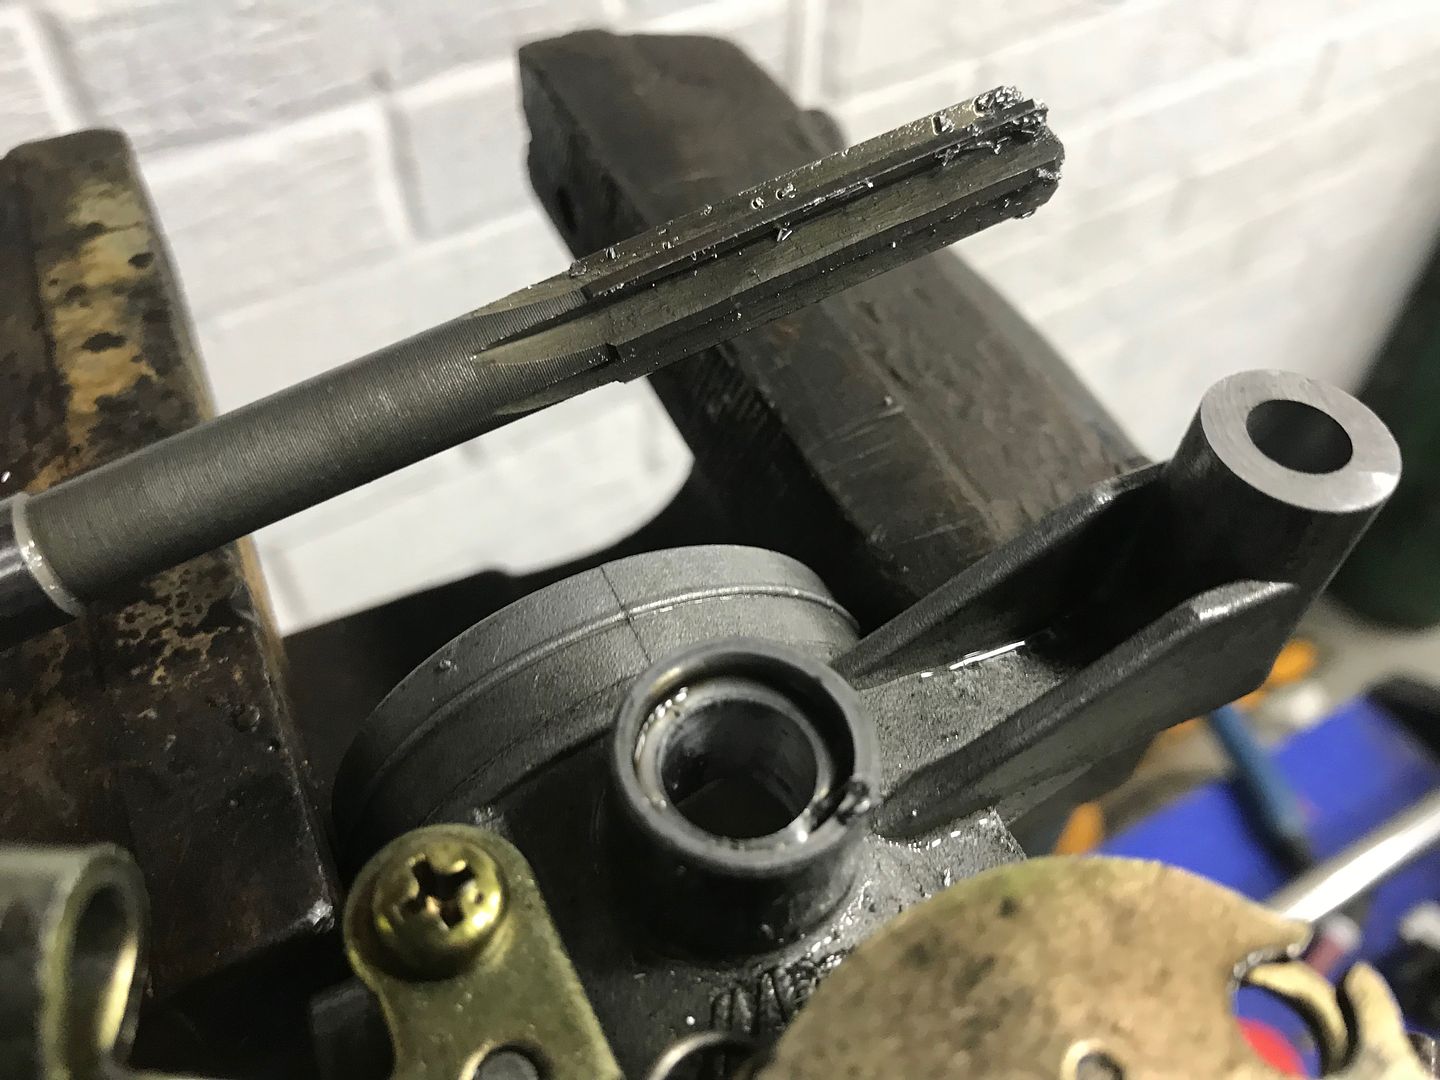
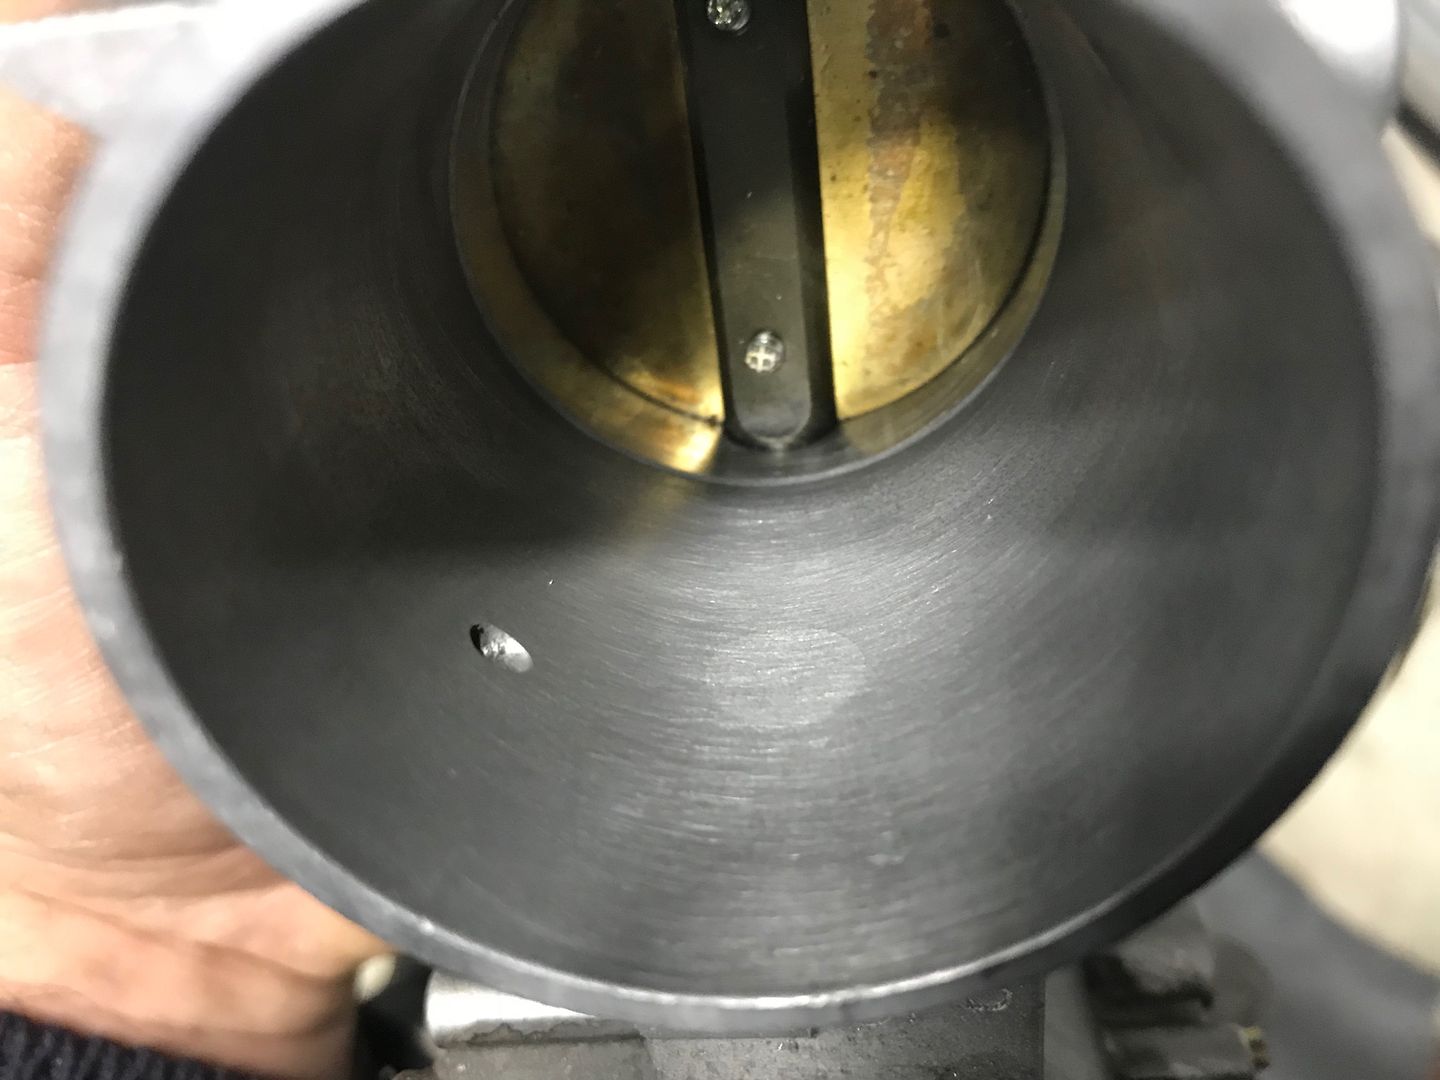
The throttle bodies already had the secondary butterflies removed from the shaft throttle bodies
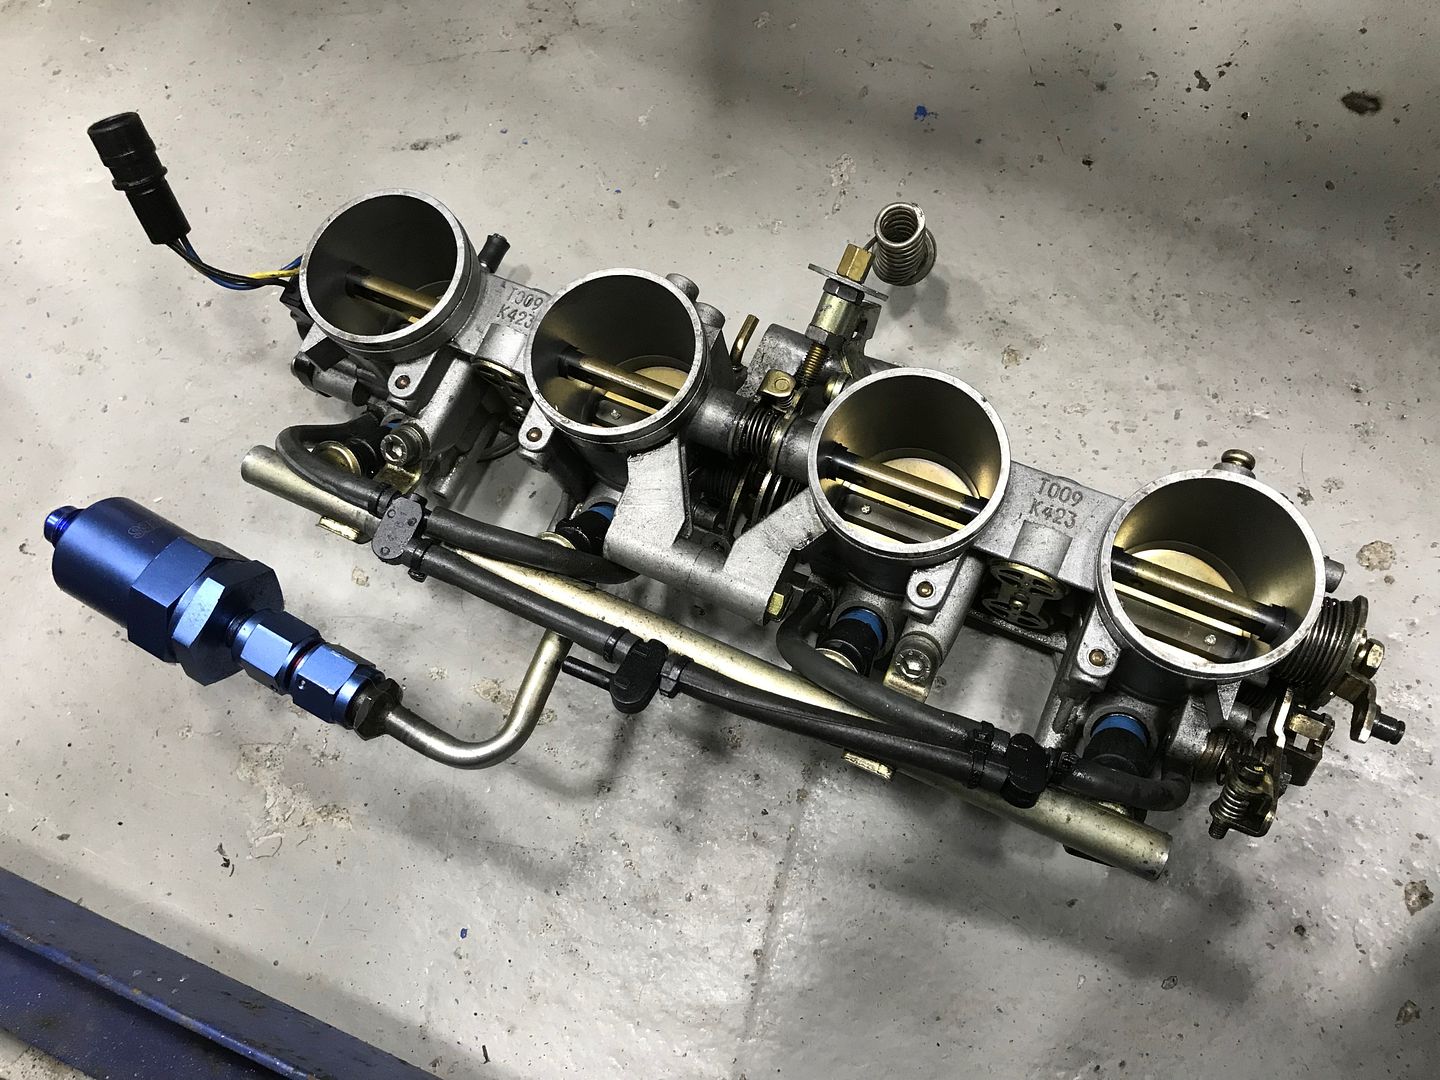
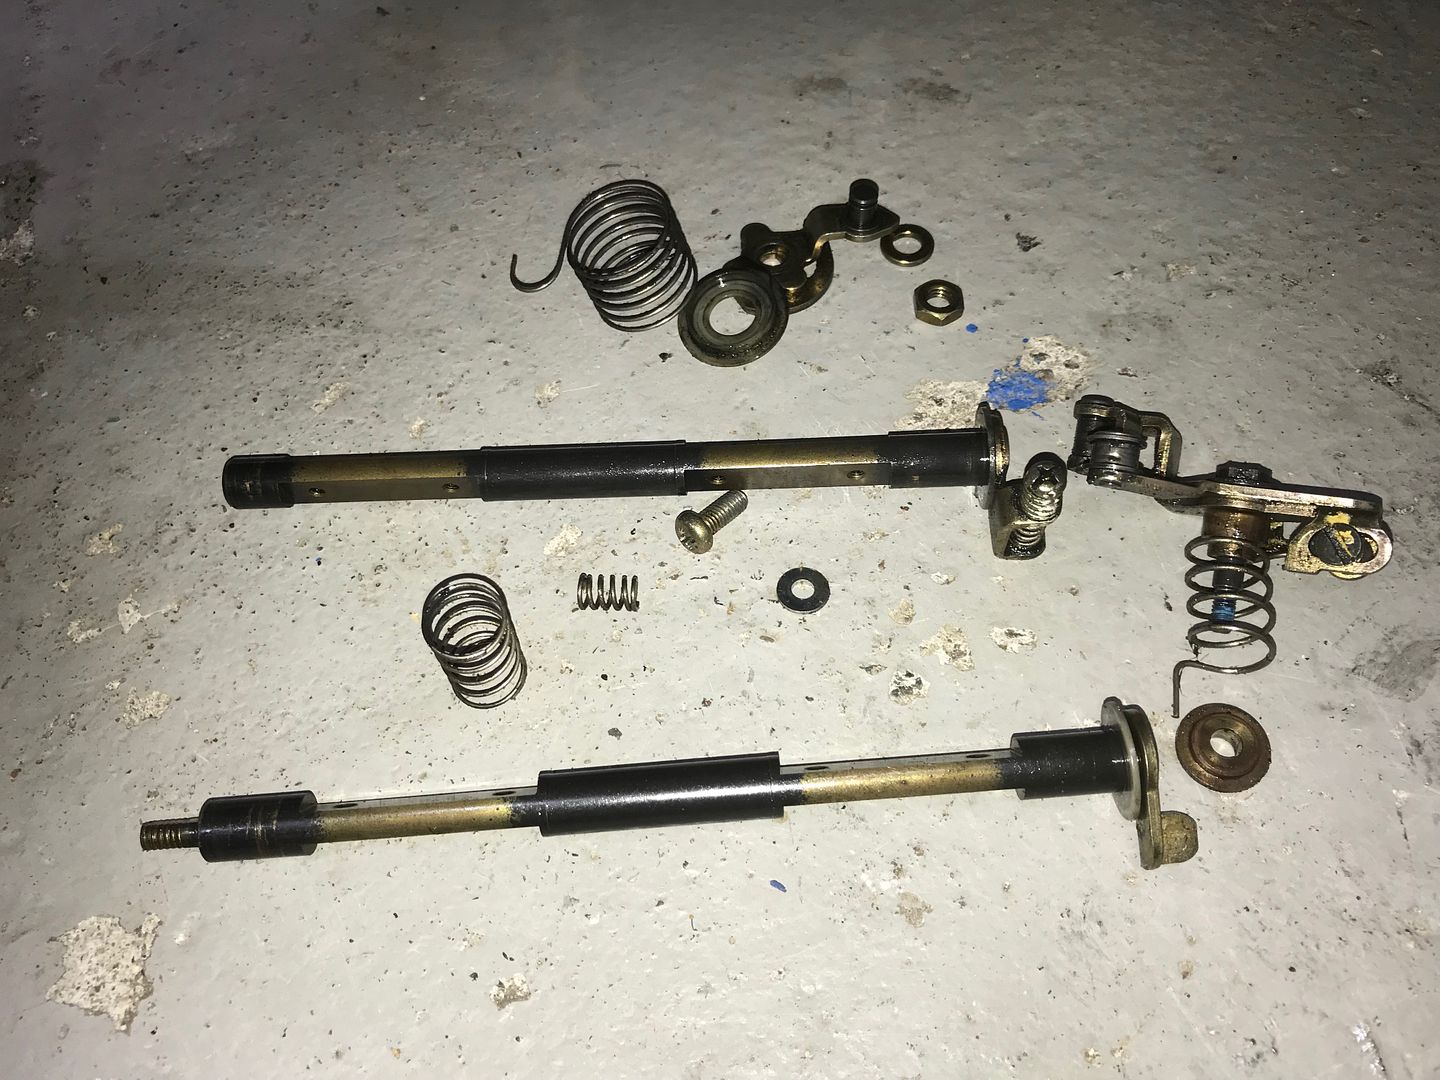
So I removed the secondary shafts
This is the left over parts for the bin
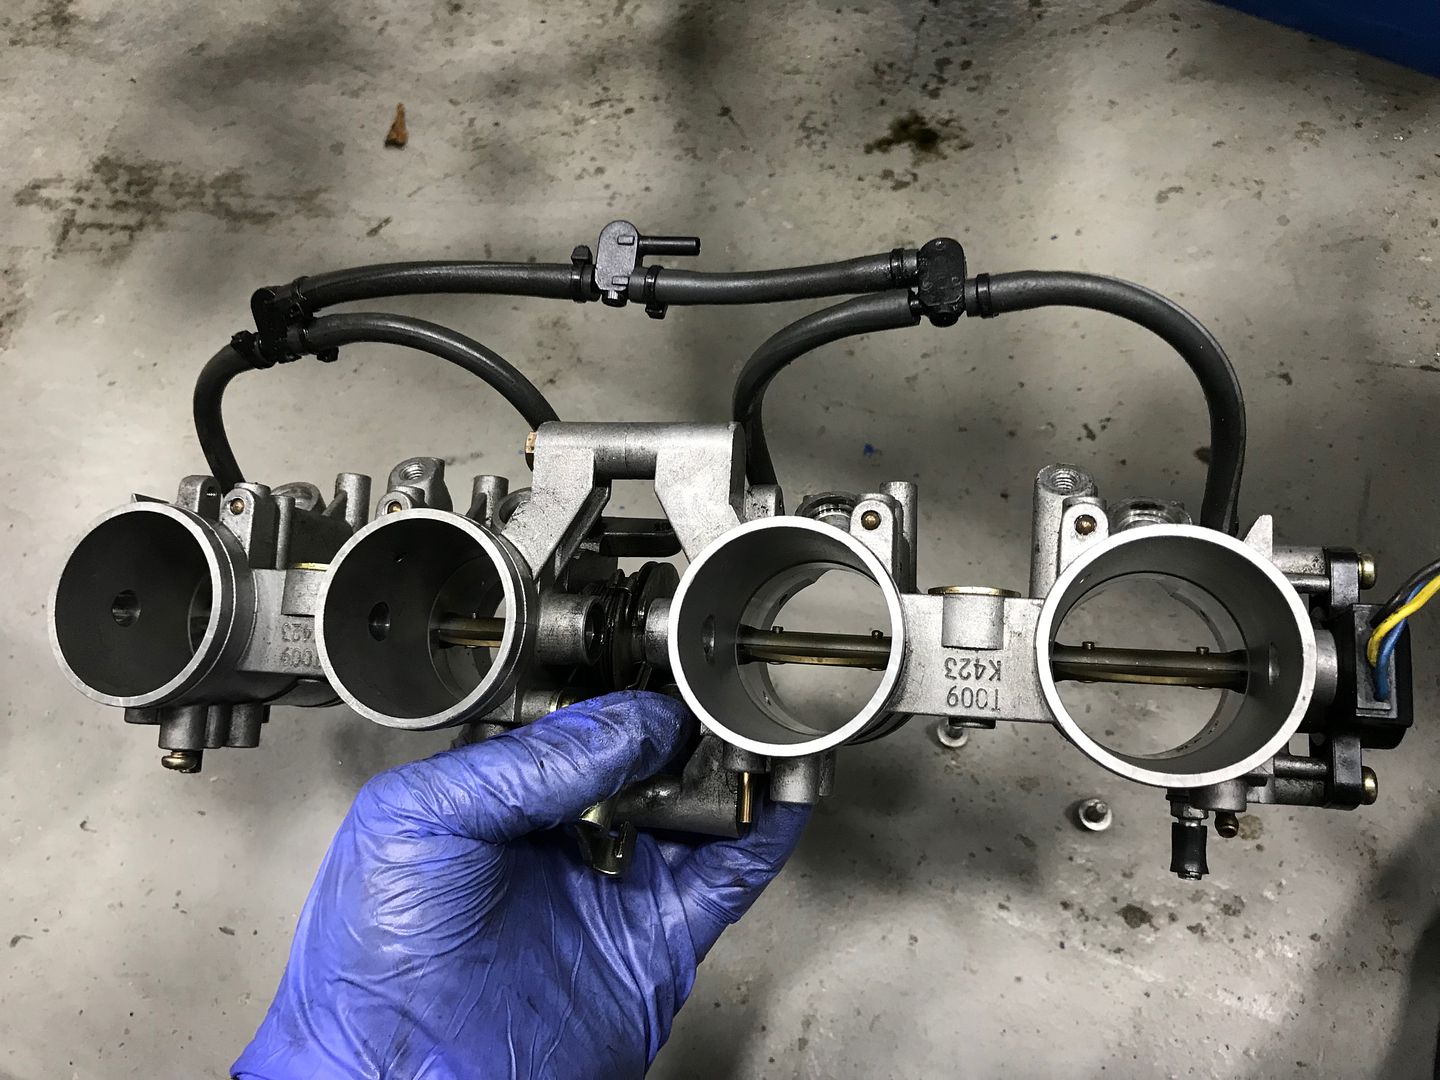
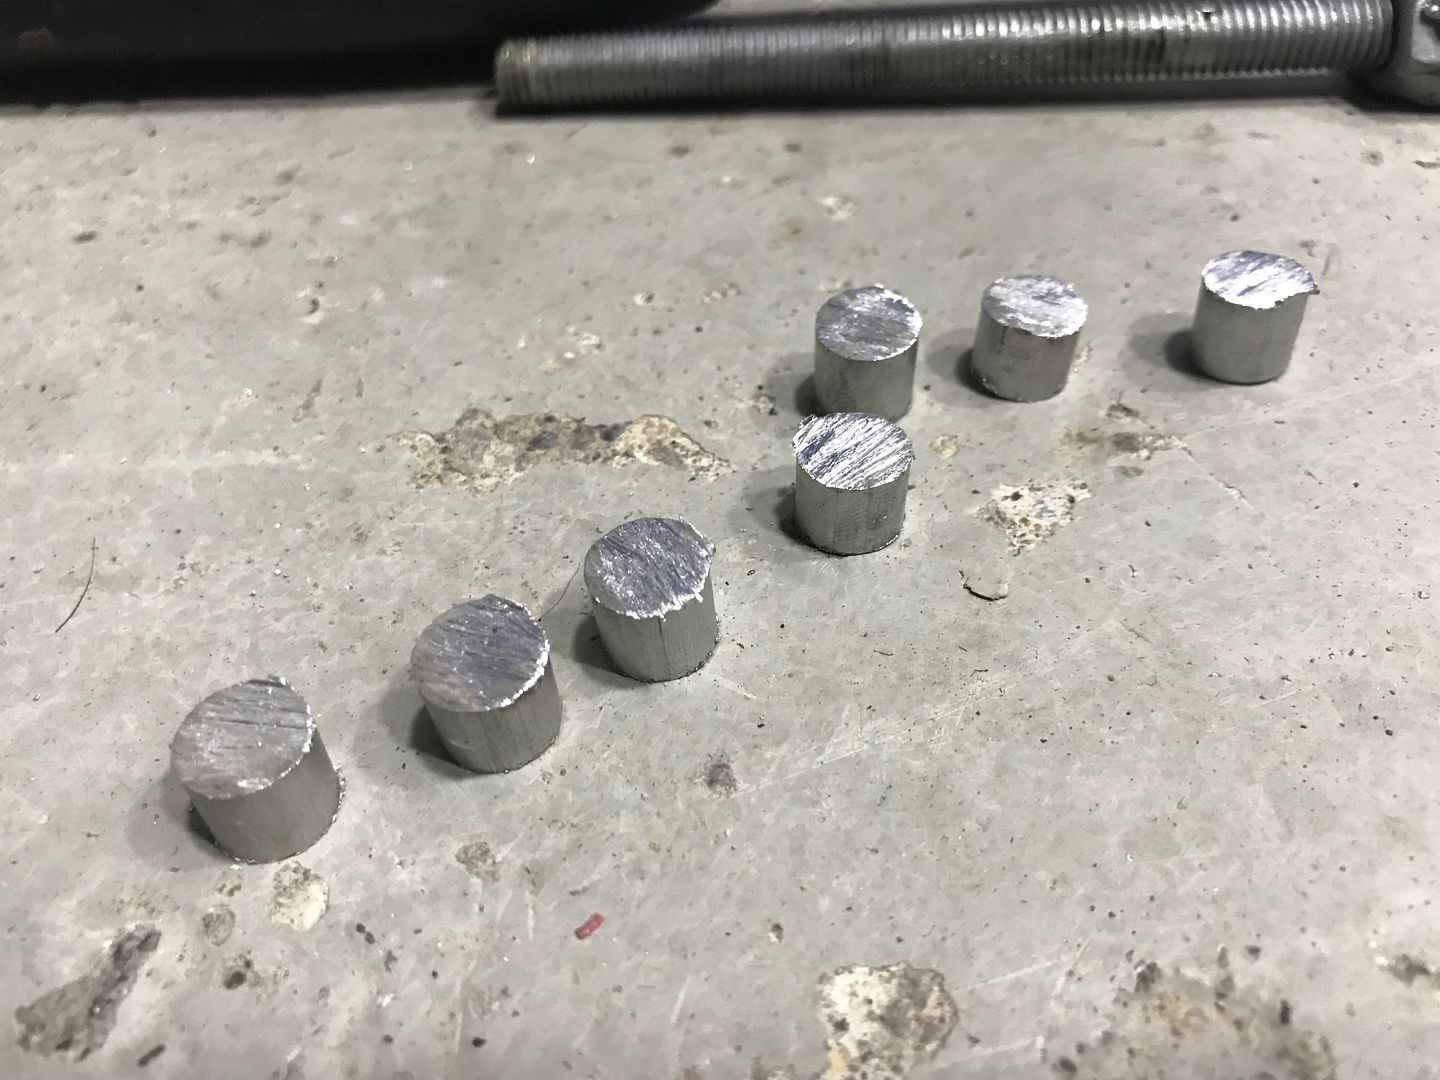
The bores were then reamed to 10mm
Some short lengths of 10.1mm diameter aluminium rod were cut, giving a 0.1mm (0.004") interference fit in the reamed holes in the throttle bodies.
The throttle bodies were heated up and the plugs were pressed into position, once installed they looked like this
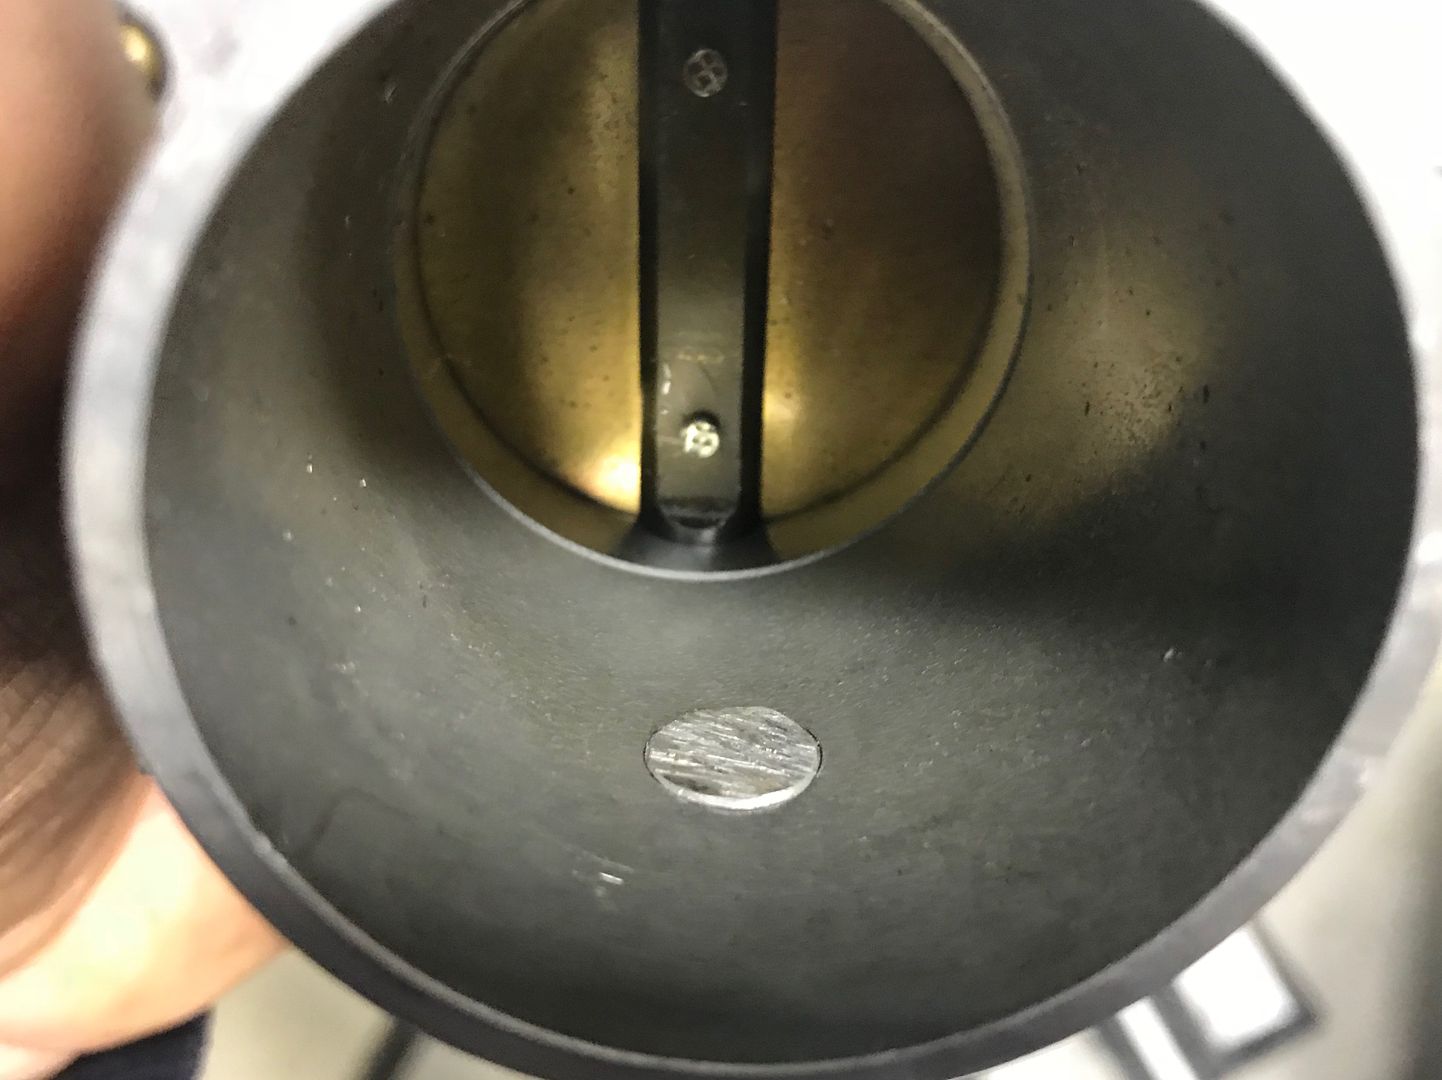
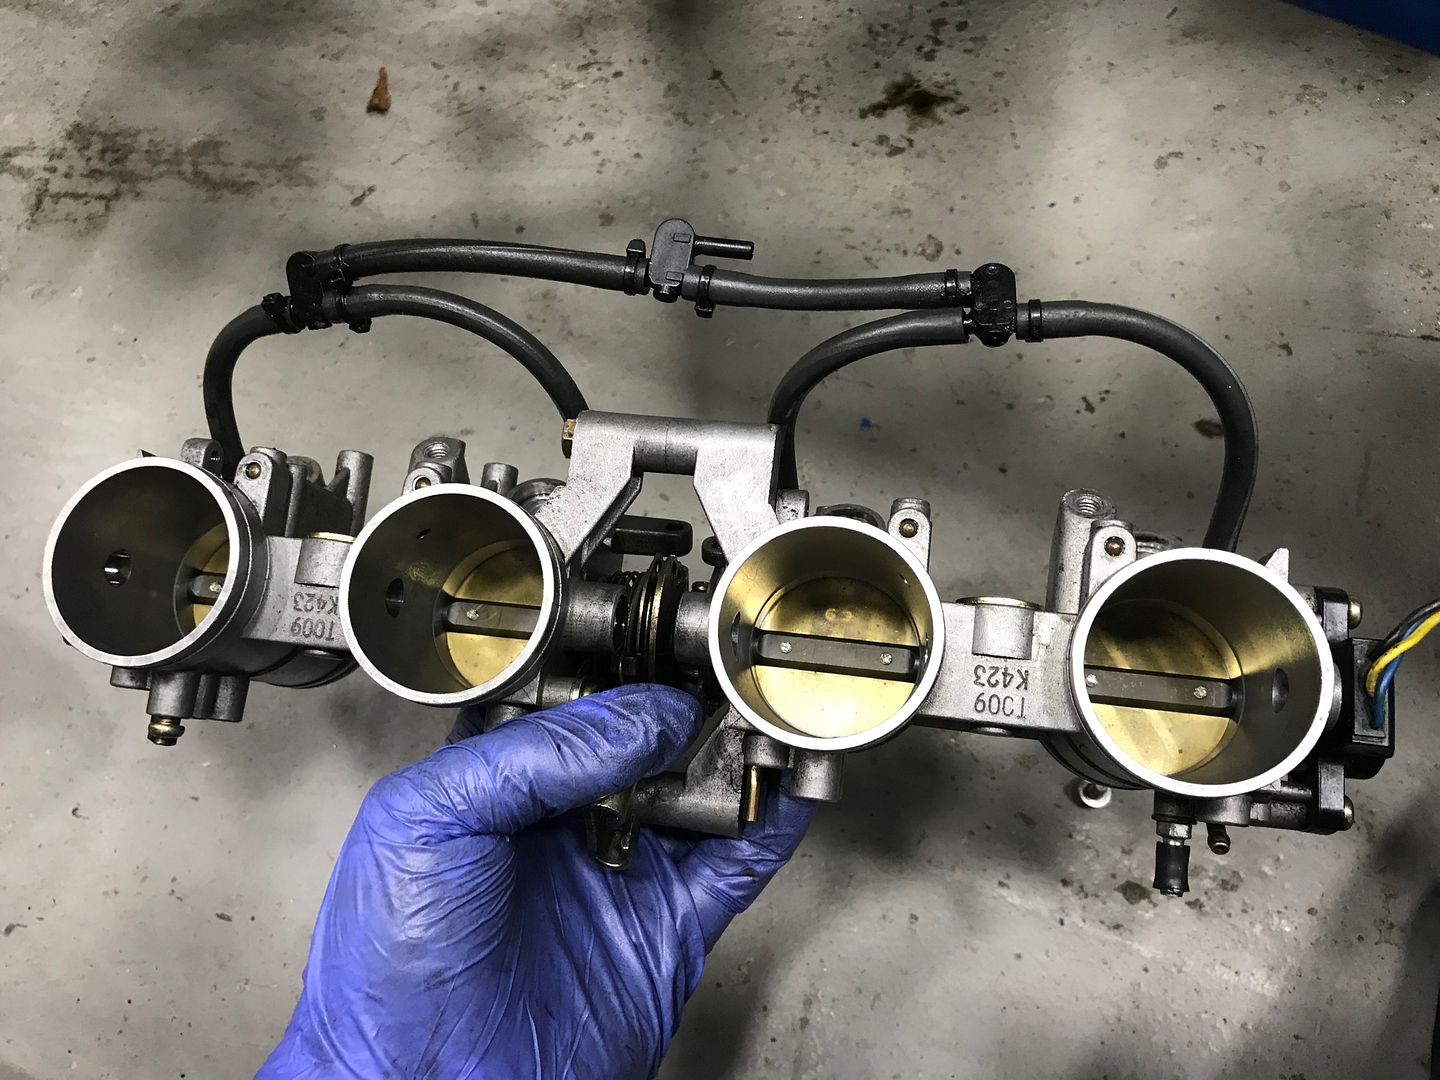
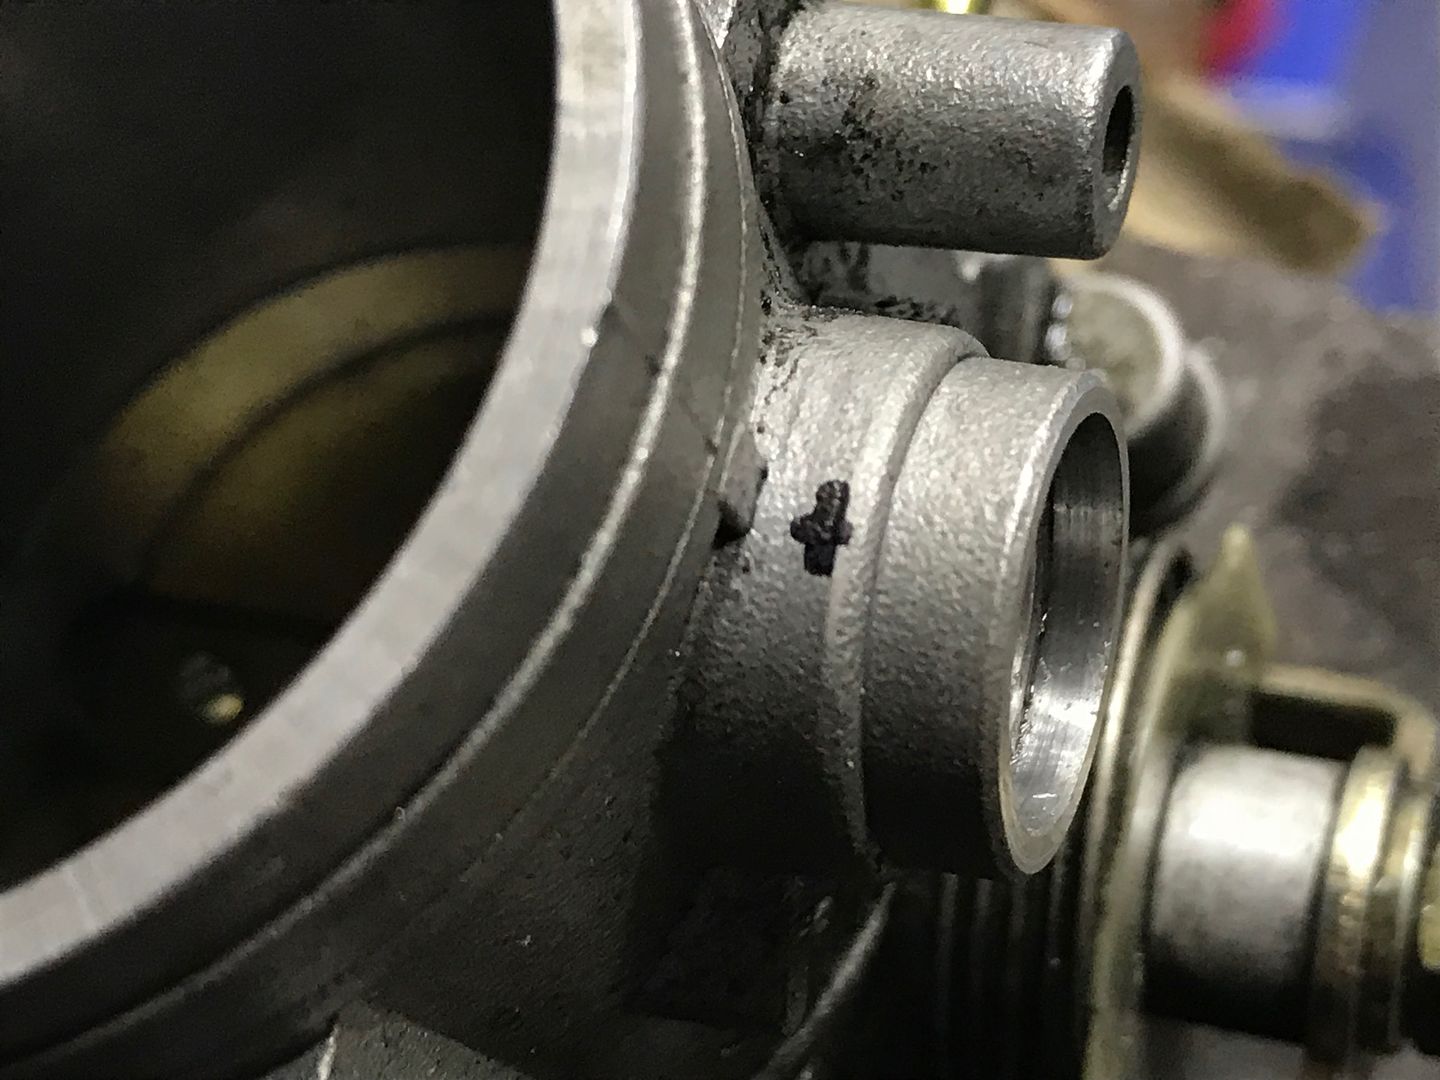
The plugs were then hand profiled to match the shape of the throttle bodies
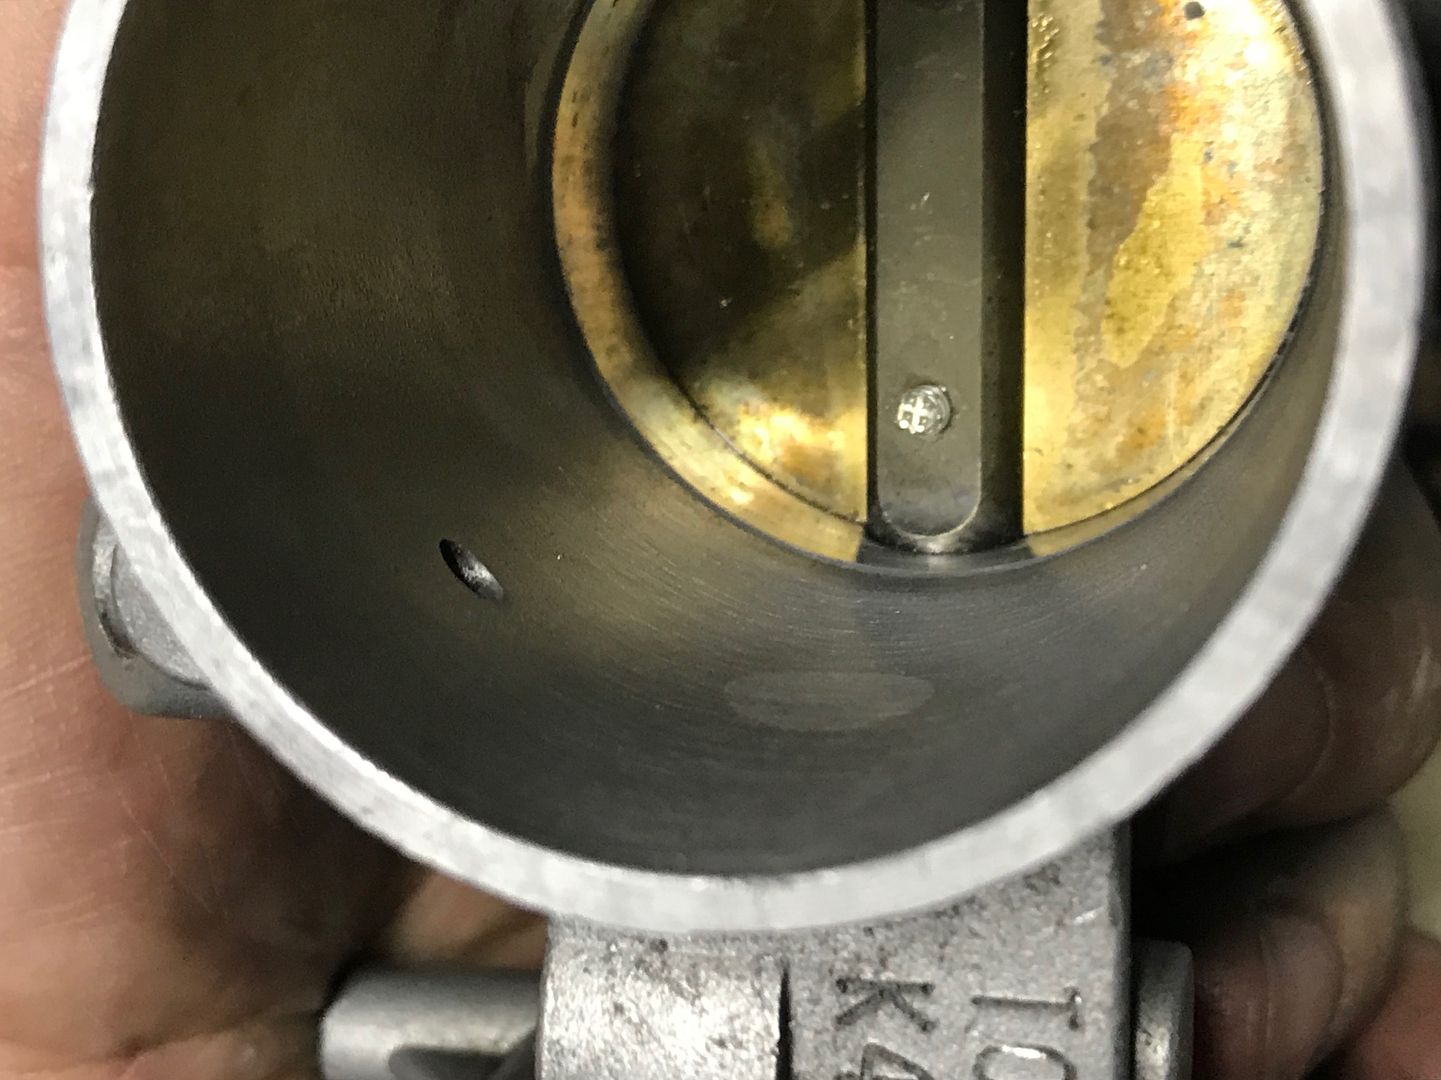
The plugs are already a 0.004" interference fit so should never come out, but I'm tempted to fit roll pins in outer sides of the plugs (where the black X is) to prevent any possible movement

So I removed the secondary shafts


This is the left over parts for the bin

The bores were then reamed to 10mm

Some short lengths of 10.1mm diameter aluminium rod were cut, giving a 0.1mm (0.004") interference fit in the reamed holes in the throttle bodies.

The throttle bodies were heated up and the plugs were pressed into position, once installed they looked like this

The plugs were then hand profiled to match the shape of the throttle bodies


The plugs are already a 0.004" interference fit so should never come out, but I'm tempted to fit roll pins in outer sides of the plugs (where the black X is) to prevent any possible movement

Just found and read this for the first time, looks like a cracking build to very high standard, and then the somewhat predictable work to get a reliable car out of a highly tuned engine.
I'm 2years into a 2l zetec re-engine of my Westfield when 8years into ownership it's 1.9 cvh dropped and exhaust valve. A slightly less adventurous choice!
Daniel
I'm 2years into a 2l zetec re-engine of my Westfield when 8years into ownership it's 1.9 cvh dropped and exhaust valve. A slightly less adventurous choice!
Daniel
dhutch said:
Just found and read this for the first time, looks like a cracking build to very high standard, and then the somewhat predictable work to get a reliable car out of a highly tuned engine.
I'm 2years into a 2l zetec re-engine of my Westfield when 8years into ownership it's 1.9 cvh dropped and exhaust valve. A slightly less adventurous choice!
Daniel
Thanks Daniel.I'm 2years into a 2l zetec re-engine of my Westfield when 8years into ownership it's 1.9 cvh dropped and exhaust valve. A slightly less adventurous choice!
Daniel
The Zetec has plenty of potential, not a bad choice of engine at all, lots of options with regards to tuning etc.
Do you have a build thread on your Westy?


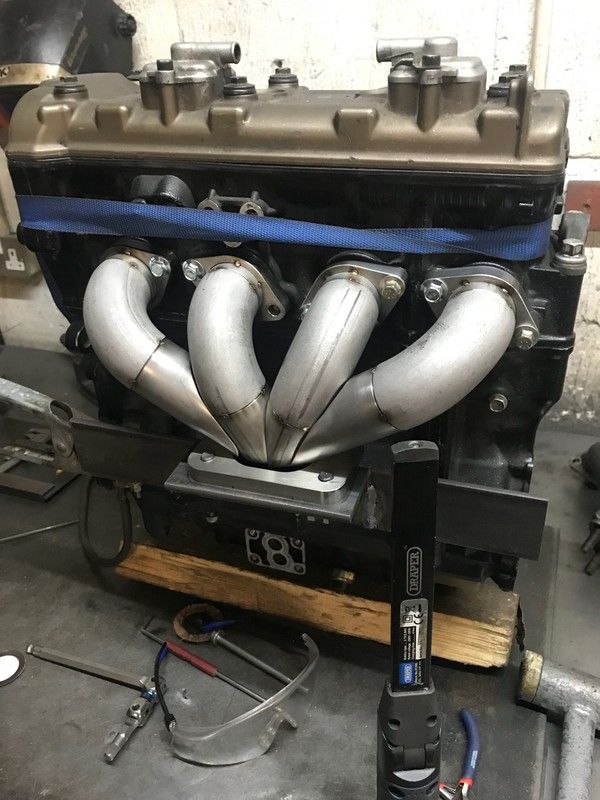
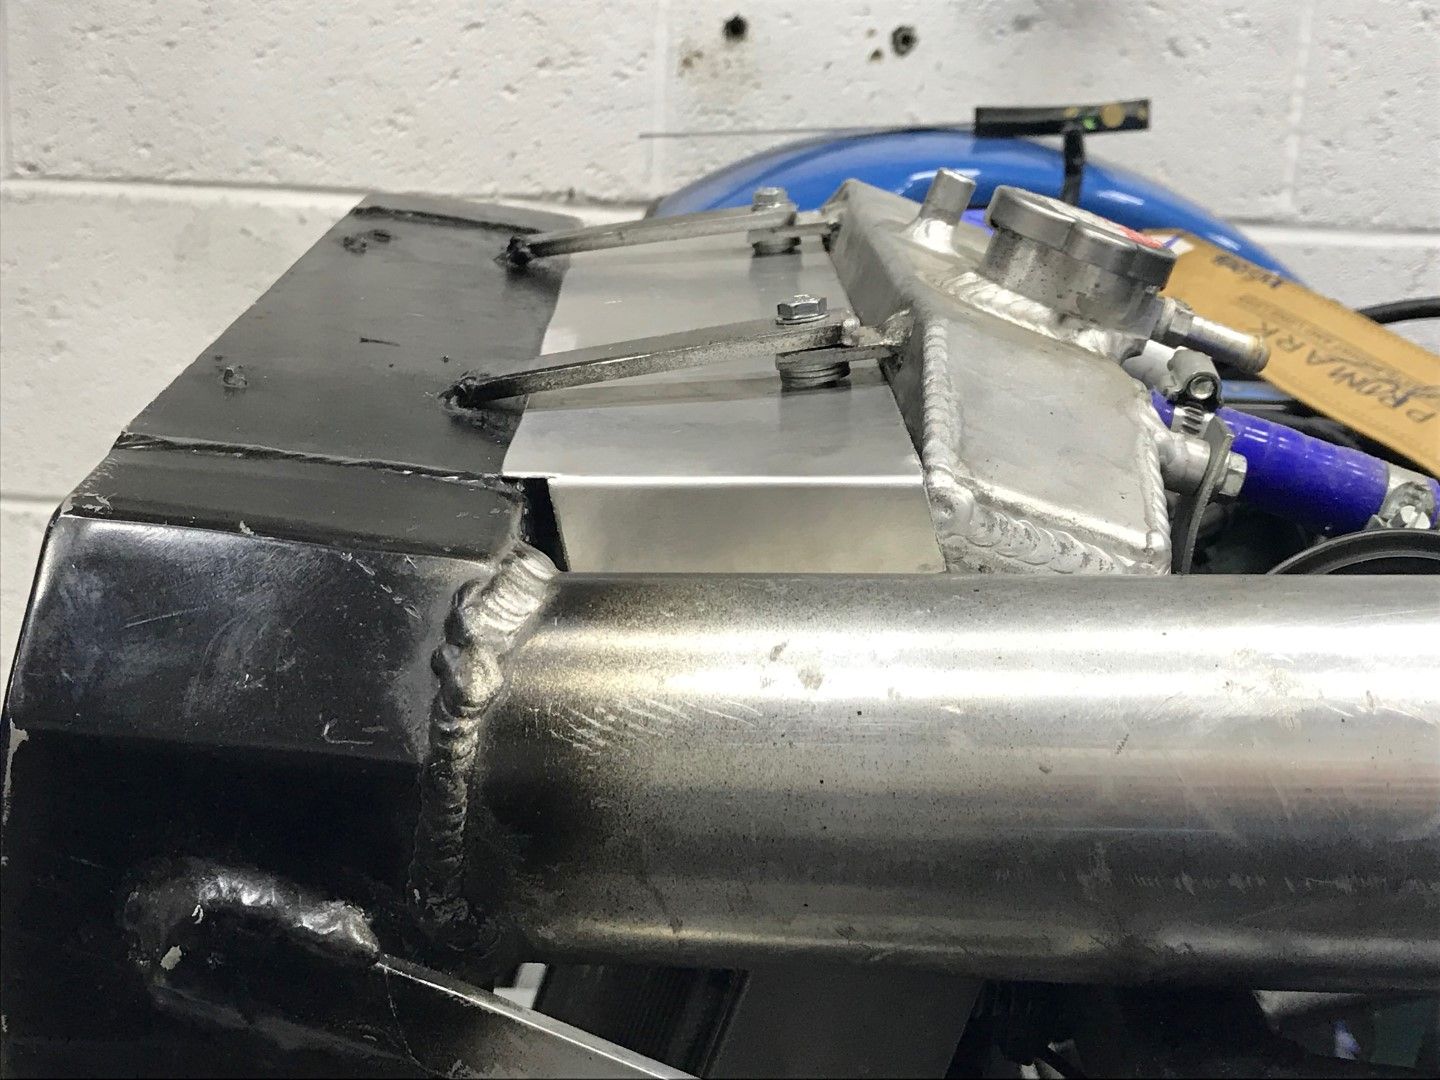
A new exhaust manifold in progress, it will mount the turbo higher than previously which means I can install the standard oil filter assembly to the engine instead of having the remote oil filter, thereby removing unnecessary load from the oil pump.
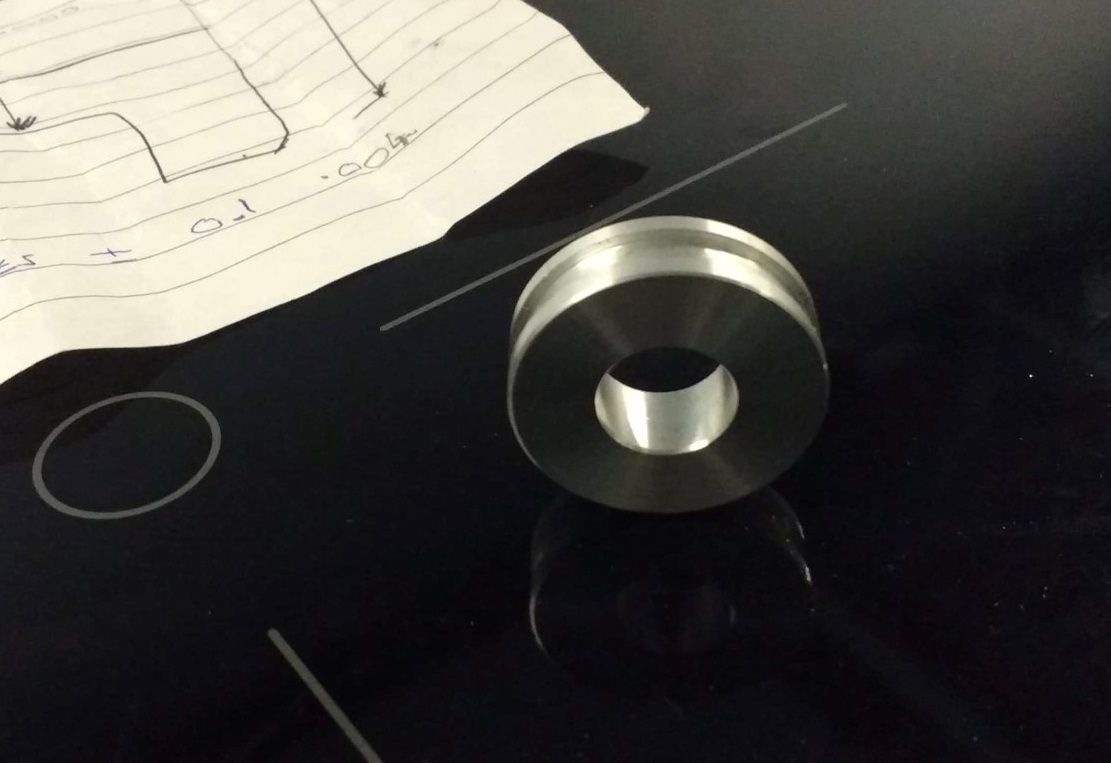
As the turbo is now mounted higher, the turbo oil will drain back to the engine without the need for a pump but obviously it needs somewhere to drain to. As the engine now runs a dry sump, I no longer need the oil sight glass in the engine case, so it has been removed and a blanking plug has been machined to fit in it's place. The plug will be installed with two O-rings on the outside diameter to seal in the sight glass bore, but first it needs the hole in the centre to be tapped out to accept an M14x1.5 to JIC 6 fitting.
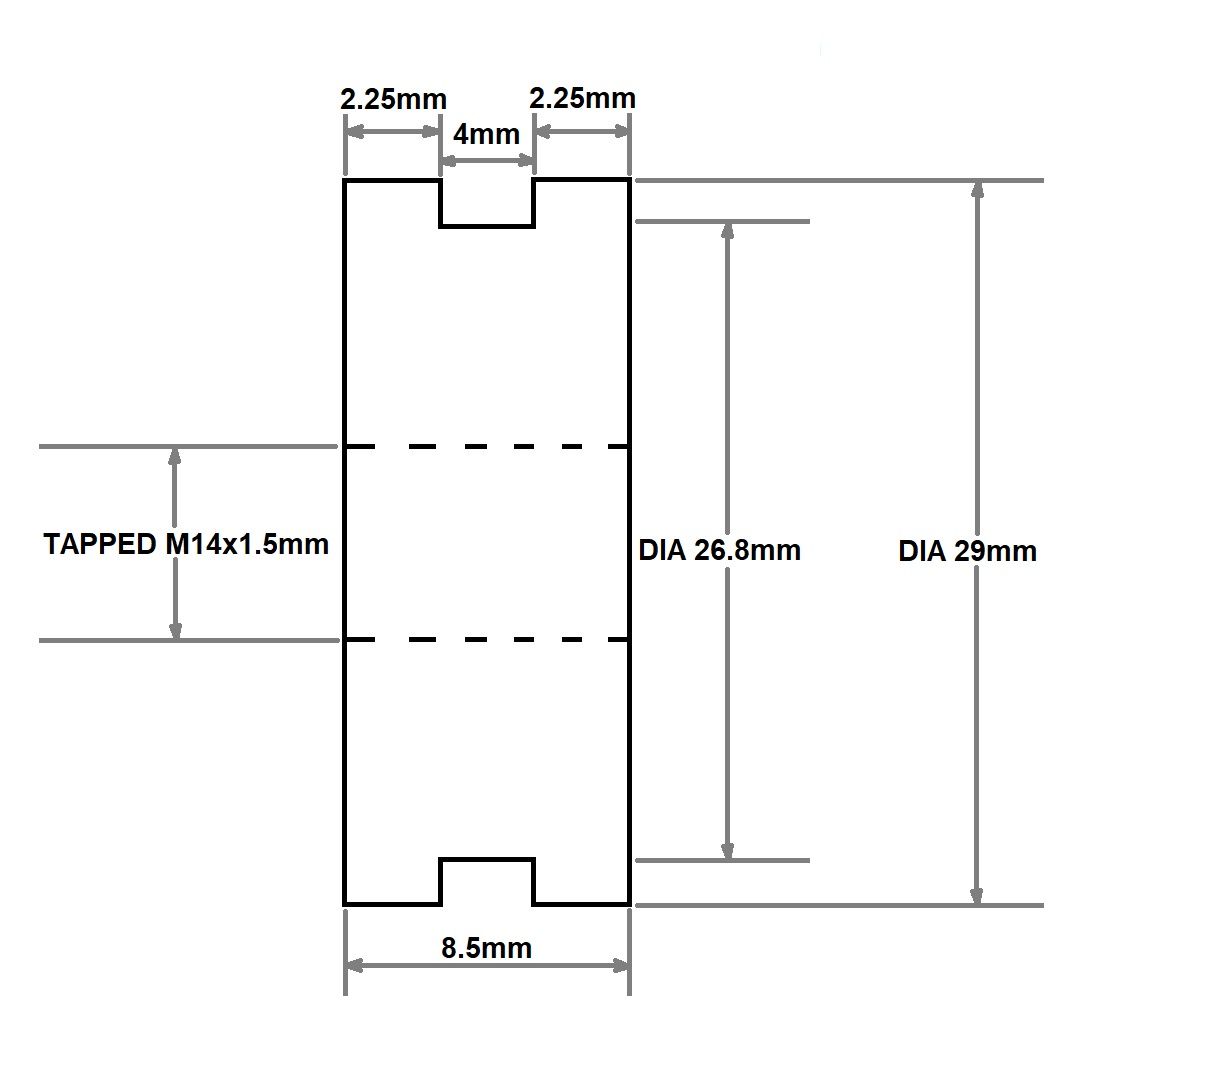

As the turbo is now mounted higher, the turbo oil will drain back to the engine without the need for a pump but obviously it needs somewhere to drain to. As the engine now runs a dry sump, I no longer need the oil sight glass in the engine case, so it has been removed and a blanking plug has been machined to fit in it's place. The plug will be installed with two O-rings on the outside diameter to seal in the sight glass bore, but first it needs the hole in the centre to be tapped out to accept an M14x1.5 to JIC 6 fitting.


Edited by Red16 on Tuesday 29th January 15:44
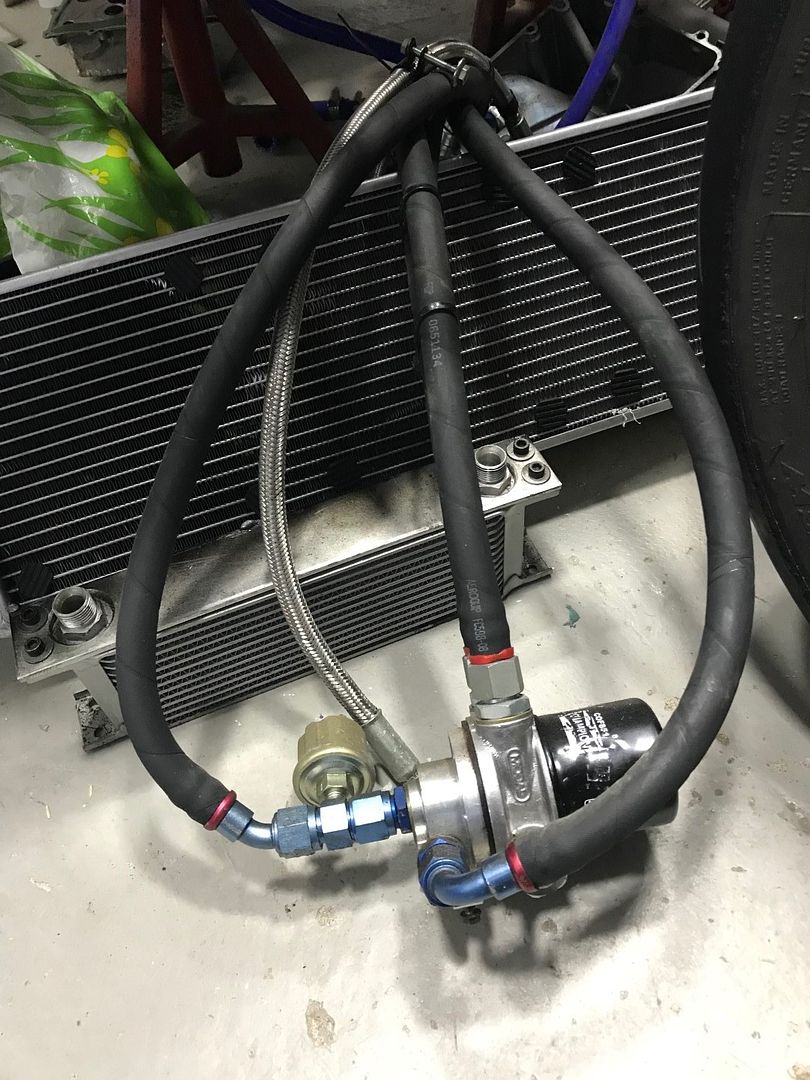
As the standard oil filter is now being reinstated I can do away with the remote oil filter assembly installed at the front of the car.
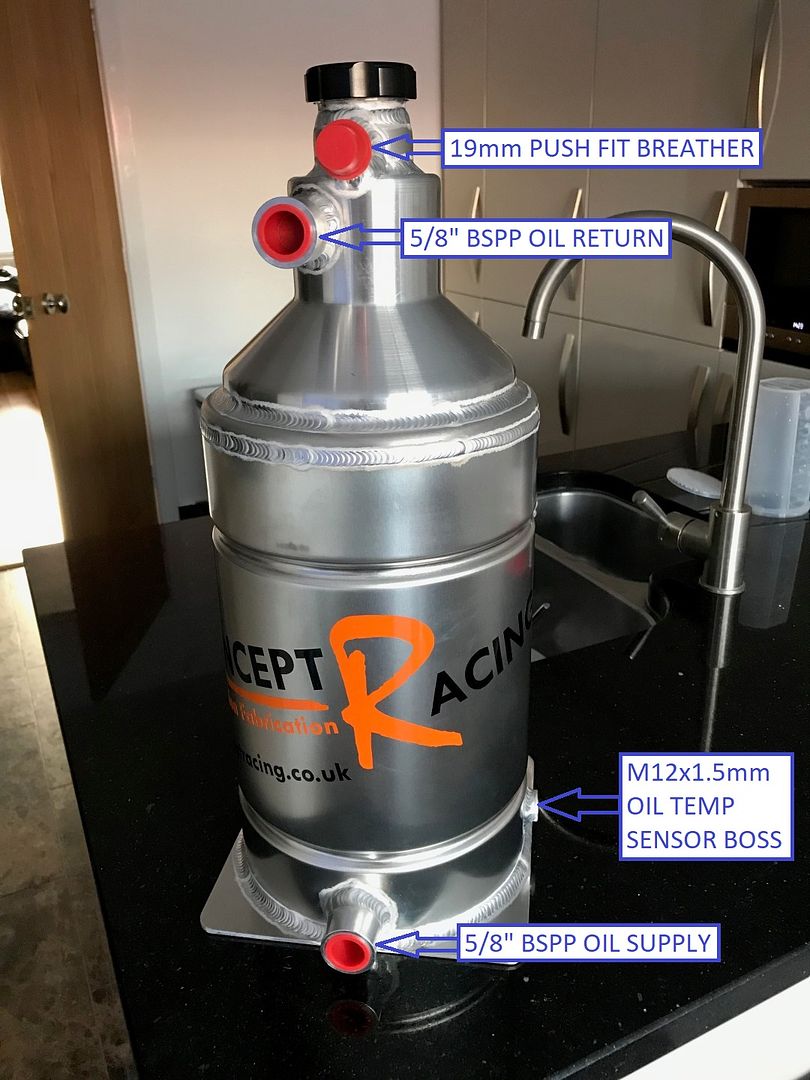
I have also decided to remove the oil to air cooler and will be installing a MOCAL Laminova oil cooler in the upper radiator pipe, the oil will be pushed through this cooler by the scavenge pump before returning it to the dry sump oil tank.
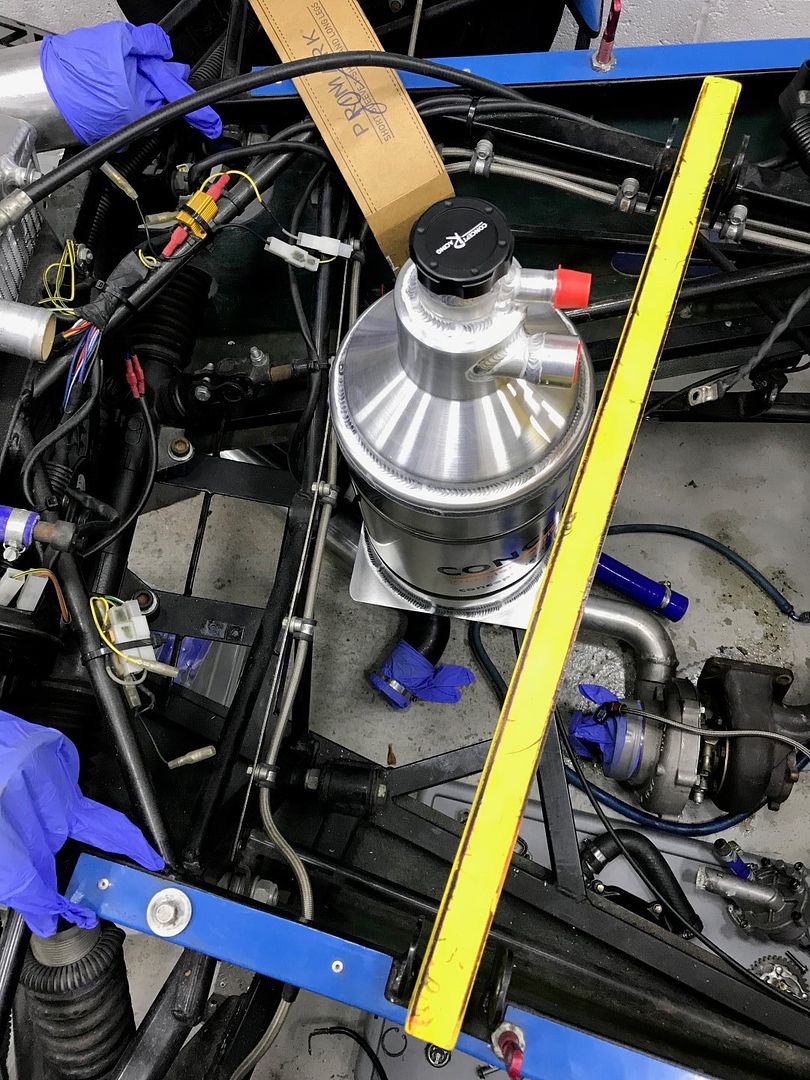
Here's the 1.5 gallon capacity dry sump oil tank, supplied by Concept Racing. I chose to have an M12 sensor boss welded in to the bottom to allow oil temperature to be measured.
The tank will sit here in the engine bay
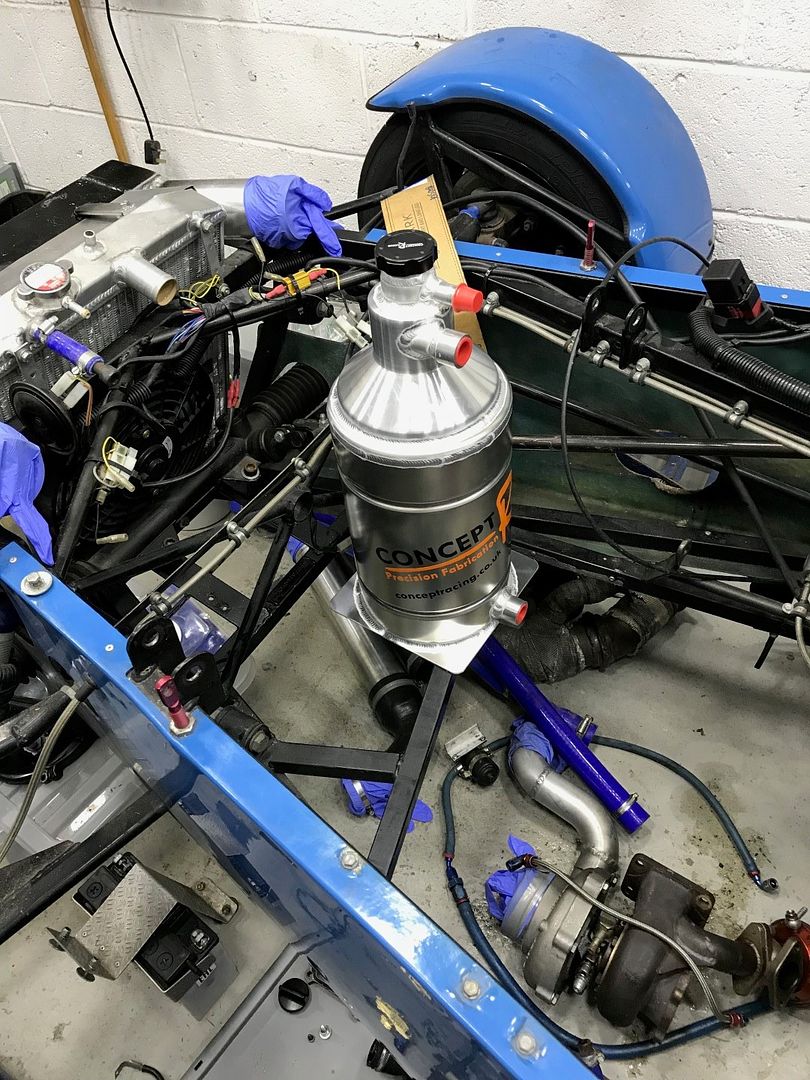
The yellow bar across the chassis is where the engine cradle sits, close but just enough clearance to squeeze the tank in.
I have also decided to remove the oil to air cooler and will be installing a MOCAL Laminova oil cooler in the upper radiator pipe, the oil will be pushed through this cooler by the scavenge pump before returning it to the dry sump oil tank.

Here's the 1.5 gallon capacity dry sump oil tank, supplied by Concept Racing. I chose to have an M12 sensor boss welded in to the bottom to allow oil temperature to be measured.

The tank will sit here in the engine bay

The yellow bar across the chassis is where the engine cradle sits, close but just enough clearance to squeeze the tank in.

Oil cooler removed left this gap
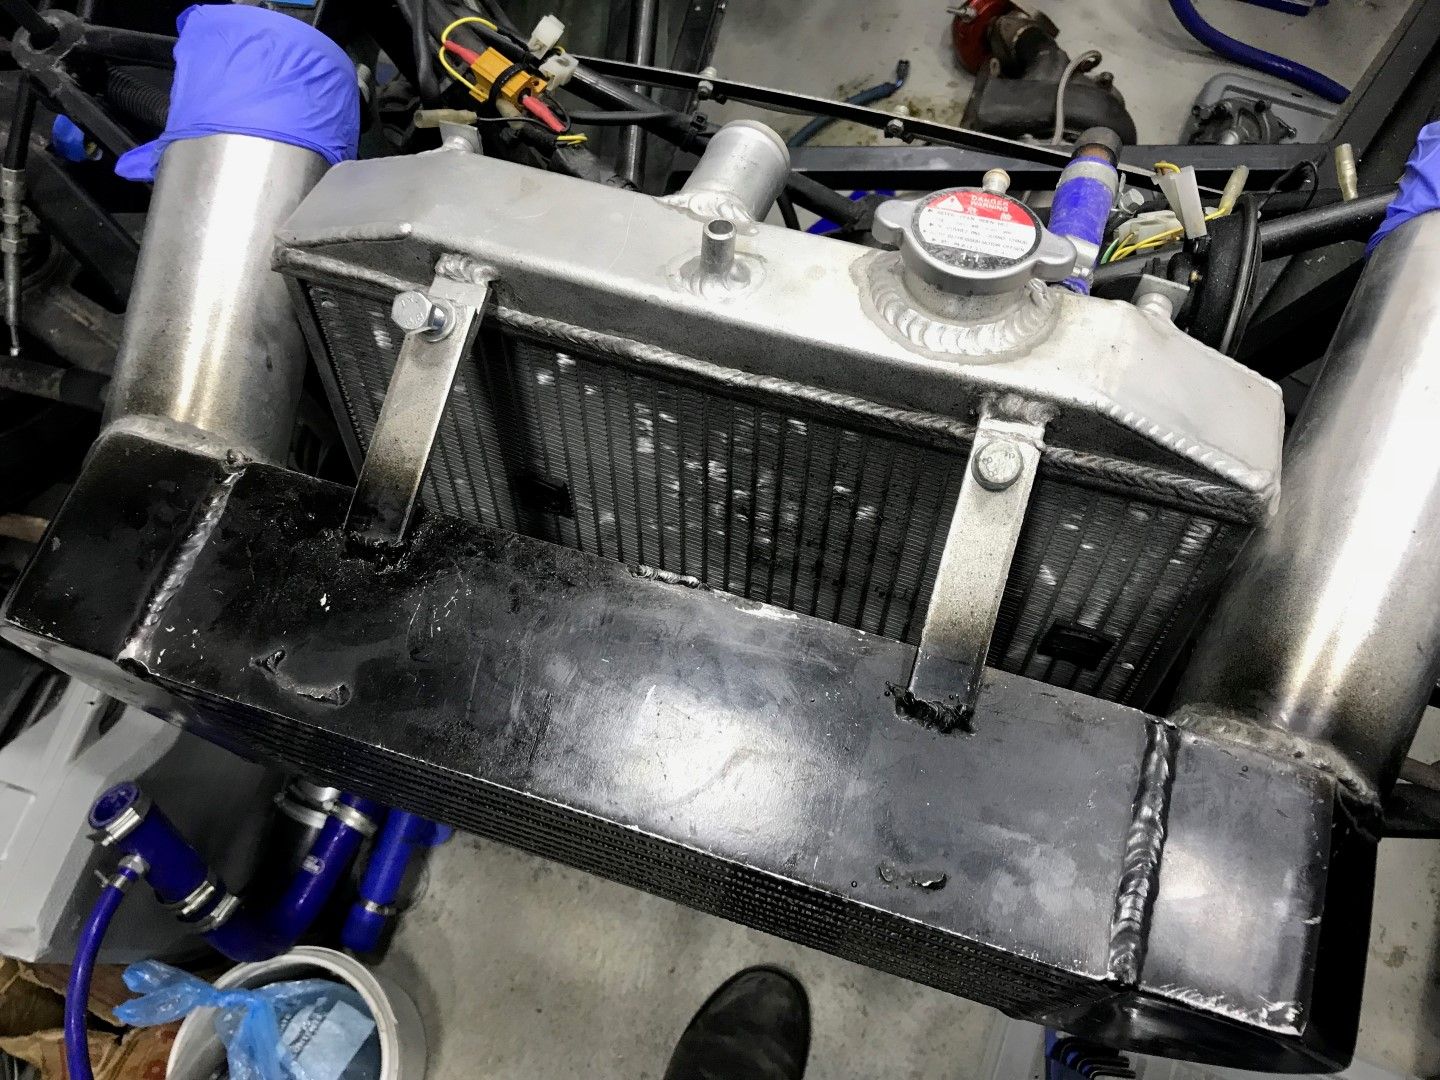
A cardboard template knocked up
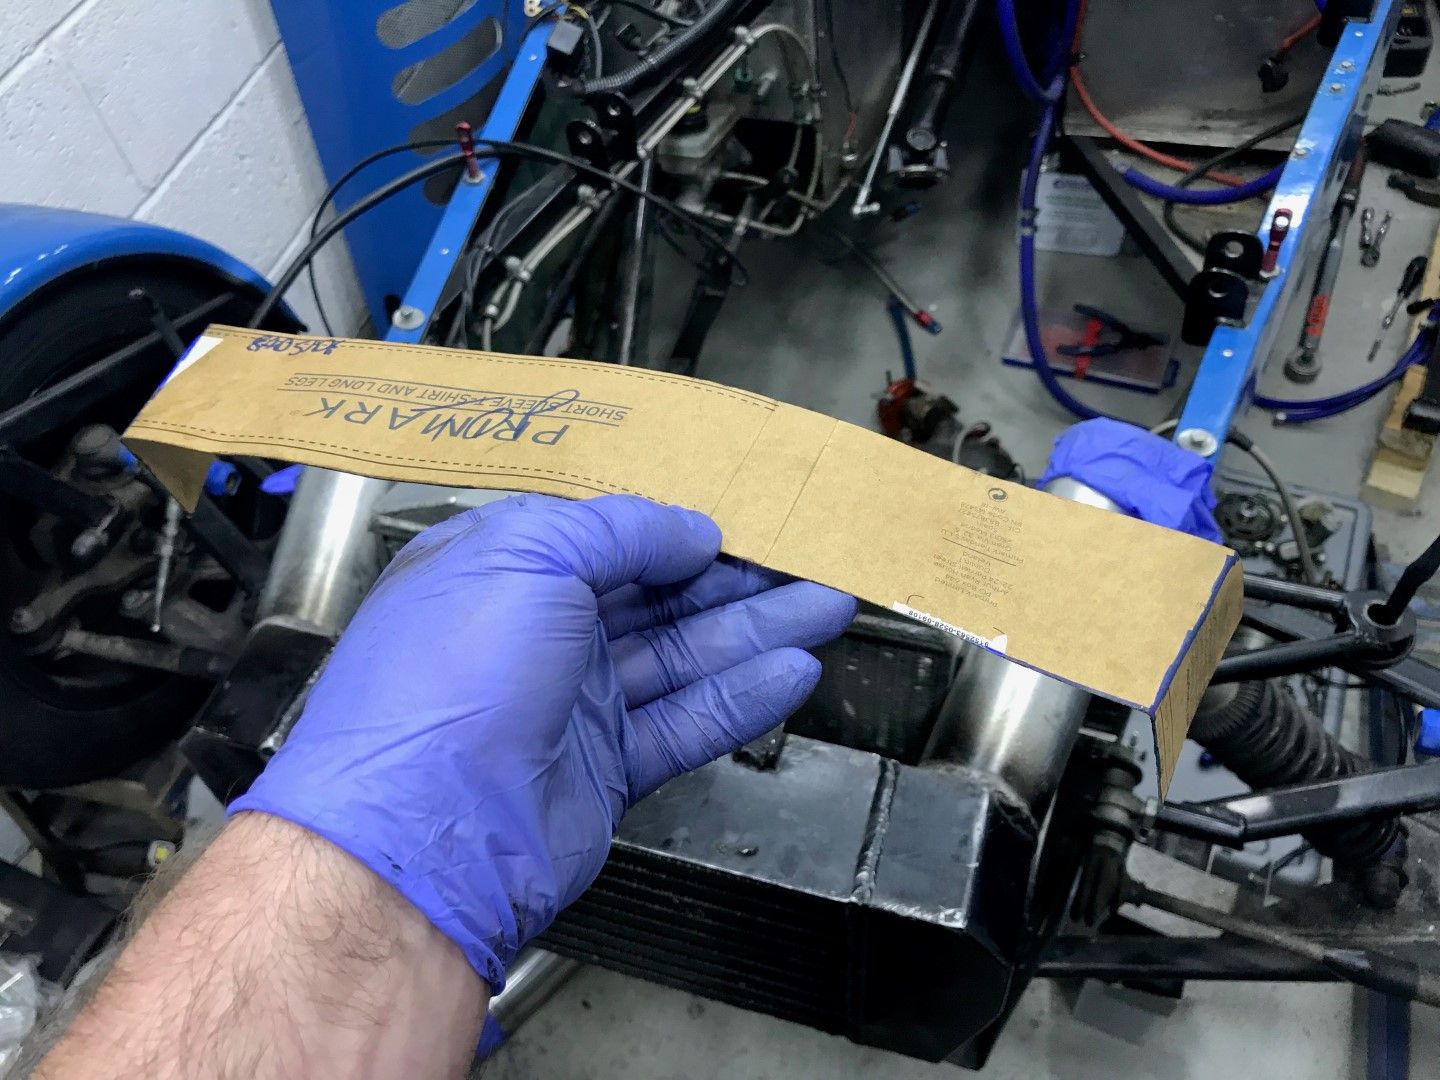
To duct air through the radiator after the intercooler
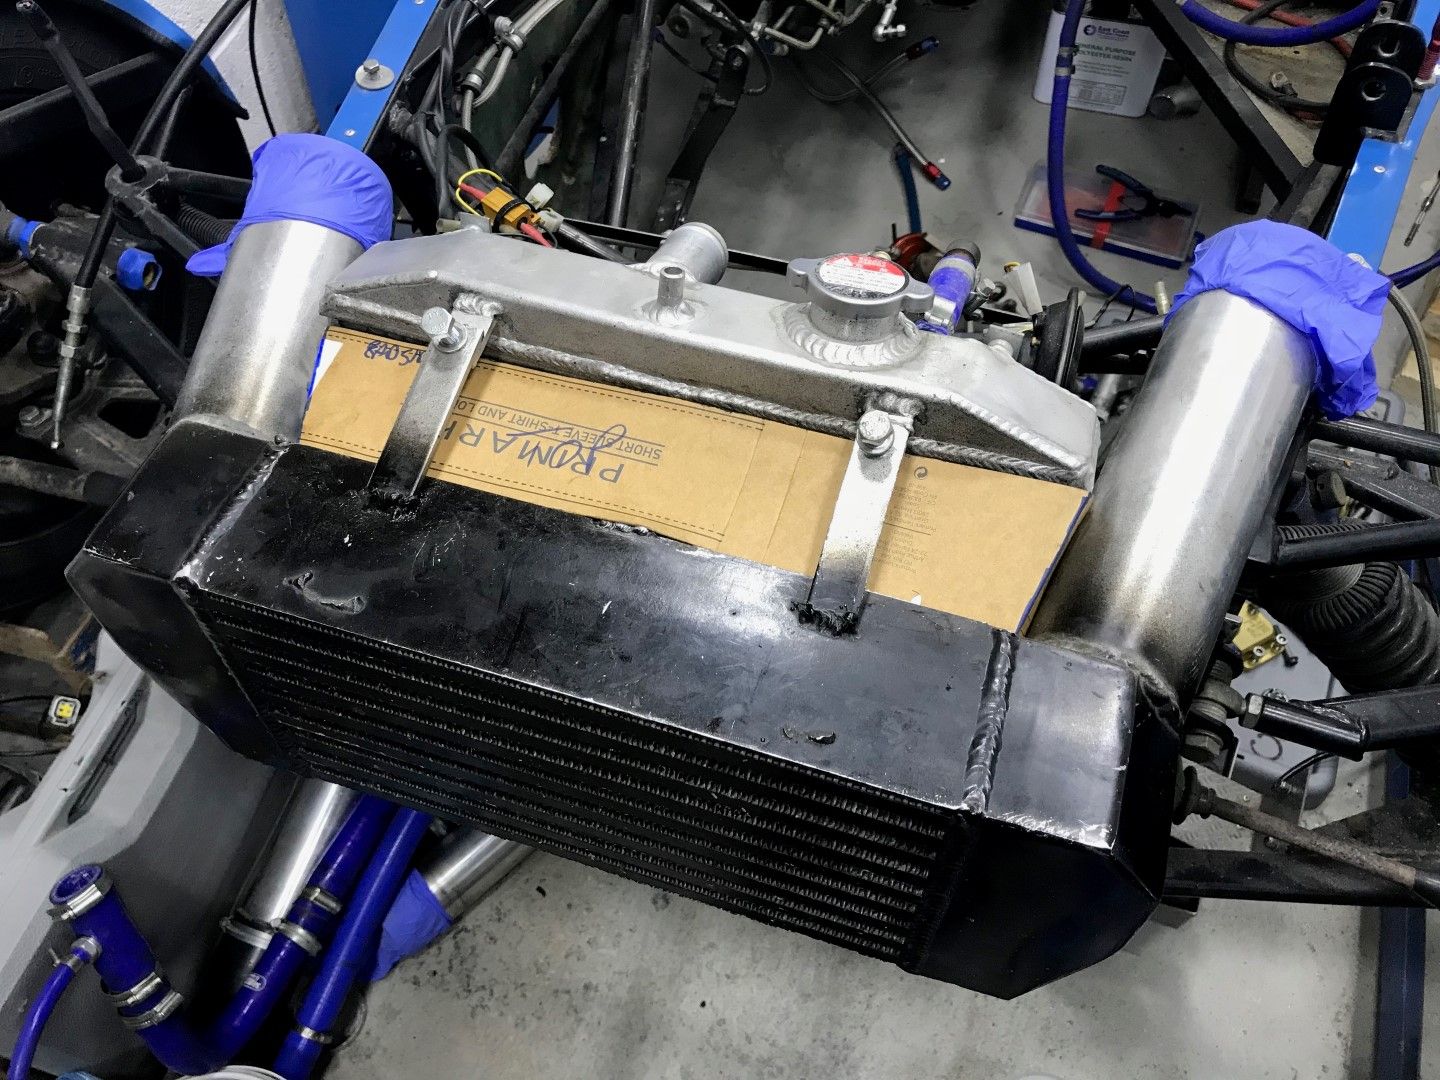
With the template transferred to aluminium you get this, with a few rivnuts fitted to allow it to be bolted to the intercooler mounting bracket.
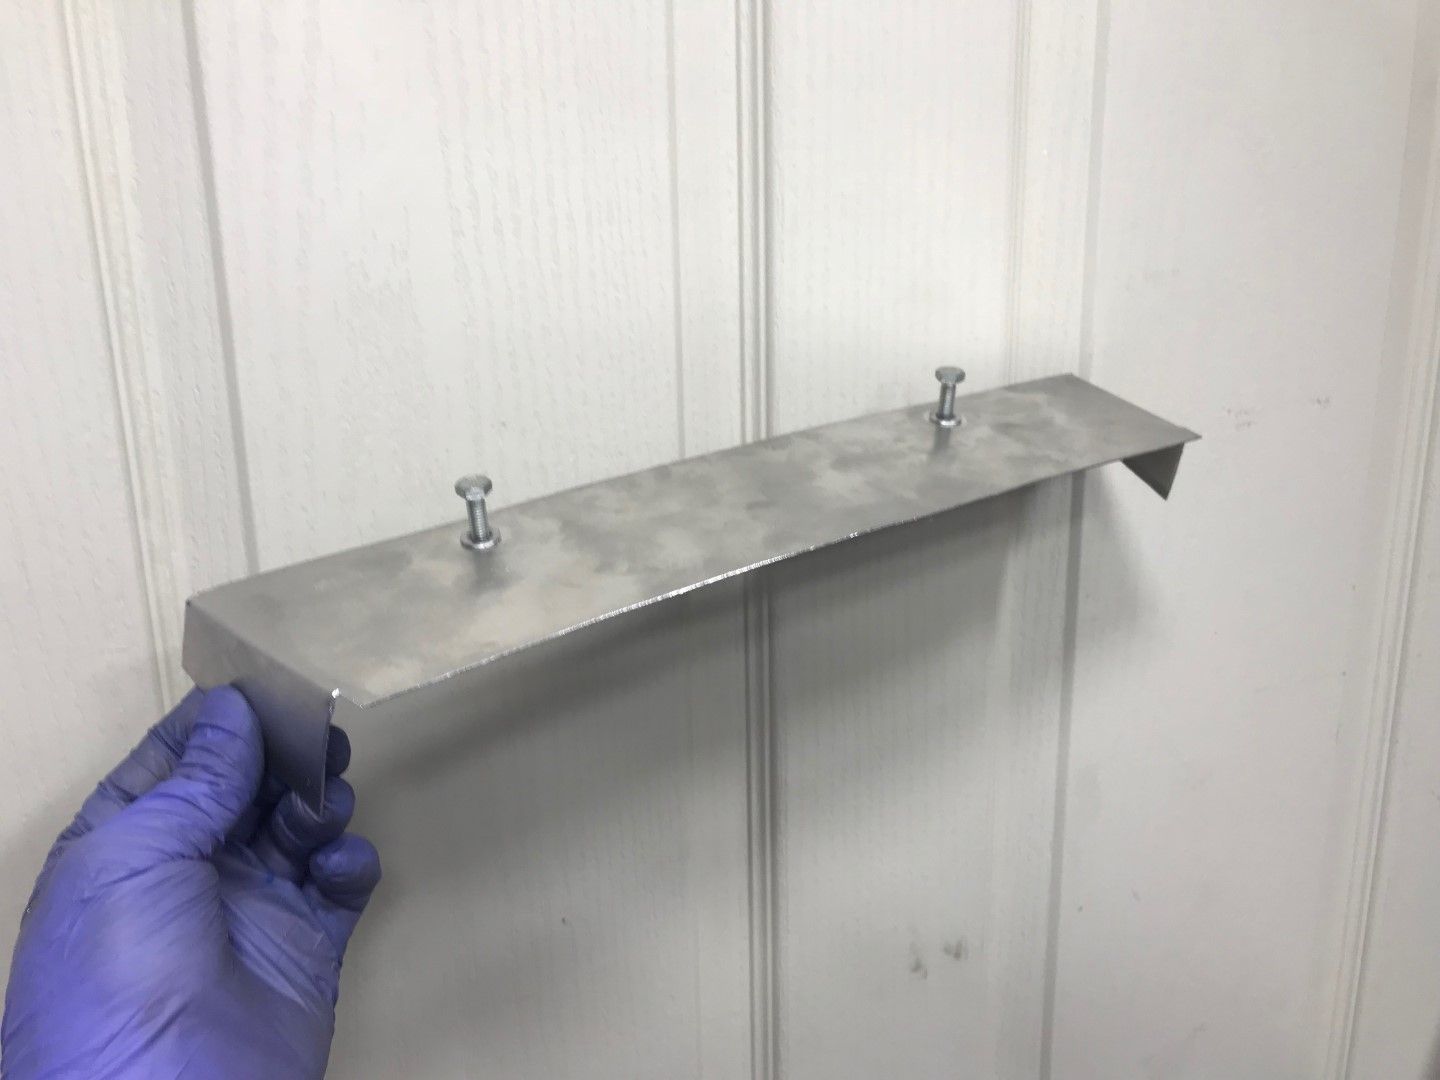
More ducting needed to go down the sides of the radiator and also the front/bottom of the radiator/intercooler, this upper one probably better made again from slightly thicker material to stop if flapping about in the wind.

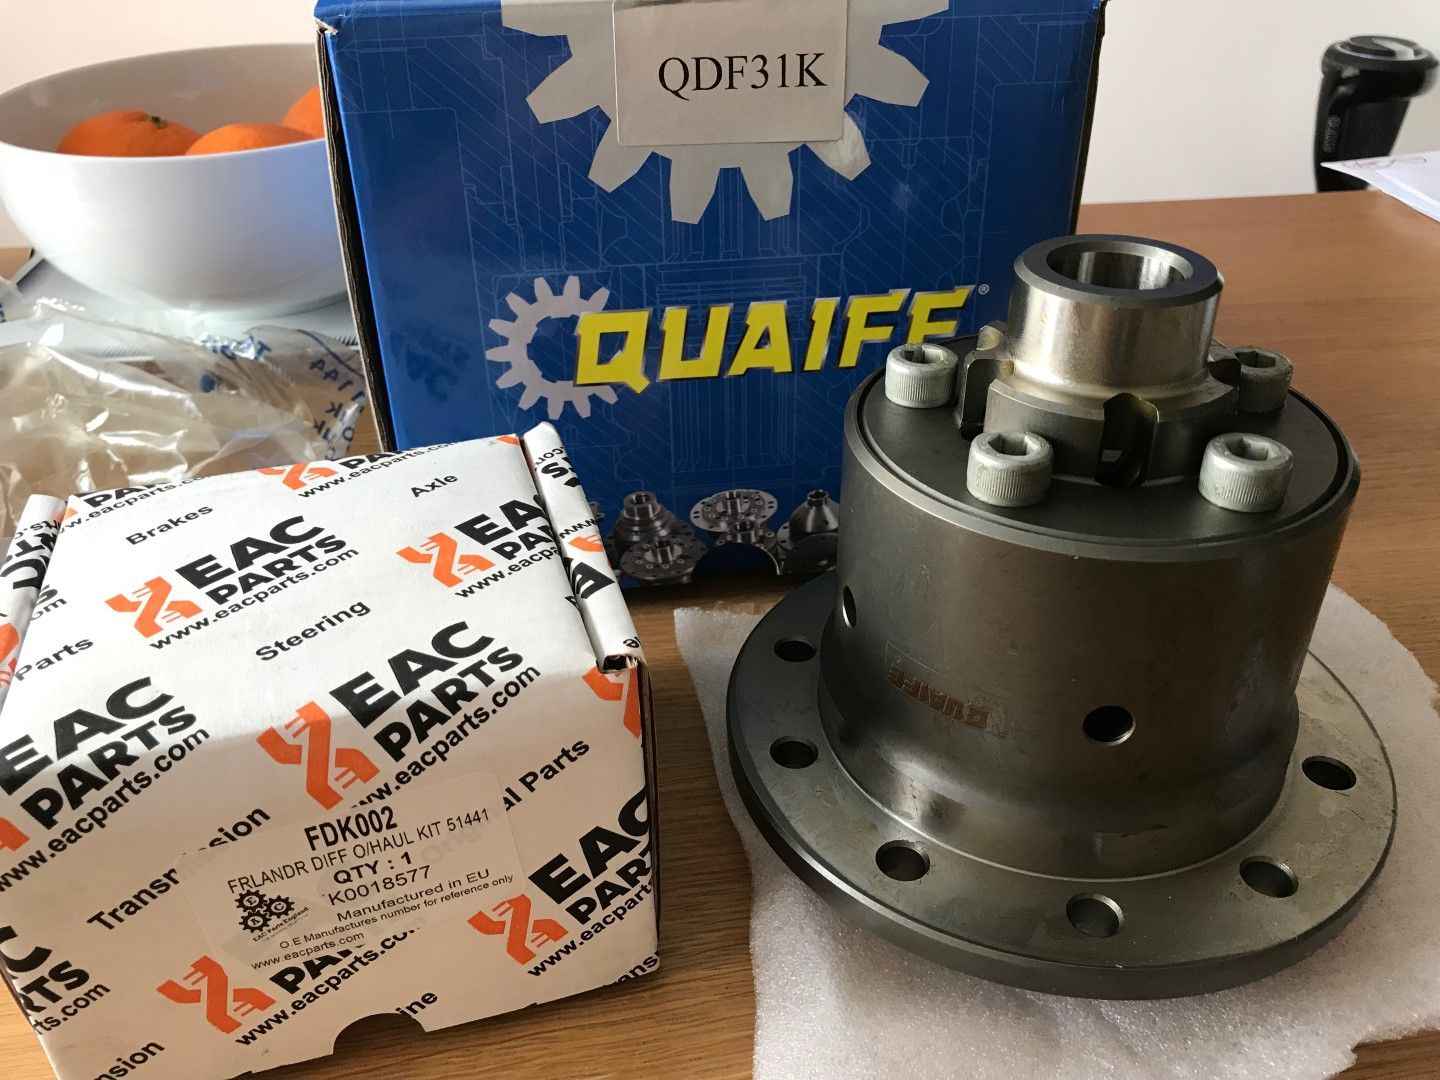
A little upgrade for the rear differential, one Quaife ATB limited slip diff assembly supplied by Quaife and a diff overhaul kit supplied by Ashcroft Transmissions. For my future reference, the diff casing stamped with the number 51441, which helps identify which bearing kit is required for the overhaul.
To go along with the diff upgrade and the new polybushes to mount the diff, the front mount threaded rod with nuts each end is being replaced for a much better fitting M12x130mm shouldered bolt.
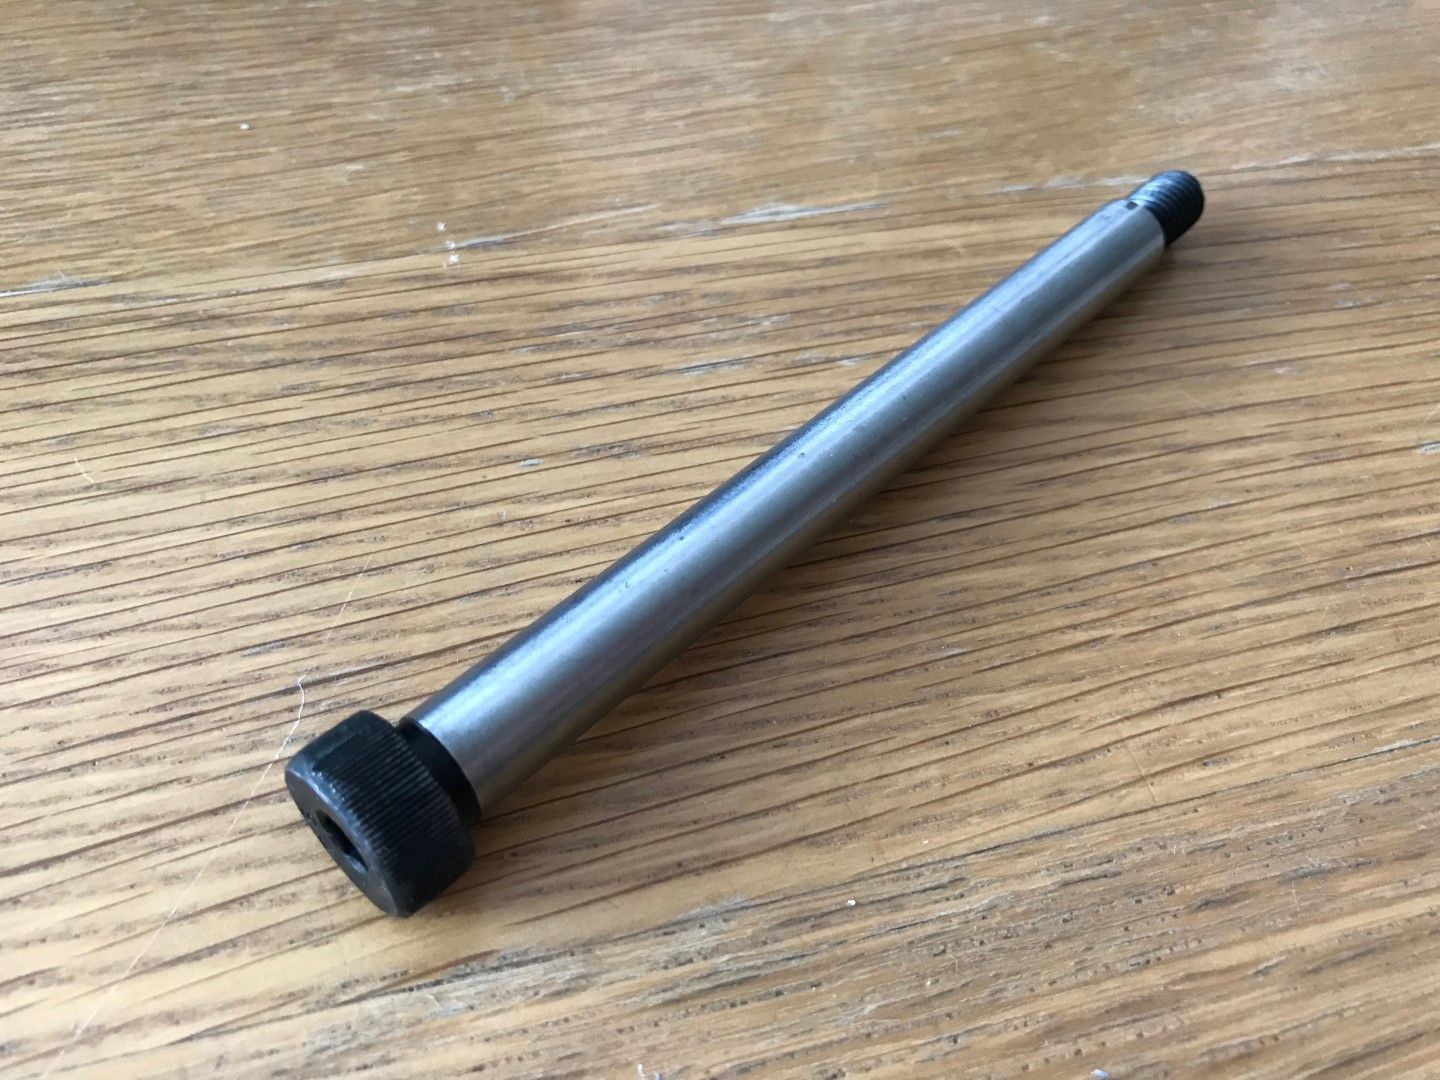

To go along with the diff upgrade and the new polybushes to mount the diff, the front mount threaded rod with nuts each end is being replaced for a much better fitting M12x130mm shouldered bolt.

Looks good as always, I can't comment on the details but improved/simplified oil supply sound like a good thing, and adding a quafie ATB to mind transformed the car both on road and during autotest competition use. Thanks for the update!
Daniel
Red16 said:
The Zetec has plenty of potential, not a bad choice of engine at all, lots of options with regards to tuning etc.
Do you have a build thread on your Westy?
I didn't built the car, and while I've had most of it apart and back together, roll hoop, dampers, full rebush, new seats, rad and fan, megajolt ecu, gearbox rebuild etc it's all been done bit by bit of ten years. If I'd done a build log in the re-engine people would have died of boredom at the rate of change! Still the house is coming on much faster so you can't have it all. Do you have a build thread on your Westy?
Daniel
dhutch said:
Looks good as always, I can't comment on the details but improved/simplified oil supply sound like a good thing, and adding a quafie ATB to mind transformed the car both on road and during autotest competition use. Thanks for the update!
Heard loads of people say the ATB transformed their cars, it's always good getting positive feedback, can't wait to try it out.dhutch said:
I didn't built the car, and while I've had most of it apart and back together, roll hoop, dampers, full rebush, new seats, rad and fan, megajolt ecu, gearbox rebuild etc it's all been done bit by bit of ten years. If I'd done a build log in the re-engine people would have died of boredom at the rate of change! Still the house is coming on much faster so you can't have it all.
Once you have a house there is always something to be done to take away from the car/hobby time you used to have.


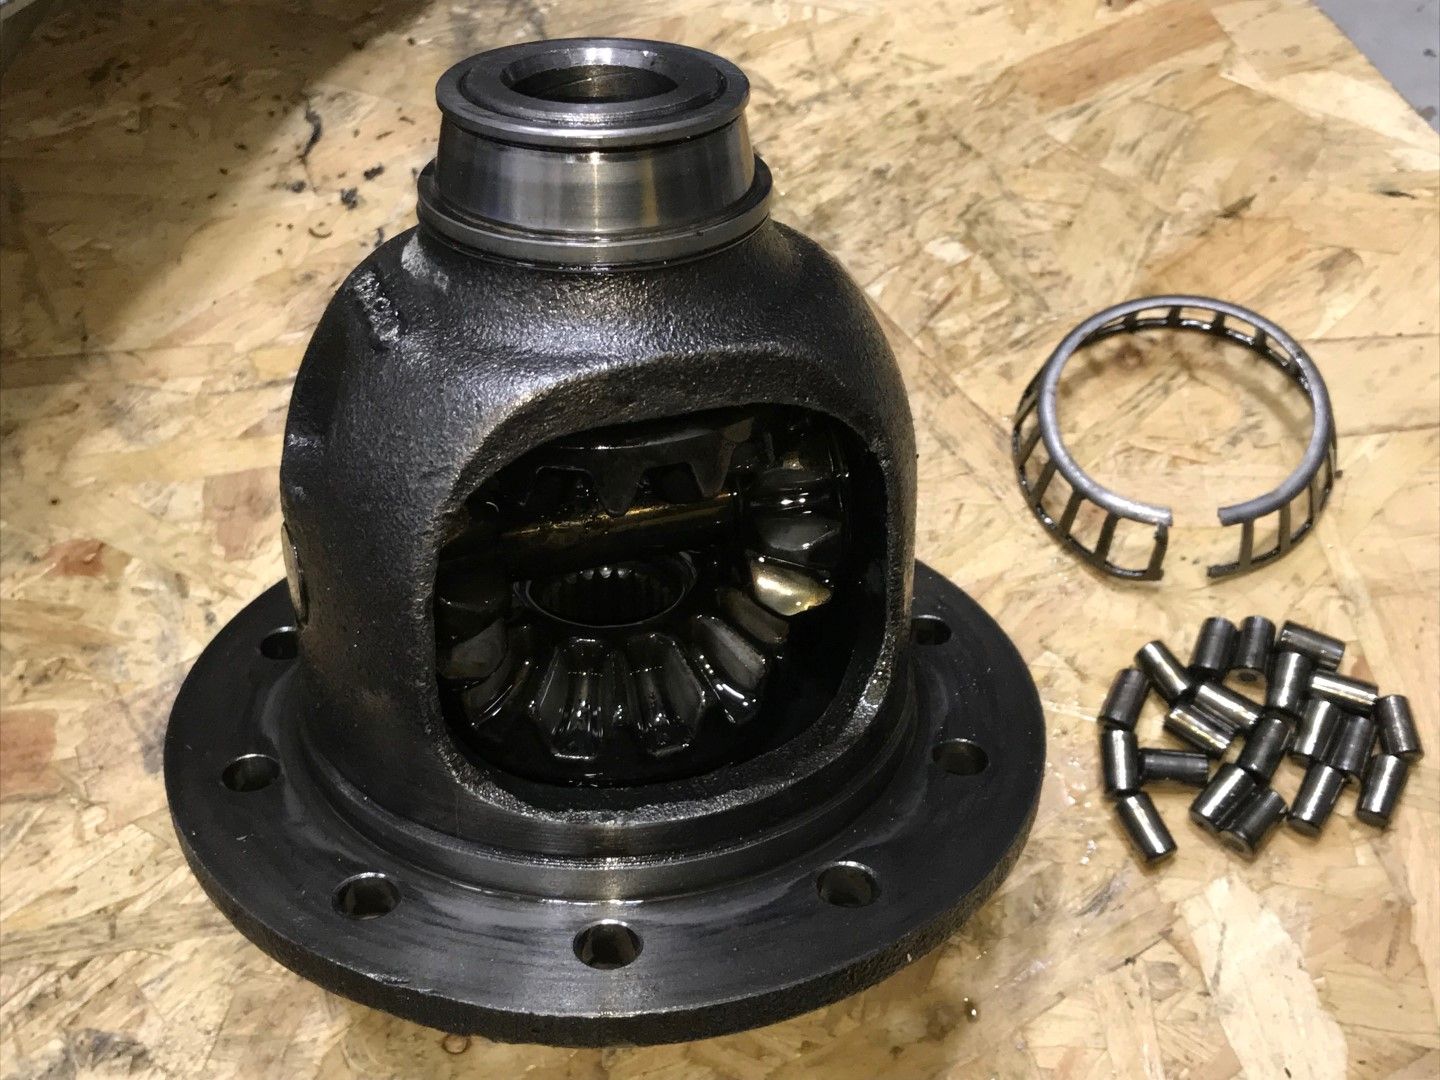
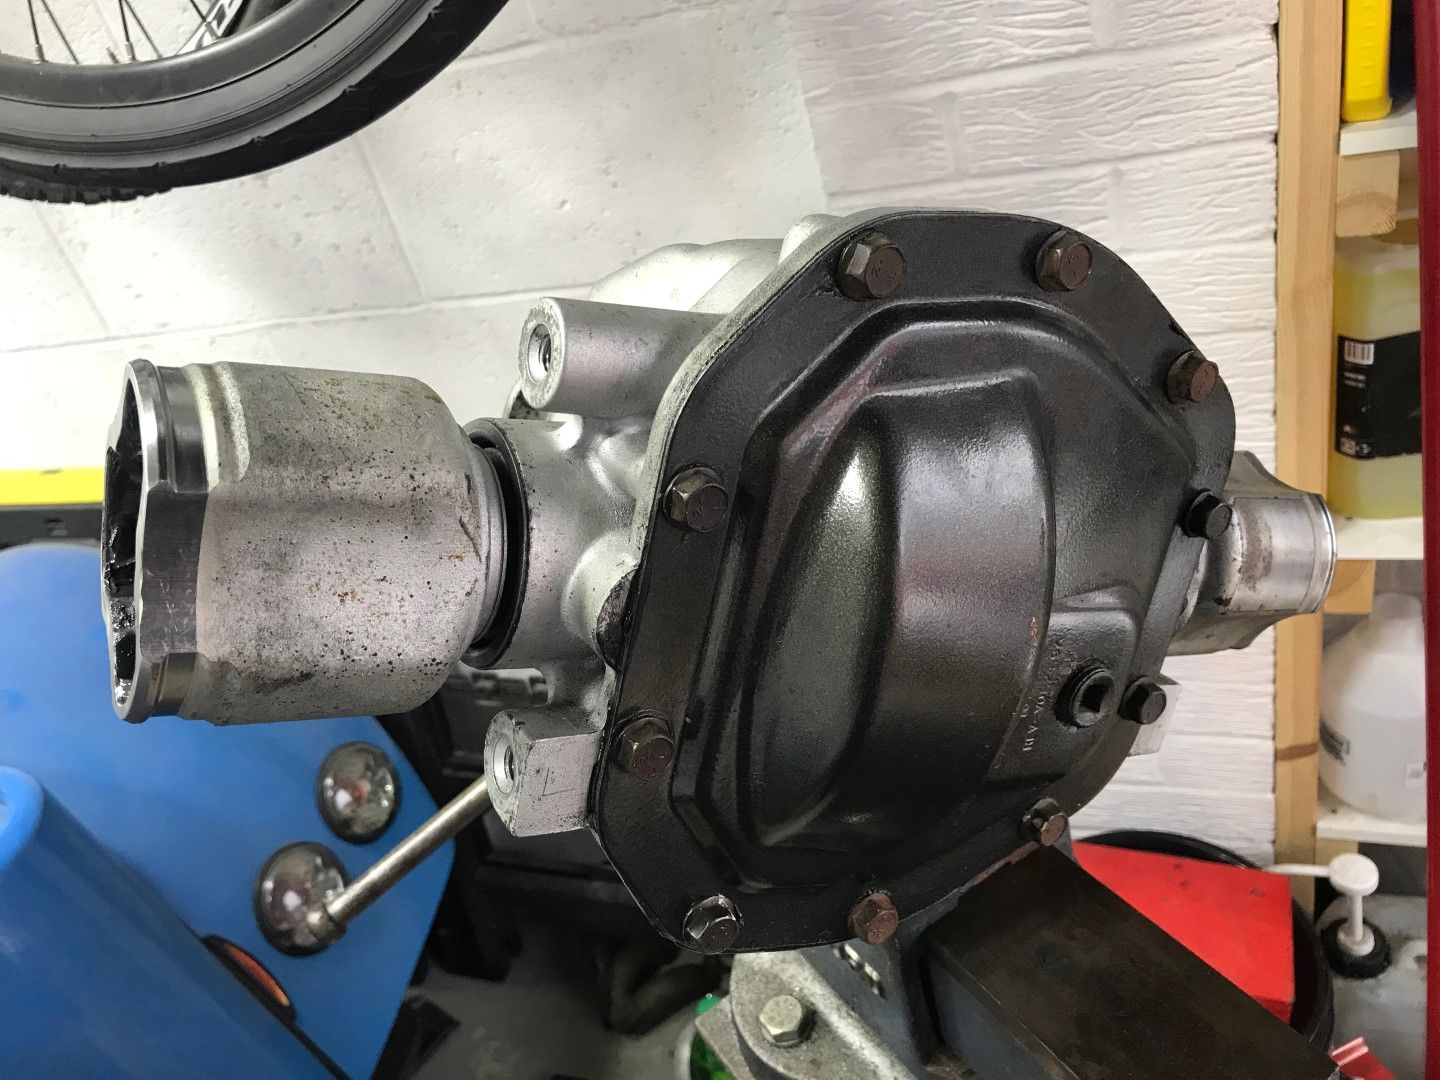
Rear cover removed from the diff and the oil drained out
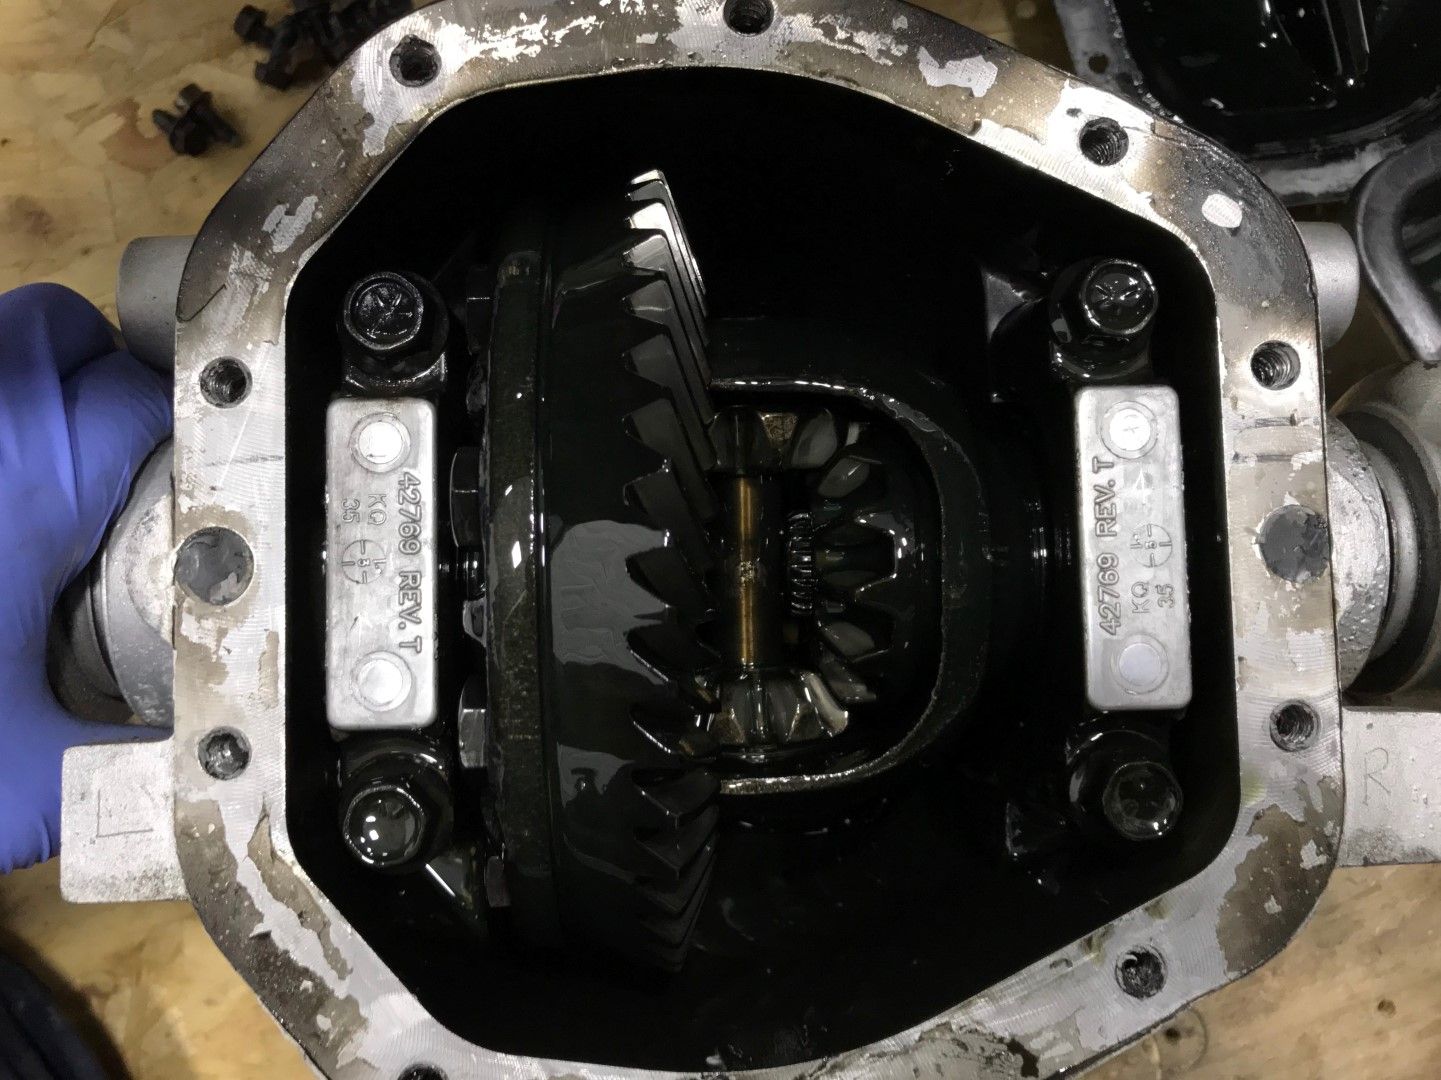
Freelander open differential assembly removed
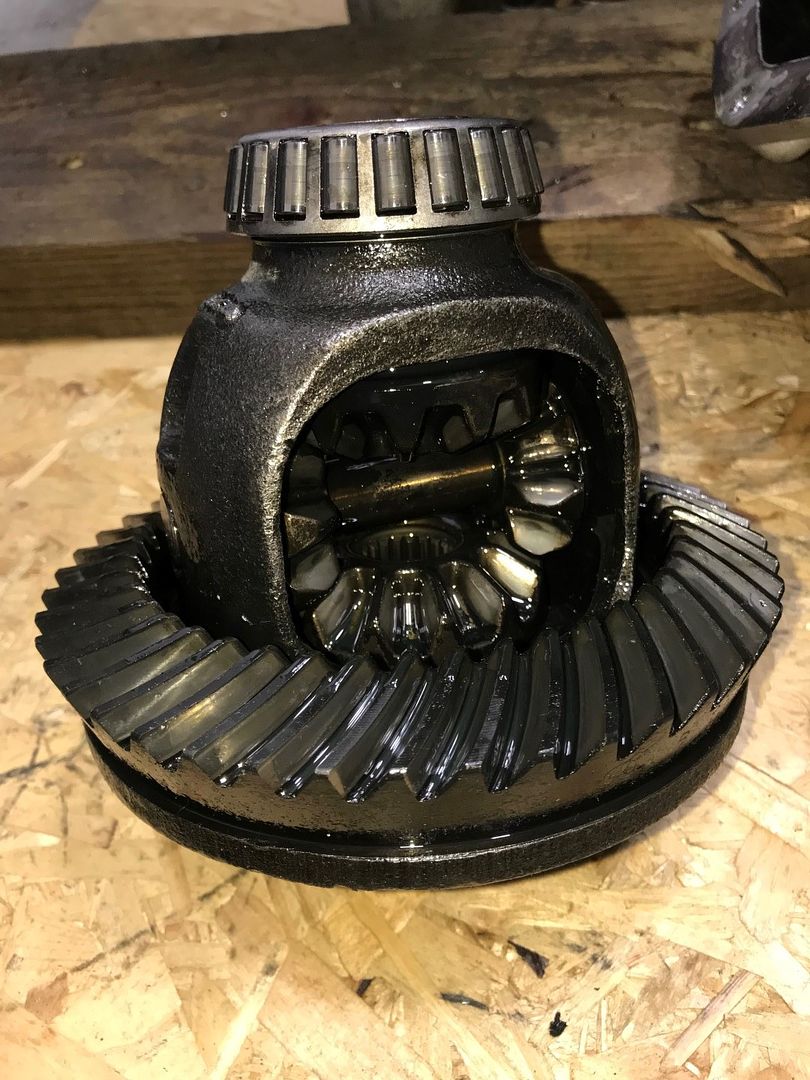
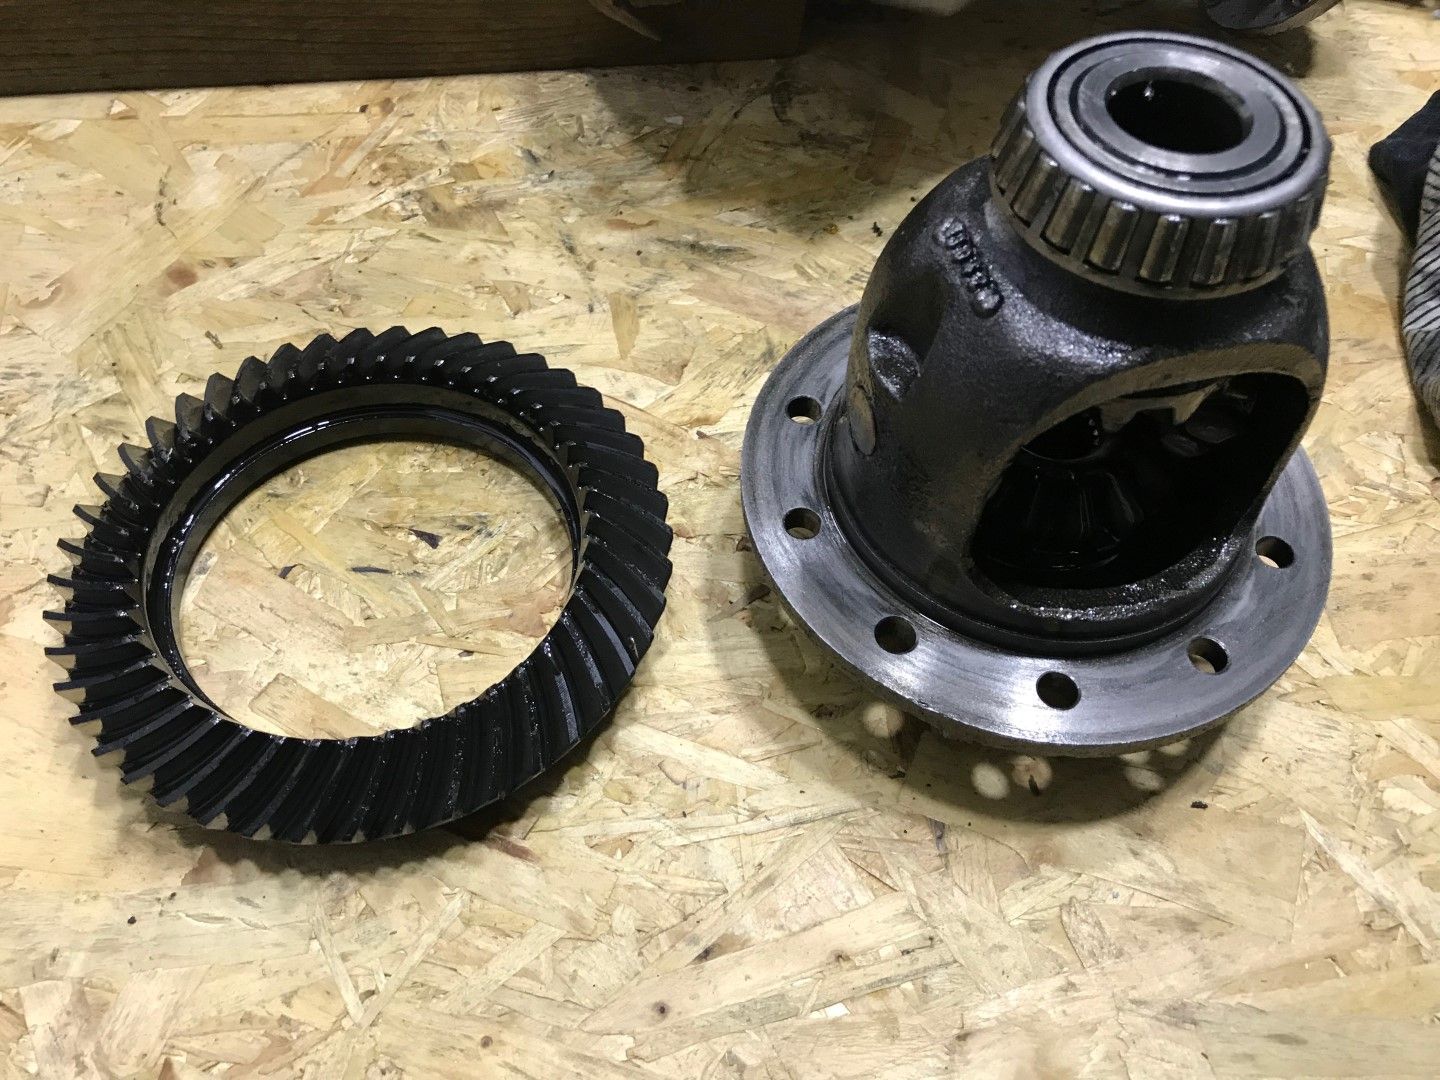
Bolts removed from the diff assembly and the crown wheel is free
Freelander open diff and crown wheel
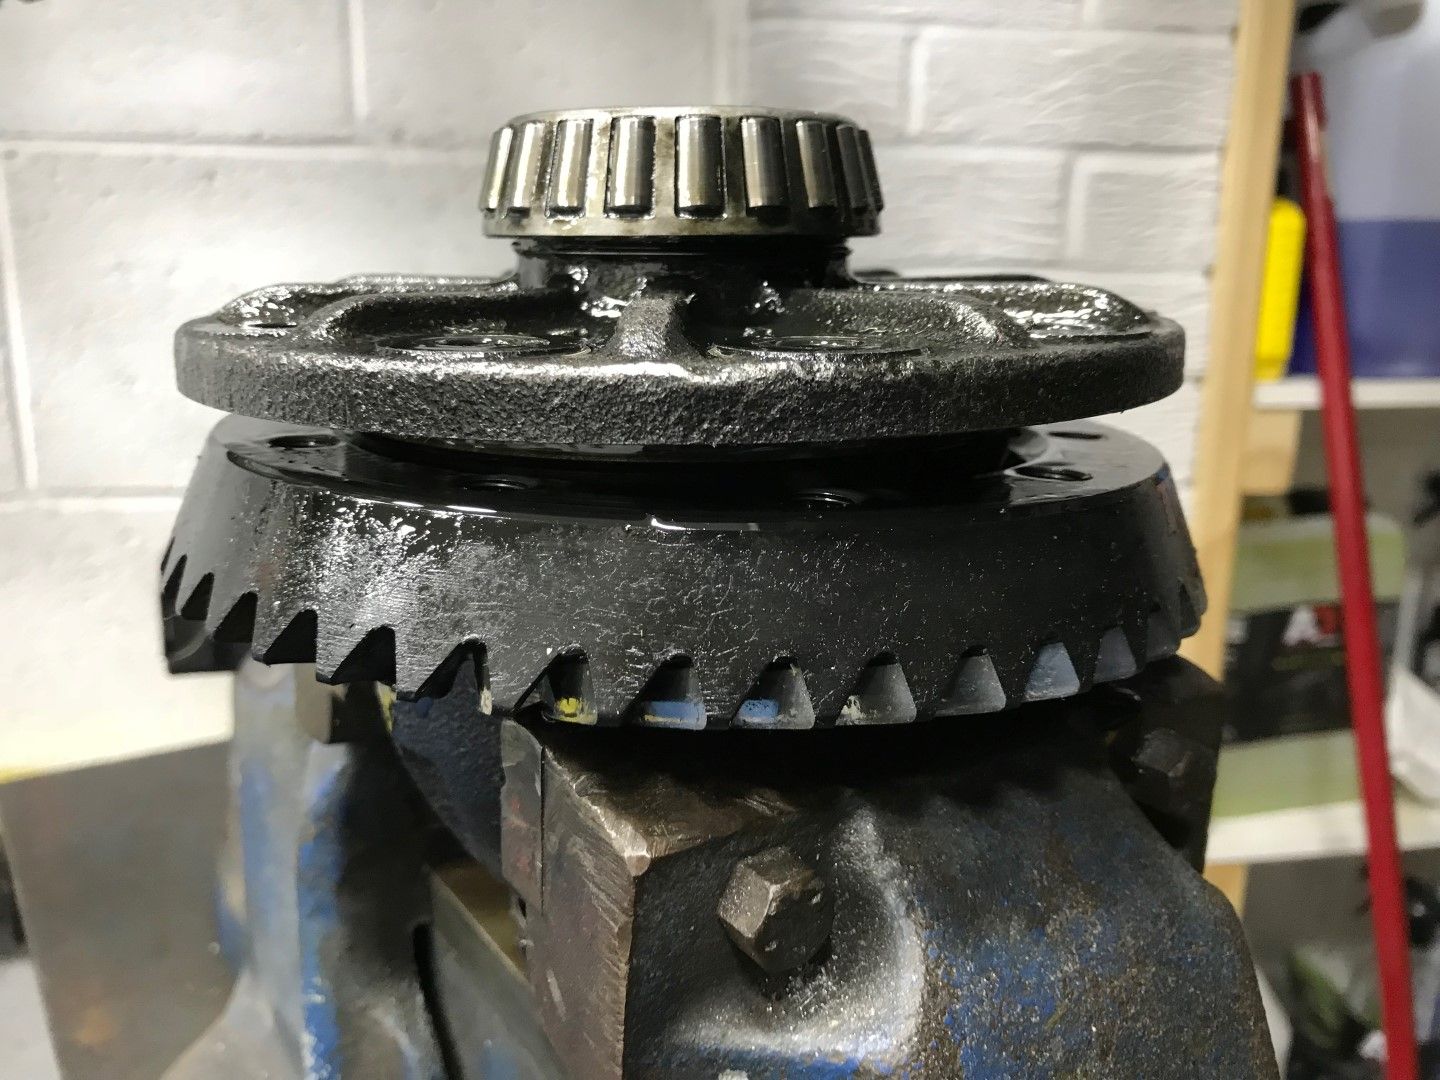
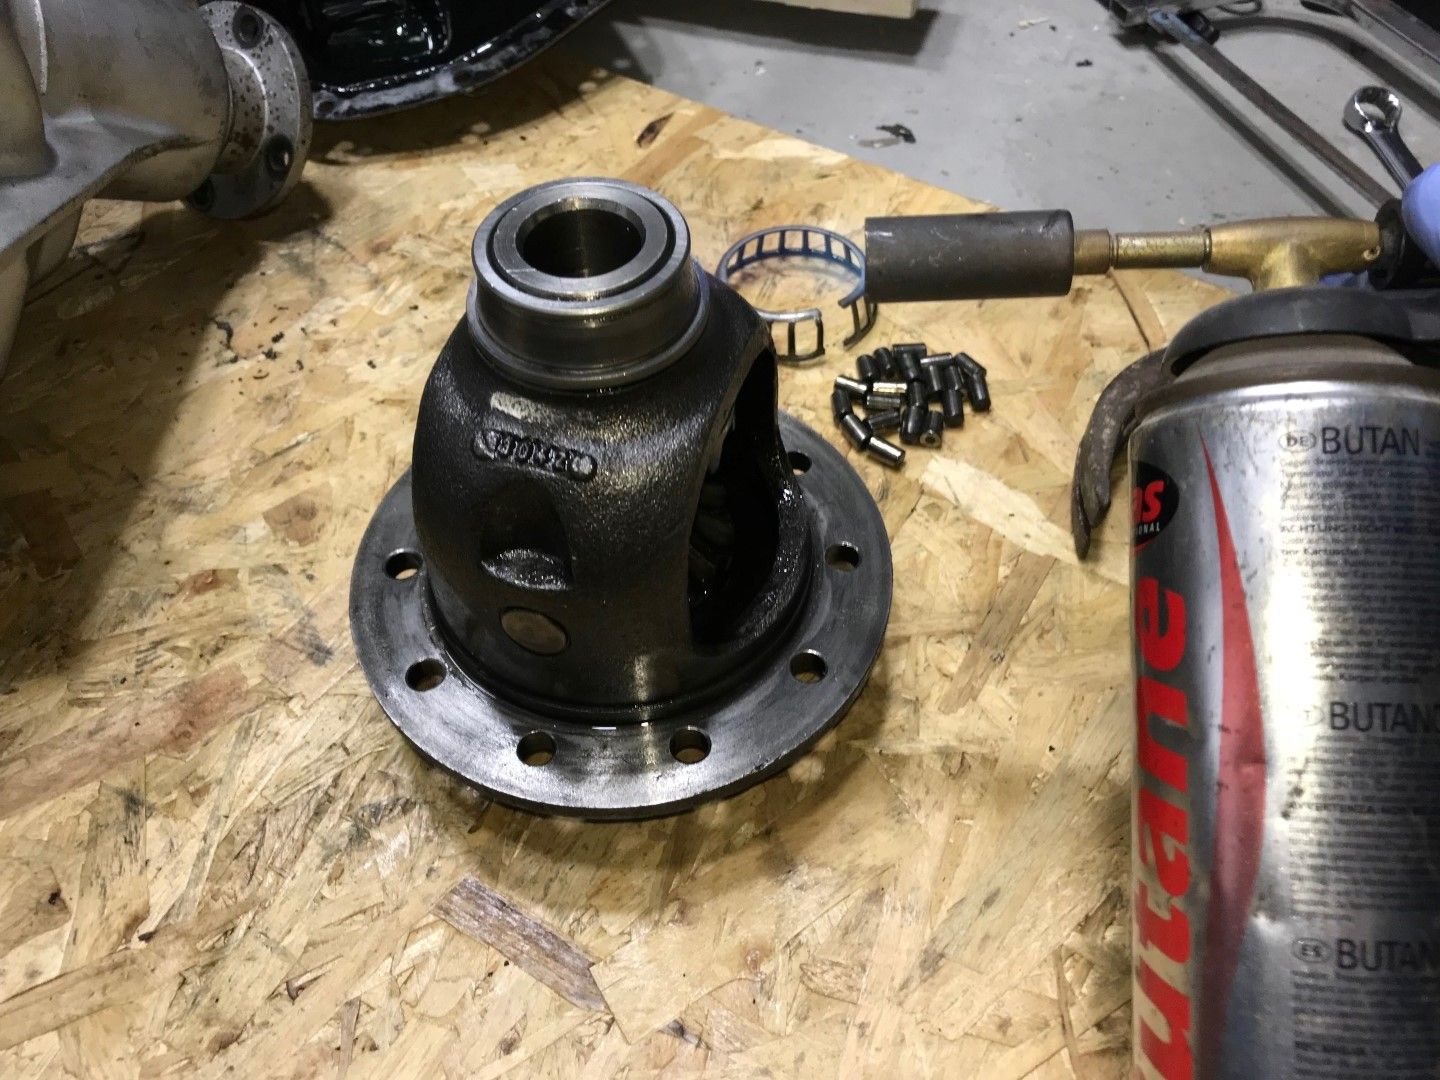
Cut through the outer bearing cages, remove cages and rollers
Apply heat to the bearing inner races
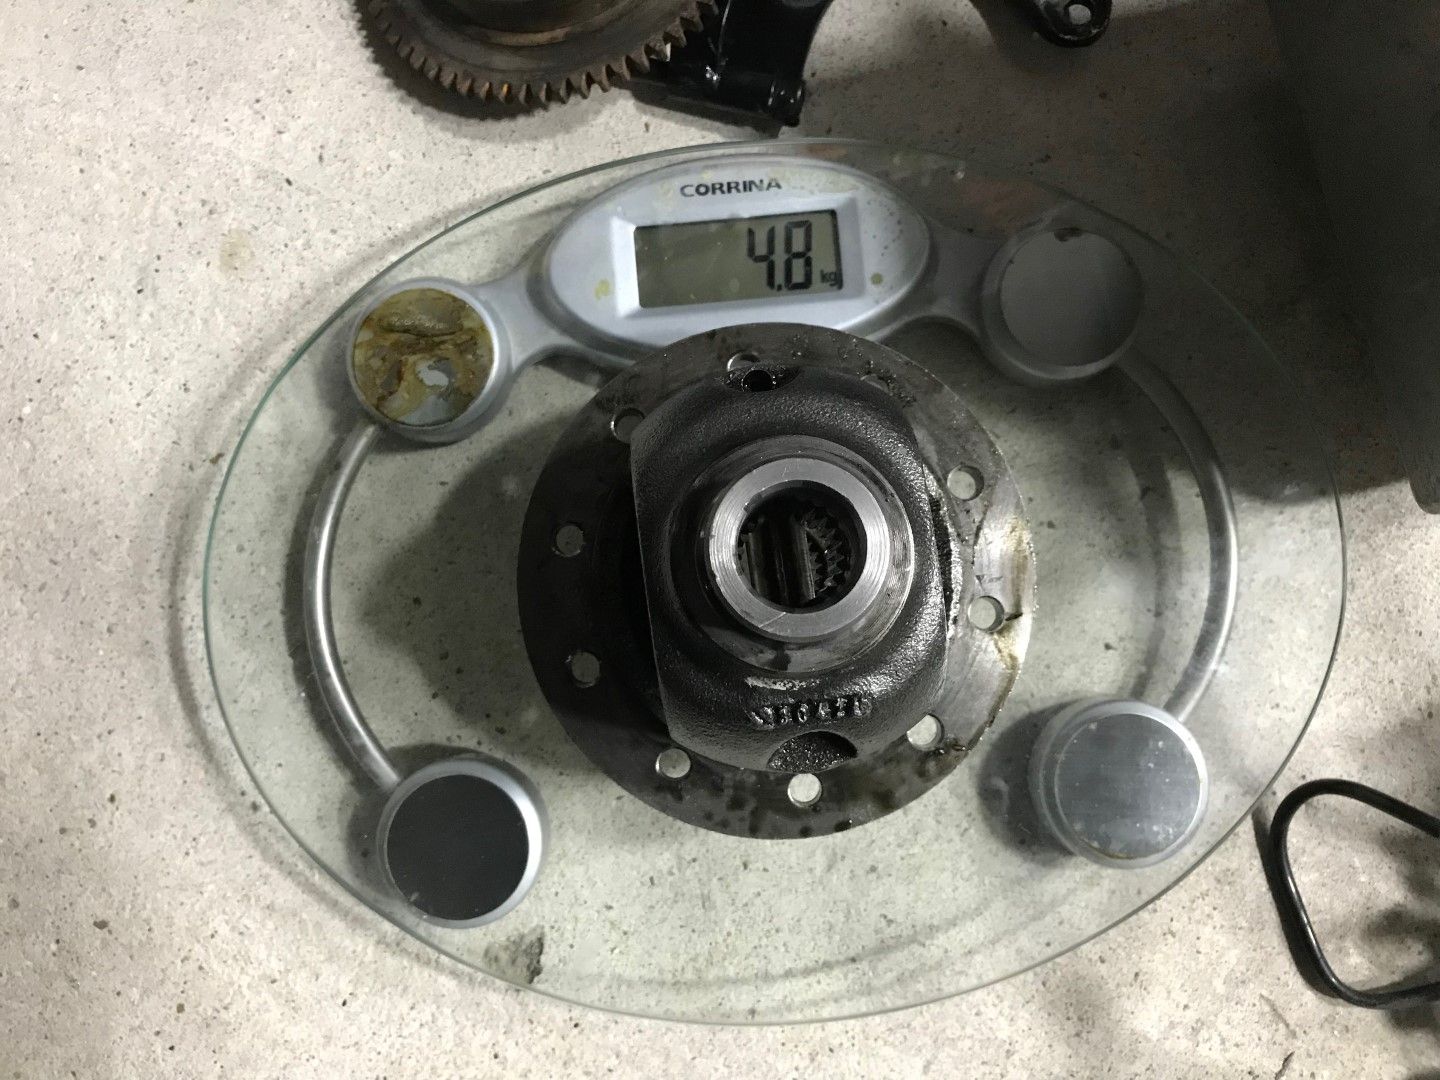
Bearing inner races removed and the open diff weighs in at 4.8kg, 2.3kg lighter than the Quaife ATB LSD.

Freelander open differential assembly removed

Bolts removed from the diff assembly and the crown wheel is free

Freelander open diff and crown wheel

Cut through the outer bearing cages, remove cages and rollers

Apply heat to the bearing inner races

Bearing inner races removed and the open diff weighs in at 4.8kg, 2.3kg lighter than the Quaife ATB LSD.

Edited by Red16 on Wednesday 30th January 21:42


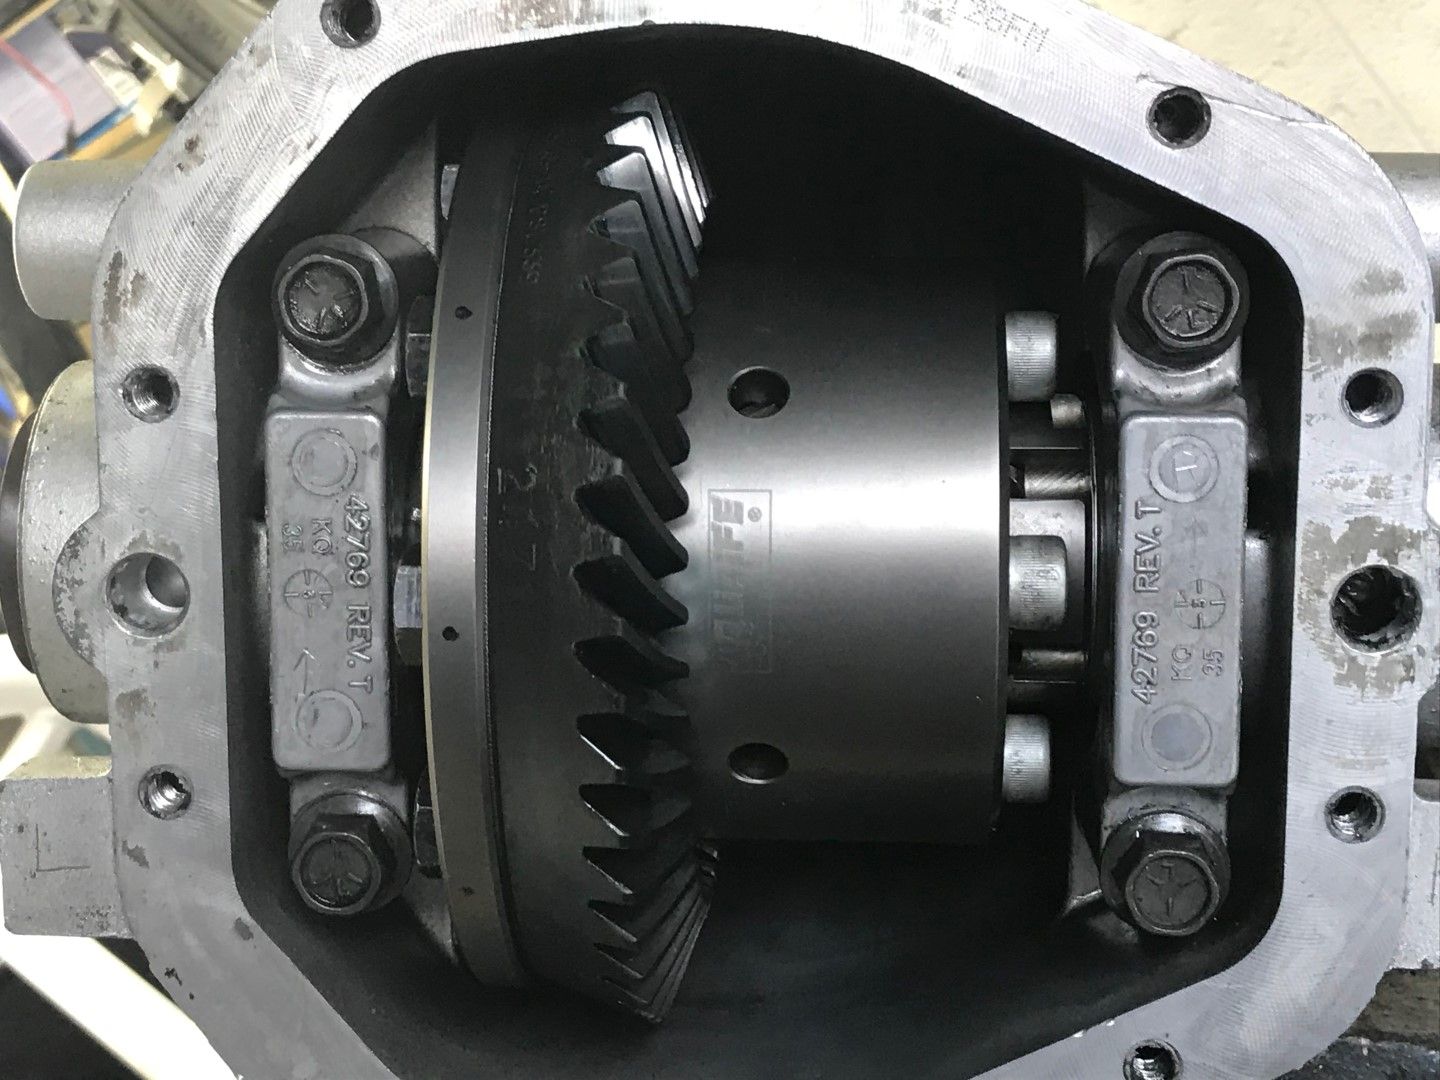
Qaife ATB back in the diff housing
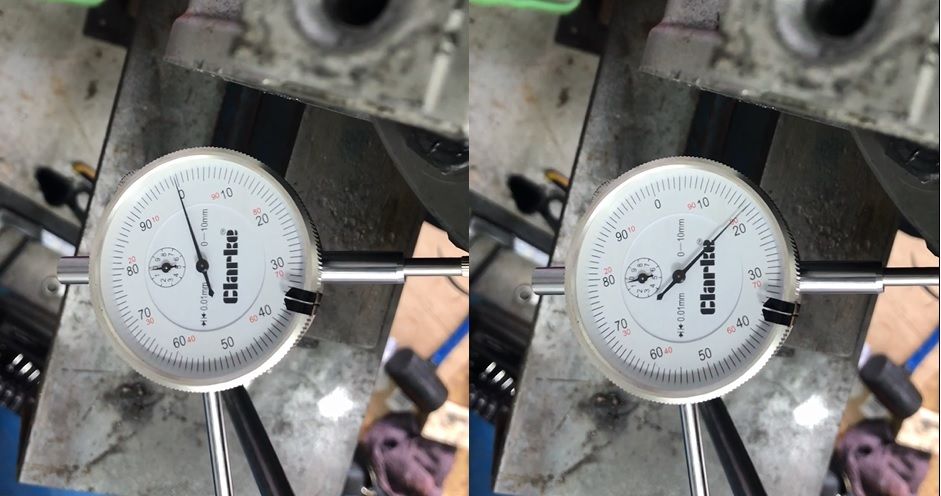
Pinion to crown wheel backlash measurement, 0.18mm, manufacturer spec says 0.13-0.2mm so no issues here.
I have a video of this but for some reason it doesn't appear in photobucket after being uploaded.
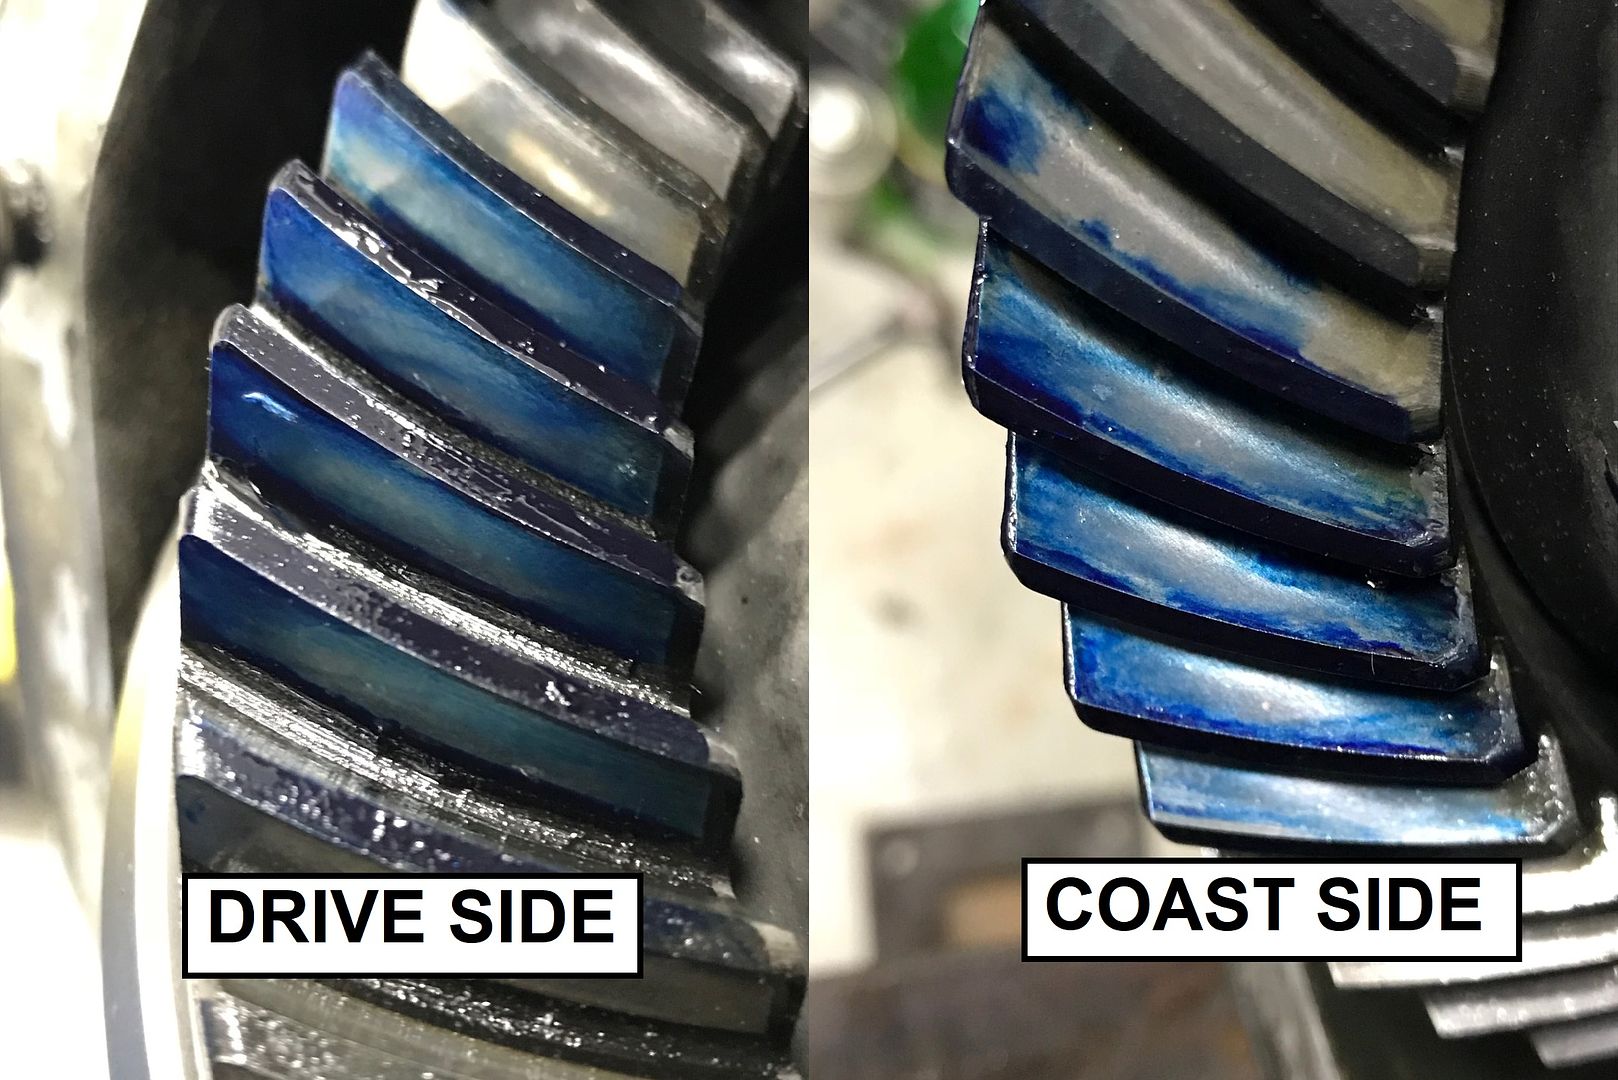
Tooth contact, looks pretty good, central and even.
Replaced the drive shaft oil seals, pushed in the driveshaft CV cups and fitted the rear cover.

Pinion to crown wheel backlash measurement, 0.18mm, manufacturer spec says 0.13-0.2mm so no issues here.
I have a video of this but for some reason it doesn't appear in photobucket after being uploaded.

Tooth contact, looks pretty good, central and even.

Replaced the drive shaft oil seals, pushed in the driveshaft CV cups and fitted the rear cover.

Gassing Station | Kit Cars | Top of Page | What's New | My Stuff