Discussion


I started the refurbishment of my 3000M yesterday and Thought Id make a thread where I can post updates, pictures and ask questions as I enjoy reading these topics myself.
A bit about the car. I purchased it just over two years ago and it had fitted the engine and diff from a racing Capri, along with the originals to accompany it. It had been fully restored to a good standard in 2000, drove for 6 months before receiving a rear end shunt. Fed up, the owner moved it on damaged and the subsequent owner left it under a tarpaulin outside. This blistered the paint, the chassis as it had been refurbished well, remained strong. It was repaired with a new fibreglass rear section that was done to a horrific standard and the wrong parts fitted. I drove the car 200 mile first journey and it was immediately apparent its set up was not very road friendly. I had the original engine refurbished and refitted. Then later on the original diff along with a new set of AVO shocks.
Through this summer the car developed an attitude and my radiator split throwing coolant all over spanking new engine. It began to take in masses of water through every seal and screw hole. The electrics then began to play tricks on me and various things stopped or started working when ever they felt like it. (This turned out to be earth points) On investigating this fault, it became apparent that the car was carrying about 160% of the wiring it needed. Even though everything was connected the majority of wires I followed lead to nothing but a loose end. The final straw was the brakes going, with a hole rotting through the servo. So the decision has been made to strip and lift the body for new paint, rewire and new interior, fixing or correct other problems as and when found. I am aiming to leave as much on the chassis as possible as its a testament to the guy who restored it last time. Well, that is until the body comes off and I get a proper look, fingers crossed!
So thats the car, a little about me. The 3000M was my first TVR, it then got accompanied by a Chimaera, I spruced up the Chim and sold that to fund a Tuscan, Unfortunately my dream Tuscan came up for sale about two months after selling the Chim and I didn't really have the funds, anyway long story short, I now have no house deposit but the Tuscan mk2 S from the 2004 motorshow This is the first time I have set about a project of this size and will be my first body lift, I have done a lot of research on the logistics side of things regards removal and storage of parts, but lacking in knowledge, experience and hand skills. I am training to become an Aircraft Technician in the RAF so hopefully I should develop this along my way. There should (will) be a few conundrums and questions for you lot to help me out with, so please respond if you know the answers as I don't get leaver very often to work on the car the quicker I have a solution the better!
Progress so far:
Removal of interior, rear lights, return hoses to fuel tank and door innards and trim.

Two things I struggled with today was the removal of the bolts holding in the window frame in drivers door. The passenger door I was able to apply enough pressure with finger to stop the nut rotating, but can't do this with driver door, or get a spanner or socket over the nut. I am thinking thin nose pliers to try and grasp the nut?
Hose on fuel tank connecting neck to filler and the single hose coming out of tank opposite side of the sender. They both have gone completely rigid and I don't have the strength to pull them off the pipes they are on. I thought about wedging in a flat nose screwdriver to ease it away but then thought about sparks and fuel fumes and backed out of this idea. Also thought of whipping out the Stanley knife and just cutting them away?

A bit about the car. I purchased it just over two years ago and it had fitted the engine and diff from a racing Capri, along with the originals to accompany it. It had been fully restored to a good standard in 2000, drove for 6 months before receiving a rear end shunt. Fed up, the owner moved it on damaged and the subsequent owner left it under a tarpaulin outside. This blistered the paint, the chassis as it had been refurbished well, remained strong. It was repaired with a new fibreglass rear section that was done to a horrific standard and the wrong parts fitted. I drove the car 200 mile first journey and it was immediately apparent its set up was not very road friendly. I had the original engine refurbished and refitted. Then later on the original diff along with a new set of AVO shocks.
Through this summer the car developed an attitude and my radiator split throwing coolant all over spanking new engine. It began to take in masses of water through every seal and screw hole. The electrics then began to play tricks on me and various things stopped or started working when ever they felt like it. (This turned out to be earth points) On investigating this fault, it became apparent that the car was carrying about 160% of the wiring it needed. Even though everything was connected the majority of wires I followed lead to nothing but a loose end. The final straw was the brakes going, with a hole rotting through the servo. So the decision has been made to strip and lift the body for new paint, rewire and new interior, fixing or correct other problems as and when found. I am aiming to leave as much on the chassis as possible as its a testament to the guy who restored it last time. Well, that is until the body comes off and I get a proper look, fingers crossed!
So thats the car, a little about me. The 3000M was my first TVR, it then got accompanied by a Chimaera, I spruced up the Chim and sold that to fund a Tuscan, Unfortunately my dream Tuscan came up for sale about two months after selling the Chim and I didn't really have the funds, anyway long story short, I now have no house deposit but the Tuscan mk2 S from the 2004 motorshow
This is the first time I have set about a project of this size and will be my first body lift, I have done a lot of research on the logistics side of things regards removal and storage of parts, but lacking in knowledge, experience and hand skills. I am training to become an Aircraft Technician in the RAF so hopefully I should develop this along my way. There should (will) be a few conundrums and questions for you lot to help me out with, so please respond if you know the answers as I don't get leaver very often to work on the car the quicker I have a solution the better!Progress so far:
Removal of interior, rear lights, return hoses to fuel tank and door innards and trim.
Two things I struggled with today was the removal of the bolts holding in the window frame in drivers door. The passenger door I was able to apply enough pressure with finger to stop the nut rotating, but can't do this with driver door, or get a spanner or socket over the nut. I am thinking thin nose pliers to try and grasp the nut?
Hose on fuel tank connecting neck to filler and the single hose coming out of tank opposite side of the sender. They both have gone completely rigid and I don't have the strength to pull them off the pipes they are on. I thought about wedging in a flat nose screwdriver to ease it away but then thought about sparks and fuel fumes and backed out of this idea. Also thought of whipping out the Stanley knife and just cutting them away?
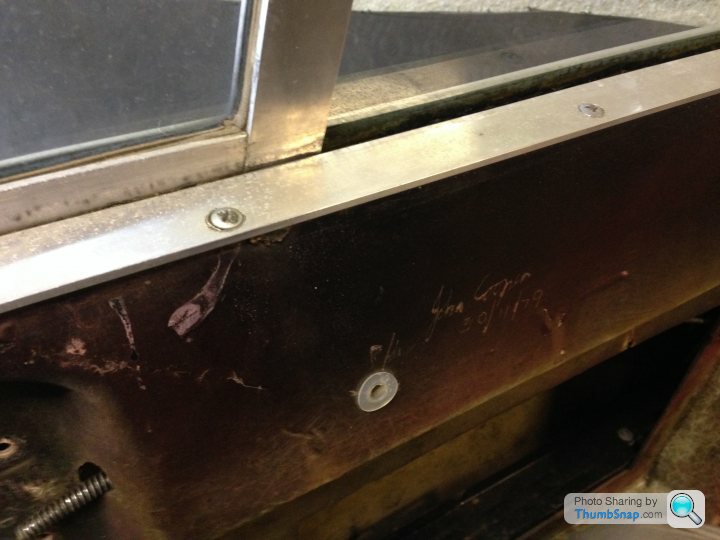
To"sort my window frames" I drilled a hole, about 1", as indicated to give better access.
I can drill holes neater than I can draw them

Prising a brittle/perished fuel pipe off is most unlikely to create a spark (imho), but less likely to damage the fitting it's siezed onto if you cut it off.
I can drill holes neater than I can draw them
Prising a brittle/perished fuel pipe off is most unlikely to create a spark (imho), but less likely to damage the fitting it's siezed onto if you cut it off.
chris52 said:
Nice project will look forward to the updates.
Chris
Just the man! I was trying to search through your posts last night as I am 80% sure I seen a picture on here of your Vixen stripped to the gelcoat and I seem to remember it being chemically done? if this is correct I'd like to know more, such as did you have to remove all glue and remainder of underlay fibres inside the car? and did you have to reinforce the body or drill any drainage holes?Chris
Adrian@ said:
The bolts on the door can only be 5/16 or 8mm nuts so 3 x 1/8 holes drilled in a row and a slim spanner will go through..(you will 3/16 pop rivet them back on in place of the bolts) the fuel lines will need to be replaced for current spec hose, the loom in that era car is a generic loom that suited all the models AND would of had 4 x speaker and 3 x electric ariel and hatch wiring along side what you were using for the lights/tank..you should of kept all the unused ones and take the coloured pigeon rings off and remarked them as part of the NEW loom.
Adrian@
NEXT job, remove the reverse light switch and spring and put it in a safe place! and store the petrol tank with 'some' fuel in but sealed (as if you remove the fuel the fumes that stop it from rusting will allow it too rust internally).
I have tried to get am 8 mm spanner and socket over but the space is too tight to achieve this, I will give it another go tomorrow and if not mark out the holes to be drilled. I have kept the loom and tried to cause as little damage to it as possible in case I needed it, in fact it is still attached running up behind the dash, but I had not thought about why the extras were there or keeping them to reuse. The reverse light switch is unattached, it looks like it has been grounded and forced out of its housing, it is cable tied to the chassis rail closes to handbrake lever. What is the spring? Ok I did not know that about the tank so that has gone on a sticky label to be placed on tank tomorrow to remind me of this! Adrian@
NEXT job, remove the reverse light switch and spring and put it in a safe place! and store the petrol tank with 'some' fuel in but sealed (as if you remove the fuel the fumes that stop it from rusting will allow it too rust internally).
Edited by Adrian@ on Wednesday 29th October 20:46
bluezeeland said:
Wouldn't be more practical to get the front/rear screens out first, so as to make for easy access to the tank and so on. They need to come out any way in order to have a proper paint job ?
Nice project this, good luck !
Frank
Yeah I am waiting on more hands! I have an extra set organised for tomorrow and could ideally do with another, as soon as I can arrange for three people to be present I will remove rear screen. Two either side and one inside should settle my nerves enough to get the job done!Nice project this, good luck !
Frank
DAKOTAstorm said:
Just the man! I was trying to search through your posts last night as I am 80% sure I seen a picture on here of your Vixen stripped to the gelcoat and I seem to remember it being chemically done? if this is correct I'd like to know more, such as did you have to remove all glue and remainder of underlay fibres inside the car? and did you have to reinforce the body or drill any drainage holes?
I had the Vixen soda blasted with some good results but the body on the car was is a pretty poor condition with quite a lot of gel coat cracks all over. If your body is in good order I would be more inclined to just have it sanded as soda blasting can be quite aggressive. 

DAKOTAstorm said:
bluezeeland said:
Wouldn't be more practical to get the front/rear screens out first, so as to make for easy access to the tank and so on. They need to come out any way in order to have a proper paint job ?
Nice project this, good luck !
Frank
Yeah I am waiting on more hands! I have an extra set organised for tomorrow and could ideally do with another, as soon as I can arrange for three people to be present I will remove rear screen. Two either side and one inside should settle my nerves enough to get the job done!Nice project this, good luck !
Frank
 )
)Would volunteer, but I'm 'bit' far away...
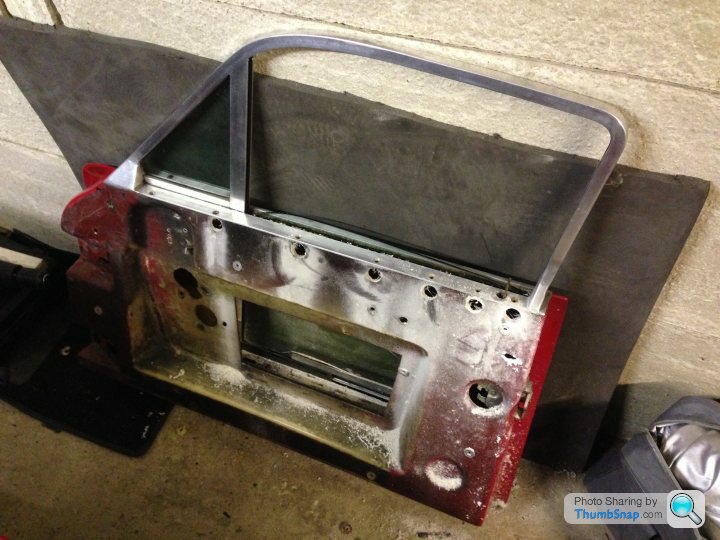
More progress today with the removal of the front and rear screens, doors off, doors hinges off body and the removal of the interior light and associated connections. Also got the holes drilled and the bolts removed holding in window frame in door. Took the door off to do this, felt wrong making such a drastic hole in the fibre glass but by the time I had the hang of it, I had to rein myself in from the start of a Colin Chapman streak adding lightness everywhere! I tried getting a grip of the nut with thin nose pliers, but gave up after 30 mins of getting no where near.
Attempted to remove the bolts holding seatbelt through wheel arch, successfully removed one of four. Tried shock and unlock, heat, vibration, rocking, extending the lever and still cant budge the remaining three. Planning on purchasing a nut splitter in morning, this should do the trick? did a little research online and they are widely used and a quick method, I spent a good two hours today with previous methods and failed so I feel I have nothing to lose on this one! Anyone used them before?
Drilling of the holes (they got tidied up later in the day)
Got a friend to help today to remove glass and to put some beef behind trying to remove those seatbelt nuts!

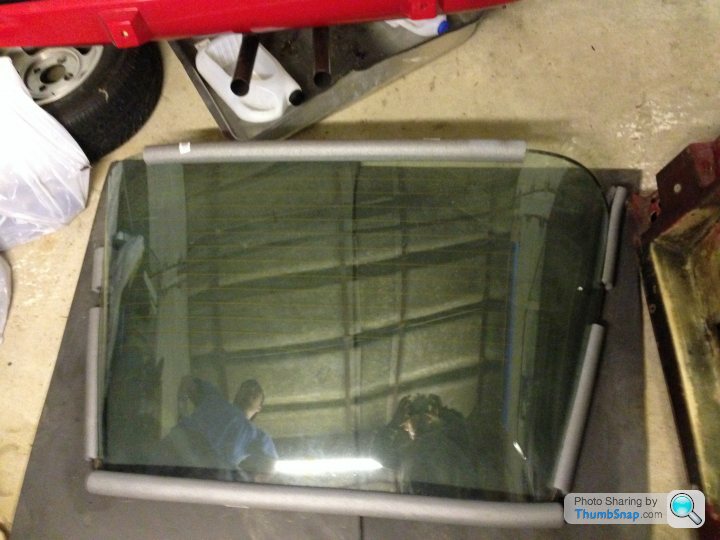
Rear screen out, the operation went perfect, the use of foam and pipe insulation came in handy!
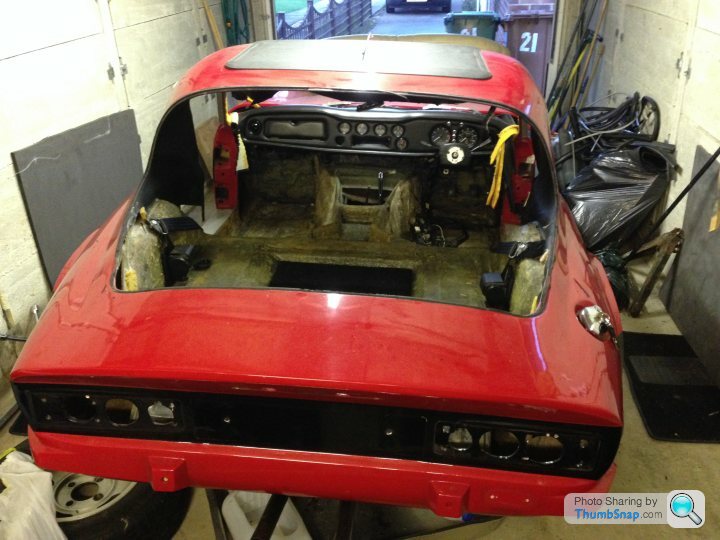
After struggling with two hoses left on the fuel tank yesterday, I done nothing other than wiggle them today and they both came off with relative ease. Once the tank was out we found about 1kg worth of scrap metal in washers, nuts, bolts, a socket from a tool set (ok, that was mine )
)


Tomorrow I will have a good tidy up to give me more space to work and should get started on the removal of the bonnet, arches and dash.
Attempted to remove the bolts holding seatbelt through wheel arch, successfully removed one of four. Tried shock and unlock, heat, vibration, rocking, extending the lever and still cant budge the remaining three. Planning on purchasing a nut splitter in morning, this should do the trick? did a little research online and they are widely used and a quick method, I spent a good two hours today with previous methods and failed so I feel I have nothing to lose on this one! Anyone used them before?
Drilling of the holes (they got tidied up later in the day)
Got a friend to help today to remove glass and to put some beef behind trying to remove those seatbelt nuts!
Rear screen out, the operation went perfect,
the use of foam and pipe insulation came in handy!After struggling with two hoses left on the fuel tank yesterday, I done nothing other than wiggle them today and they both came off with relative ease. Once the tank was out we found about 1kg worth of scrap metal in washers, nuts, bolts, a socket from a tool set (ok, that was mine
)Tomorrow I will have a good tidy up to give me more space to work and should get started on the removal of the bonnet, arches and dash.
I've used a nut splitter on a few occasions on my old MG but I'm certainly no expert. It's worth having one or two in your toolbox as they're inexpensive and can sometimes make the virtualy impossible more achievable. They're not the answer to everything though - there won't always be enough room to get the spliter over some nuts. Best of luck with the restoration.
Chris
Chris
bluezeeland said:
DAKOTAstorm said:
bluezeeland said:
Wouldn't be more practical to get the front/rear screens out first, so as to make for easy access to the tank and so on. They need to come out any way in order to have a proper paint job ?
Nice project this, good luck !
Frank
Yeah I am waiting on more hands! I have an extra set organised for tomorrow and could ideally do with another, as soon as I can arrange for three people to be present I will remove rear screen. Two either side and one inside should settle my nerves enough to get the job done!Nice project this, good luck !
Frank
)Would volunteer, but I'm 'bit' far away...
A
Well the nut splitter worked a treat, trial and error to start, came as a set of two and I chose the smallest one as the nut size was on the cross over size between small and large, the small nut splitter made a decent mark but did not 'pop' the nut. Switched to the large size and decent effort had the nut off in no time, all three seized nuts off within 30 mins! undone the frame from the chassis that extends into the wheel arch the seatbelt is bolted through and lowered these down out the way.
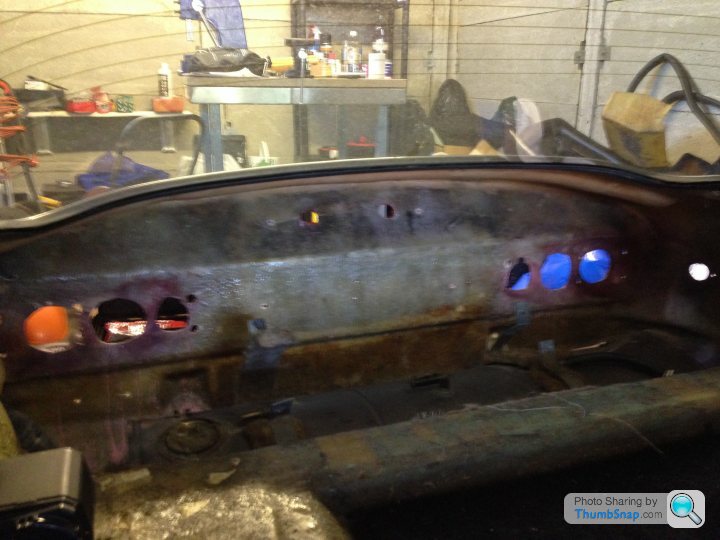
Started on the dash and the majority of the time was spent searching and blindly feeling for what was holding the thing on! Once it came away I was greeted with loops and loops of wire running in all sorts of looms. Looked as though it had been stuffed up there out the way like the old dust under the carpet trickery! after clipping the cable ties it all began to make sense and I was able to get the full loom out today as one, except for a relay connection which I had to snip then drill the bolt out the body, the back of the ignition barrel as they were soldered on and the connections to the bulbs in the gauges, they got the snip so I could retain the gauges as a whole piece.
Slowed the pace today with it being more intricate but over all happy with where I have left it. As far as I am aware I have to drain the brakes to disconnect those, disconnect throttle cable (remove pedal box?) and fathom out the heater. Had to pack away and tidy up today so everything got stored ready for my return. Should hopefully fit in a weekend or two before my Christmas leave.
Off to the NEC Classic Car show, hoping to pick up a few items and steal a few ideas there!
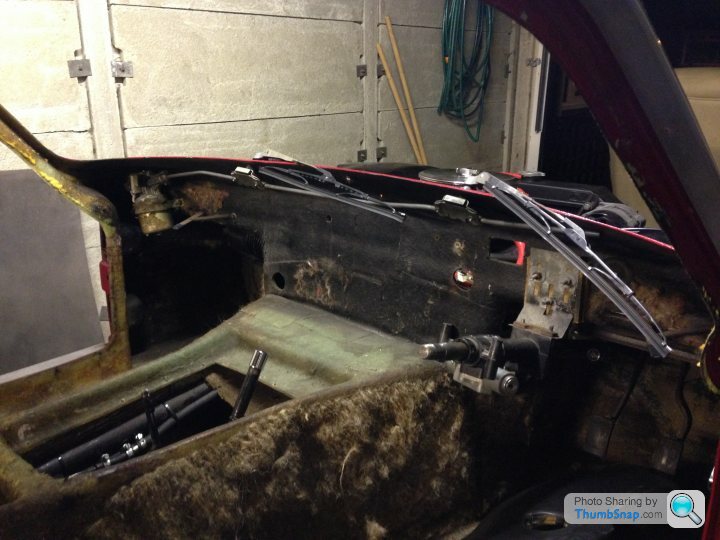
Adrian@ said:
I should have historic photos of this car from the 2003 period (on my computer back up discs)...I certainly went to see the car at the rear end shunt point, and then helped the then owner purchase his next TVR (a turbo) from the proceeds of this car.
Adrian@
Apologies Adrian I did not see this post! If you can find them or dig them out that would be great, I have a folder that I keep the history and pictures of the car in, that would be a great addition and interesting to see. I did get in contact with the previous owner who replied with a little description of ownership, but when I questioned further I heard nothing back.Adrian@
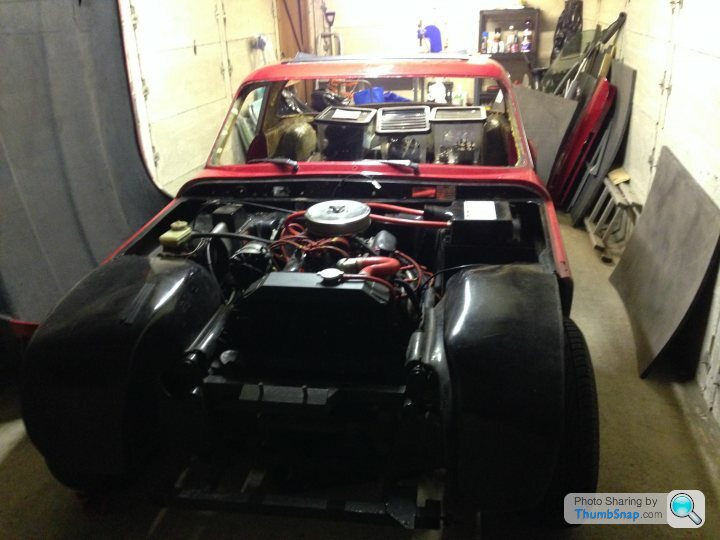
I have made some progress with the car over the holidays. Removing steering column (which to be honest was a bit hap hazard, parts fell out everywhere, so I have no idea how it goes back together). Wiper motor and wipers off, brake cylinder, servo and pedal box all removed. This now leaves me with only the body bolts left in. However, I have made the decision to leave this on until I am in a better place parts wise. As the garage I am working in will not be big enough to house chassis and body separately, I hope to have all the parts to be fitted to body clean, shiny or new ready to go, so when body is lifted I can send it to paint shop and upon its return plonk it straight back on to avoid it sitting outside.
I still have aluminium trim along door recess to remove, as well as kick plates and sunroof. These are riveted on. By the end of the week I am aiming to have body lifted, a quick scout of chassis to see what is required, then body placed back on for storage until my next opportunity.
I will post some pictures up of progress soon.
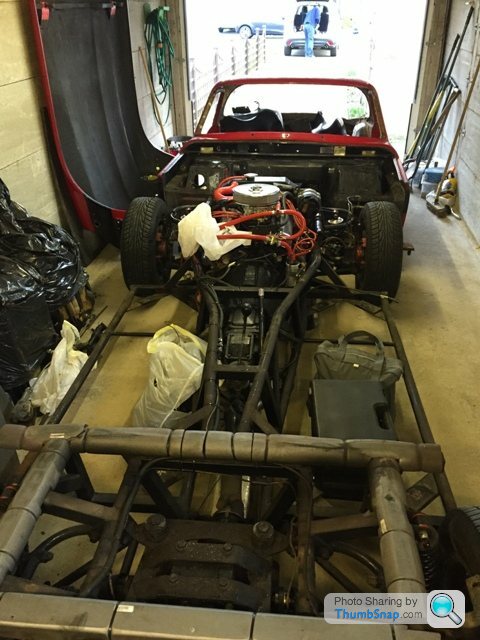
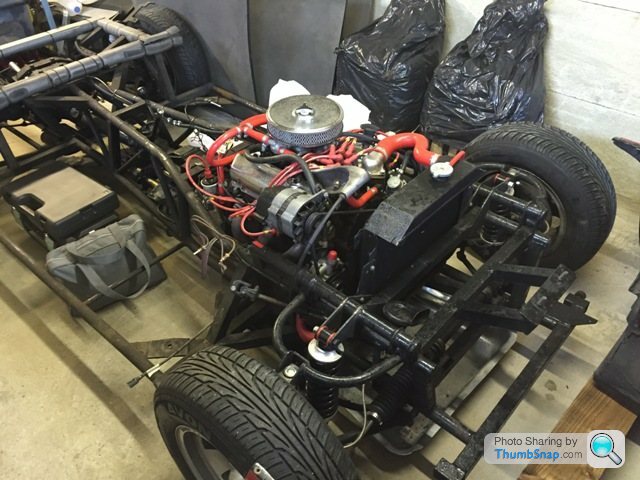
Body is off!
Removed trim yesterday and jeez was the sunroof hard work! Once the rivets were drilled I snapped two stanley blades in an effort to remove the sealant, luckily grandfather had a carpenters knife with a thin flexible blade which slid under a treat! Took four hours to remove aluminium trim. Body bolts were left soaking over night with 'shock and unlock' and came off with ease. Put four back through to allow car to be pushed outside for body lift and it was a race against the rain to get it done this morning. Four of us managed the lift with the body sticking slightly to the mounting plates, but pleasingly it came away well and with little hassle. With a bit of jiggling around managed to arrange garage to fit chassis and body so both are now stored. However to work on either, one would need to be pushed outside, so fitted a wooden frame and wheels to body.
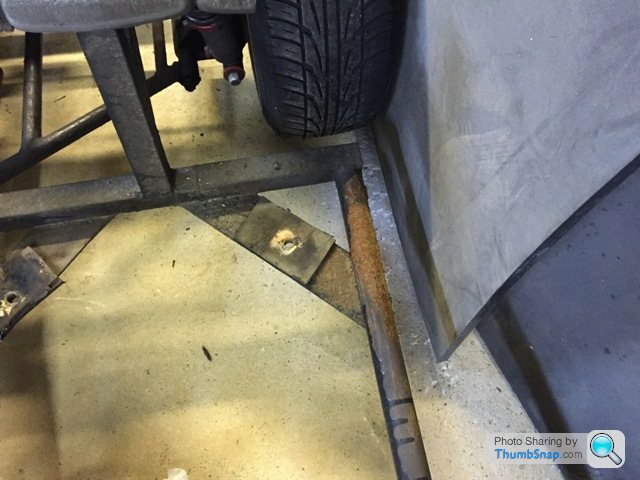
Not many photos of chassis but overall pleased as it should clean up well and take very little repair wise with spots of surface rust and rust to the rear of the outrigger slightly deeper. No damage to chassis from its previous accident as far as I can tell and there looks to be no repair to chassis made either.
Had to get it away and use the inner of the chassis as storage space too until I can next get time to work.

Removed trim yesterday and jeez was the sunroof hard work! Once the rivets were drilled I snapped two stanley blades in an effort to remove the sealant, luckily grandfather had a carpenters knife with a thin flexible blade which slid under a treat! Took four hours to remove aluminium trim. Body bolts were left soaking over night with 'shock and unlock' and came off with ease. Put four back through to allow car to be pushed outside for body lift and it was a race against the rain to get it done this morning. Four of us managed the lift with the body sticking slightly to the mounting plates, but pleasingly it came away well and with little hassle. With a bit of jiggling around managed to arrange garage to fit chassis and body so both are now stored. However to work on either, one would need to be pushed outside, so fitted a wooden frame and wheels to body.
Not many photos of chassis but overall pleased as it should clean up well and take very little repair wise with spots of surface rust and rust to the rear of the outrigger slightly deeper. No damage to chassis from its previous accident as far as I can tell and there looks to be no repair to chassis made either.
Had to get it away and use the inner of the chassis as storage space too until I can next get time to work.
Gassing Station | TVR Classics | Top of Page | What's New | My Stuff