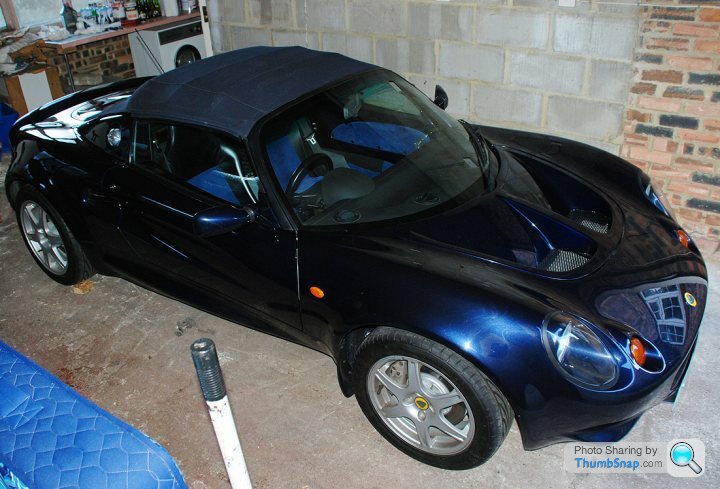
Elise S1 Millennium Edition, 1 owner from new...
Discussion
moribund said:
Not sure I dare look after they've been down for 13 years in a car that lived outside 
I assume it's far too late to get a main dealer to fix for free, but I'll ask anyway.
It's not about getting it fixed, it's about stopping it from getting worse. So don't worry - just ditch the rubber mats. 
I assume it's far too late to get a main dealer to fix for free, but I'll ask anyway.
With them in place, if there is corrosion it *will* continue to get worse, and eventually you'll end up with holes in the floor. Which is bad as you'll get wet feet.
Just tear them up and replace them with regular mats. You don't even need to faff around with a fix - it won't get any worse once you remove the source of the problem.
I bought a cheap roll of black carpet and cut it to fit exactly - so there are no gaps, you can't see the scabby old floor, but it can still breath.
You're outside the period of time that Lotus was offering fixes for, although sometimes their *fixes* were a bit bodgetastic for my liking (bonding in a new alu panel on top of a corroded panel isn't exactly a great idea!).
Looks like that's the next job then.
Just got the car back from Pure Lotus today.
- passed it's MOT first time
- new expansion tank
- new disks and pads all round and new brake fluid
- "A" service completed
Got excellent service and car was properly cleaned too - even the engine bay, I've never had a clean engine bay on any car I've owned before!
The mechanic told me it's in decent mechanical condition all round - good news. Even better news the owner told if he was selling my car it'd retail at £10k. I've spent £9k so far, so as long as I can resist spending too much on cosmetics hopefully I can now enjoy a little depreciation-free weekend fun...
moribund said:
I've also fitted a cabin air filter in the form of the foot off a pair of tights but the blower still spreads grit all over the interior so I guess there's a lot of crap in the system yet.
Where do you put this? Anyone got a pic? I'm tired of getting dirt in my face above 60 mph!HereBeMonsters said:
Where do you put this? Anyone got a pic? I'm tired of getting dirt in my face above 60 mph!
Open the front bonnet, and pull off the big silver pipe at the top end - it just unplugs. Put the tights over the hole, and then put the pipe back on again. It will reduce the effect of the blower slightly.
pthelazyjourno said:
HereBeMonsters said:
Where do you put this? Anyone got a pic? I'm tired of getting dirt in my face above 60 mph!
Open the front bonnet, and pull off the big silver pipe at the top end - it just unplugs. Put the tights over the hole, and then put the pipe back on again. It will reduce the effect of the blower slightly.
HereBeMonsters said:
Any denier recommendations? We should start a thread about this!
Haha. Well, I just tend to use the tights I've been wearing, when I stop being Susan for the weekend and go back to being Philip during the week...In all honesty I haven't done it - I always have the blower aimed at my feet and two of the four dash vents closed, so it's quite rare I have to clean the dash top.
Out of common sense though, I'd recommend a fairly light fabric, as the pipework on mine is a pretty tight fit - I could imagine it being tricky getting it back on if you've got a hefty pair of tights.
Actually, I'd recommend buying a mixed set (does such a thing exist?) - then you can try it out and strike a balance between fan performance / the amount of dead flies!
Pipe you need to remove you can see here, the huge silver one, underneath the latch for the bonnet. Literally just pulls off.
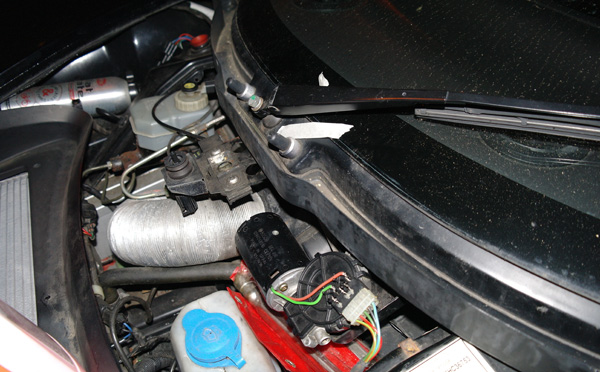
I personally would attach the tights at the top, rather than the other end, as it will be easier to change them when dirty. I'd imagine they'll get filled up with crap pretty quickly!
HereBeMonsters said:
Hmmm. I'm considering doing a double layer of thin, with a pot pourri filling for added fragrance.
P.S. cheers for the pics!
You know the pot pourri will end in tears, and scattered big time all over the interior of your Elise / you / your passenger! P.S. cheers for the pics!
I'd quite like to see the photograph when it does!

pthelazyjourno said:
HereBeMonsters said:
Hmmm. I'm considering doing a double layer of thin, with a pot pourri filling for added fragrance.
P.S. cheers for the pics!
You know the pot pourri will end in tears, and scattered big time all over the interior of your Elise / you / your passenger! P.S. cheers for the pics!
I'd quite like to see the photograph when it does!

Maybe just a magic tree then...
Well a busy weekend working on the car ... hopefully soon I'll be spending some time driving the damn thing 
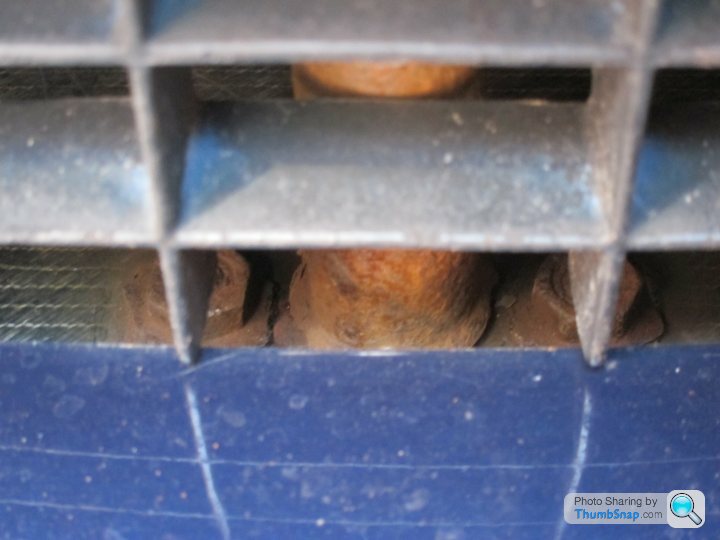
First job on Saturday was to try and remove the rear grills and repaint them. No joy removing the screws, they're rusted solid to the rawl nuts. My drill was too puny to drill them out and I was worried it was going to get hot enough to set fire to the rubber nut. Back to the drawing board for this job. I might get a body shop or similar to grind off the screws. If I attempt it I'm more likely to grind holes in the paint...
Next job was to clean the worst of the rust off the front towing bracket and paint it. Unfortunately the wire brush revealed that the lower mount has rusted clean through Hopefully I won't break down before I get the chance to replace this. It'll need the front clam to come off too
  Bugger!
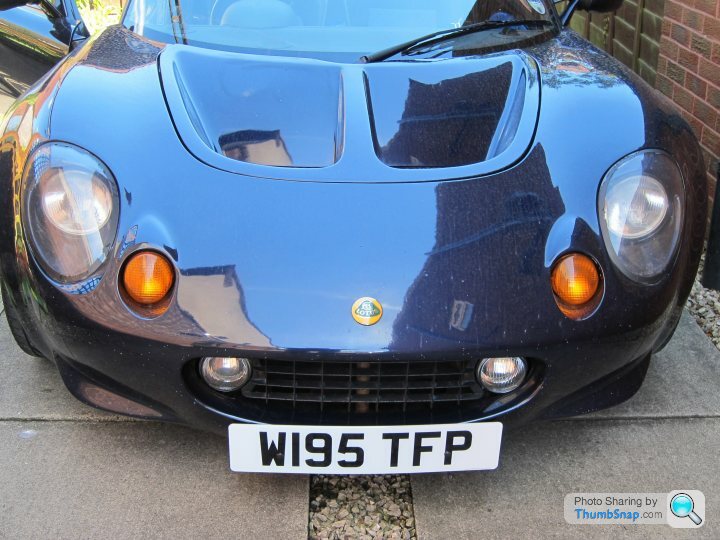
At least I had more success replacing the tatty front numberplate.
Bouyed by this, I then steeled myself to remove the front mats (thanks to num2uk, wevster & pthelazyjourno for the heads-up ). The corrosion revealed underneath was pretty ugly. Scraped off big piles of oxide which left loads of quite severe pitting but no actual holes. The alloy was perfect under the tape strips so I left most of those in place.
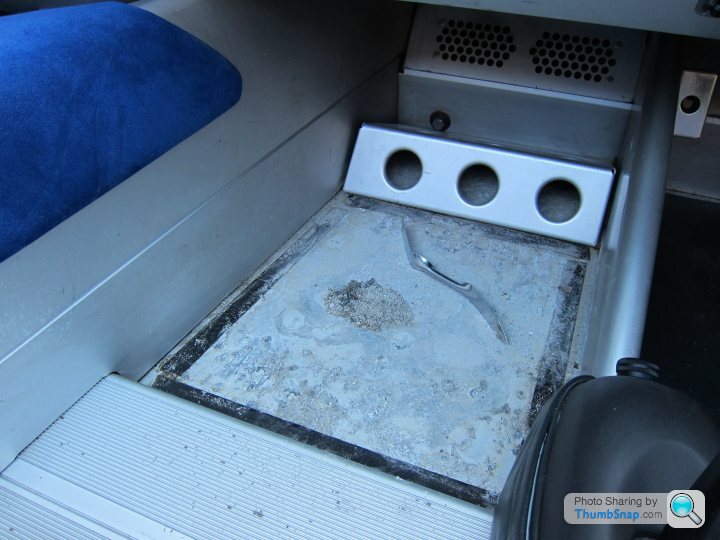
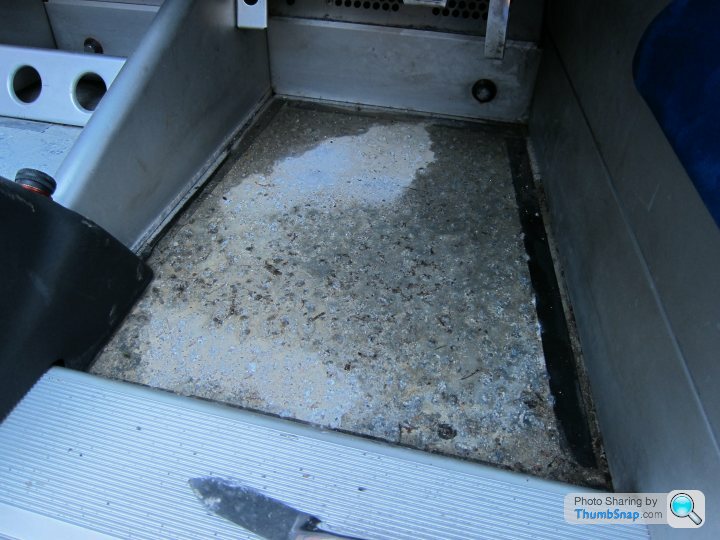
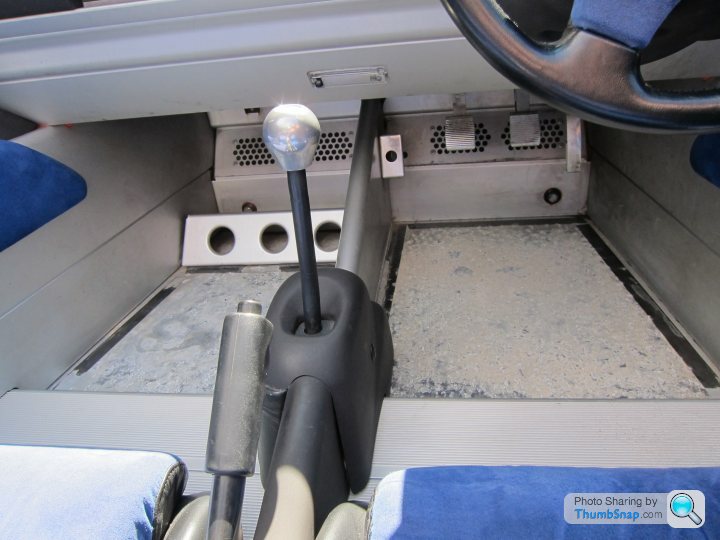
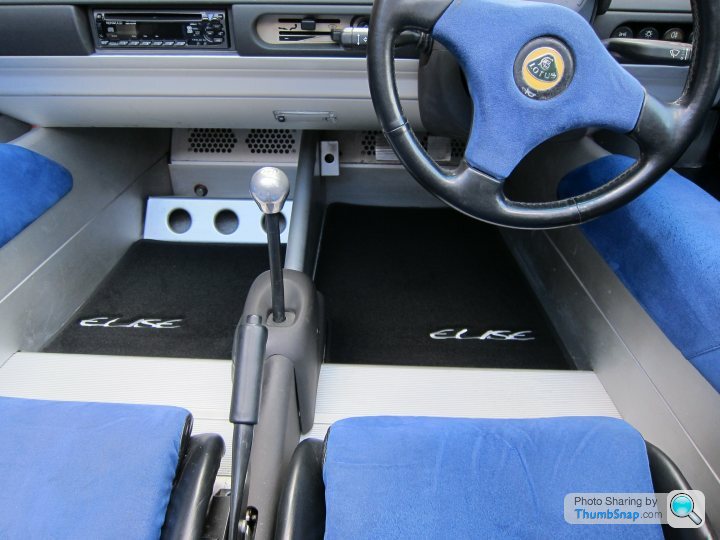
Nice Hanger111 carpets in place now so I can forget all about the horrors below
Last job was to paint over the rust on the front bonnet grill with some rust inhibitor paint. Supposed to be a satin finish but it looks a bit too glossy to my eyes.
While doing this found the bonnet hinge had broken one of it's rivets. Damn! Another job!
Sunday started with a trip to Halfords for a new stereo and bits to repair the hinge.
Once home then off came the front bonnet. I had to drill out what was left of the rivets and clean off the mastic. The hinge was almost seized and the steel part was pretty rusty so I cleaned it up and repainted it.
While the paint dried I fitted the new stereo. No matter what I did with its settings the original Kenwood unit has only ever worked intermittently. I've replaced it with a £63 Philips iPod/usb/bluetooth head unit which seems a really good deal (online here). The new unit plugged straight into the ISO connectors which the Kenwood adaptor cable was attached to.
Finally I reassembled the hinge (with plenty of grease) and bolted it back on to the clam. Had a lot of fun getting the bonnet lined up again. I managed to get the catch stuck twice before getting it aligned properly. I was very lucky that I could open it both times with just some enthusiastic wiggling and without having to remove a wheel and arch liner like some people!
That's it for now until the new towing bracket arrives.

First job on Saturday was to try and remove the rear grills and repaint them. No joy removing the screws, they're rusted solid to the rawl nuts. My drill was too puny to drill them out and I was worried it was going to get hot enough to set fire to the rubber nut. Back to the drawing board for this job. I might get a body shop or similar to grind off the screws. If I attempt it I'm more likely to grind holes in the paint...
Next job was to clean the worst of the rust off the front towing bracket and paint it. Unfortunately the wire brush revealed that the lower mount has rusted clean through
 Hopefully I won't break down before I get the chance to replace this. It'll need the front clam to come off too
  Bugger!
At least I had more success replacing the tatty front numberplate.

Bouyed by this, I then steeled myself to remove the front mats (thanks to num2uk, wevster & pthelazyjourno for the heads-up ). The corrosion revealed underneath was pretty ugly. Scraped off big piles of oxide which left loads of quite severe pitting but no actual holes. The alloy was perfect under the tape strips so I left most of those in place.


Nice Hanger111 carpets in place now so I can forget all about the horrors below


Last job was to paint over the rust on the front bonnet grill with some rust inhibitor paint. Supposed to be a satin finish but it looks a bit too glossy to my eyes.
While doing this found the bonnet hinge had broken one of it's rivets. Damn! Another job!
Sunday started with a trip to Halfords for a new stereo and bits to repair the hinge.
Once home then off came the front bonnet. I had to drill out what was left of the rivets and clean off the mastic. The hinge was almost seized and the steel part was pretty rusty so I cleaned it up and repainted it.
While the paint dried I fitted the new stereo. No matter what I did with its settings the original Kenwood unit has only ever worked intermittently. I've replaced it with a £63 Philips iPod/usb/bluetooth head unit which seems a really good deal (online here). The new unit plugged straight into the ISO connectors which the Kenwood adaptor cable was attached to.
Finally I reassembled the hinge (with plenty of grease) and bolted it back on to the clam. Had a lot of fun getting the bonnet lined up again. I managed to get the catch stuck twice before getting it aligned properly. I was very lucky that I could open it both times with just some enthusiastic wiggling and without having to remove a wheel and arch liner like some people!
That's it for now until the new towing bracket arrives.
Edited by moribund on Monday 27th May 00:40
I used a Dremel to remove the heads of the screws in the rear grills. I think I got the replacement screws etc from either Elise Parts or Elise Shop, I tried a few different types and those were the best. I will sort out a link later when I'm at home.
Good work up to yet!
Good work up to yet!
Edited by wevster on Monday 27th May 10:46
wevster said:
I used a Dremel to remove the heads of the screws in the rear grills. I think I got the replacement screws etc from either Elise Parts or Elise Shop, I tried a few different types and those were the best. I will sort out a link later when I'm at home.
Cheers! By Dremel do you mean a grinding stone on a drill?Gassing Station | Readers' Cars | Top of Page | What's New | My Stuff


