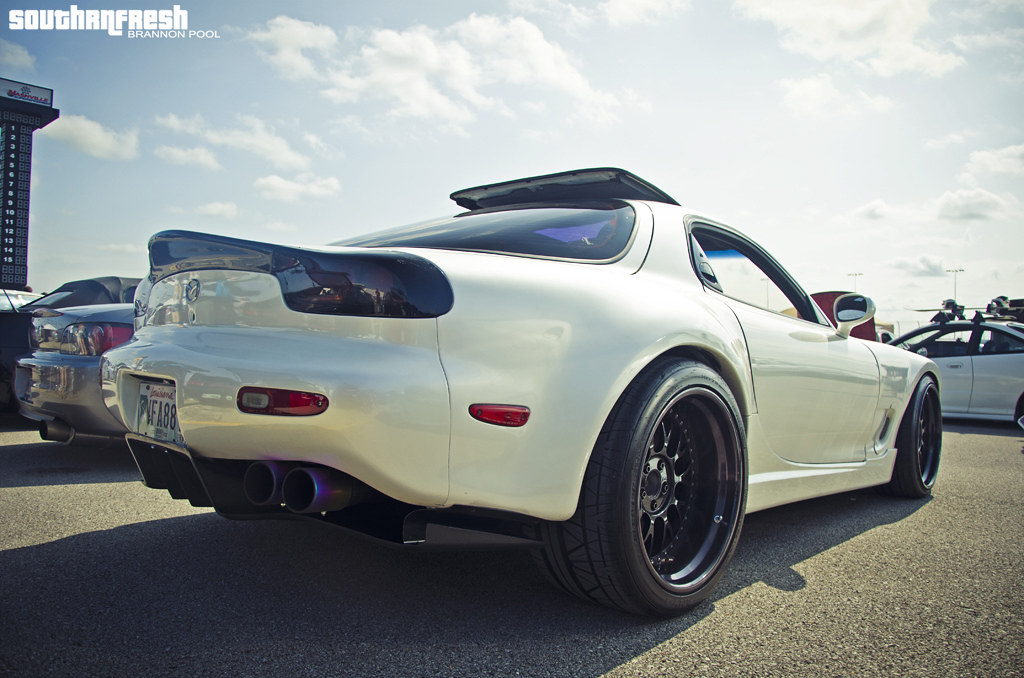
My wife is letting me have a Wankle with twins
Discussion


As winter has come, I thought I would update this thread 
I enjoyed using the car over the summer and so not much was done, plenty of breakfast clubs were visited however and the odd car show. Along with a spine shattering drive over Exmoor which made me get the suspension sorted out by a man who knew what he was doing! Suffice to say the ride is epic.
This winter my plans are:
Fit front mount intercooler with uprated radiator.
Remove cat and air pump
Fit Apexi ECU and controller
replace fuel filter (harder than it sounds)
Give the engine bay a clean and lick of paint whilst said parts are removed.
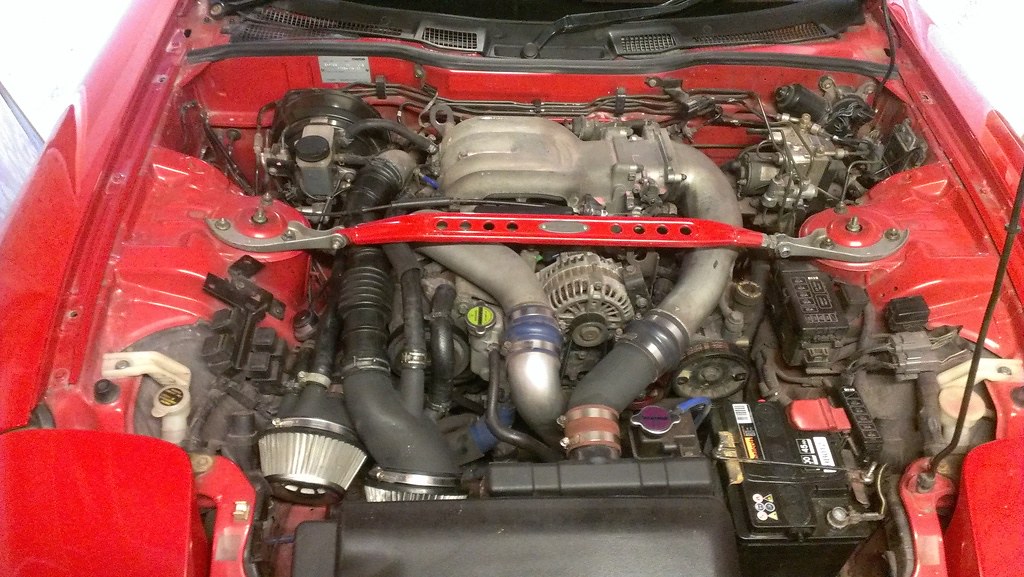
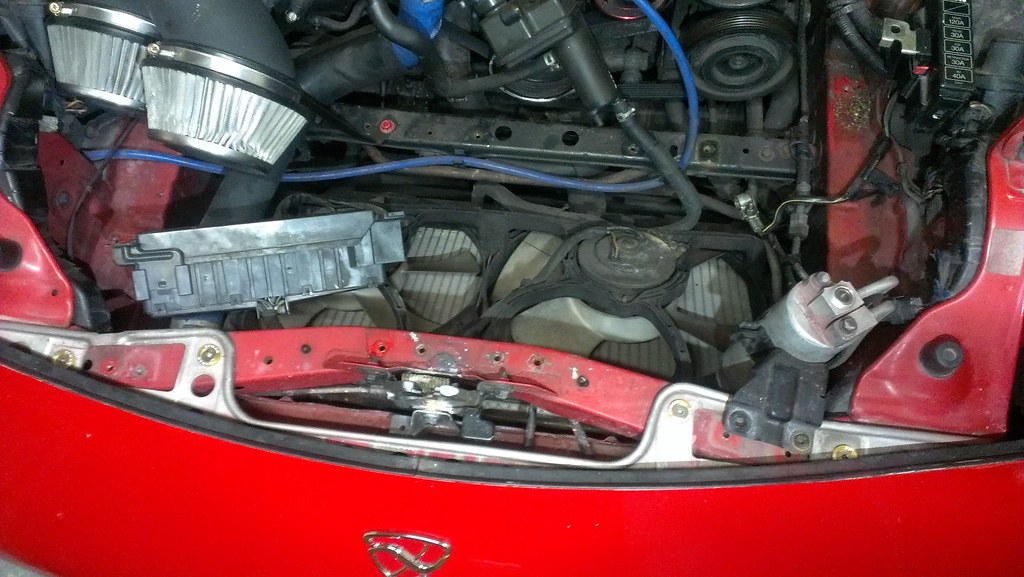
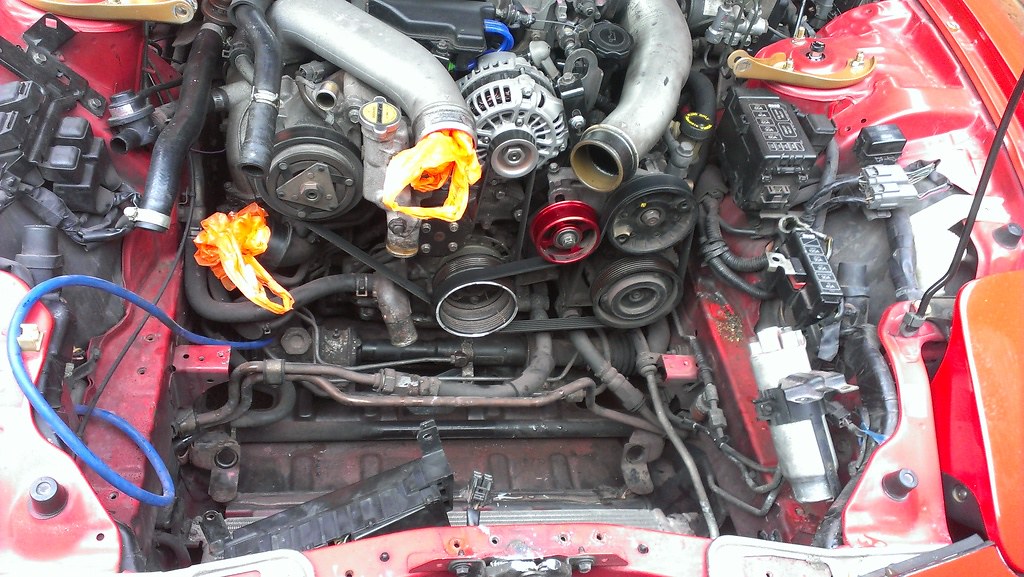
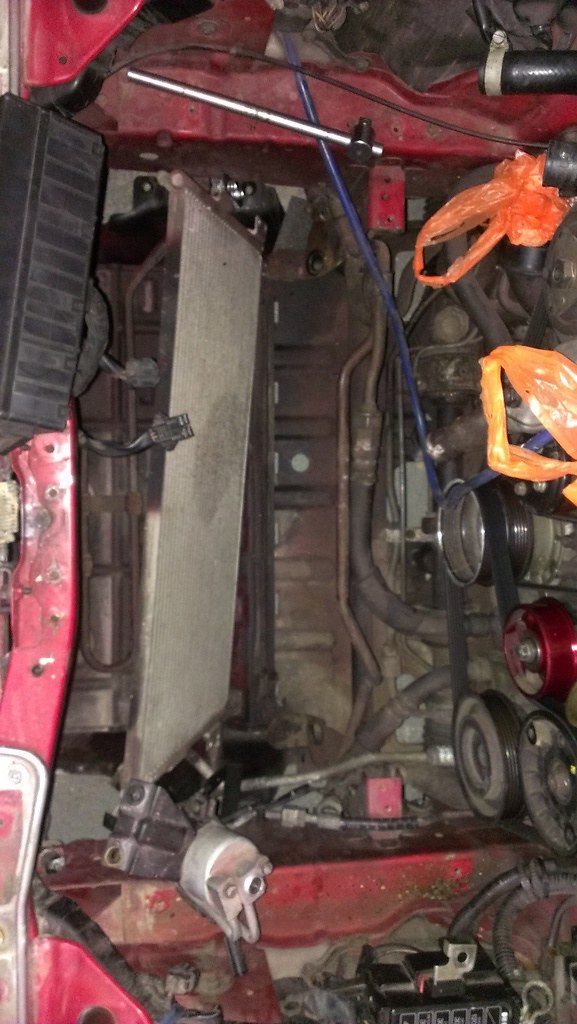
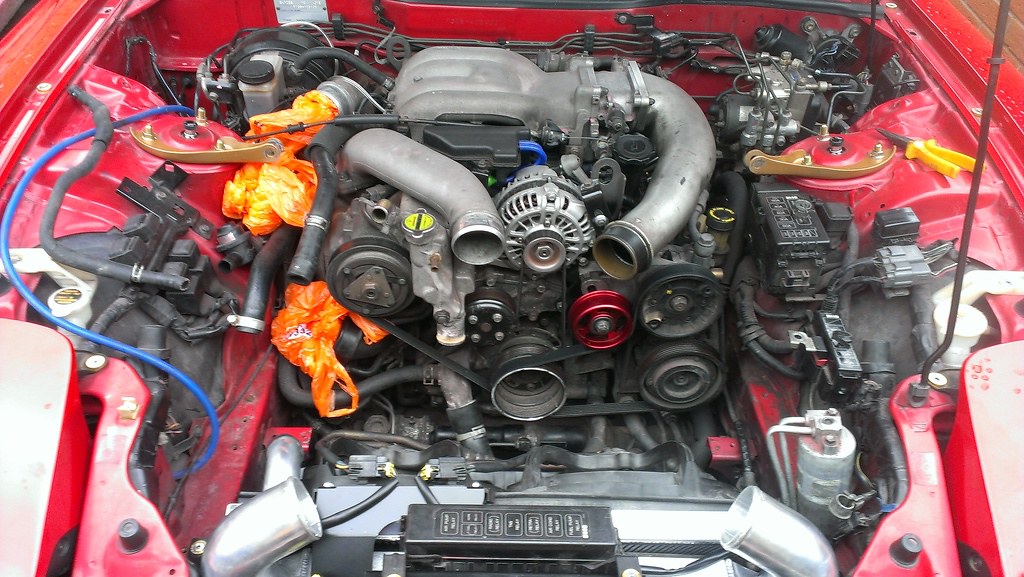
Here is how everything looked before I got cracking.
First task was to remove the old original intercooler, thankfully this was just a 4 bolts and clamp plus some jubilee clips.
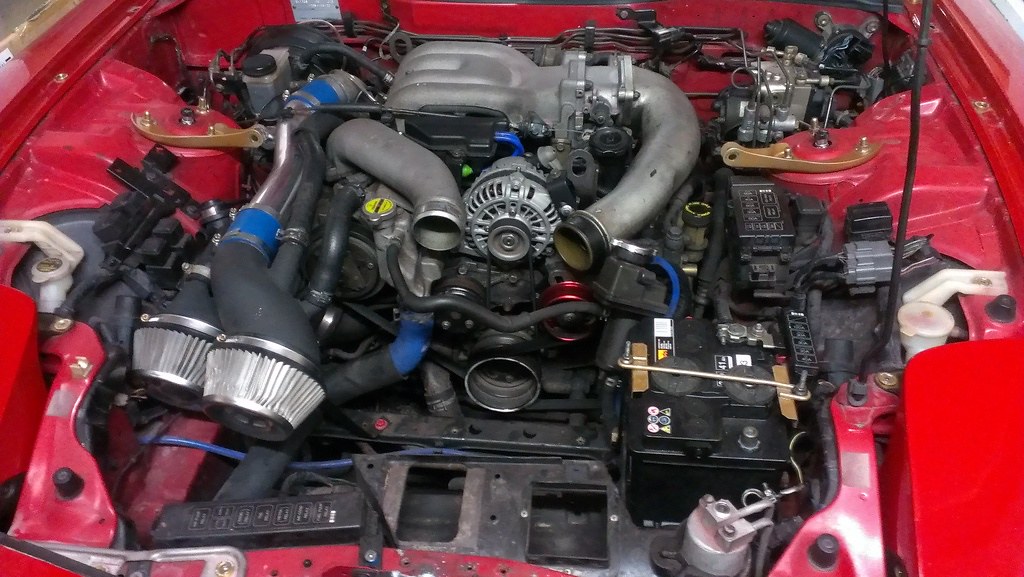
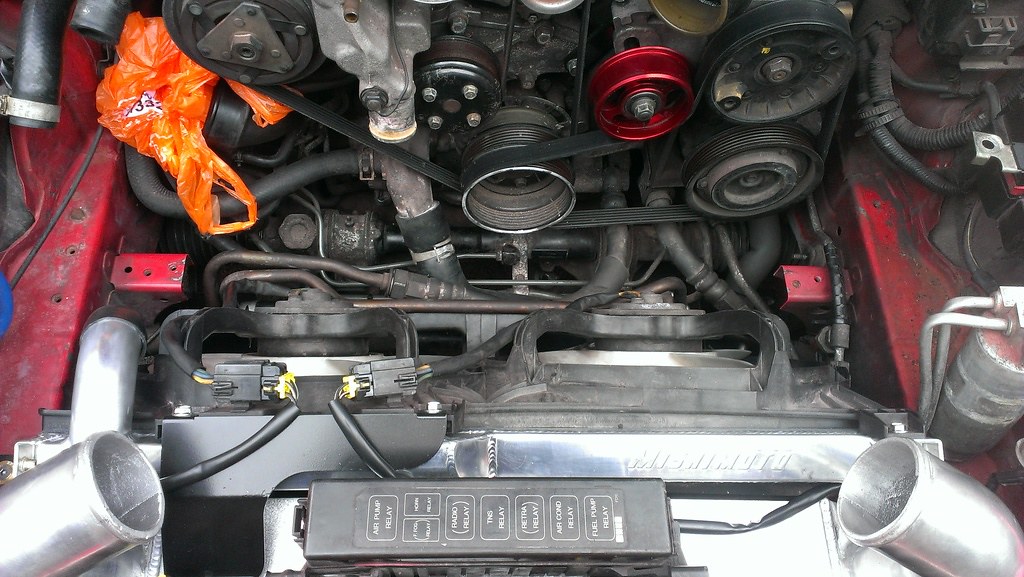
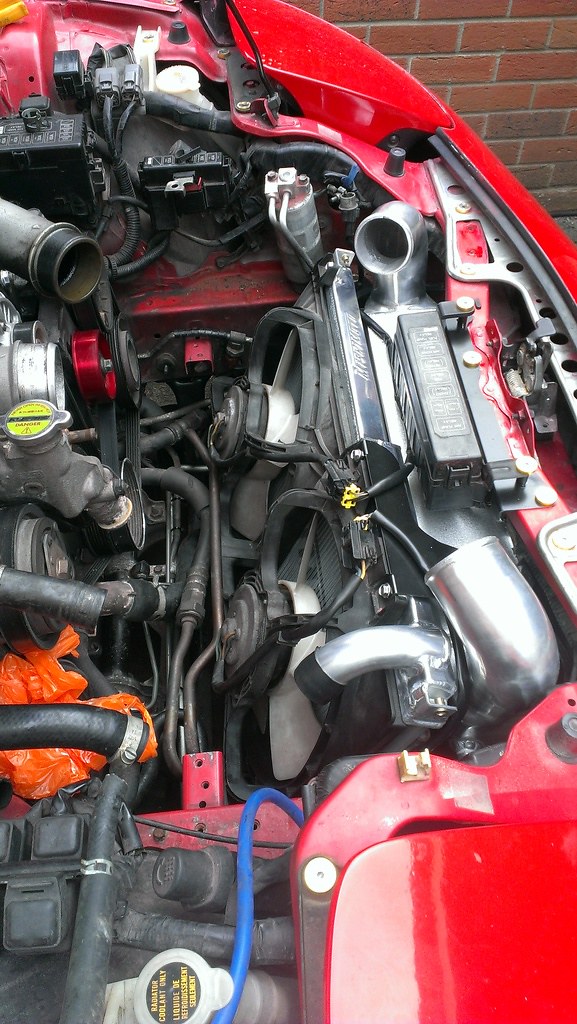
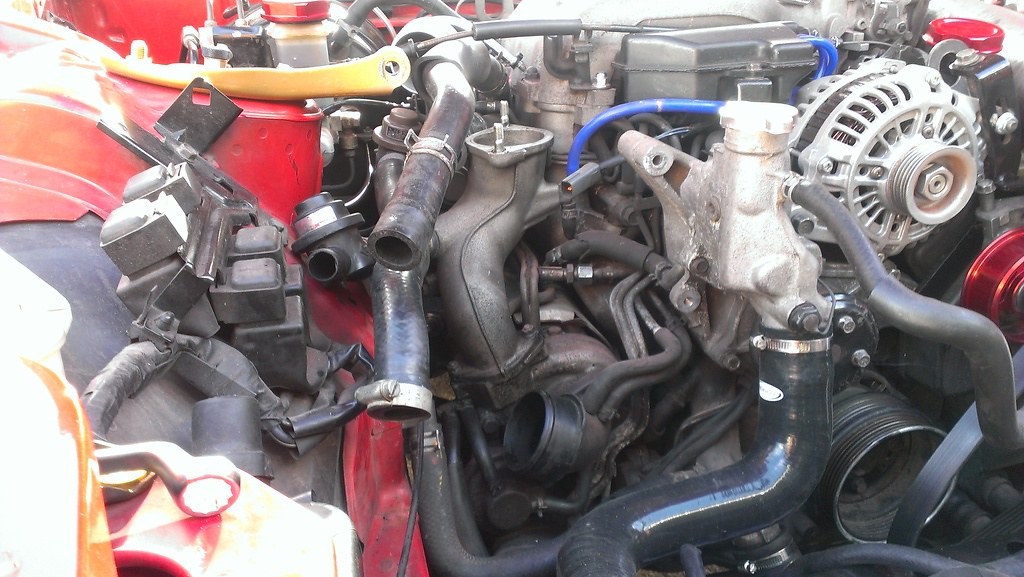
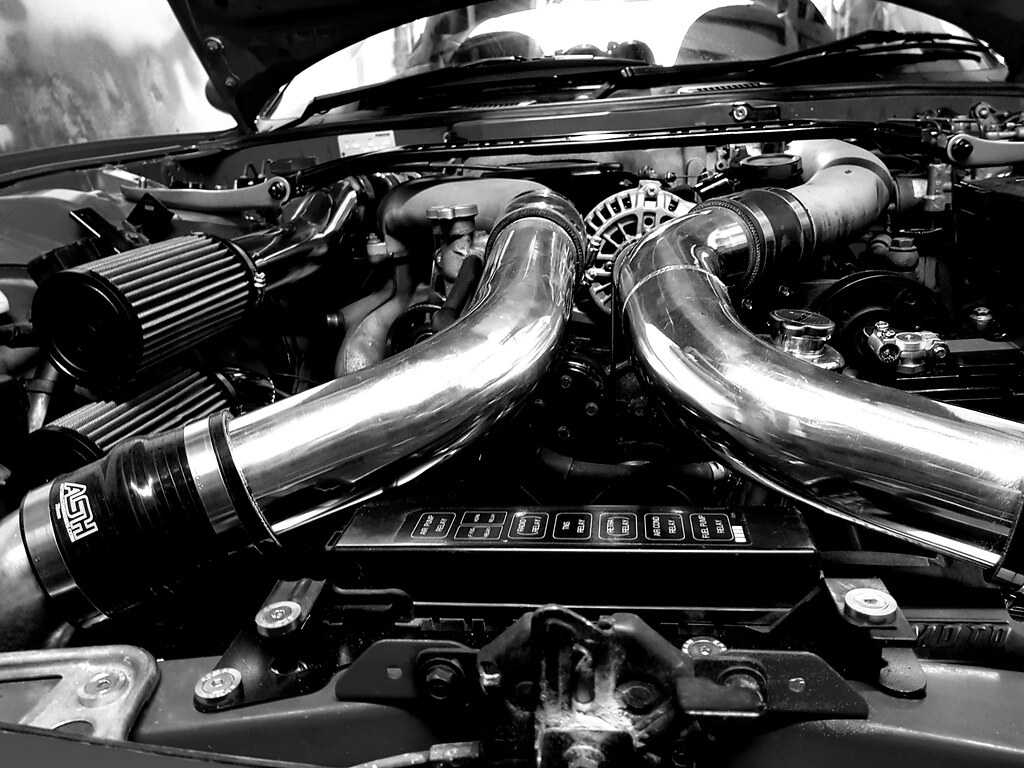
For the first time in ownership I get to the engine, I was starting to think it was a series of pulleys and pipes under all that lot!
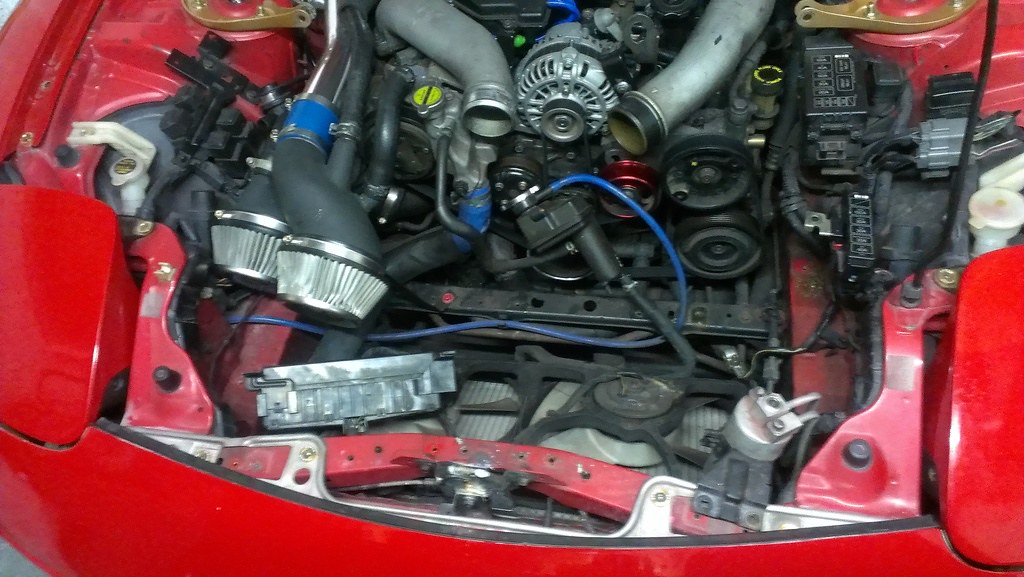
The air scoop for the intercooler proved to be the hardest thing yet to get out. The air con cylinder on the right sits in side it and has to be carefully bent out of the hole whilst wiggling the plastic shielding free.
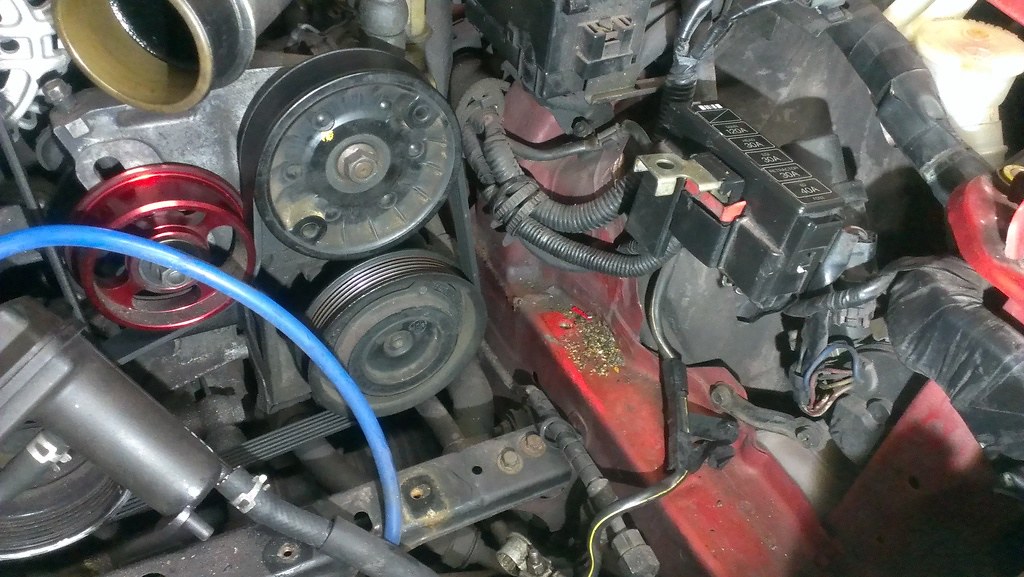
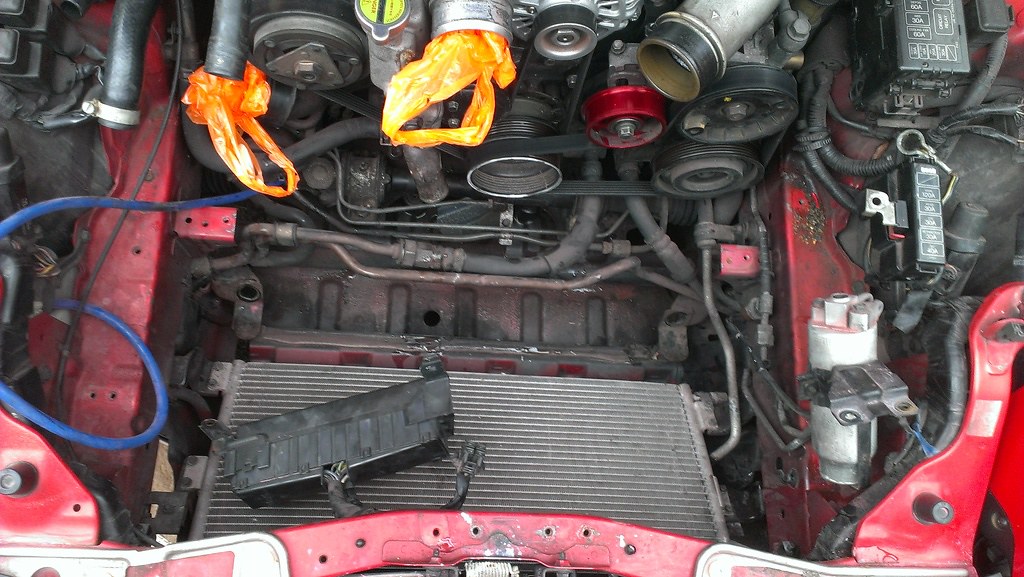
With the battery and tray removed as well as the air intakes I could start to see some issues that I want to sort out. Although the engine has only recently been rebuilt there is a lot of grime around the engine bay that I do not like.
Some of the bits I will be cleaning up and repainting
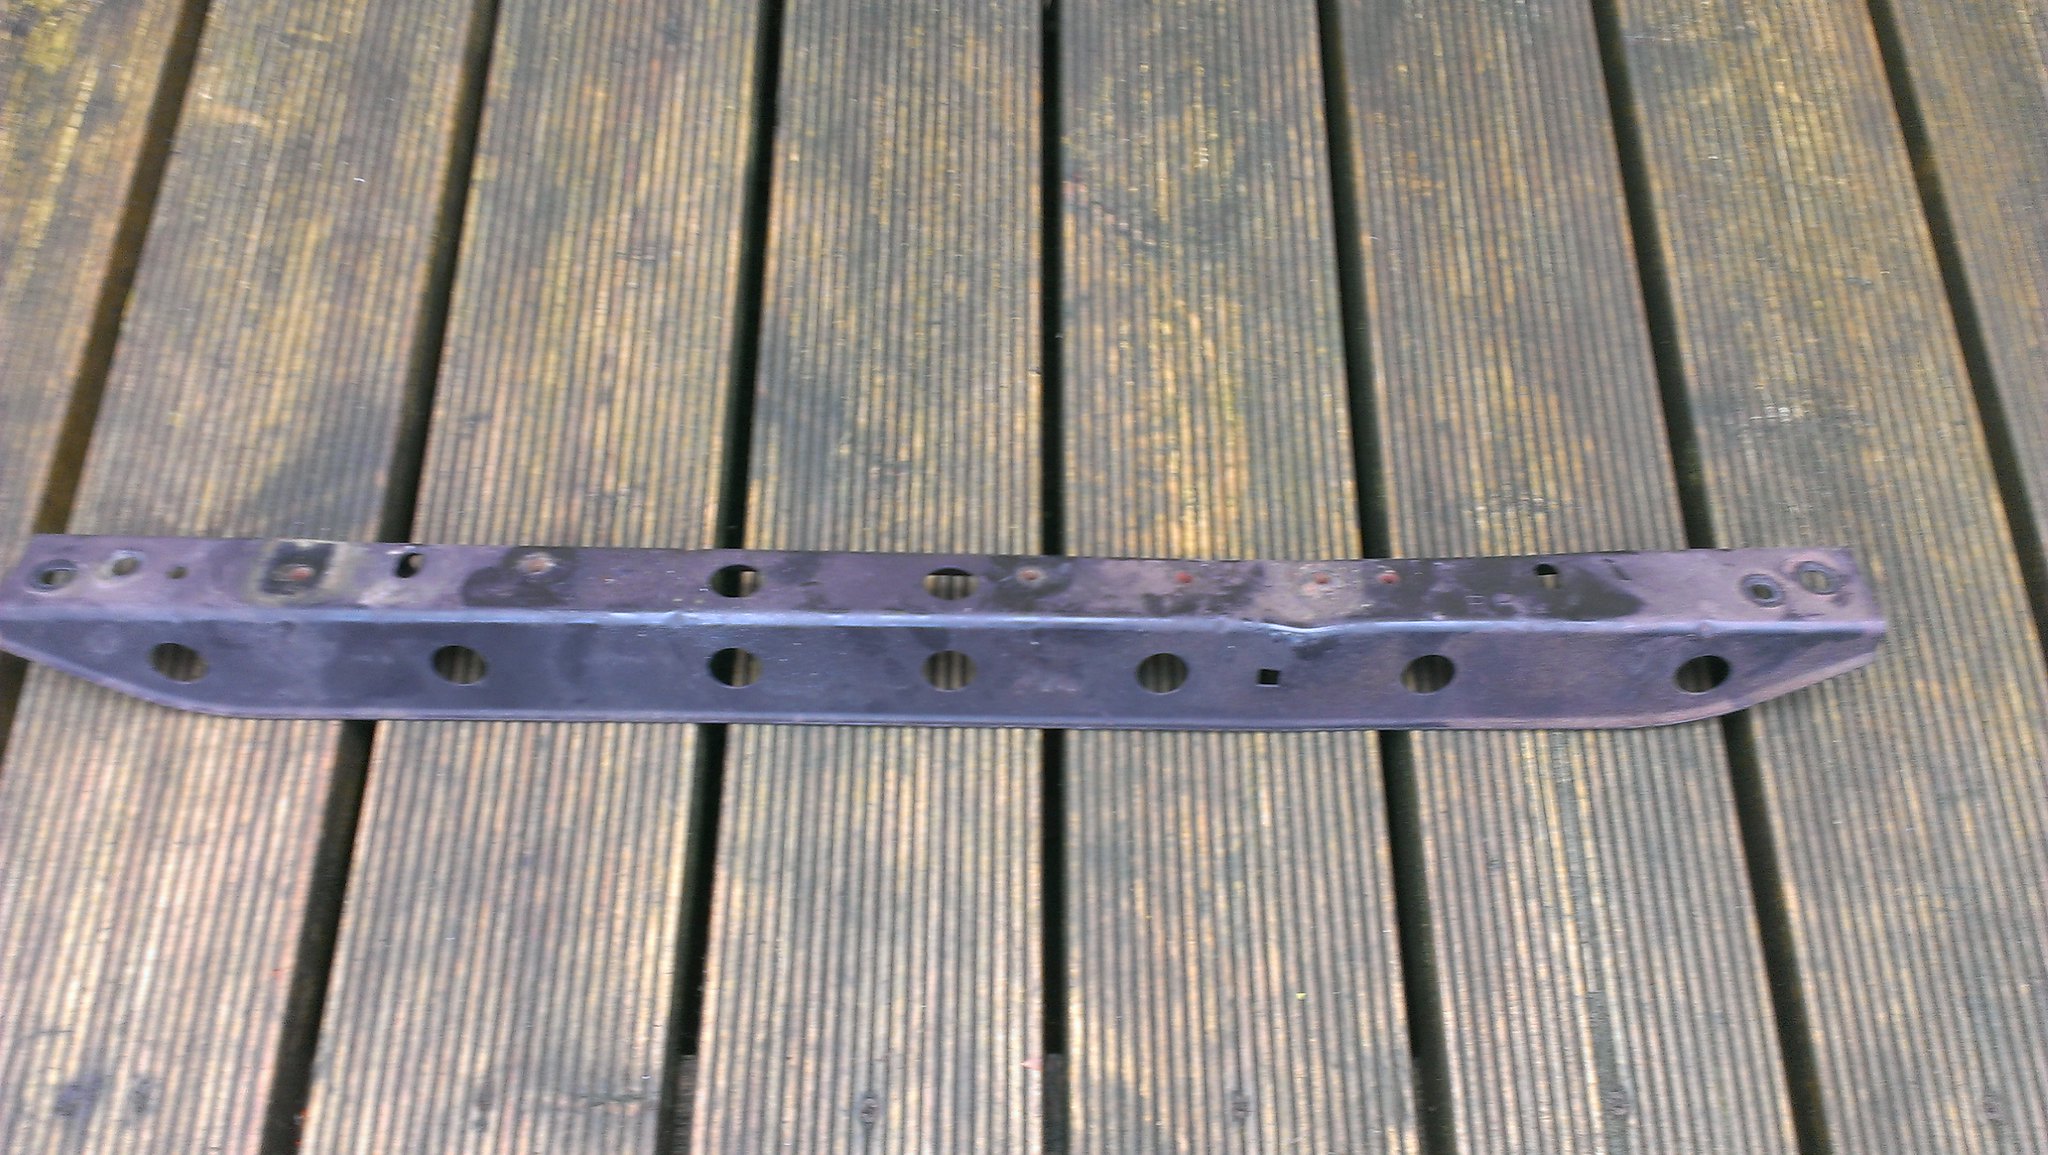
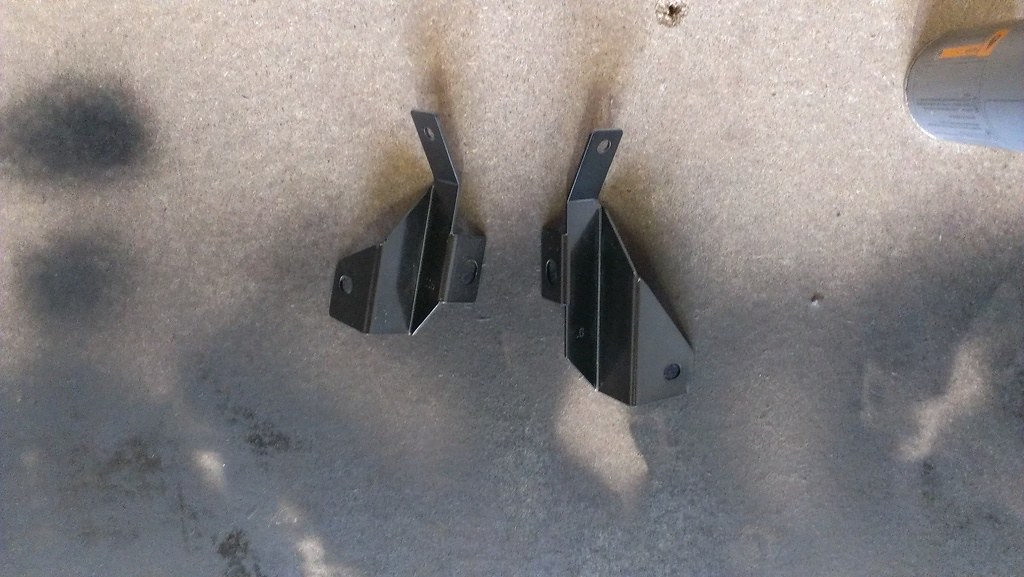
The mounting bracket for the intercooler also came out, this will get cleaned up, sanded down and repainted....not sure what colour yet.
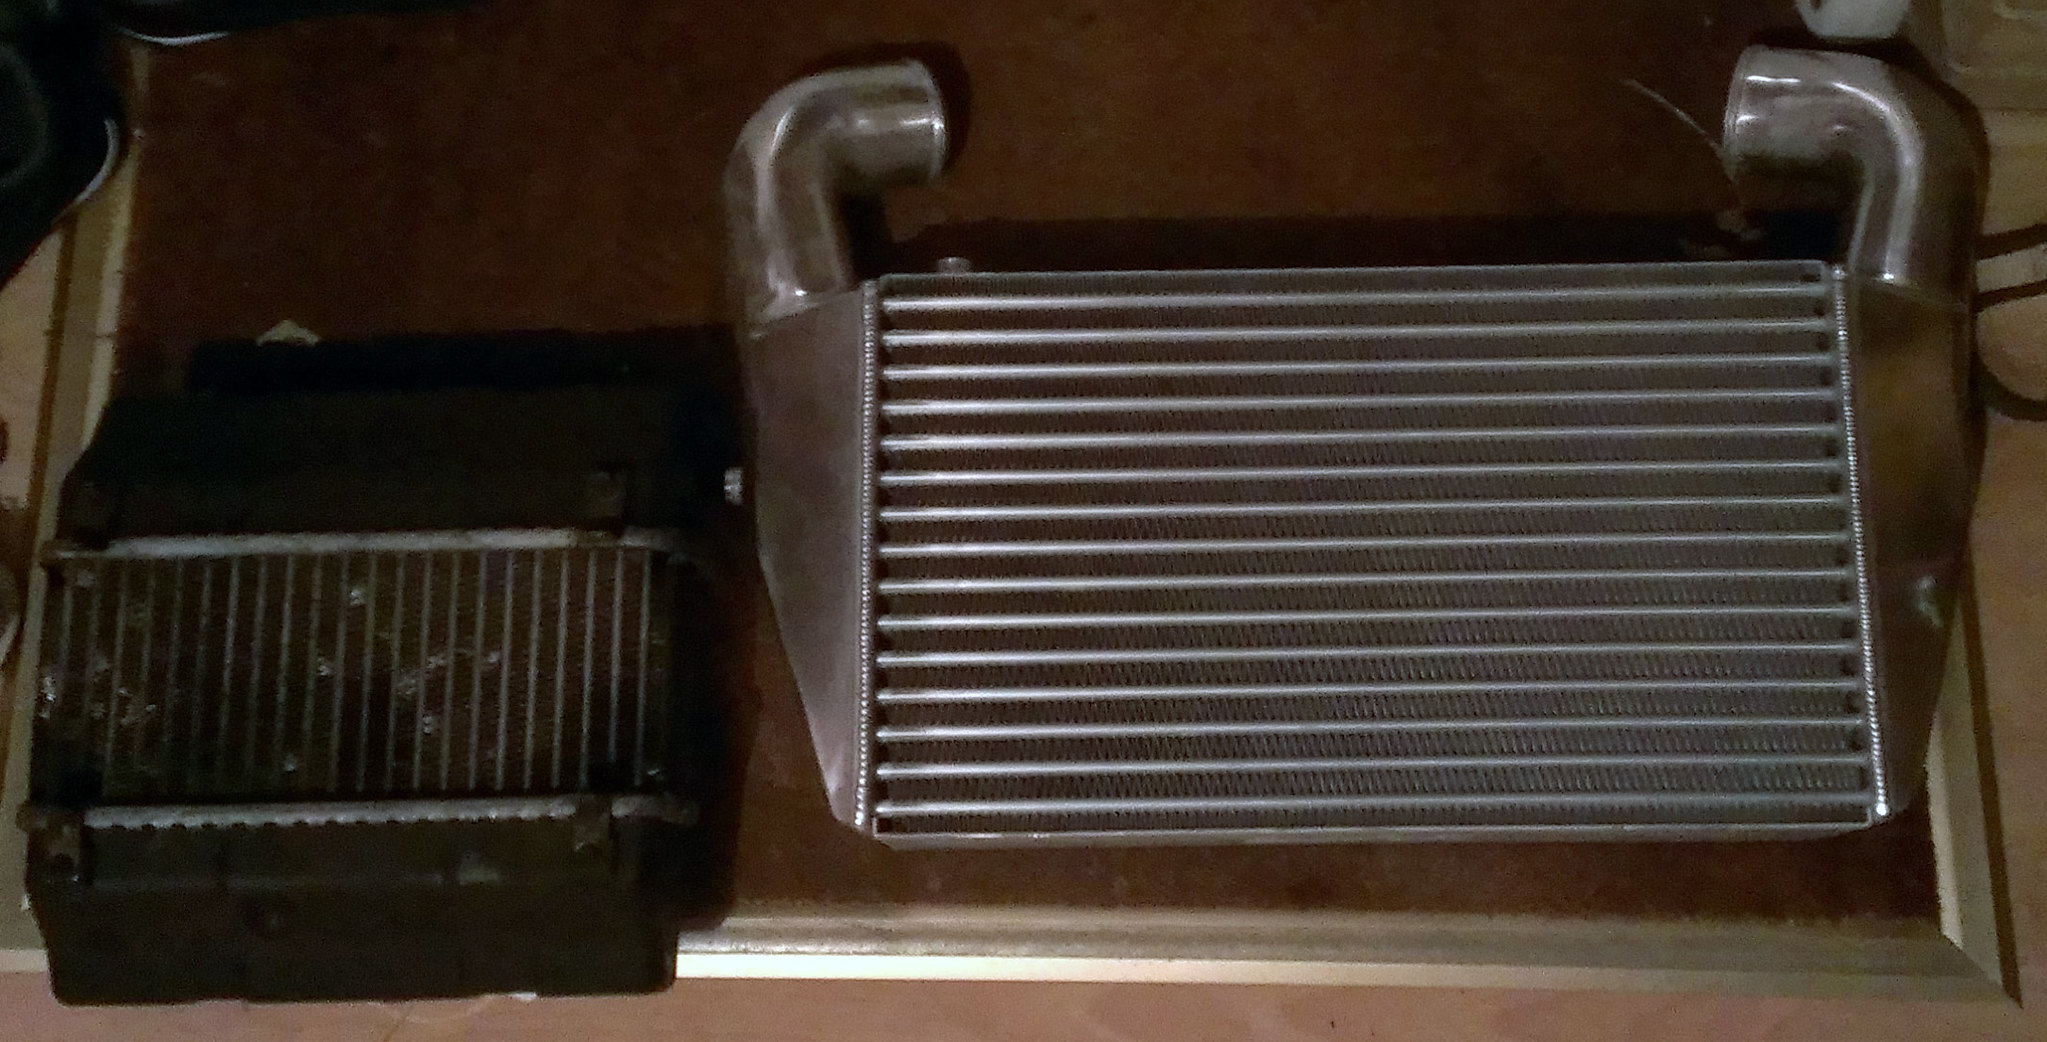
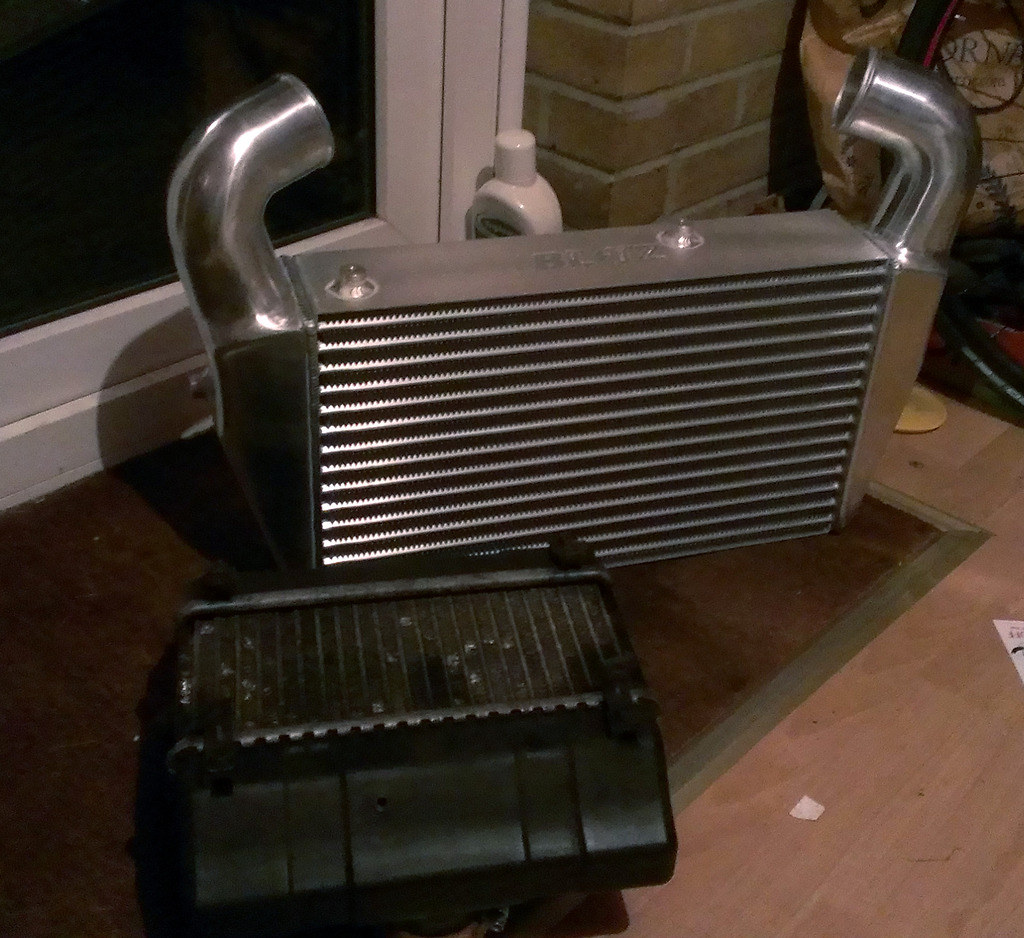
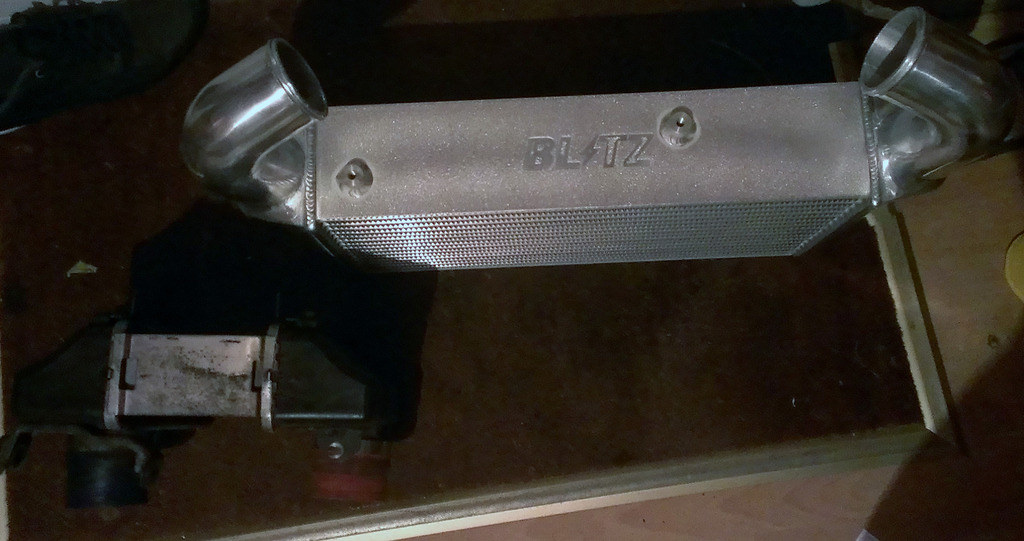
Finally some shots of the new Blitz intercooler next to the mazda one.
Next task to remove the radiator.
I enjoyed using the car over the summer and so not much was done, plenty of breakfast clubs were visited however and the odd car show. Along with a spine shattering drive over Exmoor which made me get the suspension sorted out by a man who knew what he was doing! Suffice to say the ride is epic.
This winter my plans are:
Fit front mount intercooler with uprated radiator.
Remove cat and air pump
Fit Apexi ECU and controller
replace fuel filter (harder than it sounds)
Give the engine bay a clean and lick of paint whilst said parts are removed.
Here is how everything looked before I got cracking.
First task was to remove the old original intercooler, thankfully this was just a 4 bolts and clamp plus some jubilee clips.
For the first time in ownership I get to the engine, I was starting to think it was a series of pulleys and pipes under all that lot!
The air scoop for the intercooler proved to be the hardest thing yet to get out. The air con cylinder on the right sits in side it and has to be carefully bent out of the hole whilst wiggling the plastic shielding free.
With the battery and tray removed as well as the air intakes I could start to see some issues that I want to sort out. Although the engine has only recently been rebuilt there is a lot of grime around the engine bay that I do not like.
Some of the bits I will be cleaning up and repainting
The mounting bracket for the intercooler also came out, this will get cleaned up, sanded down and repainted....not sure what colour yet.
Finally some shots of the new Blitz intercooler next to the mazda one.
Next task to remove the radiator.
Edited by Daston on Saturday 10th December 16:15
Edited by Daston on Wednesday 9th August 23:19
Edited by Daston on Tuesday 30th January 19:00

samoht said:
Wonderful photos, really brings out the shape
I have a Racing Beat twin outlet, making 340hp on twins, it's pretty well tucked-up into the factory position:

(car doesn't look as good as yours!)
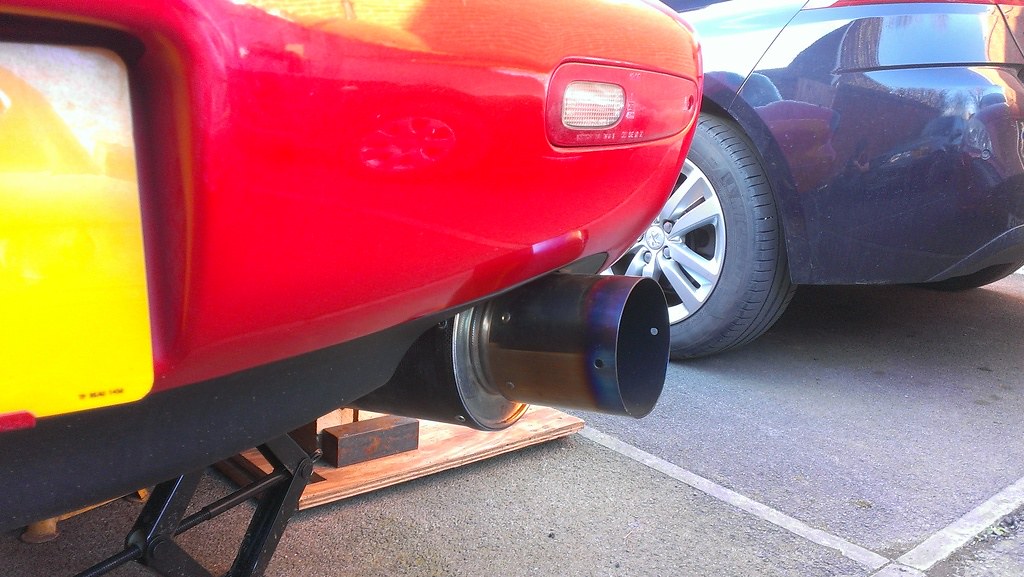
I do like the look of the racing beat, I do have plans for a single Turbo possibly next winter so not sure how restrictive the flow would be on that. I do like the looks of the Apexi N1 but heard it sounds a bit meh....should be able to come up with something similar.I have a Racing Beat twin outlet, making 340hp on twins, it's pretty well tucked-up into the factory position:
(car doesn't look as good as yours!)
Edited by samoht on Saturday 10th December 23:23
I had a productive morning,
Started off draining the radiator, I had hoped to do this with the car on the ground but my tub would not fit under the splitter. As the under tray needs to come out in order to modify the anti roll bar mounts I thought I may as well make a start on it.
It was going so well until I got to a bolt with a broken nut that just kept spinning
 The nut is located inside the subframe under the lower wishbone so a right sod to get to. I do think I have enough clearance now so that can wait another day.
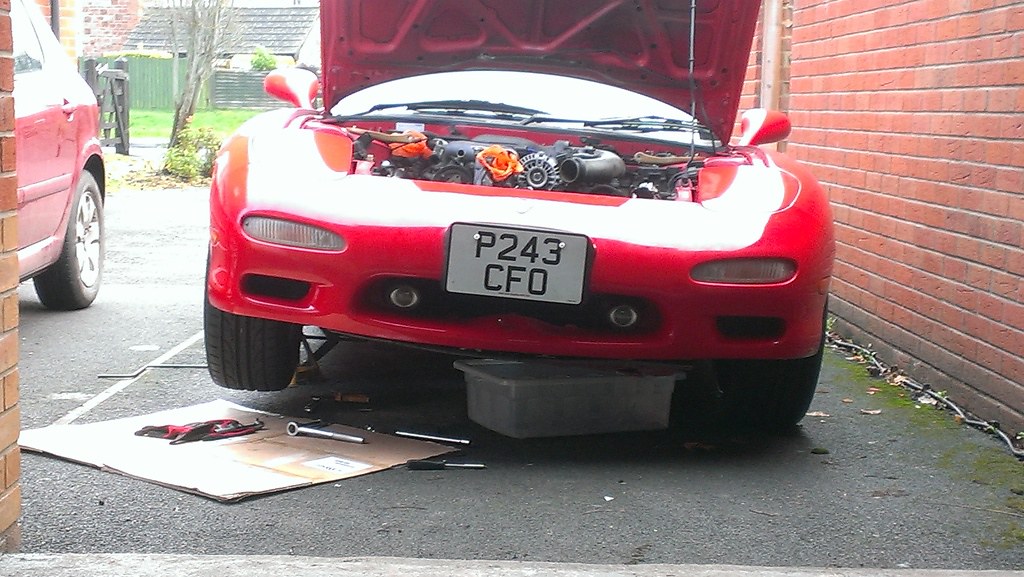
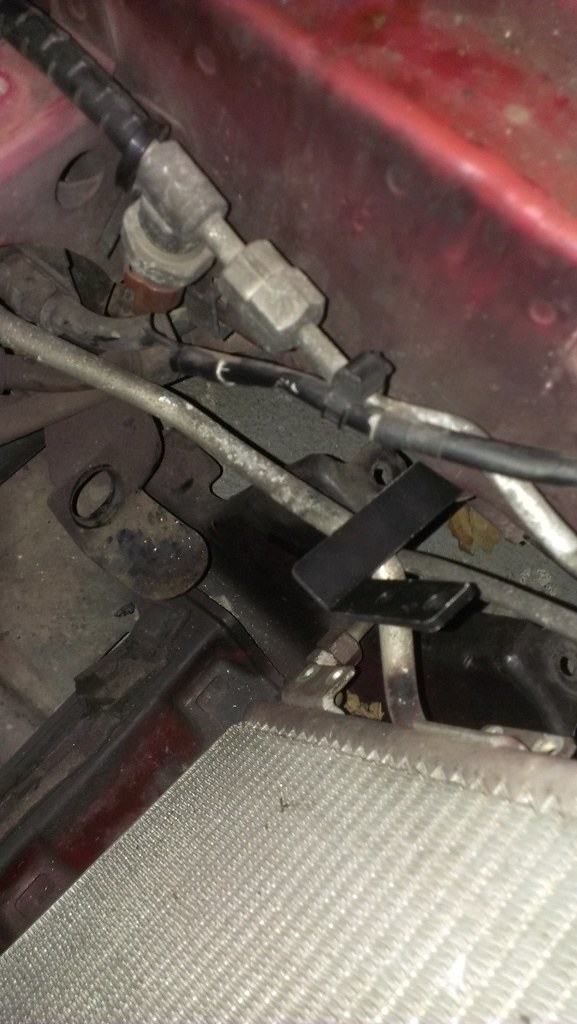
Whist this was draining I had a look at the first couple of brackets that I will need to fit. The brackets look to be machined from stainless steel but I don't want to take any chances with rust. So a lick of paint is in order.
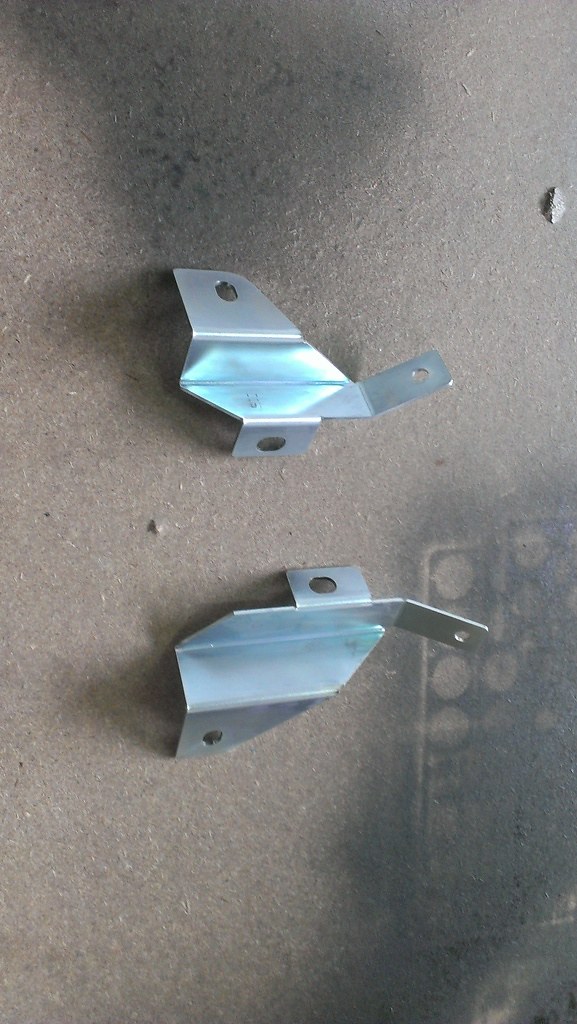
I also took this time to look over the old Intercooler mount whilst it was out, its pretty manky and looks to have taken a wack in a previous life. This will be washed and sanded down before painting....still not 100% sure if it is even reused.
After looking at the instructions further the part is reused as the battery tray now bolts onto the mount. The right hand side of the bracket needs cutting/bending to clear the oil cooler pipes as these too need to be moved further back in the engine bay.
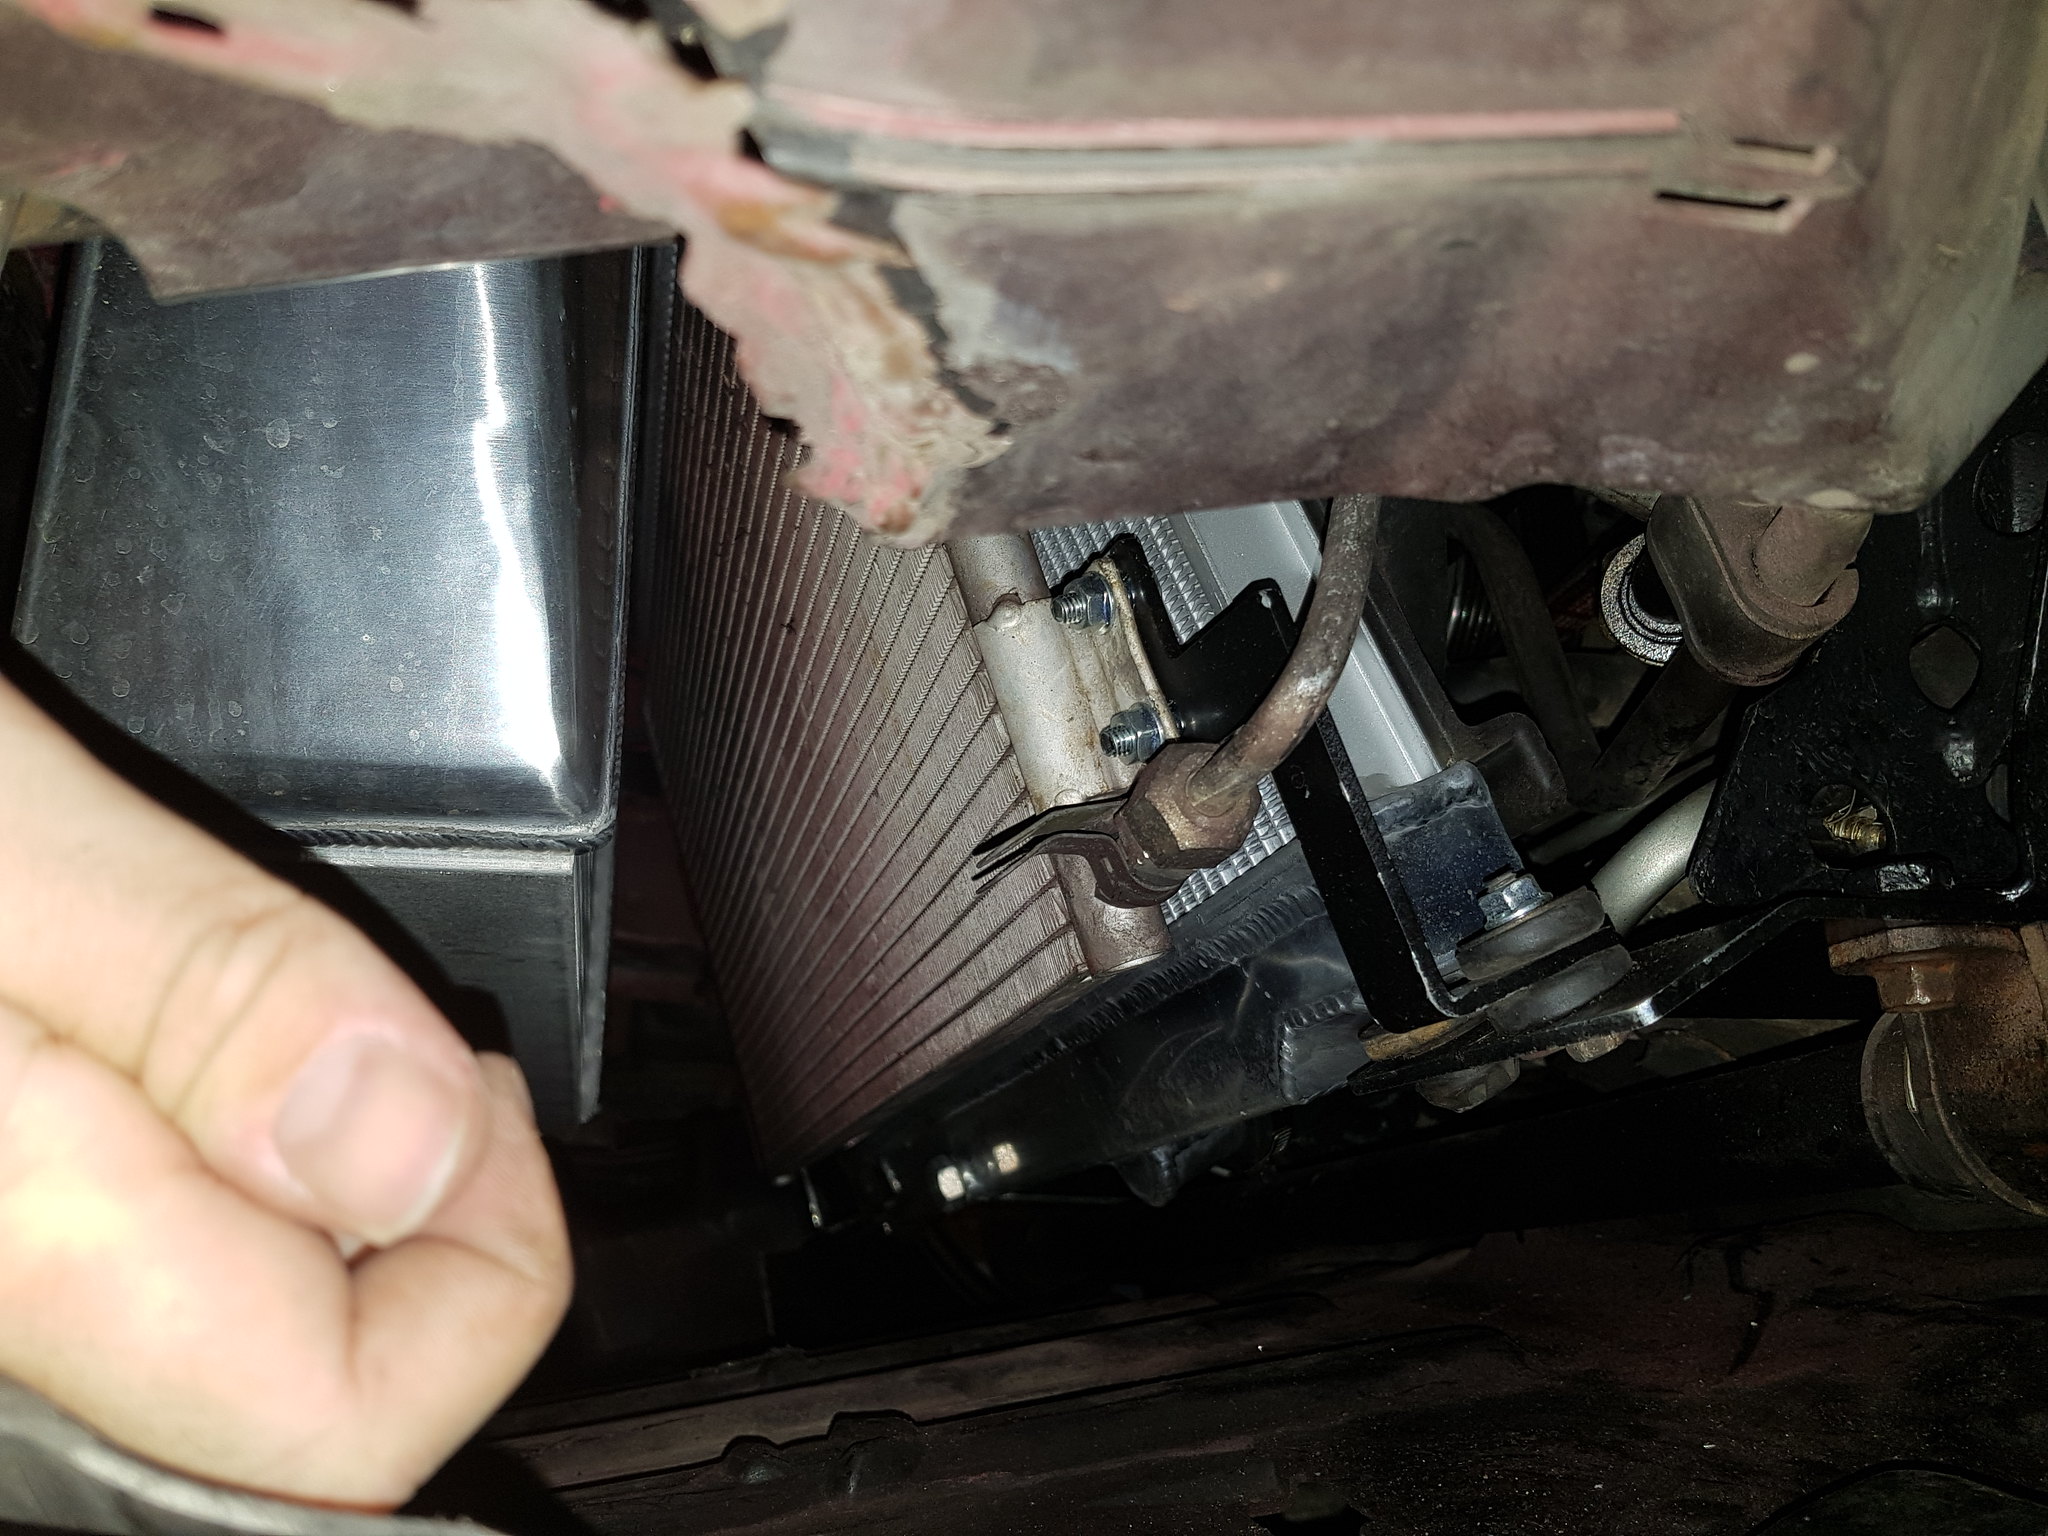
Once the radiator was empty I then lifted it out, this was not a lot of fun as it would either clip the relay box or the air con filling tank, then when you clear them the lower nossle clips the oil cooler lines. With a lot of wiggling I managed to remove it and keep the Air Con Condenser in tack.
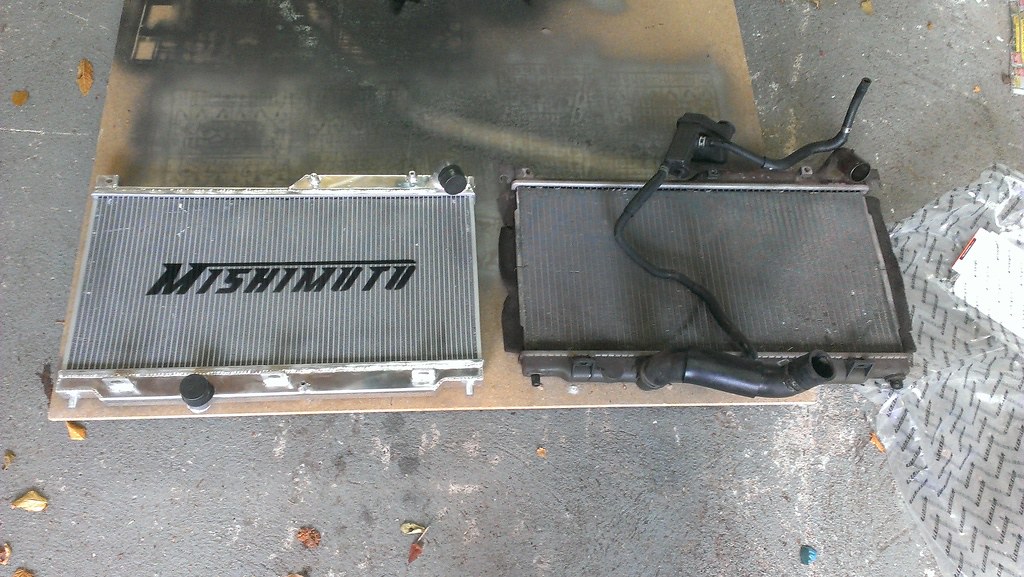
Old and new radiators together
Next on the to do list is remove the Condenser, move (bend) the oil pipe lines further towards the engine and extend the wires on the Fans by 30cm.
Edited by Daston on Wednesday 9th August 23:24
Thought I would update this thread. I had planned on doing a lot of this work over the christmas break but the Flu had other ideas and instead I spent the whole time in bed.
The condenser really slowed my progress down, I did not want to remove the air con system and I just couldn't get the hose to bend enough to move the unit. I installed one of the brackets to see how far I was out and it was not a good sigh.
In the end I went for the brute force and ignorance approach and for once it paid off, it turned out there was enough room for the flexi part of the hose to bend and the condenser is in the right place. I don't think I will be able to fit the upper left hand bracket due to the pipes but it should be solid enough from the other 3.
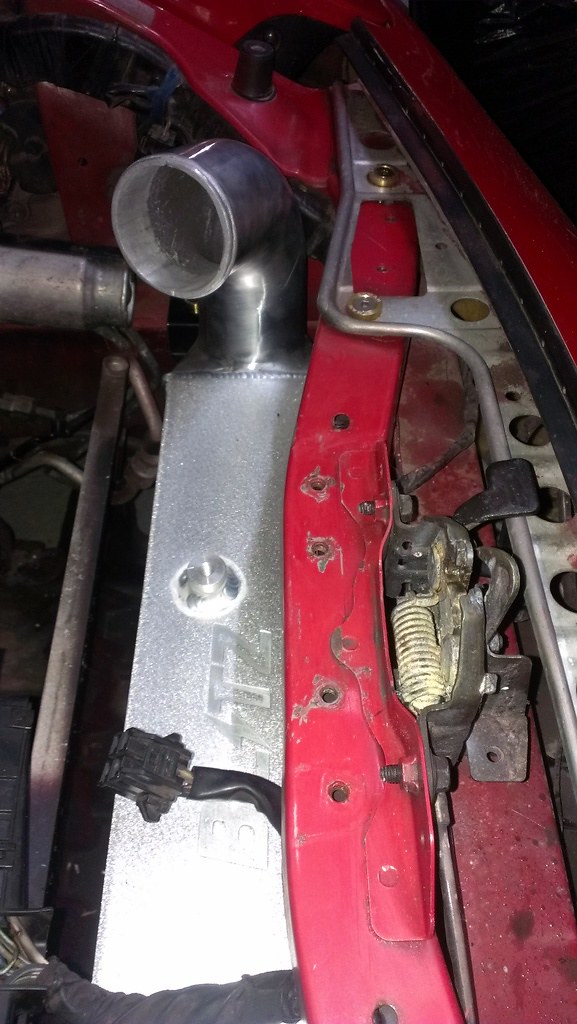
With that out of the way I dropped the intercooler into place. The brackets lined up with all the existing bolt holes and the 2 bolts that held in the radiator perfectly.
 IMAG2952_zpsckbvmovv by Dave & Lisa, on Flickr
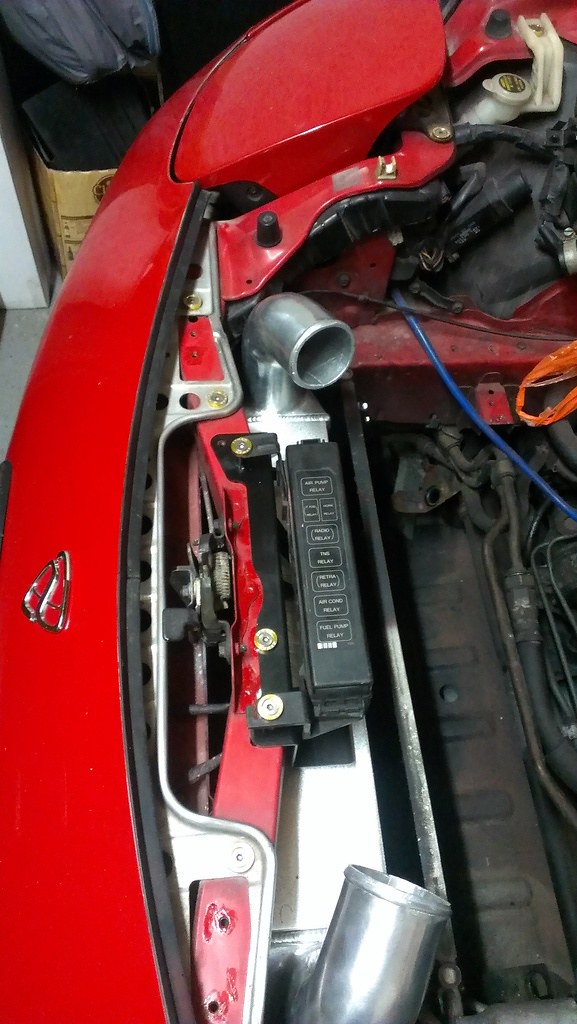
Finally the bracket went on top that locates the relay box to its new home. There is quite a gap between the intercooler and condenser so I will be looking at making some form of shroud or insulation to ensure the air flow goes through everything and not just around.
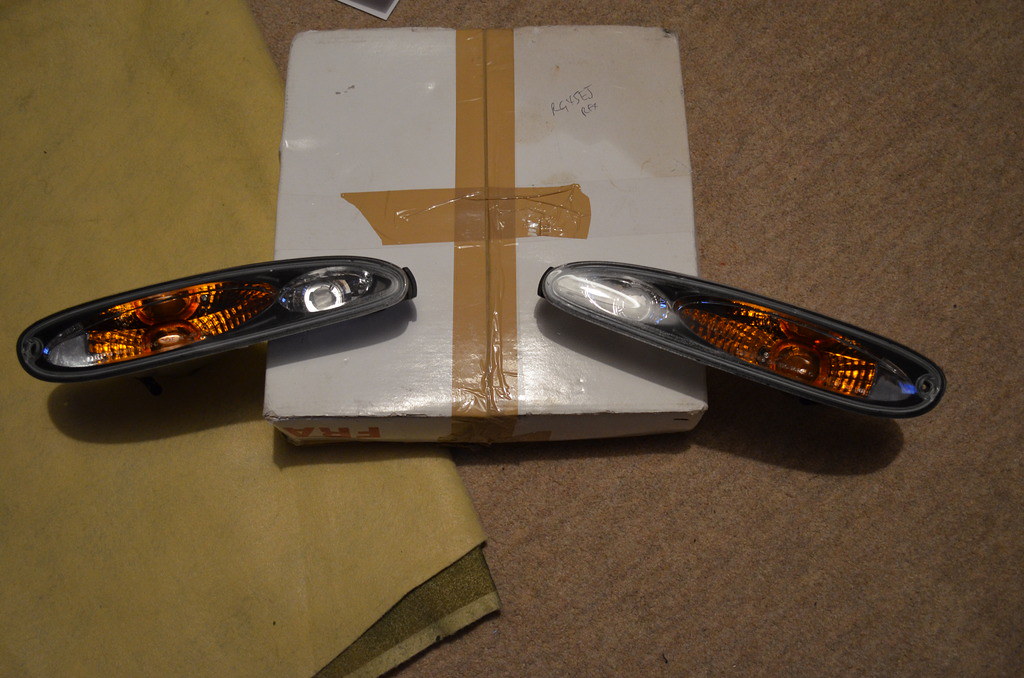
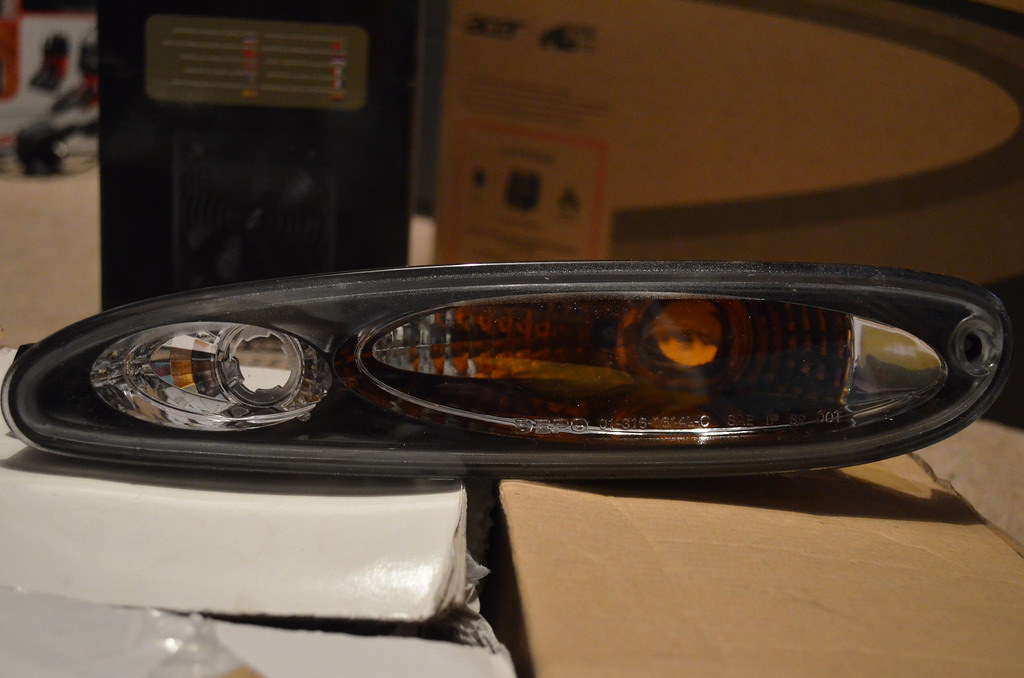
I managed to pick up a new set of lights for the front as well to get rid of the old yellowing 90's goodness. These look a lot more modern and should give the front end a more up to date look (well as modern as a car with pop up headlights can get).
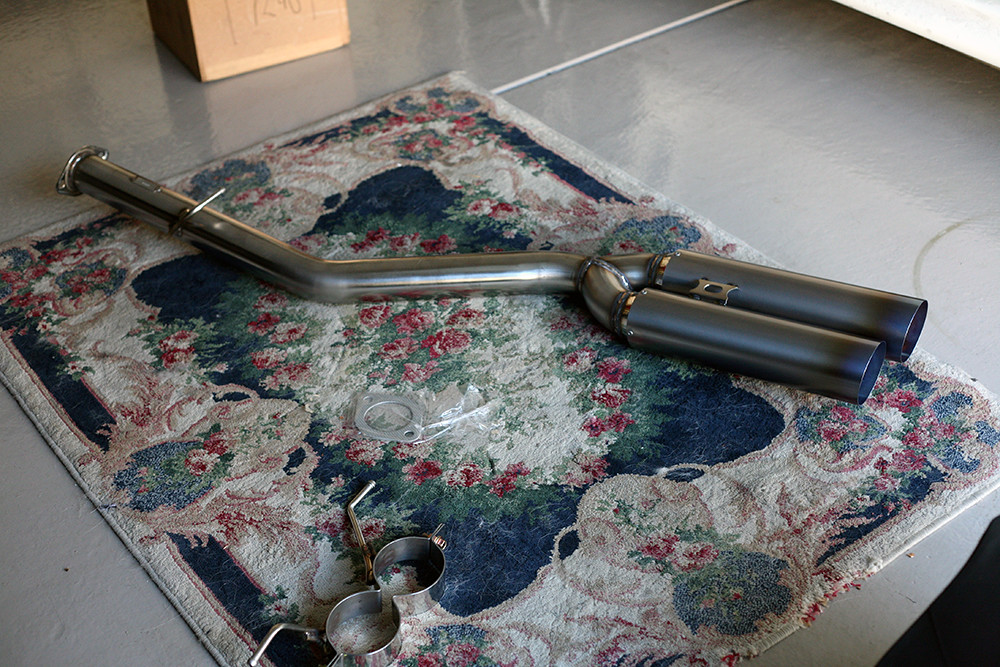
I plan on making up some mock exhausts for the back end, as much as I like the HKS the 5" tip is just way to big for the RX. The new system will certainly be dual tip and will probably follow a similar pattern to the Rein Heart systems found in Japan.
The condenser really slowed my progress down, I did not want to remove the air con system and I just couldn't get the hose to bend enough to move the unit. I installed one of the brackets to see how far I was out and it was not a good sigh.
In the end I went for the brute force and ignorance approach and for once it paid off, it turned out there was enough room for the flexi part of the hose to bend and the condenser is in the right place. I don't think I will be able to fit the upper left hand bracket due to the pipes but it should be solid enough from the other 3.
With that out of the way I dropped the intercooler into place. The brackets lined up with all the existing bolt holes and the 2 bolts that held in the radiator perfectly.
IMAG2952_zpsckbvmovv by Dave & Lisa, on FlickrFinally the bracket went on top that locates the relay box to its new home. There is quite a gap between the intercooler and condenser so I will be looking at making some form of shroud or insulation to ensure the air flow goes through everything and not just around.
I managed to pick up a new set of lights for the front as well to get rid of the old yellowing 90's goodness. These look a lot more modern and should give the front end a more up to date look (well as modern as a car with pop up headlights can get).
I plan on making up some mock exhausts for the back end, as much as I like the HKS the 5" tip is just way to big for the RX. The new system will certainly be dual tip and will probably follow a similar pattern to the Rein Heart systems found in Japan.
Edited by Daston on Tuesday 28th February 21:39
Edited by Daston on Wednesday 9th August 23:32
Work has been slow and becoming a Dad has got in the way of playing with the car!
My next job was to remove the anti roll bar mounts to cut off the radiator brackets. As using the scissor jack last time pissed me off I decided to purchase a new jack.
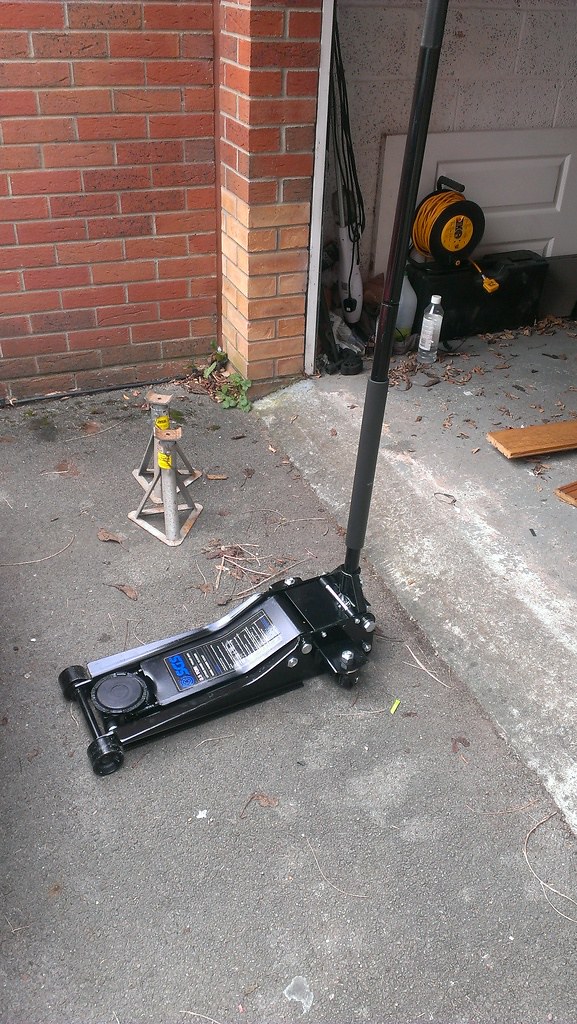
One giant design flaw was also noticed with this jack. To get to the jacking point the whole thing goes under the car with the handle poking out, to lower the jack you turn the handle inside the handles bracket. If you remove the handle the bracket springs up and you cant lower the fecking jack. Thankfully I had a s t halfords jack I could use in order to lift the car up and get new jack out to reattach the handle....lesson learnt.
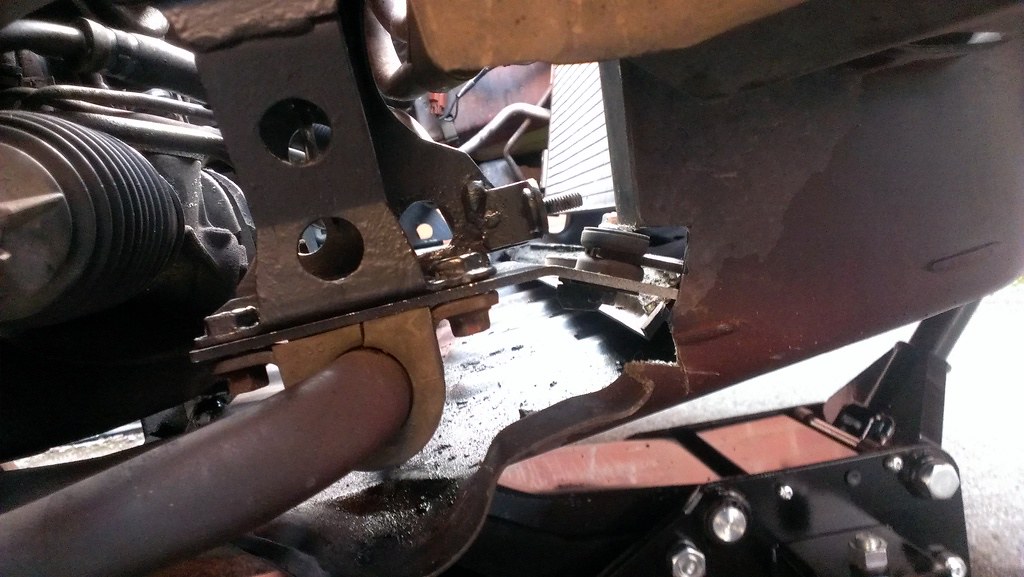
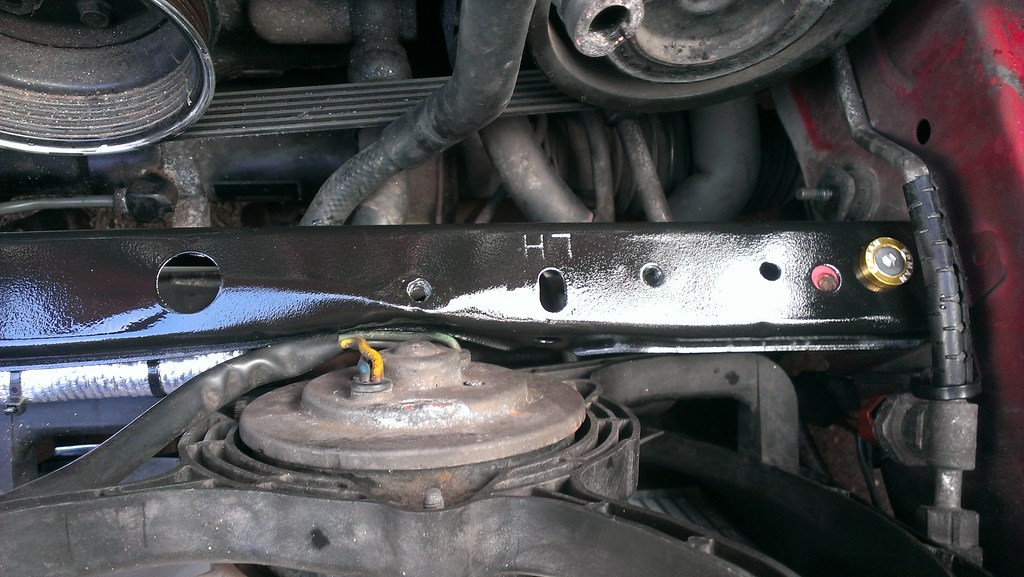
As my model is a Type R it has two oil coolers, these are connected by a hard pipe between the two directly in line with the radiator fans new home. These had to be bent back towards the engine bay to clear sufficient room.

Sat in gale force winds at the weekend I got the new mounts for the radiator in and the under tray trimmed to fit around the brackets. The holes will be made neater as the are a bit messy.
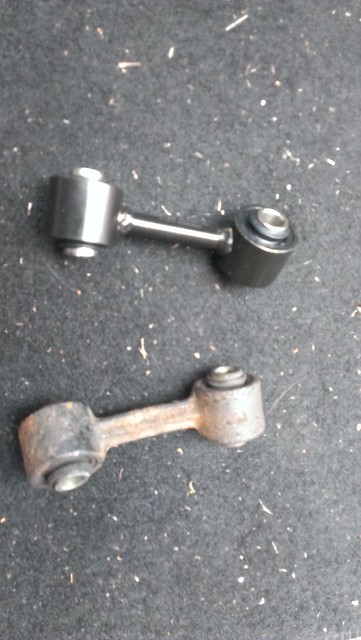
Whilst the anti roll bar was removed I thought it probably best to do the droplinks at the same time, the originals were still on the car and were picked up as an advisory last year....you can see why!
With a bit of strength the radiator was shoe horned in and the oil pipes moved back, I will need to put something around the oil hose to stop it rubbing against the fan housing but all in all I am very happy with the out come. Just got to fit some coolant pipes, the battery tray and Air Separation Tank.
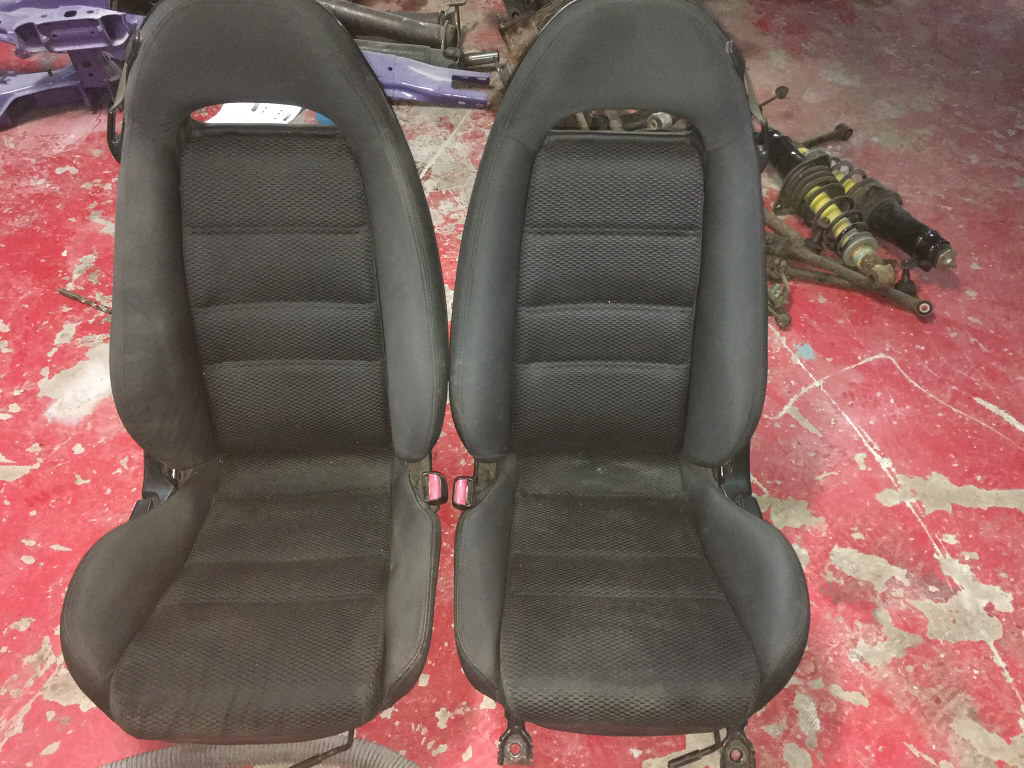
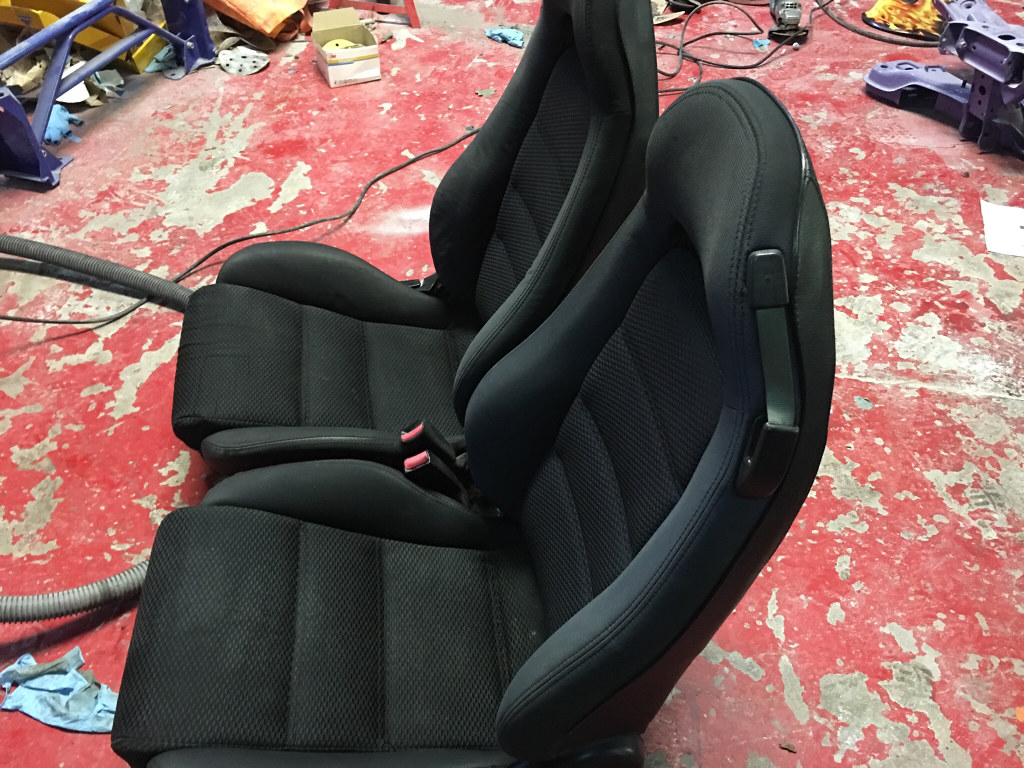
Just picked up some new seats as well, they are fabric rather than suede and in my opinion look a lot better and a bit more modern. Will need a good clean before they go in.
My next job was to remove the anti roll bar mounts to cut off the radiator brackets. As using the scissor jack last time pissed me off I decided to purchase a new jack.
One giant design flaw was also noticed with this jack. To get to the jacking point the whole thing goes under the car with the handle poking out, to lower the jack you turn the handle inside the handles bracket. If you remove the handle the bracket springs up and you cant lower the fecking jack. Thankfully I had a s
t halfords jack I could use in order to lift the car up and get new jack out to reattach the handle....lesson learnt. As my model is a Type R it has two oil coolers, these are connected by a hard pipe between the two directly in line with the radiator fans new home. These had to be bent back towards the engine bay to clear sufficient room.
Sat in gale force winds at the weekend I got the new mounts for the radiator in and the under tray trimmed to fit around the brackets. The holes will be made neater as the are a bit messy.
Whilst the anti roll bar was removed I thought it probably best to do the droplinks at the same time, the originals were still on the car and were picked up as an advisory last year....you can see why!
With a bit of strength the radiator was shoe horned in and the oil pipes moved back, I will need to put something around the oil hose to stop it rubbing against the fan housing but all in all I am very happy with the out come. Just got to fit some coolant pipes, the battery tray and Air Separation Tank.
Just picked up some new seats as well, they are fabric rather than suede and in my opinion look a lot better and a bit more modern. Will need a good clean before they go in.
Edited by Daston on Tuesday 28th February 21:40
Edited by Daston on Wednesday 9th August 23:37
Daston said:
Work has been slow and becoming a Dad has got in the way of playing with the car!
My next job was to remove the anti roll bar mounts to cut off the radiator brackets. As using the scissor jack last time pissed me off I decided to purchase a new jack.
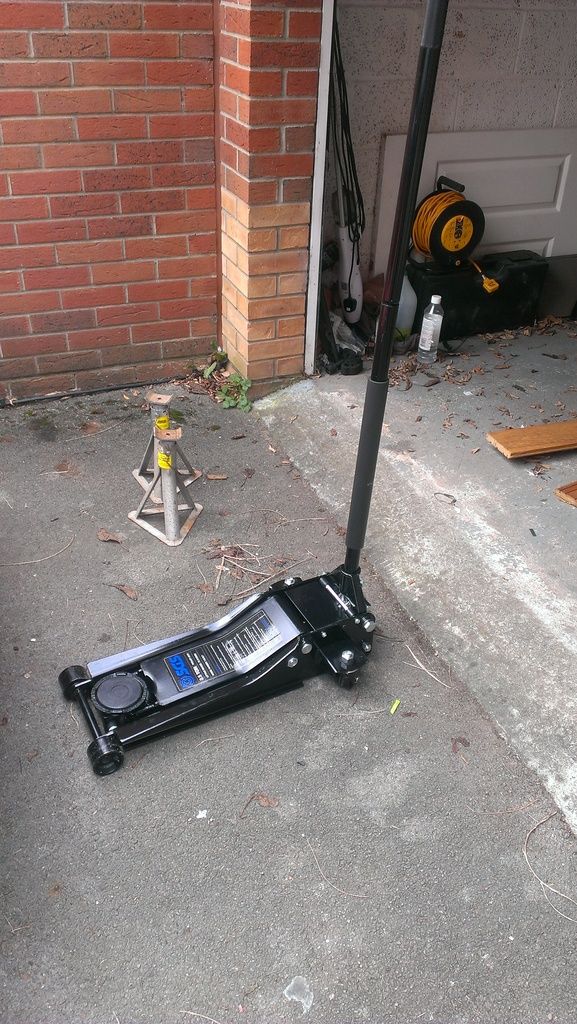
One giant design flaw was also noticed with this jack. To get to the jacking point the whole thing goes under the car with the handle poking out, to lower the jack you turn the handle inside the handles bracket. If you remove the handle the bracket springs up and you cant lower the fecking jack. Thankfully I had a st halfords jack I could use in order to lift the car up and get new jack out to reattach the handle....lesson learnt.
Congratulations on the new arrival! My MR2 was left untouched, on axle stands in the garage for the first 6 weeks after my son was born - so you look like you've done better than I did!My next job was to remove the anti roll bar mounts to cut off the radiator brackets. As using the scissor jack last time pissed me off I decided to purchase a new jack.

One giant design flaw was also noticed with this jack. To get to the jacking point the whole thing goes under the car with the handle poking out, to lower the jack you turn the handle inside the handles bracket. If you remove the handle the bracket springs up and you cant lower the fecking jack. Thankfully I had a s
t halfords jack I could use in order to lift the car up and get new jack out to reattach the handle....lesson learnt. I have the same jack and noticed the same issue, it is great for using the sill jacking points, but less so when you need to exploit its low profile nature. Also, it weighs a ton!
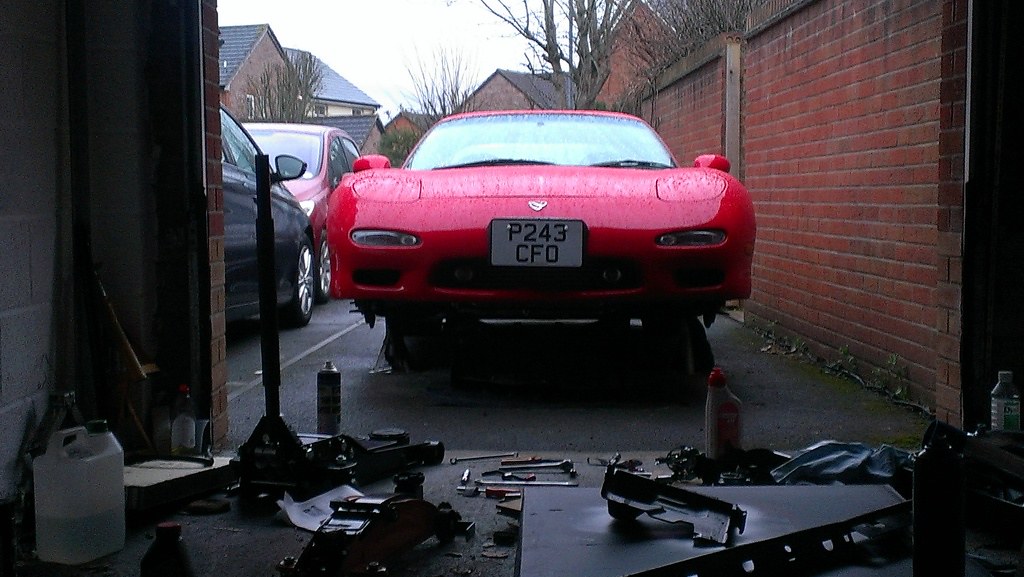
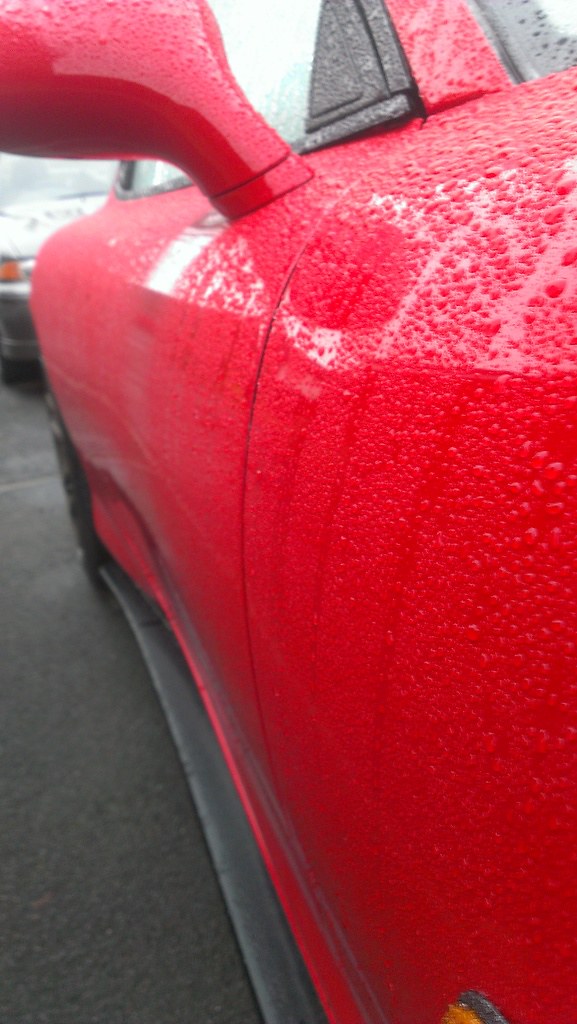
I attempted to do more work on the car on Sunday whilst dodging the rain showers! Most of the time I ended up sat in the garage trying to keep dry, although its good to see the dodo juice is still doing wonders considering I haven't washed or waxed the car for 8 months.
With the weather lifting I plumbed the radiator in, installed the old intercooler bracket (the battery trays new position uses this as does my air filters). The bracket needed some bending to get around the new position of the fans.
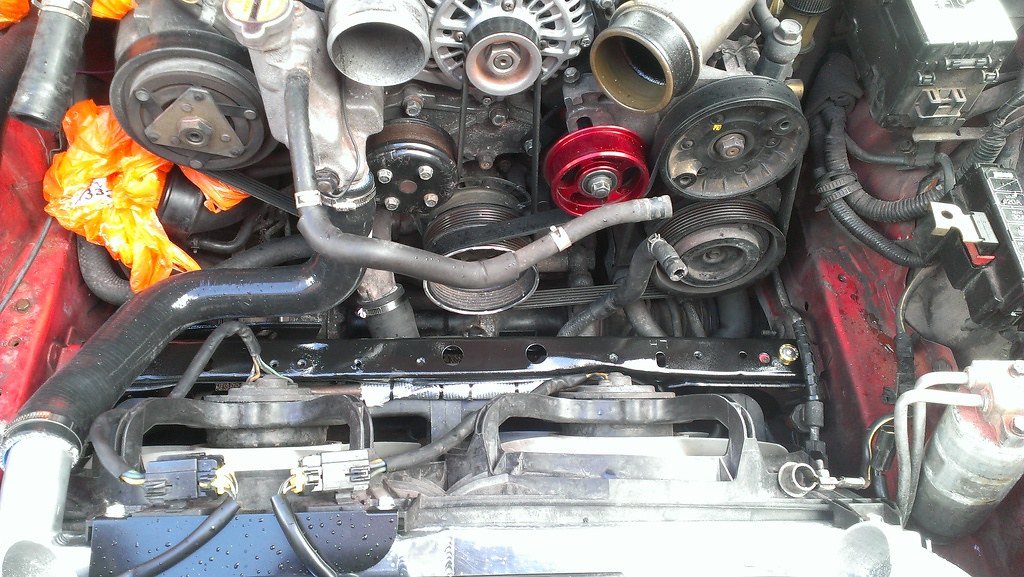
I also wrapped the oil cooler pipe to stop it from rubbing
With not much left to do apart from wait on Demon tweeks I thought I may as well test fit all the piping.
This turned out to be harder than I thought, the pipes are a tight fit with not a lot of room for adjustment

Then it was onto the air filters whilst praying they actually fit, they are also made by Blitz so I assumed they would all be designed to go together
I will need to make new brackets for them and raise the top one a few mill as it is currently resting on the radiator.
The coolant is back in the car so far no leaks so fingers crossed its all still there when I check tomorrow (turns out its very hard checking a radiator for leaks in the rain!)
Next up is removing the air pump and replacing it with an idle pulley.
With the weather lifting I plumbed the radiator in, installed the old intercooler bracket (the battery trays new position uses this as does my air filters). The bracket needed some bending to get around the new position of the fans.
I also wrapped the oil cooler pipe to stop it from rubbing
With not much left to do apart from wait on Demon tweeks I thought I may as well test fit all the piping.
This turned out to be harder than I thought, the pipes are a tight fit with not a lot of room for adjustment
Then it was onto the air filters whilst praying they actually fit, they are also made by Blitz so I assumed they would all be designed to go together
I will need to make new brackets for them and raise the top one a few mill as it is currently resting on the radiator.
The coolant is back in the car so far no leaks so fingers crossed its all still there when I check tomorrow (turns out its very hard checking a radiator for leaks in the rain!)
Next up is removing the air pump and replacing it with an idle pulley.
Edited by Daston on Wednesday 9th August 23:40
Some more updates now bits have started to arrive, my wife is getting sick of signing for parcels.
A new mid pipe is now in place, I took the opportunity to see if I could get the exhaust to hang better and not droop down so much. I had read somewhere that if you jack the exhaust into the position you want before tightening stuff up it should stay in place.
They were not kidding!
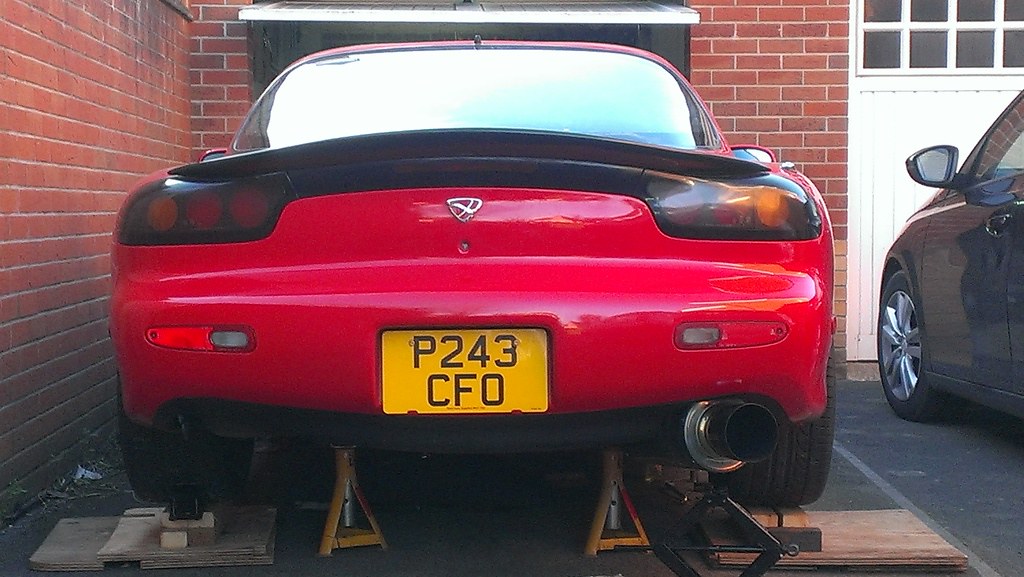
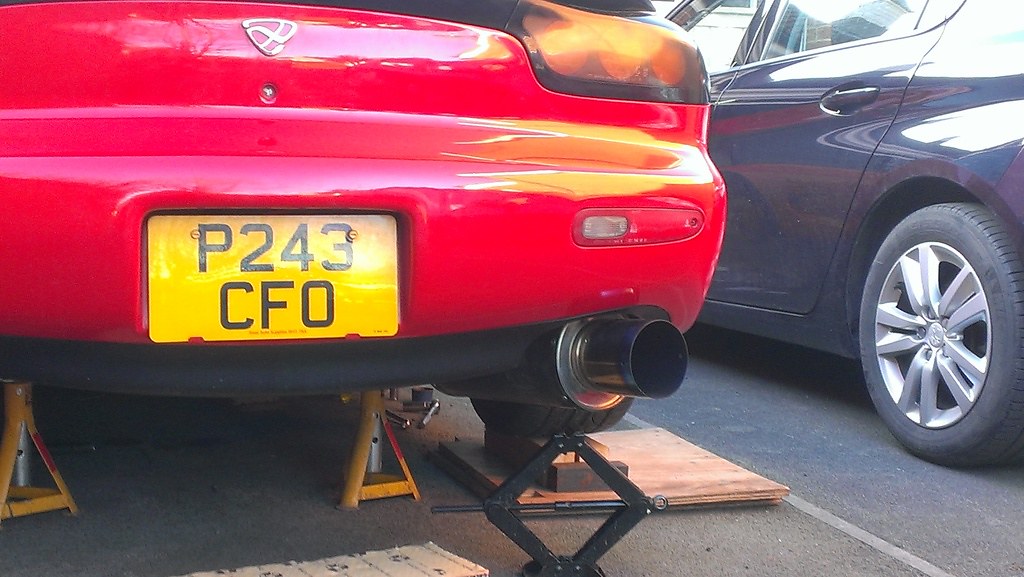
It completely changes the look of the exhaust and has made me decide to keep it for a little while longer (whilst I save for a Reinhard system).
I do need to run some heat resistant tape around the plastic splitter to stop it from melting.
Next up was the air pump removal and fitting the idle pulley.
3 bolts and the pump was free, all pretty easy so far...
I even have turbos! I have felt their presence but not actually seen one buried away in the depths of the engine. They do need a clean mind.
The new pulley is on, looks very smart if I do say so myself. The part wasn't cheap but it appears to be well made, lined up without fault and should keep my water pump happy for many years to come.

And belts on but not tightened......the pulley now highlights how st my water pulley looks! Next job to do then.
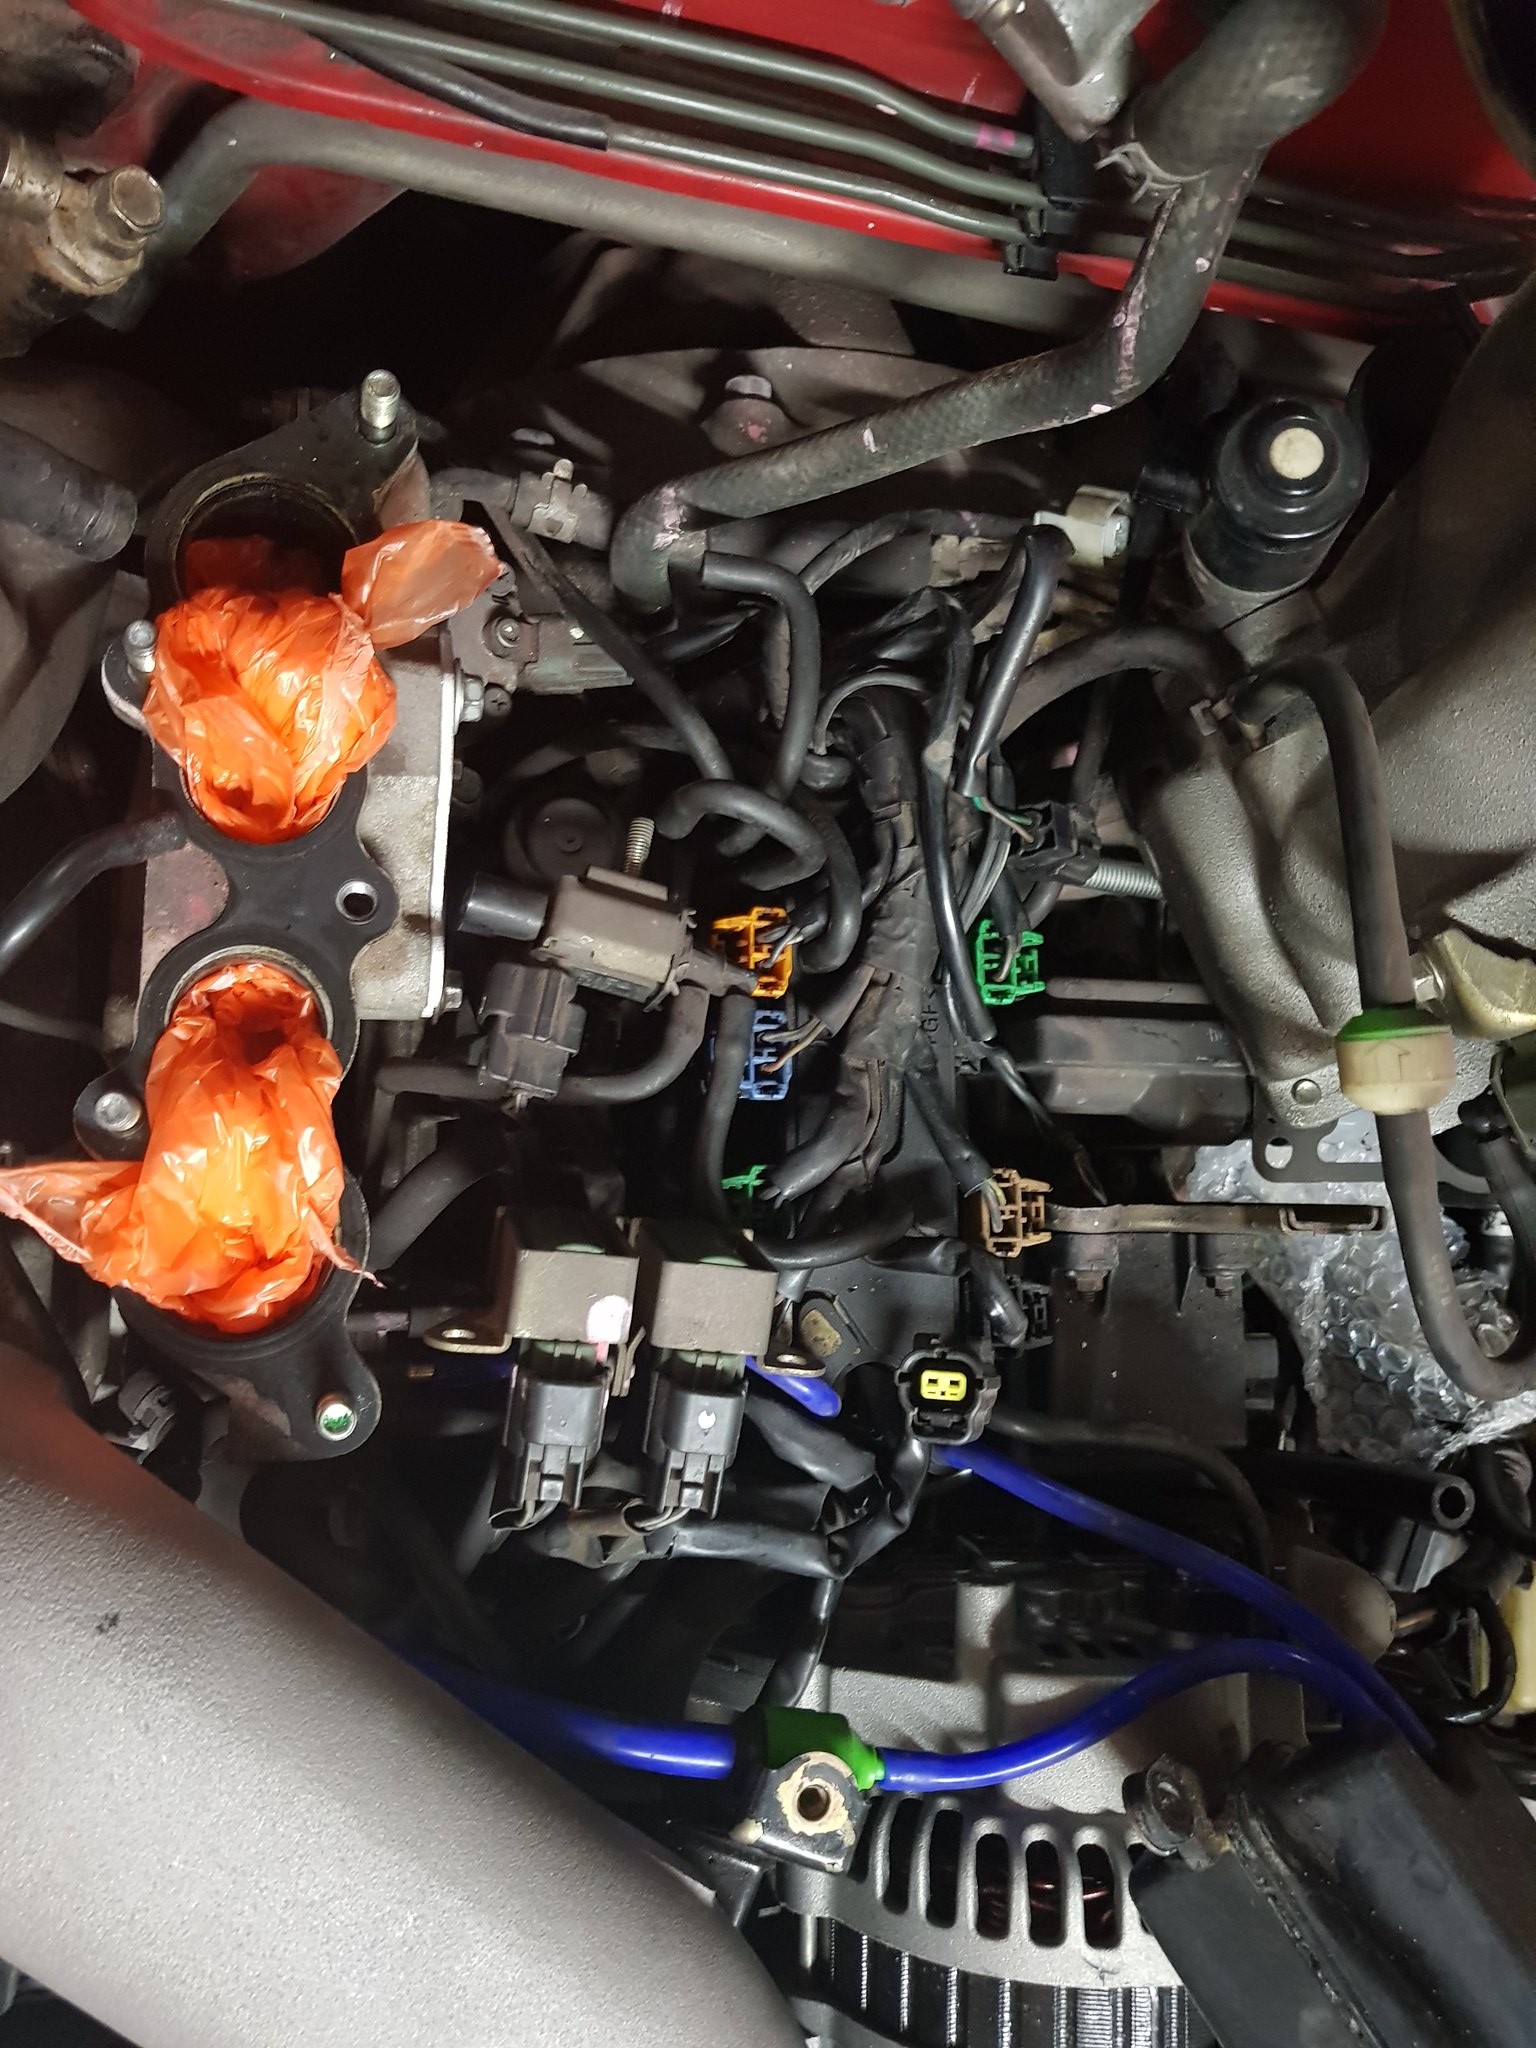
Took the upper intake manifold off to blank the air control valve and air split pipes etc to find this bd wedged in a chamber!
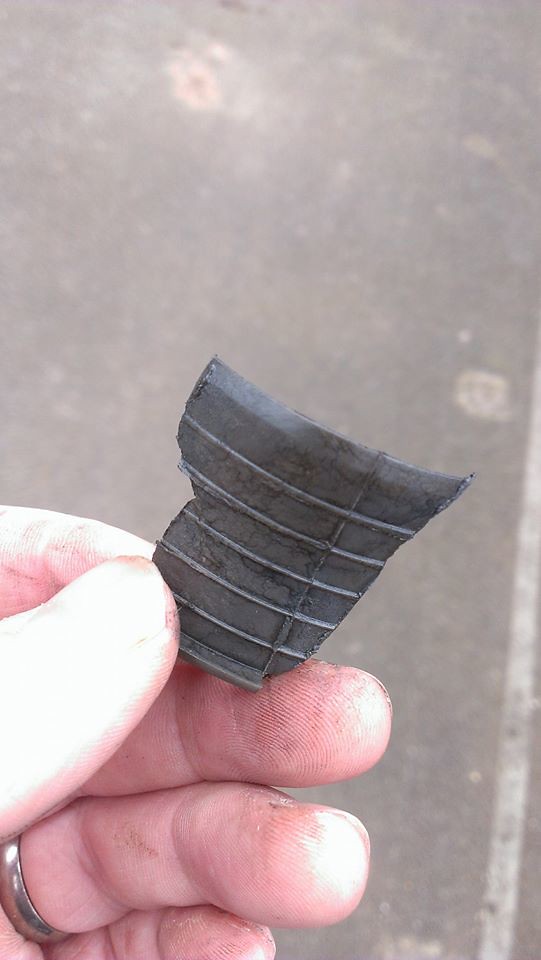
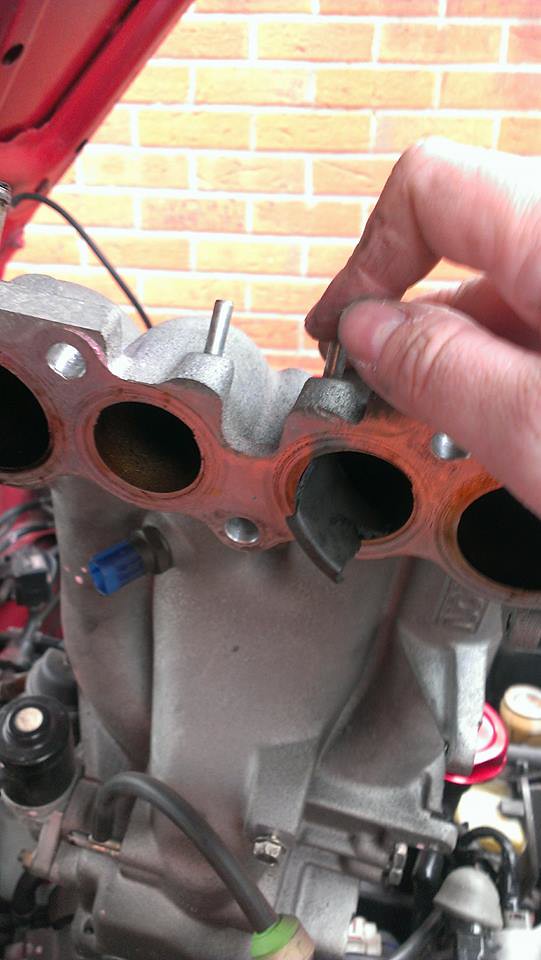
No idea where it came from, the engine was rebuilt in May 2014 and to my knowledge has not been taken apart since, doesn't look like a mazda part. Thankfully it has a lip on it that looks to have got stuck between the two manifolds when it was put together. Will be getting a borascope on the the other chambers to just to be sure.
A new mid pipe is now in place, I took the opportunity to see if I could get the exhaust to hang better and not droop down so much. I had read somewhere that if you jack the exhaust into the position you want before tightening stuff up it should stay in place.
They were not kidding!
It completely changes the look of the exhaust and has made me decide to keep it for a little while longer (whilst I save for a Reinhard system).
I do need to run some heat resistant tape around the plastic splitter to stop it from melting.
Next up was the air pump removal and fitting the idle pulley.
3 bolts and the pump was free, all pretty easy so far...
I even have turbos! I have felt their presence but not actually seen one buried away in the depths of the engine. They do need a clean mind.
The new pulley is on, looks very smart if I do say so myself. The part wasn't cheap but it appears to be well made, lined up without fault and should keep my water pump happy for many years to come.
And belts on but not tightened......the pulley now highlights how s
t my water pulley looks! Next job to do then.Took the upper intake manifold off to blank the air control valve and air split pipes etc to find this b
d wedged in a chamber! No idea where it came from, the engine was rebuilt in May 2014 and to my knowledge has not been taken apart since, doesn't look like a mazda part. Thankfully it has a lip on it that looks to have got stuck between the two manifolds when it was put together. Will be getting a borascope on the the other chambers to just to be sure.
Edited by Daston on Wednesday 9th August 23:45
Who knew a small baby would take up so much time!
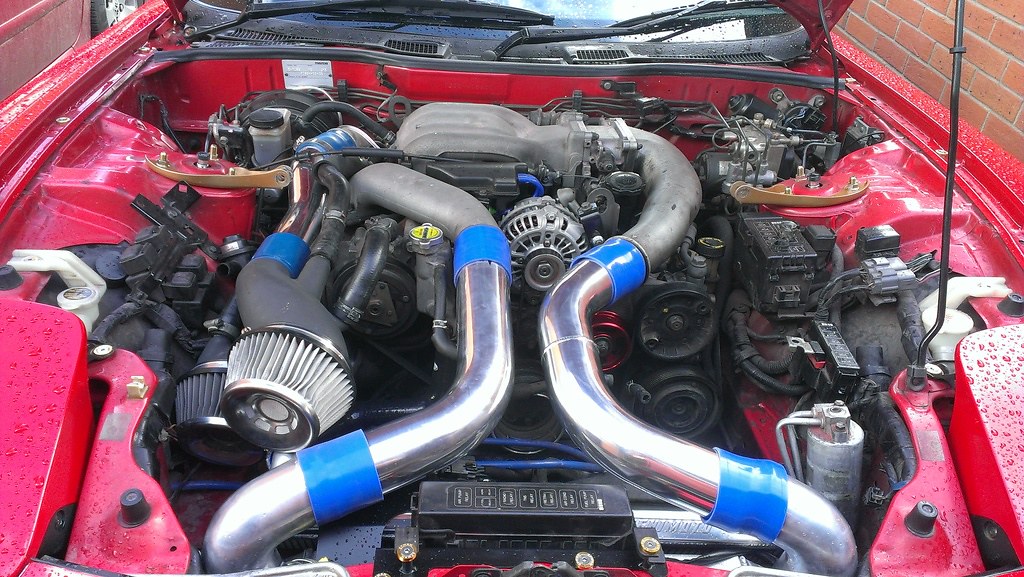
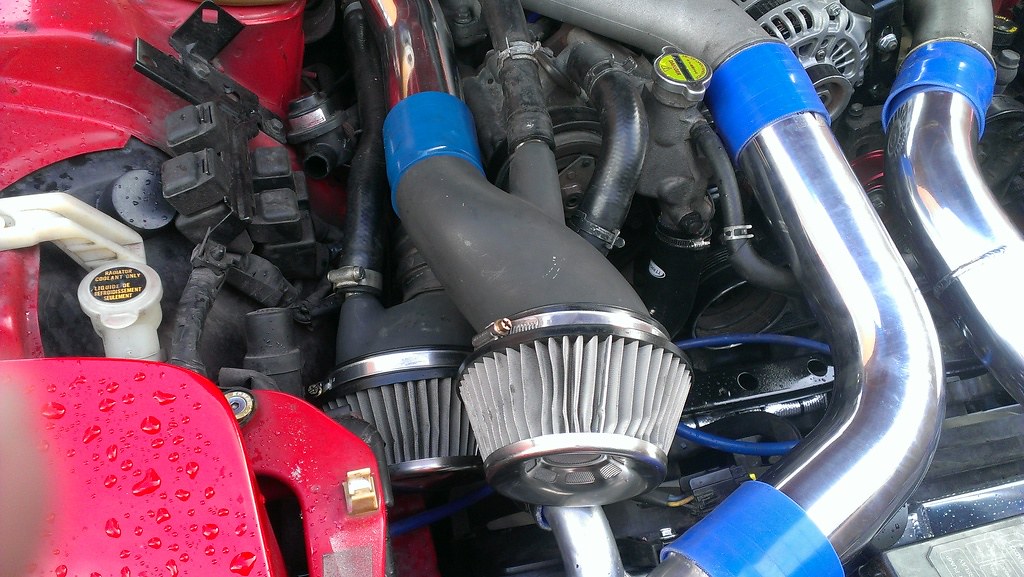
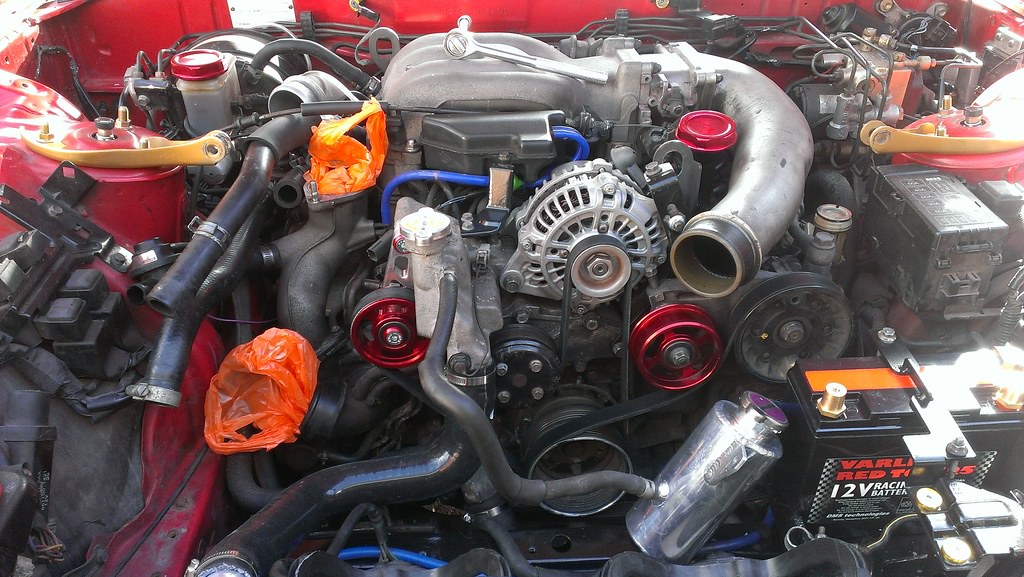
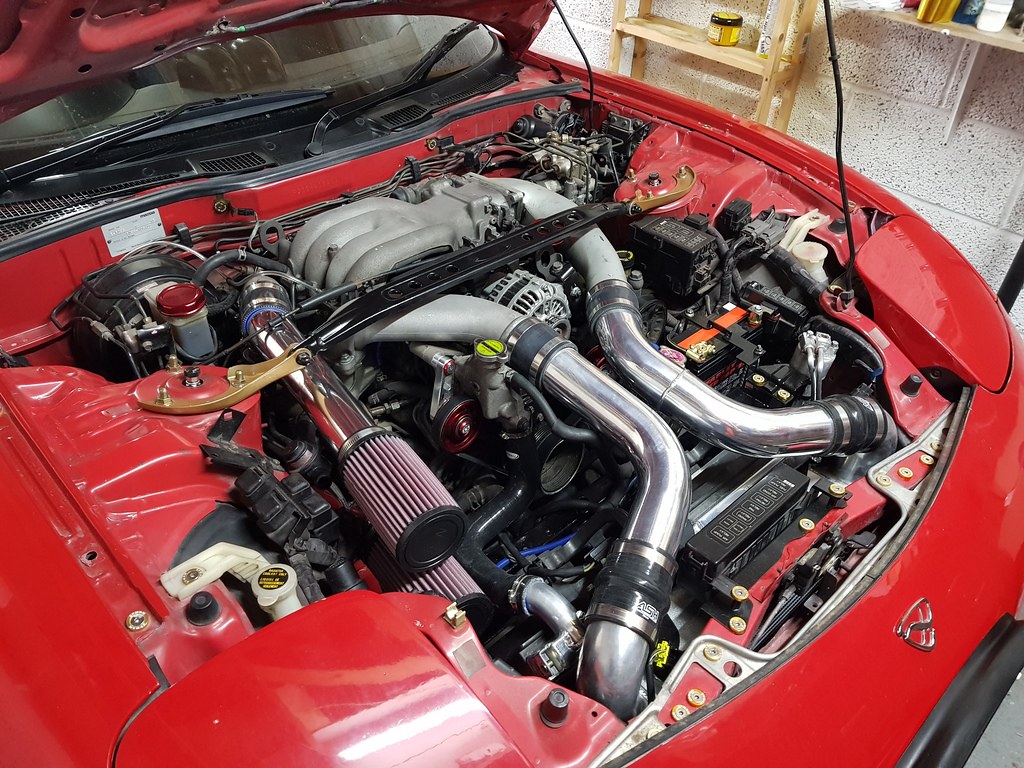
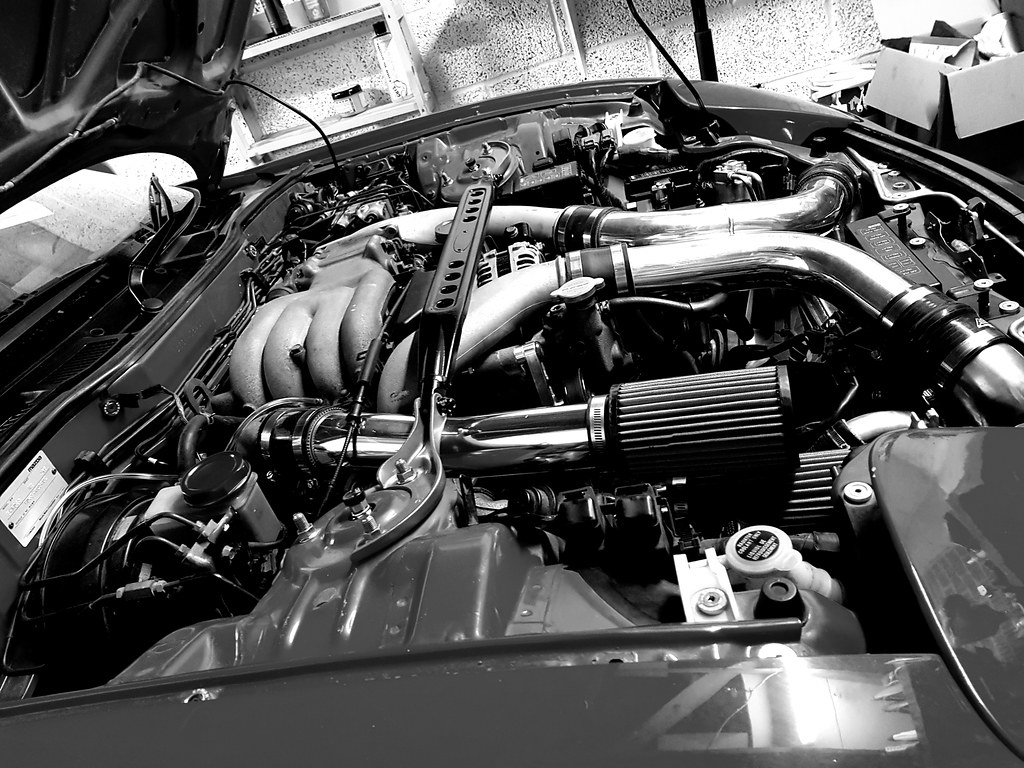
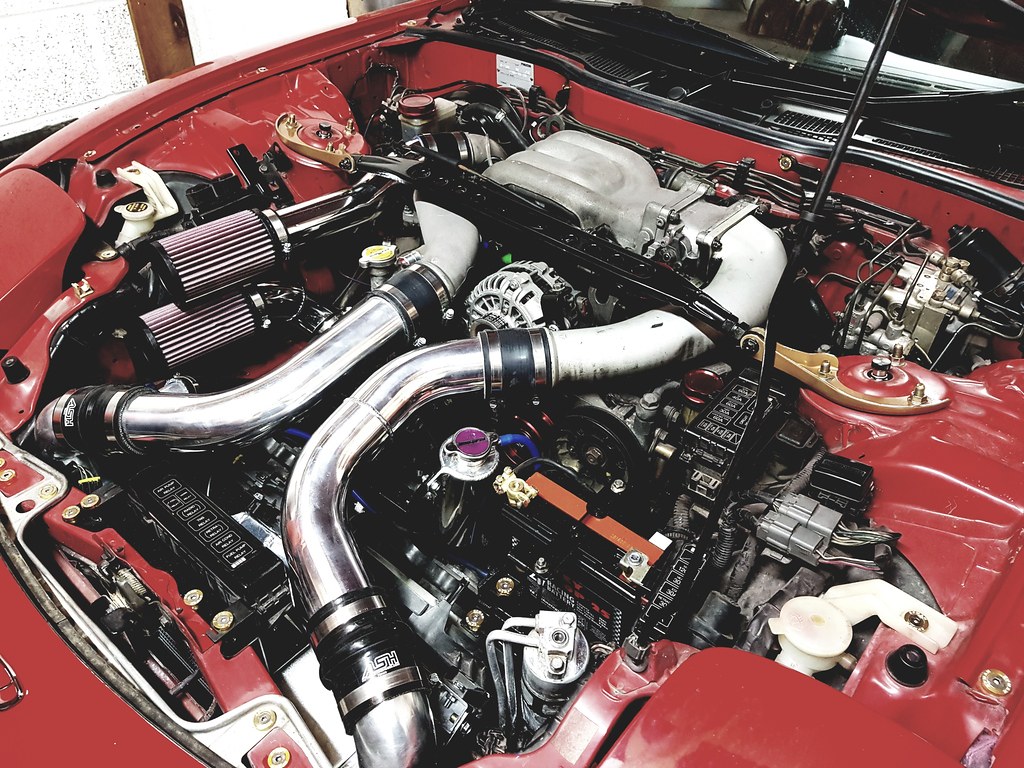
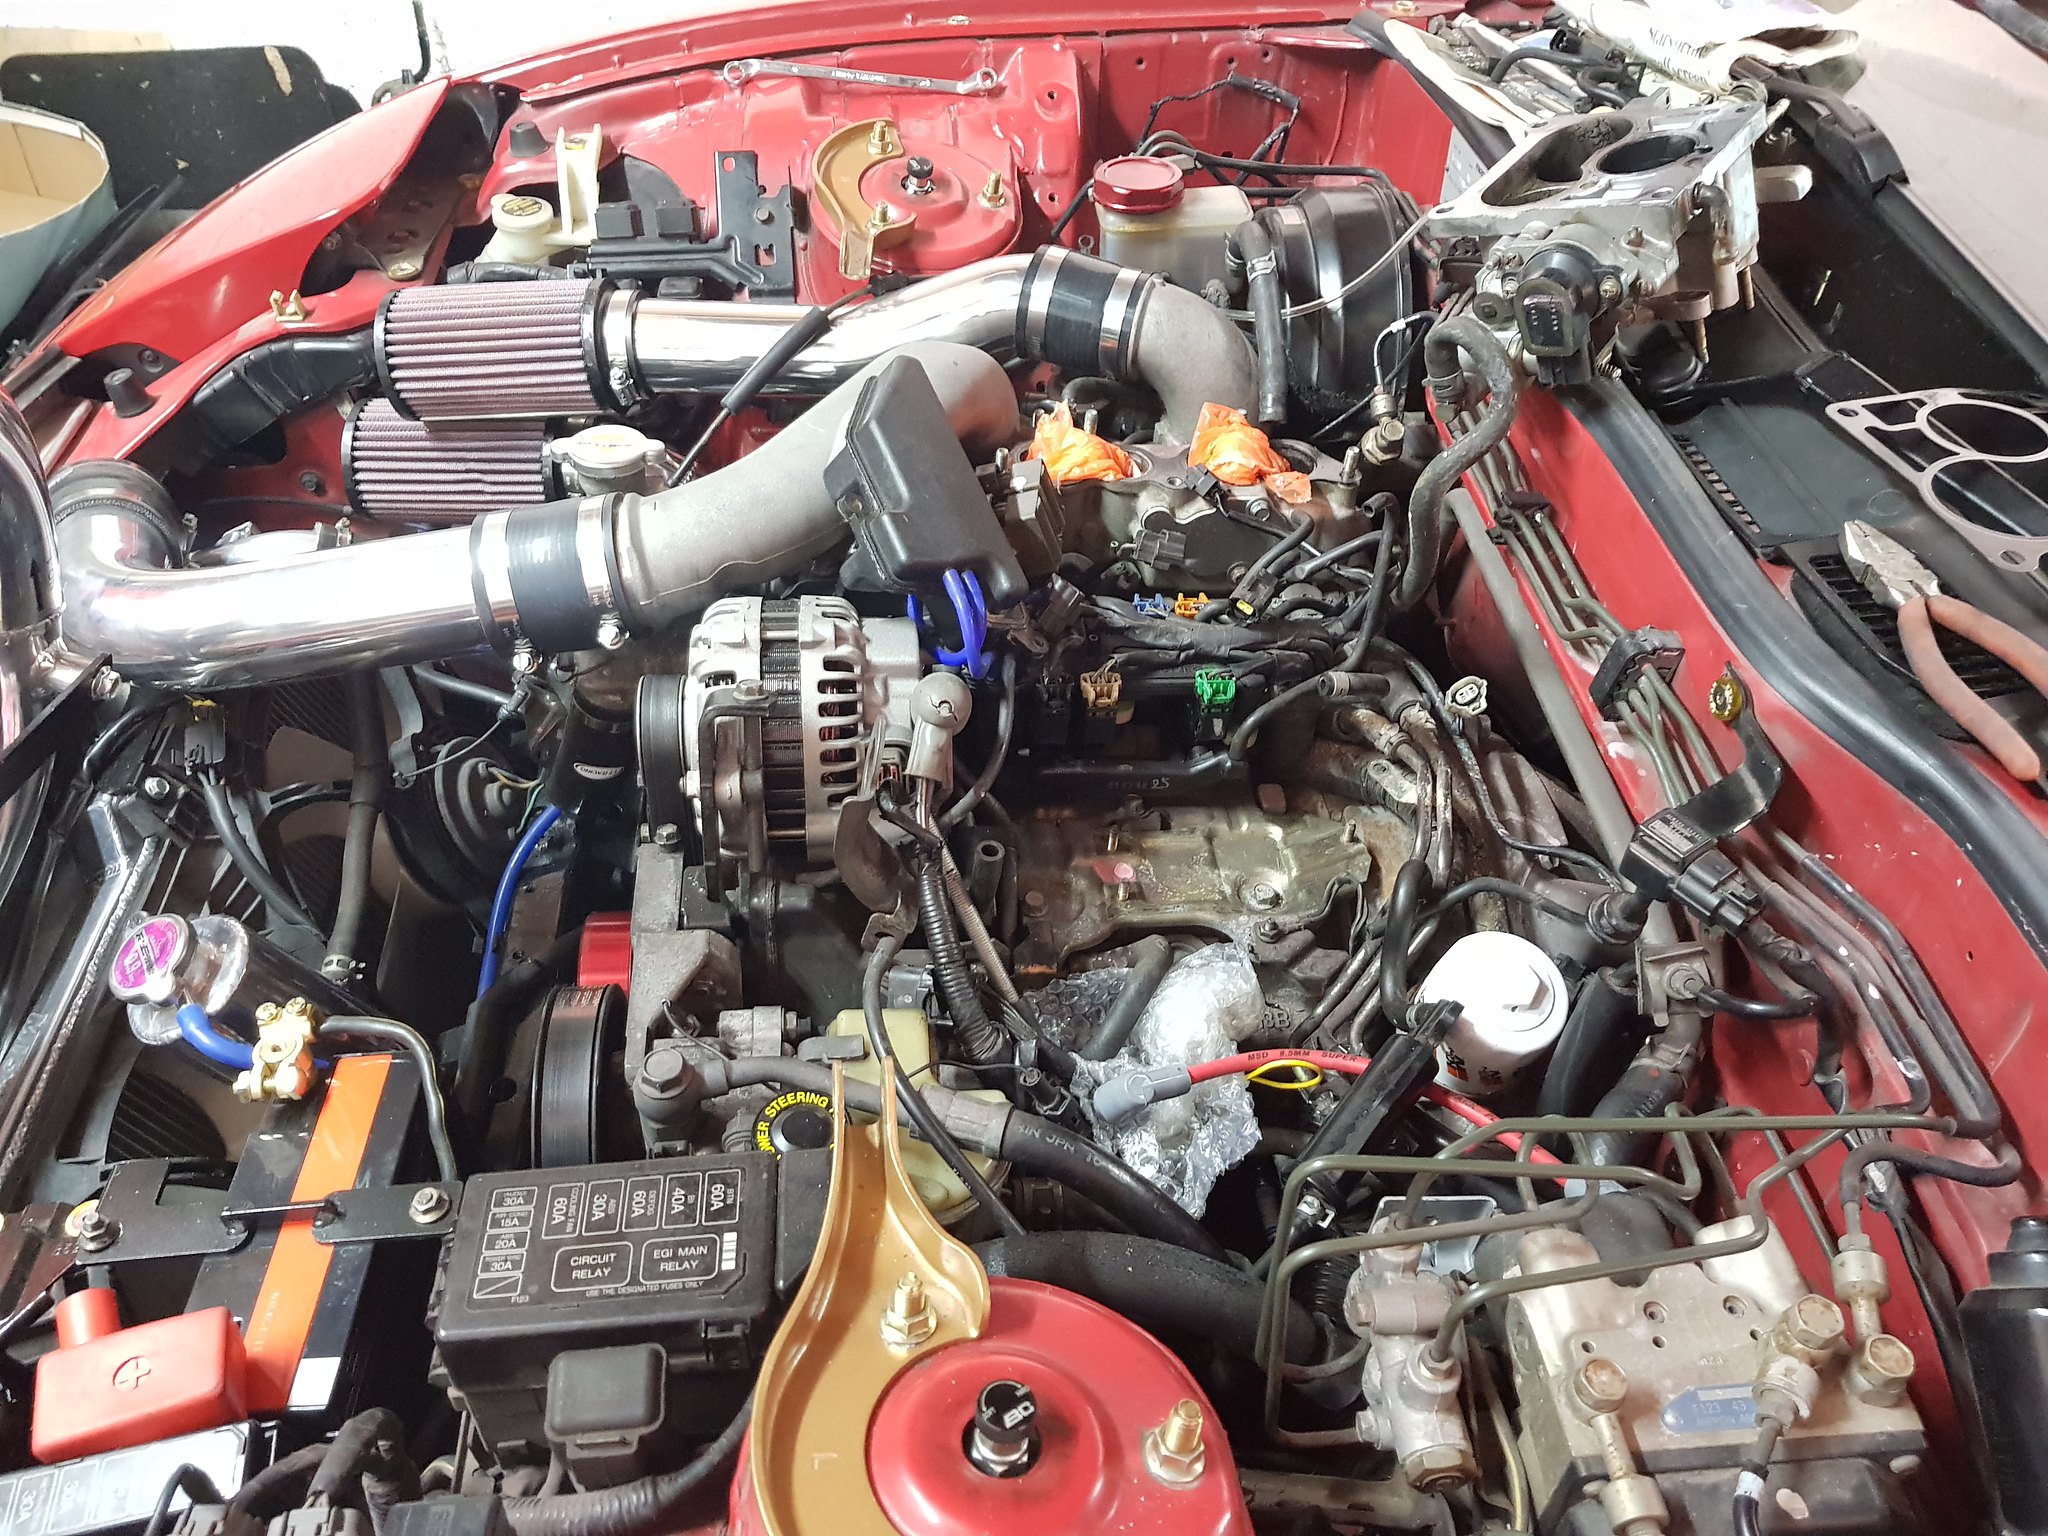
I have finally finished the engine bay, the Blitz intake has been striped out as all of the additional hoses are now redundant, this has been replaced by two K&N filters. Next on the to do list is ducting and a bit of heat shielding.
I am very happy with the engine bay and really only needs a spot of polishing on the turbo intake and manifold. Gave me a good chance to muck about with my new phone.
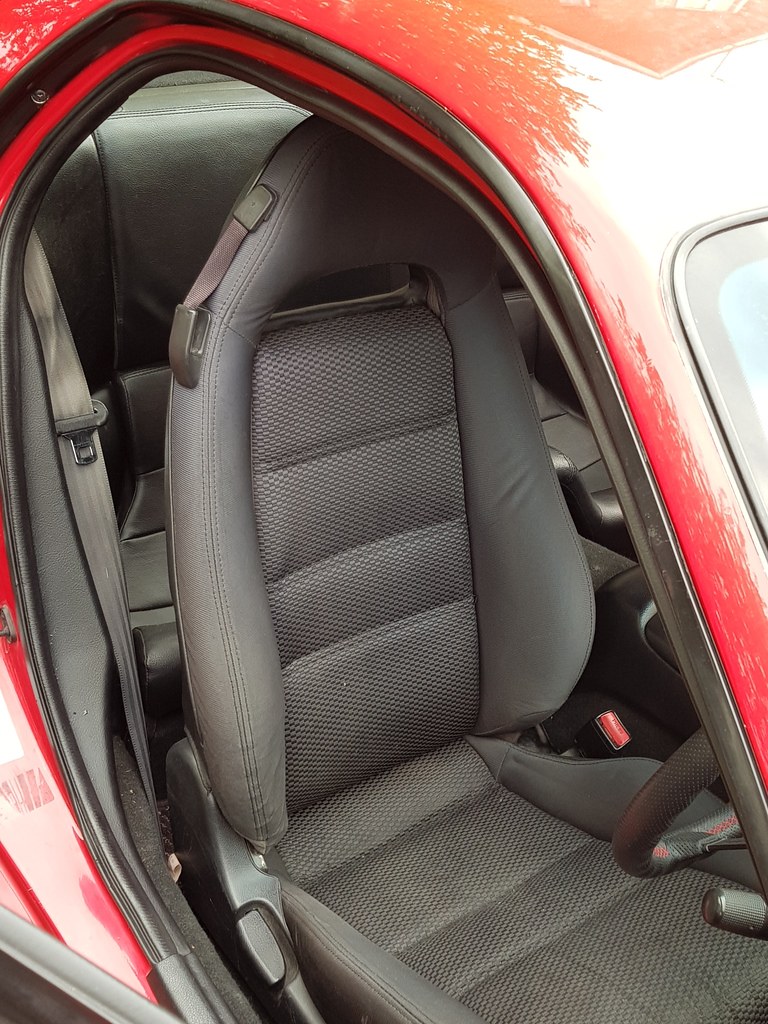
With the help of my bro inlaw we also managed to swap the seats over. Down side is they are from a 2 seater RX7 so they do not have the auto slide function when they tilt forward but seeing as I hardly ever take more than 2 people out it is no big issue.

First trip out in the car was a nice 185 mile trip to Northampton to get the new ECU mapped. With breakdown cover in hand and the ECU display computer cable tied to an air vent I set off. I managed to cover 50 miles without incident and so thought it was safe to assume all was OK.
Mapping did not go to plan, anything over 0.6 bar of boost caused the spark plugs to be washed out and create a missfire (with a lot of flame). So a 185 mile home again only to go back in June once the ignition is sorted.
I was amazed with the amount of power it made though considering.
I have finally finished the engine bay, the Blitz intake has been striped out as all of the additional hoses are now redundant, this has been replaced by two K&N filters. Next on the to do list is ducting and a bit of heat shielding.
I am very happy with the engine bay and really only needs a spot of polishing on the turbo intake and manifold. Gave me a good chance to muck about with my new phone.
With the help of my bro inlaw we also managed to swap the seats over. Down side is they are from a 2 seater RX7 so they do not have the auto slide function when they tilt forward but seeing as I hardly ever take more than 2 people out it is no big issue.
First trip out in the car was a nice 185 mile trip to Northampton to get the new ECU mapped. With breakdown cover in hand and the ECU display computer cable tied to an air vent I set off. I managed to cover 50 miles without incident and so thought it was safe to assume all was OK.
Mapping did not go to plan, anything over 0.6 bar of boost caused the spark plugs to be washed out and create a missfire (with a lot of flame). So a 185 mile home again only to go back in June once the ignition is sorted.
I was amazed with the amount of power it made though considering.
Edited by Daston on Wednesday 9th August 23:49
Daston said:
My next job was to remove the anti roll bar mounts to cut off the radiator brackets. As using the scissor jack last time pissed me off I decided to purchase a new jack.
One giant design flaw was also noticed with this jack. To get to the jacking point the whole thing goes under the car with the handle poking out, to lower the jack you turn the handle inside the handles bracket. If you remove the handle the bracket springs up and you cant lower the fecking jack. Thankfully I had a st halfords jack I could use in order to lift the car up and get new jack out to reattach the handle....lesson learnt.
I've got the same jack and been done exactly the same thing One giant design flaw was also noticed with this jack. To get to the jacking point the whole thing goes under the car with the handle poking out, to lower the jack you turn the handle inside the handles bracket. If you remove the handle the bracket springs up and you cant lower the fecking jack. Thankfully I had a s
t halfords jack I could use in order to lift the car up and get new jack out to reattach the handle....lesson learnt. 
Will be keeping an eye out around Somerset for this car - would love to see it in the flesh
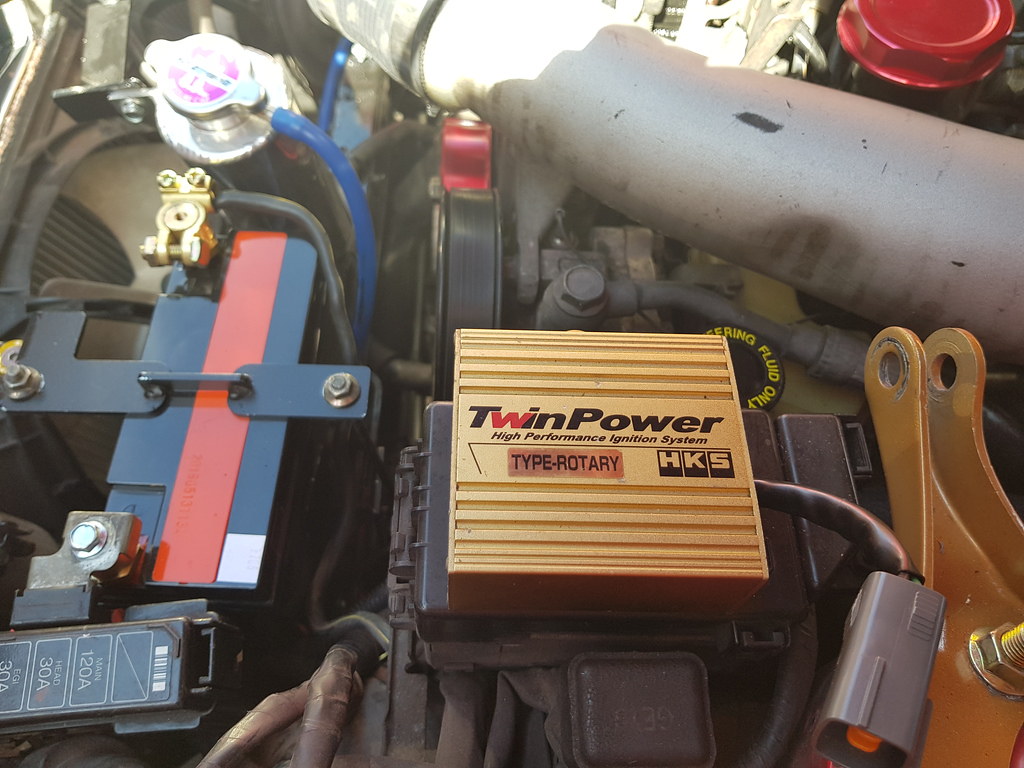
The HKS Twin Spark is in the car, this little box essentially enables the plugs to fire twice so should burn more fuel.
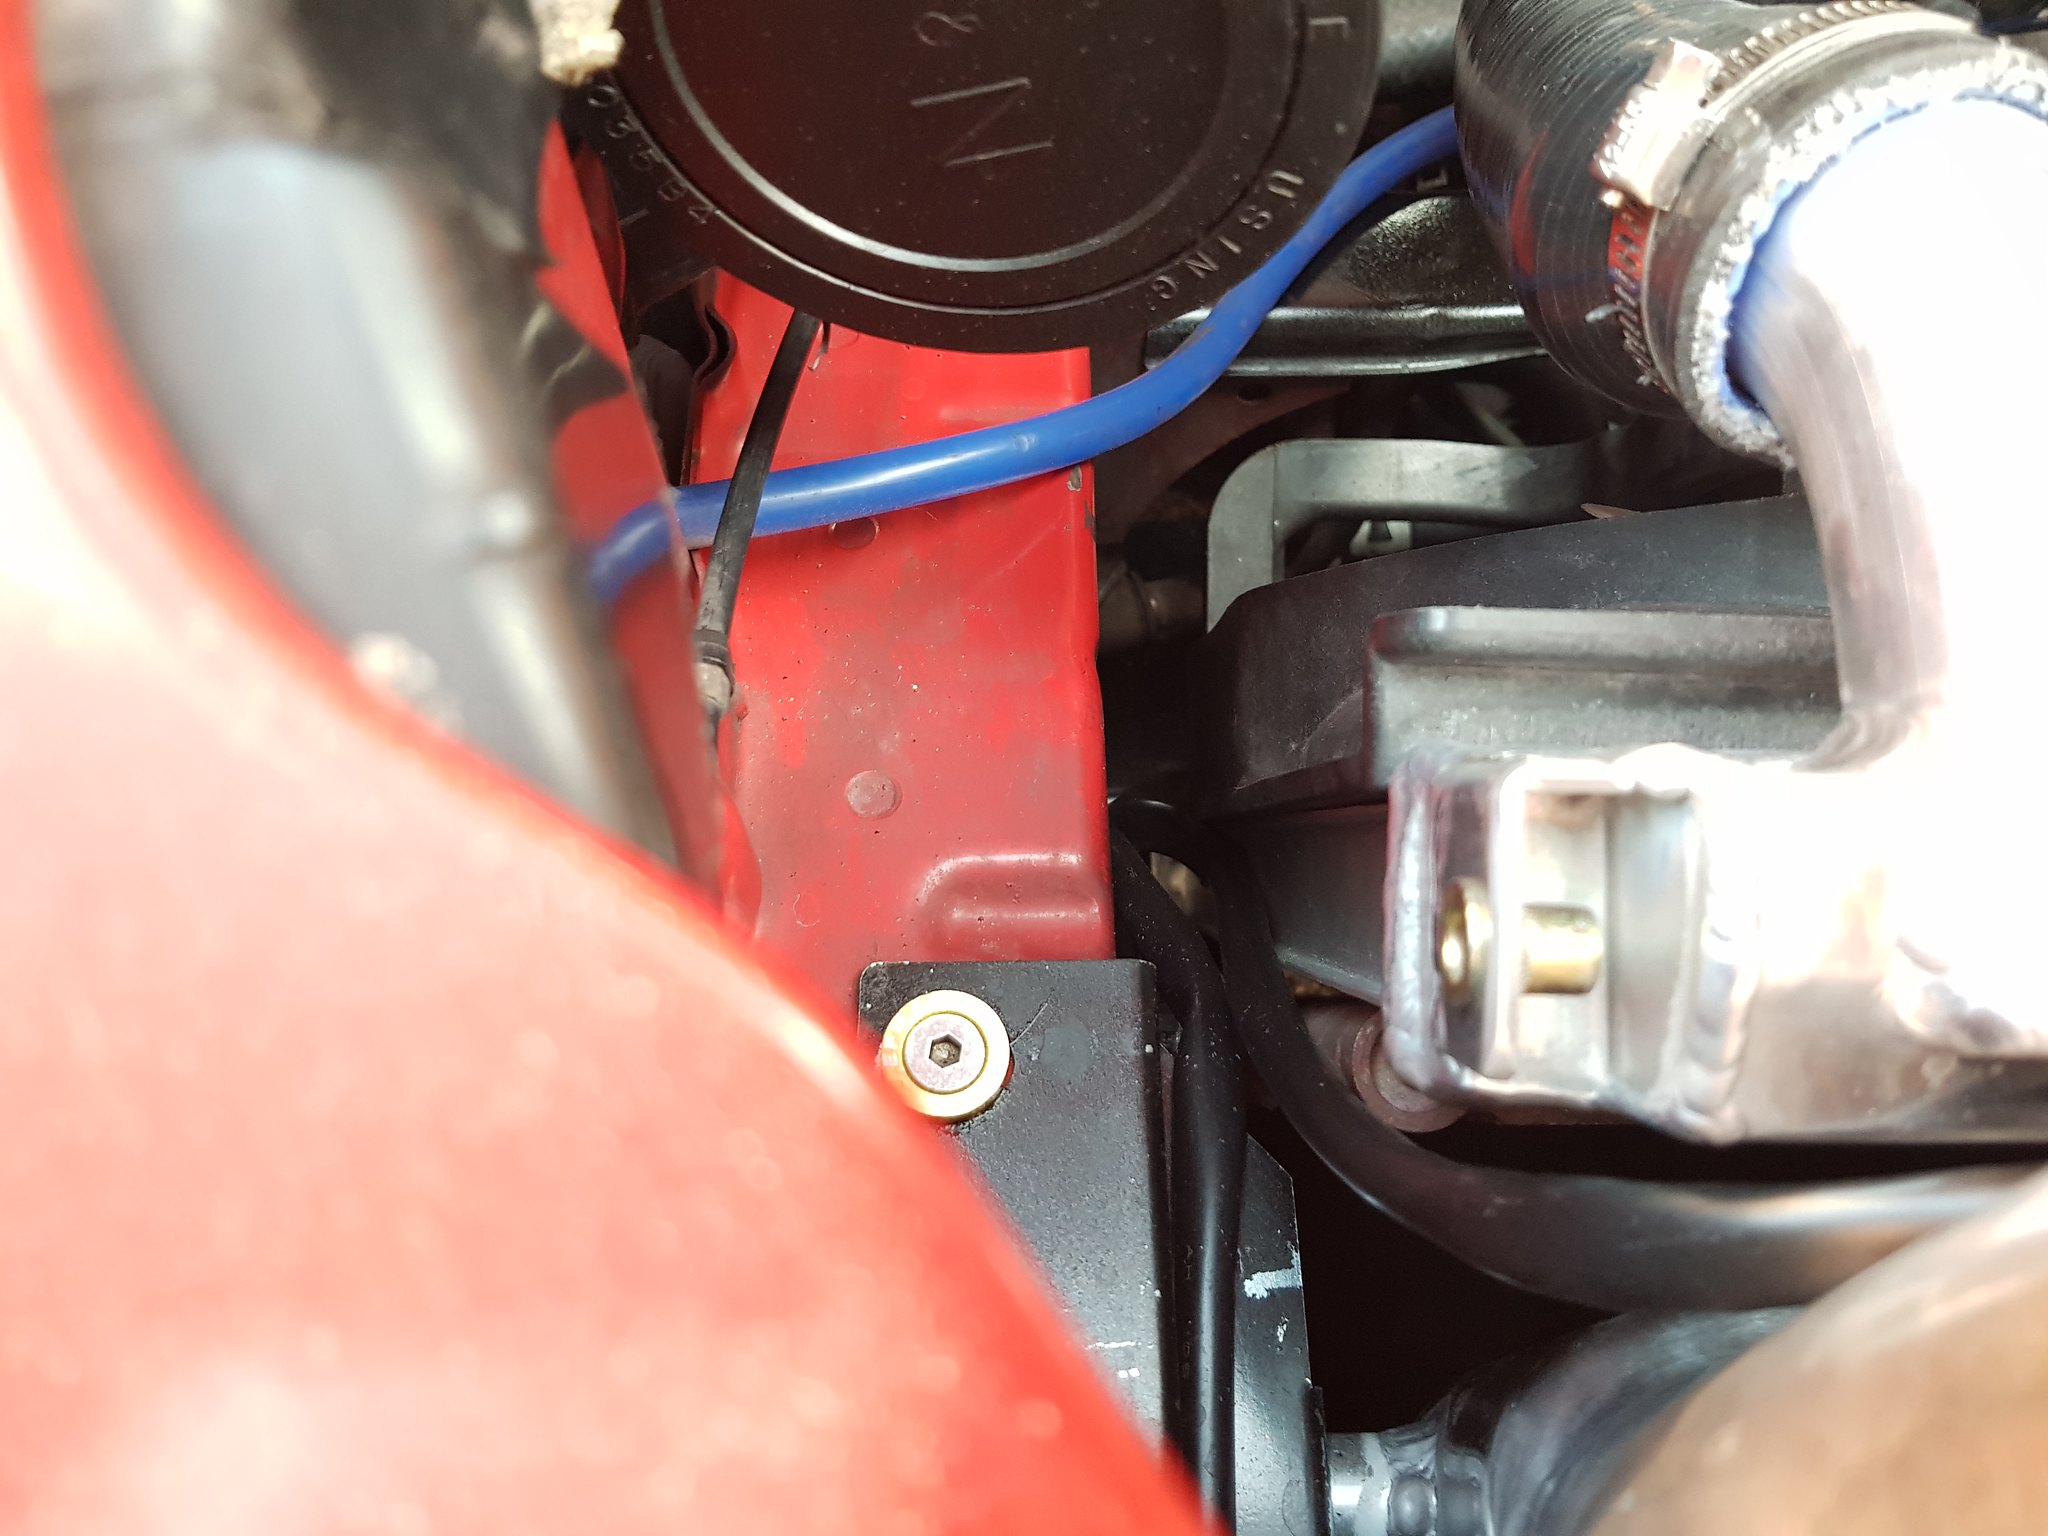
Trying to find a home for it was a little tricky but I managed to reuse one of the old radiator brackets and mount it by the ABS.
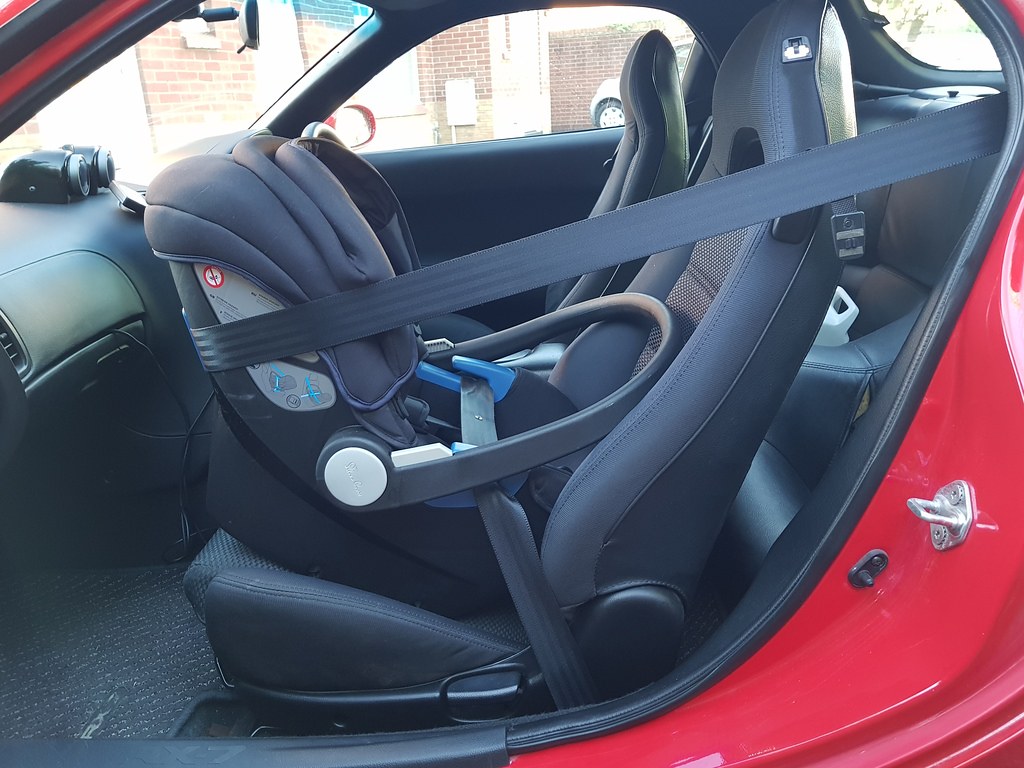
Whilst the car was out of the garage I took the opportunity to see if our baby seat will fit as we plan on taking our little girl with us to some shows next month....and it looks like she can come to the ball!
Next up some ear defenders!
Trying to find a home for it was a little tricky but I managed to reuse one of the old radiator brackets and mount it by the ABS.
Whilst the car was out of the garage I took the opportunity to see if our baby seat will fit as we plan on taking our little girl with us to some shows next month....and it looks like she can come to the ball!
Next up some ear defenders!
Edited by Daston on Wednesday 9th August 23:51
Well I am back! Just updated all the stupid photobucket links with Flickr ones. What a ball ache!!!
So some updates with whats happened.
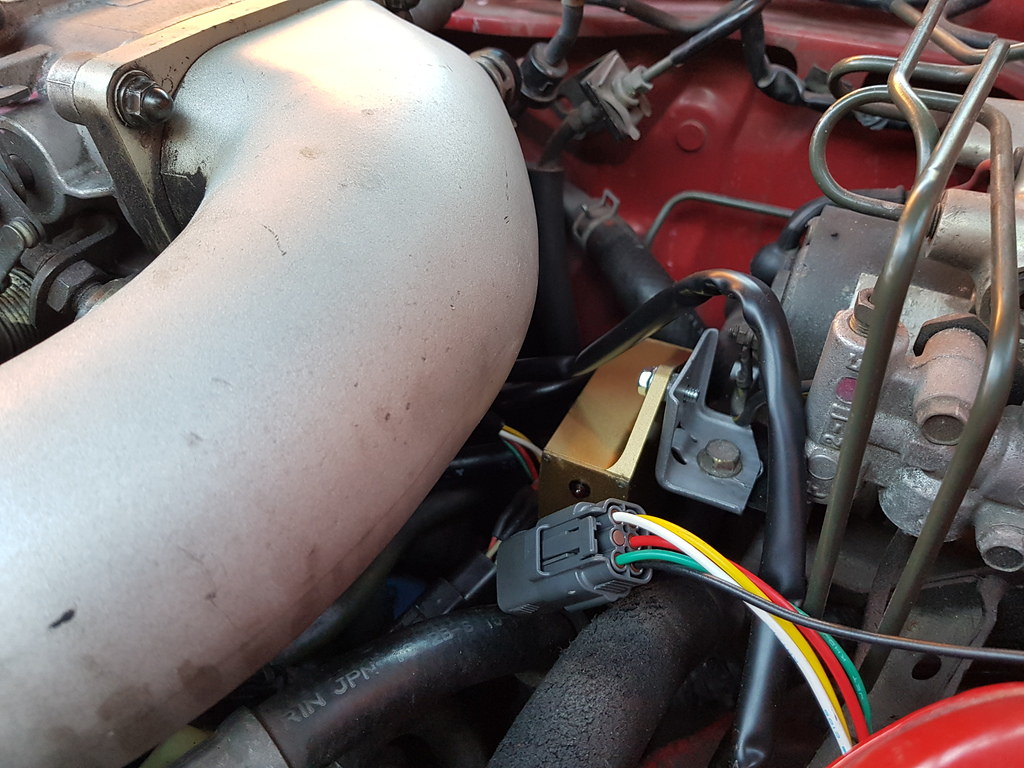
As I previously said the ignition was breaking down at higher boost and thus the car was unable to be mapped. It was recommended that I put a direct power feed to the coils in order to help this issue. I was also advised not to use the twin power as it covered up any issues in the wiring.
So I decided to go all out and do the following:
1) Direct power feed.
Following a very helpful diagram from the club forums this is basically what I did
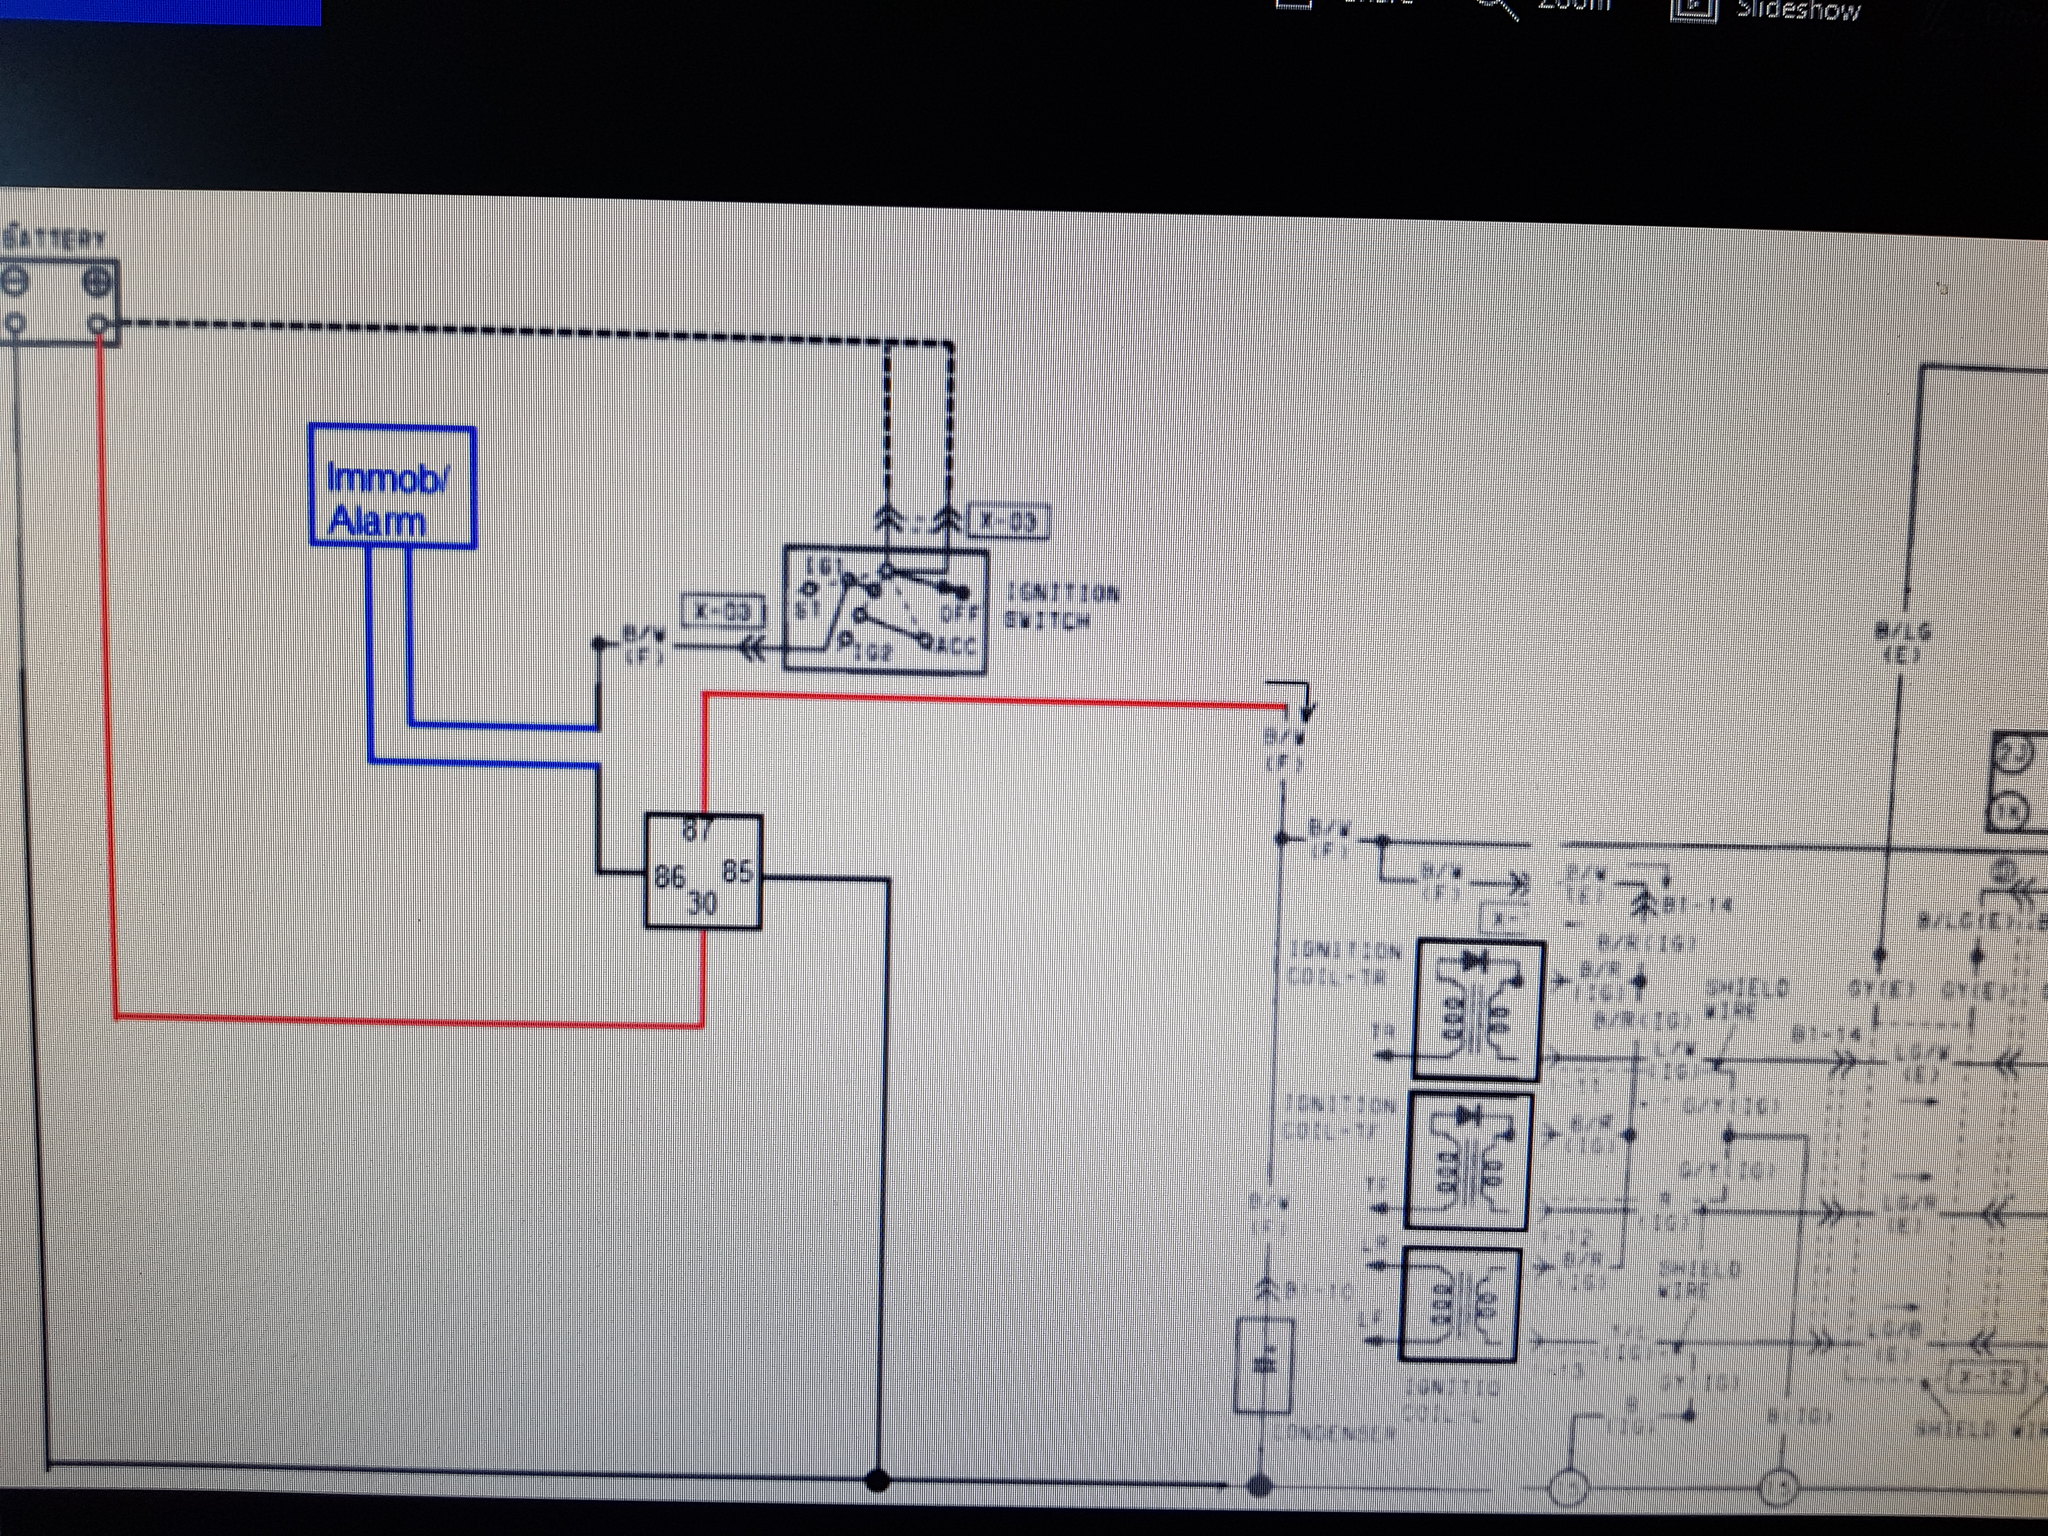
I now have a power feed going direct to the coil loom from the battery when ignition is on therefore I no longer rely on the 20 year old engine loom. I need to make the wires a bit neater as its rather colourful.
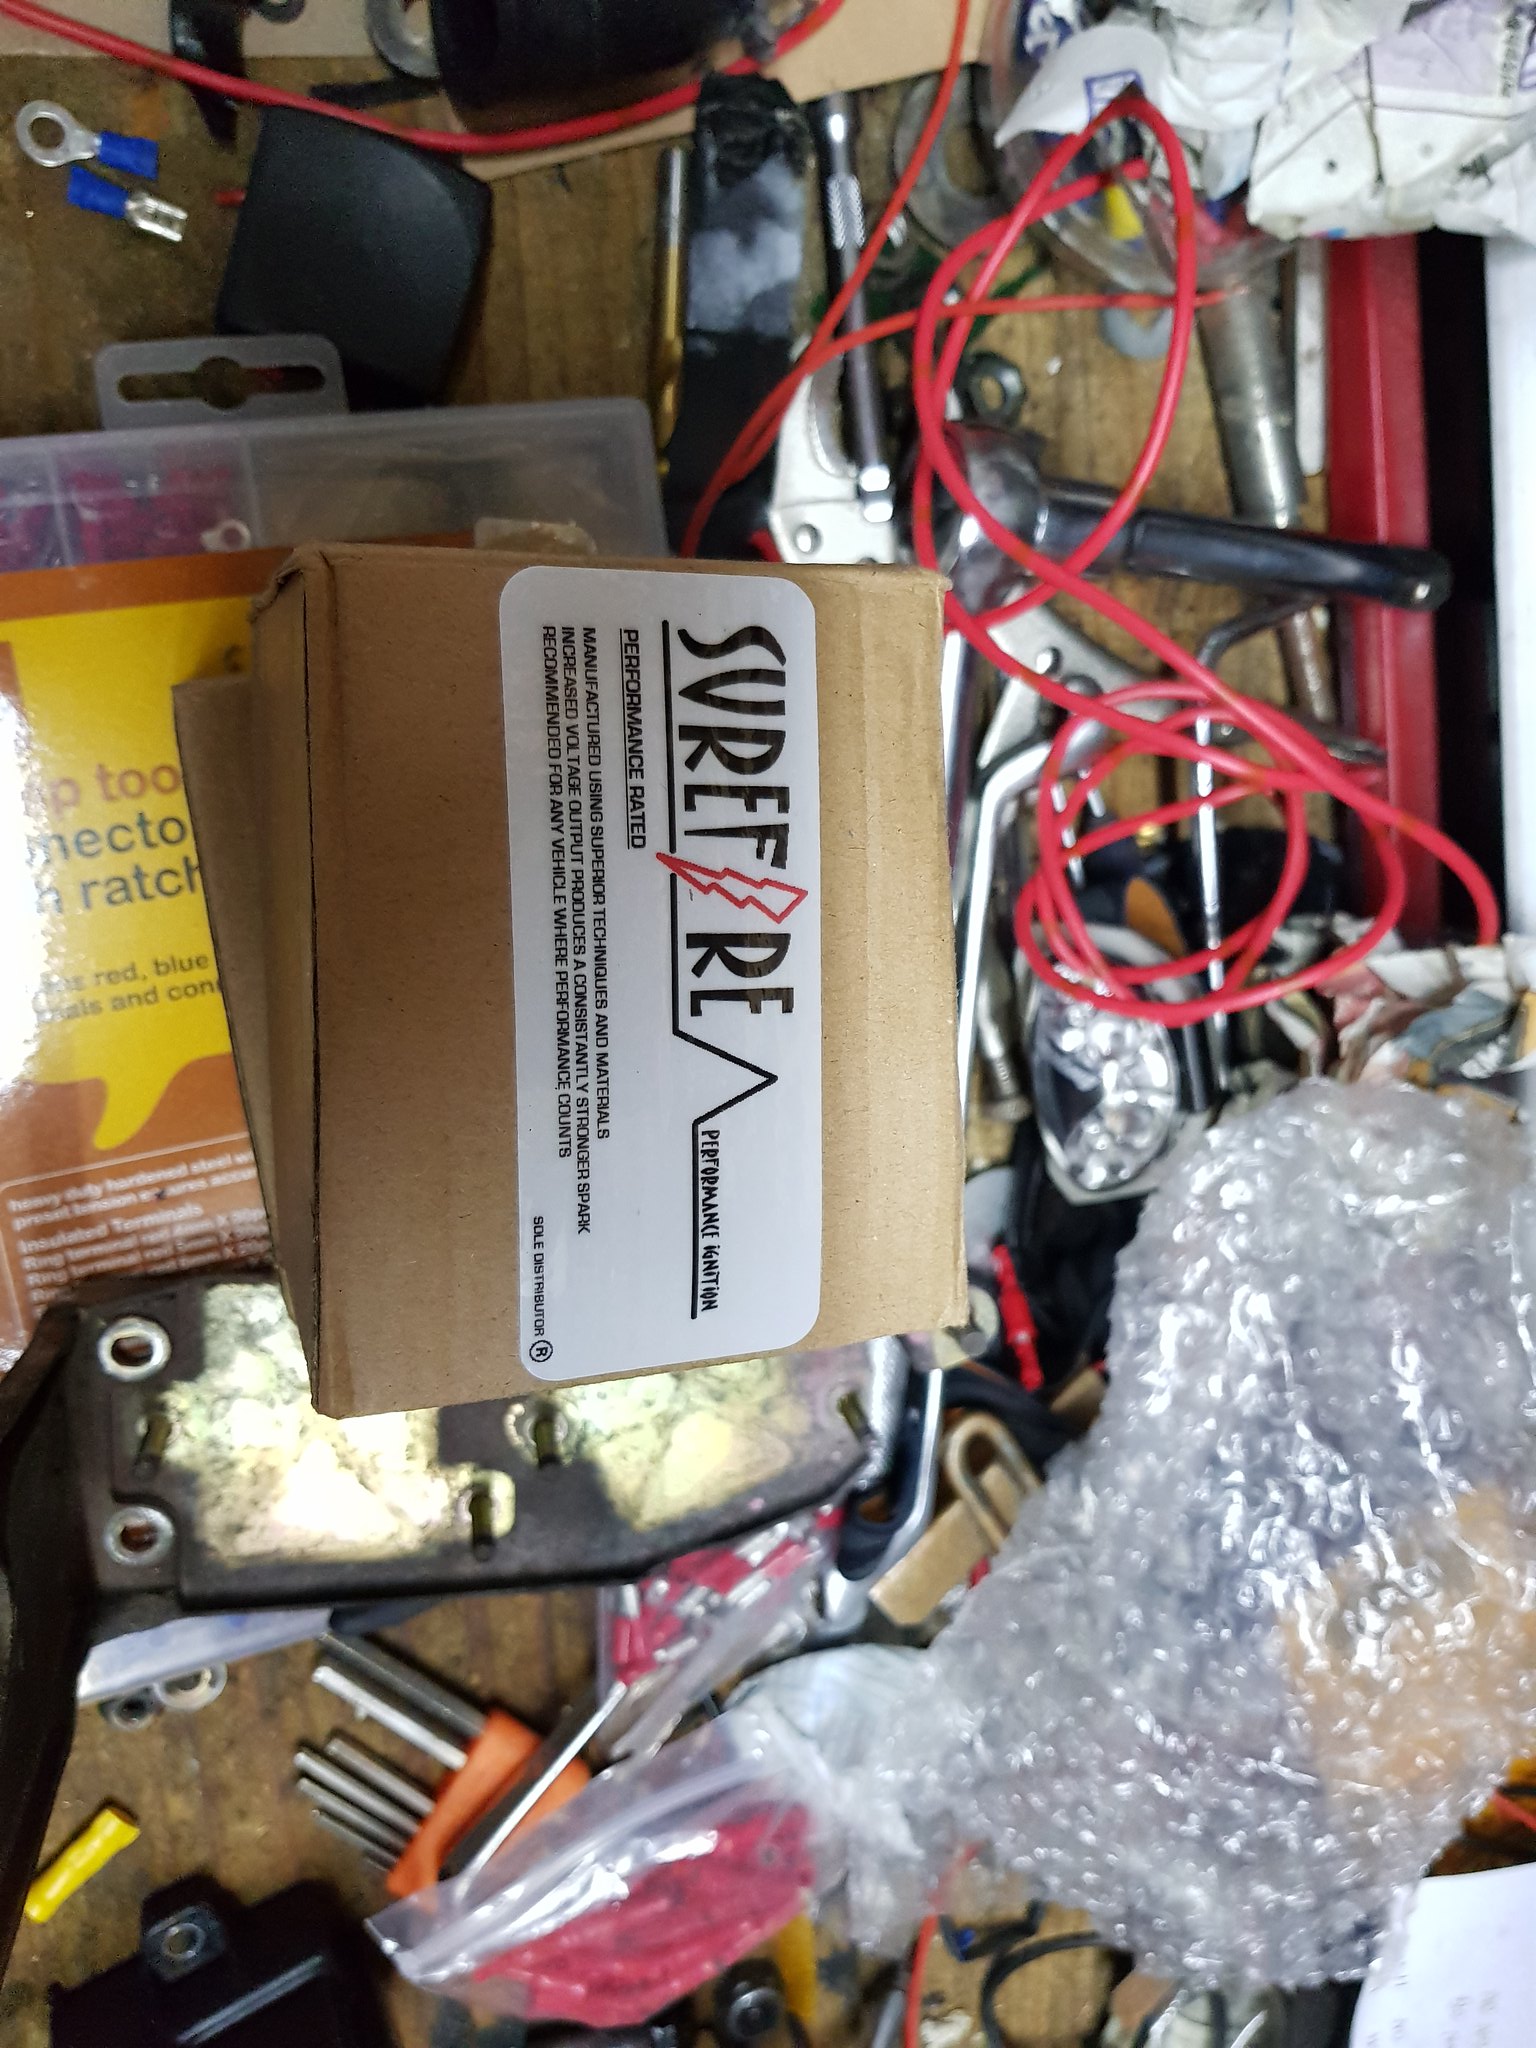
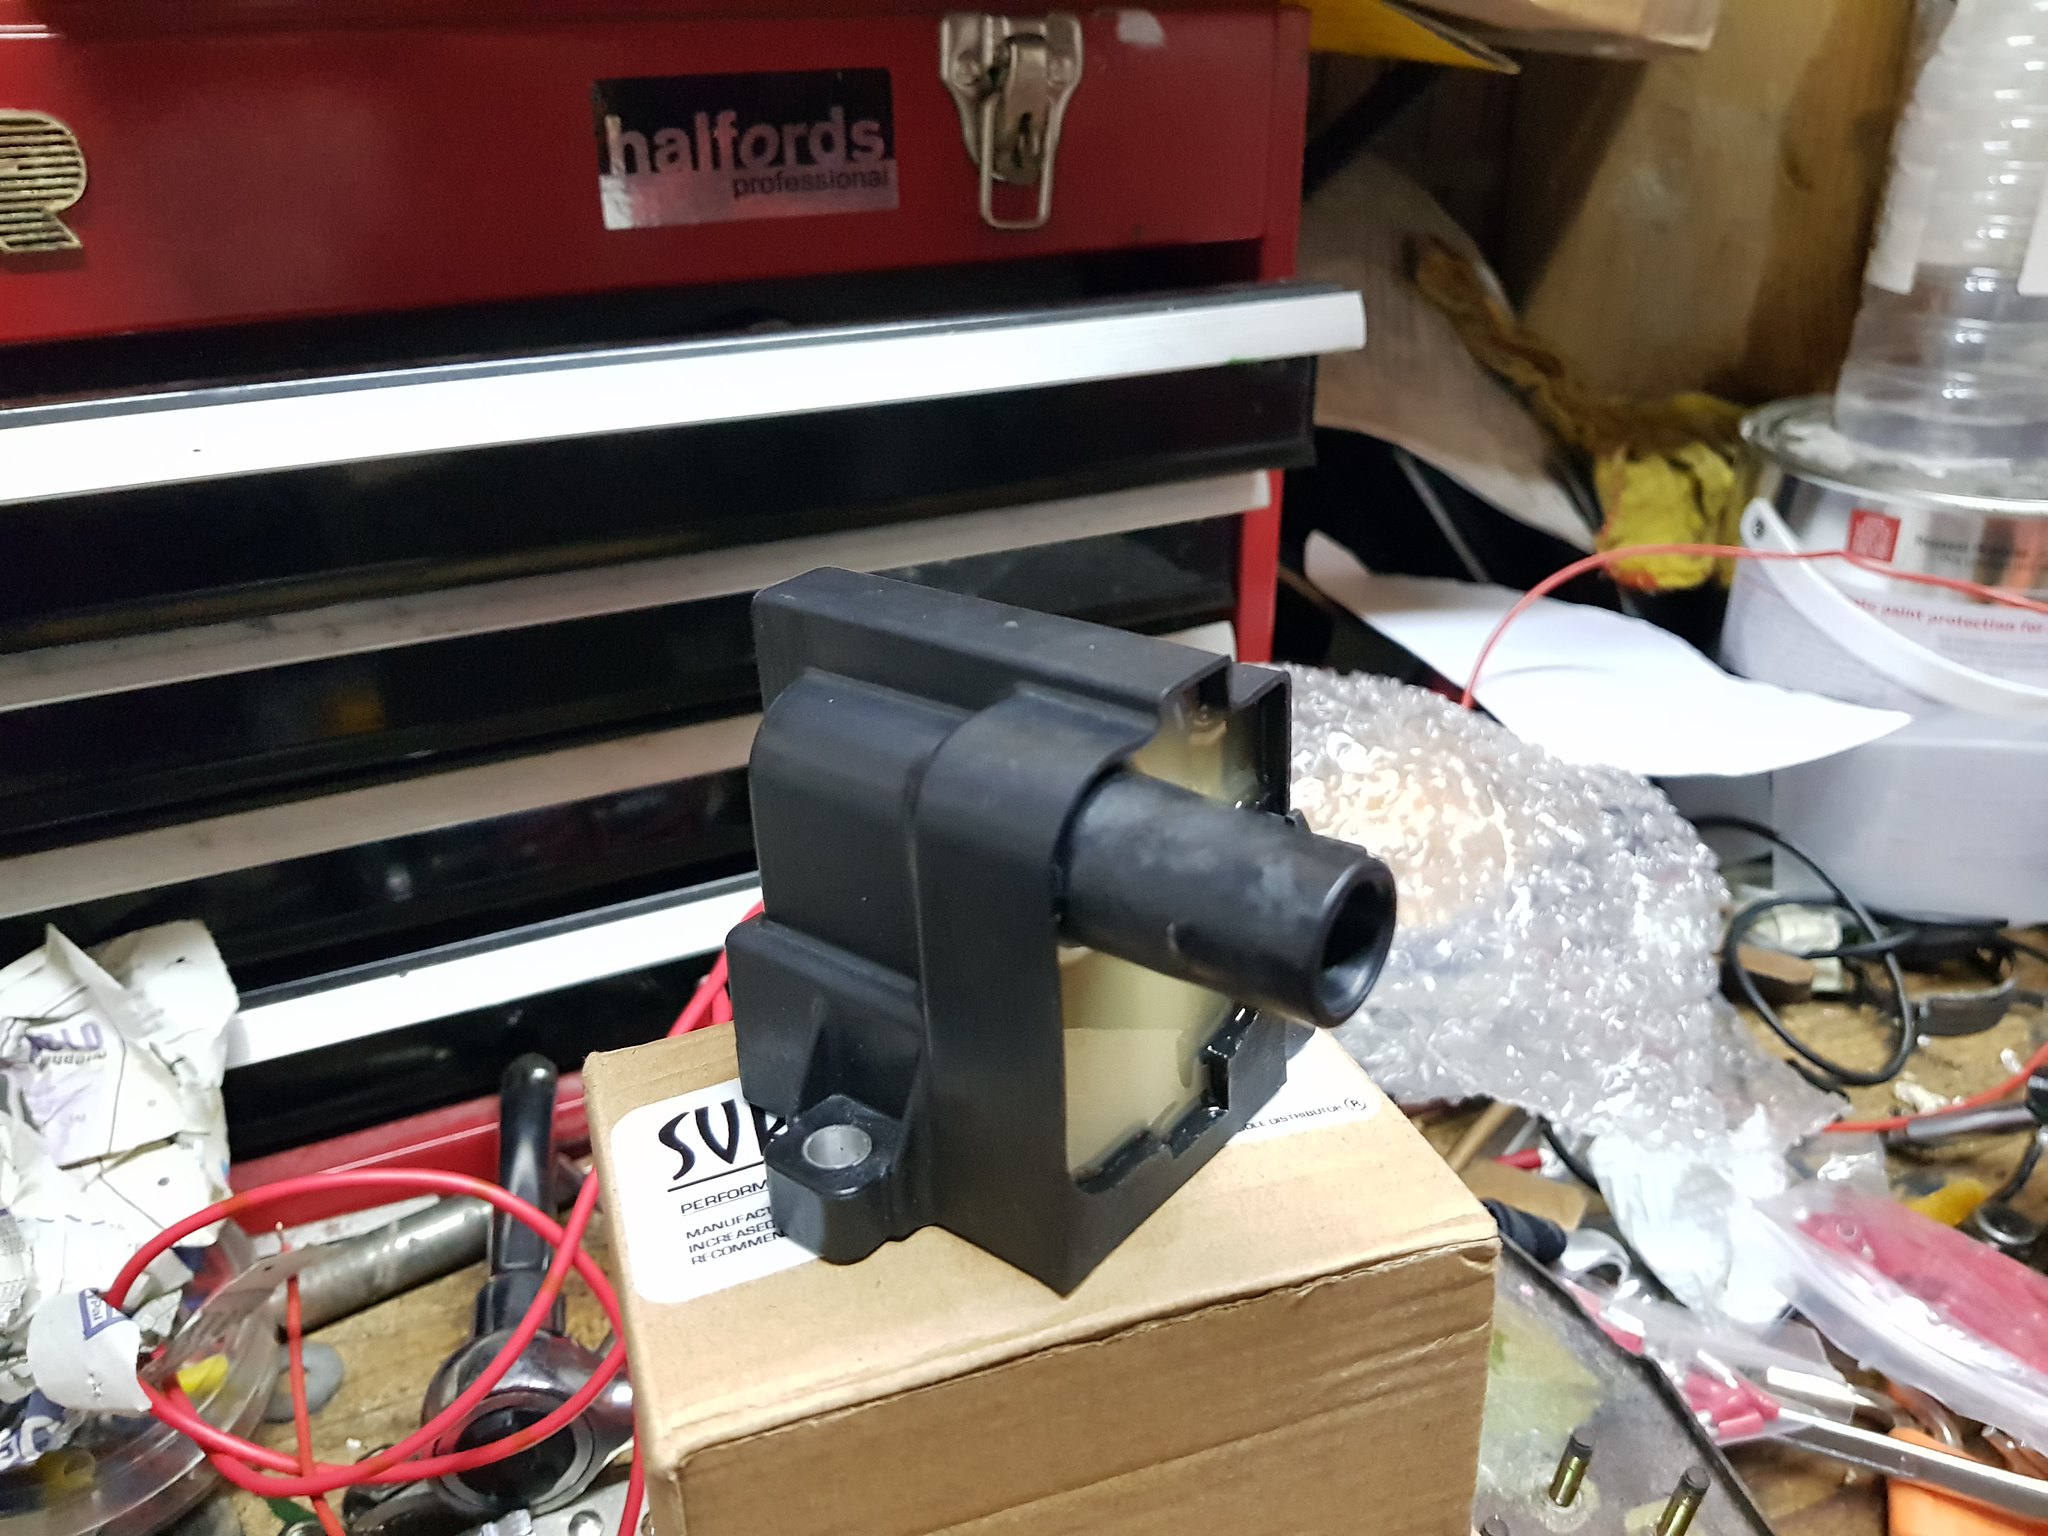
2) New more powerful coils
Although the resistance in the coils checked out according to the Mazda workshop manual I still wasn't convinced and don't fancy another wasted trip. They were cheap enough for me to purchase and thought it couldn't hurt.
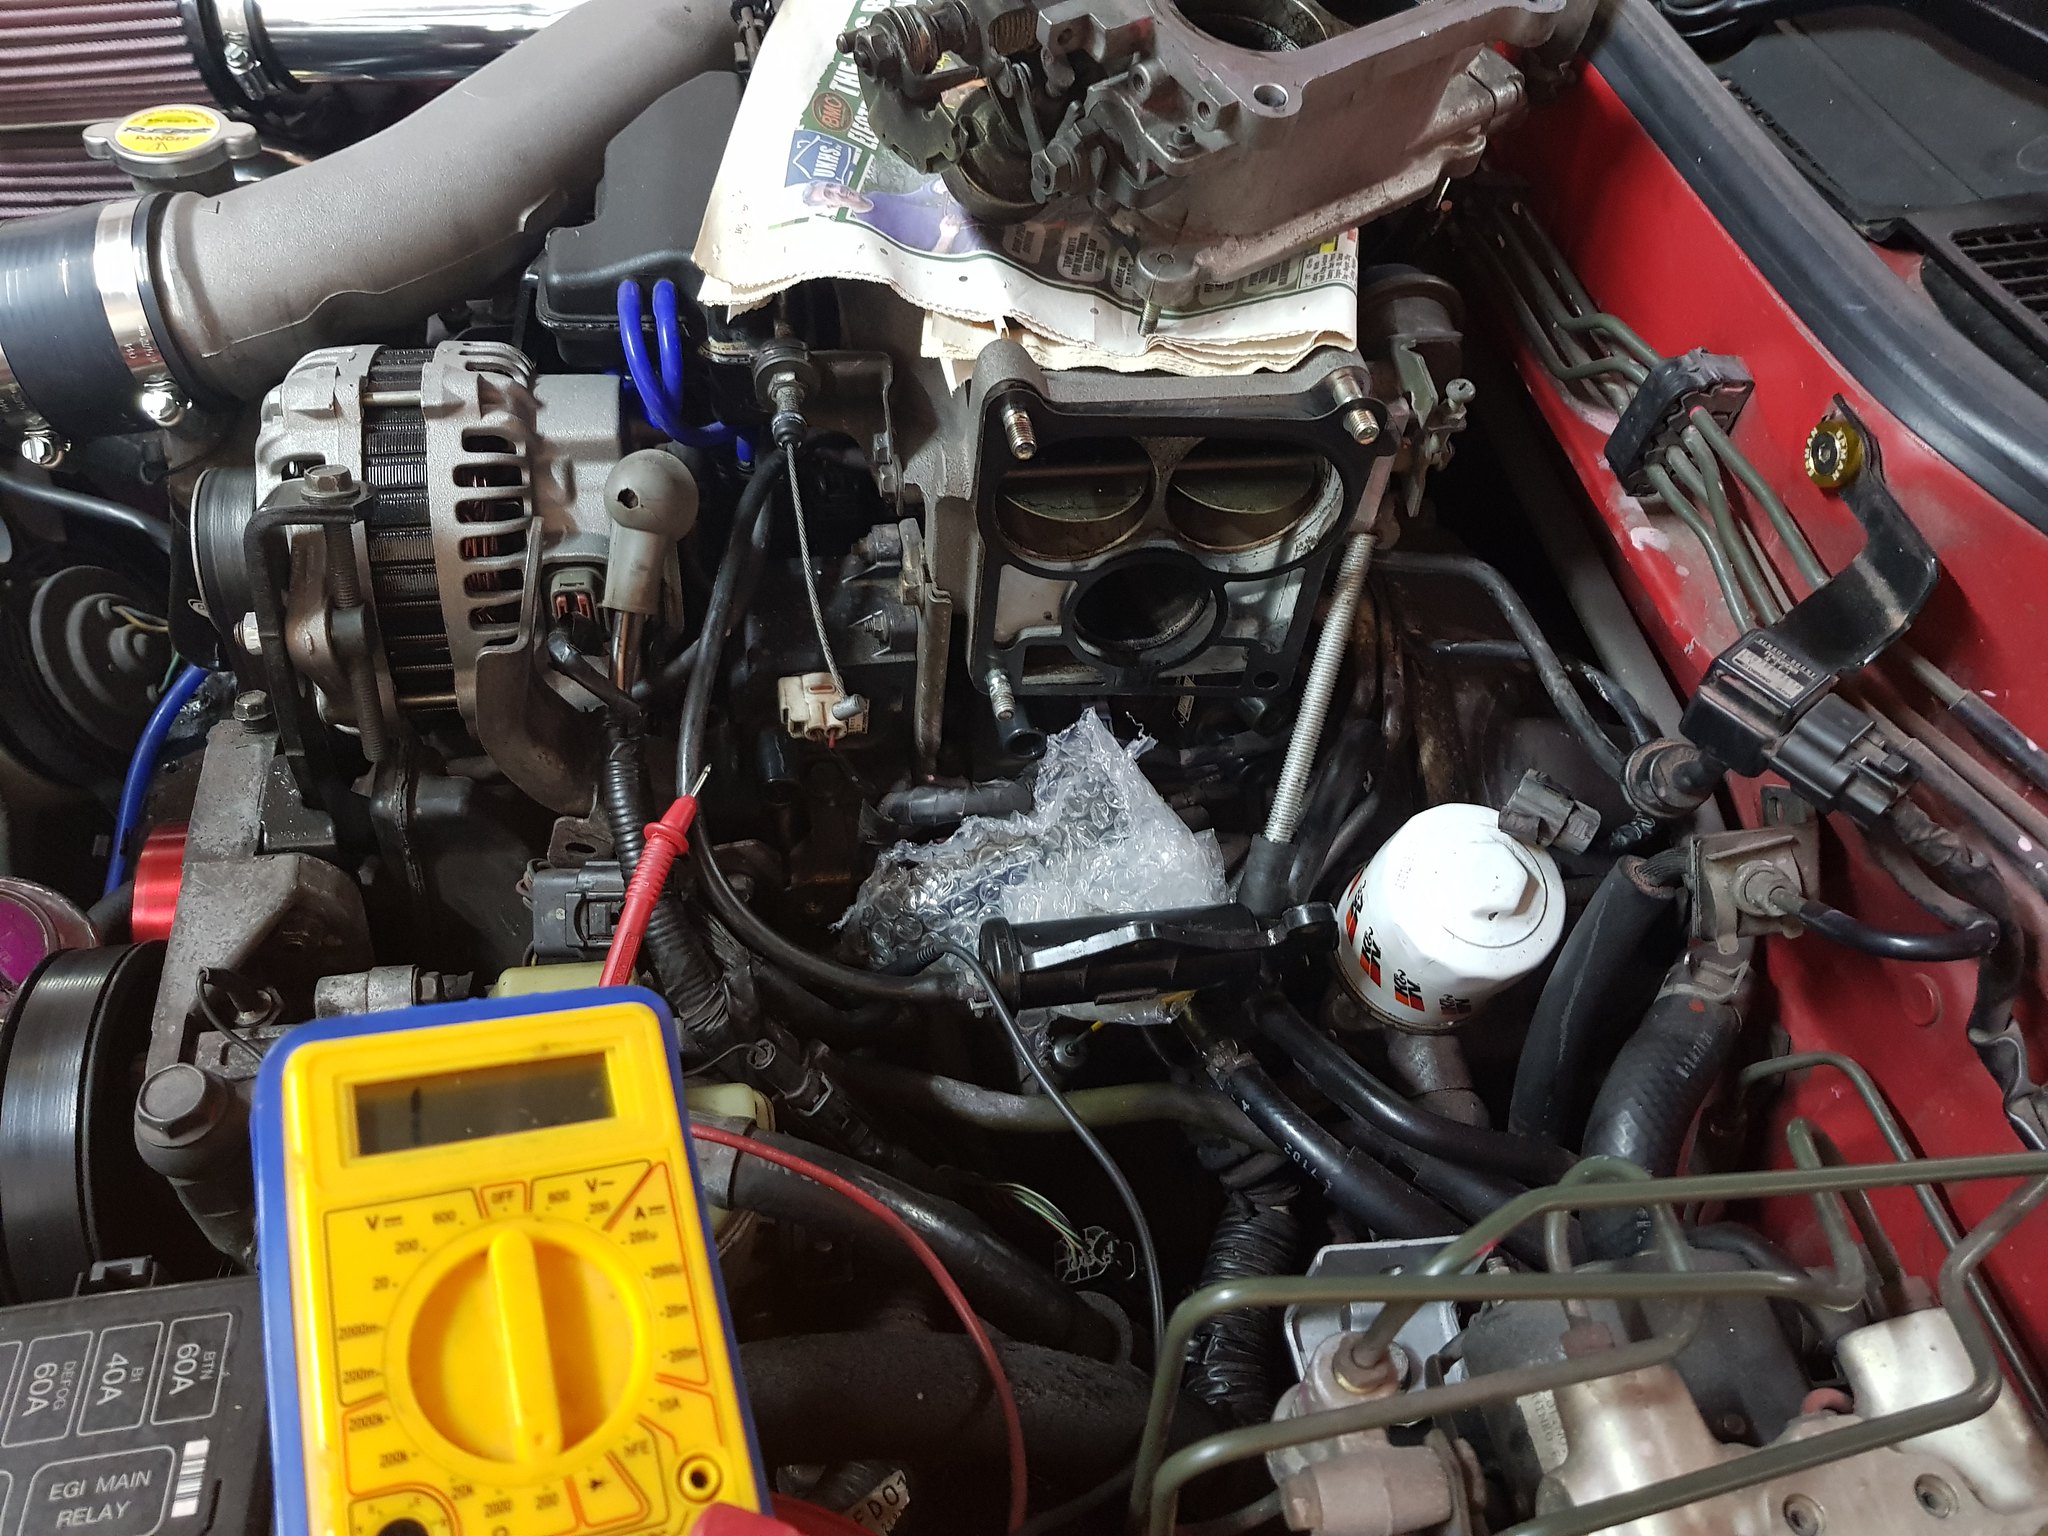
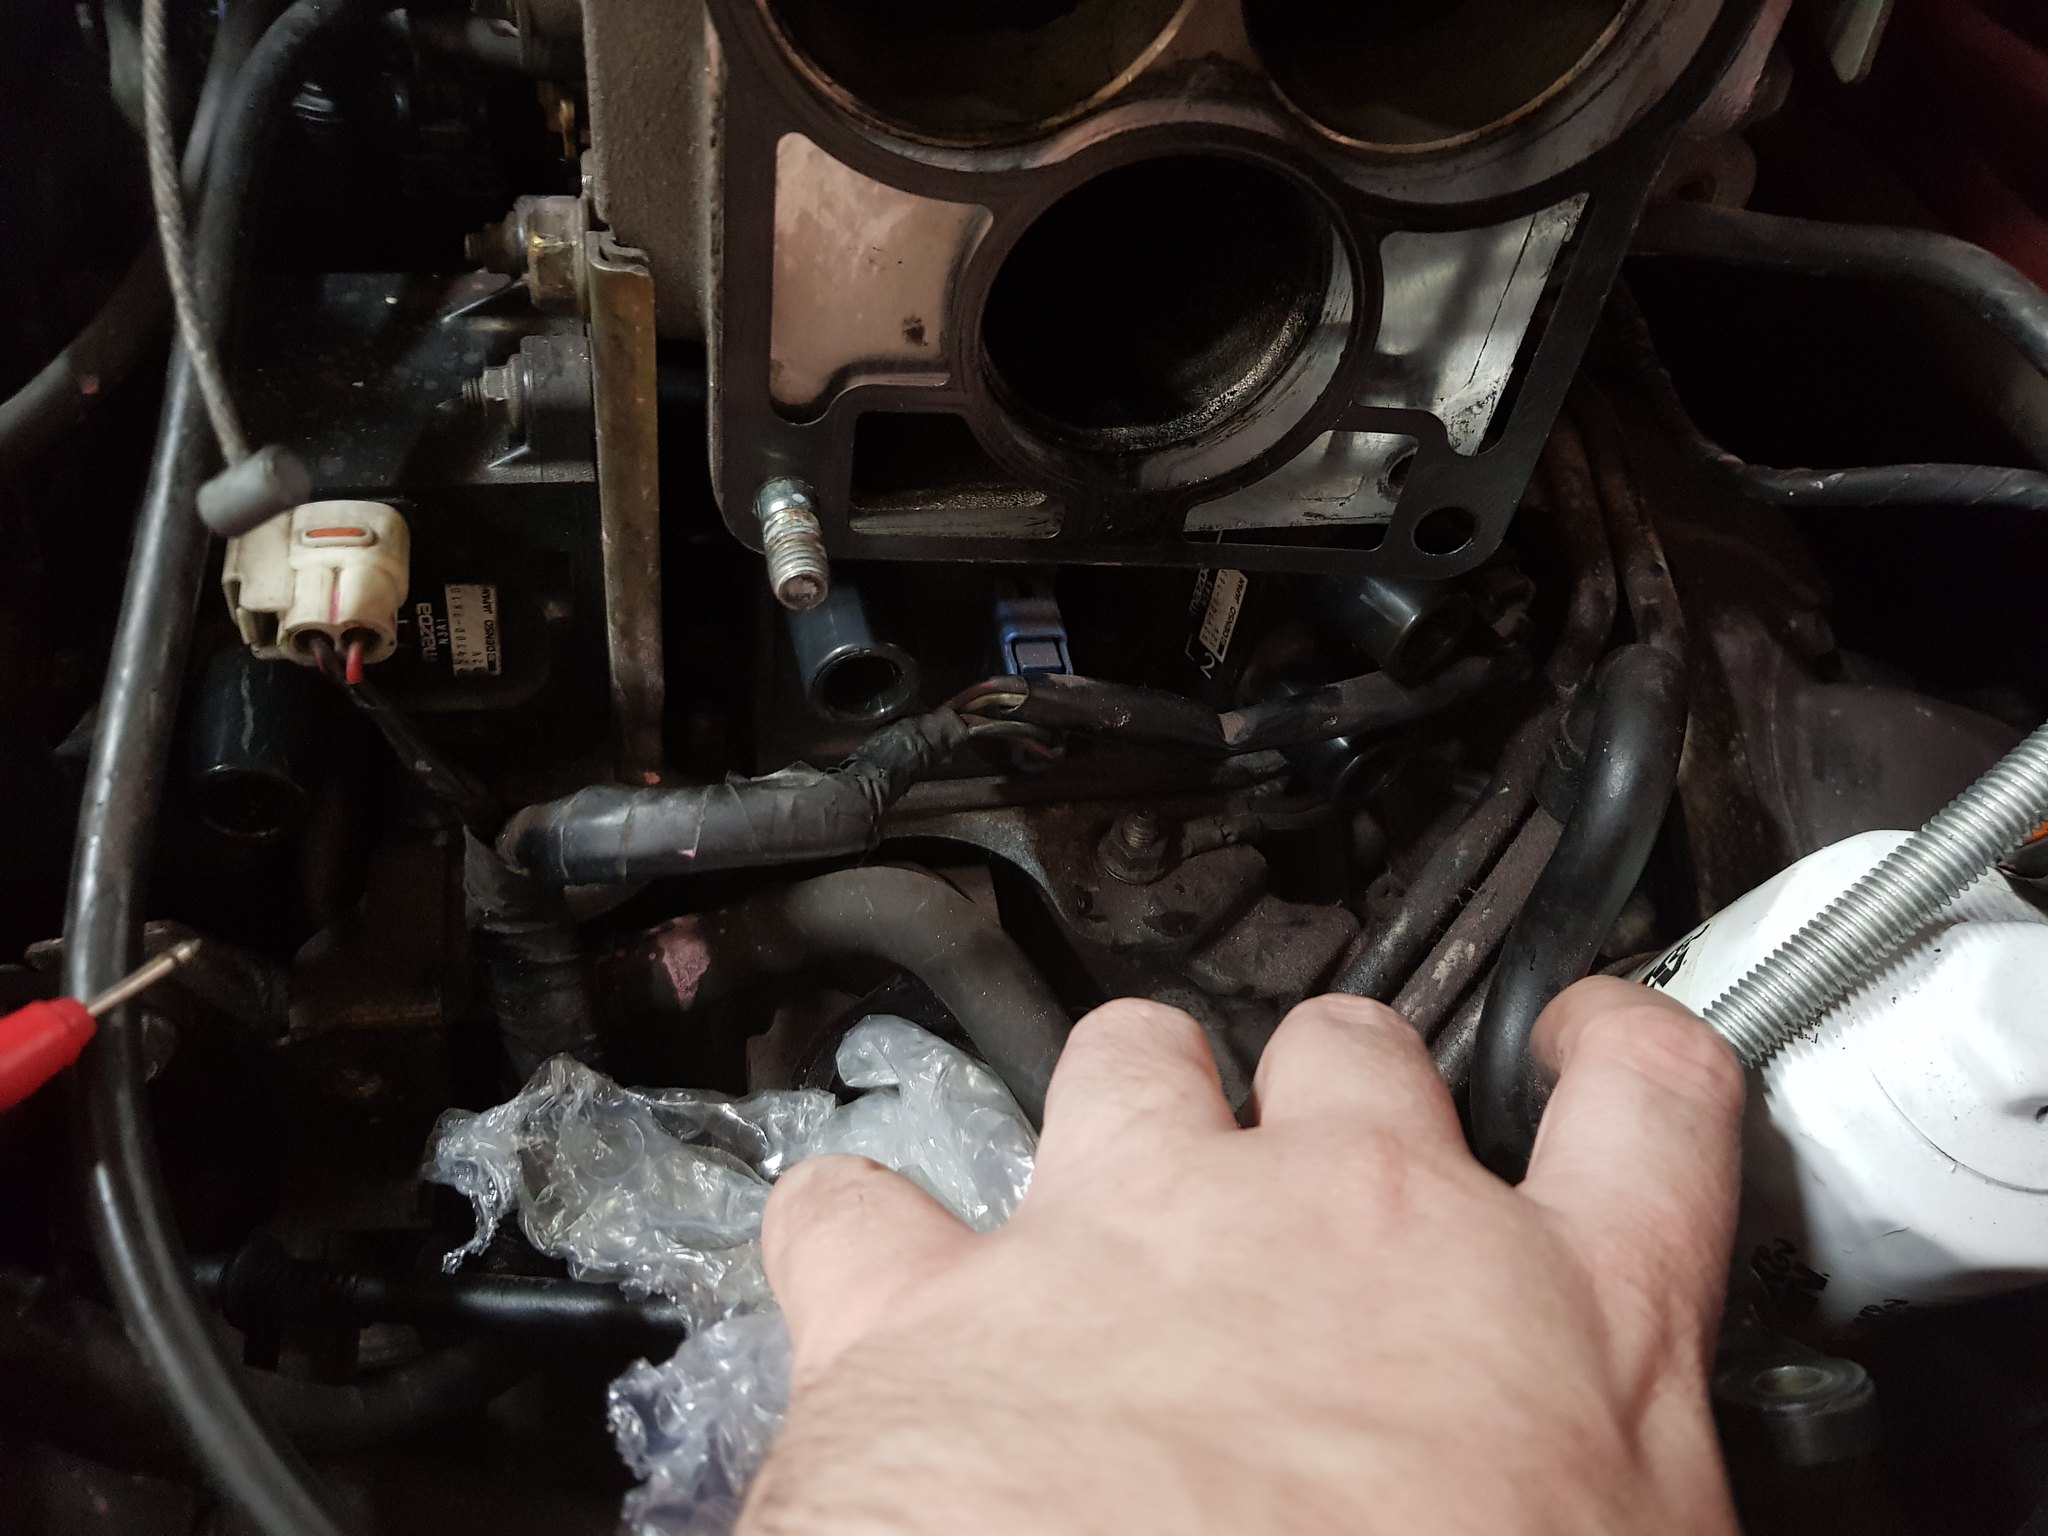
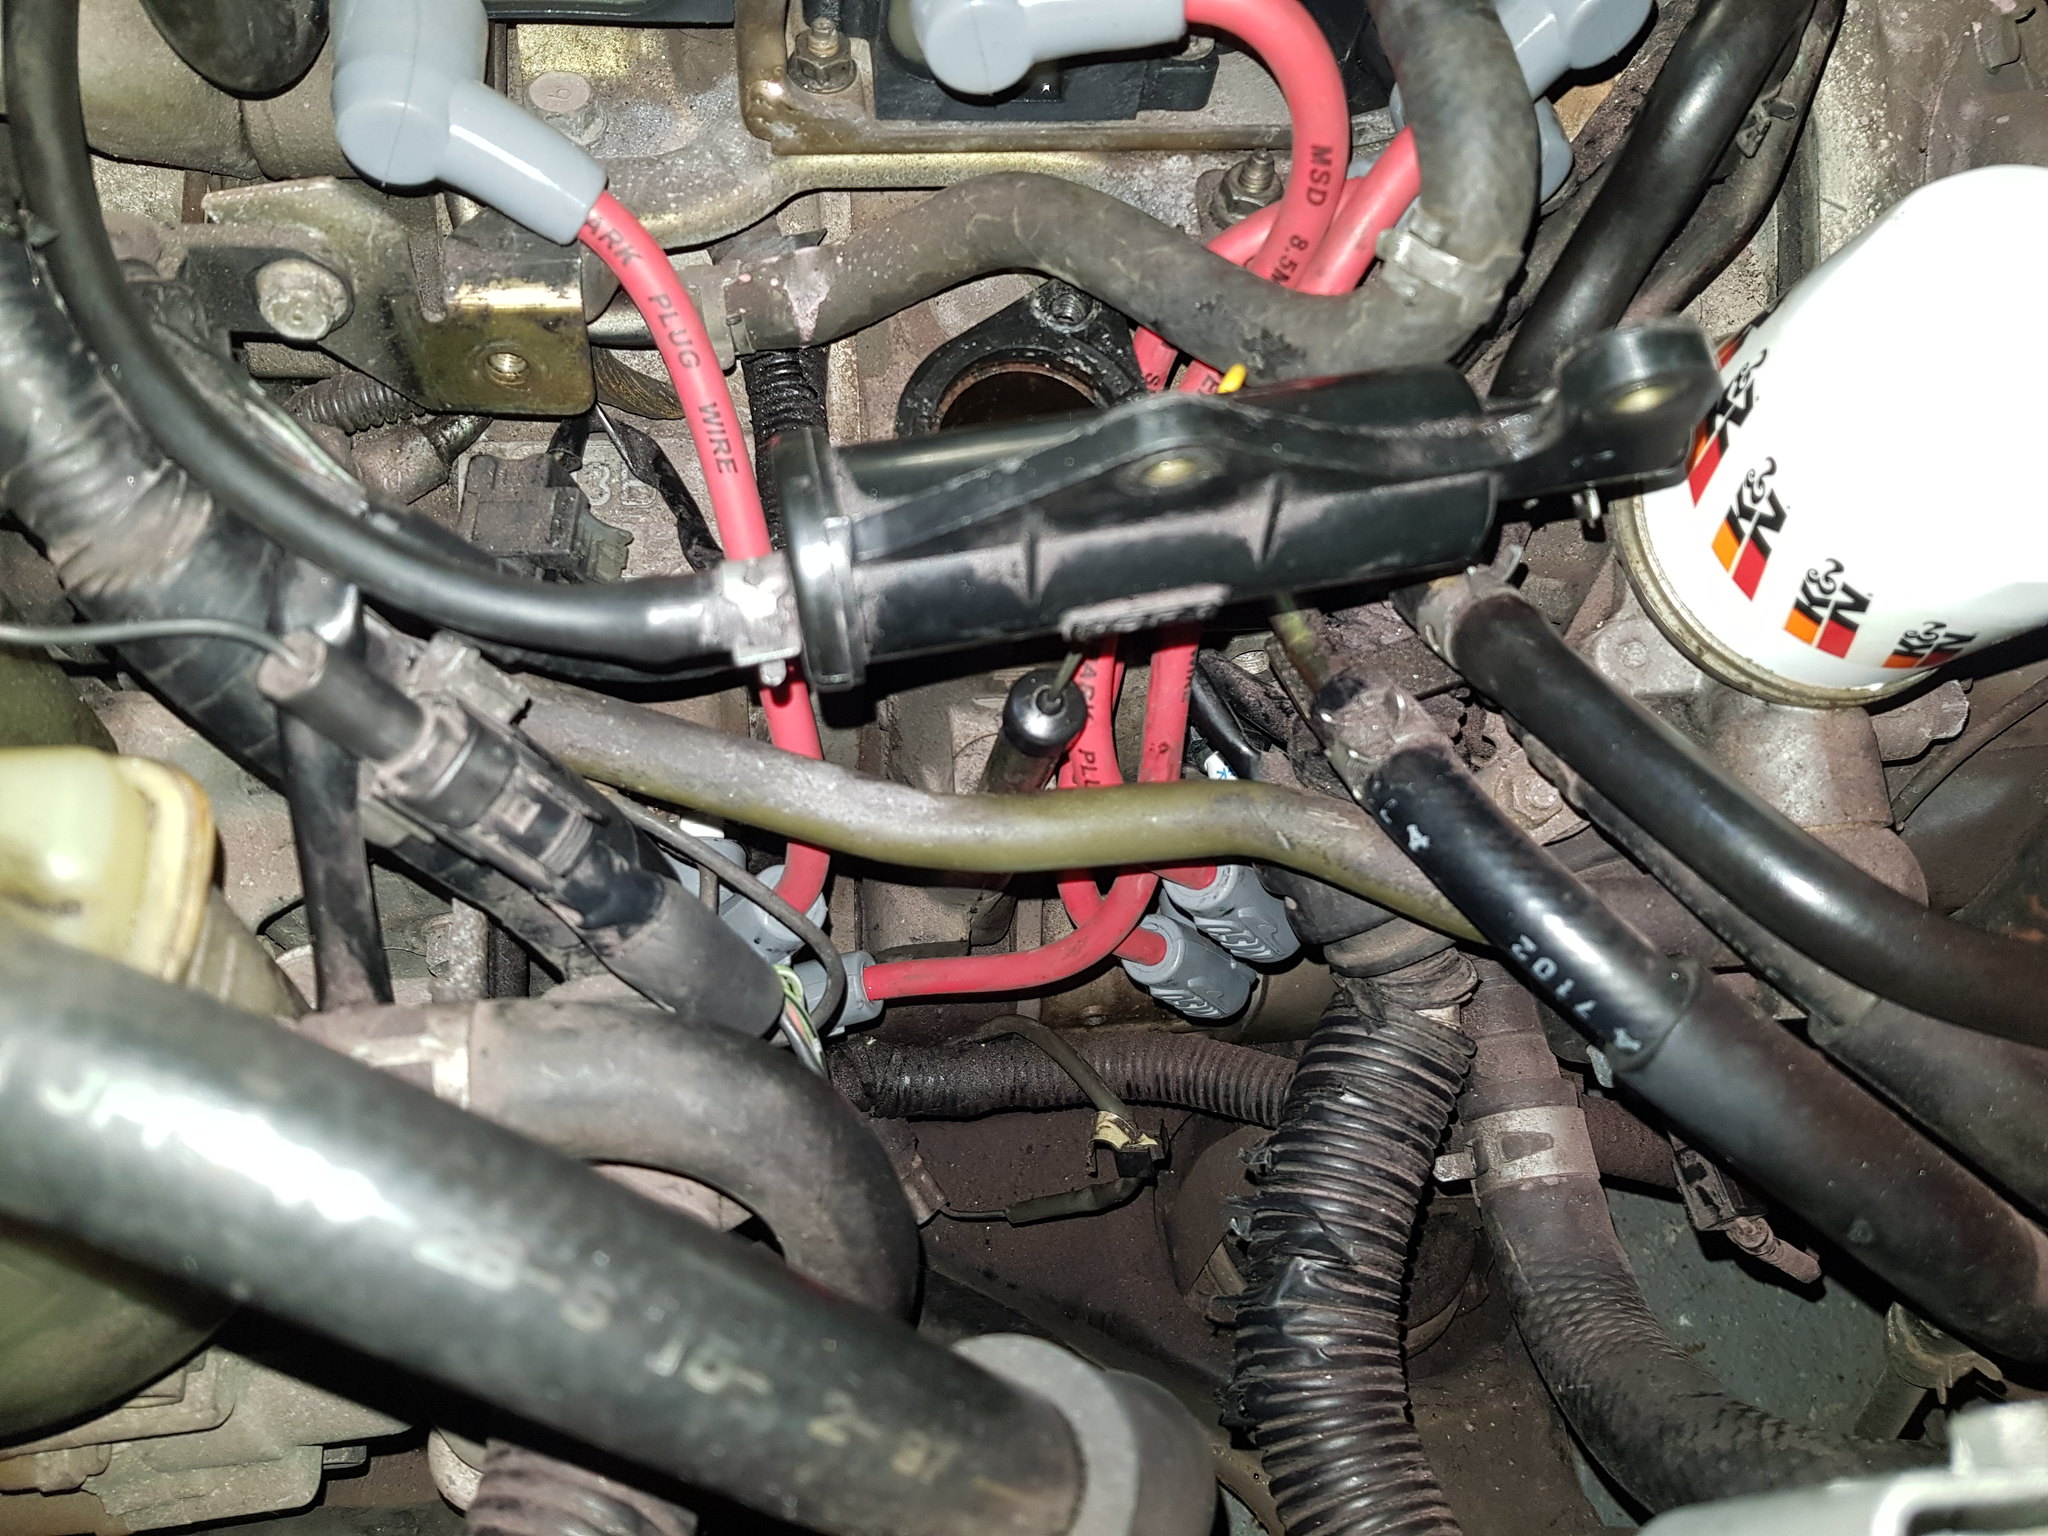
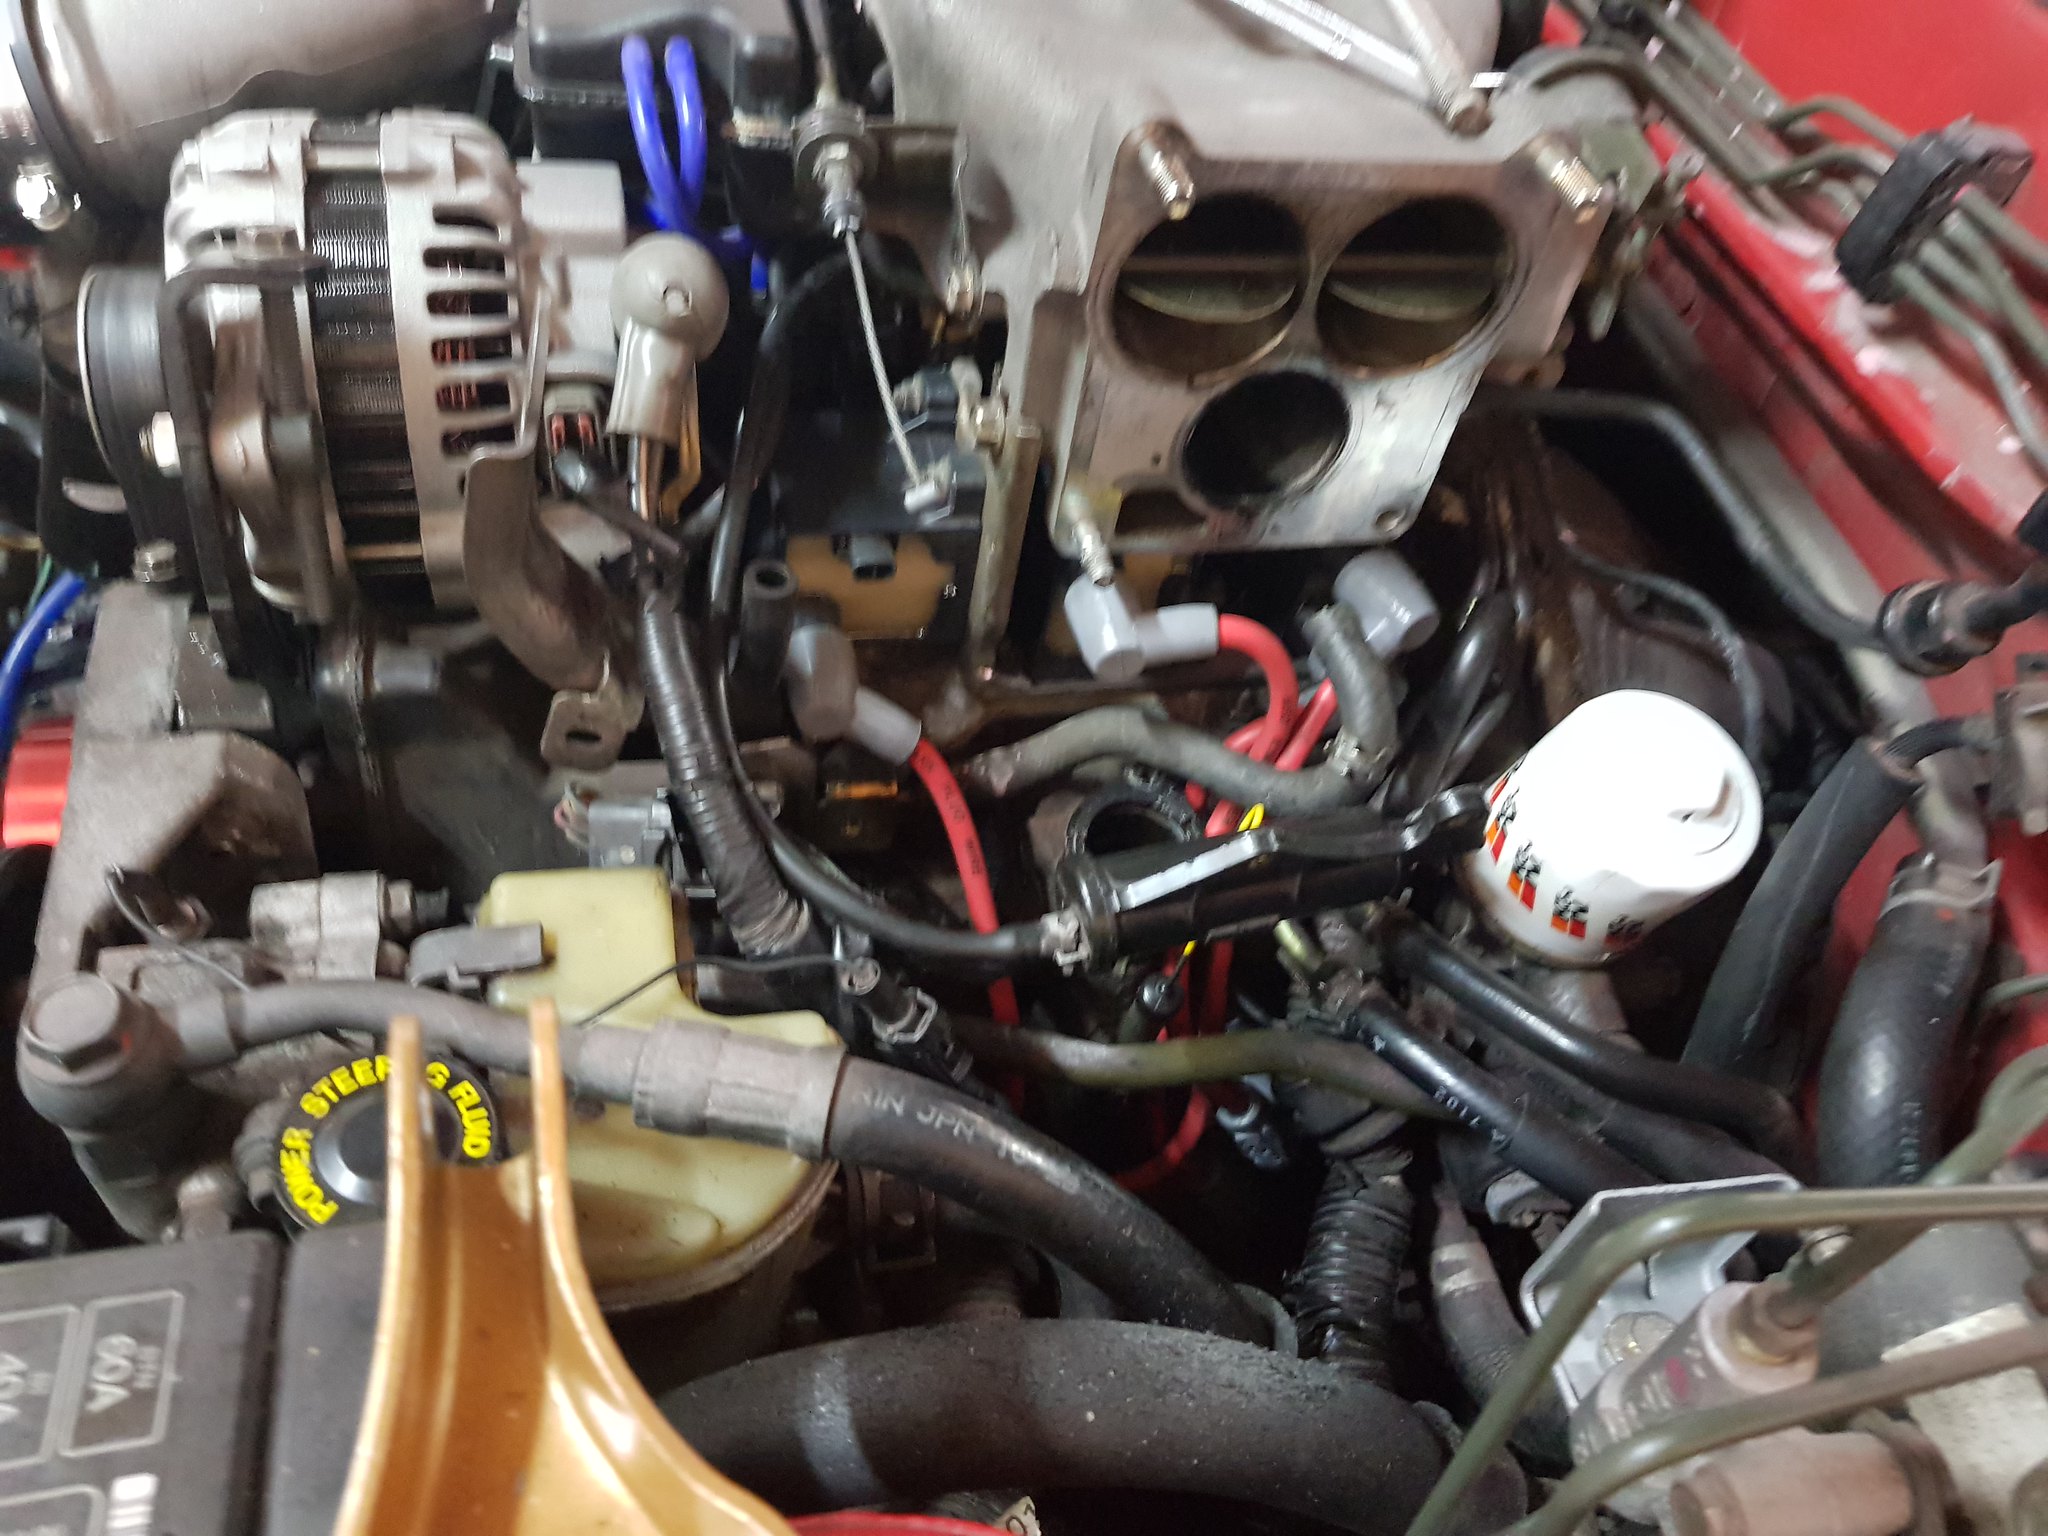
Changing them was a different matter, the sit right under the intake manifold and so the whole upper manifold needed removing which means a lot of the twinturbo pipe work comes out.
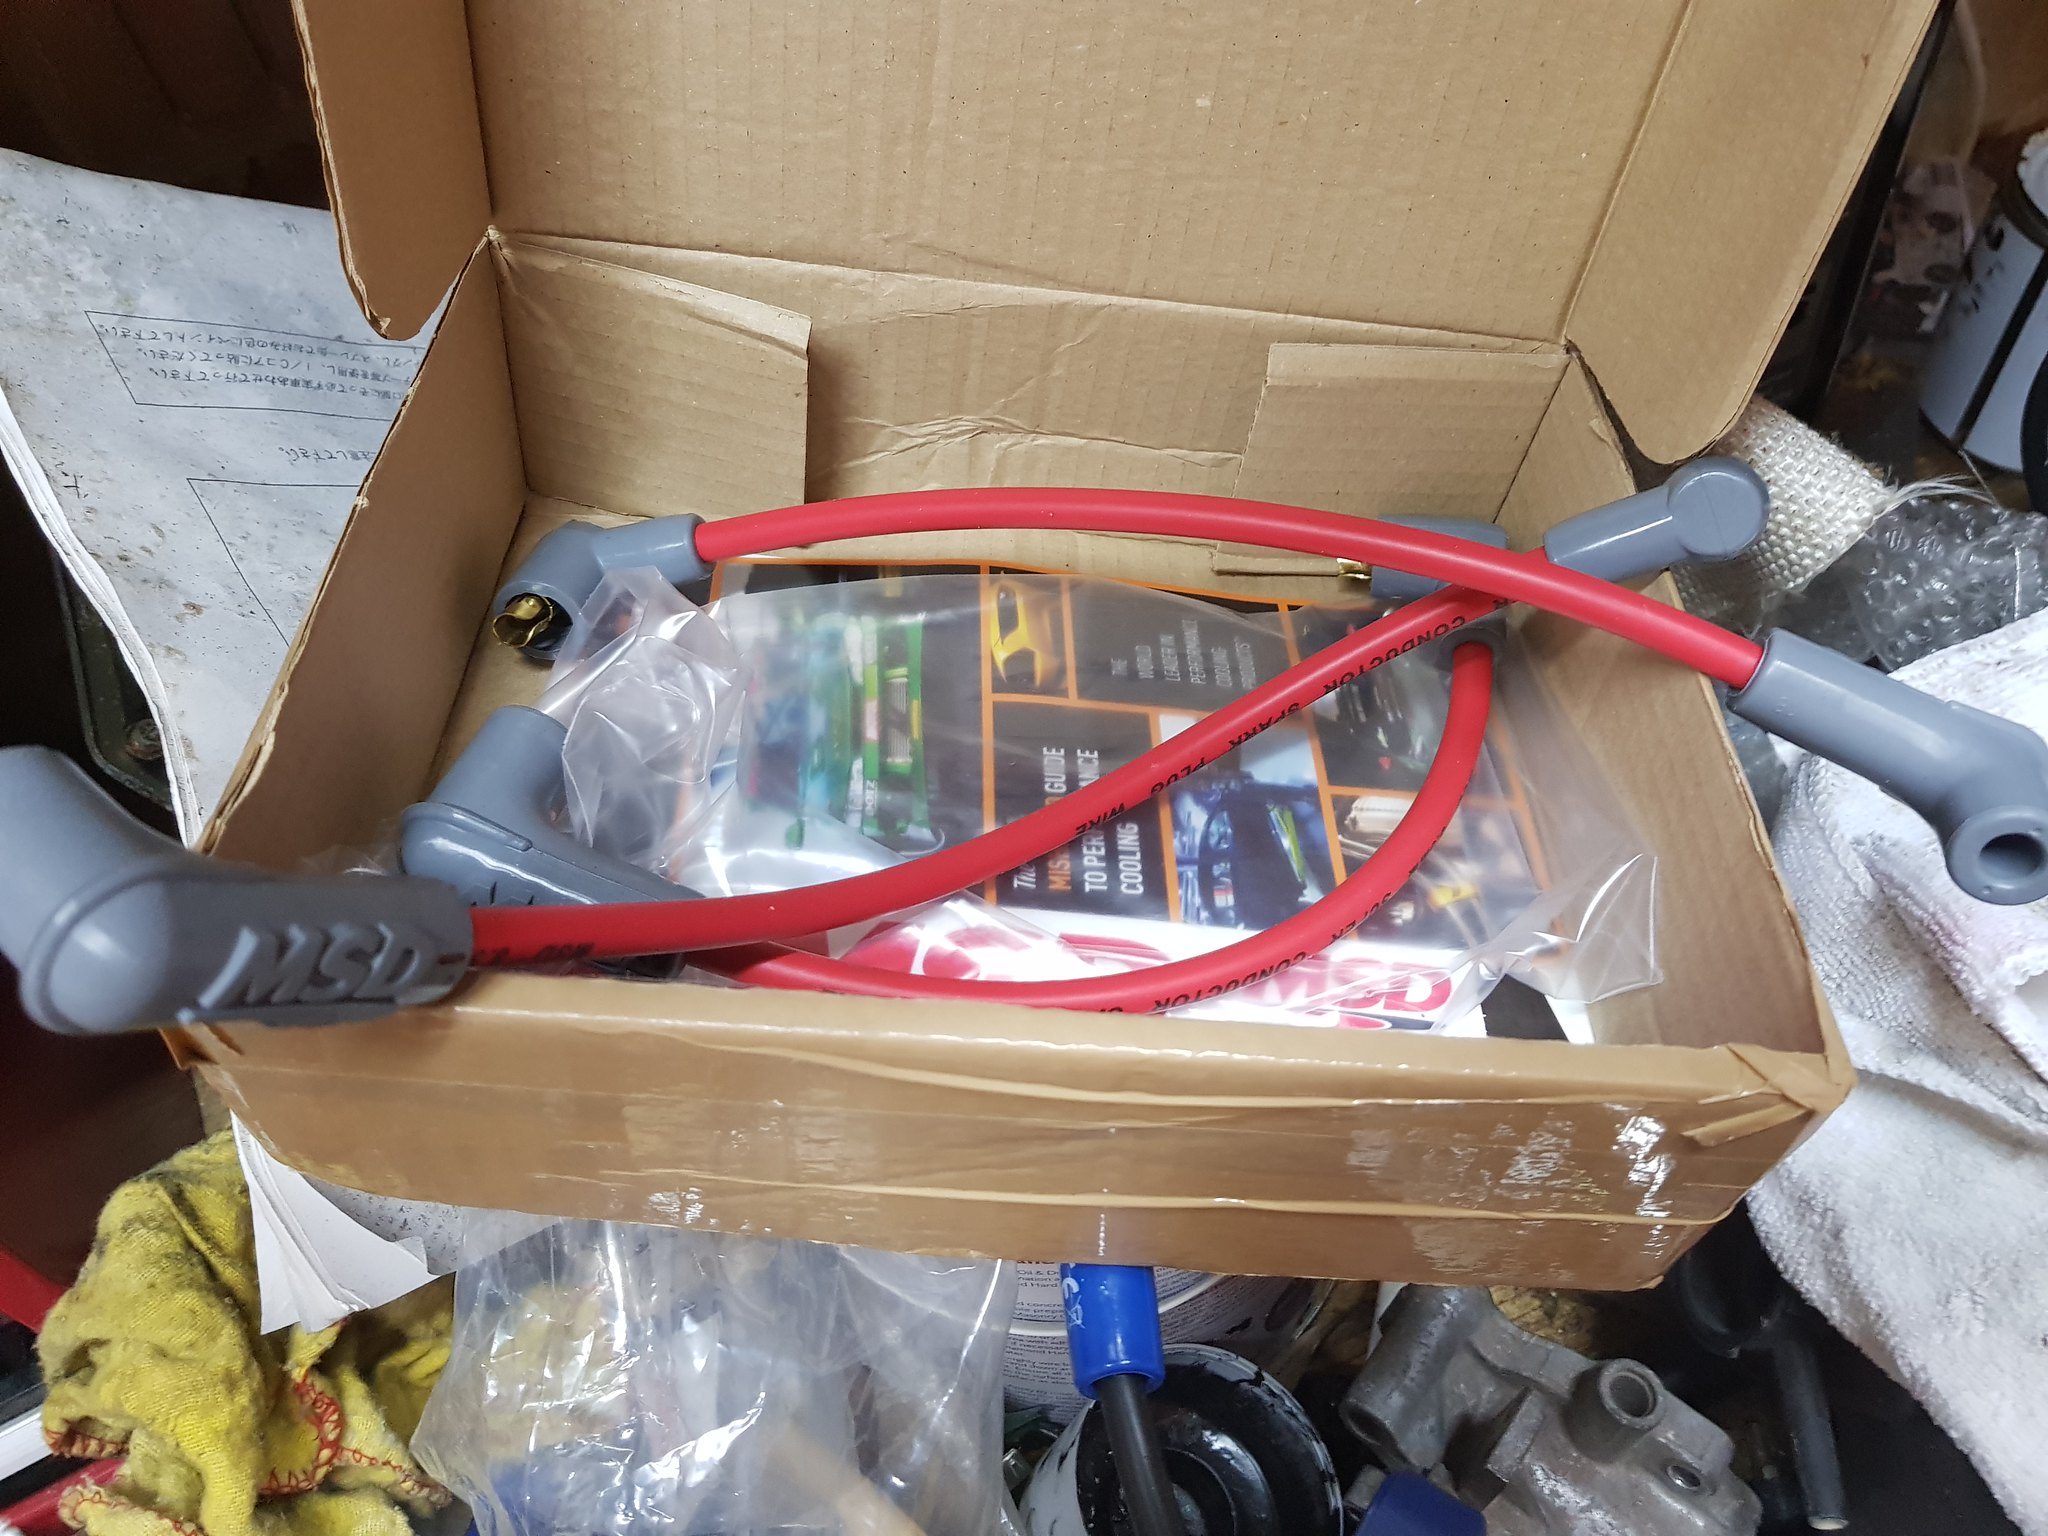
3) New HT Leads and Plugs
Despite the plugs not seeing too many miles I thought I had better pull them. They looked just as st as the ones I changed when I first got the car, clearly been running rich/not burning all the fuel!
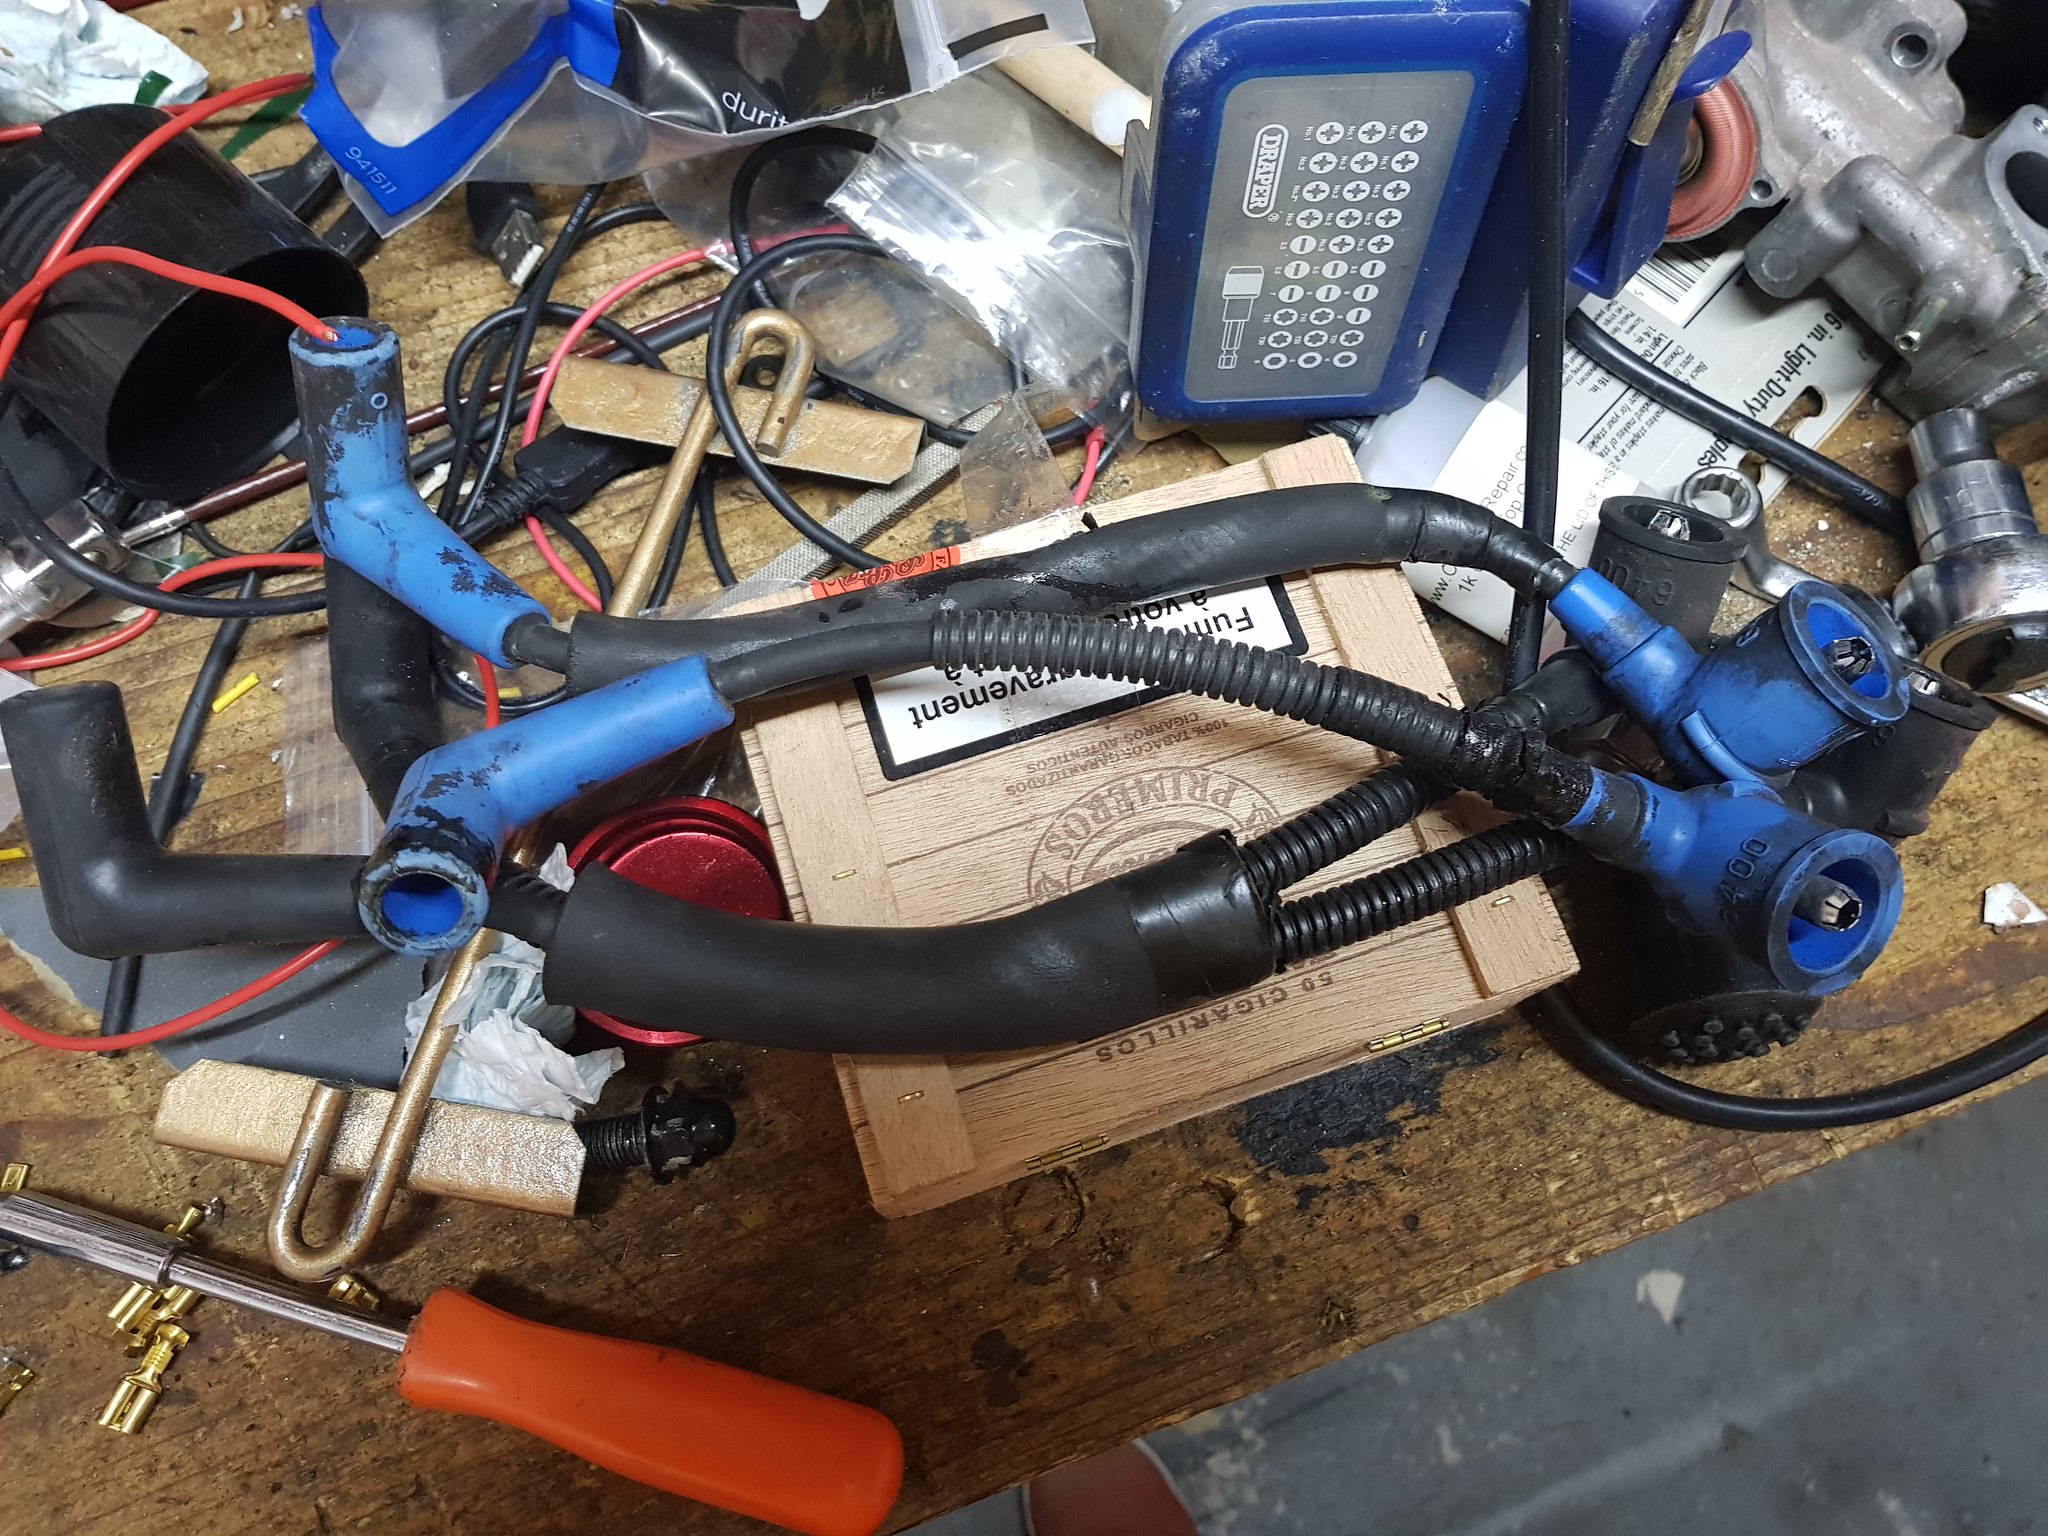
I also swaped the HT leads over, this was a good plan to do it now as the you also need to remove the throttle body to get to the coils

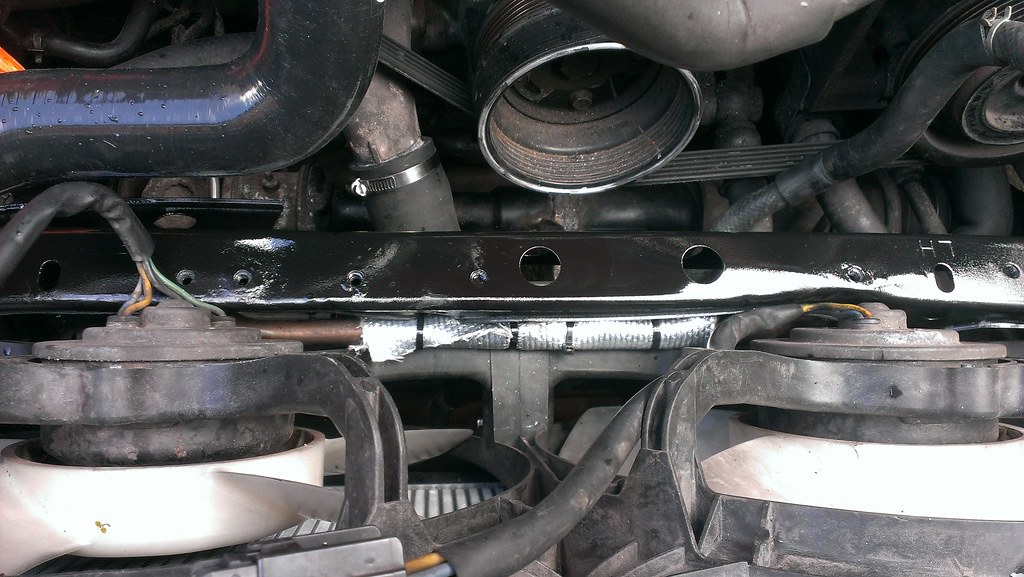
One thing I have noticed whilst driving locally is water temps were very high when doing low speed town traffic. I hadn't got round to doing any ducting on the rad/intercooler so heatsoak was proving to be an issue. I managed to find some expanding weather foam and went and filled most of the gaps. I also made some pretty shoddy ali shielding as a temporary measure. I will eventually make a fiberglass tub that surrounds the intercooler and rad.
I am waiting for a date for the second lot of mapping, I will get more updates on now I can share photos again! A little bit annoyed as I was hoping to get the car sorted for the summer and with the recent weather I think the best is behind us.
So some updates with whats happened.
As I previously said the ignition was breaking down at higher boost and thus the car was unable to be mapped. It was recommended that I put a direct power feed to the coils in order to help this issue. I was also advised not to use the twin power as it covered up any issues in the wiring.
So I decided to go all out and do the following:
1) Direct power feed.
Following a very helpful diagram from the club forums this is basically what I did
I now have a power feed going direct to the coil loom from the battery when ignition is on therefore I no longer rely on the 20 year old engine loom. I need to make the wires a bit neater as its rather colourful.
2) New more powerful coils
Although the resistance in the coils checked out according to the Mazda workshop manual I still wasn't convinced and don't fancy another wasted trip. They were cheap enough for me to purchase and thought it couldn't hurt.
Changing them was a different matter, the sit right under the intake manifold and so the whole upper manifold needed removing which means a lot of the twinturbo pipe work comes out.
3) New HT Leads and Plugs
Despite the plugs not seeing too many miles I thought I had better pull them. They looked just as s
t as the ones I changed when I first got the car, clearly been running rich/not burning all the fuel! I also swaped the HT leads over, this was a good plan to do it now as the you also need to remove the throttle body to get to the coils
One thing I have noticed whilst driving locally is water temps were very high when doing low speed town traffic. I hadn't got round to doing any ducting on the rad/intercooler so heatsoak was proving to be an issue. I managed to find some expanding weather foam and went and filled most of the gaps. I also made some pretty shoddy ali shielding as a temporary measure. I will eventually make a fiberglass tub that surrounds the intercooler and rad.
I am waiting for a date for the second lot of mapping, I will get more updates on now I can share photos again! A little bit annoyed as I was hoping to get the car sorted for the summer and with the recent weather I think the best is behind us.
Edited by Daston on Thursday 10th August 00:21
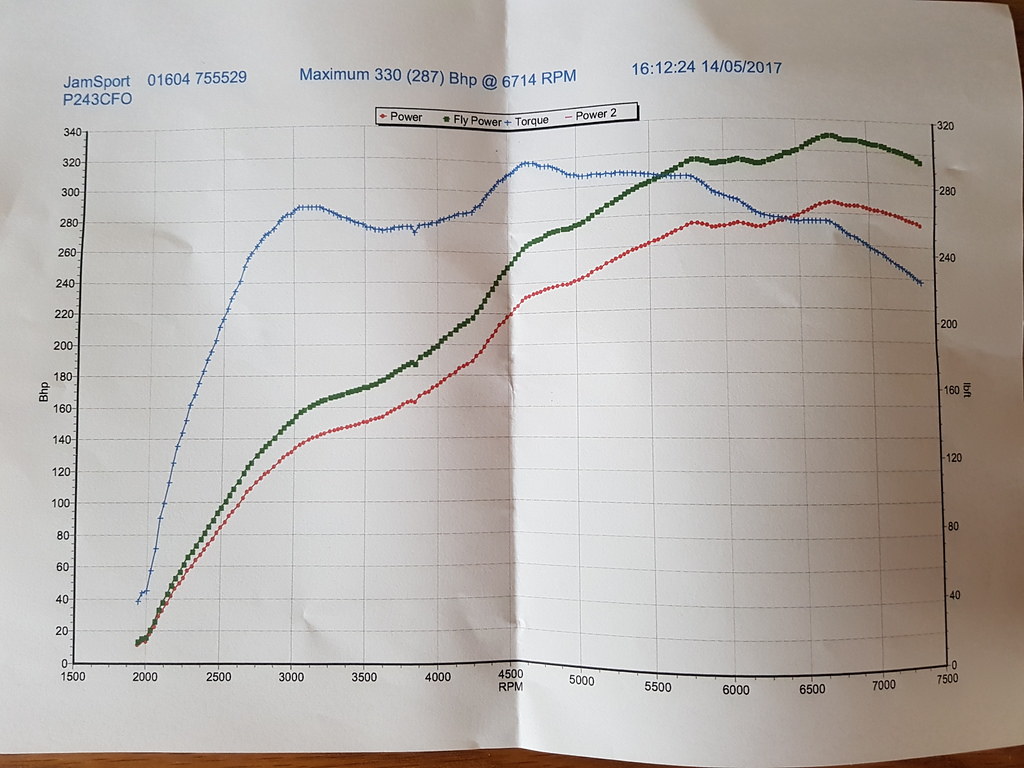
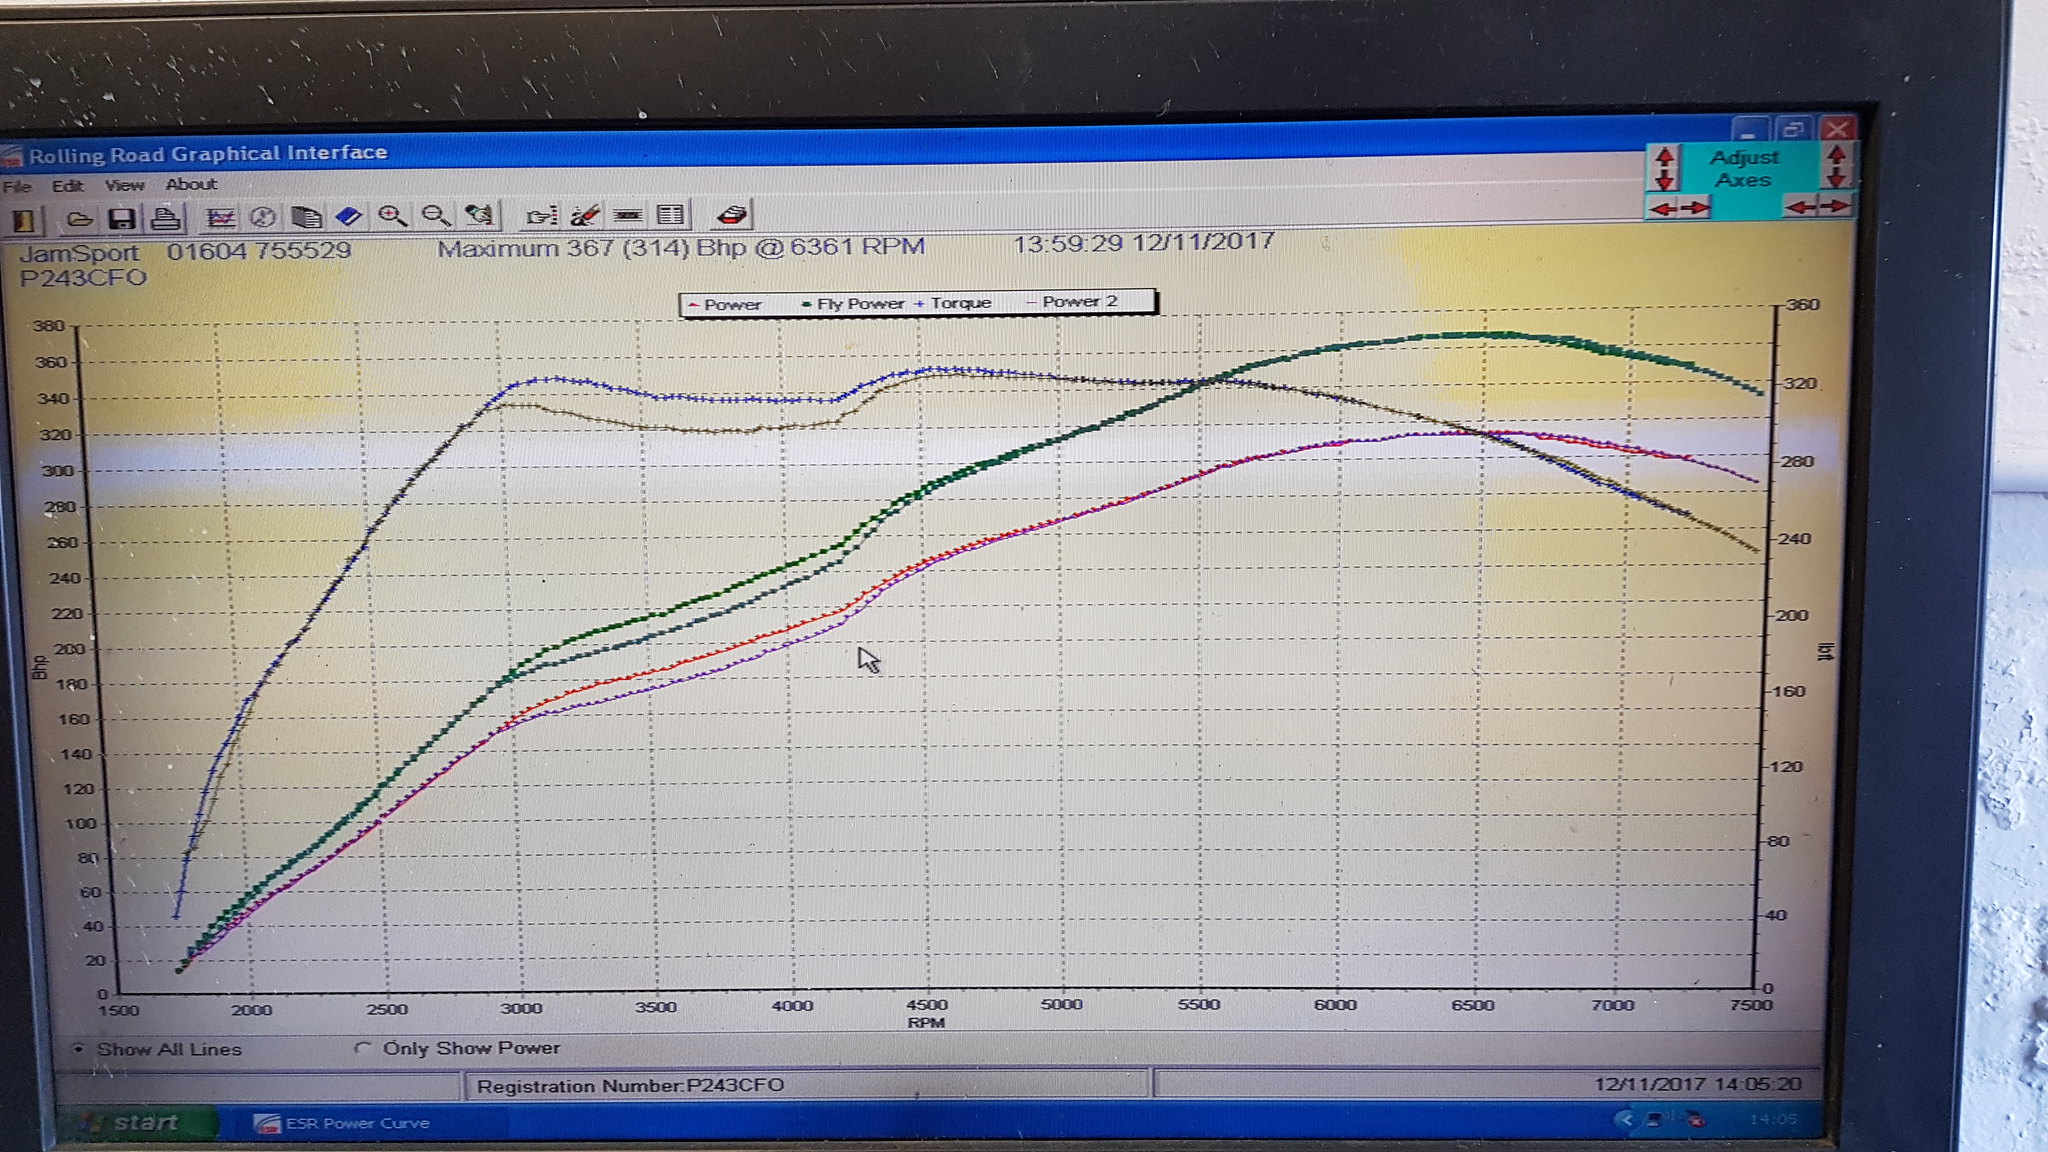
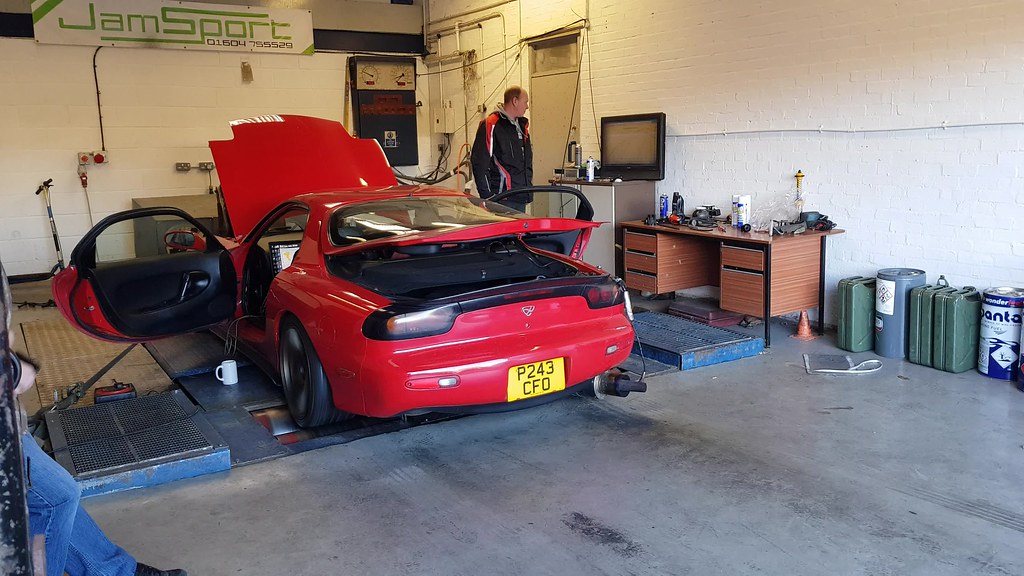
So 6 months later and the car is finally mapped!
Thankfully the new bits worked out and seemed to have fixed the ignition breakup at least I have a load of spare plugs once I clean them up.
The car is currently running 0.8 bar of boost and making a lot more power than I expected, in order to go up to 1 bar will require an upgraded fuel pump but should see a nice round 400hp.
click for video
Plans for the winter is boring cosmetic stuff, the underside needs some treatment with waxoil or something similar and the dash lighting needs to be looked at again as I seem to have lost an LED and the odometer is playing up.
Gassing Station | Readers' Cars | Top of Page | What's New | My Stuff