Ferrari F430 Spider
Discussion


markiii said:
how much do you reckon that will save?
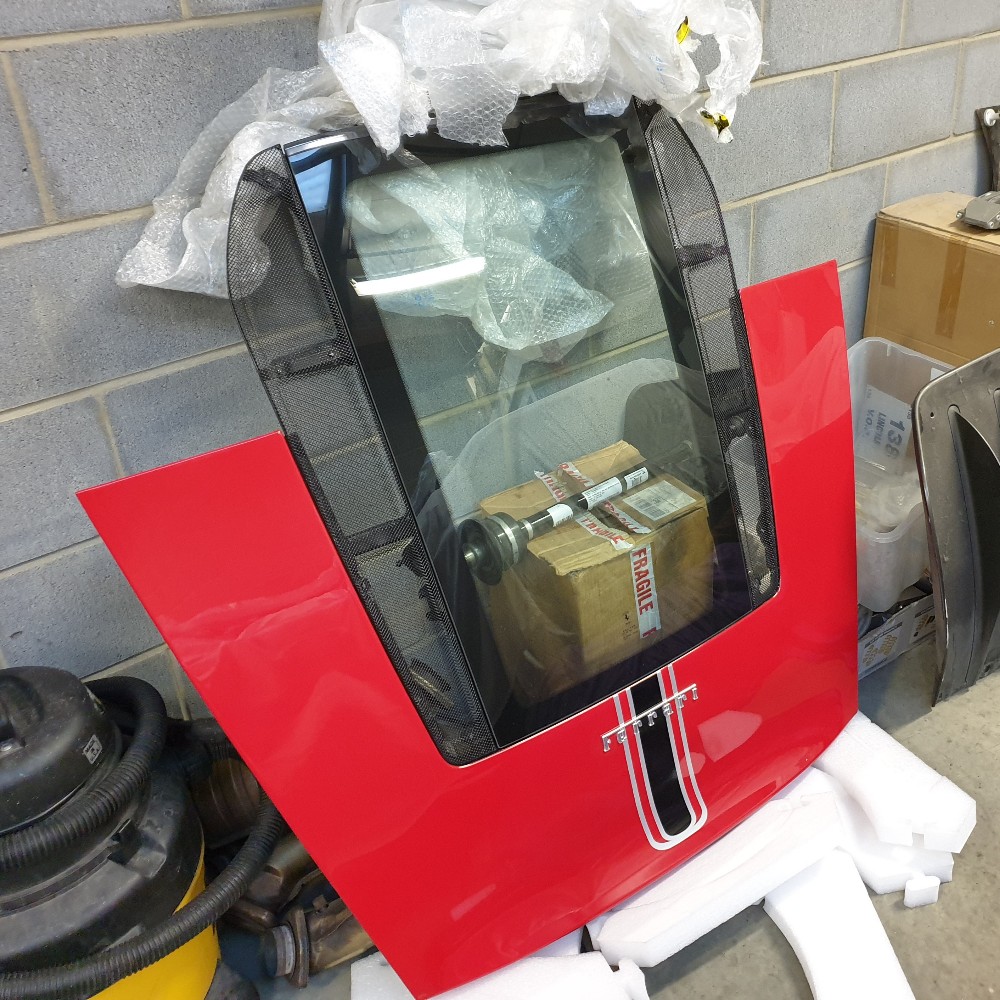
4mm glass: 10.00kg/m²4mm Lexan: 4.80kg/m²
The part is approx 5 ft² / 0.46 m²
4mm glass: 0.46 m² x 10.00kg/m² = 4.6kg
4mm Lexan: 0.46 m² x 4.80kg/m² = 2.208kg
Saving = 2.392kg
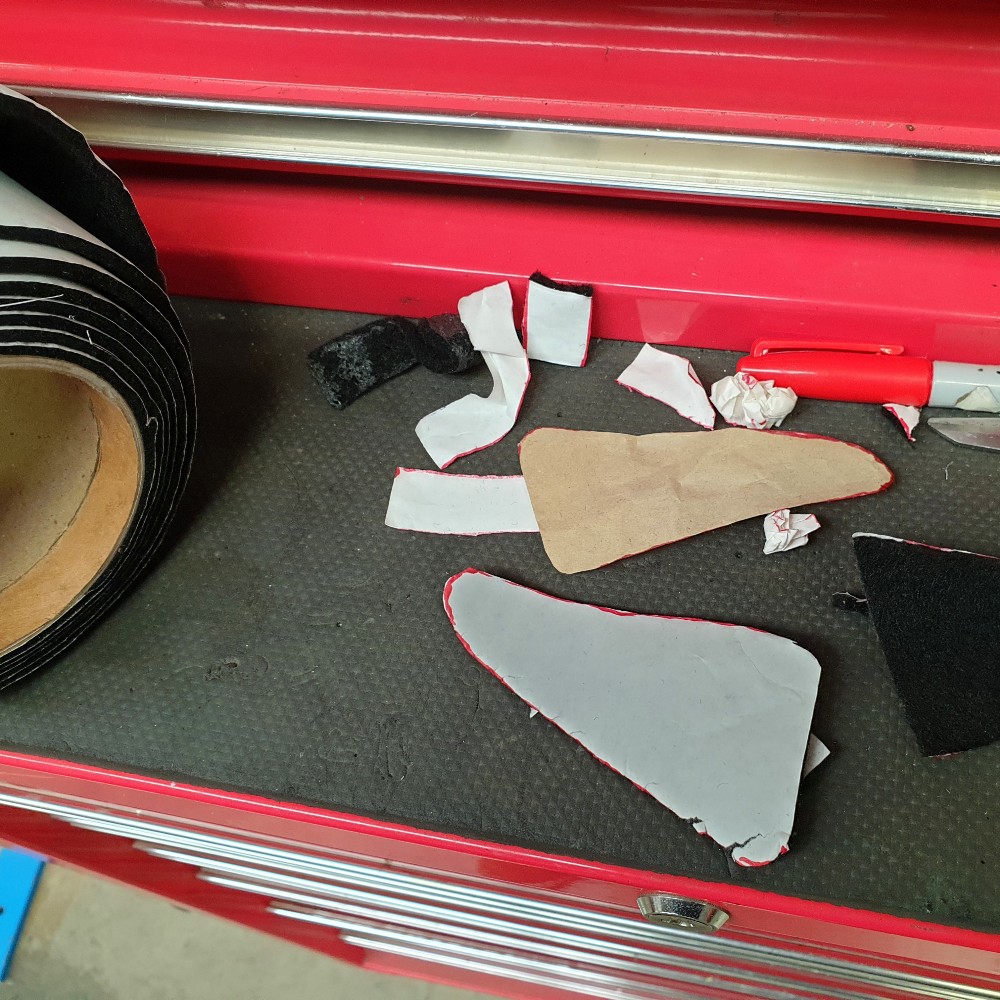
Cost is around £250 for a hard-coated thermo-formed replacement - the latter is required due to a slight compound curve.
£104/kg.
Door Strikers
The door strikers are a consumable part. Over time the nylon sleeve wears away which not only looks bad, but turns an otherwise positive but mechanical sounding door closure into something on the unpleasant side.
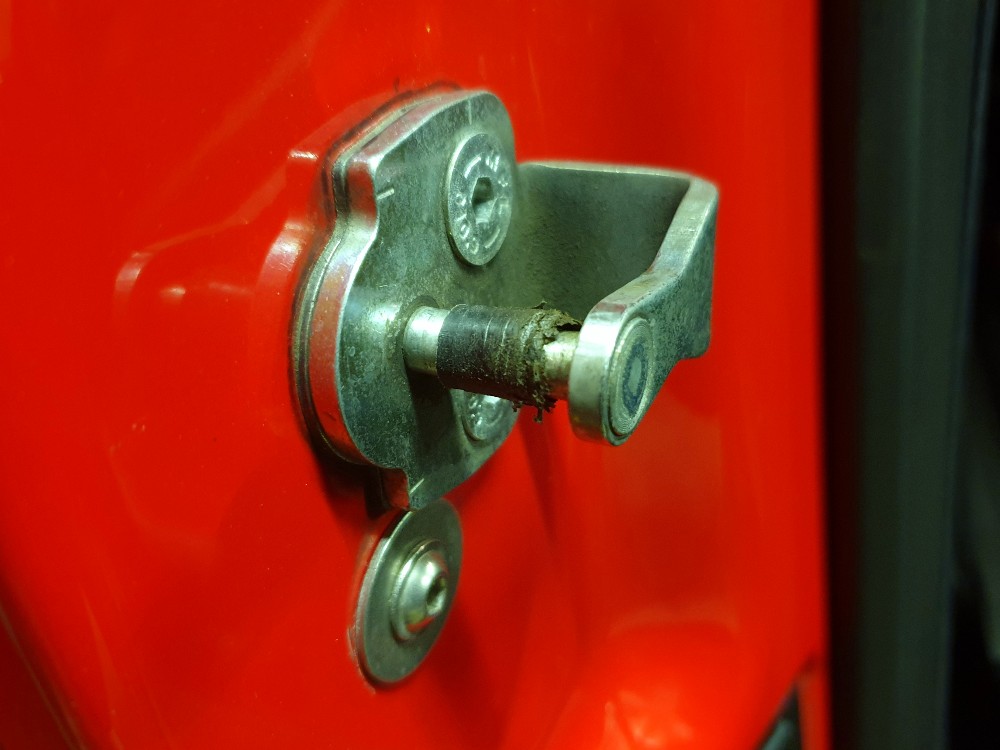
The last time I ordered a replacement pair I was sent a superceded part that was all metal. It made door closure sound even worse than a worn original catch, so I didn't fit them. I did though think it was a waste to throw away a big chunk of metal for the sake of a small piece of nylon, so I came up with a way to refurbish them: drill out the pressed head securing the striker pin, cut some 10mm Derlin rod to size, mill down to 9.5mm diameter, bore an 8mm hole in the centre, slide over the pin and TIG it back in place.
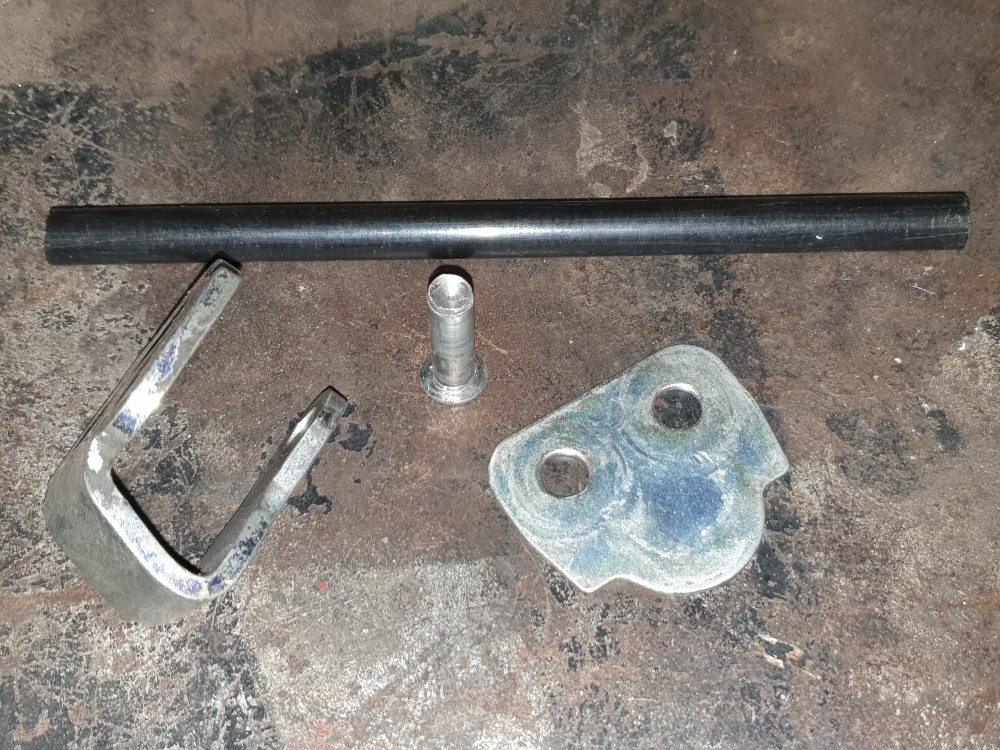
After doing all of that I discovered a new pair of original strikers in my parts store, so the resto approach went hold
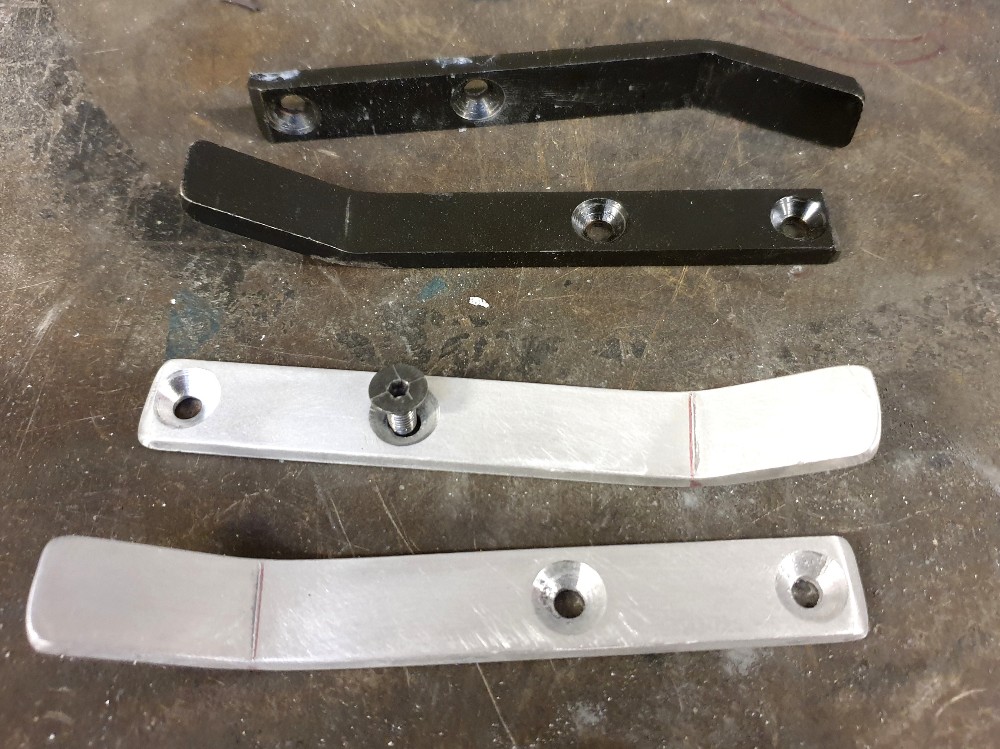
The photo below shows the original type (bottom and right), and the new, all-metal type (left).
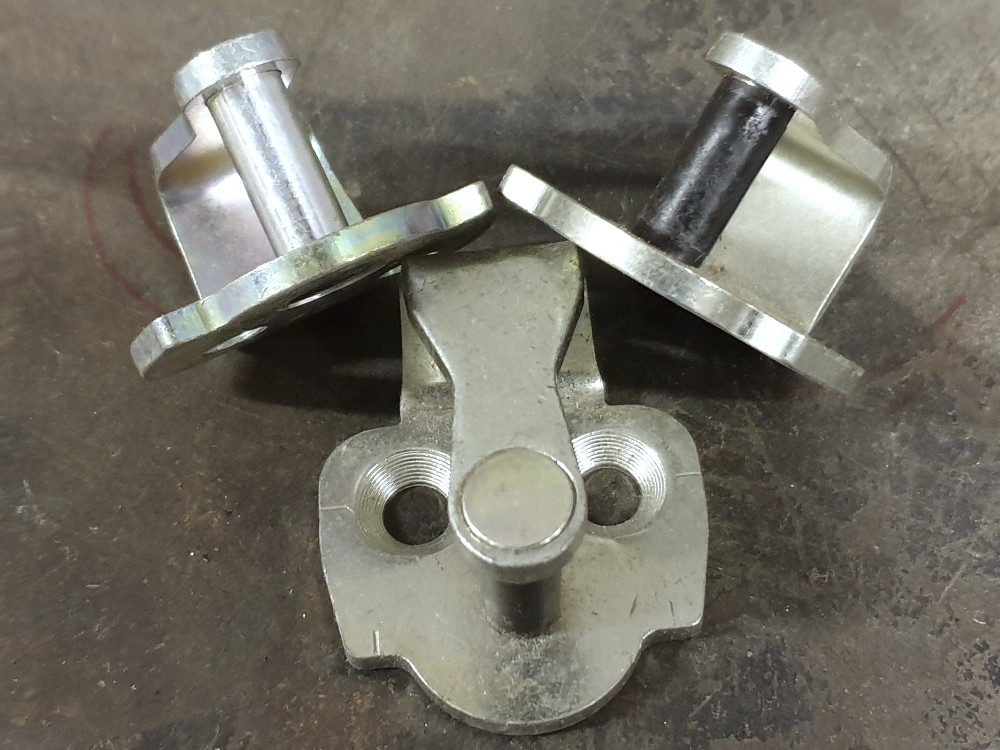
Fitted. I took the opportunity to tweak the door closed position - when closed the passenger door was ever so slightly proud of the rear quarter; it's now flush.
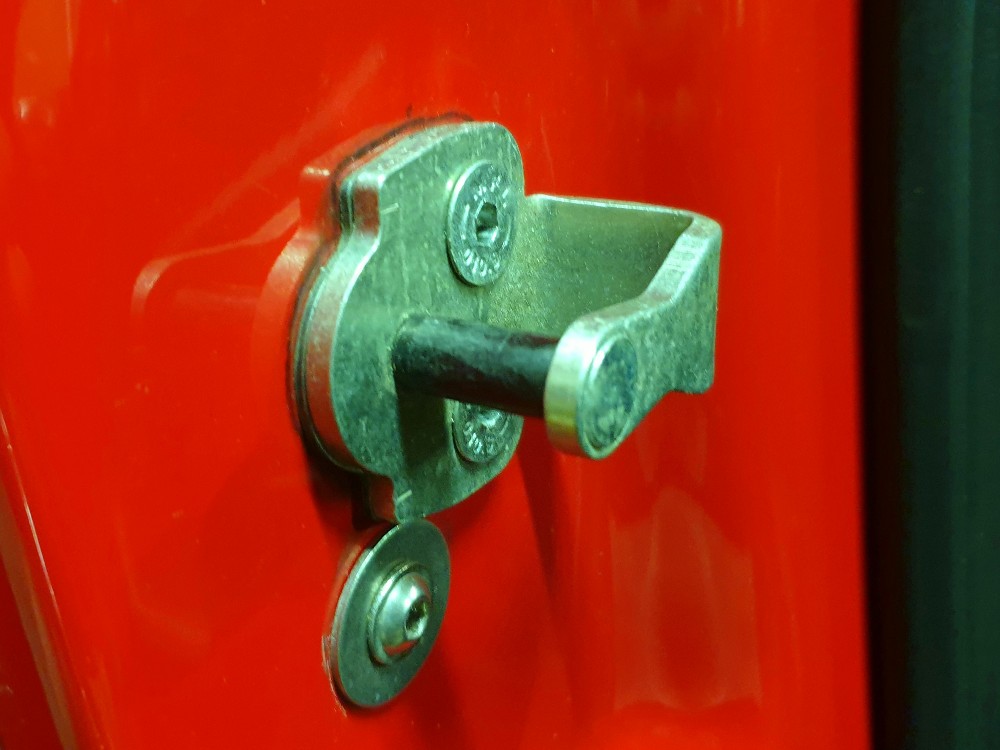
If anyone is interested I found whilst searching that the original version is Alfa Romeo part 50509788. I found some available new in the UK for £8 inc. VAT, so I have ordered more spares.
The door strikers are a consumable part. Over time the nylon sleeve wears away which not only looks bad, but turns an otherwise positive but mechanical sounding door closure into something on the unpleasant side.
The last time I ordered a replacement pair I was sent a superceded part that was all metal. It made door closure sound even worse than a worn original catch, so I didn't fit them. I did though think it was a waste to throw away a big chunk of metal for the sake of a small piece of nylon, so I came up with a way to refurbish them: drill out the pressed head securing the striker pin, cut some 10mm Derlin rod to size, mill down to 9.5mm diameter, bore an 8mm hole in the centre, slide over the pin and TIG it back in place.
After doing all of that I discovered a new pair of original strikers in my parts store, so the resto approach went hold
The photo below shows the original type (bottom and right), and the new, all-metal type (left).
Fitted. I took the opportunity to tweak the door closed position - when closed the passenger door was ever so slightly proud of the rear quarter; it's now flush.
If anyone is interested I found whilst searching that the original version is Alfa Romeo part 50509788. I found some available new in the UK for £8 inc. VAT, so I have ordered more spares.
Suspension Height Increase
My goal is a height increase of 7mm. I knew from my previous measurements that the rake is within spec which means that I can adjust equally F&R. On Ferrarichat.com there is a very knowledgeable member with extensive experience of racing this platform, and thanks to him I had the motion ratio and mm/spring seat turn data:
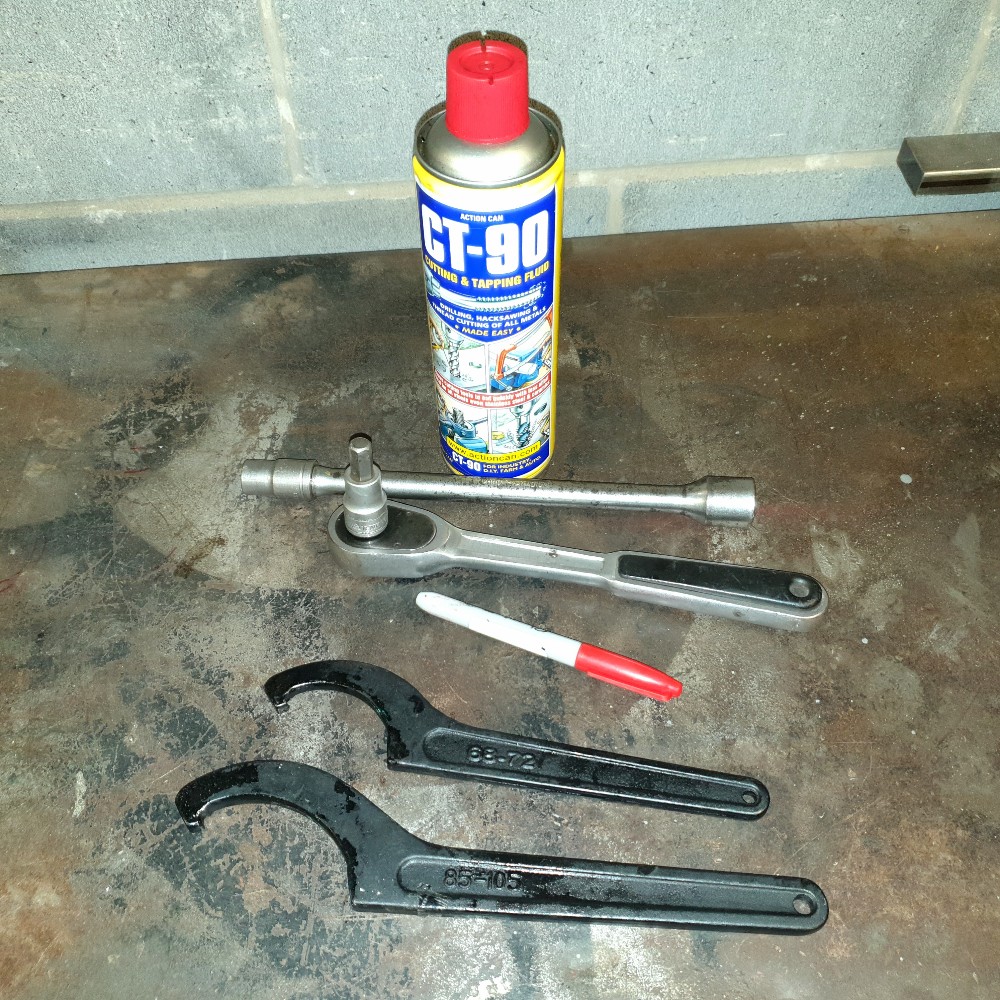
Tools for the job: I removed the upper wishbone in order to improve access. I used 68-72mm and 85-105mm C spanners to adjust the shocks, and a Sharpie to mark damper body and spring seat.
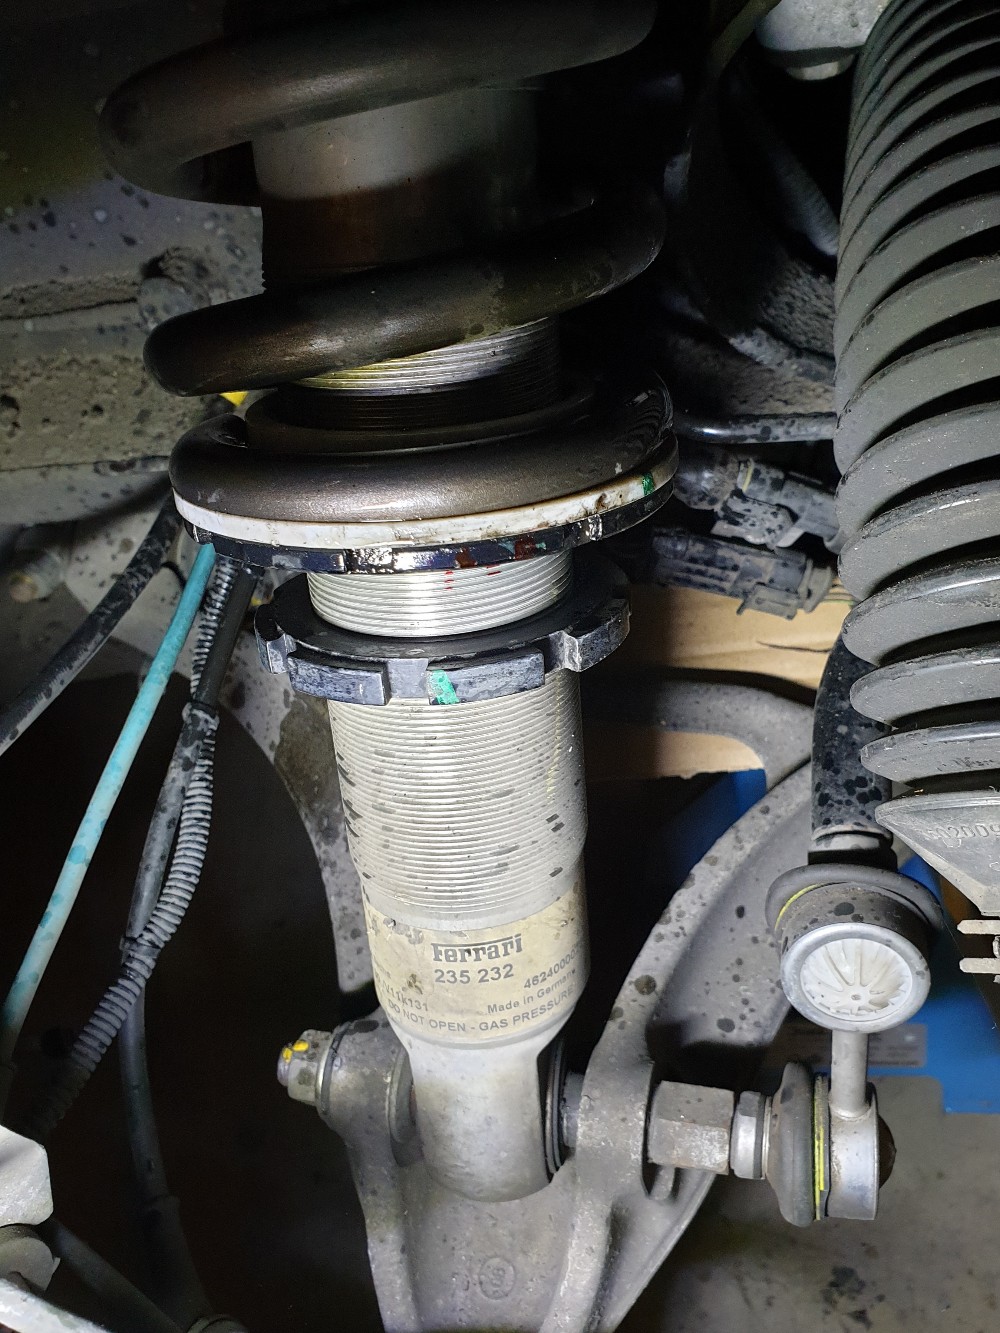
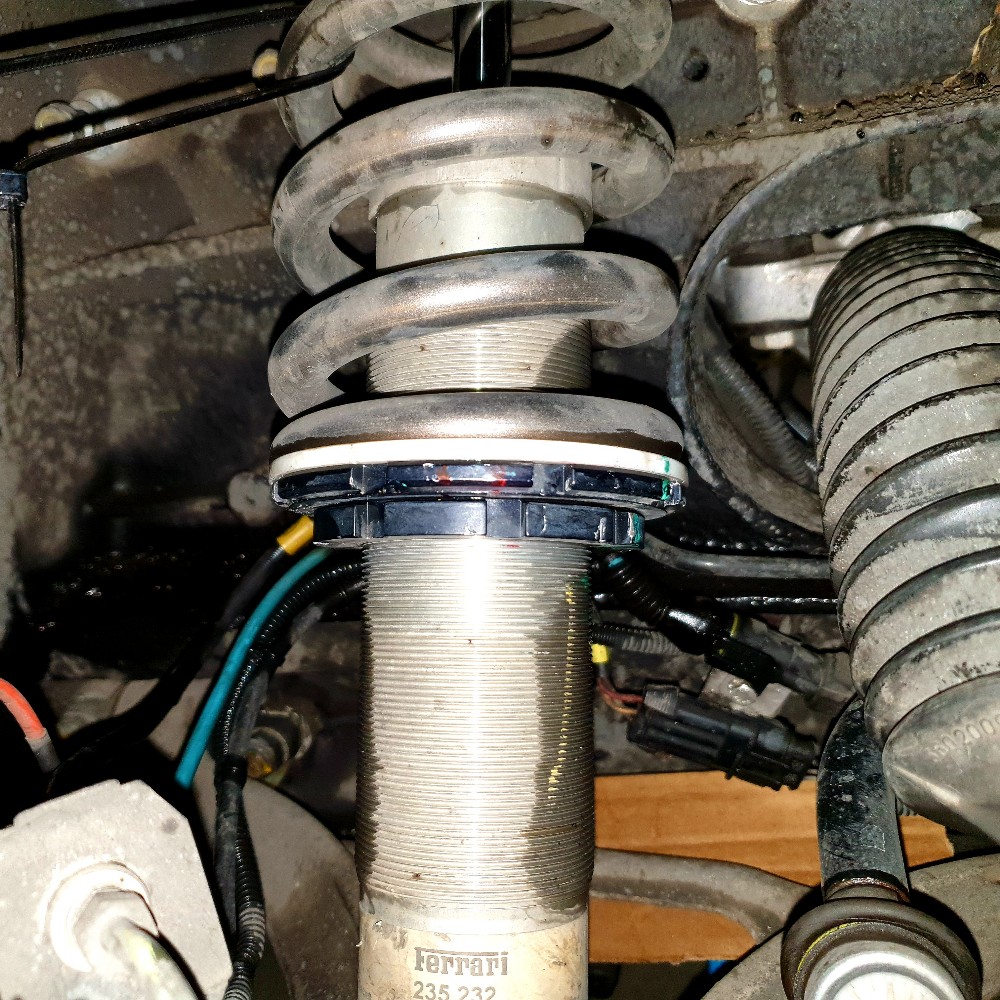
Based on experience of doing this to my last F430 I didn't expect this to be a quick job, but I found that thanks to Derlin rather than rubber spring seats, a little bit of cutting oil as lubricant enabled the seats to slide easily against the spring, negating the need to remove the assembly and compress the spring.
The front took an hour and a half from jacking up to refitting the wheels. I was pleased with that.
At some point over the winter I shall give everything a good spruse up
My goal is a height increase of 7mm. I knew from my previous measurements that the rake is within spec which means that I can adjust equally F&R. On Ferrarichat.com there is a very knowledgeable member with extensive experience of racing this platform, and thanks to him I had the motion ratio and mm/spring seat turn data:
F430GT said:
The motion ratio as I had it measured is 0.571 in front axle and 0.564 in the rear axle.
Every turn on the stock spring perches drops/increases the shock height by 1.5mm, then you apply the motion ratio, and the chassis will move up/down by (1.5 /0.571) 2.63mm at the front axle, (1.5 / 0.564) 2.66 mm at the rear axle.
Three turns would raise by 7.89 at the front and 7.98 at the rear, though I will calculate it and adjust so that it's equal to the front. I'll go with this and see how it is Every turn on the stock spring perches drops/increases the shock height by 1.5mm, then you apply the motion ratio, and the chassis will move up/down by (1.5 /0.571) 2.63mm at the front axle, (1.5 / 0.564) 2.66 mm at the rear axle.
Tools for the job: I removed the upper wishbone in order to improve access. I used 68-72mm and 85-105mm C spanners to adjust the shocks, and a Sharpie to mark damper body and spring seat.
Based on experience of doing this to my last F430 I didn't expect this to be a quick job, but I found that thanks to Derlin rather than rubber spring seats, a little bit of cutting oil as lubricant enabled the seats to slide easily against the spring, negating the need to remove the assembly and compress the spring.
The front took an hour and a half from jacking up to refitting the wheels. I was pleased with that.
At some point over the winter I shall give everything a good spruse up
Suspension adjustment is finished. After accounting for driver ballast weight the final target measurements were as below:
Left front
2.25 turns x 2.63mm = 5.92mm increase.
New height: 116mm + 5.92mm = 121.92mm
Right front
3 turns x 2.63mm = 7.89mm increase.
New height: 115mm + 7.89mm = 122.89mm
Left rear
2.25 turns x 2.66mm = 5.98mm increase.
New height: 141mm + 5.98mm = 146.98mm
Right rear
3 turns x 2.66mm = 7.98mm increase.
New height: 140mm + 7.97mm = 147.97mm
Like most aspects of car design and configuation suspension setup is all about compromises. Ferrari specify ballast weight for both driver and passenger but because I rarely drive 10/10ths with a passenger I chose to make the setup optimal for driver-only; this results in the ~1mm increased ride height on the driver's side.
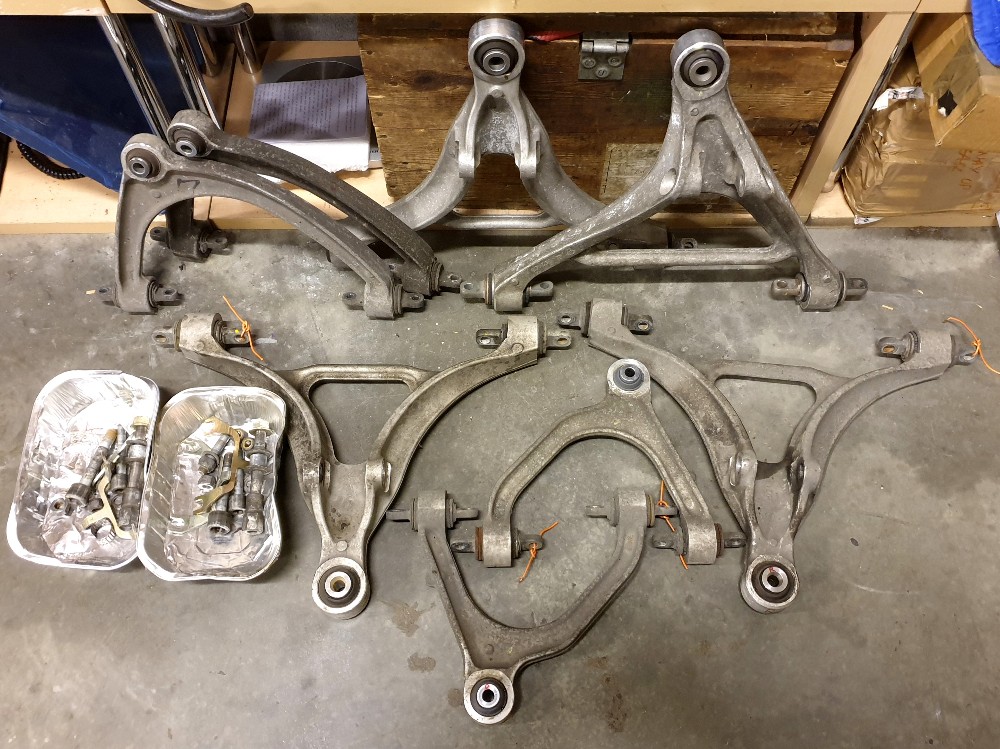
With the adjustments finished I stripped the suspension ready to send the wishbones for vapour/aqua blasting.
Left front
2.25 turns x 2.63mm = 5.92mm increase.
New height: 116mm + 5.92mm = 121.92mm
Right front
3 turns x 2.63mm = 7.89mm increase.
New height: 115mm + 7.89mm = 122.89mm
Left rear
2.25 turns x 2.66mm = 5.98mm increase.
New height: 141mm + 5.98mm = 146.98mm
Right rear
3 turns x 2.66mm = 7.98mm increase.
New height: 140mm + 7.97mm = 147.97mm
Like most aspects of car design and configuation suspension setup is all about compromises. Ferrari specify ballast weight for both driver and passenger but because I rarely drive 10/10ths with a passenger I chose to make the setup optimal for driver-only; this results in the ~1mm increased ride height on the driver's side.
With the adjustments finished I stripped the suspension ready to send the wishbones for vapour/aqua blasting.
Have a watch of this, its pretty interesting about Ferraris factory set ups,
https://www.youtube.com/watch?v=bnT-vz1RjL4&t=...
https://www.youtube.com/watch?v=bnT-vz1RjL4&t=...
Lord-Haggis said:
Have a watch of this, its pretty interesting about Ferraris factory set ups,
https://www.youtube.com/watch?v=bnT-vz1RjL4&t=...
Thank you for that - good video. He covers everything really well e.g. the later cars (458 onwards) have overly sensitive controls in order to give the impression to the average driver that something has improved, but the factory approach to geo setup actuually goes back a long way. https://www.youtube.com/watch?v=bnT-vz1RjL4&t=...
On my car I've gone from front toe out to 0°, I've added more shims to the front lower wishbone rear mount to increase castor, more F+R camber, and slightly less rake. It's a different car.
Of all the 130 kilograms so far lost the 24.97kg of unsprung weight is by far the most transformative, so whilst the suspension is apart I've done a small study on the unsprung assemblies to see what remaining parts can be weight optimised.
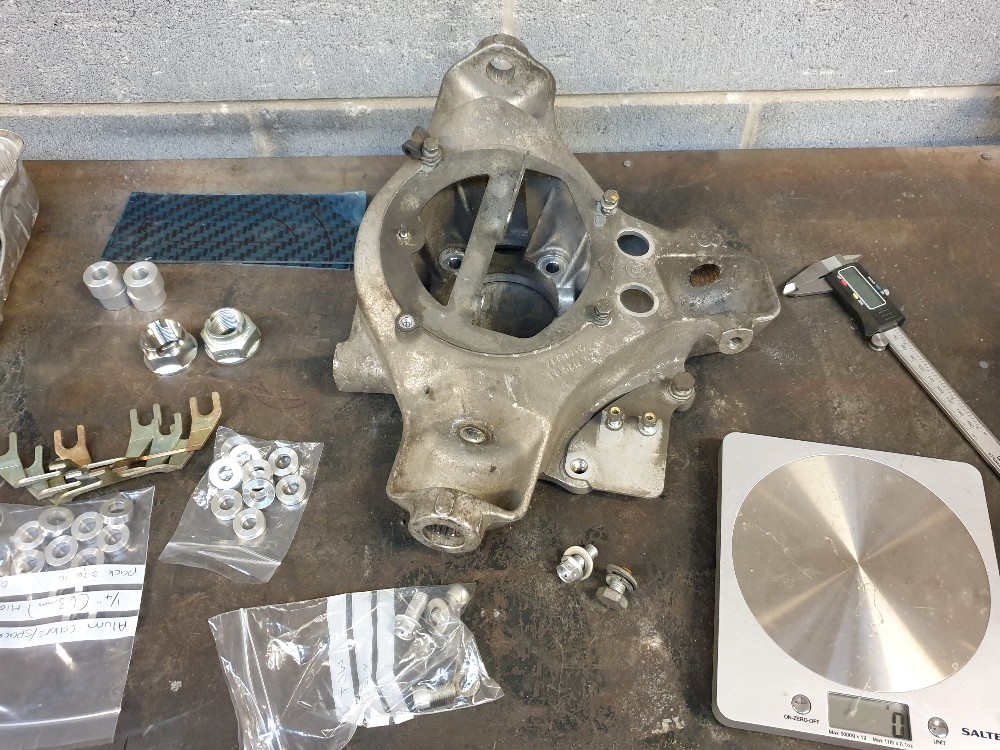
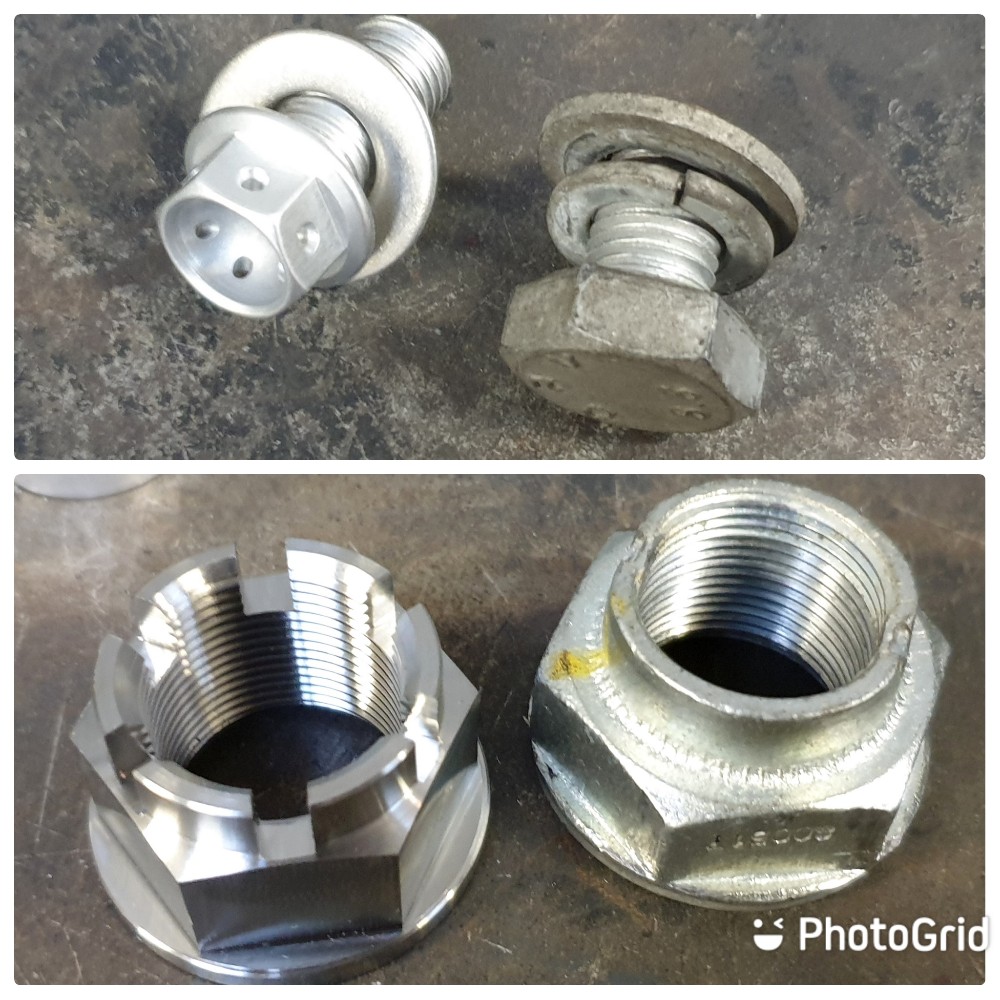
There are some non-load-bearing fastenings that can be replaced with aluminium for maximum weight saving - approximately 1/3 the weight of steel - and certain load-bearing parts that may be remanufactured in Titanium 6AL-4V, commonly known as grade 5. Ti parts are roughly 1/2 the weight of their steel equivalent.
I've commissioned the first Ti parts and there will be more to follow.
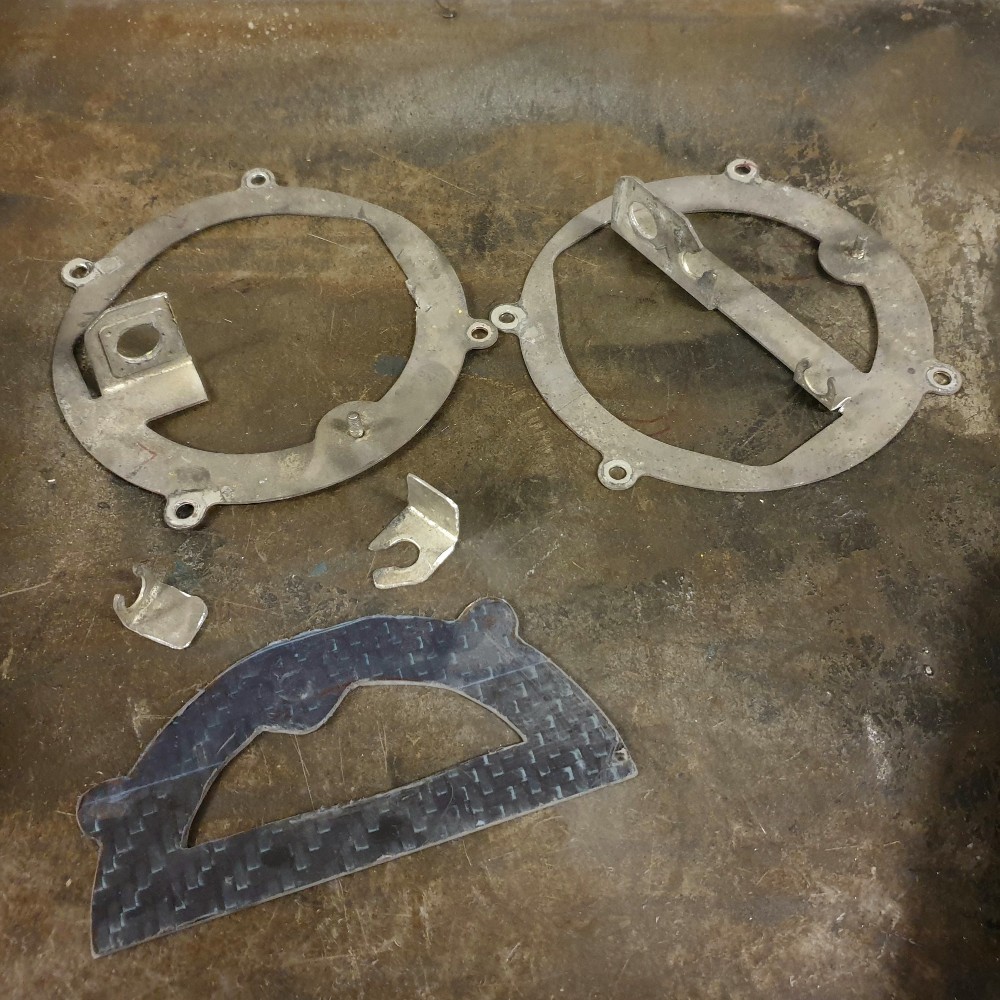
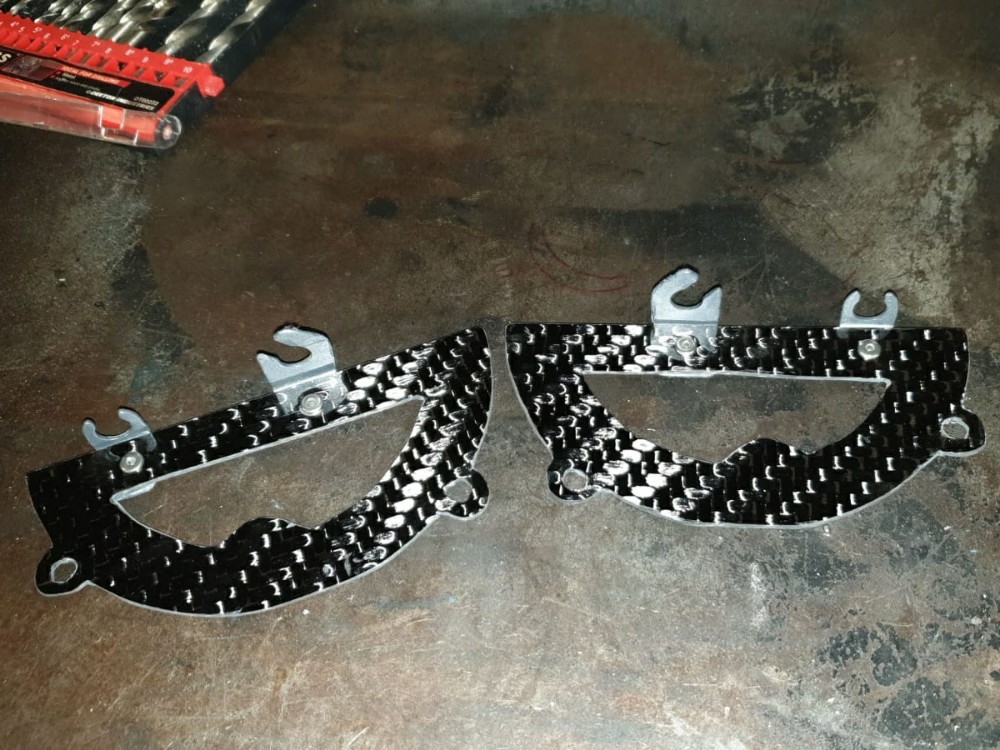
I've designed a weight-optimised brake line for the front end which does away with a secondary bulkhead fitting and length of steel pipe. More on that later, but another benefit of this approach is a redesign of the 0.3kg steel brake line brackets which now need only support cables from the suspension, ABS, and pad wear sensors. I've made new versions from 2mm pre-preg carbon.
Unrelated to the unsprung suspension assembly, but last year when I had the soft top roof cover remade in carbon I planned to remake some of the fastenings in aluminium, where appropriate. I've now done that. Primer and paint to follow before they are fitted.
There are some non-load-bearing fastenings that can be replaced with aluminium for maximum weight saving - approximately 1/3 the weight of steel - and certain load-bearing parts that may be remanufactured in Titanium 6AL-4V, commonly known as grade 5. Ti parts are roughly 1/2 the weight of their steel equivalent.
I've commissioned the first Ti parts and there will be more to follow.
I've designed a weight-optimised brake line for the front end which does away with a secondary bulkhead fitting and length of steel pipe. More on that later, but another benefit of this approach is a redesign of the 0.3kg steel brake line brackets which now need only support cables from the suspension, ABS, and pad wear sensors. I've made new versions from 2mm pre-preg carbon.
Unrelated to the unsprung suspension assembly, but last year when I had the soft top roof cover remade in carbon I planned to remake some of the fastenings in aluminium, where appropriate. I've now done that. Primer and paint to follow before they are fitted.

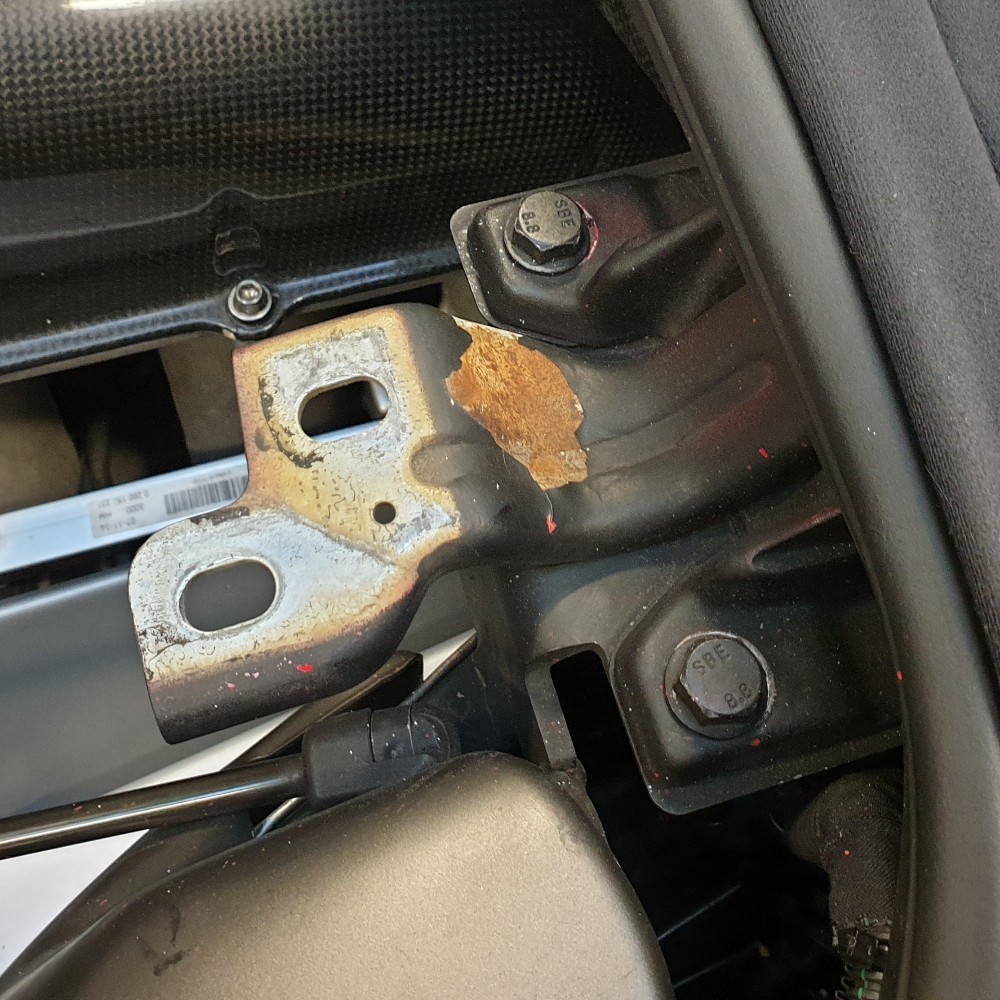
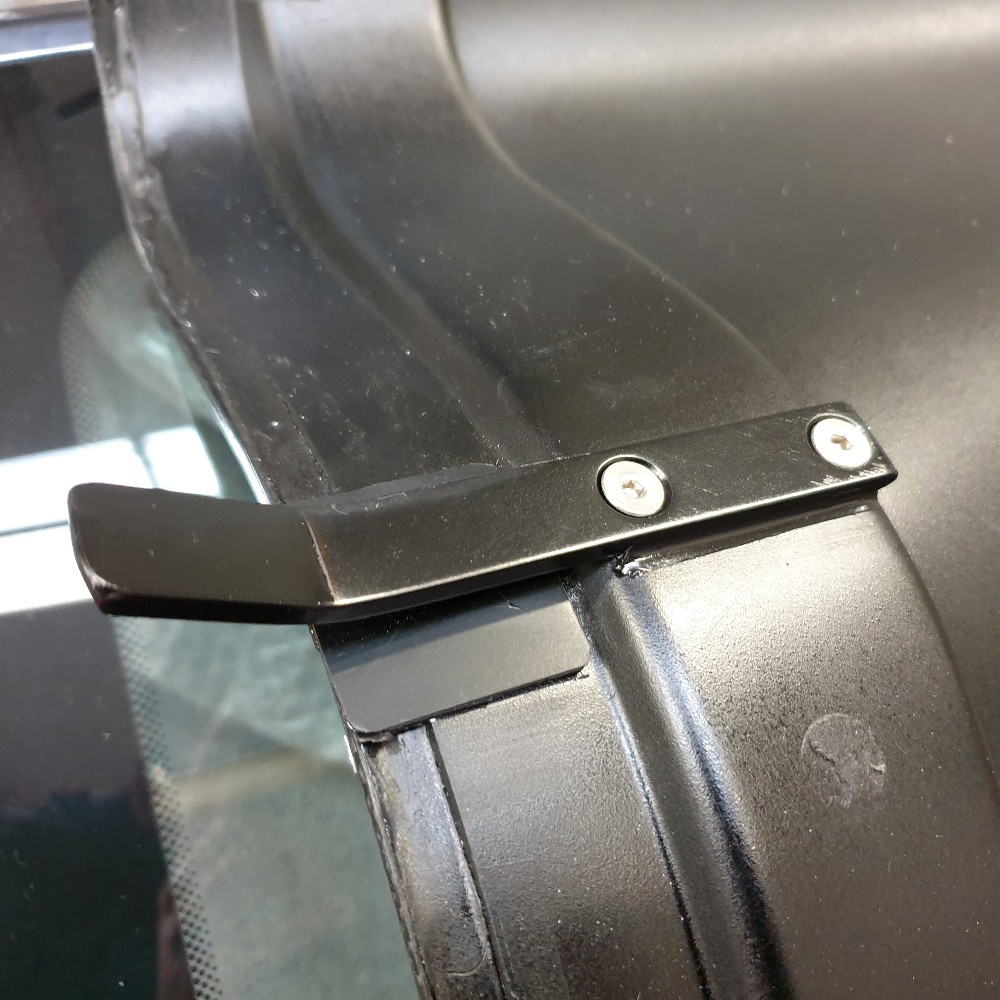
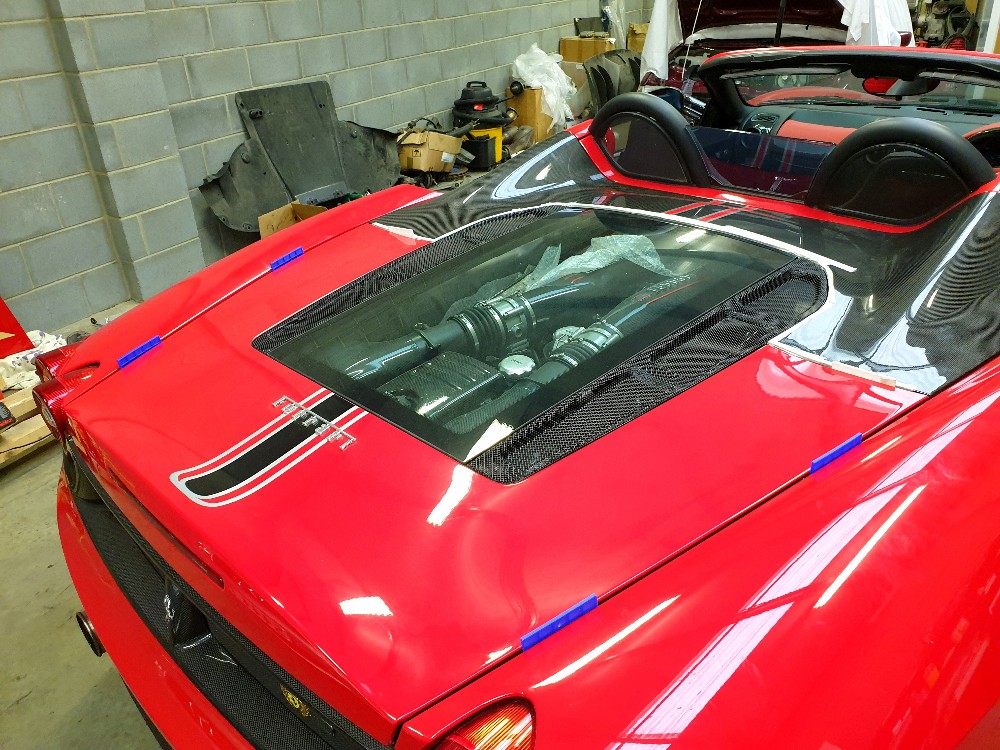
Back on to something less interesting and another winter job to repaint the engine lid hinges. The engine lid is easy to remove but surprisingly heavy - I hope that my lexan screen will improve things here.
Here is the offending article; it's the usual story of poor prep for the black painted parts. I sanded down, applied Kurust, etch primer, then a thick coat of satin black.

Much better. I did both sides.
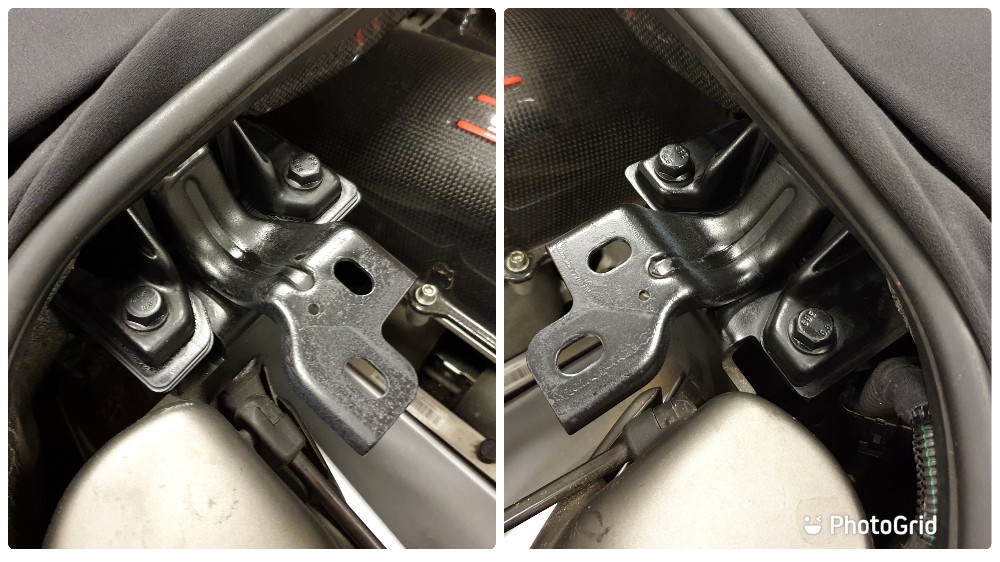
I checked panel gaps around everything and tweaked if necessary. I use glazing packers wrapped in masking tape - from memory 2.5mm.
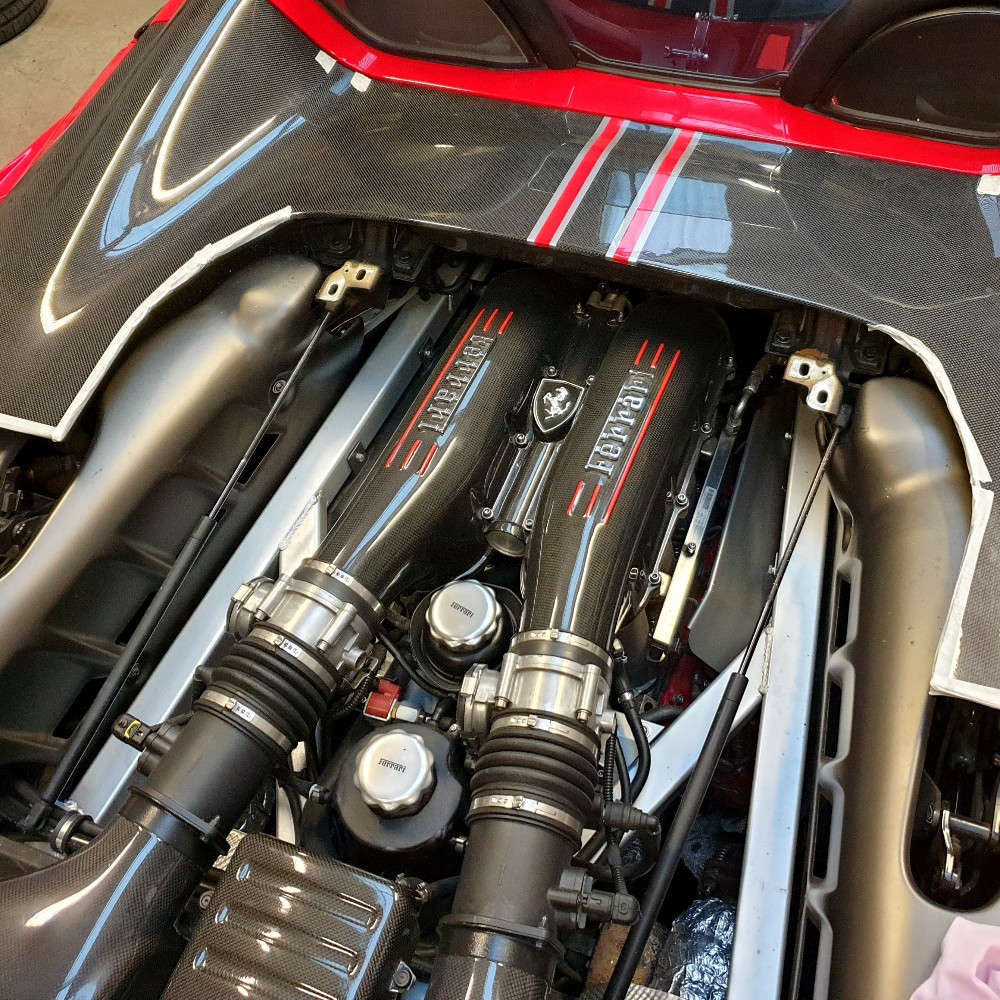
Engine shot.
Here is the offending article; it's the usual story of poor prep for the black painted parts. I sanded down, applied Kurust, etch primer, then a thick coat of satin black.
Much better. I did both sides.
I checked panel gaps around everything and tweaked if necessary. I use glazing packers wrapped in masking tape - from memory 2.5mm.
Engine shot.
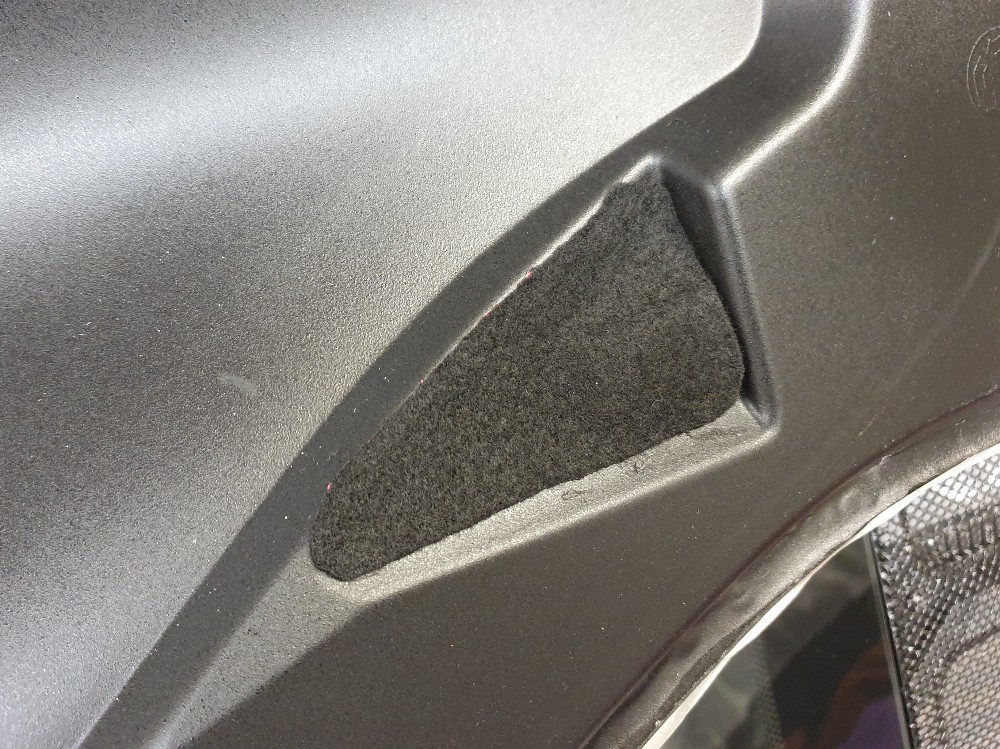

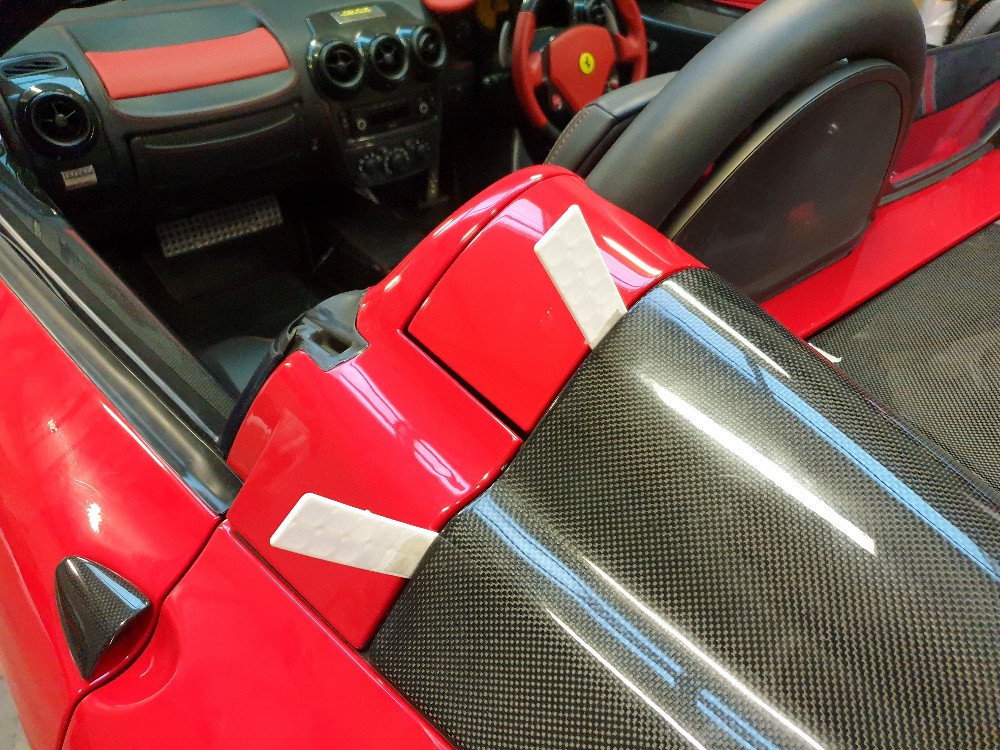
The drivers side door seal had split above the rear view mirror mount.
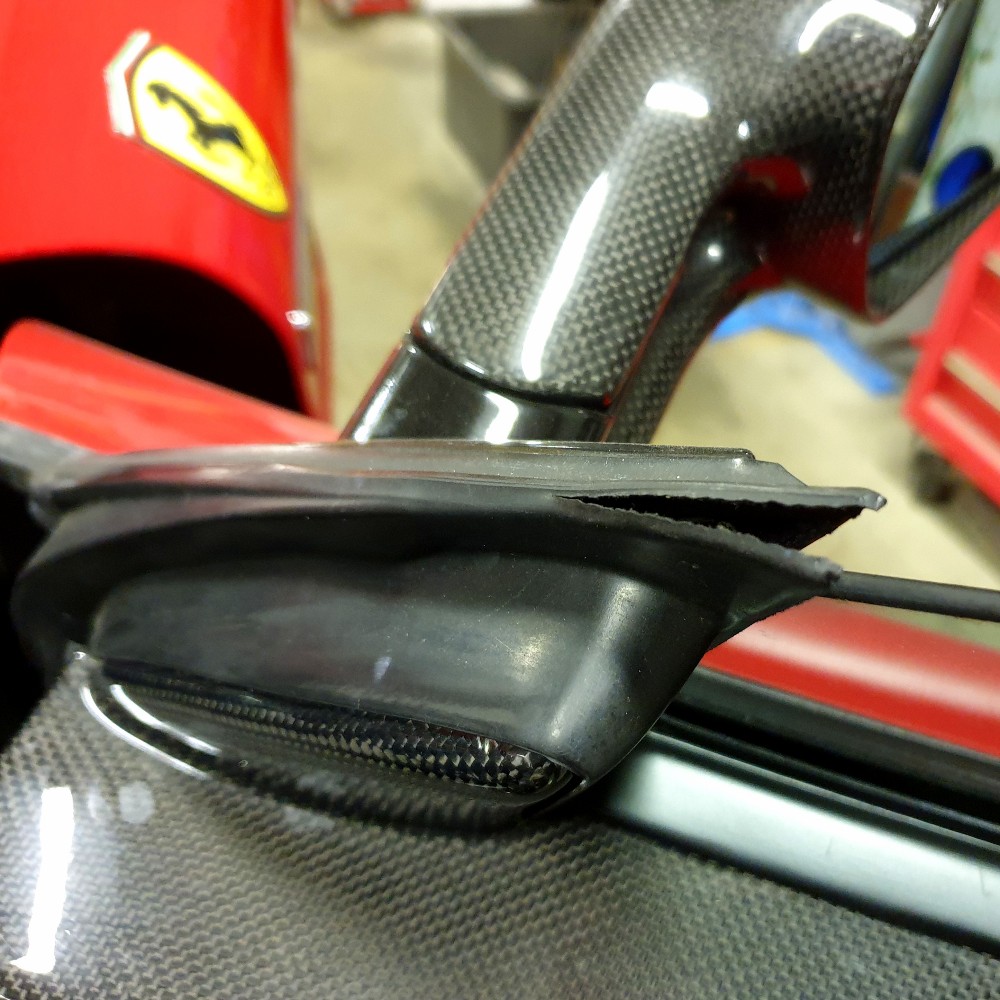
I came up with the idea of repairing it with a bicycle inner tube repair kit. Some kits are available with a large patch of rubber rather than the little pads, so I got one of those and made a template of the top edge of the broken seal and cut it from the patch.
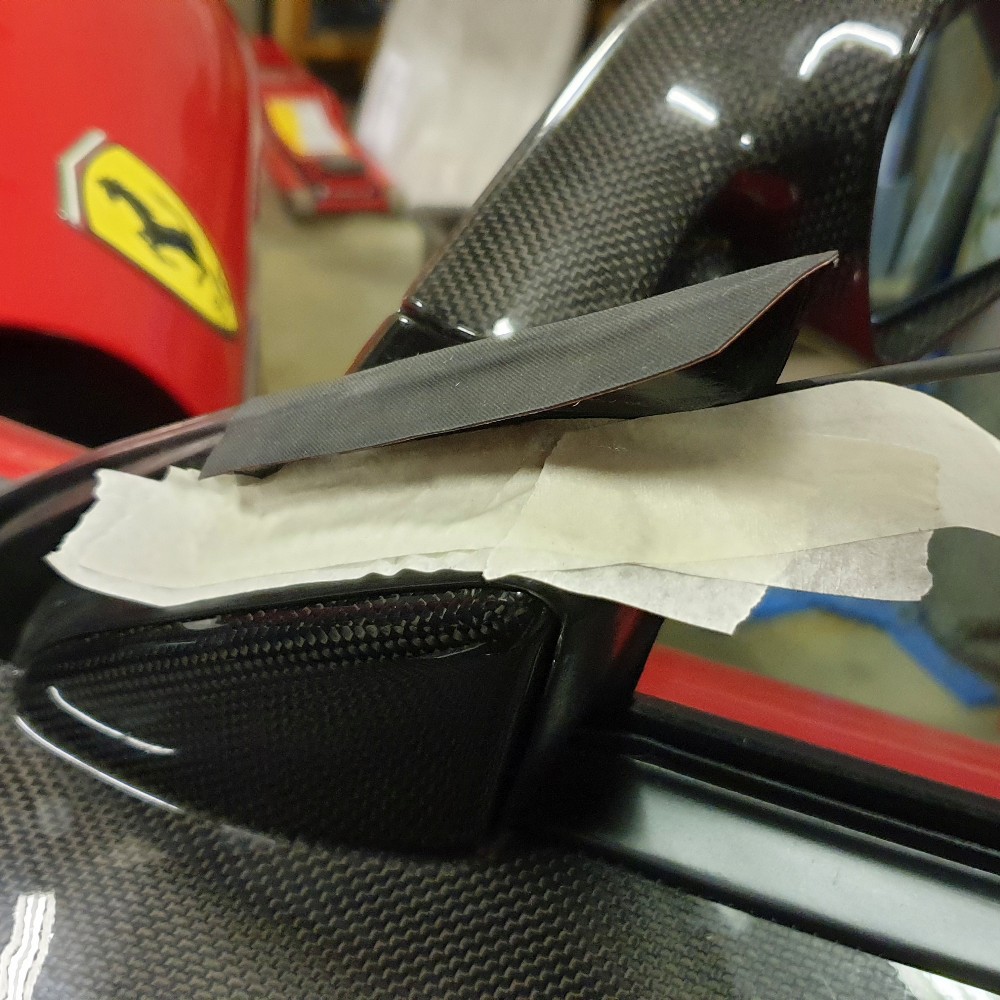
It turned out OK. I don't think that it's worth replacing the seal for this.
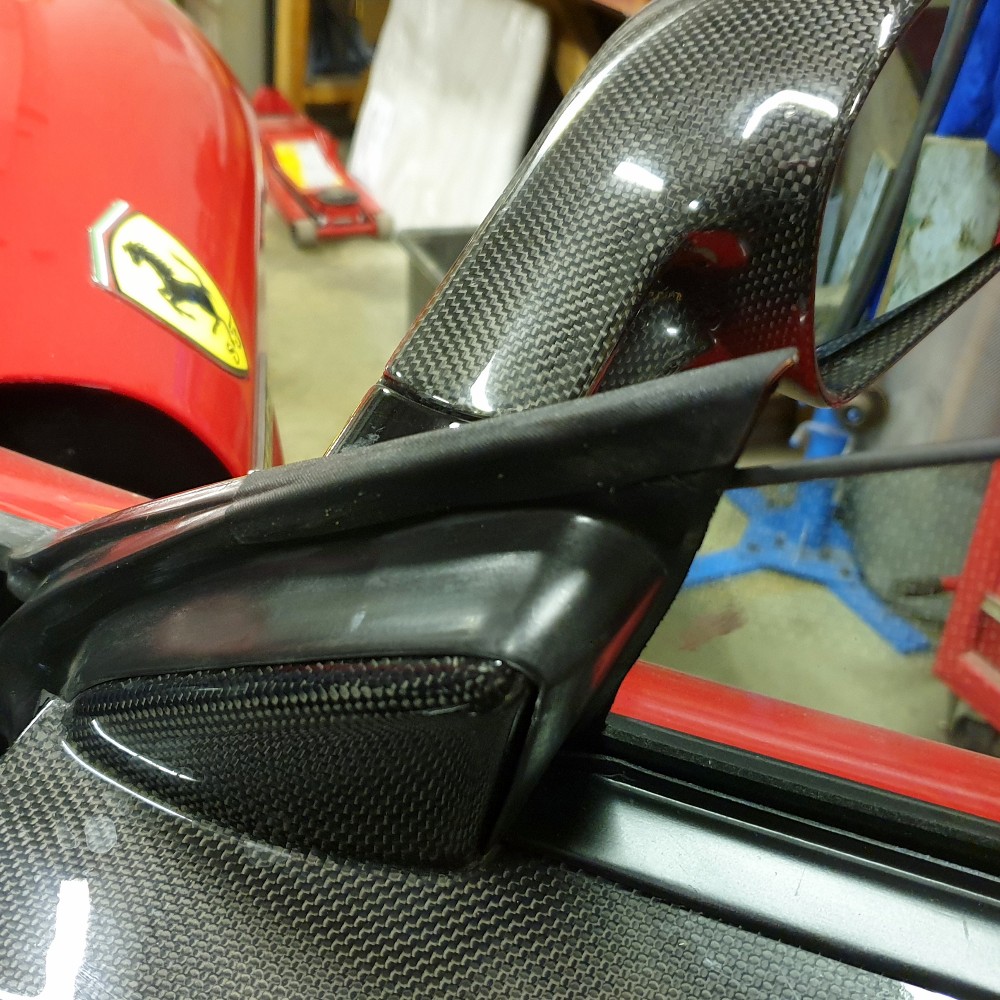
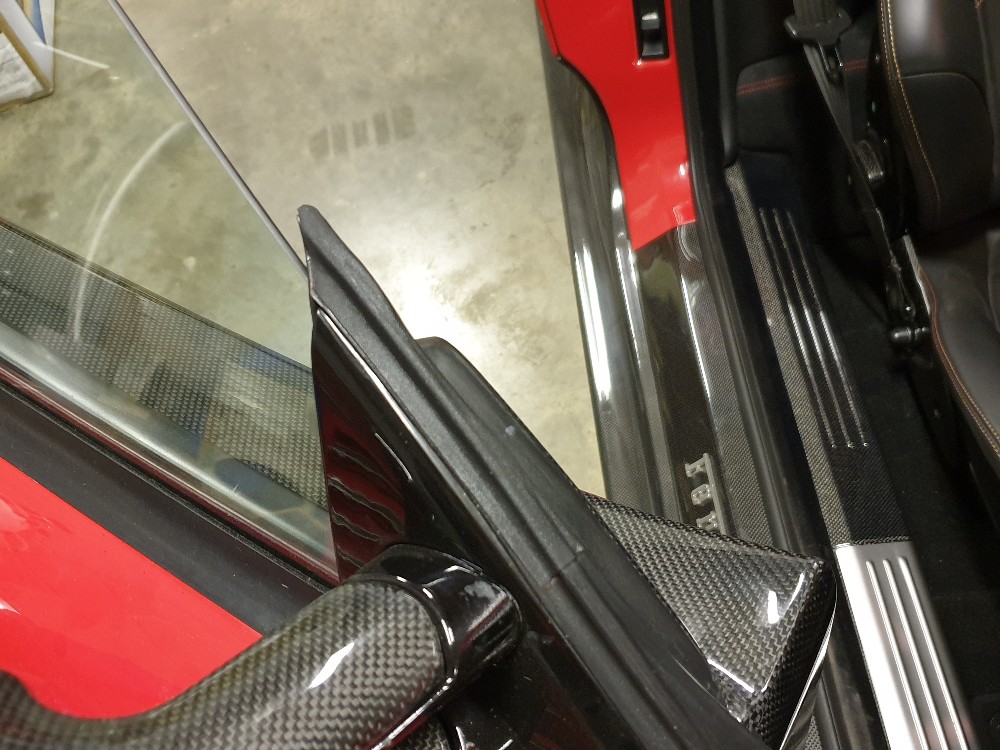
It's invisible with the door shut.

I came up with the idea of repairing it with a bicycle inner tube repair kit. Some kits are available with a large patch of rubber rather than the little pads, so I got one of those and made a template of the top edge of the broken seal and cut it from the patch.
It turned out OK. I don't think that it's worth replacing the seal for this.
It's invisible with the door shut.
Gassing Station | Readers' Cars | Top of Page | What's New | My Stuff