Race Car Rebuild
Discussion


Part 5
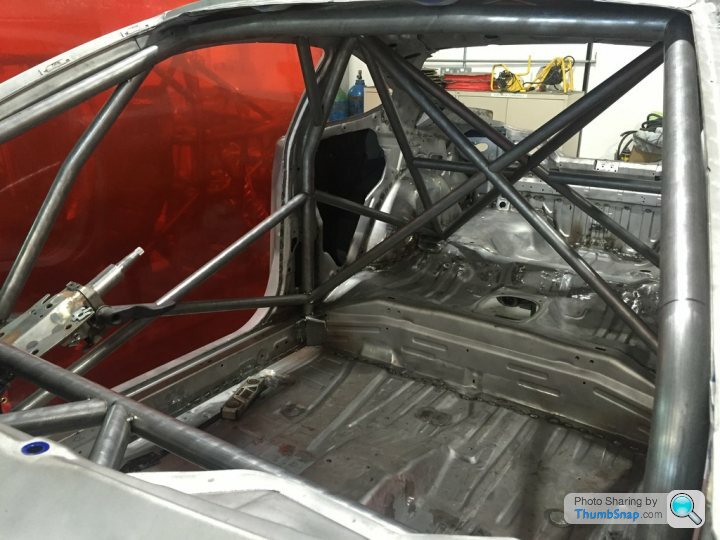
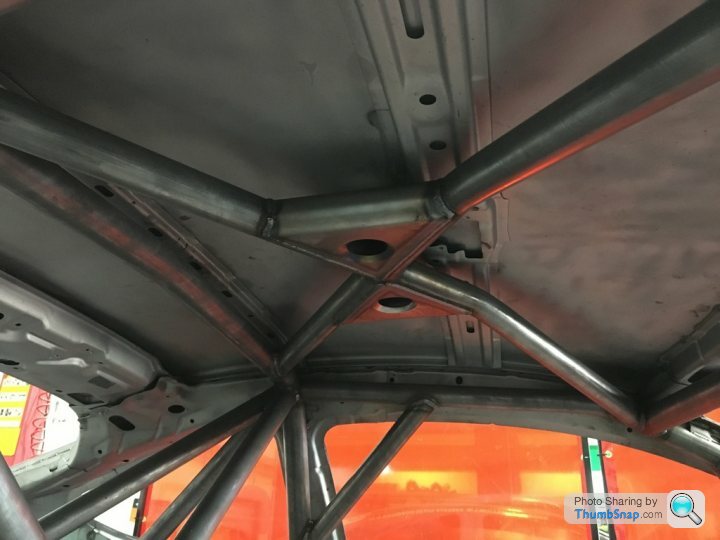
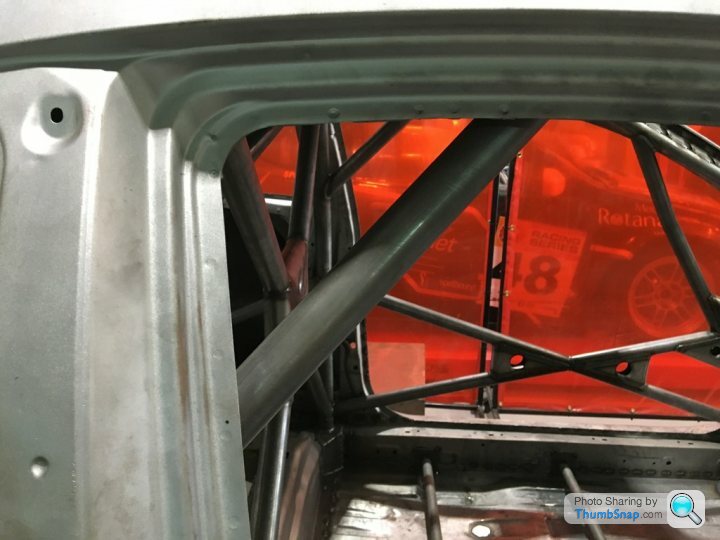
So, something new to me (having never installed a cage before) is..... How do you weld the bits at the top of the roll cage which are tight to the underside of the roof? Many of you maybe saying... That's easy dummy and so it is.... When you know how. I knew (well I did research for the update on our website on the roll cage) but others might not, so some may it interesting to learn how.
Actually there are two ways:
1.You cut the roof off, weld and refit the roof.
2.You fabricate up the cage in-situ by tack welding together, cut holes in the floor beside the vertical mounting points, remove the lateral supports and drop the cage 50-100mm through the floor, weld 360-degree's around the tops of the cage connection points and then lift the cage back into place and make solid base mounting plates.
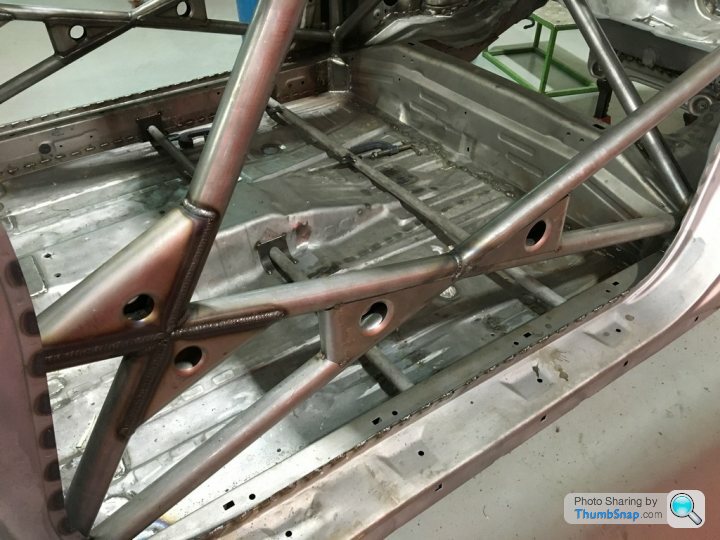
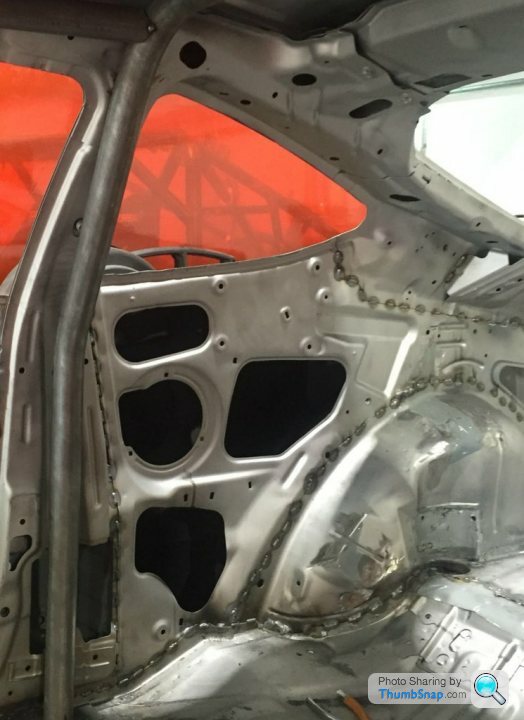
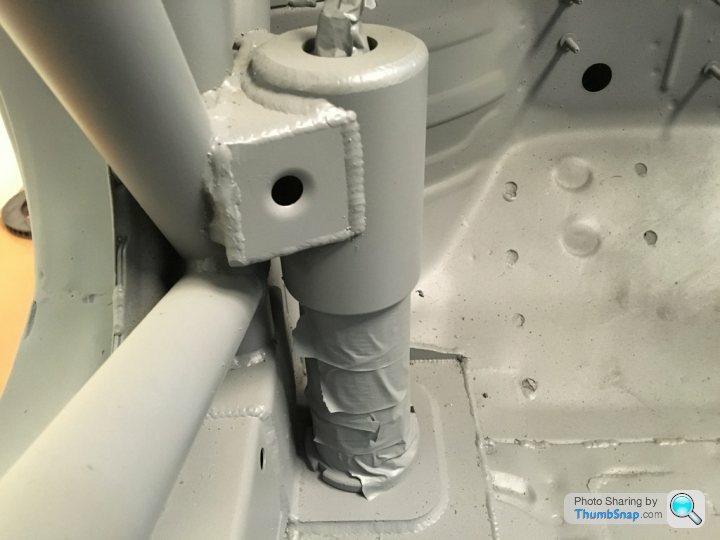
If you look at the mounting point in the below image, there is a pre-cut hole and the cage is tack welded in place. That will then be ground off to allow the cage to drop.
I’m not experienced in welding but when something looks right it probably is 😊
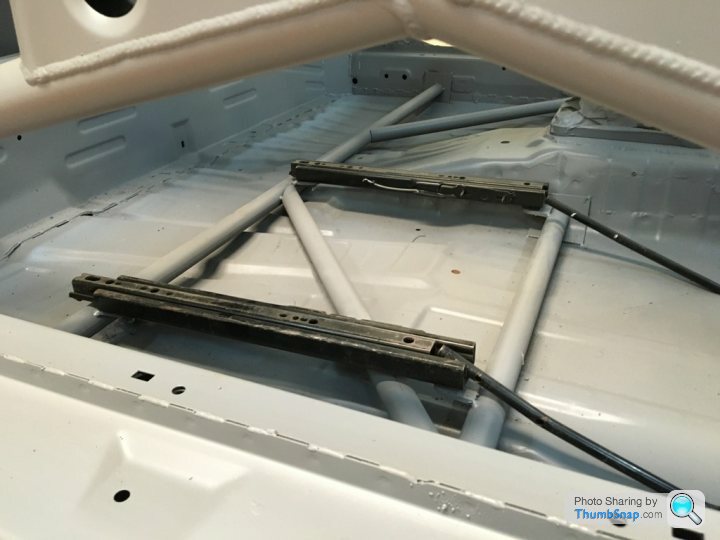
The last thing to talk about today is the seat mounting points. We asked Saluki to make provision for driver and passenger seats because we may wish to take sponsors on taxi rides at the 24-Hrs event.
The seat bars are secured to the sills of the car and fitted as close to the floor as possible. We are using Corbeau Revenge seat supplied by Jon of MotorsportWheels, Dubai so the fixing points are set out to the Corbeau seat frames.
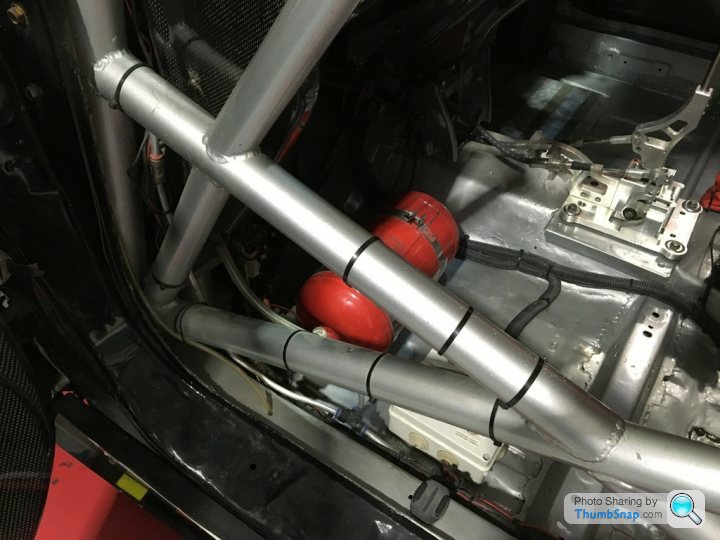
Next up is the 100L fuel cell and just how we are going to squeeze it between the 'X' bars of the cage. Stay tuned for part 6 as this bit is quite cool....
So, something new to me (having never installed a cage before) is..... How do you weld the bits at the top of the roll cage which are tight to the underside of the roof? Many of you maybe saying... That's easy dummy and so it is.... When you know how. I knew (well I did research for the update on our website on the roll cage) but others might not, so some may it interesting to learn how.
Actually there are two ways:
1.You cut the roof off, weld and refit the roof.
2.You fabricate up the cage in-situ by tack welding together, cut holes in the floor beside the vertical mounting points, remove the lateral supports and drop the cage 50-100mm through the floor, weld 360-degree's around the tops of the cage connection points and then lift the cage back into place and make solid base mounting plates.
If you look at the mounting point in the below image, there is a pre-cut hole and the cage is tack welded in place. That will then be ground off to allow the cage to drop.
I’m not experienced in welding but when something looks right it probably is 😊
The last thing to talk about today is the seat mounting points. We asked Saluki to make provision for driver and passenger seats because we may wish to take sponsors on taxi rides at the 24-Hrs event.
The seat bars are secured to the sills of the car and fitted as close to the floor as possible. We are using Corbeau Revenge seat supplied by Jon of MotorsportWheels, Dubai so the fixing points are set out to the Corbeau seat frames.
Next up is the 100L fuel cell and just how we are going to squeeze it between the 'X' bars of the cage. Stay tuned for part 6 as this bit is quite cool....
If I'm doing a cage that has to be up against the roof I generally make the mounting plates more of a box the cage sits on, then you can tack up, knock the boxes out to drop the cage down, weld it, lift it, knock the boxes/feet back under and weld up without touching the chassis (well, no more than already required anyway.
The advantage over cutting holes is you can angle the cage around inside more easily to get nice welds behind the windscreen, etc.
Windscreen cracking is usually chassis flex as you said - we've done one or two when we've landed on a rock or something on a landing and the frame goes bannana shaped - T45 has a lot more spring than glass
Part 6
Ok before we go on to the tank we'll give an update as to where things are now.
Firstly the cage is pretty much complete with the exception of some final welds in certain places.
Door bars:
Roof section:
Seat rails in place:
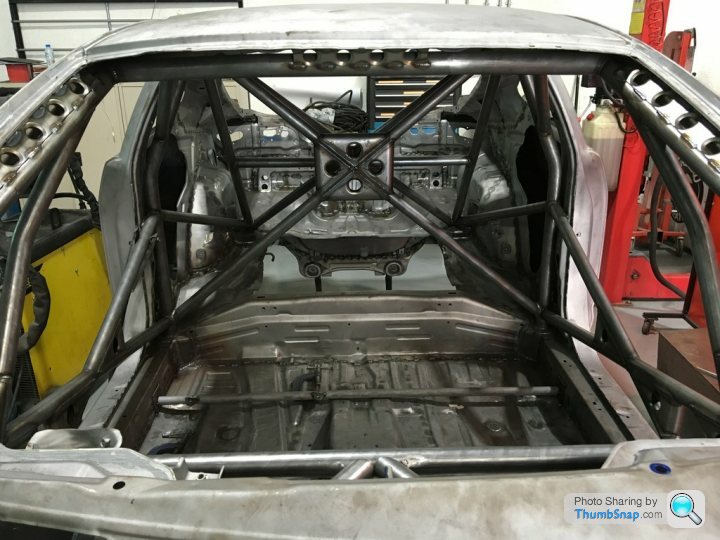
Main cage X section completed.
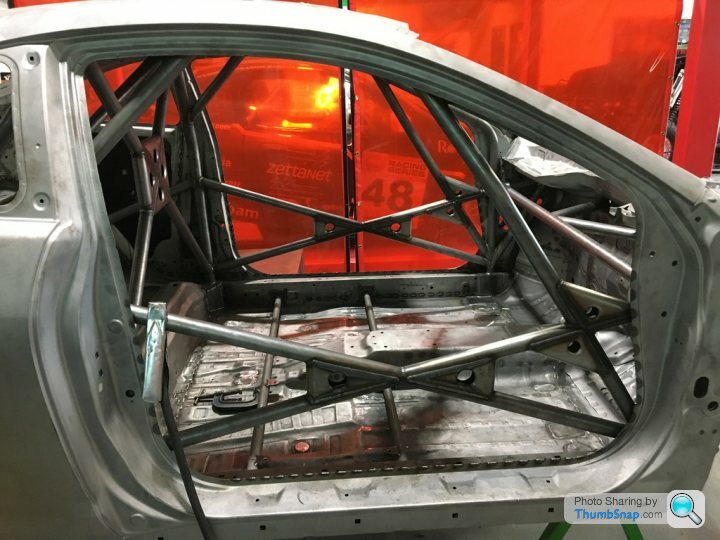
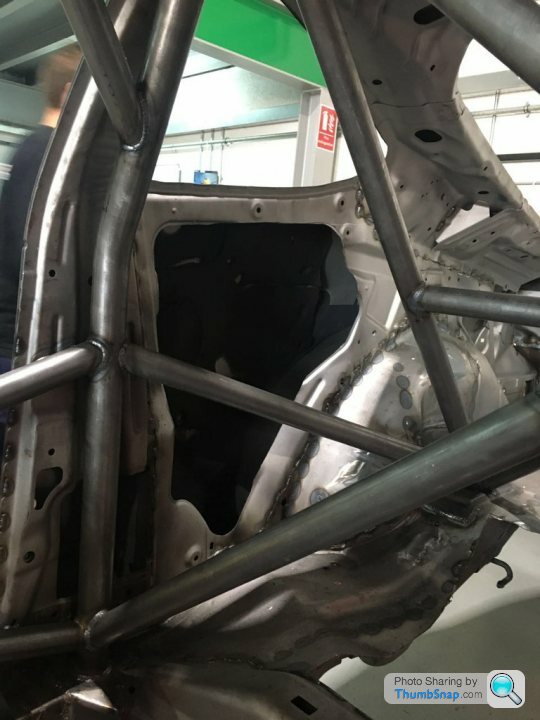
One of the problems we had with the previous Custom cages design was the positioning of the 45-degree support bar at the door. Firstly this restricted the access and secondly it fouled our Corbeau seat to the point whereby we had to hack a section out of the centre tunnel, which in turn led us to moving the pedal box and eventually moving the steering column. (I did mention we were stubborn earlier in the thread!)
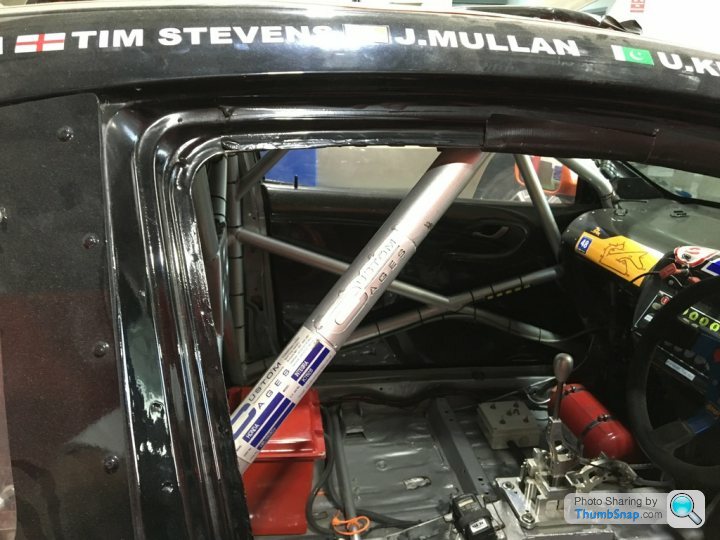
So this time no such mods required. Saluki were able to move the support back whilst still being fully compliant with the FIA (Appendix J) regulations. Should also mention that the CC previous cage was 45mm throughout whereas we are now using 38mm with the exception of the main roll bar and the bar above the screen.
Previous:
New:
Stay tuned for part 7...
Ok before we go on to the tank we'll give an update as to where things are now.
Firstly the cage is pretty much complete with the exception of some final welds in certain places.
Door bars:
Roof section:
Seat rails in place:
Main cage X section completed.
One of the problems we had with the previous Custom cages design was the positioning of the 45-degree support bar at the door. Firstly this restricted the access and secondly it fouled our Corbeau seat to the point whereby we had to hack a section out of the centre tunnel, which in turn led us to moving the pedal box and eventually moving the steering column. (I did mention we were stubborn earlier in the thread!)
So this time no such mods required. Saluki were able to move the support back whilst still being fully compliant with the FIA (Appendix J) regulations. Should also mention that the CC previous cage was 45mm throughout whereas we are now using 38mm with the exception of the main roll bar and the bar above the screen.
Previous:
New:
Stay tuned for part 7...
Part 7
As you become 'used' to something you tend not to realise or appreciate when things are wrong. Take the example of the ever widening waistline, few kgs here and there and all of a sudden without any warning you are 10kgs overweight. Well the same happened to our trusty Honda. 4-paint jobs and 3-vinyl wrap schemes later and lots of filler and all of a sudden we were almost 100kgs over our 'sprint' spec weight just 2-years earlier.
So the aim this time is to stay fit and light from the start.
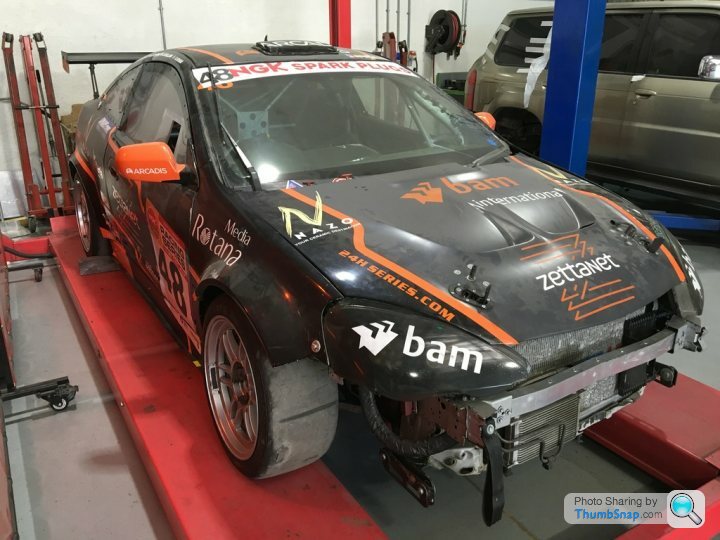
For those that don't know this is the old girl and whilst we moan about her putting on kgs, she did put us on the podium in 14 out of 16 races in 2013-14 so lets not be too hard.
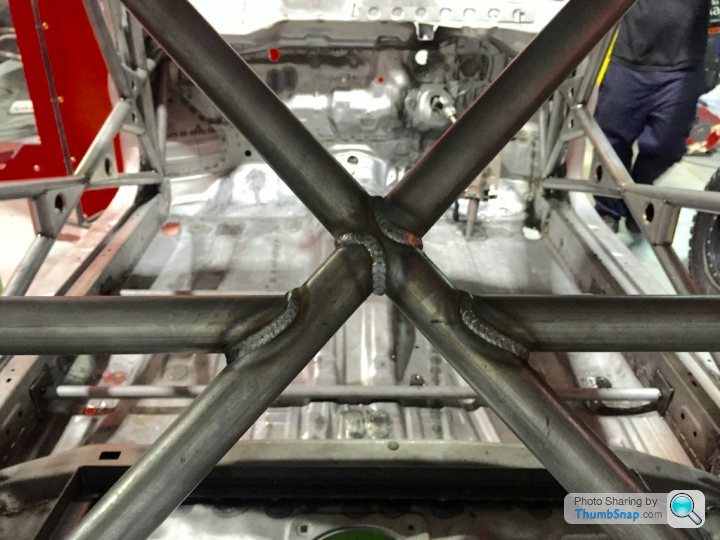
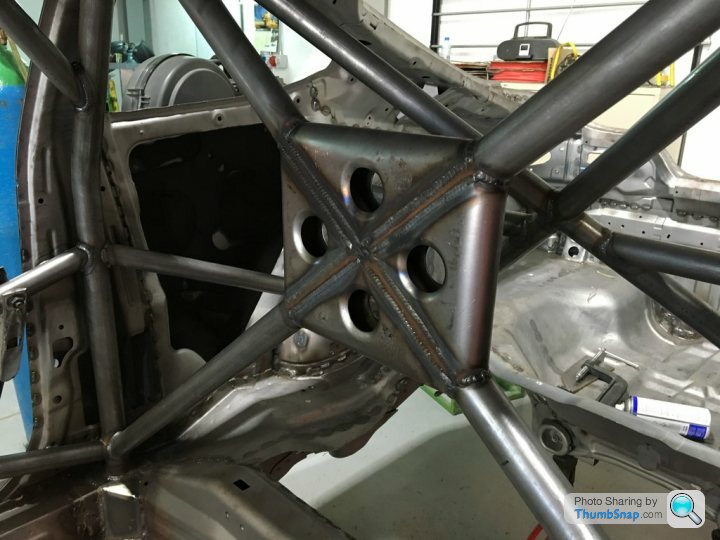
Speaking of wrong (in the same context of the previous point) below are a few examples of our previous cage quality when compared to the new cage.
Previous centre section of the X brace:
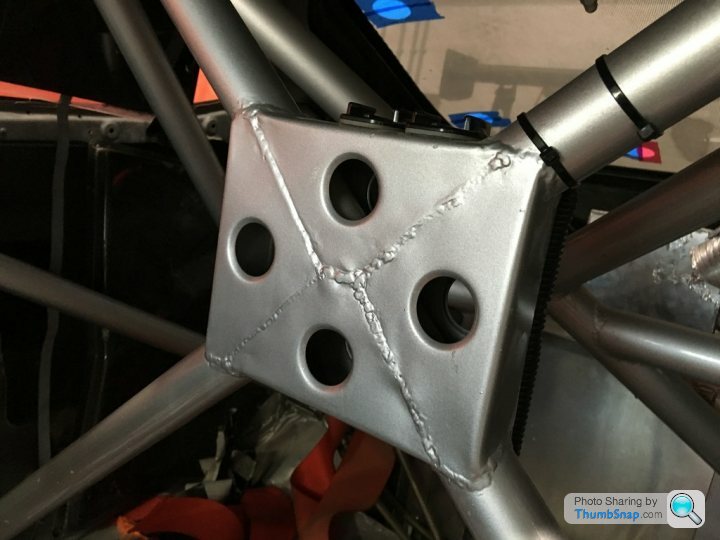
New:
Previous door bars:
New:
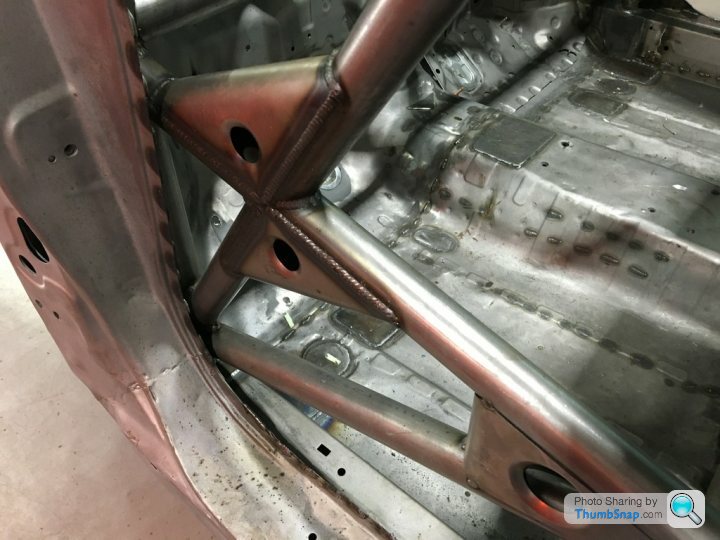
As you can see the quality is vastly improved.
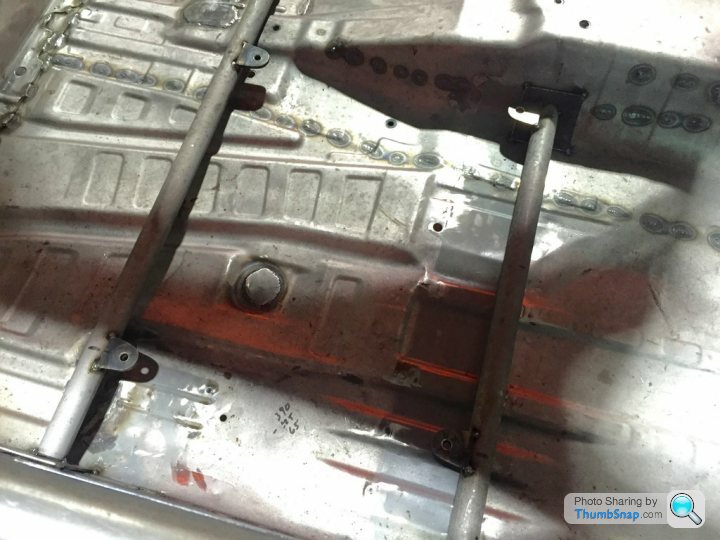
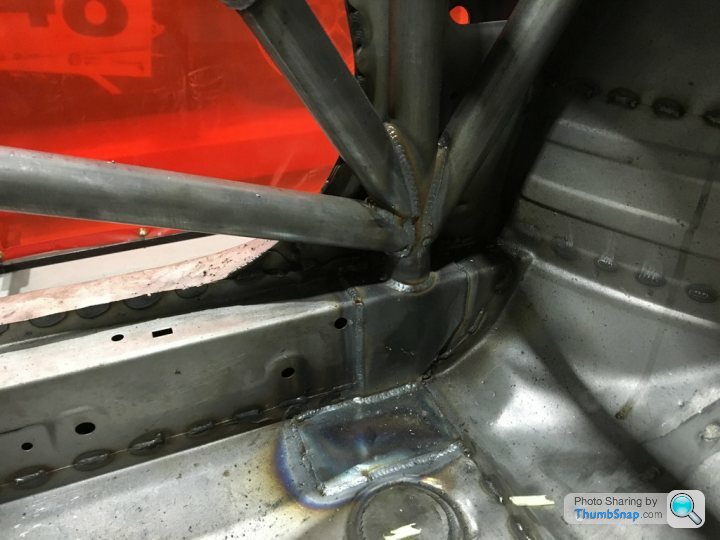
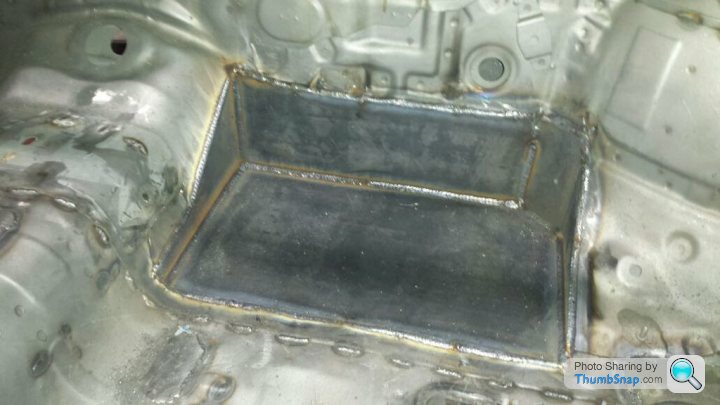
In the below image you can see where the floor was cut to drop the cage through to weld the top sections as mentioned previously:
Saluki reinforced the rear shock anchoring sections firstly to support the cage and secondly to give a robust foundation for the rear shocks to be fixed to.
We also went over the car with Saluki looking for areas were we could remove a little weight but not effect the structural integrity of the car. Below is one example of where we are able to remove a little bit of unnecessary metal.
Before:
After:
We have a carbon fibre infil panel to cover the new "hole".
At this stage there are only three main jobs left:
1. Air jacks
2. Pedal box
3. Fuel cell
Stay tuned for Part 8....
As you become 'used' to something you tend not to realise or appreciate when things are wrong. Take the example of the ever widening waistline, few kgs here and there and all of a sudden without any warning you are 10kgs overweight. Well the same happened to our trusty Honda. 4-paint jobs and 3-vinyl wrap schemes later and lots of filler and all of a sudden we were almost 100kgs over our 'sprint' spec weight just 2-years earlier.
So the aim this time is to stay fit and light from the start.
For those that don't know this is the old girl and whilst we moan about her putting on kgs, she did put us on the podium in 14 out of 16 races in 2013-14 so lets not be too hard.
Speaking of wrong (in the same context of the previous point) below are a few examples of our previous cage quality when compared to the new cage.
Previous centre section of the X brace:
New:
Previous door bars:
New:
As you can see the quality is vastly improved.
In the below image you can see where the floor was cut to drop the cage through to weld the top sections as mentioned previously:
Saluki reinforced the rear shock anchoring sections firstly to support the cage and secondly to give a robust foundation for the rear shocks to be fixed to.
We also went over the car with Saluki looking for areas were we could remove a little weight but not effect the structural integrity of the car. Below is one example of where we are able to remove a little bit of unnecessary metal.
Before:
After:
We have a carbon fibre infil panel to cover the new "hole".
At this stage there are only three main jobs left:
1. Air jacks
2. Pedal box
3. Fuel cell
Stay tuned for Part 8....

Holy crap the cage in the old shell looks like a bit of a mess!! The x-bar gussets won't do much welded like that as the welds are acting in shear to the bars... Although walking around the paddock at any club race meet as you'll see far worse examples of this go through scrutineering without question.
The new cage on the other hand looks great!! I take it you've gone for a full custom install this time? Looks like a proper job, would love to do a full bare shell build as you can really go to town on the detail. Being as I'm having to build my race car on the drive at home it's not really an option for me though, plus I'd probably get too carried away and it would never be finished!..
The new cage on the other hand looks great!! I take it you've gone for a full custom install this time? Looks like a proper job, would love to do a full bare shell build as you can really go to town on the detail. Being as I'm having to build my race car on the drive at home it's not really an option for me though, plus I'd probably get too carried away and it would never be finished!..

Part 8
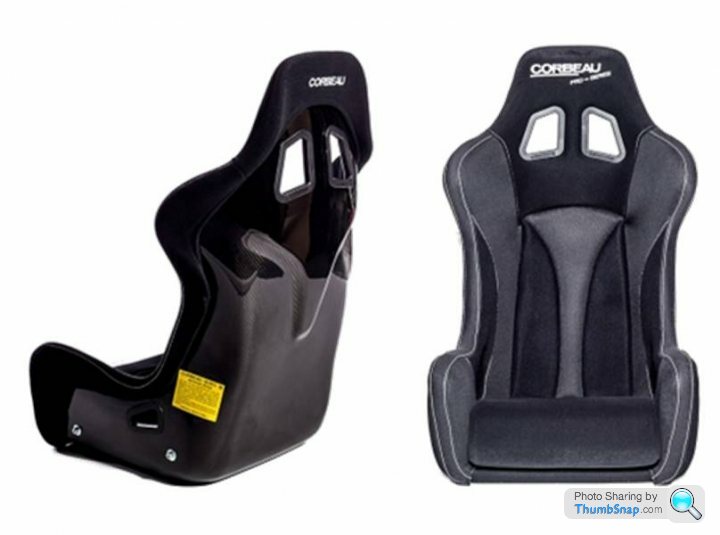
Well it seems we have a problem. Despite our best endeavors the Corbeau Revenge seat doesn't fit.
So we thought about the various options, took some measurements and in the end decided to opt for the Corbeau Pro Series seat.
http://www.corbeau-seats.com/motorsports-seats/pro...
As you can see from the description we are clearly not the first people to enounter this problem.
To be honest there are two advantages with this seat type that actually benefit us:
1. Its easier to get in and out of the car during driver changes.
2. The driver has better peripheral vision. (Which is useful with a grid of 100-cars).
So we've placed our order with the MotorsportWheels team and eagerly await delivery.
The old seat will either become an office chair or if I have my way, I will use it to replace one of the hard plastic seats on the pit perch 😊
Next up. Rear air jack and pedal box
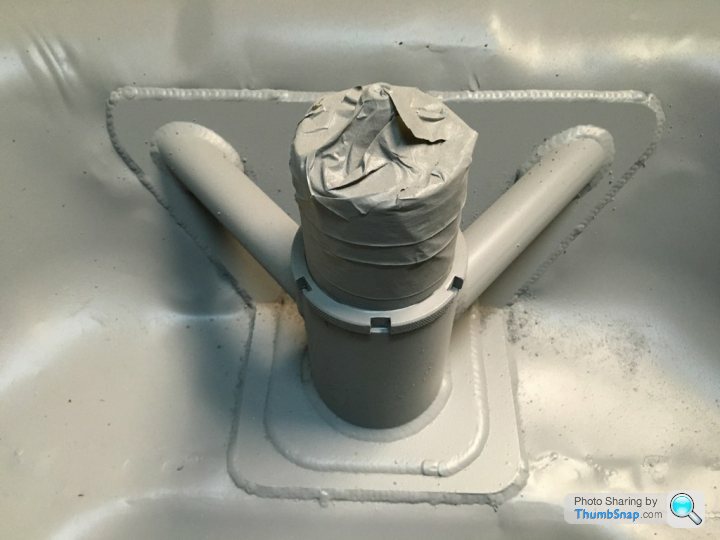
Last time we had located the rear jack right at the back of the car boot floor. The reason was because of the location of the fuel cell but because we are able to locate the fuel cell on the back seat this time we are able to locate the air jack more centrally.
This means its positioned closer to the main structure of the roll cage and therefore should not cause any flex in the shell when operated. Below is the rear mounting point.

In the Honda DC5 the firewall is angled where it meets the floor (where the conventional pedals are located) so to fit a race type pedal box. We've ordered the following AP Racing pedal box from our friends at MotorsportWheels.
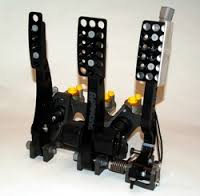
https://www.apracing.com/product_details/race_car/...
In order to fit this pedal box the floor requires modification to be a flat floor. Saluki have ensured that the boxed out section is extremely strong so that there will be no flex in the floor which could impact the effectiveness of the brake pedal.
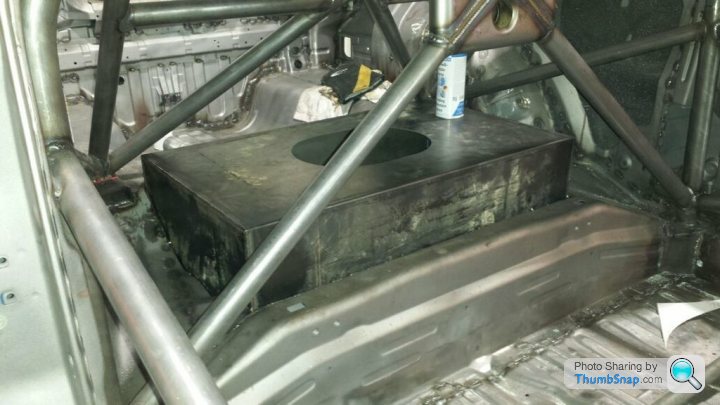
Fuel cell has been located as stated between the roll cage. This hopefully will enhance the cars balance and handling by centralising the weight and making it safer but locating the tank in what should be the safest part of the car.
We are very happy with the Engineering work carried out by Saluki Motorsport thus far and by working with some of the best people and businesses in Dubai we are confident the end product will be amazing.
Stay tuned for part 9.
Well it seems we have a problem. Despite our best endeavors the Corbeau Revenge seat doesn't fit.
So we thought about the various options, took some measurements and in the end decided to opt for the Corbeau Pro Series seat.
http://www.corbeau-seats.com/motorsports-seats/pro...
As you can see from the description we are clearly not the first people to enounter this problem.
To be honest there are two advantages with this seat type that actually benefit us:
1. Its easier to get in and out of the car during driver changes.
2. The driver has better peripheral vision. (Which is useful with a grid of 100-cars).
So we've placed our order with the MotorsportWheels team and eagerly await delivery.
The old seat will either become an office chair or if I have my way, I will use it to replace one of the hard plastic seats on the pit perch 😊
Next up. Rear air jack and pedal box
Last time we had located the rear jack right at the back of the car boot floor. The reason was because of the location of the fuel cell but because we are able to locate the fuel cell on the back seat this time we are able to locate the air jack more centrally.
This means its positioned closer to the main structure of the roll cage and therefore should not cause any flex in the shell when operated. Below is the rear mounting point.
In the Honda DC5 the firewall is angled where it meets the floor (where the conventional pedals are located) so to fit a race type pedal box. We've ordered the following AP Racing pedal box from our friends at MotorsportWheels.
https://www.apracing.com/product_details/race_car/...
In order to fit this pedal box the floor requires modification to be a flat floor. Saluki have ensured that the boxed out section is extremely strong so that there will be no flex in the floor which could impact the effectiveness of the brake pedal.
Fuel cell has been located as stated between the roll cage. This hopefully will enhance the cars balance and handling by centralising the weight and making it safer but locating the tank in what should be the safest part of the car.
We are very happy with the Engineering work carried out by Saluki Motorsport thus far and by working with some of the best people and businesses in Dubai we are confident the end product will be amazing.
Stay tuned for part 9.

 what currency are you talking? If GBP I think you're way off the mark, if of course you're being serious?..
 To answer a few of the questions:
Cage Design: Yes it is a custom design that complies with FIA Appendix J. Every piece of the cage has been bent by Saluki who have built multiple roll cages for Dakar style rally cars.
Build Cost: We have purposely chosen to build the car in our off season as we can get the work done quicker and at a lower cost. Our budget is substantially less than 250K AED.
Part 9
Below is a further update on the project. At this stage it looks like Saluki are only 4-days away from finishing which on reflection is a pretty fast build. 1-month from a dusty shell to a fully fabricated race car shell considering the quality and engineering thought process that was required for some components of the build is really impressive.
Although we posted this image of the rear air jack before, below is a much clearer picture showing precisely the welding and engineering quality.
Below is the final door bracing welding
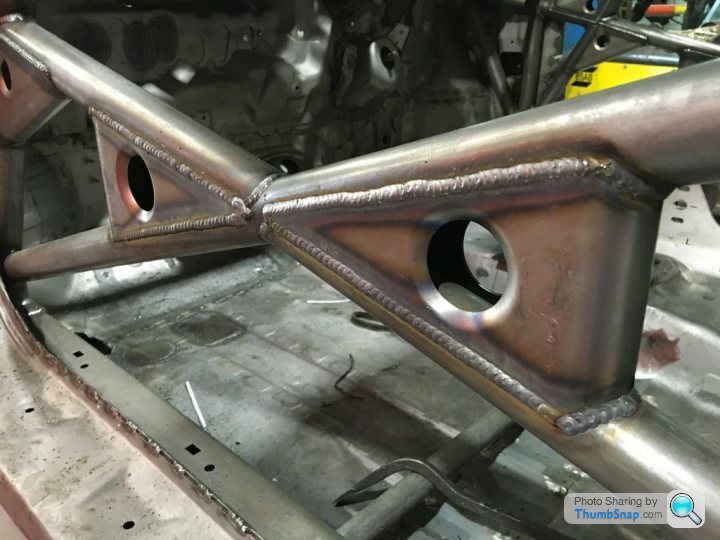
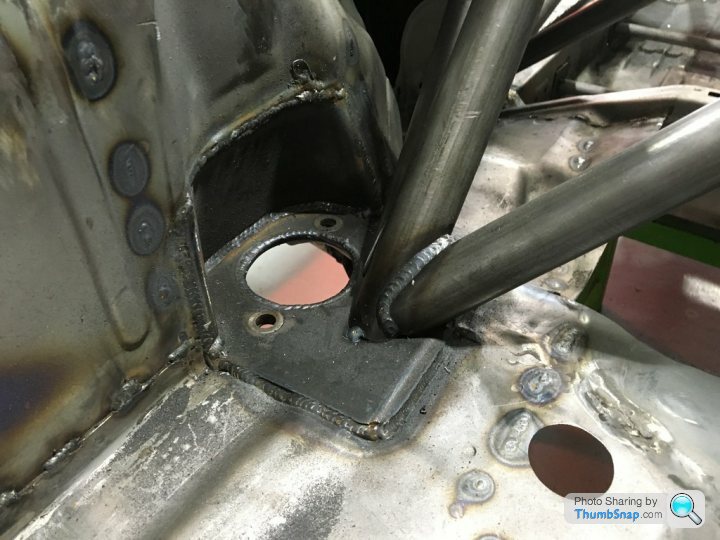
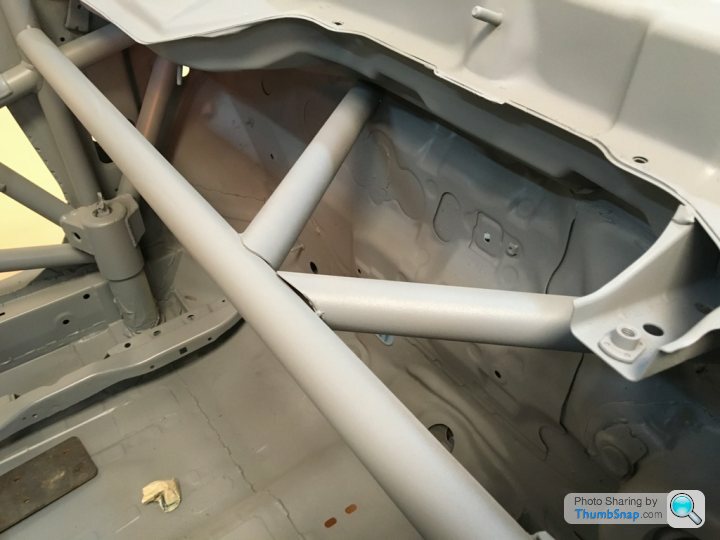
Below is where Saluki have joined the front section of the roll cage to the front strut turret.
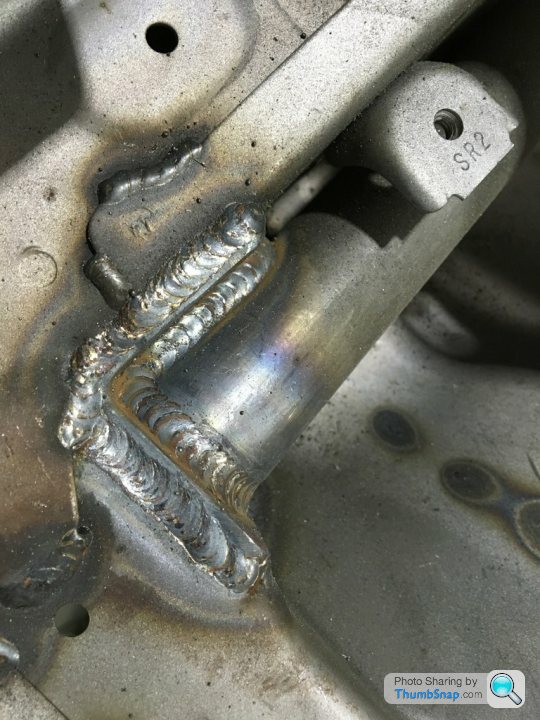
There is a second diagonal support which we posted previously.
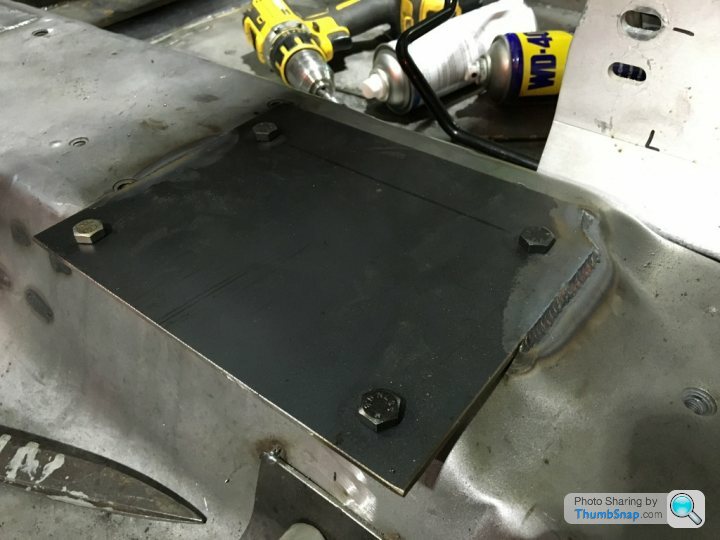
Below is a reinforced plate which the K-tuned billet alloy gear shifter is bolted to. Captive nuts have already been welded to the underside of the plate so that the shifter is just bolted down.
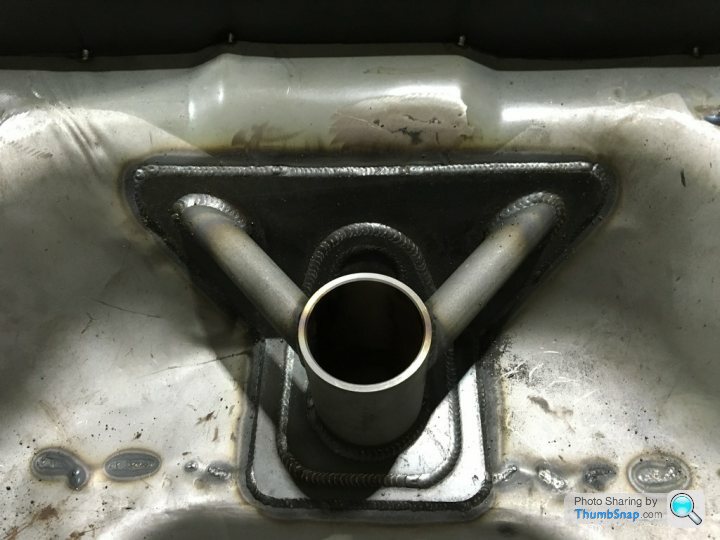
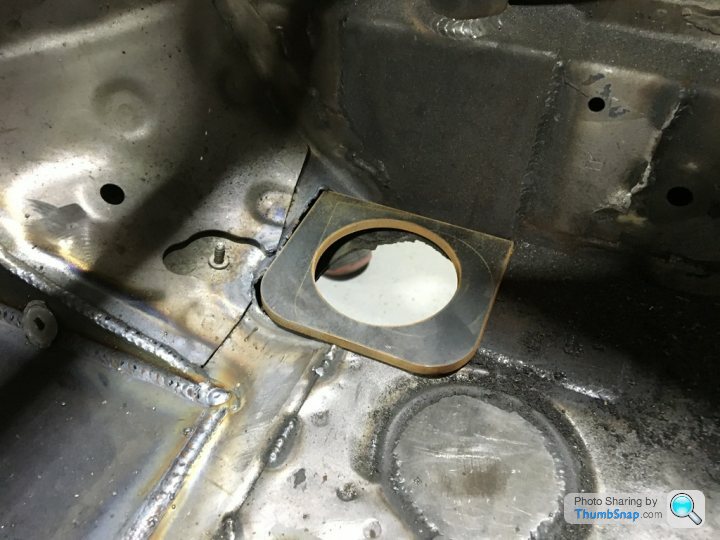
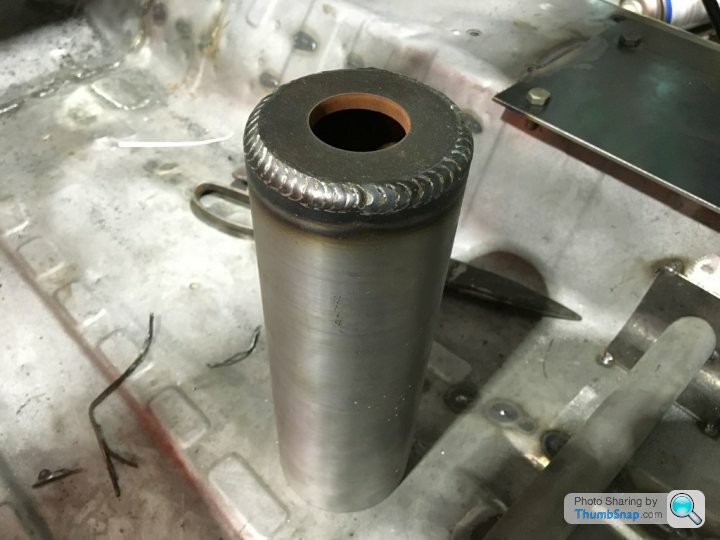
Below is the reinforced plate which the air-jack sleeve will be welded to. The second pic is the sleeve before it is fixed in place. We'll post a pic of the final installation once completed.
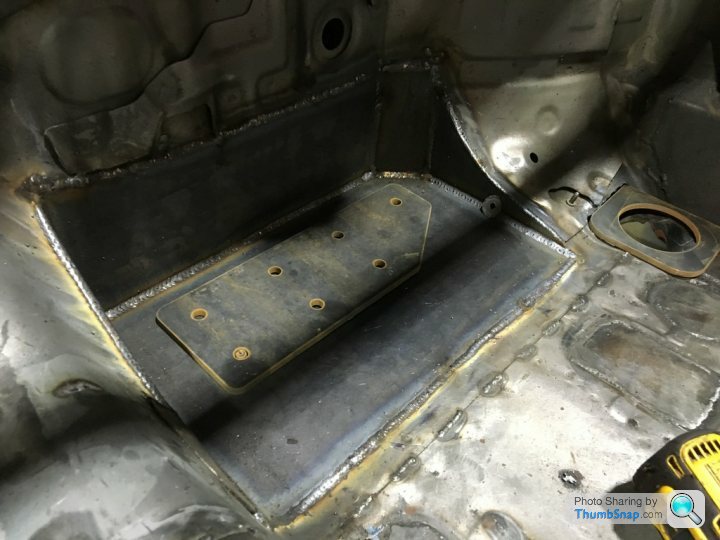
Below is the pedal box mounting plate. This again will have nuts welded to the underside and be recessed into the existing floor plate then welded all around resulting in a strong platform.
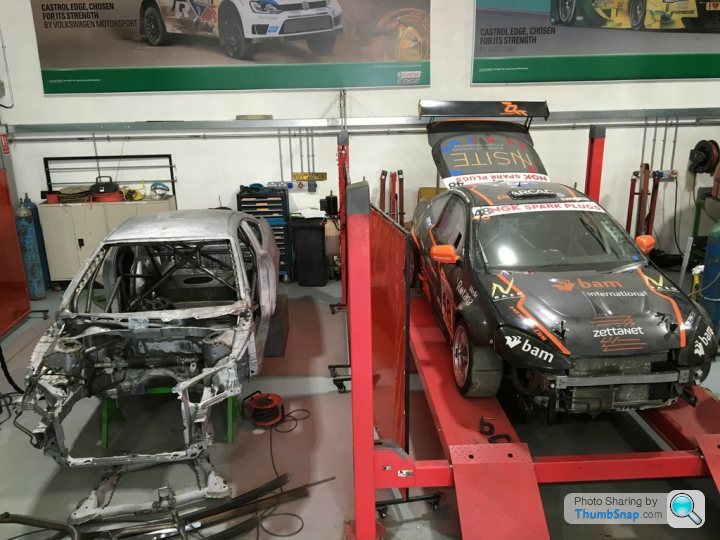
Comparison of the two soon to be one race cars.
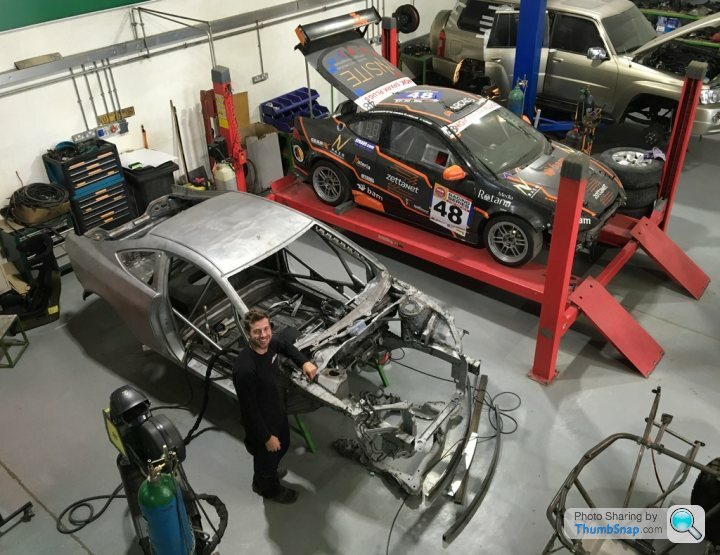
And last up a huge thank you to Robbie of Saluki pictured below who is the head fabricator and has really taken a lot of care and attention for our little project. Thanks Robbie, everyone loves the work and appreciates the efforts.
 [
[
Cage Design: Yes it is a custom design that complies with FIA Appendix J. Every piece of the cage has been bent by Saluki who have built multiple roll cages for Dakar style rally cars.
Build Cost: We have purposely chosen to build the car in our off season as we can get the work done quicker and at a lower cost. Our budget is substantially less than 250K AED.
Part 9
Below is a further update on the project. At this stage it looks like Saluki are only 4-days away from finishing which on reflection is a pretty fast build. 1-month from a dusty shell to a fully fabricated race car shell considering the quality and engineering thought process that was required for some components of the build is really impressive.
Although we posted this image of the rear air jack before, below is a much clearer picture showing precisely the welding and engineering quality.
Below is the final door bracing welding
Below is where Saluki have joined the front section of the roll cage to the front strut turret.
There is a second diagonal support which we posted previously.
Below is a reinforced plate which the K-tuned billet alloy gear shifter is bolted to. Captive nuts have already been welded to the underside of the plate so that the shifter is just bolted down.
Below is the reinforced plate which the air-jack sleeve will be welded to. The second pic is the sleeve before it is fixed in place. We'll post a pic of the final installation once completed.
Below is the pedal box mounting plate. This again will have nuts welded to the underside and be recessed into the existing floor plate then welded all around resulting in a strong platform.
Comparison of the two soon to be one race cars.
And last up a huge thank you to Robbie of Saluki pictured below who is the head fabricator and has really taken a lot of care and attention for our little project. Thanks Robbie, everyone loves the work and appreciates the efforts.
[ Part 10
It has been a while since the last update (I have been traveling with work, writing updates on braking and car set-up for the team web page, Ramadan, etc), but have no fear work has continued on the rebuild.
So, where were we?
Finalising the build I guess.... Well its finalised, sort of. As mentioned earlier we ordered the Corbeau Seats from Jon at Motorsport Wheels but he very kindly agreed to arrange ZRT Motorsport logo to be embroidered on the seats so the order delivery will take a little longer. Because its a different seat Saluki want to make sure the seat position and steering wheel level is perfect so the dash bar, seat bases and associated triangulated bars are not yet fully welded in case of any minor modifications required.
Below you can see what I mean:
Below is the seat rail bolted in place just for the purpose of fitting but again final positioning may change. We think its unlikely but better safe than sorry:
Below is the finished installation of the air jack brackets (2-front and 1-rear). You can see how the bracket is fixed to the cage and also reinforced with a strengthened plate on the floor.
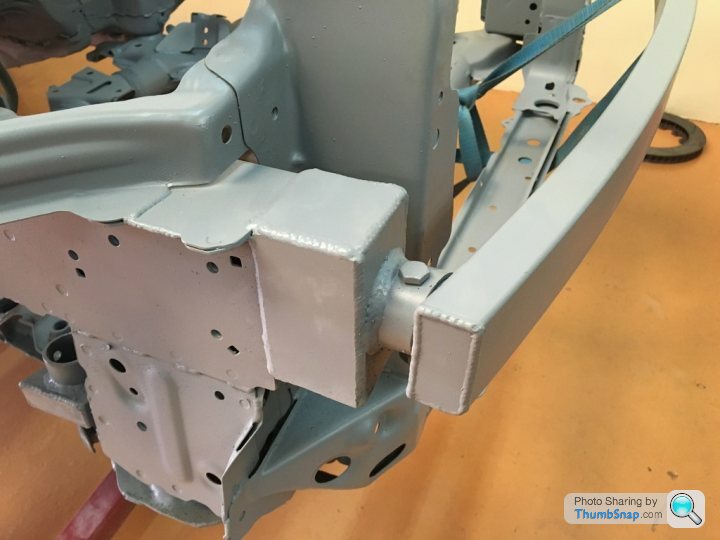
On our previous car we had a straight aluminium bar on the front of the car. This didn't provide much protection so this time Saluki fabricated a steel box section curved to provide more strength in the event of impact.
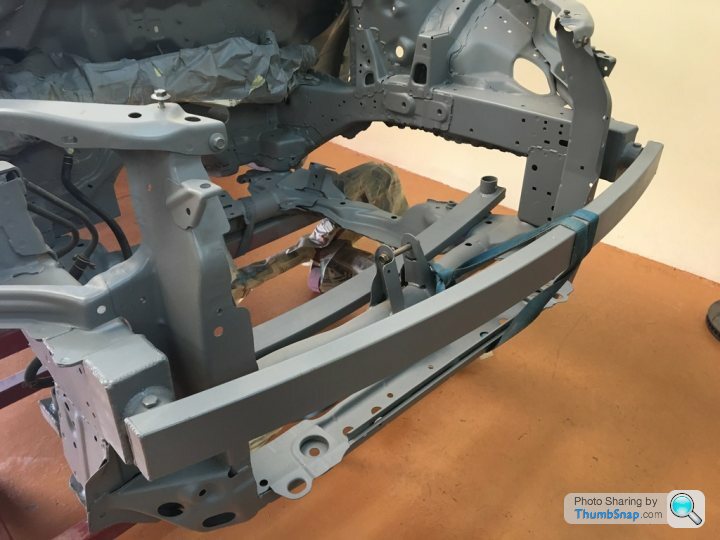
At the moment it is fixed in place with a nut and bolt but this will be replaced with a quick release pin system eventually (We have fabricated a spare in the event of damage).
Below is a close up:
So, with the exception of some final welding we bid farewell to the Saluki Team and wish to thank Mark, Robbie, Rodel, Ben and Jordan for the excellent work. Cheers guys 😊
It has been a while since the last update (I have been traveling with work, writing updates on braking and car set-up for the team web page, Ramadan, etc), but have no fear work has continued on the rebuild.
So, where were we?
Finalising the build I guess.... Well its finalised, sort of. As mentioned earlier we ordered the Corbeau Seats from Jon at Motorsport Wheels but he very kindly agreed to arrange ZRT Motorsport logo to be embroidered on the seats so the order delivery will take a little longer. Because its a different seat Saluki want to make sure the seat position and steering wheel level is perfect so the dash bar, seat bases and associated triangulated bars are not yet fully welded in case of any minor modifications required.
Below you can see what I mean:
Below is the seat rail bolted in place just for the purpose of fitting but again final positioning may change. We think its unlikely but better safe than sorry:
Below is the finished installation of the air jack brackets (2-front and 1-rear). You can see how the bracket is fixed to the cage and also reinforced with a strengthened plate on the floor.
On our previous car we had a straight aluminium bar on the front of the car. This didn't provide much protection so this time Saluki fabricated a steel box section curved to provide more strength in the event of impact.
At the moment it is fixed in place with a nut and bolt but this will be replaced with a quick release pin system eventually (We have fabricated a spare in the event of damage).
Below is a close up:
So, with the exception of some final welding we bid farewell to the Saluki Team and wish to thank Mark, Robbie, Rodel, Ben and Jordan for the excellent work. Cheers guys 😊
Part 11
When it rains it pours… Nothing for weeks and now two updates at once.
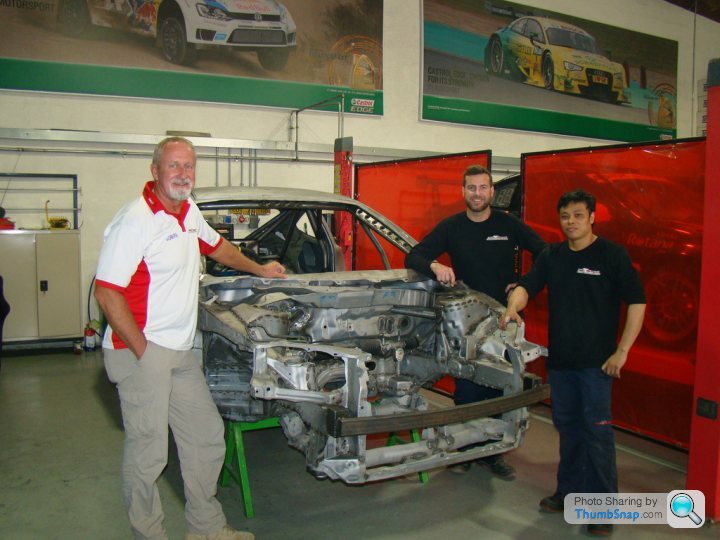
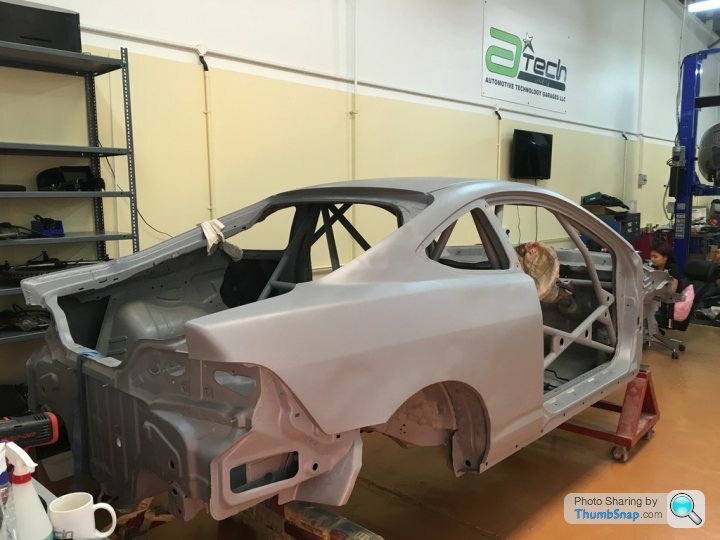
Next stop on our project was to hand the car over to Julian at A-Tech to do the build. The only exception is that our engine will be built by TGMsport in UK.
First task was to undertake a primer coat so that the shell is protected. This is only a temporary coat which will eventually be rubbed down before final priming and painting.
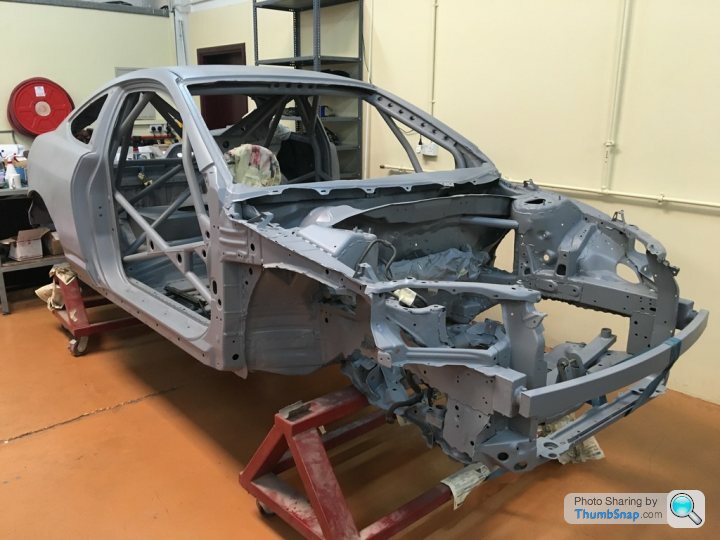
The primer coat was finished pretty quickly and back to A-Tech to plan what is going where.
On the downside the new primer highlighted all the damage caused to the shell by the shot blasting (particularly rear 3/4 panels and roof). On the bright side A-Tech have an excellent panel beater who will spend a day taking the worst out of it and the rest will be smoothed out with a light skim of filler in select places.
Its quite evident in the below photo on the rear panel:
The next update will be the strip down of the old car and some details of what new technology we intend to use in the new car.
Till then… Ciao

When it rains it pours… Nothing for weeks and now two updates at once.
Next stop on our project was to hand the car over to Julian at A-Tech to do the build. The only exception is that our engine will be built by TGMsport in UK.
First task was to undertake a primer coat so that the shell is protected. This is only a temporary coat which will eventually be rubbed down before final priming and painting.
The primer coat was finished pretty quickly and back to A-Tech to plan what is going where.
On the downside the new primer highlighted all the damage caused to the shell by the shot blasting (particularly rear 3/4 panels and roof). On the bright side A-Tech have an excellent panel beater who will spend a day taking the worst out of it and the rest will be smoothed out with a light skim of filler in select places.
Its quite evident in the below photo on the rear panel:
The next update will be the strip down of the old car and some details of what new technology we intend to use in the new car.
Till then… Ciao
Gassing Station | Readers' Cars | Top of Page | What's New | My Stuff