Attempting to build the fastest road legal Elan in the world
Discussion


rampageturke said:
are you planning to run side walls for your v-mount? IIRC the RX7 guys get better performance out of them this way

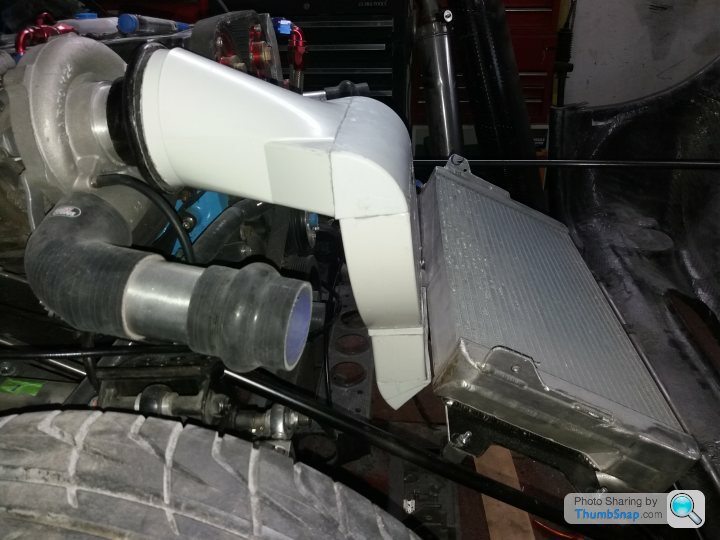
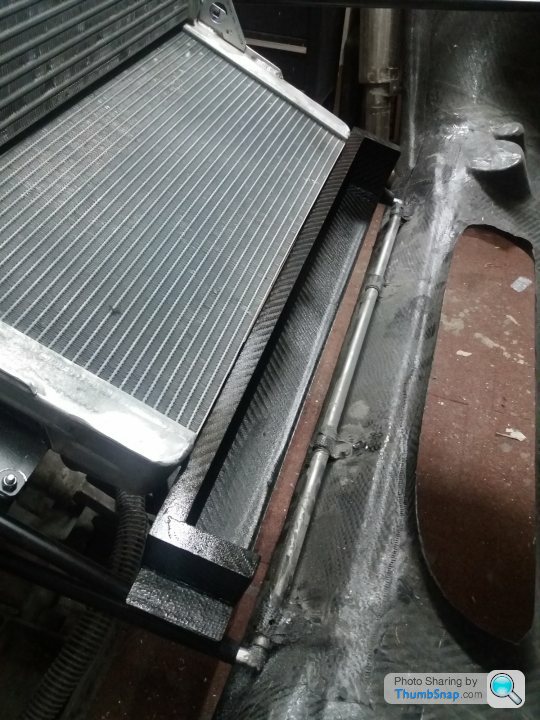
The plan was to enclose rads in a sealed duct when I had the original body fitted. However, as the ducting will be more complicated (due to the flip front) and heavy :-), I will leave them open for now and monitor temps. stevebroad said:
Basically, yes :-)
150w bulbs on four separate circuits, one of which is thermostatically controlled. Large fan to distribute heat evenly. 8 temp sensors to monitor temp. Glass from mircowave door so I can see what is going on :-) I normally use it at 120 deg C. However it takes quite a while to get there so I have bought a spider bulb holder that takes 6 bulbs which should allow me to ramp up the temp at around 3 deg C a minute which is what is recommended for my prepreg.
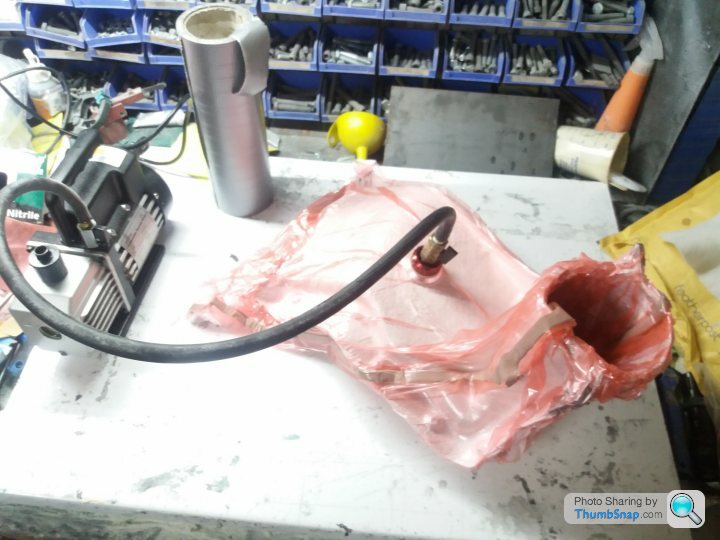
I have both vacuum and pressure lines installed.

A bit Heath Robinson, but it works :-)
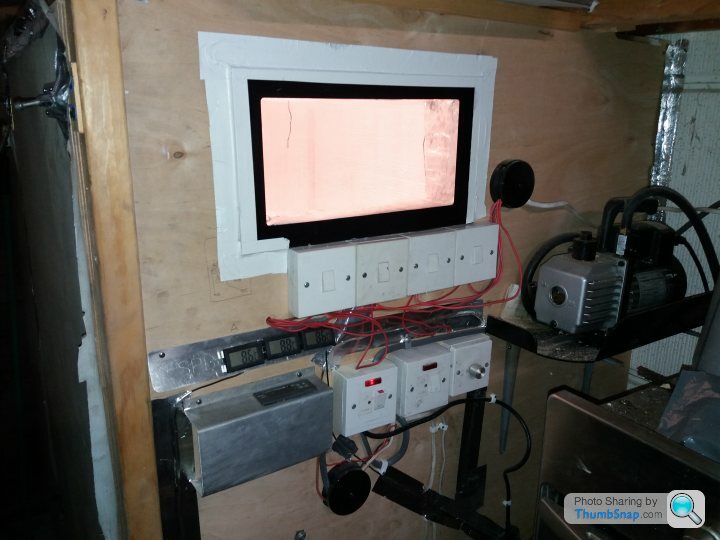
"Mr police man this is for carbon fibre only I promise you! There are not narcotics grown here!" Lol 150w bulbs on four separate circuits, one of which is thermostatically controlled. Large fan to distribute heat evenly. 8 temp sensors to monitor temp. Glass from mircowave door so I can see what is going on :-) I normally use it at 120 deg C. However it takes quite a while to get there so I have bought a spider bulb holder that takes 6 bulbs which should allow me to ramp up the temp at around 3 deg C a minute which is what is recommended for my prepreg.
I have both vacuum and pressure lines installed.
A bit Heath Robinson, but it works :-)
Edited by stevebroad on Tuesday 12th June 11:34
Edited by stevebroad on Tuesday 12th June 11:35
Edited by stevebroad on Tuesday 12th June 11:37
Nice setup!
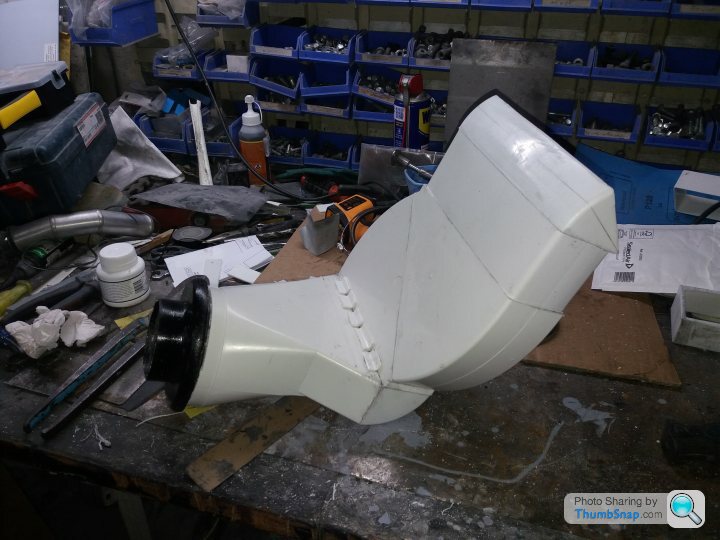
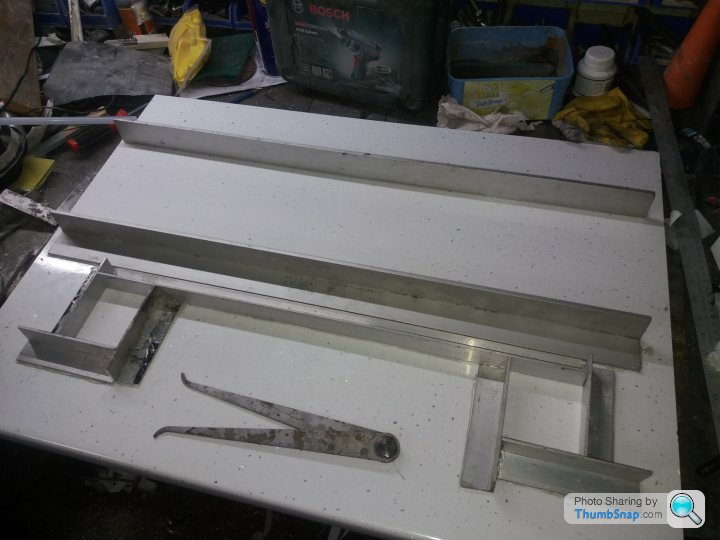
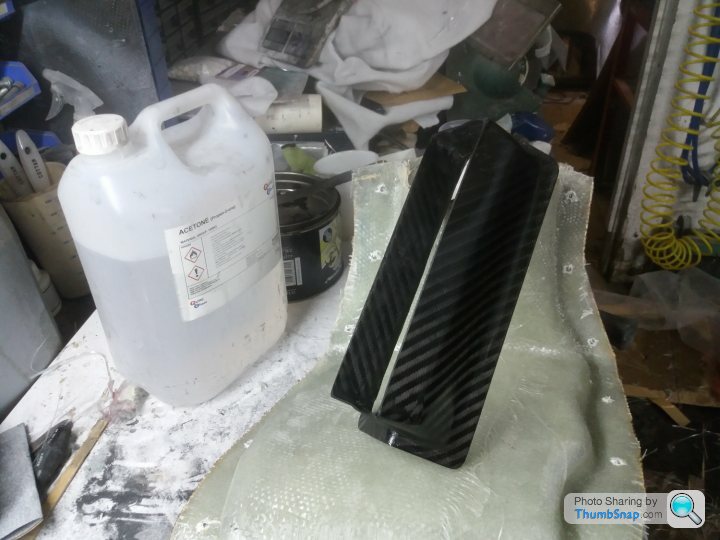
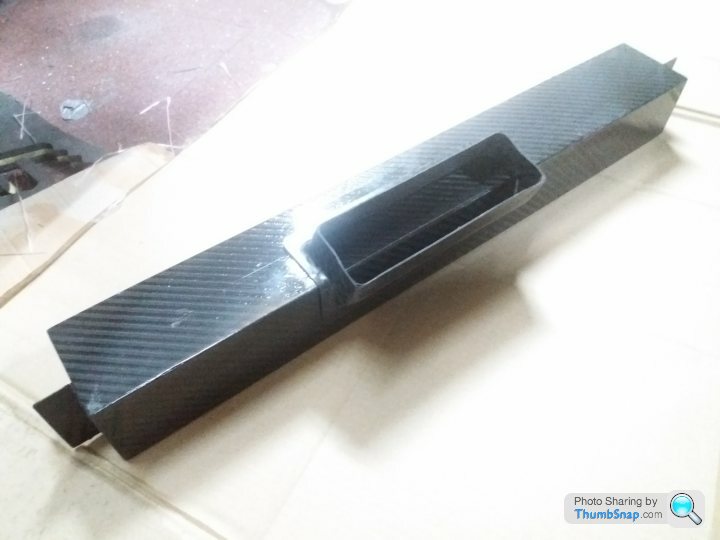
Parts arrived today so I can get on with making the induction pattern. From this a two part fibreglass mould will be made so a carbon fibre induction system can be fabricated.
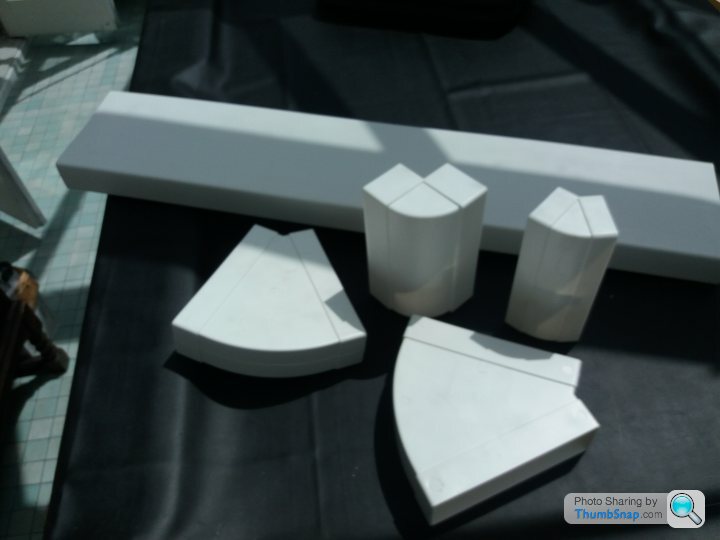
The round to rectangular adaptor fits the turbo inlet perfectly.

Filter box designed, just waiting for a price from ITG for the bespoke filter element.
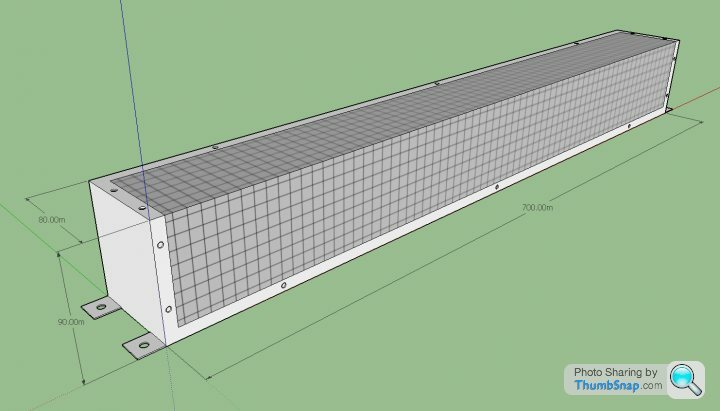
The round to rectangular adaptor fits the turbo inlet perfectly.
Filter box designed, just waiting for a price from ITG for the bespoke filter element.
Edited by stevebroad on Saturday 16th June 08:23
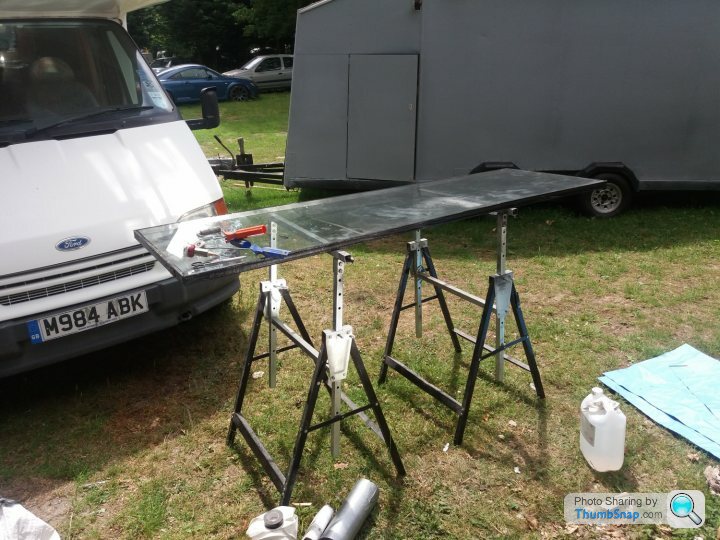
Started on the floor panels that will sit under the rads and engine.
Decided to lay the floor up on a large double glazing panel so it would be flat. First time I have done this with prepreg so I needed to deal with the issue of the gas in the panel expanding due to the heat. To this end I simply drilled a couple of holes through the separator.
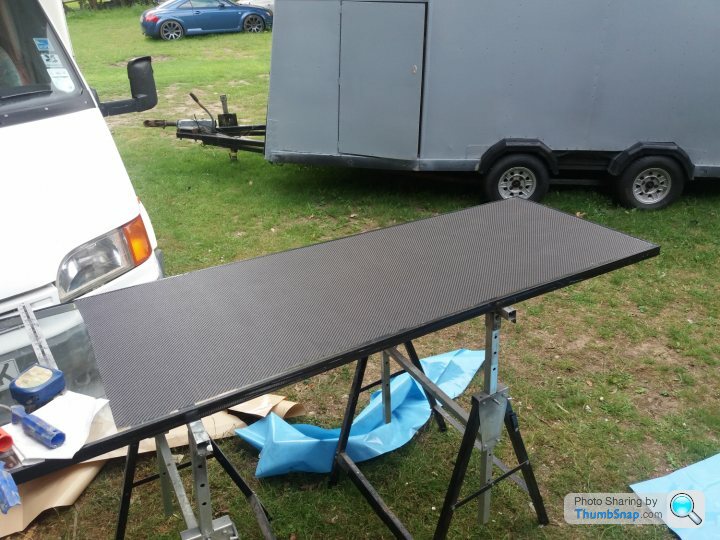
All went well until it came to extracting the air. Stated off OK but then I started to hear creaking noises. This isn't right, I thought to myself, so I had a closer look and noticed that the glass was starting to take on a concave shape! The vacuum bag was trying to pull the two panes of glass together so I quickly turned the pump off and released the vacuum.
Now what to do? Luckily, I found an old flat pack desk top in the barn that was a suitable size. Managed to remove the floor from the glass and transfer it to the top. Phew! Panic over.
As the foam filler isn't designed for prepreg it doesn't like high temperatures. I have, therefore, had to cure the carbon at 100 deg C rather than the usual 120. Same result, just takes longer so I have left it to run over night.


Decided to lay the floor up on a large double glazing panel so it would be flat. First time I have done this with prepreg so I needed to deal with the issue of the gas in the panel expanding due to the heat. To this end I simply drilled a couple of holes through the separator.
All went well until it came to extracting the air. Stated off OK but then I started to hear creaking noises. This isn't right, I thought to myself, so I had a closer look and noticed that the glass was starting to take on a concave shape! The vacuum bag was trying to pull the two panes of glass together so I quickly turned the pump off and released the vacuum.
Now what to do? Luckily, I found an old flat pack desk top in the barn that was a suitable size. Managed to remove the floor from the glass and transfer it to the top. Phew! Panic over.
As the foam filler isn't designed for prepreg it doesn't like high temperatures. I have, therefore, had to cure the carbon at 100 deg C rather than the usual 120. Same result, just takes longer so I have left it to run over night.

 |https://thumbsnap.com/Lg3KBYW7[/url]
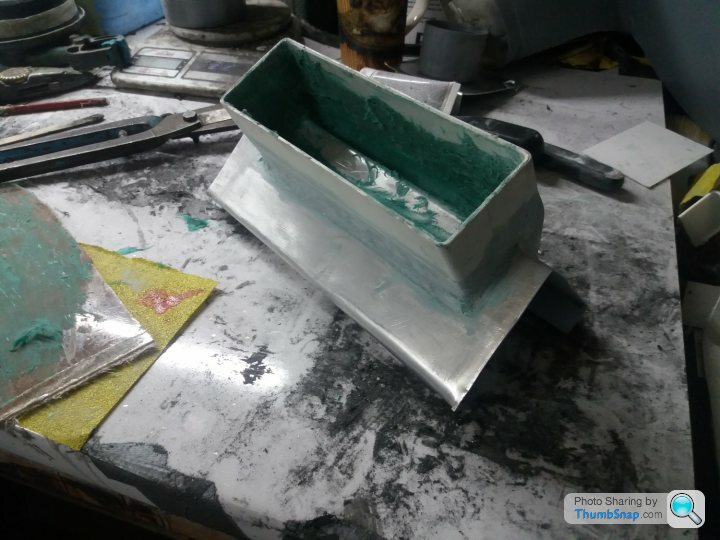
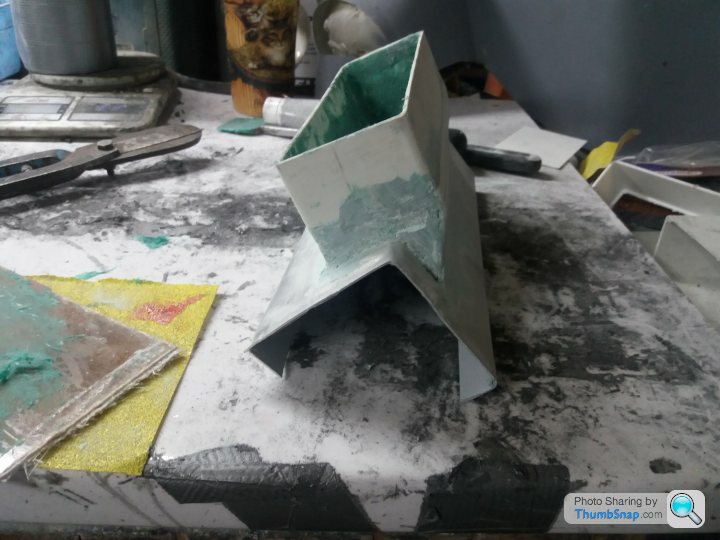

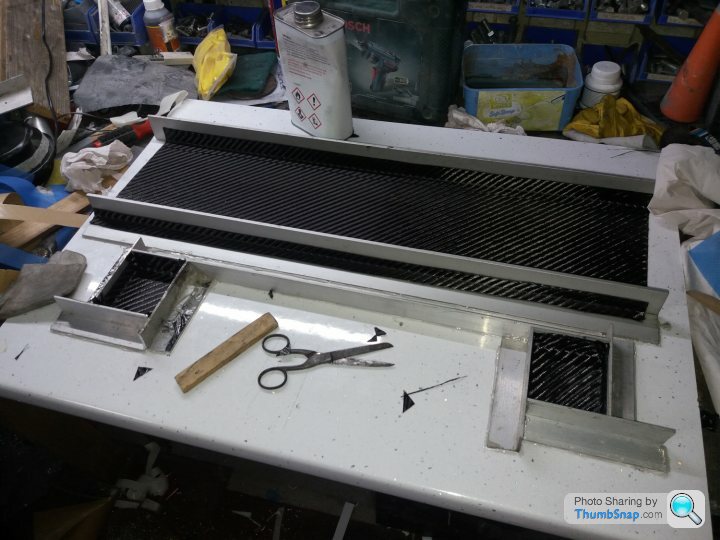
A couple of days making the mould and smoothing out the internal angles and i was ready to lay up some carbon. This was quickly done, then I spent an hour working out how to lay in the peal ply, breather cloth and vacuum bag. After curing I spent another hour separating the carbon from the mould.
Subject to my customary post cure fettling, it should look OK


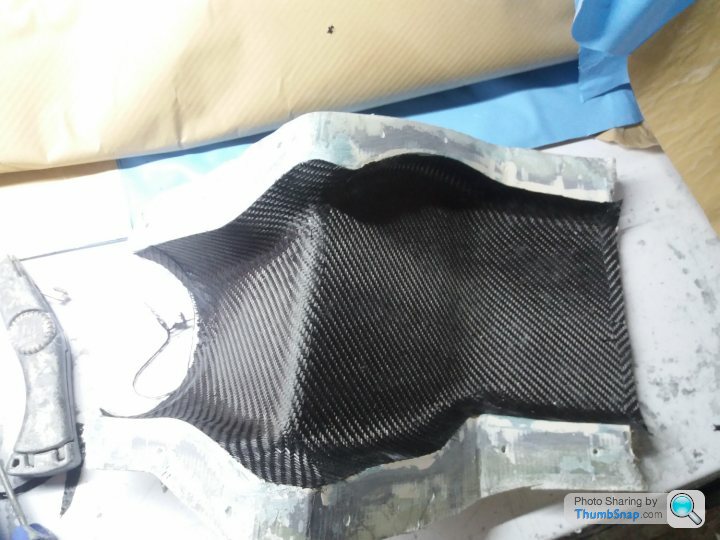

Subject to my customary post cure fettling, it should look OK
Not everything goes to plan. Most people tend to hide or gloss over their failures, but not me :-)
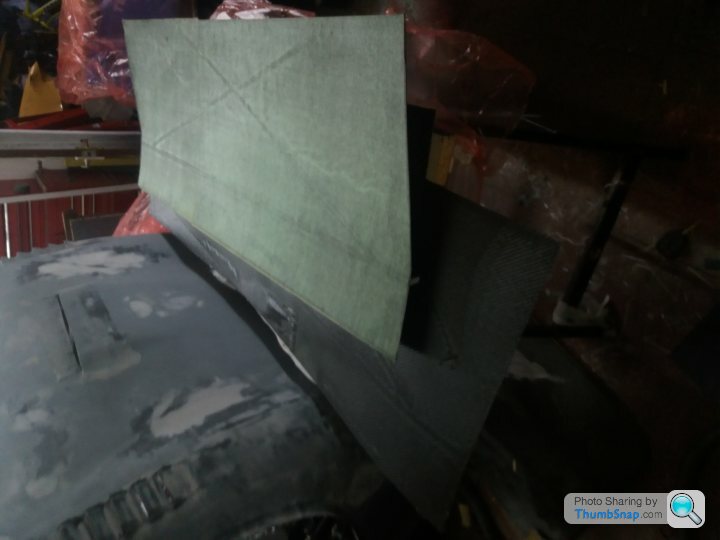
Back on page 72 I chronicled the saga of making the first section of undercar panelling, where I had to change from glass to a timber support for the carbon. This turned out to be an issue.
Everything started out OK, for the first hour. Then the vacuum pump started to make strange noises and the oil went very cloudy. I turned the pump off, removed the drain plug and clear water poured out before the oil! To say I was confused is an understatement. Where the hell did this water come from. My conclusion was that I hadn't allowed the carbon the thaw properly so was contaminated with moisture.
As the vacuum seemed to be holding up I carried on with the cure cycle. However, when I took it out of the oven, the vacuum had dissipated and the carbon wasn't properly compacted and hadn't adhered to the core material - basically a complete disaster.
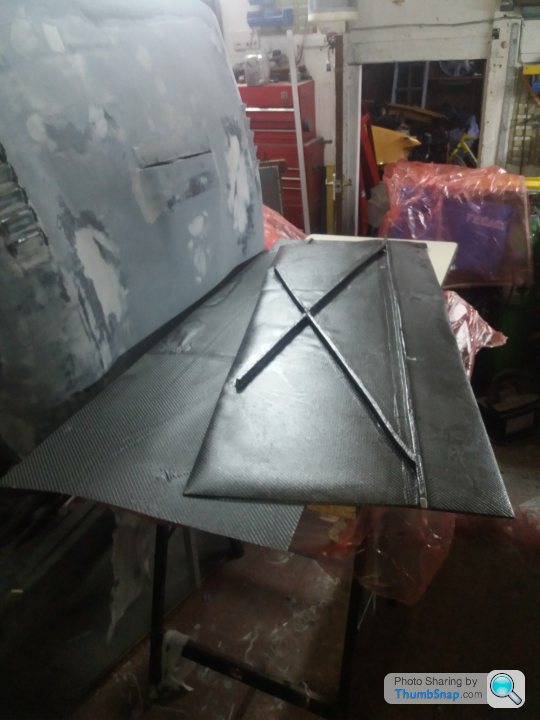
I was out of carbon so a second attempt had to wait until new stock arrived. As this turned out to be heavier, 375gm/m2 rather than the original 210gm/m2, I decided to go with two layers without the foam core.
Also, as this carbon is primarily designed for use in an autoclave (beggars can't be choosers when it is free - apart from the carriage) I had to go through a more complicated process in order to be able to use it in my non-pressurised oven. Each layer had to be debulked before adding the next layer. This entails vacuum compacting each layer of carbon in order to remove any trapped air and to make sure it is fully compressed.
Once this was completed and the carbon was ready for the oven the next task was to cure it. I had to slowly raise the temp to 80 deg C and keep it there for 30 minutes. I then had to raise the temp up to 120 deg C and keep it there for 2.5 hours.
I had the same problem with moisture getting into the vacuum pump's oil. Fortunately, the vacuum bag was air tight this time so I was able to drain and refill the pump with no loss of vacuum. I had to do this four times! After the third oil change is dawned on me what the problem was. I was drying out the timber support and pulling the moisture into the pump!
I will be geting a moisture trap before I use a timber suppoort again. Live and learn. live and learn :-)
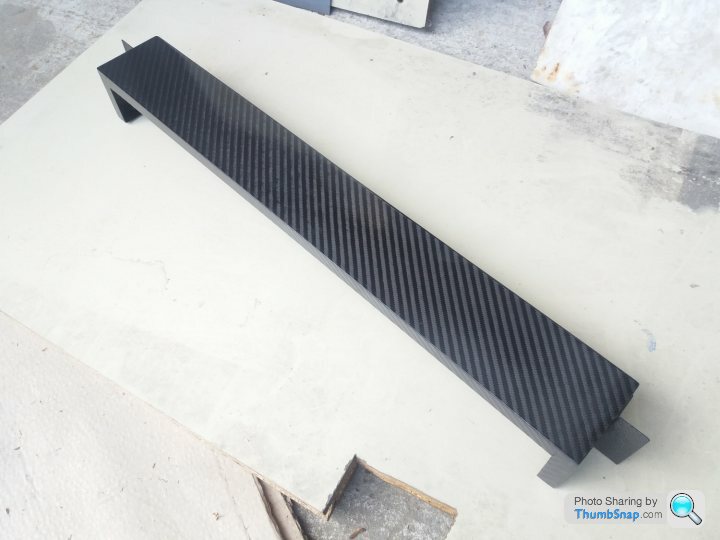
Anyway, unwrapped the carbon and it has come out perfect and weighs little more than the original effort so all is good. 1.2Kg, so once it is trimmed to allow the wheels to turn and various supports and air strakes are added it should end up at around this figure.
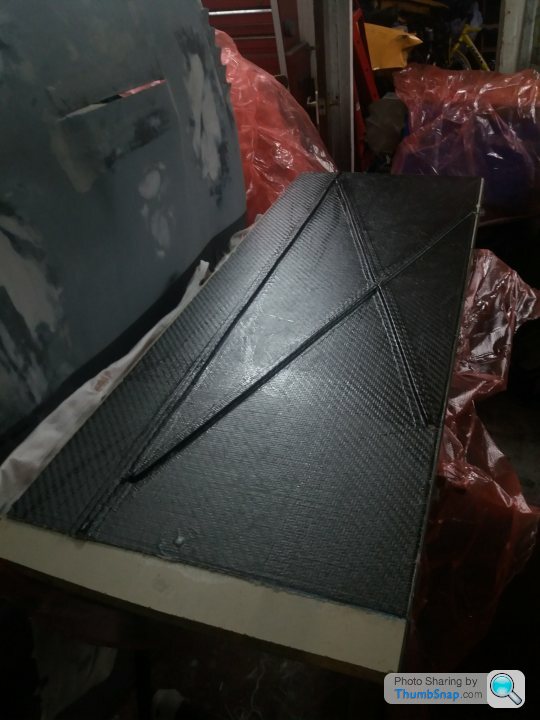

Extra weight, I know, but this will be more than outweighed by the improved aerodynamics. The underside presently looks like this :-)

I now have to work out how to attach it so it allows the front to open, I love these challenges :-)
Back on page 72 I chronicled the saga of making the first section of undercar panelling, where I had to change from glass to a timber support for the carbon. This turned out to be an issue.
Everything started out OK, for the first hour. Then the vacuum pump started to make strange noises and the oil went very cloudy. I turned the pump off, removed the drain plug and clear water poured out before the oil! To say I was confused is an understatement. Where the hell did this water come from. My conclusion was that I hadn't allowed the carbon the thaw properly so was contaminated with moisture.
As the vacuum seemed to be holding up I carried on with the cure cycle. However, when I took it out of the oven, the vacuum had dissipated and the carbon wasn't properly compacted and hadn't adhered to the core material - basically a complete disaster.
I was out of carbon so a second attempt had to wait until new stock arrived. As this turned out to be heavier, 375gm/m2 rather than the original 210gm/m2, I decided to go with two layers without the foam core.
Also, as this carbon is primarily designed for use in an autoclave (beggars can't be choosers when it is free - apart from the carriage) I had to go through a more complicated process in order to be able to use it in my non-pressurised oven. Each layer had to be debulked before adding the next layer. This entails vacuum compacting each layer of carbon in order to remove any trapped air and to make sure it is fully compressed.
Once this was completed and the carbon was ready for the oven the next task was to cure it. I had to slowly raise the temp to 80 deg C and keep it there for 30 minutes. I then had to raise the temp up to 120 deg C and keep it there for 2.5 hours.
I had the same problem with moisture getting into the vacuum pump's oil. Fortunately, the vacuum bag was air tight this time so I was able to drain and refill the pump with no loss of vacuum. I had to do this four times! After the third oil change is dawned on me what the problem was. I was drying out the timber support and pulling the moisture into the pump!
I will be geting a moisture trap before I use a timber suppoort again. Live and learn. live and learn :-)
Anyway, unwrapped the carbon and it has come out perfect and weighs little more than the original effort so all is good. 1.2Kg, so once it is trimmed to allow the wheels to turn and various supports and air strakes are added it should end up at around this figure.
Extra weight, I know, but this will be more than outweighed by the improved aerodynamics. The underside presently looks like this :-)
I now have to work out how to attach it so it allows the front to open, I love these challenges :-)
Edited by stevebroad on Monday 2nd July 22:45

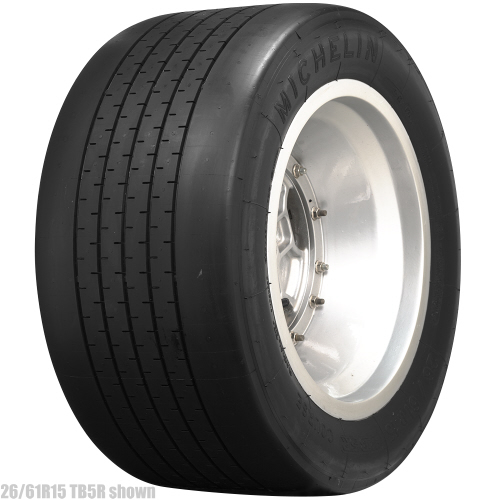
Still ruminating about tyres. I think that I have narrowed it down to two. The Pirelli P7 Corsa Classic 305/35 (592mm dia) on 15 x 11 rims and the Michelin TB5 285/40 (610mm dia) on 15 x 10.5. However, I have no idea of their respective Mu values so don't know which has the stickiest rubber.
Tyres have to be UK road legal.
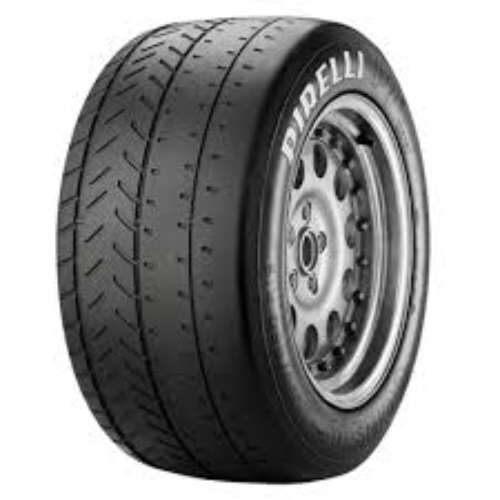
Tyres have to be UK road legal.
Edited by stevebroad on Sunday 5th August 14:56
Gassing Station | Readers' Cars | Top of Page | What's New | My Stuff