1964 Alvis Stalwart
Discussion


Wonderful story...keep up the good work! I had half a dozen Stalwarts (and Abbots) more or less under my control in Germany in the early 70,s In my innocence I had no real idea what made them go / kept them going, but they were wonderful workhorses and bloody good fun...all at taxpayers expense😆 Ours mostly had hiabs for picking up ammunition pallets.
Fun fact, Beetles, Morris Minors and Marinas all have torsion bar suspension, as if you didn't all know.
Fun fact, Beetles, Morris Minors and Marinas all have torsion bar suspension, as if you didn't all know.
Great thread! Found some footage showing the suspension at work, apologies if it’s already been posted.
Drove one of these on a tank driving experience day more than 20 years ago and it was my favourite vehicle of the day. So easy to drive but felt like it would go absolutely anywhere.
Very jealous OP, well done for putting all the hard work in, it will be epic once you’ve finished!
Grrr embedding fail! here's the link
https://www.youtube.com/watch?v=pW9Z0HrzdMo&ab...
Edit:Hopefully now fixed!
Edited by Beerfinch on Monday 6th February 11:46
skwdenyer said:
Krikkit said:
Agree on torsion bars, very clever and incredibly compact relative to the vehicle!
Another great British invention (torsion bar suspension) improved-upon by the Germans  Parry-Thomas, followed by Porsche.
Very lucky, I know back in the 70s a lot of American muscle made use of torsion bars on the front suspension like Challengers etc.
Thanks very much for those words, if you ever get chance and are interested have a look at some of the Australian Armour and Artillery Museum restoration videos on YouTube, absolutely superb work and what they'll build into a full tank or tank destroyer from a collection of blown up bent and buckled pieces of armour plate is truly amazing. Well and truly puts any of my measly efforts to shame!
I wish I had more regular and interesting updates for the thread but it's difficult when half the time you're on your own, or at work working on other large vehicles to pay for your hobby of working on large vehicles
A very similar Pathe video to that is 'On 6 wheels anywhere', at the end they land on the ramp of a troop ship, looks bloody scary!
LewG said:
All too kind you know I'm just a fat bloke with a hammer!
Today was the first day back on the Wart for a couple of weeks as had a few other things going on and it's been rather chilly!
Annoyingly after fitting the wheel station I tried fitting the torsion bar assembly and reaction arm all in one and speared straight through the rubber gaiter that joins each wishbone on the torsion bar tube. It was pretty clear it'd have to come apart to fit the bar on its own then build up once on the hull so we set about making a gaiter by wrapping round some flat rubber sheet and clipping it together, then using tiger seal adhesive to glue the centre together. This was an absolute sod to fit right back behind the shocks at the hull, we tried some 60mm rubber rad hose but that proved too chunky to fit next to the bevel box housing so that was a no go.
Anyway a few pics of stripping the bar assembly, thankfully far easier and relatively straightforward than I'd built the task up to be in my head. That's the thing with Stollies, if you assume the worst at least in theory it can only go as bad or better than you thought as a bonus

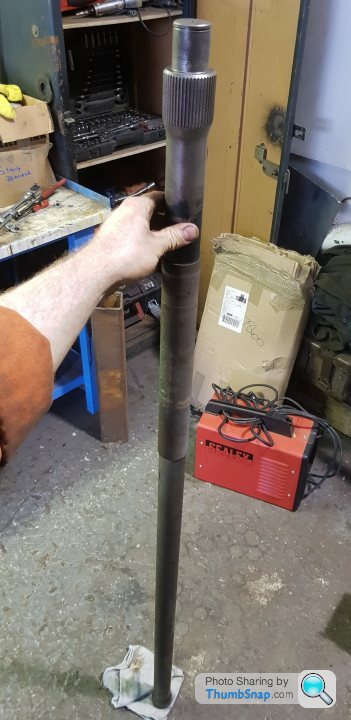

When you consider this is all the 'spring' that big assembly needs it is mighty impressive as relatively speaking they take up no space, the whole design really is quite something for a vehicle of its time. In a way I'm glad I've been forced to take this bit apart as it's fairly simple and gives a chance to clean all the crap out and lubricate properly etc. There are videos in period of them driving over a line of railway sleepers at speed and the whole vehicle staying more or less level as the wishbones shoot up and down. The suspension is very tight and squeaky at the moment but with lubrication and use I'm hoping this will improve hugely more or less back to how it should be
There's something uncanny about watching those wheels bouncing up and down and realising it's all down to twisting a set of solid metal bars.Today was the first day back on the Wart for a couple of weeks as had a few other things going on and it's been rather chilly!
Annoyingly after fitting the wheel station I tried fitting the torsion bar assembly and reaction arm all in one and speared straight through the rubber gaiter that joins each wishbone on the torsion bar tube. It was pretty clear it'd have to come apart to fit the bar on its own then build up once on the hull so we set about making a gaiter by wrapping round some flat rubber sheet and clipping it together, then using tiger seal adhesive to glue the centre together. This was an absolute sod to fit right back behind the shocks at the hull, we tried some 60mm rubber rad hose but that proved too chunky to fit next to the bevel box housing so that was a no go.
Anyway a few pics of stripping the bar assembly, thankfully far easier and relatively straightforward than I'd built the task up to be in my head. That's the thing with Stollies, if you assume the worst at least in theory it can only go as bad or better than you thought as a bonus
When you consider this is all the 'spring' that big assembly needs it is mighty impressive as relatively speaking they take up no space, the whole design really is quite something for a vehicle of its time. In a way I'm glad I've been forced to take this bit apart as it's fairly simple and gives a chance to clean all the crap out and lubricate properly etc. There are videos in period of them driving over a line of railway sleepers at speed and the whole vehicle staying more or less level as the wishbones shoot up and down. The suspension is very tight and squeaky at the moment but with lubrication and use I'm hoping this will improve hugely more or less back to how it should be
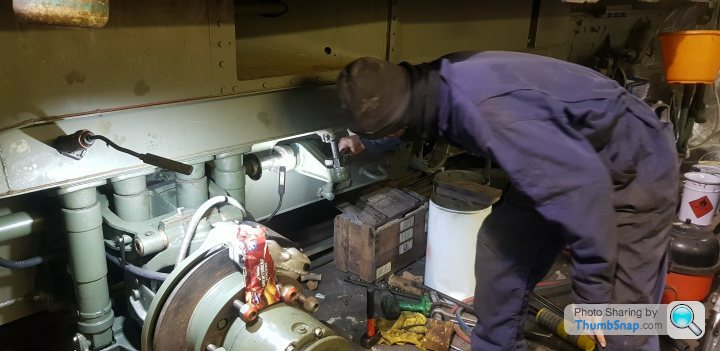
Today was operation fit torsion bar assembly to hull, firstly the 'holder' was bolted up, then bar pushed back into position ready to fit the splined reaction arm.
Before fitting the arm I thought I'd make sure the torsion adjustment nut would move nicely. So begins a day of struggle
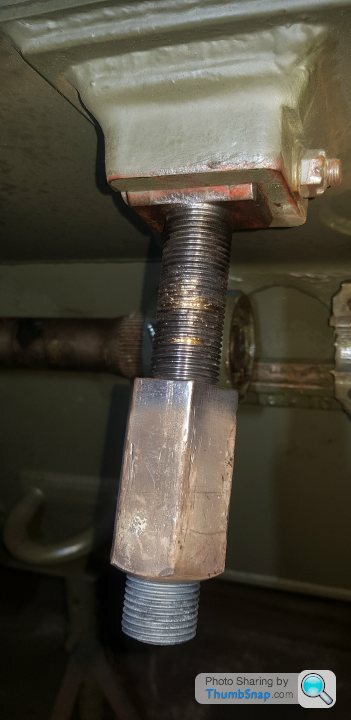
It was tight as hell all the way off, 2ft Stilsons with a 5ft scaffold tube plus the thread glowing orange following some help from my friends oxy and acetylene had it off eventually!
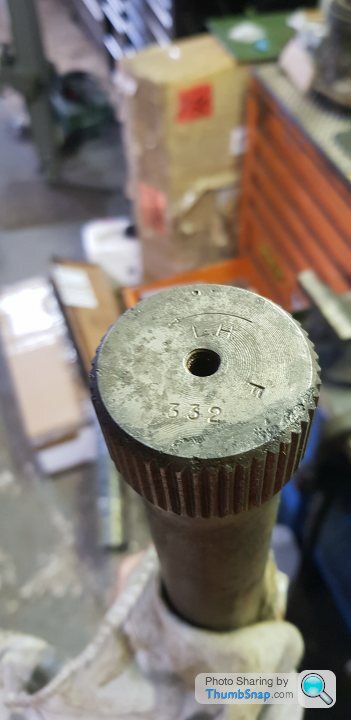
Removed the lug and stud from its holder on the hull and cleaned up inside and greased. It's a half moon of sorts that sits inside a female housing so allows a slight amount of movement.

I rotary wire brushed the threads to clean them up and gave it a dress up with the edge of a file where it'd picked up, sadly I don't have a 1" UNF tap and die (now on order) so with it in the vice I used the old trick of cutting a slot in the thread with a thin cutting disc and coated it in some valve grinding paste to try and act like a self tapper.
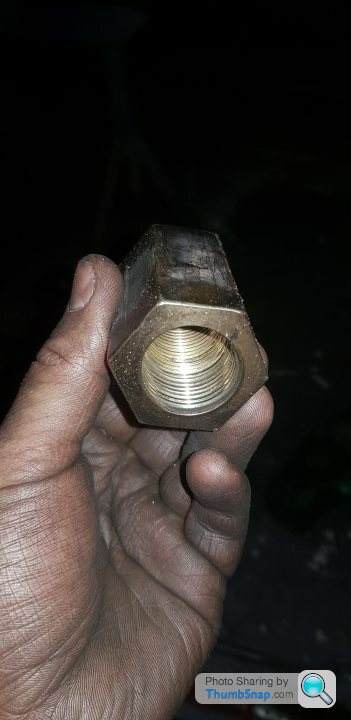
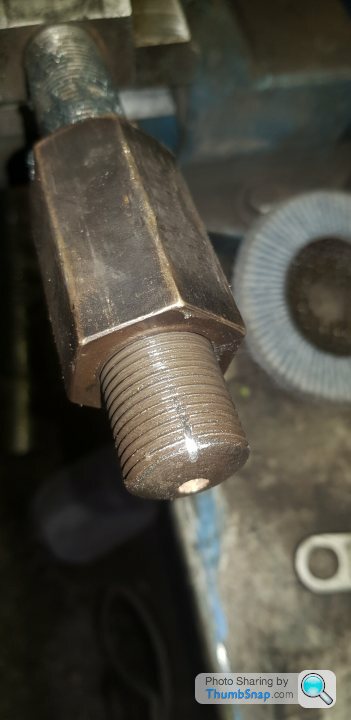
This worked surprisingly well and having wound the nut up and down a few times working back and forth I could easily wind it up and down by hand. Not bad for something that an hour previously needed a scaff bar to turn!
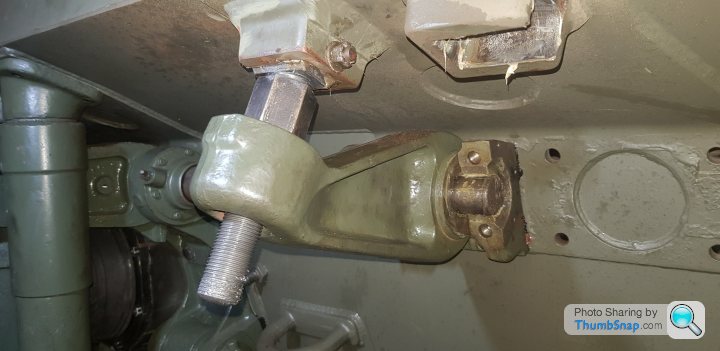
Bar and reaction arm in place
Winding some tension into the bar, we tried a jack under the hub to see if it'll move up and down, with no engine or weight in the back there's a bit of movement but not a lot til the whole thing starts to lift off the stands!
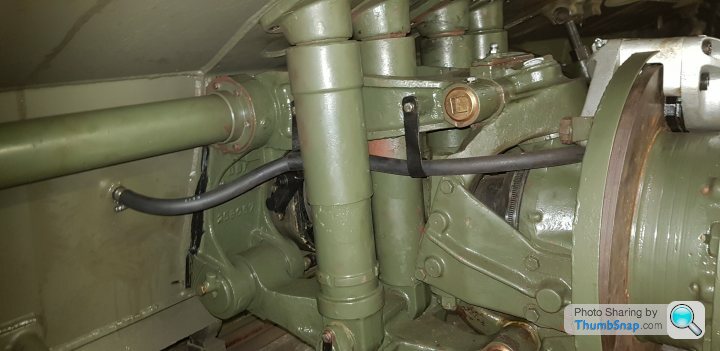
Finally a nice piece of breather hose fitted with freshly painted clips etc, all nice little details to add to the finished product. It might be ready by the time fossil fuels are a long distant memory
Before fitting the arm I thought I'd make sure the torsion adjustment nut would move nicely. So begins a day of struggle
It was tight as hell all the way off, 2ft Stilsons with a 5ft scaffold tube plus the thread glowing orange following some help from my friends oxy and acetylene had it off eventually!
Removed the lug and stud from its holder on the hull and cleaned up inside and greased. It's a half moon of sorts that sits inside a female housing so allows a slight amount of movement.
I rotary wire brushed the threads to clean them up and gave it a dress up with the edge of a file where it'd picked up, sadly I don't have a 1" UNF tap and die (now on order) so with it in the vice I used the old trick of cutting a slot in the thread with a thin cutting disc and coated it in some valve grinding paste to try and act like a self tapper.
This worked surprisingly well and having wound the nut up and down a few times working back and forth I could easily wind it up and down by hand. Not bad for something that an hour previously needed a scaff bar to turn!
Bar and reaction arm in place
Winding some tension into the bar, we tried a jack under the hub to see if it'll move up and down, with no engine or weight in the back there's a bit of movement but not a lot til the whole thing starts to lift off the stands!
Finally a nice piece of breather hose fitted with freshly painted clips etc, all nice little details to add to the finished product. It might be ready by the time fossil fuels are a long distant memory
LewG said:
It was tight as hell all the way off, 2ft Stilsons with a 5ft scaffold tube plus the thread glowing orange following some help from my friends oxy and acetylene had it off eventually!
Christ... 
Can't be seized if it's a liquid.
I struggled to find my 11mm spanner today to deal with the M7 fasteners Andre Citroen used everywhere.... As well as his profound love of M9 and M11 threads.
I can only imagine stuff that small was only used for bolting in clocks, info plates and cup holders in the stolly!

LewG said:
This a superb bit of film I've just found, gets interesting from approximately 2 minutes on showing them blasting around in 1960s Germany, every vehicle you see there is a 23 EK xx reg number so I would hazard a guess that mine would be there with them
skwdenyer said:
What's fascinating is the mine-resistance (about 12:30 mins in that video) - we replaced the Stalwarts with soft-skin vehicles, and now we're replacing soft-skin vehicles with things that might end up looking like Stalwarts
A thicker bottom with a proper V in it, and you could roll a Stolly out into a lot of theatres!Gassing Station | Readers' Cars | Top of Page | What's New | My Stuff