460hp Lotus Exige V6
Discussion


anonymous said:
[redacted]
Gearbox was pretty bad when I got the car, I got the dealer to adjust the cables but it didn't help much to be honest. I then fitted aftermarket SSC cables and it made a good difference. It's not as precise and short throw as the Sport 350, but actually I sort of prefer it. The Sport 350 you have to be incredible precise to get it into gear and it can be quite notchy to get it into gear sometimes. On my car the gear shift is a lot smoother.anonymous said:
[redacted]
Well, I've fitted SSC cables, an Evora 400 clutch and flywheel, and replaced 2/3/4th gears. Same ratios, just new condition. I'll add a gearbox cooler before I next go on track.Honestly can't remember costs but I think it ended up at about £1k when installed. I didn't fit them myself, they need to be aligned perfectly so a job which requires patience!
anonymous said:
[redacted]
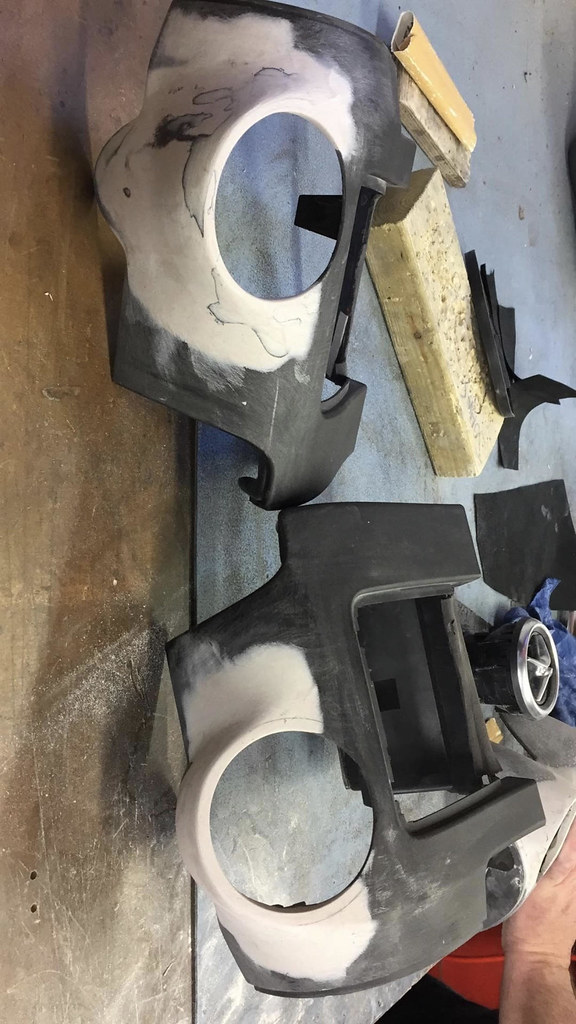
Roughly that, yes.Little update on the interior, I'm attempting to fit Mercedes A-Class air vents to the car. I won't go into too much detail, but basically they're significantly bigger than the standard air vents so lots of cutting is required, then some filling will be needed, then finally I'll get everything trimmed nicely.
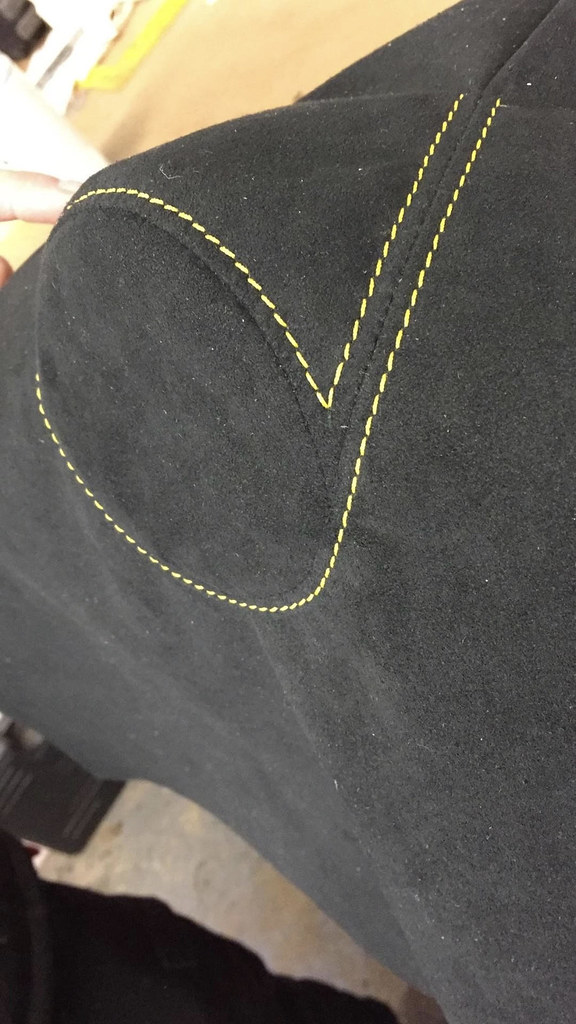
Here's a picture of rough fitment after a fair bit of cutting!
Little update on my air vent project...
So in order to make them fit the dashboard, it required some cutting of the dash to the new diameter of the vent. Unfortunately they still didn't fit and needed to sit a bit further forward from the actual dash in order to retain the full functionality and slot into the dash behind (there are round holes for the vents in the ali chassis plate, so you have to fit inside those holes).
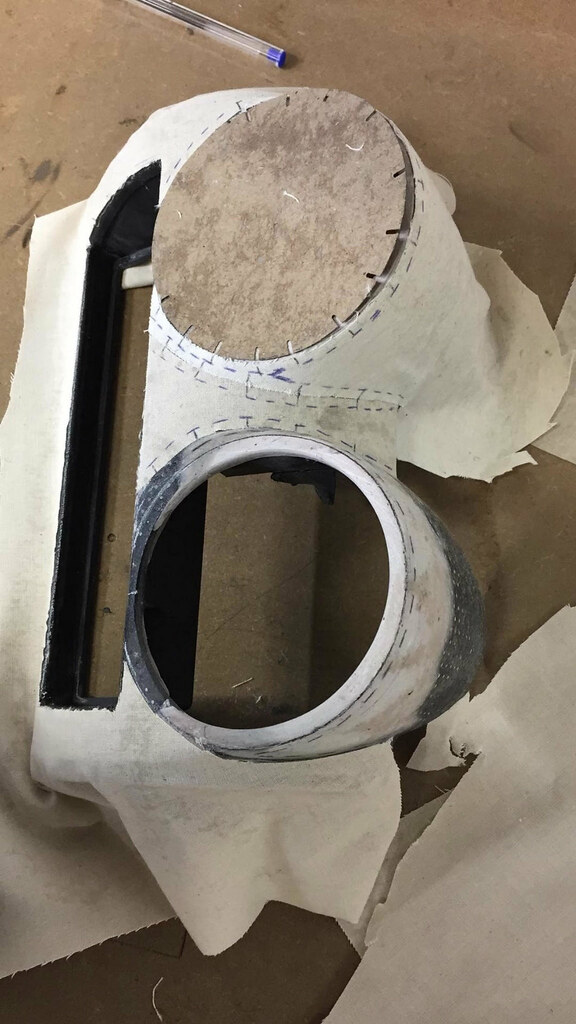
I realised that the only way I could do it for a reasonable cost was to use filler and change the shape of the dash a little to make it work. So I started with the filler and after many hours of trying to get it to work, I got to this stage:

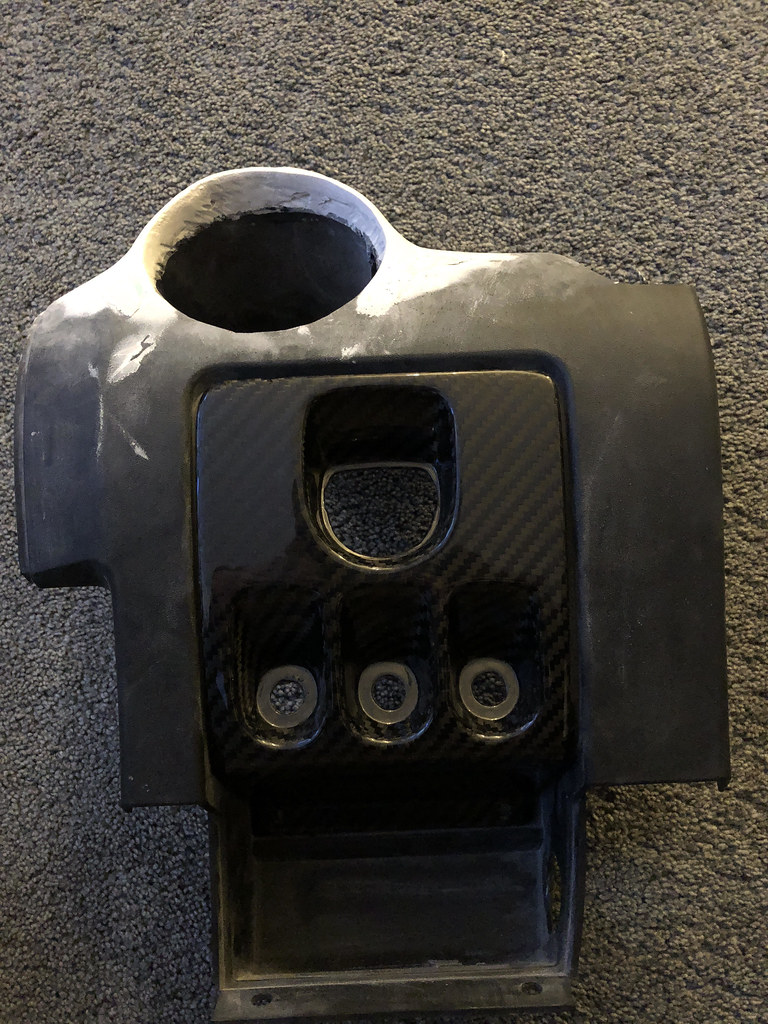
I also bought some carbon switch panels from Elise Shop. Pretty disappointed that they needed quite a bit of work to make them fit, but by that stage I was getting used to using a dremel to make things fit!
I did a test fit of everything and it all fitted eventually! So then I took them to the friendly and brilliant guys at D:Class Auto to trim them in Alcantara. They took it upon themselves to fix up my poor filler skills and make them actually look good!
Here they are making a template for the trimming
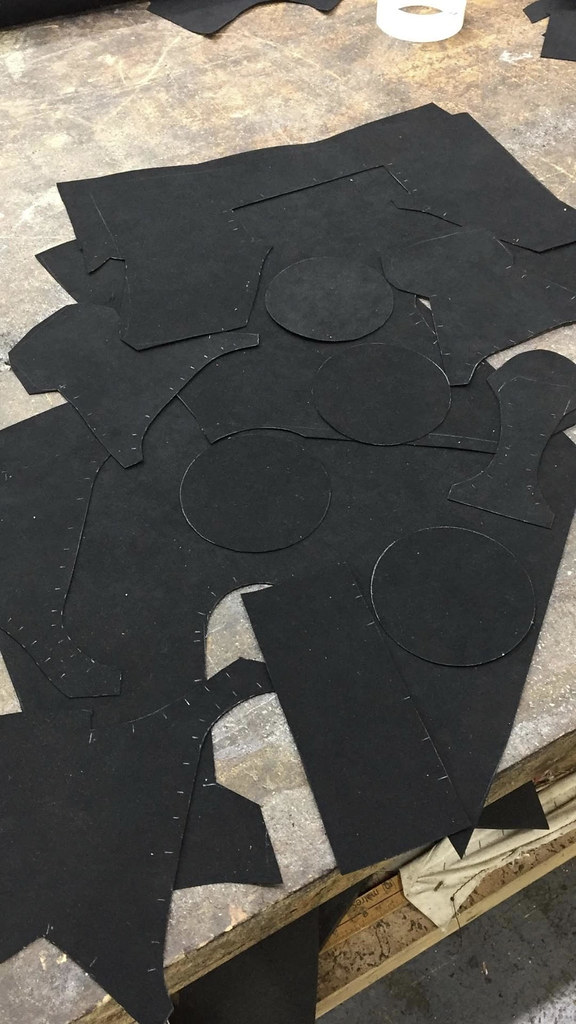
Then they use the templates to mark out where to cut

Cut out ready to make magic happen
Here you can see the trimming in progress
And finished!
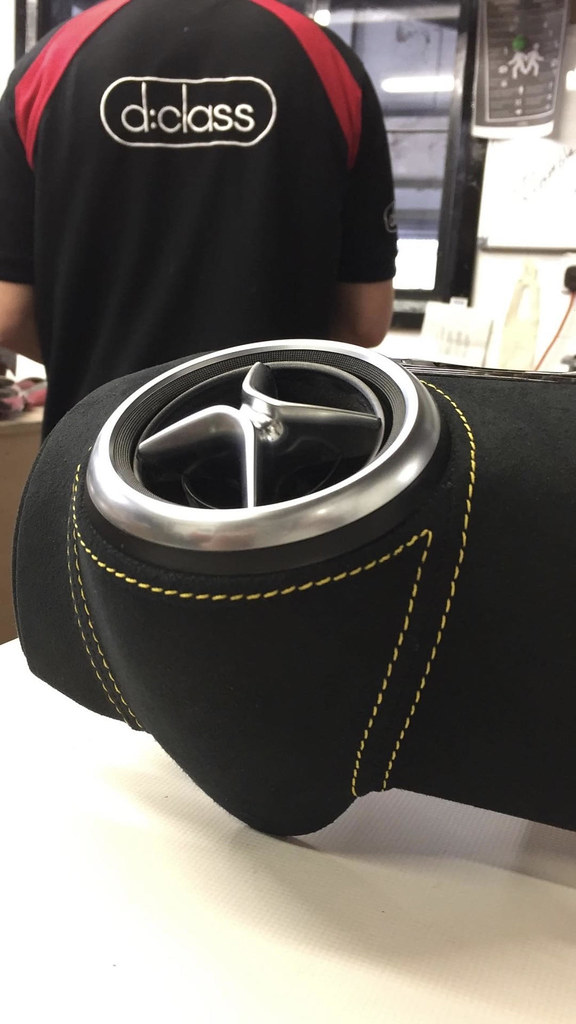
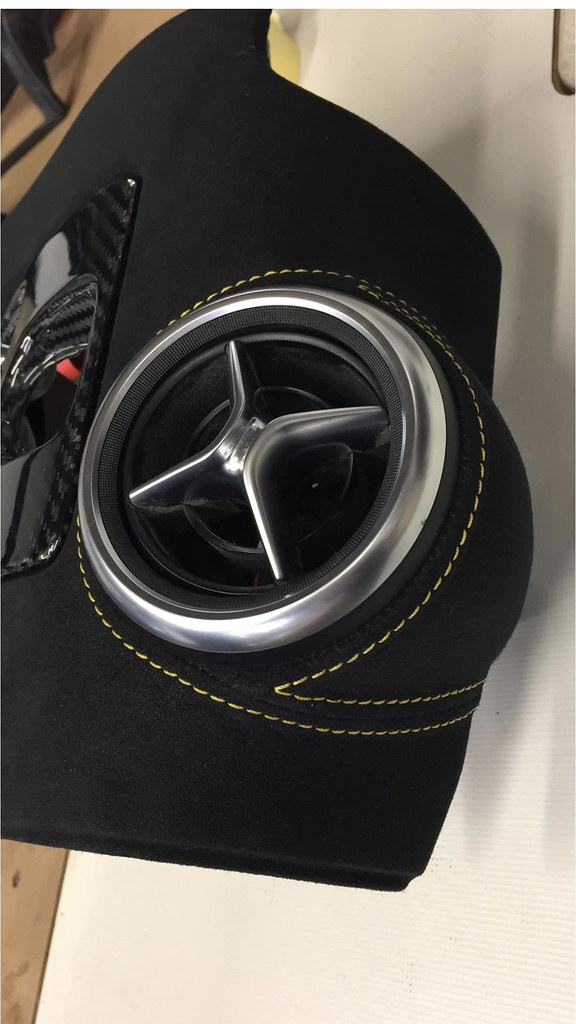
Hats off, very impressive work making my filling look good and then doing such an amazing job on the actual trimming. Can't recommend D:Class Auto enough!
Next up, got to pick up the bits and fit them. Carbon Sills are also finished at Topaz Detailing with the latest, self healing, paint protection film.
So in order to make them fit the dashboard, it required some cutting of the dash to the new diameter of the vent. Unfortunately they still didn't fit and needed to sit a bit further forward from the actual dash in order to retain the full functionality and slot into the dash behind (there are round holes for the vents in the ali chassis plate, so you have to fit inside those holes).
I realised that the only way I could do it for a reasonable cost was to use filler and change the shape of the dash a little to make it work. So I started with the filler and after many hours of trying to get it to work, I got to this stage:
I also bought some carbon switch panels from Elise Shop. Pretty disappointed that they needed quite a bit of work to make them fit, but by that stage I was getting used to using a dremel to make things fit!
I did a test fit of everything and it all fitted eventually! So then I took them to the friendly and brilliant guys at D:Class Auto to trim them in Alcantara. They took it upon themselves to fix up my poor filler skills and make them actually look good!
Here they are making a template for the trimming
Then they use the templates to mark out where to cut
Cut out ready to make magic happen
Here you can see the trimming in progress
And finished!
Hats off, very impressive work making my filling look good and then doing such an amazing job on the actual trimming. Can't recommend D:Class Auto enough!
Next up, got to pick up the bits and fit them. Carbon Sills are also finished at Topaz Detailing with the latest, self healing, paint protection film.
The new vents and trimming look great.  This has just reminded me I used D:Class to retrim the steering wheel and gear lever on my old AMG C43 - expensive, but it was nappa leather done really nicely and the look and feel was superb.
I might have to head back there for my GT3's wheel and gear lever. Not sure I'll upgrade to A Class vents and alcantara though.
This has just reminded me I used D:Class to retrim the steering wheel and gear lever on my old AMG C43 - expensive, but it was nappa leather done really nicely and the look and feel was superb.I might have to head back there for my GT3's wheel and gear lever. Not sure I'll upgrade to A Class vents and alcantara though.

Thanks for the kind words chaps, and the location looks correct in Norway, well done! I had no idea!
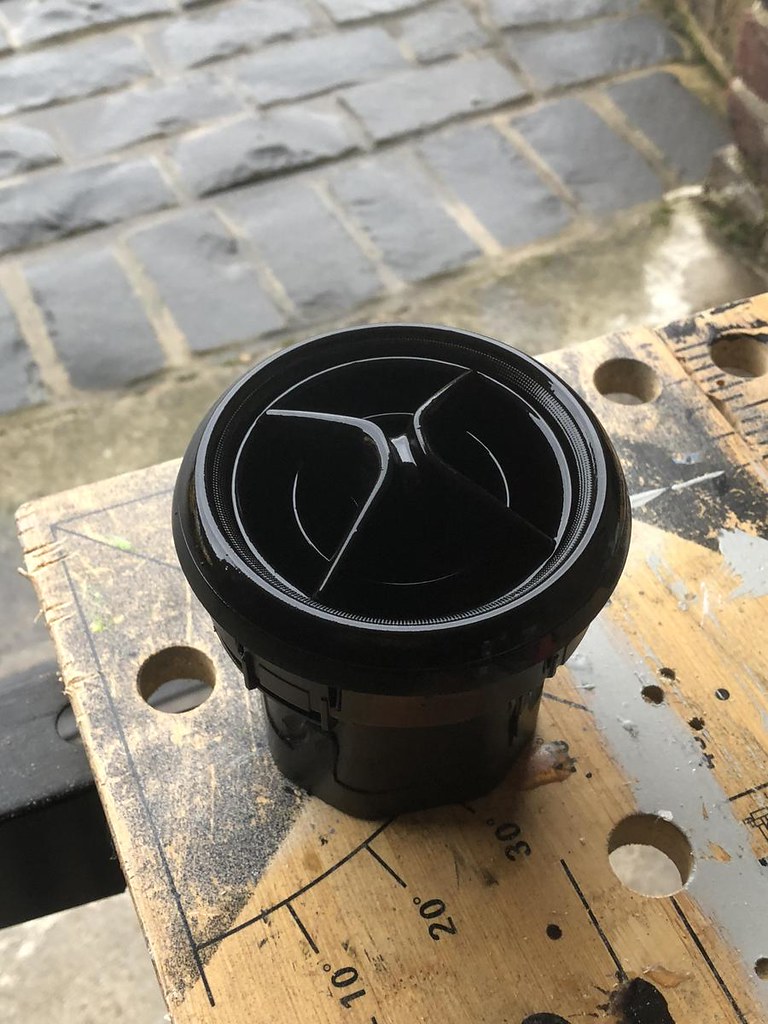
It’s the little things which make a difference. Always annoyed me that you couldn’t tell which way the heater controls were facing. I seriously looked into fitting the Sport 350 onwards controls and it’s not possible due to big wiring changes, so this is my solution. I got the dials machined so you can feel which direction they’re pointing. I’ll get them anodised at a later date too.
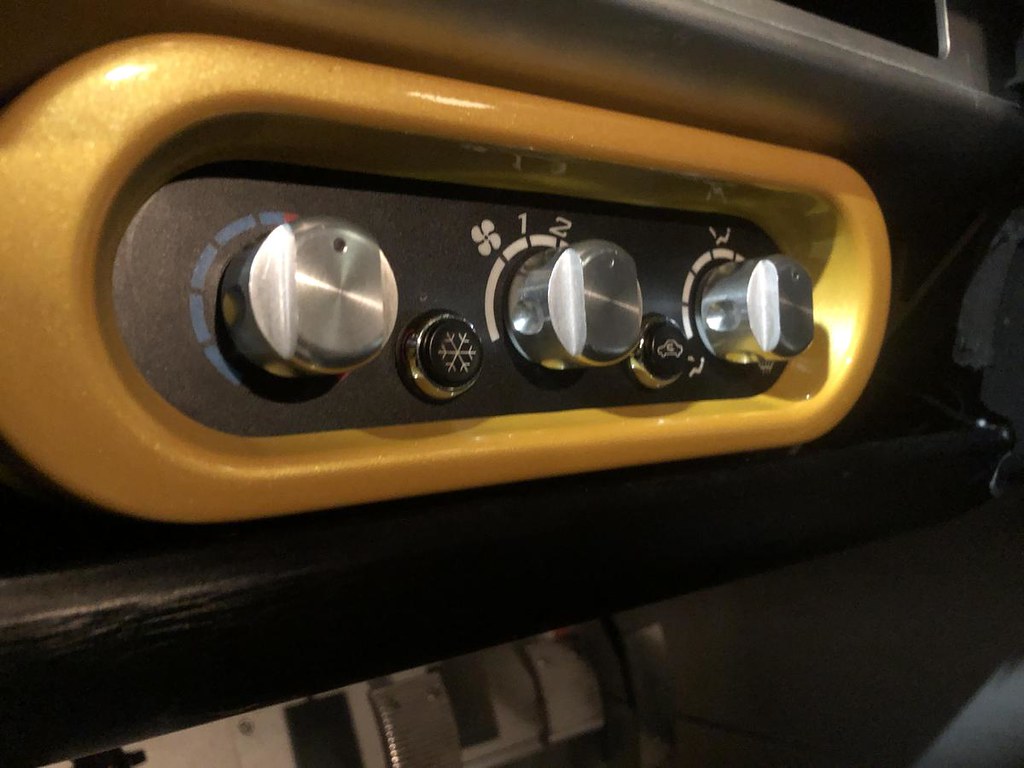
Also, I had a spare vent so quickly put a coat of black paint on to see how it looks. Really happy with the look so I think I’m decided on gloss black and will get them to the painters to do them properly.
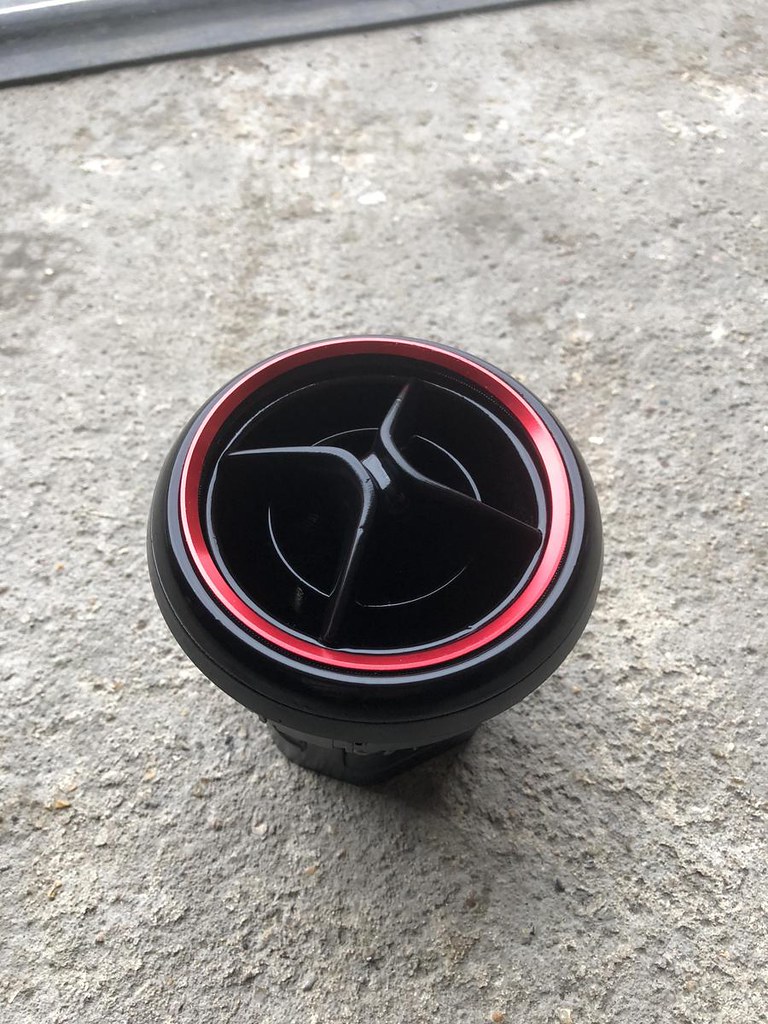
The red looks quite good, but I don’t think it’ll work with the yellow stitching. They're rings which you can just place on, so I can do a test fit and see if I like it, but I feel it might be better to keep things simple this time.
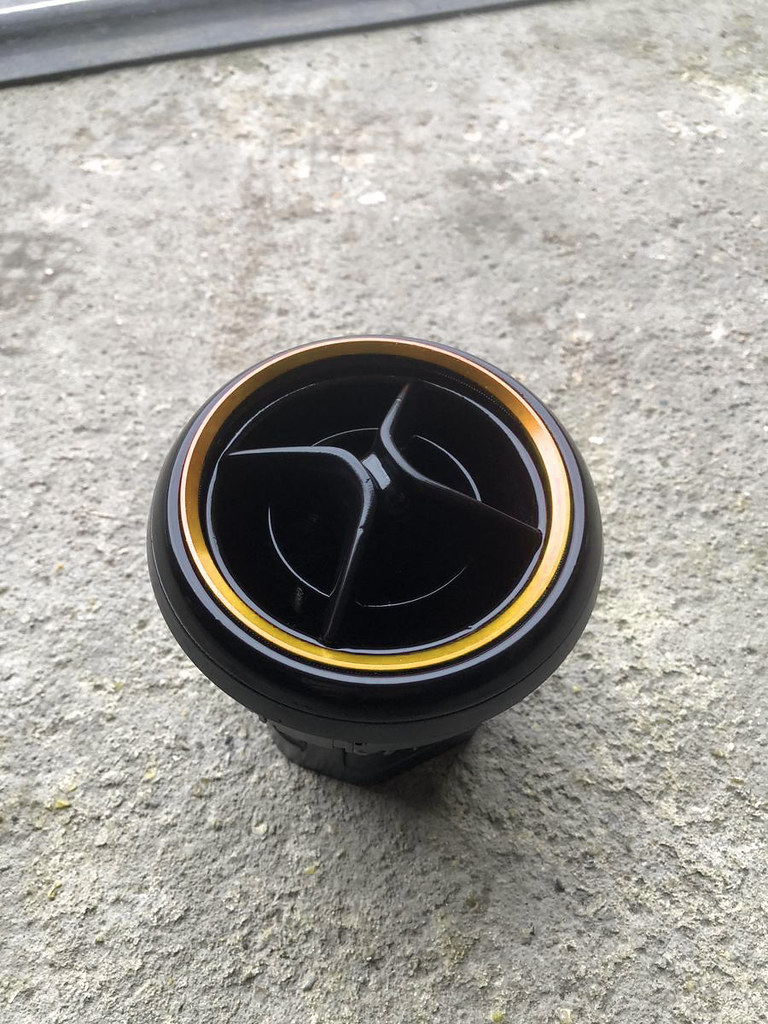
Photoshop to see what yellow would look like. It's good, but costs more money and the costs of the winter project are quite high so don't really want to spend even more to be honest. Easy to do at a later date if I want to though...
It’s the little things which make a difference. Always annoyed me that you couldn’t tell which way the heater controls were facing. I seriously looked into fitting the Sport 350 onwards controls and it’s not possible due to big wiring changes, so this is my solution. I got the dials machined so you can feel which direction they’re pointing. I’ll get them anodised at a later date too.
Also, I had a spare vent so quickly put a coat of black paint on to see how it looks. Really happy with the look so I think I’m decided on gloss black and will get them to the painters to do them properly.
The red looks quite good, but I don’t think it’ll work with the yellow stitching. They're rings which you can just place on, so I can do a test fit and see if I like it, but I feel it might be better to keep things simple this time.
Photoshop to see what yellow would look like. It's good, but costs more money and the costs of the winter project are quite high so don't really want to spend even more to be honest. Easy to do at a later date if I want to though...
Edited by GFWilliams on Tuesday 20th February 00:08
GFWilliams said:
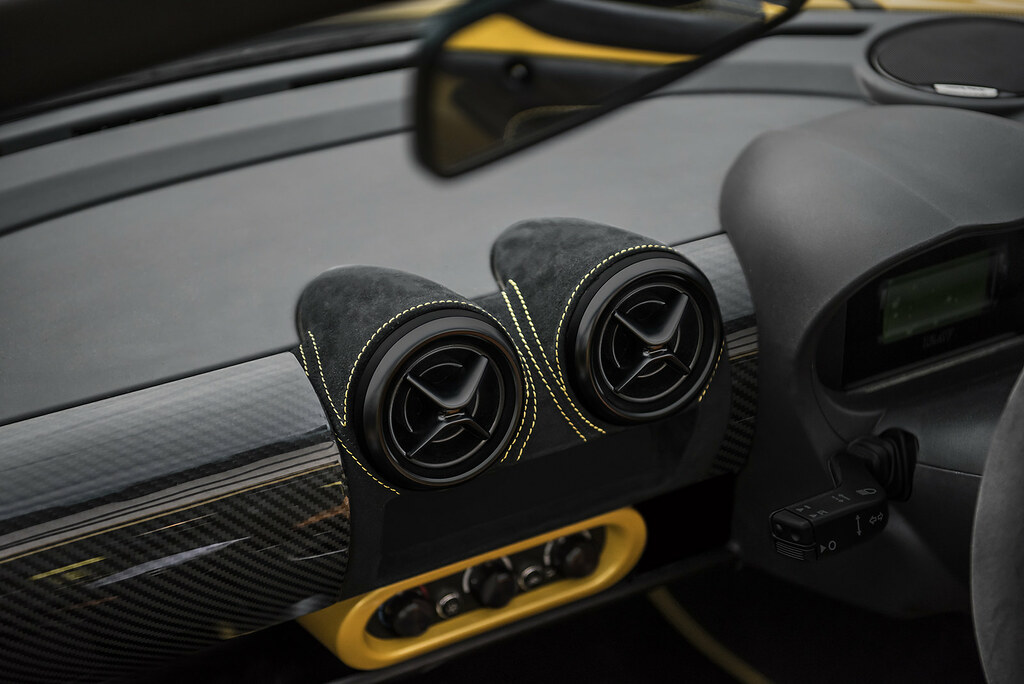
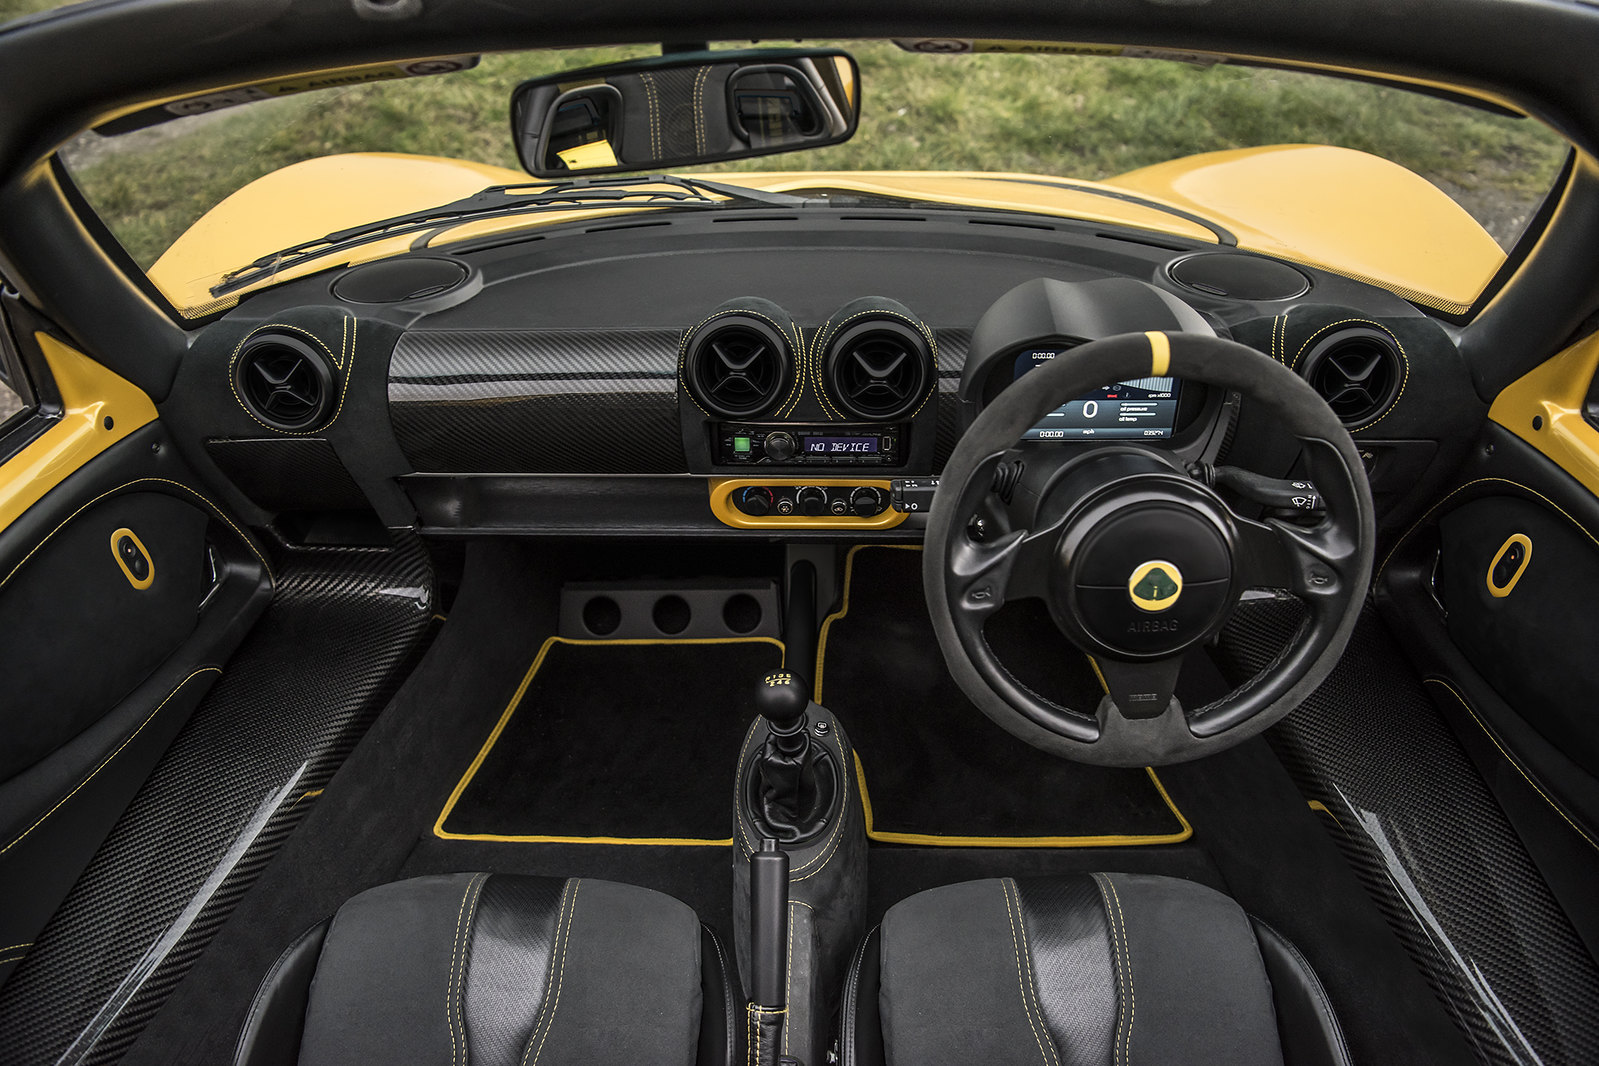
A shot of the whole interior back together!
That looks really great...and a slight difference from Sunday now all the trim and seats are back in!I would be tempted to leave the vent rings in black (aside from the hassle and costs of painting them) as the yellow of the vents may jar or diminish the appearance of the stitching around the vents. (Although this is merely my opinion).
EJH said:
That looks really great...and a slight difference from Sunday now all the trim and seats are back in!
I would be tempted to leave the vent rings in black (aside from the hassle and costs of painting them) as the yellow of the vents may jar or diminish the appearance of the stitching around the vents. (Although this is merely my opinion).
I'm thinking just black vents. I'm also thinking the yellow edge of the carpets is too much!I would be tempted to leave the vent rings in black (aside from the hassle and costs of painting them) as the yellow of the vents may jar or diminish the appearance of the stitching around the vents. (Although this is merely my opinion).

Gassing Station | Readers' Cars | Top of Page | What's New | My Stuff