320touring's 1959 Morris Oxford
Discussion


LewG said:
That looks so cool, what a great little car. I'd much prefer one of these compared to the standard Moggy 1000 etc
Thanks, it is a little bit different from the norm however, it does bring some challenges.
Luckily mechanical parts are relatively easy to source!
CharlesdeGaulle said:
LewG said:
That looks so cool, what a great little car. I'd much prefer one of these compared to the standard Moggy 1000 etc
It's great, isn't it? Really nice to see an ordinary (but now rare) little thing catch an enthusiast's eye. I hope it treats you well, as long as it's been pretty well looked after throughout its life there's not a lot that can go wrong. I do find in the days of Canbus, ECUs, and automatic everything, cars like this are a refreshing change because getting stuck in with the maintenance is genuinely enjoyable and all part of keeping it running just so.
LewG said:
I hope it treats you well, as long as it's been pretty well looked after throughout its life there's not a lot that can go wrong. I do find in the days of Canbus, ECUs, and automatic everything, cars like this are a refreshing change because getting stuck in with the maintenance is genuinely enjoyable and all part of keeping it running just so.
I'm just trying to get my head around imperial sizes;)But aye, nothing needs coded to anything else
After Saturday's initial clean and inspection, it was time for Bodicea (she's been named that by the Burd as "she's aww boady") to head north to a friend's garage for a thorough examination.
The tank was brimmed (a rather surprising 24.78mpg) and she was parked up on Saturday evening.
Sunday arrived with a vengeance! -8 degrees and the need to defrost the door lock to get into the car.
Once inside it was no better – the inside of the windows were frozen. Luckily, a bit of choke and some throttle got the B series to fire, and she sat happily on the choke whilst I scraped.
The roads were a touch slippy, so it was slow and steady progress to the rendezvous point with my Brother for breakfast.

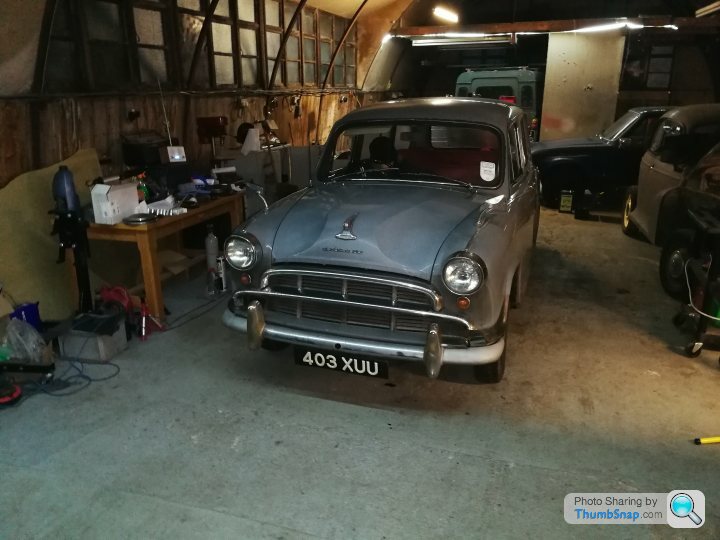
Suitably fed, we headed northwards. About 90 mins later, we arrived at our mate John’s workshop. It’s the ideal kind of place for working on such a car, as he has an eclectic mix of cars, and all the tools to suit..
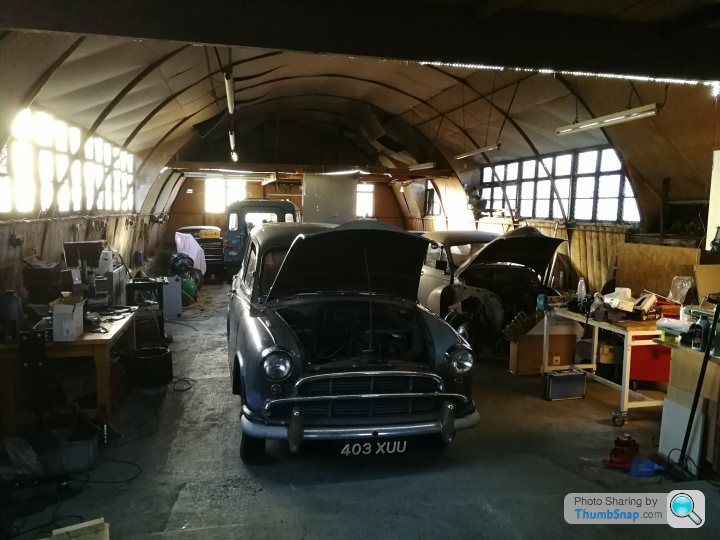
It was -3 in the unit, so that aided and abetted some rapid working.
In no time she was up on axle stands and ready for perusal
At the rear end, the news was decent.
No cracked springs, axle looked ok (if a touch leaky) and the floor was in decent shape but had been patched.
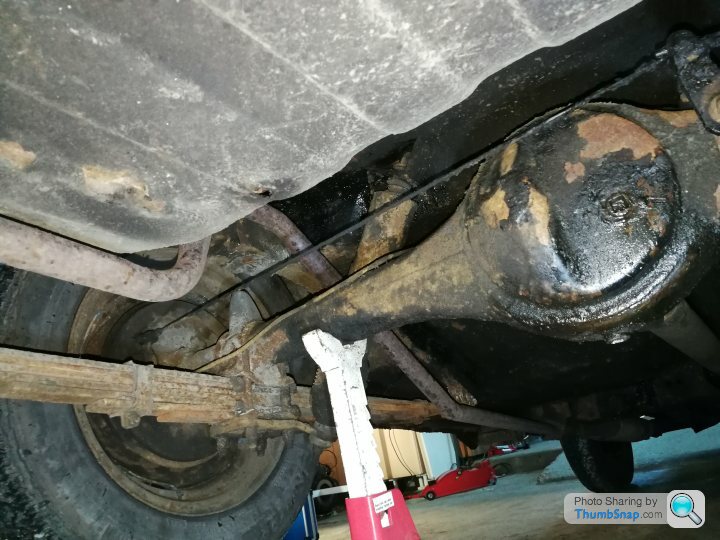
There’s a fair bit of rot at the rear of the arches but the main parts of the arch are solid.
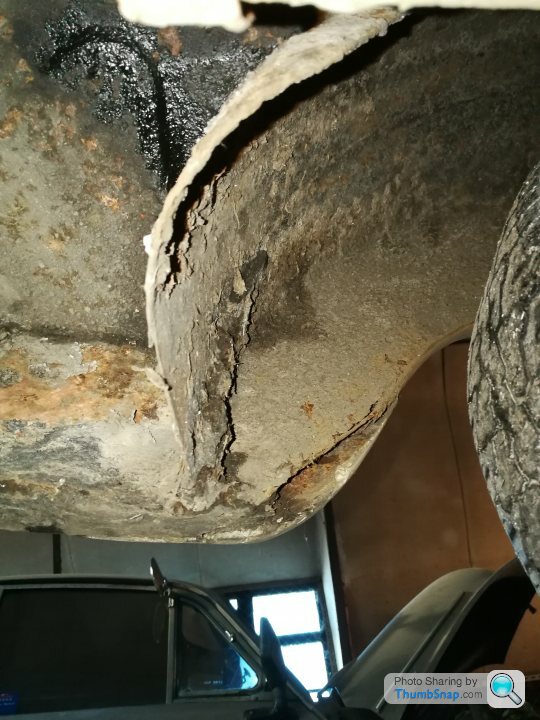
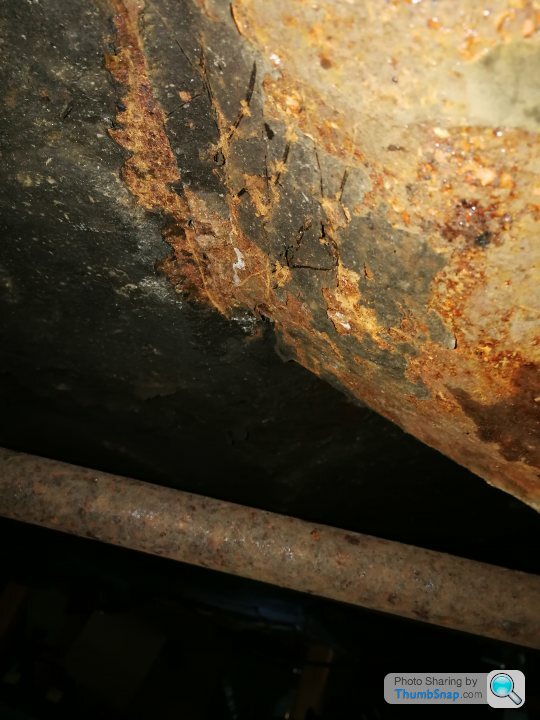
This was not unexpected as she’s 59 years old! The intention will be to clean it all up and repair where required before painting and coating in wax to protect it.
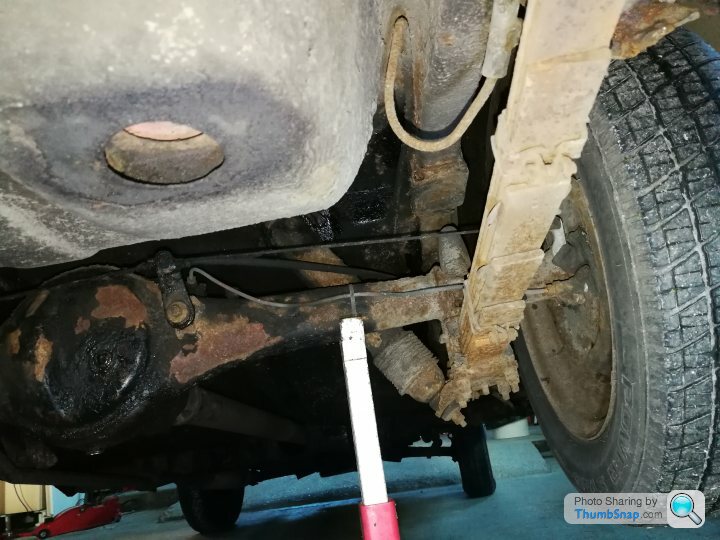
Next up was a look at the rear dampers, as the car became unsettled going over bumps
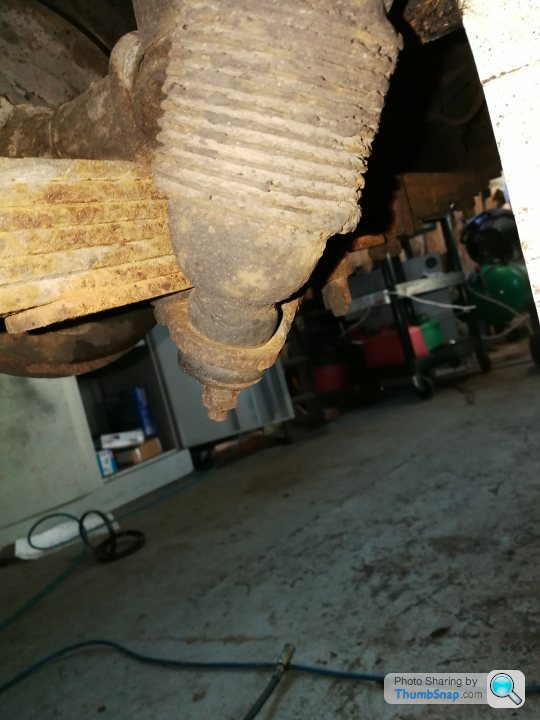
I suspect they are not in their first flush of use, so I’ll be seeking replacements.
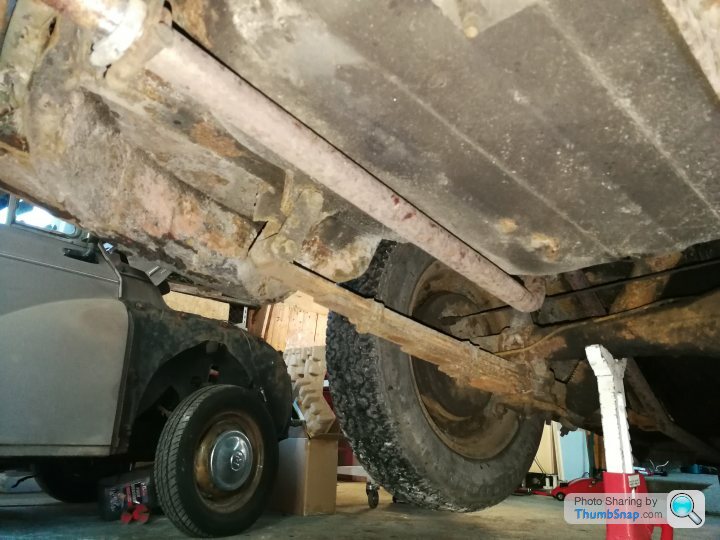
We moved along the sills, not finding too much to worry about – plenty of sound, solid metal, and a modicum of surface rust.
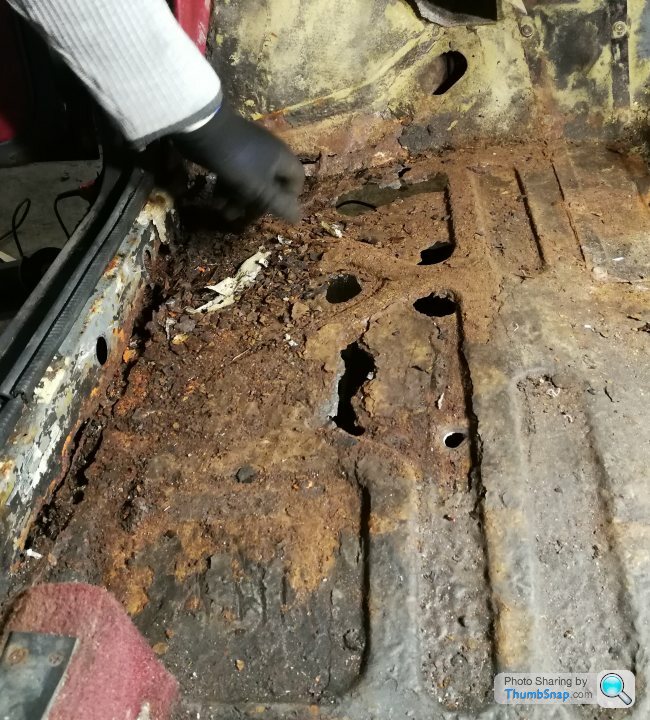
Both front footwells are rough – especially along the sill sides and where they (used to) join to the wheelwell/bulkhead area.
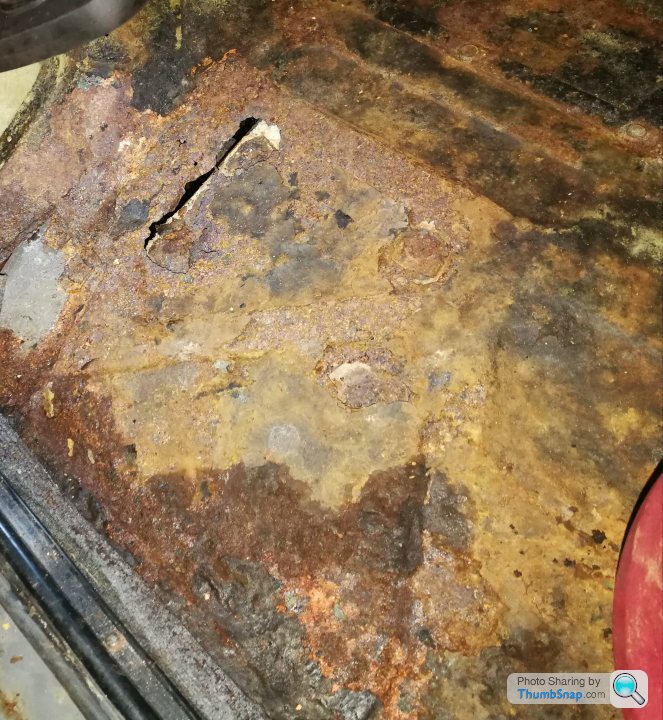
On the passenger side, this is exacerbated by the original fitment asbestos heatshield. Over the years it has trapped plenty of mud and water, significantly rotting the floor.
We’re not too concerned re these areas as they are flat, square easy to access panels!
it’s a C for structural intergrity.
Next up was the brakes – having never driven and ‘all drum’ car before, I have to say I was less than enamored by Bodicea’s powers of stopping.
There was a squeal from the front right at low speed, and a fair amount of pedal travel before anything happened.
Off with the hubcaps and wheels then, discovering that the drivers front tyre was more like a 50p than a circle. That’ll be the wobble from the front end then.
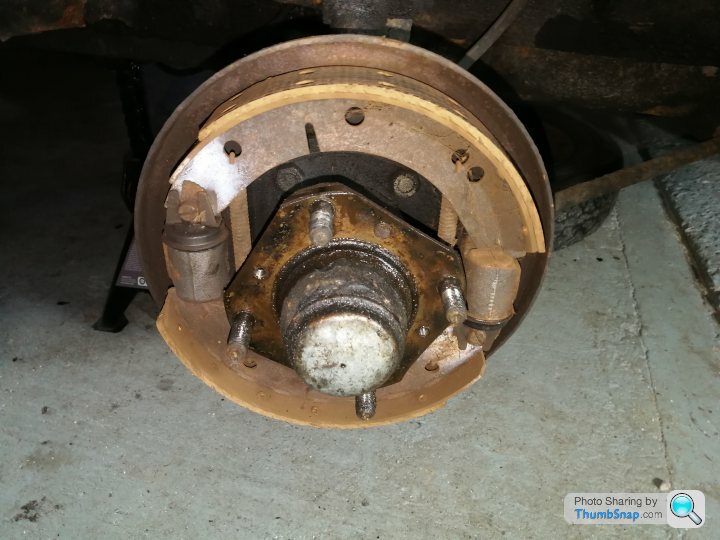
We started at the rear. The handbrake mechanism was moving freely on both sides, so we decided to pull off the drums and check the shoe and cylinder condition.
This was good news all round.
We donned protective masks as we were unsure of the age of components – and don’t want to inhale any asbestos dust that may be present.
The drum retaining screws came out cleanly, and the drums pulled off (exhibiting no discernible lip).
The cylinders on both sides were clean, dry and functional.
The adjustors rotated through their full range after some light cleaning, and the drums and shoes were lightly scuffed with sandpaper to clean them up.
The drums were refitted and the shoes adjusted to just drag slightly.
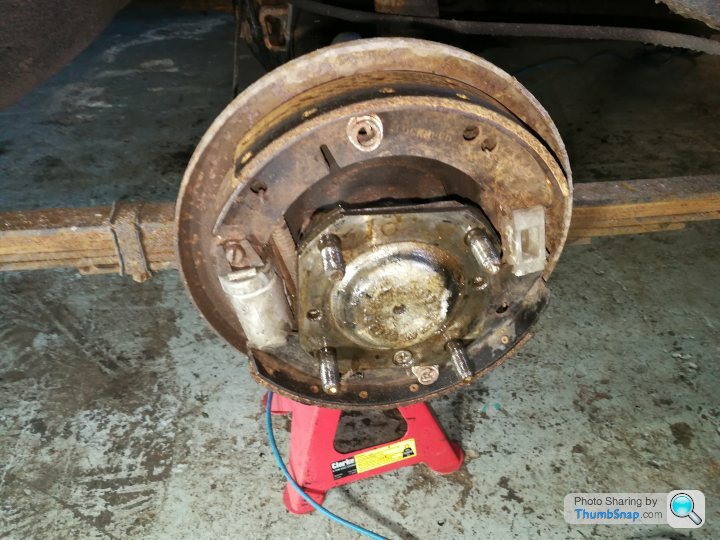
The fronts were much the same ( bar being twin leading shoe, with 2 cylinders per drum)
The only noticeable difference was a couple of missing ‘beehive’ shoe retaining springs – a likely cause of the squeal from the front as the shoes moved during use.
The cylinders, shoes and drums were all in good condition, so only some retaining springs required, and I’ll order them up.
With the shoes adjusted, the pedal feel of the car was improved too, so it’s a B for brakes (Geddit!?).
The next job was also brake related.
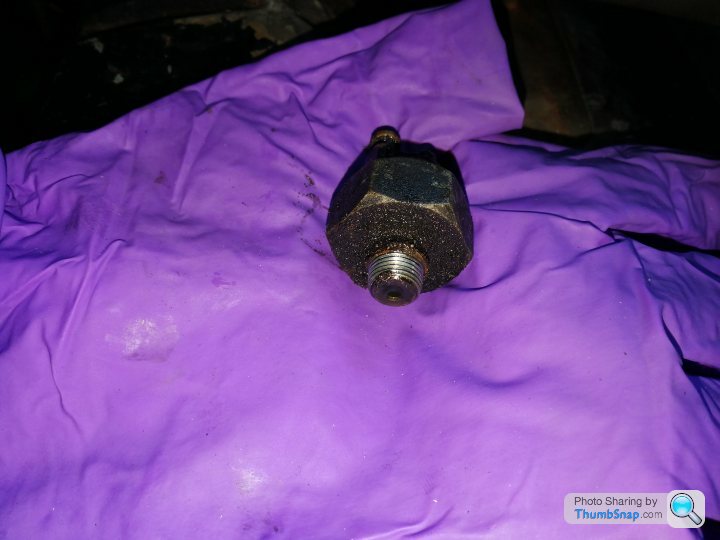
Prior to my purchase, the hydraulically operated brake light switch failed, meaning that the brake lights were always on.
The switch works by using the movement of fluid when the pedal is depressed to fill the switch and complete the circuit.
But in this instance, it was operated by a dash mounted switch.
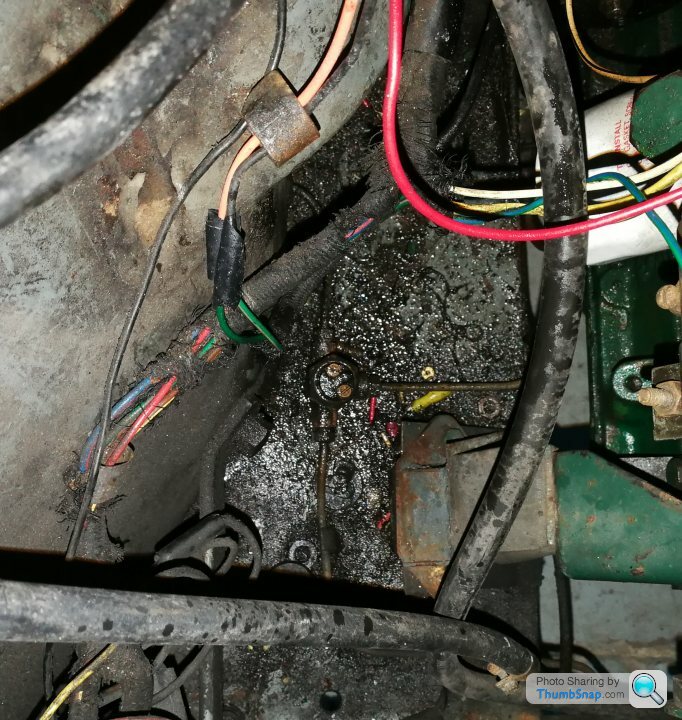
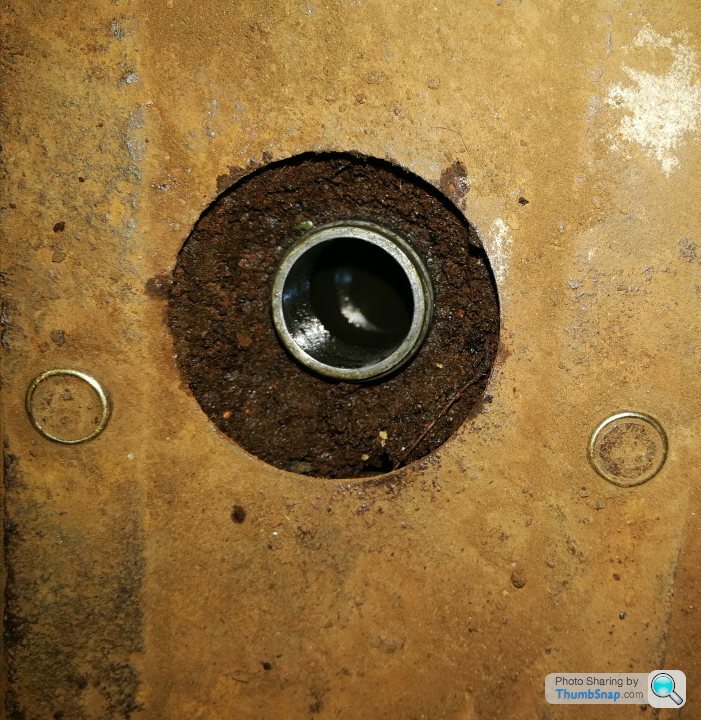
Handily, the switch is located at the front of the engine bay, providing unfettered access for removal.
Not so handy are the myriad tales of brake line damage as the switch rotates the whole T piece due to years of detritus welding them together.
Such tales rang in my ears as I doused the switch in penetrating oil over a couple of days. Today was the acid test.
We braced against the inner wing with one pry bar, and used a hammer head beside the engine mount to brace the other side of the switch. Application of a socket and ratchet, plus a few muttered prayers lead to a successful removal of the old switch!
The new one was fitted, wired up and tested as working. Tremendous
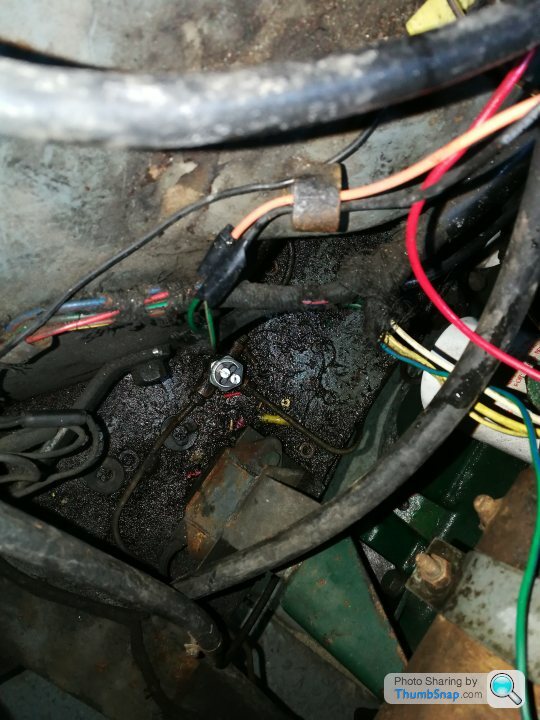
The state of the old switch clearly shows that the cause was mingin brake fluid.
A decision was taken to bleed the brakes though with new fluid – easily done by pouring the fresh fluid onto the floor.
Well, not onto, more into!
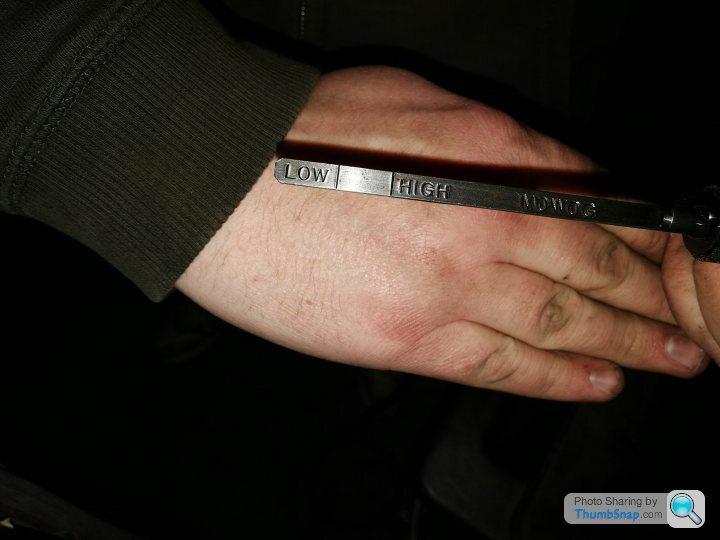
At the same time, the gearbox oil level was checked using the handy dipstick.
I got a pic of it once wiped clean as it is a lovely looking thing!
The tank was brimmed (a rather surprising 24.78mpg) and she was parked up on Saturday evening.
Sunday arrived with a vengeance! -8 degrees and the need to defrost the door lock to get into the car.
Once inside it was no better – the inside of the windows were frozen. Luckily, a bit of choke and some throttle got the B series to fire, and she sat happily on the choke whilst I scraped.
The roads were a touch slippy, so it was slow and steady progress to the rendezvous point with my Brother for breakfast.
Suitably fed, we headed northwards. About 90 mins later, we arrived at our mate John’s workshop. It’s the ideal kind of place for working on such a car, as he has an eclectic mix of cars, and all the tools to suit..
It was -3 in the unit, so that aided and abetted some rapid working.
In no time she was up on axle stands and ready for perusal
At the rear end, the news was decent.
No cracked springs, axle looked ok (if a touch leaky) and the floor was in decent shape but had been patched.
There’s a fair bit of rot at the rear of the arches but the main parts of the arch are solid.
This was not unexpected as she’s 59 years old! The intention will be to clean it all up and repair where required before painting and coating in wax to protect it.
Next up was a look at the rear dampers, as the car became unsettled going over bumps
I suspect they are not in their first flush of use, so I’ll be seeking replacements.
We moved along the sills, not finding too much to worry about – plenty of sound, solid metal, and a modicum of surface rust.
Both front footwells are rough – especially along the sill sides and where they (used to) join to the wheelwell/bulkhead area.
On the passenger side, this is exacerbated by the original fitment asbestos heatshield. Over the years it has trapped plenty of mud and water, significantly rotting the floor.
We’re not too concerned re these areas as they are flat, square easy to access panels!
it’s a C for structural intergrity.
Next up was the brakes – having never driven and ‘all drum’ car before, I have to say I was less than enamored by Bodicea’s powers of stopping.
There was a squeal from the front right at low speed, and a fair amount of pedal travel before anything happened.
Off with the hubcaps and wheels then, discovering that the drivers front tyre was more like a 50p than a circle. That’ll be the wobble from the front end then.
We started at the rear. The handbrake mechanism was moving freely on both sides, so we decided to pull off the drums and check the shoe and cylinder condition.
This was good news all round.
We donned protective masks as we were unsure of the age of components – and don’t want to inhale any asbestos dust that may be present.
The drum retaining screws came out cleanly, and the drums pulled off (exhibiting no discernible lip).
The cylinders on both sides were clean, dry and functional.
The adjustors rotated through their full range after some light cleaning, and the drums and shoes were lightly scuffed with sandpaper to clean them up.
The drums were refitted and the shoes adjusted to just drag slightly.
The fronts were much the same ( bar being twin leading shoe, with 2 cylinders per drum)
The only noticeable difference was a couple of missing ‘beehive’ shoe retaining springs – a likely cause of the squeal from the front as the shoes moved during use.
The cylinders, shoes and drums were all in good condition, so only some retaining springs required, and I’ll order them up.
With the shoes adjusted, the pedal feel of the car was improved too, so it’s a B for brakes (Geddit!?).
The next job was also brake related.
Prior to my purchase, the hydraulically operated brake light switch failed, meaning that the brake lights were always on.
The switch works by using the movement of fluid when the pedal is depressed to fill the switch and complete the circuit.
But in this instance, it was operated by a dash mounted switch.
Handily, the switch is located at the front of the engine bay, providing unfettered access for removal.
Not so handy are the myriad tales of brake line damage as the switch rotates the whole T piece due to years of detritus welding them together.
Such tales rang in my ears as I doused the switch in penetrating oil over a couple of days. Today was the acid test.
We braced against the inner wing with one pry bar, and used a hammer head beside the engine mount to brace the other side of the switch. Application of a socket and ratchet, plus a few muttered prayers lead to a successful removal of the old switch!
The new one was fitted, wired up and tested as working. Tremendous
The state of the old switch clearly shows that the cause was mingin brake fluid.
A decision was taken to bleed the brakes though with new fluid – easily done by pouring the fresh fluid onto the floor.
Well, not onto, more into!
At the same time, the gearbox oil level was checked using the handy dipstick.
I got a pic of it once wiped clean as it is a lovely looking thing!
At the same time this shenanigry was occuring, my brother was making significant progress under the bonnet.
In the course of the day, he got both horn units out and tested, checked the wiring and relay, and cleaned the contacts. This resulted in a strident “GET OUT MY WAY” from the front of the car.
Lucas Windtones are a sound to behold.
He also got the fan unit remounted, and wired the now redundant dash mounted brake light to provided a supply to the fan.
We now have warm air capable of being wafted at screen or passengers at will.
These two things make a huge difference to the viability of using this car in anger – a clear screen and the ability to communicate one’s presence are key!
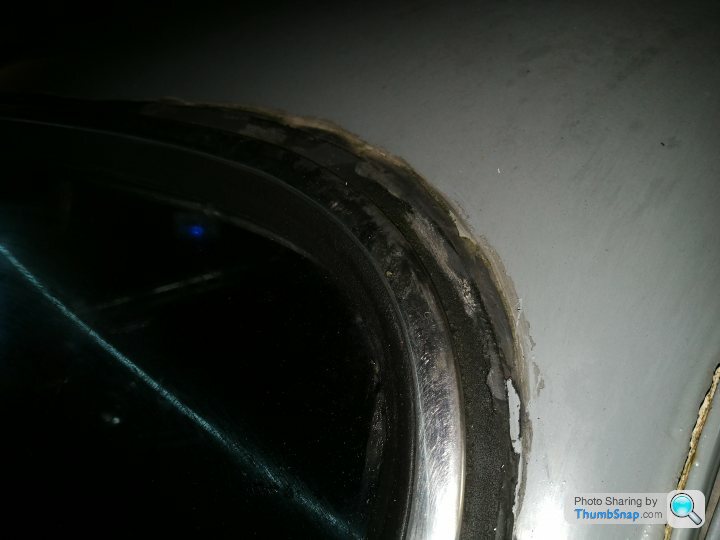
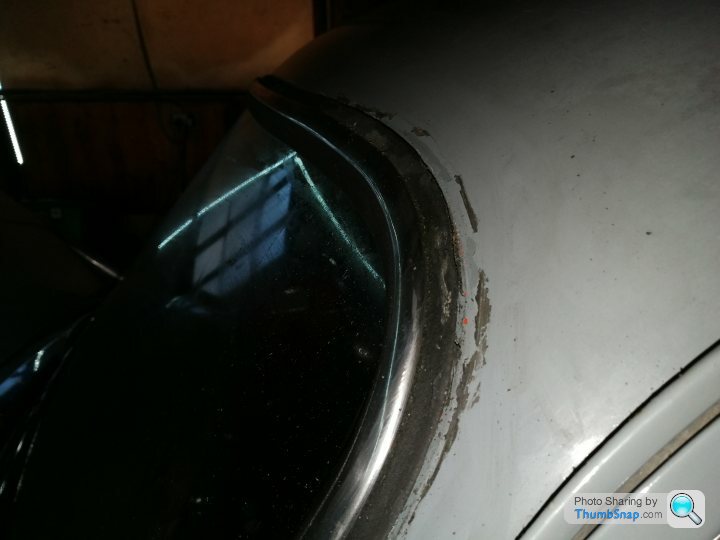
Further to this, a level of water repellent capability for the windscreen was much craved – internal water features, despite being an attractive feature, are not conducive to pleasant driving conditions.
The old sealant was removed, in preparation for application of the new.
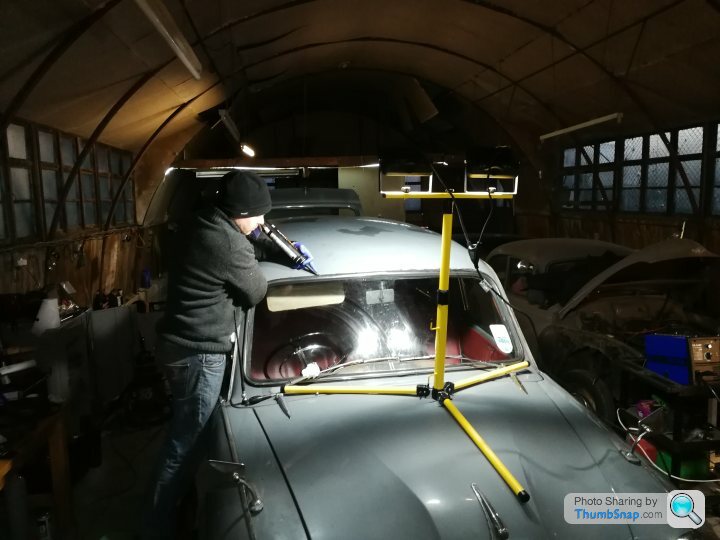
Most of this delicate job was left to the man with a history of driving a caulking gun. He was also responsible for the innovative* lighting solution.
We took her out for a test drive.
Fitting the new spare to the front drivers side has solved most of the low speed wobble.
The brake pedal is much more positive, but the car still pulls to the left – more adjustment and the correct shoe retaining springs should sort that.
Having functioning heating and brake lights has significantly improved and simplified the driving experience, and the ability to shock pedestrians using the horn never grows old.
That’s a B+ for driveability!
We returned to base and had my welder set up and tested – it will soon be used in anger!
And there she rests until the next time..
In the course of the day, he got both horn units out and tested, checked the wiring and relay, and cleaned the contacts. This resulted in a strident “GET OUT MY WAY” from the front of the car.
Lucas Windtones are a sound to behold.
He also got the fan unit remounted, and wired the now redundant dash mounted brake light to provided a supply to the fan.
We now have warm air capable of being wafted at screen or passengers at will.
These two things make a huge difference to the viability of using this car in anger – a clear screen and the ability to communicate one’s presence are key!
Further to this, a level of water repellent capability for the windscreen was much craved – internal water features, despite being an attractive feature, are not conducive to pleasant driving conditions.
The old sealant was removed, in preparation for application of the new.
Most of this delicate job was left to the man with a history of driving a caulking gun. He was also responsible for the innovative* lighting solution.
We took her out for a test drive.
Fitting the new spare to the front drivers side has solved most of the low speed wobble.
The brake pedal is much more positive, but the car still pulls to the left – more adjustment and the correct shoe retaining springs should sort that.
Having functioning heating and brake lights has significantly improved and simplified the driving experience, and the ability to shock pedestrians using the horn never grows old.
That’s a B+ for driveability!
We returned to base and had my welder set up and tested – it will soon be used in anger!
And there she rests until the next time..
Usget said:
Enjoyed that!! The horn thing makes me laugh, I can exactly imagine the sort of polite but irritated "PARRRRP" it comes out with
Cheers! With the high and low tone together it is akin to a Glaswegian Maw shouting her wean in fur tea.I have a video to make of some of the work has been done..
el romeral said:
Great car and surprisingly full instrumentation! What is the gauge which goes from -30 to +30? Was thinking outside temperature but would not have been Centigrade then.
Thanks, yes there's plenty info available when drivingIt's amps - shows the state of the charging circuit..


Back up to Tickman's for a super duper day of bodywork sorting.
First up, a look at the task ahead - it was pretty obvious we needed to go heavy on this.
In for a penny, in for a pound, so out with the grinder.
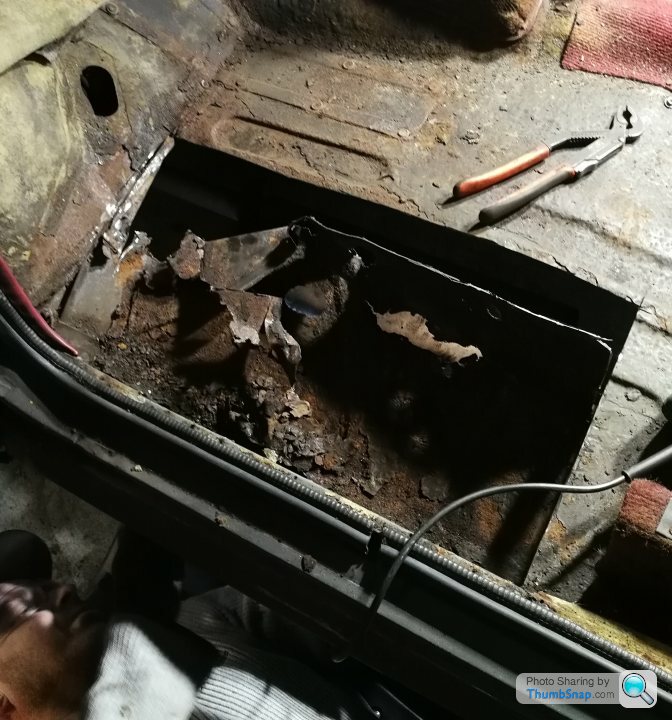
Time for more of an inspection.
The lack of mid- sill and inner sill was problematic,
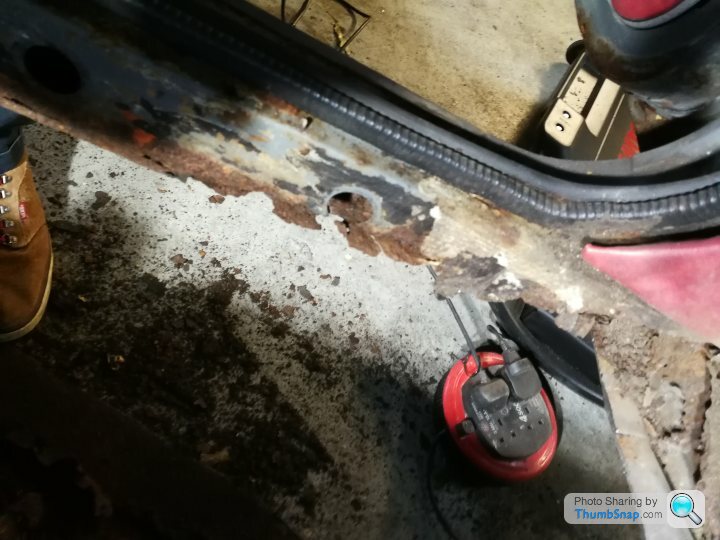
We got the edges all cleaned and trimmed up - the car had at least 4 layers of patches in areas, so plenty time was lost chopping out crap.
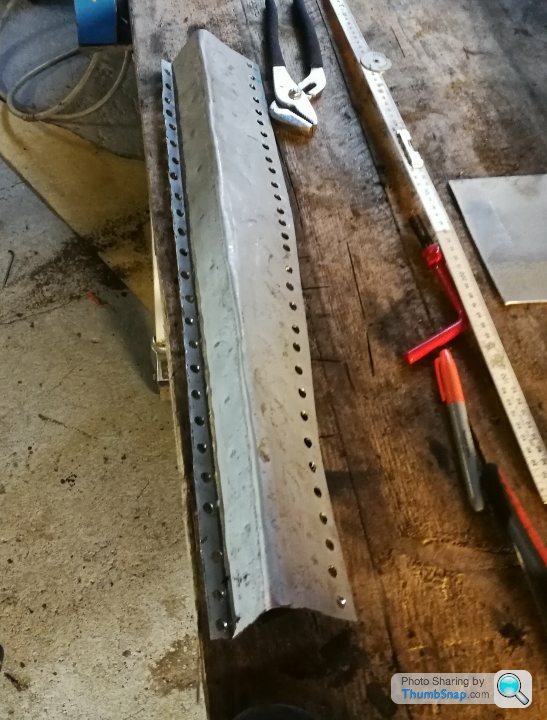
We made up some panels to join the mod sill to the bottom seam where all 3 meet.
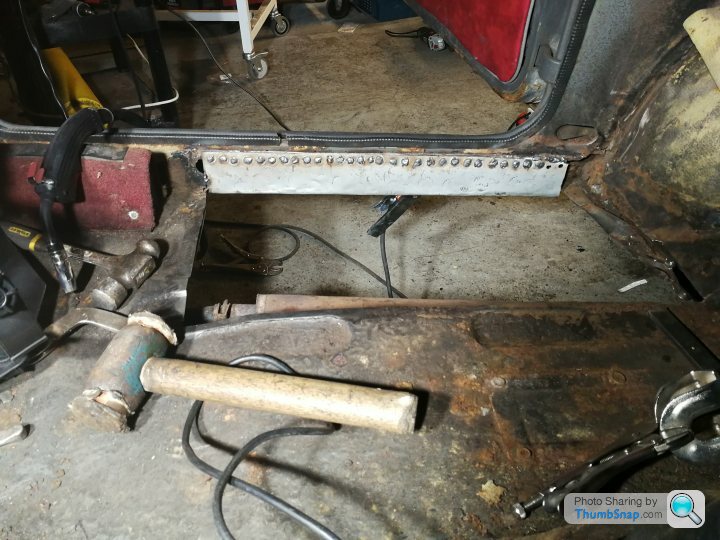
I did my first ever welding on a car -
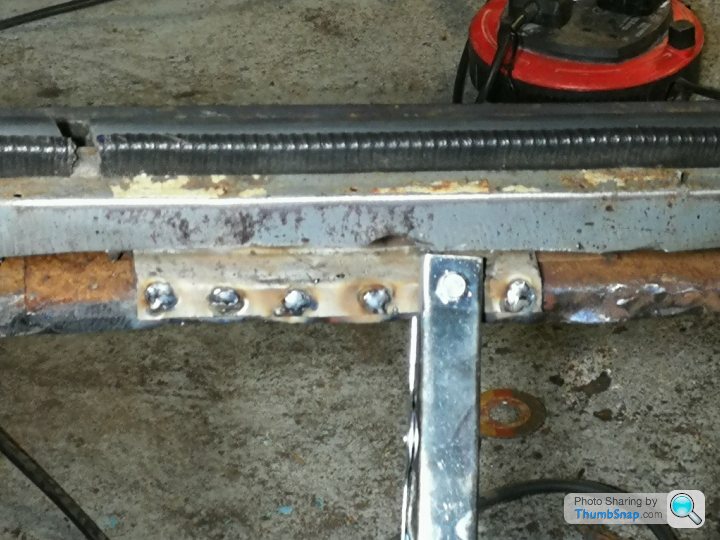
We had to make fairly small panels, to allow us to support and straighten the bottom sill joins.
Eventually we got them all in place
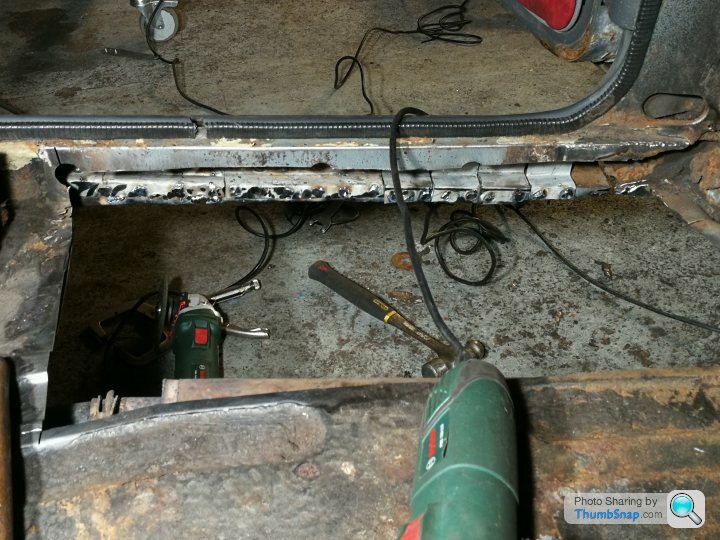
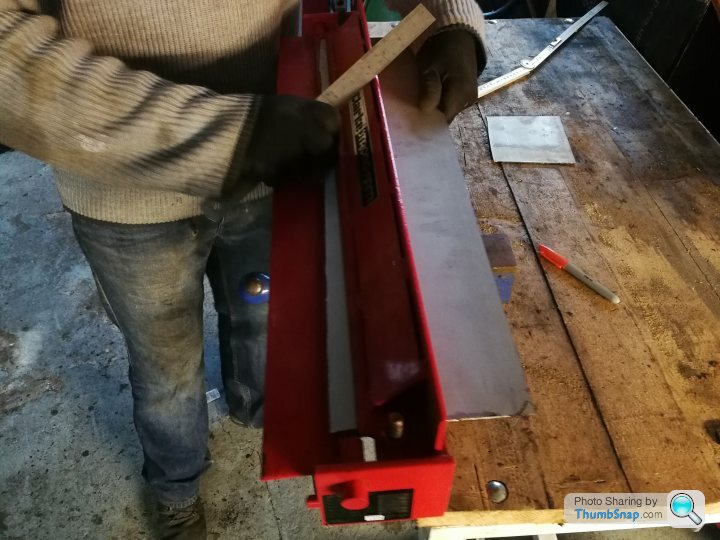
The next thing to do was fit the outer sill we had made
To get this far took approx 6hrs working.
First up, a look at the task ahead - it was pretty obvious we needed to go heavy on this.
In for a penny, in for a pound, so out with the grinder.
Time for more of an inspection.
The lack of mid- sill and inner sill was problematic,
We got the edges all cleaned and trimmed up - the car had at least 4 layers of patches in areas, so plenty time was lost chopping out crap.
We made up some panels to join the mod sill to the bottom seam where all 3 meet.
I did my first ever welding on a car -
We had to make fairly small panels, to allow us to support and straighten the bottom sill joins.
Eventually we got them all in place
The next thing to do was fit the outer sill we had made
To get this far took approx 6hrs working.
Gassing Station | Readers' Cars | Top of Page | What's New | My Stuff