Shed ahead... 75
Discussion


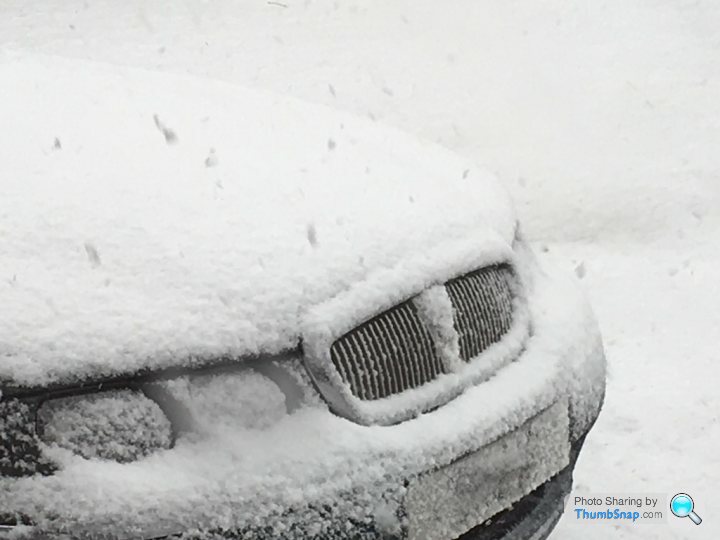
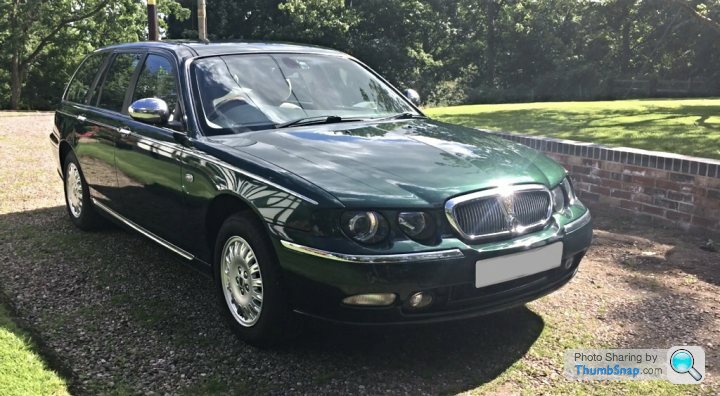
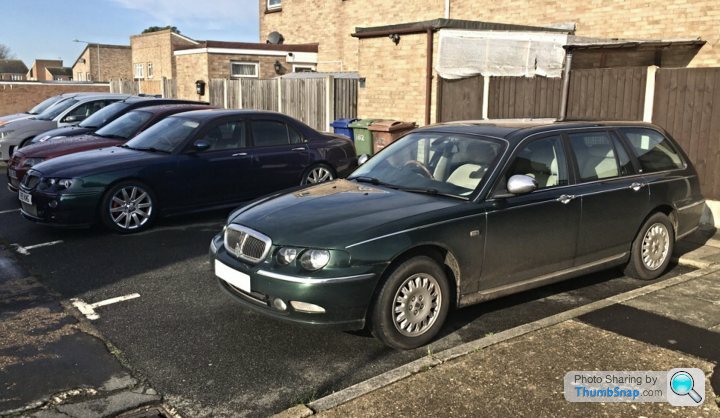
Finally some snow! This was taken the day after Storm Ciara, the day on which I was considering taking the winter tyres off as it's been so mild. This changed my mind..
It's this time of year that the MOT falls due, so a visit back to North Wales was booked in, to see Jules. Those who don't know, Jules is the go-to man with anything 75 or ZT related. It's a bit of a trek to his place but it's worth it, his knowledge of these cars is second to none and his hospitality is great too.
I figured that should it fail, then it was in safe hands with Jules to see about getting it through. I had a slight concern about the airbag light - a common issue with these cars, if the wiring connector under the seat is disturbed it can trigger a warning light on the dash. Given the seat was going to be moved for the test, there's a good chance the light would come on. Anyway, off to Wales...
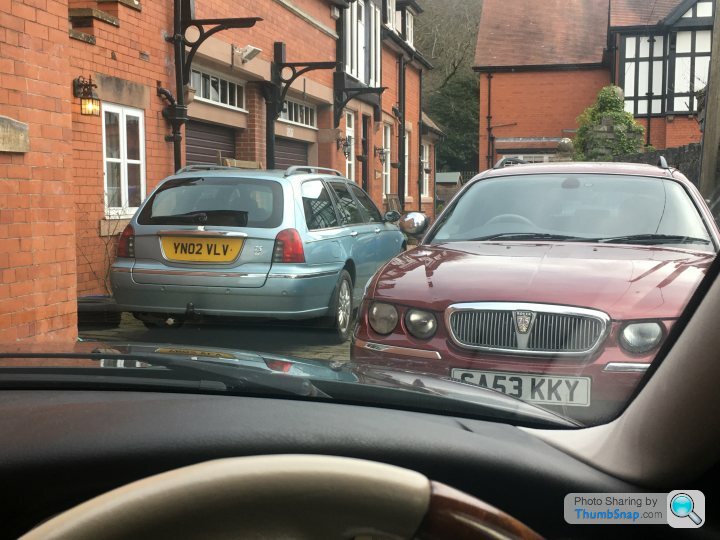
You know you're in the right place when you're surrounded by Rover 75s! A quick check over revealed nothing obvious other than a brake flexi-pipe that had come adrift from a securing clip. Reattached, it was off to the test.
Regretfully it failed on two counts, one being the aforementioned airbag light coming on, second on emissions - well, it is a 17-year old pre-DPF diesel! It was only just over the limit so shouldn't be too hard to get through.
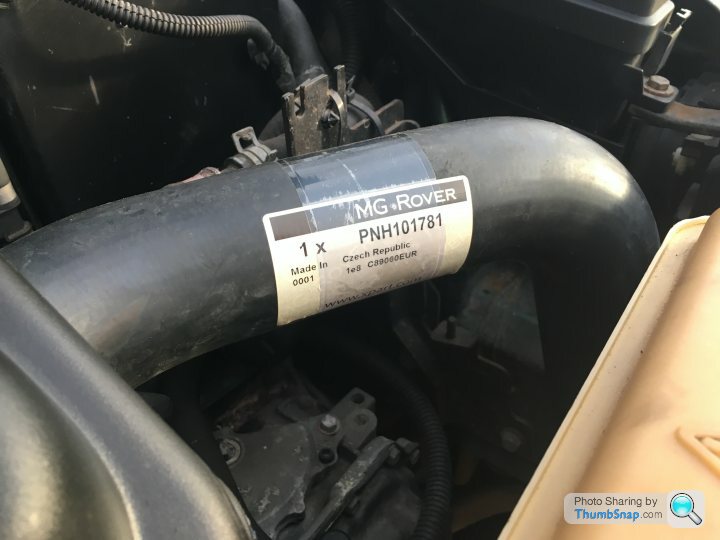
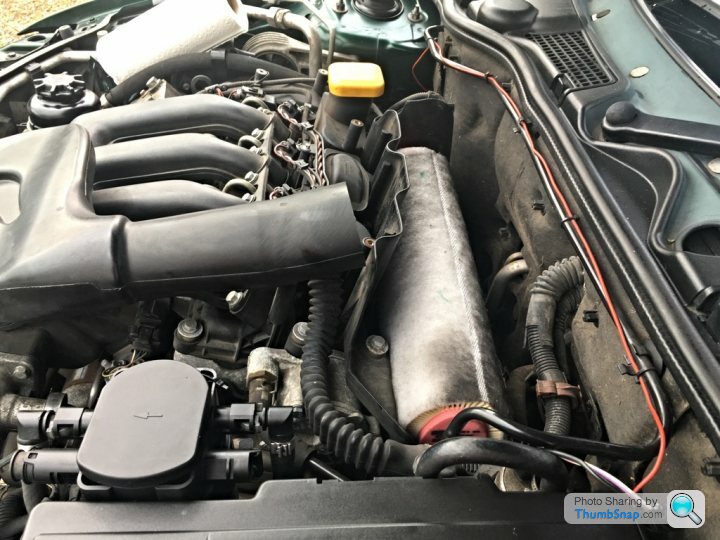
After pouring some neat injector cleaner straight into the fuel filter, it was noticed that the top intercooler hose was looking a bit past its best. They have a tendency to absorb oil and after 100,000 miles split. Seeing as mine was original and over 134,000 miles, we opted to replace it with a brand new hose.
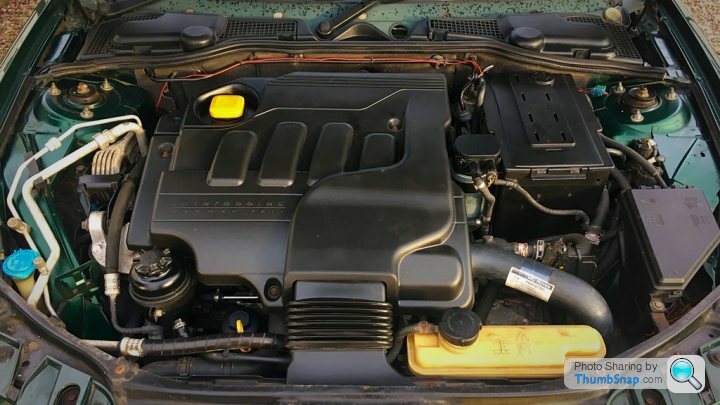
Otherwise looking reasonably tidy under the bonnet!
The airbag light was fixed permanently by cutting the faulty connector out and crimping the wires back together. We headed back down to test centre, via a slight detour up to the next junction and back on the local DC, just to really work that cleaner through, blast any loose stuff from the exhaust and get everything nice and hot for the retest.
Pulling into the garage, it blew an indicator bulb... But anyway, it passed on emissions this time, an average of less than half the limit - which I was pleased about. So began the long drive home, fresh MOT certificate on the passenger seat, when the rear washer jet decided to empty its contents into the rear headlining...
TBC
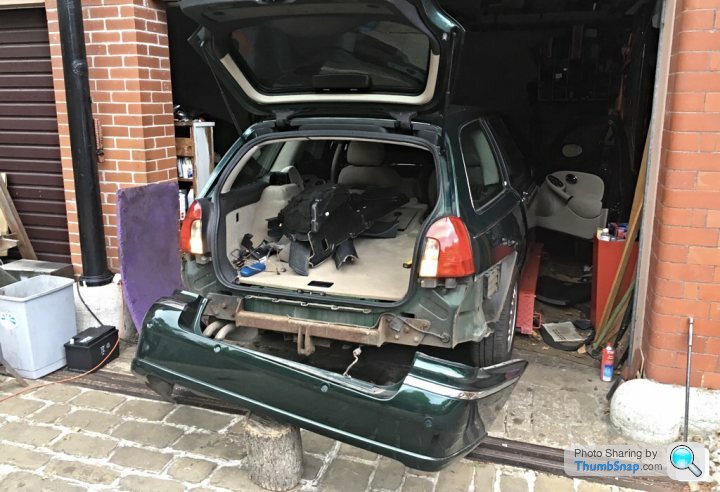
Since I bought the car in Jan 2018, it had always suffered weak pressure at the rear washer jet, but now that I had a sagging purple headlining, wet boot carpet and no fluid at all at the jet, it was time to fix it.
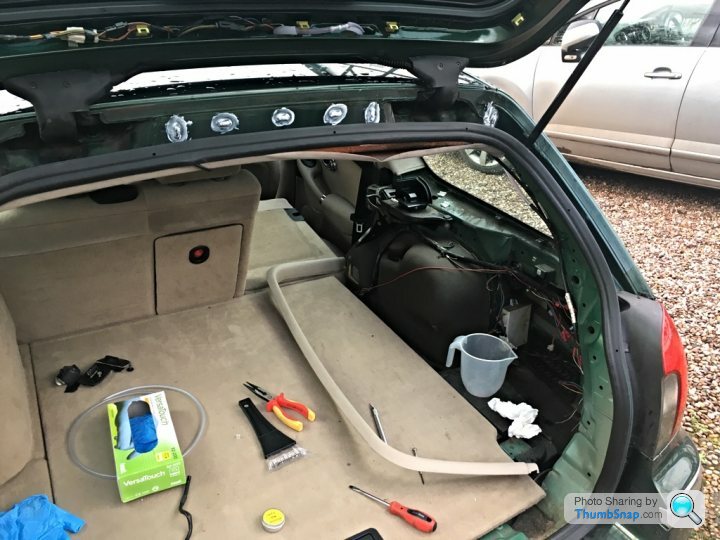
The pipe routes up the offside D-pillar, so all corresponding trim was removed, including side carpets, tailgate trim removed and rear headlining dropped. The original pipe was cut half way up the D-pillar, as the trim here is easily removed so any future issues with the washer can be diagnosed without having to take the entire interior to bits. The old pipework from the pillar, under the headlining, through the rubber tubes into the tailgate, then through secondary rubber tubes to the opening glass hatch and jet were all removed.
I discovered five separate splits in the old pipe, it's a wonder I had any washer fluid getting to the window at all! All old pipe replaced with new 5mm clear PVC stuff bought from B&Q for about £1.50, reinforced in certain areas at risk of rubbing on sharp edges -
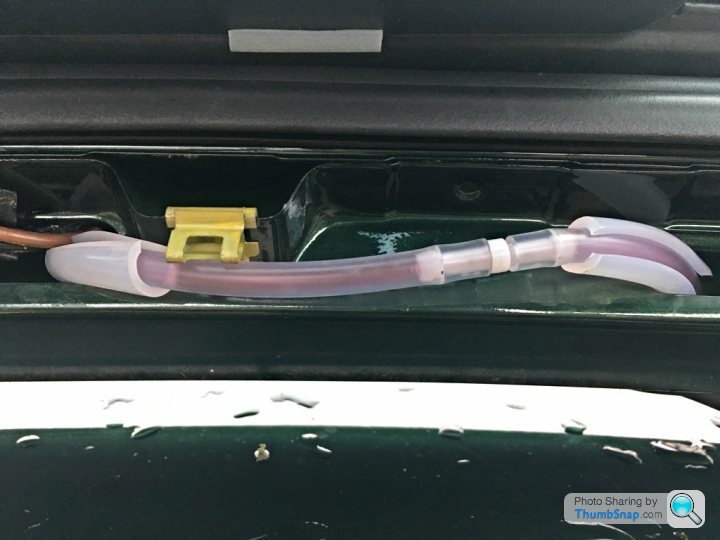
I now had a powerful rear washer. While the boot sides were out, I took the opportunity to check for leaks from the exterior waistline chrome trim - these are known for leaking but all appeared dry on my car.
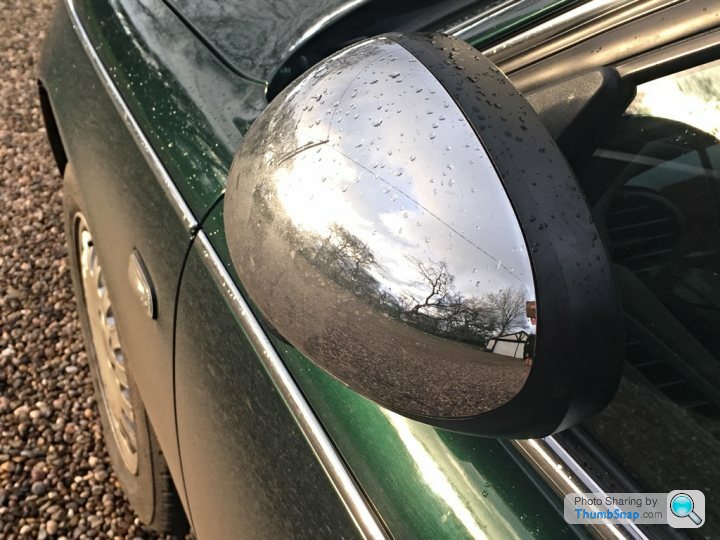
While I was at it fixing little niggles, I thought I'd have a go at the passenger door mirror. On the 75, these are permanently heated. On most cars with heated mirrors, they only function when the HRW is on, however for some reason this isn't the case with Rover. The spade connections to the back of the mirror glass are known to corrode, meaning the heating element ceases to work properly. Often cleaning up the contacts is enough to get them going again, on mine I decided they looked sufficiently manky to warrant replacement with new connectors..

Upon testing, it helped a bit but the mirror wasn't getting as warm as the fully functioning drivers side mirror, and only in one corner. It would seem that the heating element itself was on the way out, so a brand new heated mirror glass was ordered courtesy of eBay for the sum of £10.
I ordered one for a Rover 45 in the end, as early 75s had different mirrors to the later cars (such as mine), the latter of which were then sharing mirrors with the 25 and 45. To avoid being sent the wrong 75 mirror glass I played if safe and went for the one listed as a 45 mirror. Once arrived, plugged in and fitted, all working perfectly. It's better than the drivers side mirror now so I may order a new glass for the drivers side in due course.
So a fresh MOT, no advisories and a few niggles fixed. Next up will be a full service again over the next couple of hundred miles, that should see the car out of winter.
The pipe routes up the offside D-pillar, so all corresponding trim was removed, including side carpets, tailgate trim removed and rear headlining dropped. The original pipe was cut half way up the D-pillar, as the trim here is easily removed so any future issues with the washer can be diagnosed without having to take the entire interior to bits. The old pipework from the pillar, under the headlining, through the rubber tubes into the tailgate, then through secondary rubber tubes to the opening glass hatch and jet were all removed.
I discovered five separate splits in the old pipe, it's a wonder I had any washer fluid getting to the window at all! All old pipe replaced with new 5mm clear PVC stuff bought from B&Q for about £1.50, reinforced in certain areas at risk of rubbing on sharp edges -
I now had a powerful rear washer. While the boot sides were out, I took the opportunity to check for leaks from the exterior waistline chrome trim - these are known for leaking but all appeared dry on my car.
While I was at it fixing little niggles, I thought I'd have a go at the passenger door mirror. On the 75, these are permanently heated. On most cars with heated mirrors, they only function when the HRW is on, however for some reason this isn't the case with Rover. The spade connections to the back of the mirror glass are known to corrode, meaning the heating element ceases to work properly. Often cleaning up the contacts is enough to get them going again, on mine I decided they looked sufficiently manky to warrant replacement with new connectors..
Upon testing, it helped a bit but the mirror wasn't getting as warm as the fully functioning drivers side mirror, and only in one corner. It would seem that the heating element itself was on the way out, so a brand new heated mirror glass was ordered courtesy of eBay for the sum of £10.
I ordered one for a Rover 45 in the end, as early 75s had different mirrors to the later cars (such as mine), the latter of which were then sharing mirrors with the 25 and 45. To avoid being sent the wrong 75 mirror glass I played if safe and went for the one listed as a 45 mirror. Once arrived, plugged in and fitted, all working perfectly. It's better than the drivers side mirror now so I may order a new glass for the drivers side in due course.
So a fresh MOT, no advisories and a few niggles fixed. Next up will be a full service again over the next couple of hundred miles, that should see the car out of winter.
oobster said:
I like reading threads like this, lots of updates with pics and making the car better wherever possible.... how do you find tinkering with the car outside in the winter though?
Generally the winter months are quieter on the tinkering front, it's generally only routine servicing and replacing the odd blow bulb that needs to be done. Bigger jobs I clump together and have done in North Wales. SeanEP3 said:
how much did you pay for the car? looks a great car to be fair
£2k, 90k on the clock at the time. Perhaps a little on the high side at the time but the car has turned out to be a good'un so far. Since then good ones seem to be selling nearer £3k and sometimes even more for low mileage examples. You can still pick up tatty examples for a few hundred quid.
Always liked the 75 and had a MK1 now moved onto a MK2, wasn't sure of the revised front bumper but they've grown on me.
After a few months looking through the classifieds I managed to pick up a 2 owners from new 48k mile MK2 for £700
https://www.pistonheads.com/gassing/topic.asp?h=0&...
After a few months looking through the classifieds I managed to pick up a 2 owners from new 48k mile MK2 for £700
https://www.pistonheads.com/gassing/topic.asp?h=0&...

Service day, as tomorrow it'll tick over a measly 135,000 miles. I believe MG Rover originally specified 15,000 mile intervals, however for various reasons I drop that interval to 10,000 miles, with a second interim oil and filter change every 5,000 miles. I know it needs a wash but I'm sure Storm Dennis will take care of that on the M5 tomorrow.
Today will be oil and filter, air filter and crankcase breather filter. The fuel filter is reasonably new and the pollen filter I haven't got in stock..

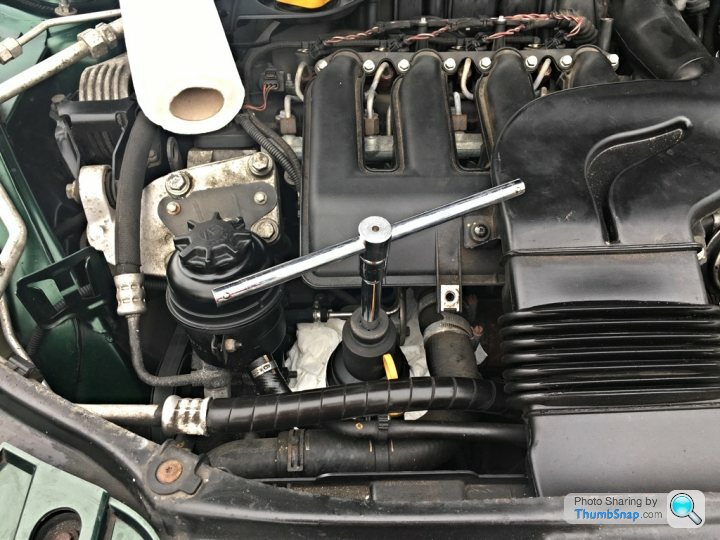
The oil filter housing is easily accessed, being at the front of the engine and close to the top. A BFO 36mm hex socket on a half inch drive takes care of the filter cap. Meanwhile, underneath a 15mm hex socket has already removed the plug, let the old oil drain and refitted a cleaned up plug with new sealing washer. You'll notice a fair amount of paper towel around the filter housing...
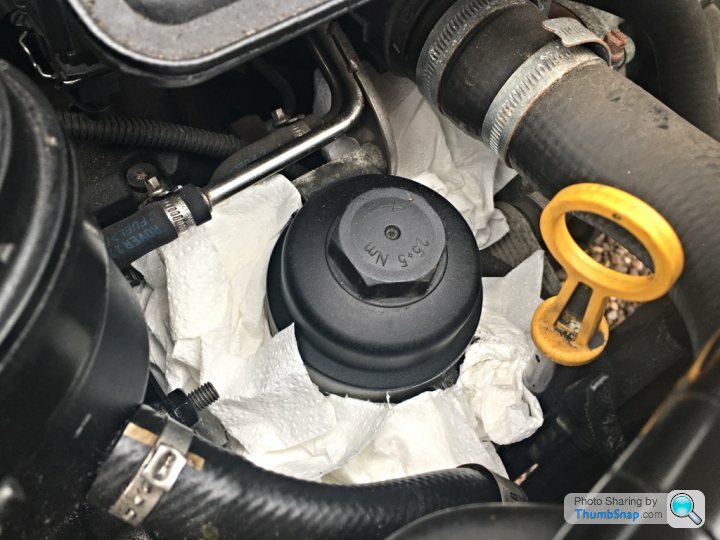
While the filter housing won't pour oil everywhere, the alternator is just underneath - the paper helps avoid dripping oil onto things I don't want oil on while lifting out the paper element. This shows how easy the filter is to access, a dream compared to some cars...
Once the new filter is in place, the system is filled up with fresh Mannol 10w-40, conforming to the various required specs. It takes about six litres to fill.
Next up, less messy jobs.. Air and PCV filter. The removal of five captive screws has this panel off..
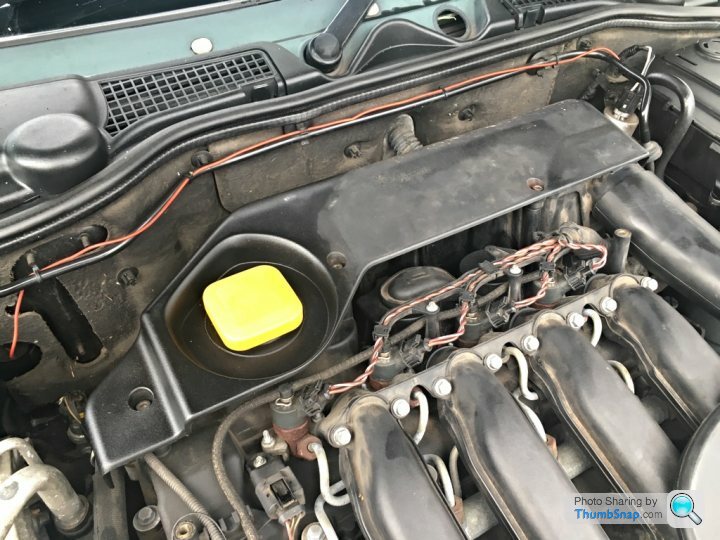
...revealing the cylindrical air filter element.
Simply lifts out and the fresh new element goes in, a nice snug fit.

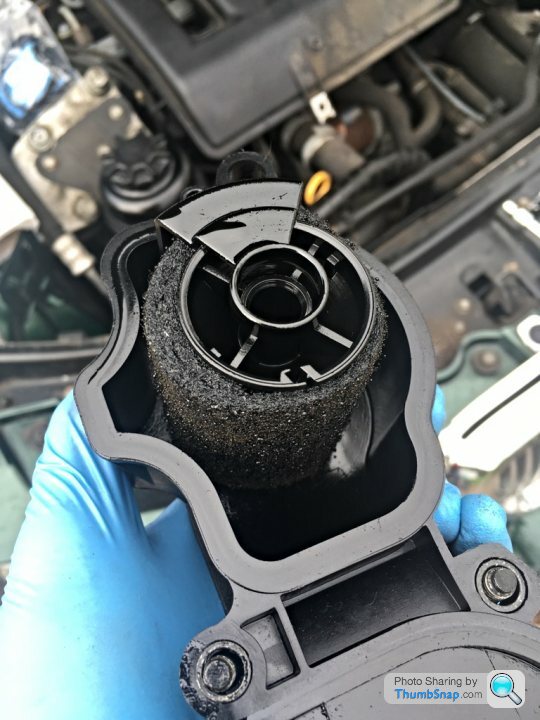
Next up is the crankcase breather filter or PCV filter. For some reason, MG Rover failed to specify this item in the original servicing schedule, as such it's often overlooked which can be bad news - a blocked PCV filter can cause plumes of black exhaust smoke, rough running and so on. Land Rover used the same engine in the original Freelander Td4, however they did list the PCV as a service item. As such it's easy to get hold of a new filter and seals, usually about £7-8.
A bracket holding fuel lines/injector wiring (I think?) needs to be unscrewed first, just to allow space for the PCV housing to be lifted out.
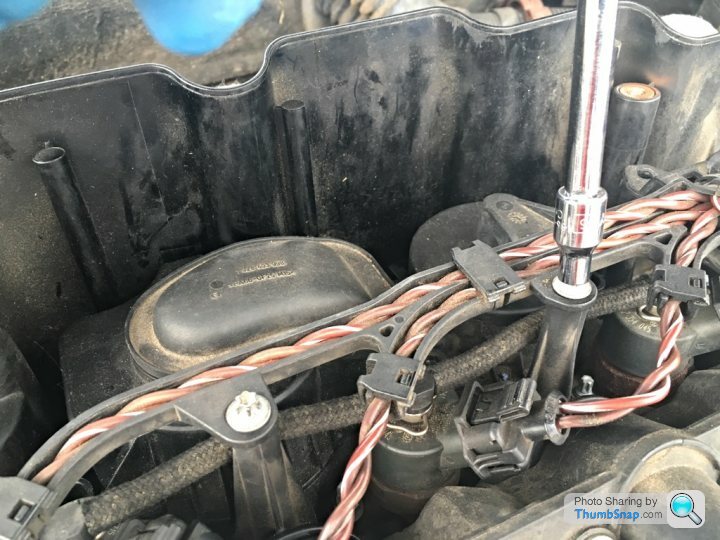
Then a T30 makes quick work of removing the four (in my case three...) captive screws to release the housing. You can lift the whole thing up about half an inch, before it needs to be tilted forwards to clear the surrounding gubbins and removed completely. The filter element comes with it and is saturated in oil.
Lift out the securing bracket, bin the old element and O-ring at the base..

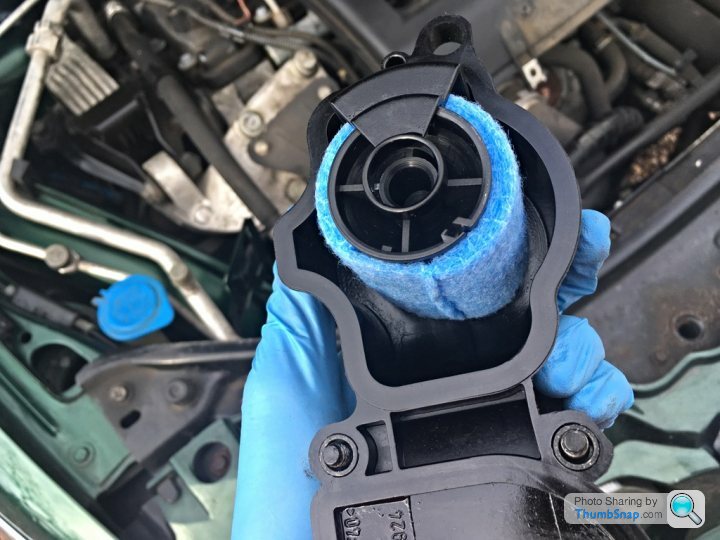
Refit with supplied new O-ring, new element and push the securing bracket back into place, that's half the job done.
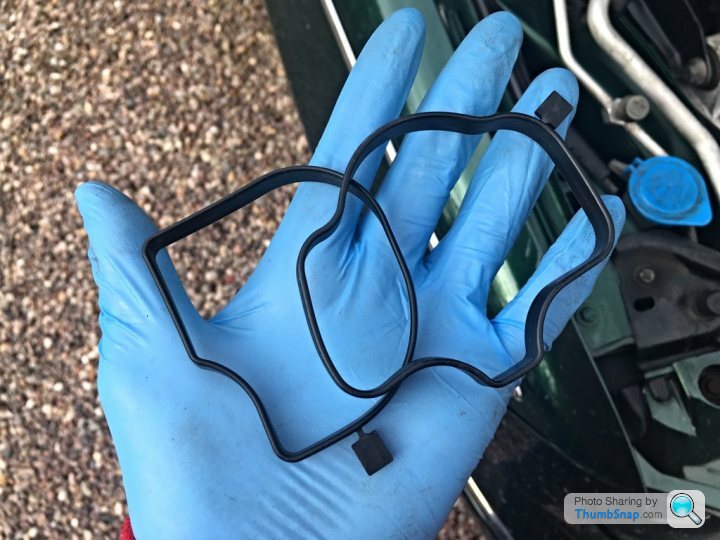
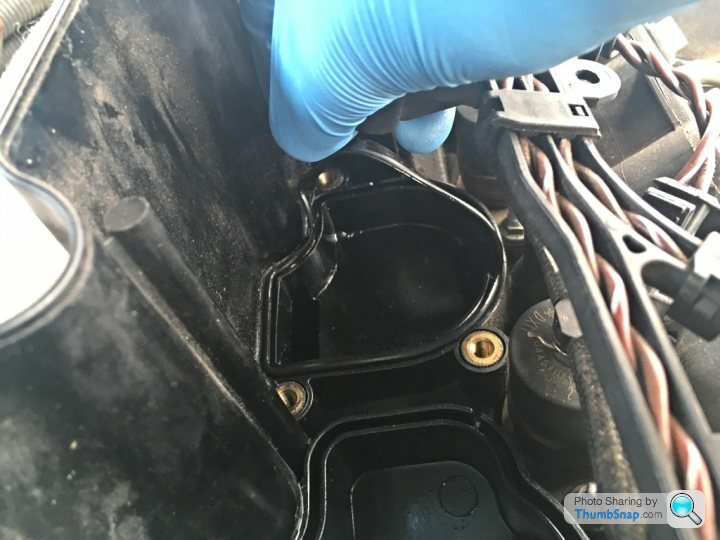
Second half is to remove the old seals and replace with new. I don't know who manufacturers these, but they're always an absolutely perfect fit. Probably my favourite part of the whole job, they're oddly satisfying to fit...
While I have the car up on ramps, I go underneath and have a poke about with my plenum drain clearing pokey stick. The plenum drains are mostly accessible from the top, however there's one I can only access from underneath, going up between ARB and driveshaft gaiter. A poke clears the mud and silt and allows any water to drain from the plenum, important on a 75 as it houses the ECU.
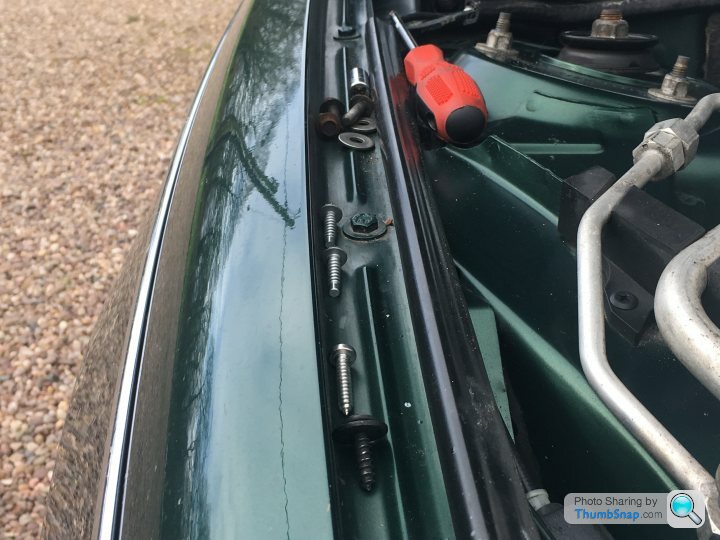
Other levels are checked, topped up where needed and everything given a visual check over. Nothing much required which is always good. On a side note, the front wings make a useful storage area for the various fixings that come off during a service..
Tyre pressures all checked and happily all at 36psi, no adjustments required. Only a small adjustment required to one of the windscreen washer jets, the aim had gone off on one, sorted with a watchmakers screwdriver. To finish, a tidy up and all the old bits thrown in a box for disposal. That ought to be it until 140,000 miles, when the oil is drained again and I'll think about throwing in a new pollen filter.

Love a good 75. I look after my parents '04 Club SE CDT Tourer. 230k now and buzzing along happily, done 45k in 3 years. CDT is a peach, ours has the XPower 135 dealer remap. Manual box is getting a bit graunchy now, but it gets a service every 6-8k and a good going over for test every year. Drop links 3 sets so far! Winter tyres from October till April and she trucks on and on.
Bus update. EDIT: Apologies about photo quality, not sure what’s happened there..
Onwards...
Having spent a large portion of the disaster year that is 2020 on furlough, my usual annual mileage of circa 22k miles has significantly dropped off. Nevertheless, it’s afforded me time to spend fettling the big old Rover. I’m reluctant to say that boredom has stepped in, but I have found myself getting into some fairly hefty projects on the old Longbridge barge, given that it’s been possible to leave the car “U/S” for a few days without worrying about needing it for the commute. Worst case scenario, I have a pair of classics lying about, which can and have been drafted in as temporary dailies while the estate receives some TLC.
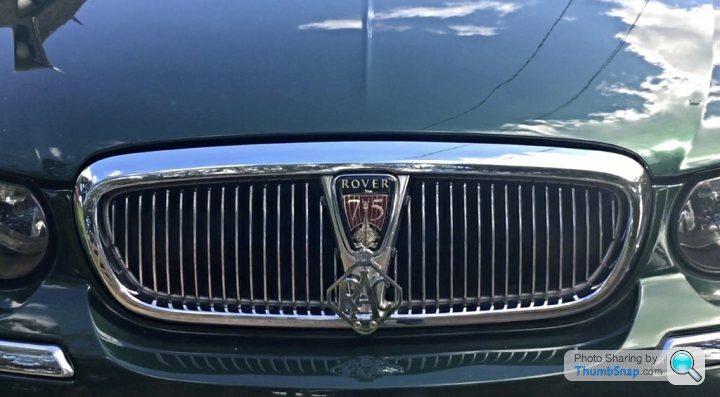
During lockdown, some idle titivating saw an old chrome RAC badge find its way onto the front of the car. I’m not really a fan of AA/RAC badges adorning the grilles of modern cars, it seems a little silly but hey, a nationwide lockdown was in full swing and there’s only so many times you can cut the grass before you go insane. The point of insanity is indicated thusly when an RAC badge fixes itself to the front of your car. I also pondered whether the removal of the roof rails would reduce wind noise, so they were whipped off one evening. Whether noise levels have changed or not remains undetermined; my wife to be tells me that I’m deaf. I call it selective hearing.
Eventually however, as sanity was restored, lockdown was eased. Just in time, as a trip to Wales was on the cards to see the 75/ZT guru, Jules. I had an issue with a rear brake disc which manifested itself during the long summer of foraging the garage for RAC badges, however I was also in the middle of doing the brakes on my ‘53 Traction Avant, so space and willpower to bugger about with Rover brakes was in short supply. The reverse sensors had packed up too and required a T4 computer to diagnose where the issue lay. So mid August, we set forth to Colwyn Bay.
I shall spare the details of fault finding the reverse sensor circuit problems, but in short both the reverse sensor ECU and one of the sensors had packed up. Jules also sniffed out a worn wheel bearing, so that was replaced while he worked his magic on the brakes. To finish, I came away with functioning reverse sensors courtesy of a new sensor and ECU, new rear discs and pads, a new rear wheel bearing and to top it off, a high note horn. As part of the cost saving exercise conducted at MG Rover in the early noughties, the high note horn was binned off, leaving the low note only. With the proper horns fitted, the old girl now gives her best impression of an approaching Amtrak to those ahead.
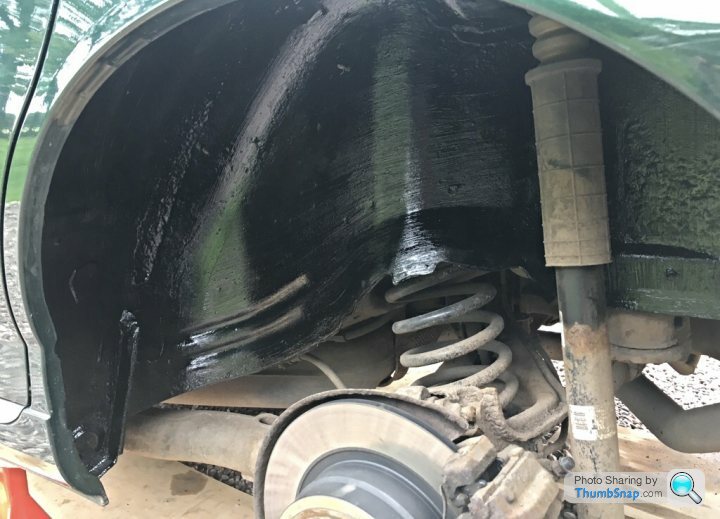
A few weeks later, during a spell of glorious early September weather, I decided to pull out the rear wheel arch liners and inspect for rot, before treating the arches to a coat of Bilt Hamber Dynax.
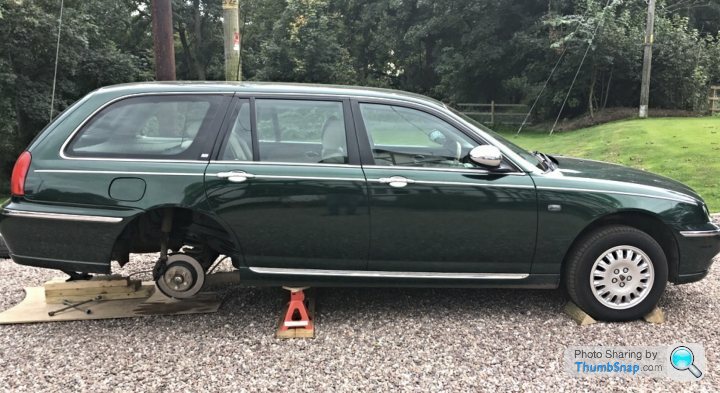
Surprisingly, no horrors were found, so the arches had two coats of the Dynax stuff, getting into as many nooks and crannies as I could.
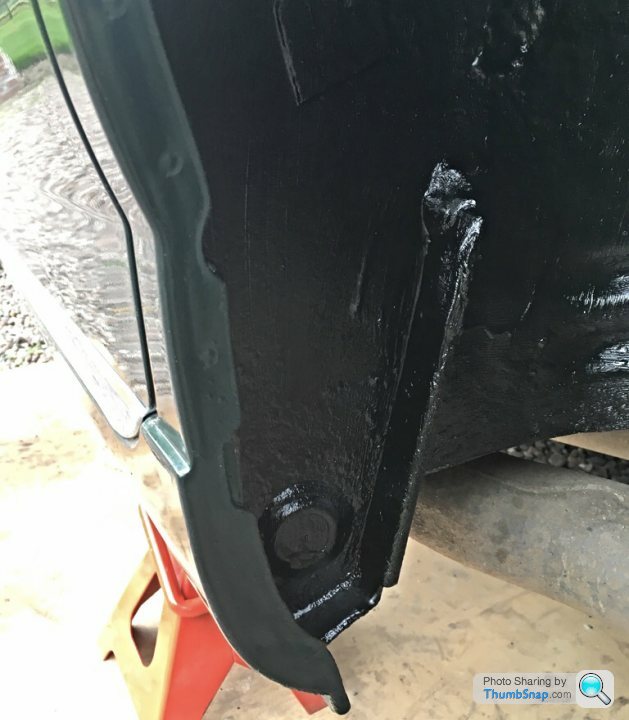
Special attention was given to the drivers side, as a fuel vent pipe runs through a hole in the metalwork to the tank under the rear seat. It’s become known for these to let water in on 75/ZT’s, causing rot under the rear seat. I applied a healthy amount of black silicone sealant to the hole, finishing off nicely against the black Dynax wax. Although it was the intention to get the whole underside protected this year, I’m just glad I’ve done the bits where mud and moisture gets trapped behind the liners.
Next up on the never ending list of things to do, the IPK screen. My car had something called a “Driver Intelligence Pack” from new, consisting of reverse sensors (ahem... fine now, thank you), rain sensing wipers, auto dimming rear view mirror and the IPK screen; an LCD message panel between the speedometer and tachometer. Three thing in life are guaranteed; death, taxes, and for lines of failed pixels to appear on your Rover’s IPK screen. Supposedly up to 12 lines of failed pixels in repairable, however mine had 47 failed rows..
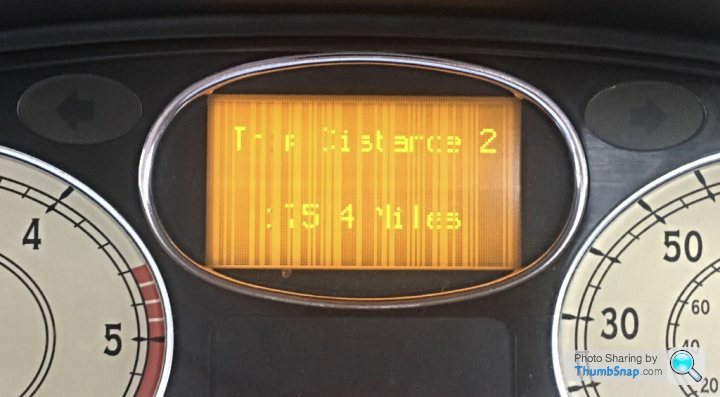
As you see, reading the trip computer becomes pure guesswork. Not the end of the world however the screen also doubles up as the tell-tale for things such as rear fog lights; it is not entirely inconceivable that a scrupulous MOT tester could fail it for the tell-tale not working properly. The screen also displays warning messages, I feel more comfortable being able to read the warnings as opposed to guessing which component is about to self destruct.
Luckily, and unsurprisingly given the absolutely brilliant 75/ZT community, there’s a chap who managed to get a run of brand new IPK screens manufactured in Singapore, utilising an improved method of ribbon bonding within the screen, resulting in a brand new screen that won’t fail like the originals. I managed to secure one in the new batch, once they were ready a trip was planned to go and see the mastermind behind it, Rick, over in Essex.
Within 20 minutes of arriving, Rick had the new IPK installed and tested, all working in perfect order. You’ll have to take my word for it, as I haven’t taken an “after” pic, but it’s made a huge difference having the thing legible again. A big thanks to Rick for going to the effort of sourcing and developing these new screens!
I then headed off to elsewhere in Essex and then off to rural Suffolk to catch up with some friends I hadn’t seen for a while (pre higher tier lockdowns I might add!). I ended up covering 500 miles that day, yet getting home at 2am was surprisingly easy - it reinforced to me just how good a 75 is at swallowing up the miles. Aside from an X350 Jag, I struggle to think of something else in this sort of price bracket that I would have rather spent the day in, progress just felt effortless and I enjoyed every minute of the drive.
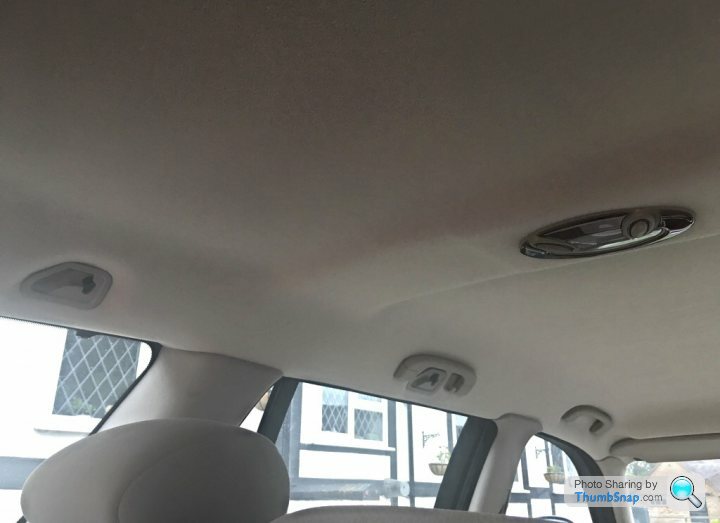
The final project in this instalment, the headliner.
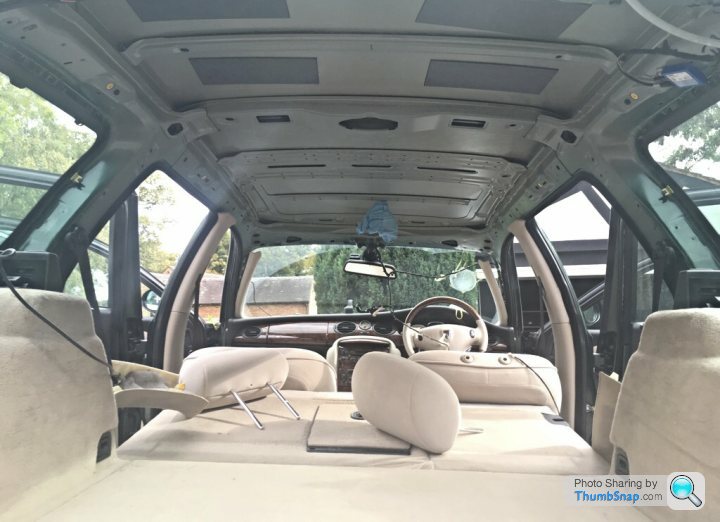
Over the past 18 months or so, I’ve started to notice some light saggage occurring above the front seats. However in true form of any old British car, the saggage has decided to get worse. A broken rear washer pipe dumped a fair amount of pink washer fluid into the rear of the headlining in February, accelerating the degradation at the rear. Then, one day while washing the car, I noticed the headlining had started falling down above the rear side windows..
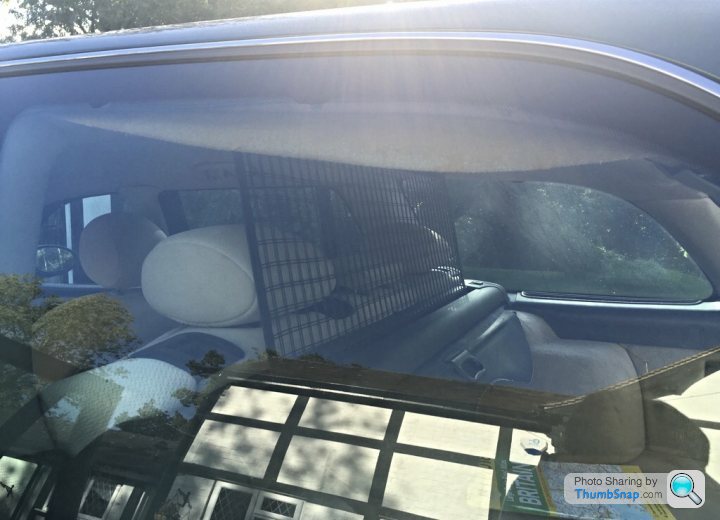
In addition, the front edge where it meets the windscreen had started peeling too. The question was posed to the Rover beards about the best way to go about fixing it, hoping that there would be an easy, fairly quick solution that didn’t involve removing the entire headliner. In the end, it became apparent that the best, long term solution would be the difficult, slow process of removing the entire headliner and trim with brand new material. The problem lay in the fact that the foam backing to the headlining material was disintegrating through a mixture of age, vibration and that stonking heatwave during the big lockdown. There was no tidy way of re using the original material, so binning it and starting fresh was the way to go. Brilliant, what a way to cut my teeth into vehicle upholstery, having never done anything like it before... *facepalm*
I contacted an automotive upholstery company in Sandbach who sent me a couple of samples of material, to try and obtain the best colour match. Satisfied, I went ahead and ordered a 3m x 1.8m roll, plus adhesives, which I reckoned would be plenty for my headliner. Next involved removing the old headliner. In a 75, there’s a fibreglass board, to which the material is bonded to, held to the roof by the A, B, C and D pillar trim, the various sun visor mounts, grab handles, interior courtesy lights and so on. Removal wasn’t too bad, however the wiring harness for various interior lights runs up the A pillar, then is glued in position to the back of the board using a hot glue gun. Not the easiest thing to prise off before extracting via the tailgate, all while having your hands stabbed by a million invisible glass fibres!
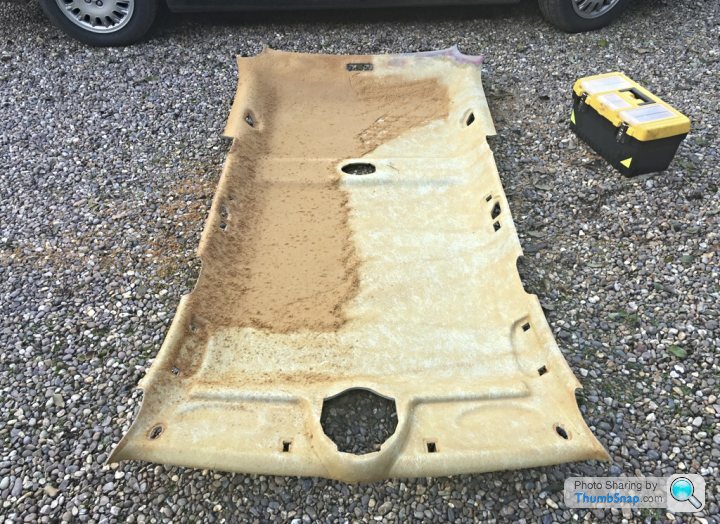
Once out, the material was inspected - this discolouration is due to the washer pipe leak...
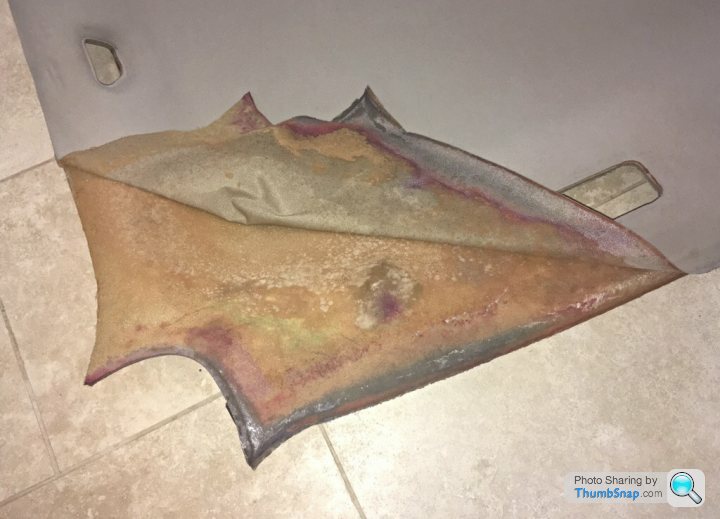
The old material was peeled off and filed in the wheelie bin, leaving the remnants of the tatty old foam backing. A stiff brush made light work of removing the old foam, leaving a “clean” board to which the new material would be applied.
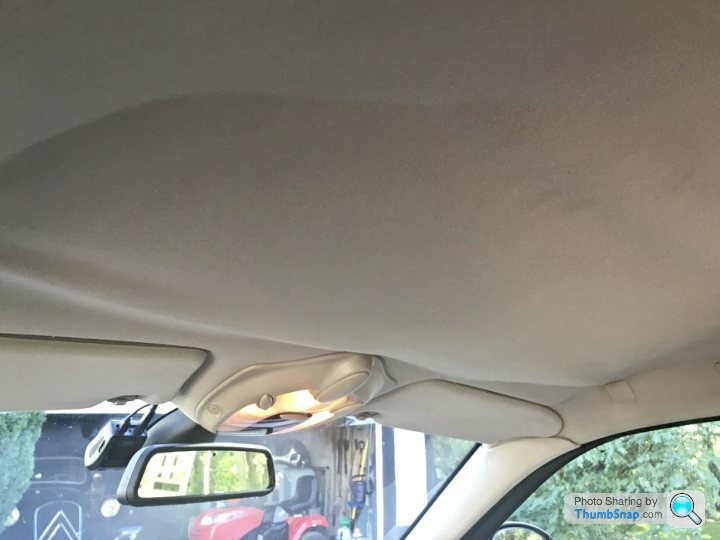
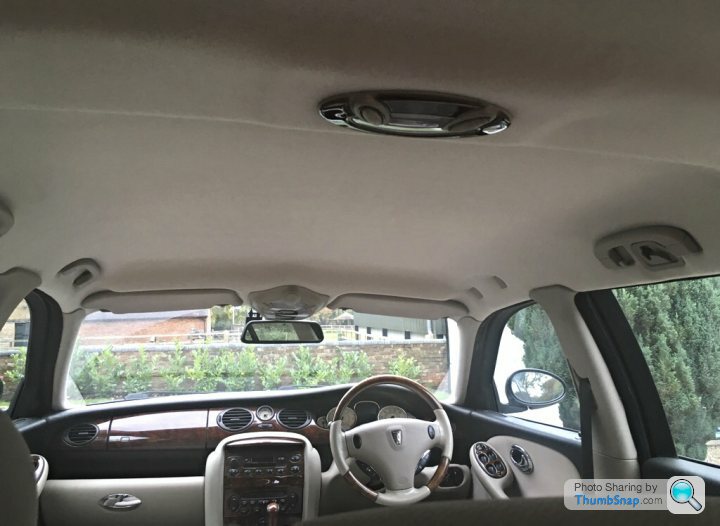
Now, I could have done with an extra two pairs of hands during the fitting of the new material. Unfortunately, I was riding solo on this one, so I didn’t take any photos during the 2.5m wrestling match to get the thing stuck down with as few wrinkles and creases as possible. However, this was the finished article, after the labour intensive task of cutting out the many different holes and apertures for things to sit in later on.

I will take a rare moment to blow my own trumpet here, and say that I’m rather chuffed with the results for a first attempt. Not perfect, but tidy enough. However I still had to reunite the thing with its soulmate from Longbridge. Like gluing the material, reinstalling was a bit of a wrestling match and thus, I have no “during photos”. However, the finished article is presentable and lifts the interior (and ceiling) nicely.
Congratulations, you’ve made it to the end. However, work on bringing the big old Rover back to its former glory is far from finished. Since completing the above, I have sourced a genuine walnut burr dashboard from a Cowley car, along with a walnut handbrake lever (rocking horse poo) to finish off the interior. These are yet to make it into the car, but progress is being made, slowly but surely.
Onwards...
Having spent a large portion of the disaster year that is 2020 on furlough, my usual annual mileage of circa 22k miles has significantly dropped off. Nevertheless, it’s afforded me time to spend fettling the big old Rover. I’m reluctant to say that boredom has stepped in, but I have found myself getting into some fairly hefty projects on the old Longbridge barge, given that it’s been possible to leave the car “U/S” for a few days without worrying about needing it for the commute. Worst case scenario, I have a pair of classics lying about, which can and have been drafted in as temporary dailies while the estate receives some TLC.
During lockdown, some idle titivating saw an old chrome RAC badge find its way onto the front of the car. I’m not really a fan of AA/RAC badges adorning the grilles of modern cars, it seems a little silly but hey, a nationwide lockdown was in full swing and there’s only so many times you can cut the grass before you go insane. The point of insanity is indicated thusly when an RAC badge fixes itself to the front of your car. I also pondered whether the removal of the roof rails would reduce wind noise, so they were whipped off one evening. Whether noise levels have changed or not remains undetermined; my wife to be tells me that I’m deaf. I call it selective hearing.
Eventually however, as sanity was restored, lockdown was eased. Just in time, as a trip to Wales was on the cards to see the 75/ZT guru, Jules. I had an issue with a rear brake disc which manifested itself during the long summer of foraging the garage for RAC badges, however I was also in the middle of doing the brakes on my ‘53 Traction Avant, so space and willpower to bugger about with Rover brakes was in short supply. The reverse sensors had packed up too and required a T4 computer to diagnose where the issue lay. So mid August, we set forth to Colwyn Bay.
I shall spare the details of fault finding the reverse sensor circuit problems, but in short both the reverse sensor ECU and one of the sensors had packed up. Jules also sniffed out a worn wheel bearing, so that was replaced while he worked his magic on the brakes. To finish, I came away with functioning reverse sensors courtesy of a new sensor and ECU, new rear discs and pads, a new rear wheel bearing and to top it off, a high note horn. As part of the cost saving exercise conducted at MG Rover in the early noughties, the high note horn was binned off, leaving the low note only. With the proper horns fitted, the old girl now gives her best impression of an approaching Amtrak to those ahead.
A few weeks later, during a spell of glorious early September weather, I decided to pull out the rear wheel arch liners and inspect for rot, before treating the arches to a coat of Bilt Hamber Dynax.
Surprisingly, no horrors were found, so the arches had two coats of the Dynax stuff, getting into as many nooks and crannies as I could.
Special attention was given to the drivers side, as a fuel vent pipe runs through a hole in the metalwork to the tank under the rear seat. It’s become known for these to let water in on 75/ZT’s, causing rot under the rear seat. I applied a healthy amount of black silicone sealant to the hole, finishing off nicely against the black Dynax wax. Although it was the intention to get the whole underside protected this year, I’m just glad I’ve done the bits where mud and moisture gets trapped behind the liners.
Next up on the never ending list of things to do, the IPK screen. My car had something called a “Driver Intelligence Pack” from new, consisting of reverse sensors (ahem... fine now, thank you), rain sensing wipers, auto dimming rear view mirror and the IPK screen; an LCD message panel between the speedometer and tachometer. Three thing in life are guaranteed; death, taxes, and for lines of failed pixels to appear on your Rover’s IPK screen. Supposedly up to 12 lines of failed pixels in repairable, however mine had 47 failed rows..
As you see, reading the trip computer becomes pure guesswork. Not the end of the world however the screen also doubles up as the tell-tale for things such as rear fog lights; it is not entirely inconceivable that a scrupulous MOT tester could fail it for the tell-tale not working properly. The screen also displays warning messages, I feel more comfortable being able to read the warnings as opposed to guessing which component is about to self destruct.
Luckily, and unsurprisingly given the absolutely brilliant 75/ZT community, there’s a chap who managed to get a run of brand new IPK screens manufactured in Singapore, utilising an improved method of ribbon bonding within the screen, resulting in a brand new screen that won’t fail like the originals. I managed to secure one in the new batch, once they were ready a trip was planned to go and see the mastermind behind it, Rick, over in Essex.
Within 20 minutes of arriving, Rick had the new IPK installed and tested, all working in perfect order. You’ll have to take my word for it, as I haven’t taken an “after” pic, but it’s made a huge difference having the thing legible again. A big thanks to Rick for going to the effort of sourcing and developing these new screens!
I then headed off to elsewhere in Essex and then off to rural Suffolk to catch up with some friends I hadn’t seen for a while (pre higher tier lockdowns I might add!). I ended up covering 500 miles that day, yet getting home at 2am was surprisingly easy - it reinforced to me just how good a 75 is at swallowing up the miles. Aside from an X350 Jag, I struggle to think of something else in this sort of price bracket that I would have rather spent the day in, progress just felt effortless and I enjoyed every minute of the drive.
The final project in this instalment, the headliner.
Over the past 18 months or so, I’ve started to notice some light saggage occurring above the front seats. However in true form of any old British car, the saggage has decided to get worse. A broken rear washer pipe dumped a fair amount of pink washer fluid into the rear of the headlining in February, accelerating the degradation at the rear. Then, one day while washing the car, I noticed the headlining had started falling down above the rear side windows..
In addition, the front edge where it meets the windscreen had started peeling too. The question was posed to the Rover beards about the best way to go about fixing it, hoping that there would be an easy, fairly quick solution that didn’t involve removing the entire headliner. In the end, it became apparent that the best, long term solution would be the difficult, slow process of removing the entire headliner and trim with brand new material. The problem lay in the fact that the foam backing to the headlining material was disintegrating through a mixture of age, vibration and that stonking heatwave during the big lockdown. There was no tidy way of re using the original material, so binning it and starting fresh was the way to go. Brilliant, what a way to cut my teeth into vehicle upholstery, having never done anything like it before... *facepalm*
I contacted an automotive upholstery company in Sandbach who sent me a couple of samples of material, to try and obtain the best colour match. Satisfied, I went ahead and ordered a 3m x 1.8m roll, plus adhesives, which I reckoned would be plenty for my headliner. Next involved removing the old headliner. In a 75, there’s a fibreglass board, to which the material is bonded to, held to the roof by the A, B, C and D pillar trim, the various sun visor mounts, grab handles, interior courtesy lights and so on. Removal wasn’t too bad, however the wiring harness for various interior lights runs up the A pillar, then is glued in position to the back of the board using a hot glue gun. Not the easiest thing to prise off before extracting via the tailgate, all while having your hands stabbed by a million invisible glass fibres!
Once out, the material was inspected - this discolouration is due to the washer pipe leak...
The old material was peeled off and filed in the wheelie bin, leaving the remnants of the tatty old foam backing. A stiff brush made light work of removing the old foam, leaving a “clean” board to which the new material would be applied.
Now, I could have done with an extra two pairs of hands during the fitting of the new material. Unfortunately, I was riding solo on this one, so I didn’t take any photos during the 2.5m wrestling match to get the thing stuck down with as few wrinkles and creases as possible. However, this was the finished article, after the labour intensive task of cutting out the many different holes and apertures for things to sit in later on.
I will take a rare moment to blow my own trumpet here, and say that I’m rather chuffed with the results for a first attempt. Not perfect, but tidy enough. However I still had to reunite the thing with its soulmate from Longbridge. Like gluing the material, reinstalling was a bit of a wrestling match and thus, I have no “during photos”. However, the finished article is presentable and lifts the interior (and ceiling) nicely.
Congratulations, you’ve made it to the end. However, work on bringing the big old Rover back to its former glory is far from finished. Since completing the above, I have sourced a genuine walnut burr dashboard from a Cowley car, along with a walnut handbrake lever (rocking horse poo) to finish off the interior. These are yet to make it into the car, but progress is being made, slowly but surely.

This is quality shedding, OP. Once you have found the joy of bangernomics, there is no turning back. I bitterly regret my foolish engagement with new cars and main dealers for a short time in the 90s. I am also regretting selling my 2005 Jaguar X Type Estate shed, which was a very fine luxo-waft AWD trash hauler, but I ran out of car storage space.
carinaman said:
Interesting stuff. Looking forward to the wood updates.
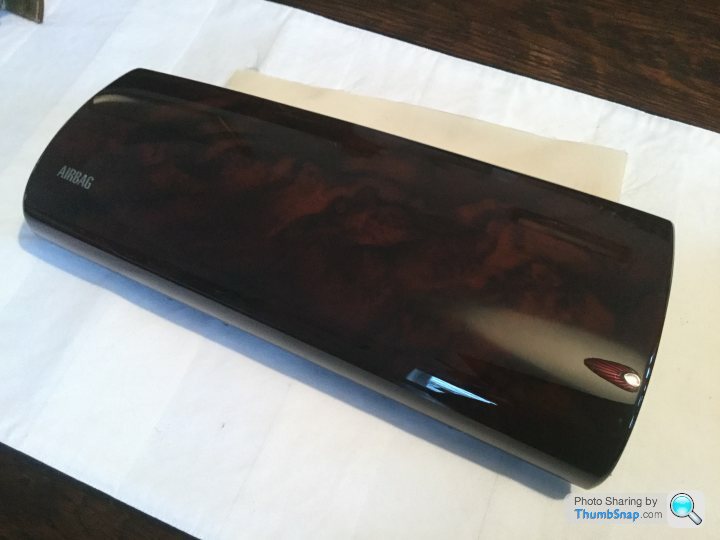
Early cars had real walnut burr veneer, later cars, such as mine, had plastic imitation wood. This early dashboard has far greater depth and lustre, the “AIRBAG” script is beneath the lacquer and the gaps around the vents are much tighter. The later, plastic versions lacked the lustre and had a plastic airbag badge stuck to the surface. The whole set was acquired from a breakers yard for £15, only a small amount of polish, followed by a coat of wax and they look basically new.
Breadvan72 said:
This is quality shedding, OP. Once you have found the joy of bangernomics, there is no turning back. I bitterly regret my foolish engagement with new cars and main dealers for a short time in the 90s. I am also regretting selling my 2005 Jaguar X Type Estate shed, which was a very fine luxo-waft AWD trash hauler, but I ran out of car storage space.
Thanks, however I suspect the shed-like intentions are diminishing away at a rapid rate of knots! It seems I’ve got a bug whereby the aim is to fix/repair every little scuff or issue, no simple task but there’s something perversely rewarding in going to great lengths to improve or restore something that is worth so little. I really ought to get another hobby...
Great car and project
Just read through from the beginning
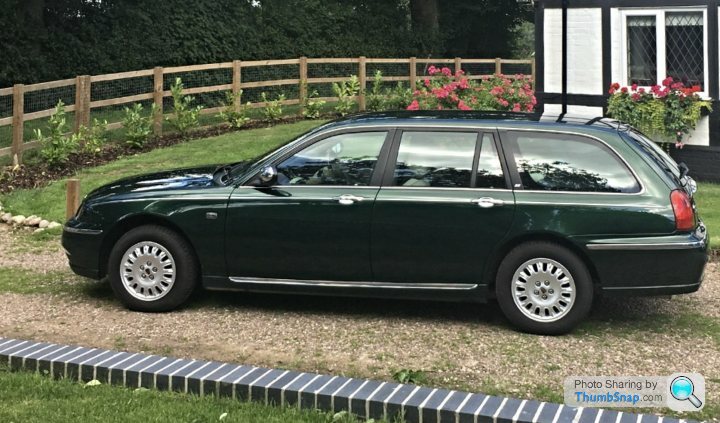
Lovely colour car too; sits so well on those wheels
I've had a few MG ZTs and a ZT-T, all V6 190s; never got into diesels but if I needed a tourer and only had a few £k to spend; these would always be on the list alongside BMW E46 and E39 tourers (what I own now; but in a different league with it being a Jap import) etc
I did have a ZT over winter 16/17; nearly bought a R75 touring 1.8T from someone selling theirs on the 75/ZT forums in Derby but was beaten to it by a day
Just read through from the beginning
Lovely colour car too; sits so well on those wheels
I've had a few MG ZTs and a ZT-T, all V6 190s; never got into diesels but if I needed a tourer and only had a few £k to spend; these would always be on the list alongside BMW E46 and E39 tourers (what I own now; but in a different league with it being a Jap import) etc
I did have a ZT over winter 16/17; nearly bought a R75 touring 1.8T from someone selling theirs on the 75/ZT forums in Derby but was beaten to it by a day
Gassing Station | Readers' Cars | Top of Page | What's New | My Stuff