325TI - Project Mpact
Discussion


shalmaneser said:
If you're going to machine adaptor brackets you may as well use CSL front discs with are 345mm (from memory). Bit bigger so better braking and will fill those 19" wheels a bit better.
I would be tempted to go for 18" wheels though personally.
You are correct, they are 345mm. Only thing with that is i wont be able to fit them inside my standard 17" wheels, it's all a bit snug inside them at the moment. I would be tempted to go for 18" wheels though personally.
I do have a plan in the back of my head with the BBS RS740's, take the centres out, get some new dishes and barrels to step the up to an 18" (from a 17") and then i could tinker with the offsets too..... but that will be a project at a later date.
amc_adam said:
Thank you for your input, It's surprising how time consuming it is working out clearances etc. Looks like you had a fun time too!
Yes i can see what you mean, I've done a lot of head scratching in the past with building 3 piece splits and making things fit, learnt the hard way/best way.
That's kind of you to offer, if i get to the stage when i need to try one i'll drop you a message thanks. I prefer the way it handles on the smaller wheels hence the reason trying to squeeze them into the standard 17" wheels.
Ok yeah but bump me here too as the messages go in my junk.Yes i can see what you mean, I've done a lot of head scratching in the past with building 3 piece splits and making things fit, learnt the hard way/best way.
That's kind of you to offer, if i get to the stage when i need to try one i'll drop you a message thanks. I prefer the way it handles on the smaller wheels hence the reason trying to squeeze them into the standard 17" wheels.
I've started going tiny on all my cars. I prefer firmer suspension with a softer tyre wall.
Small update,
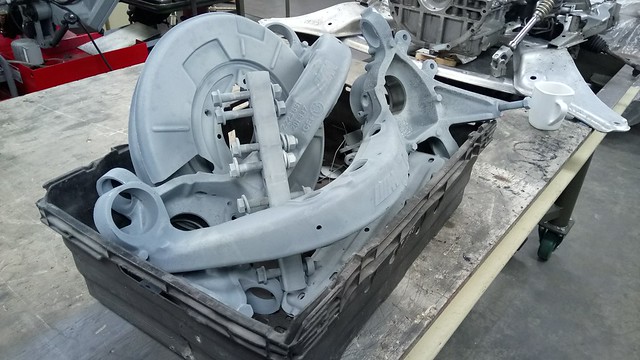
While i was faffing around with the front suspension/brakes i'd sent my rear trailing arms, back plates, anti roll bars and a few other bits to be blasted.
With the rear trailing arms being hollow i wanted to make sure they concentrated getting all the rust and crud out the inside, while the parts were there they also sprayed everything inside and out with hot zinc to prevent rust in the future.
Painted all the parts with POR15
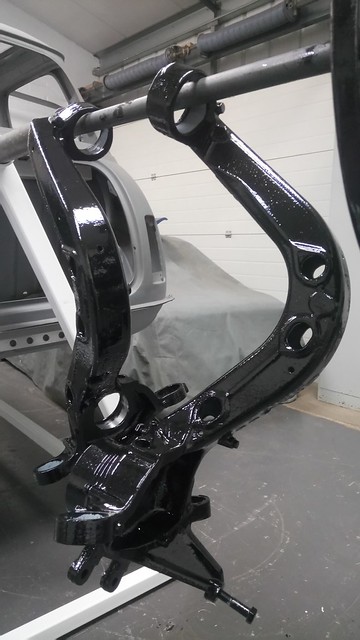
With all the parts painted the next thing was to start reassembling. All threads were tapped out to ensure threads were clean, Melye wheel bearings and bushes were carefully pressed in using a fly press.

While i was faffing around with the front suspension/brakes i'd sent my rear trailing arms, back plates, anti roll bars and a few other bits to be blasted.
With the rear trailing arms being hollow i wanted to make sure they concentrated getting all the rust and crud out the inside, while the parts were there they also sprayed everything inside and out with hot zinc to prevent rust in the future.
Painted all the parts with POR15
With all the parts painted the next thing was to start reassembling. All threads were tapped out to ensure threads were clean, Melye wheel bearings and bushes were carefully pressed in using a fly press.
It's all starting to come together now!
With a workshop full of nice clean painted bits everywhere it was time to start assembling them all together. Unlike the removal of the rear end (where it all came off in one big lump) i found the easiest way i found was to mount the axle carrier first and then bolt all the other parts to it, this saves parts from getting damaged or paint chipped/scratched.
Most the parts together and torqued up, i fitted the rear shocks but left the springs out the the time being.
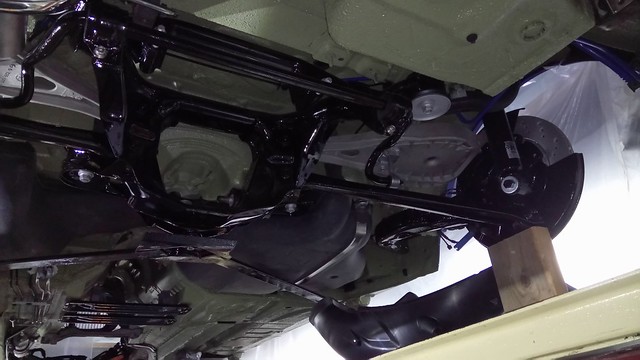
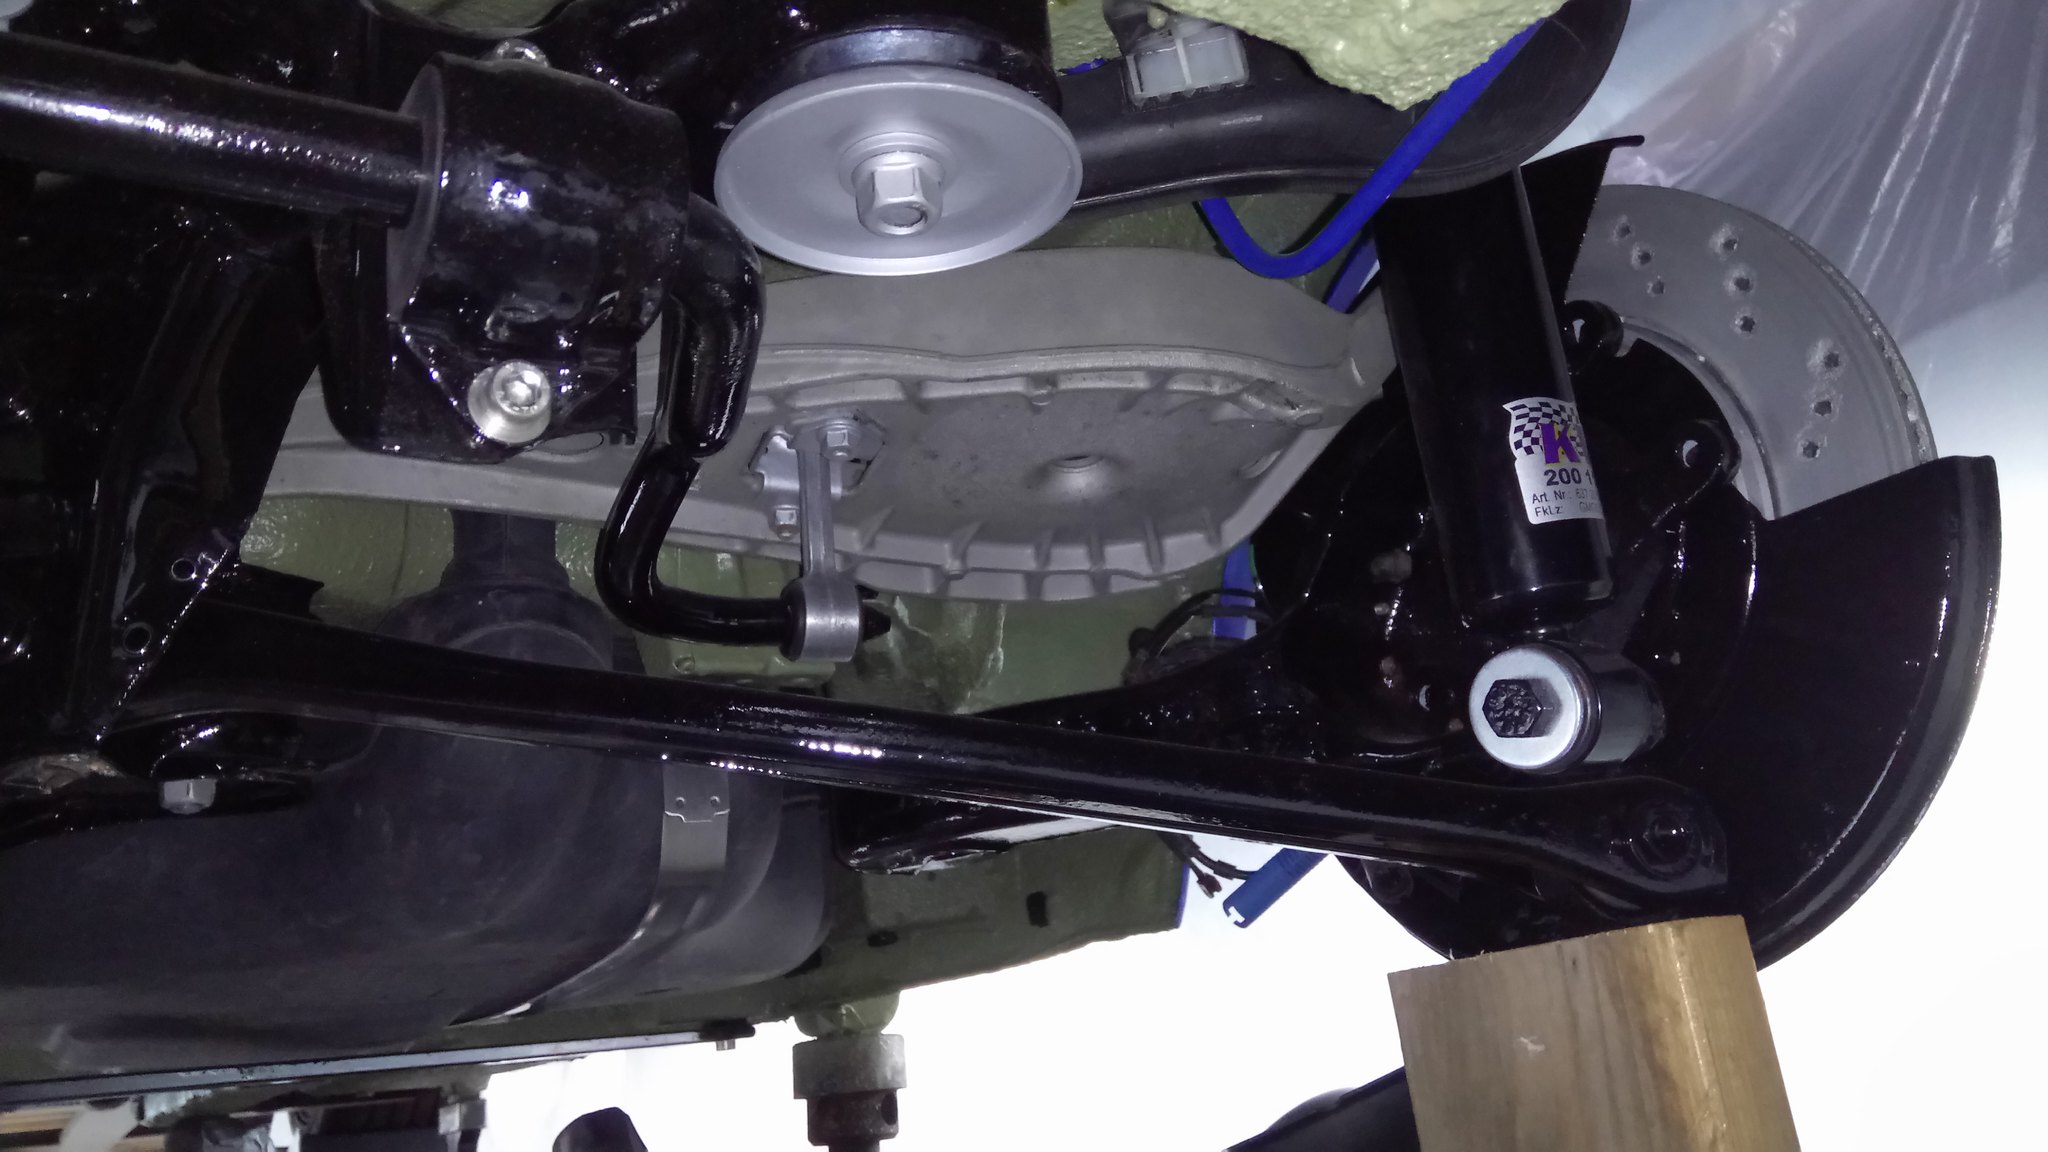
Excuse the crappy dark photos, they looked a lot brighter on my phone.
With a workshop full of nice clean painted bits everywhere it was time to start assembling them all together. Unlike the removal of the rear end (where it all came off in one big lump) i found the easiest way i found was to mount the axle carrier first and then bolt all the other parts to it, this saves parts from getting damaged or paint chipped/scratched.
Most the parts together and torqued up, i fitted the rear shocks but left the springs out the the time being.
Excuse the crappy dark photos, they looked a lot brighter on my phone.
It was time i started to make something, theirs only so much cleaning and painting i can do until i get bored and need to tinker.
So, way back in 2011 a few friends and i went to RAF Upwood....an old RAF base that you could pretty much just drive around. Which we did, and took lots of photos of our cars, as you do.
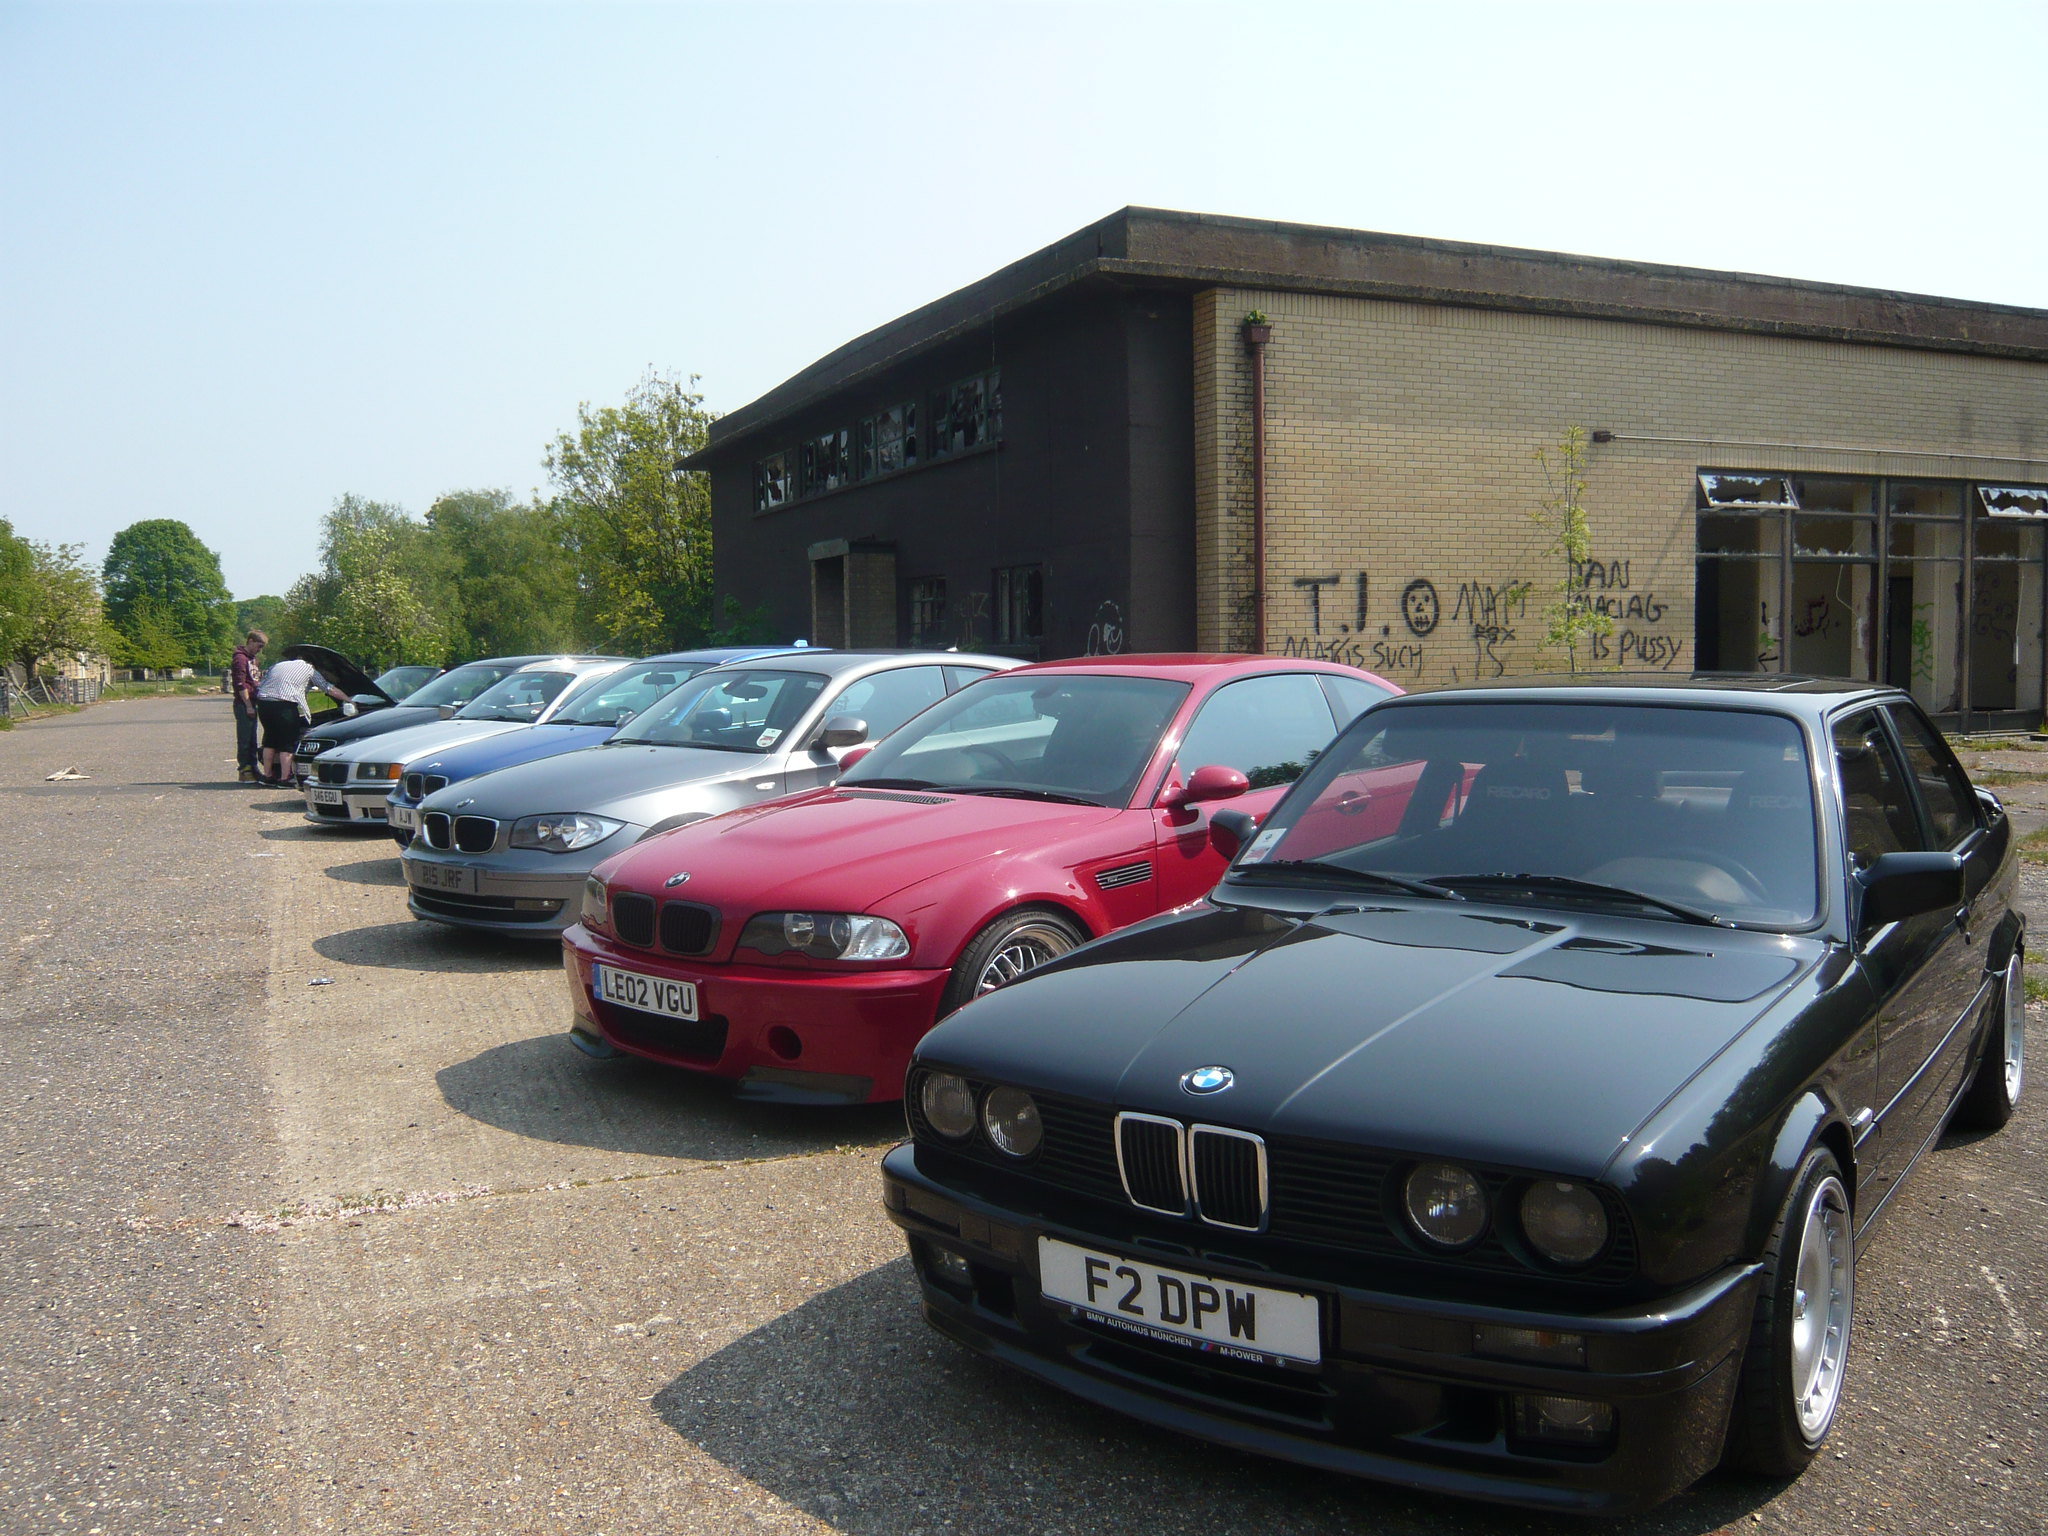
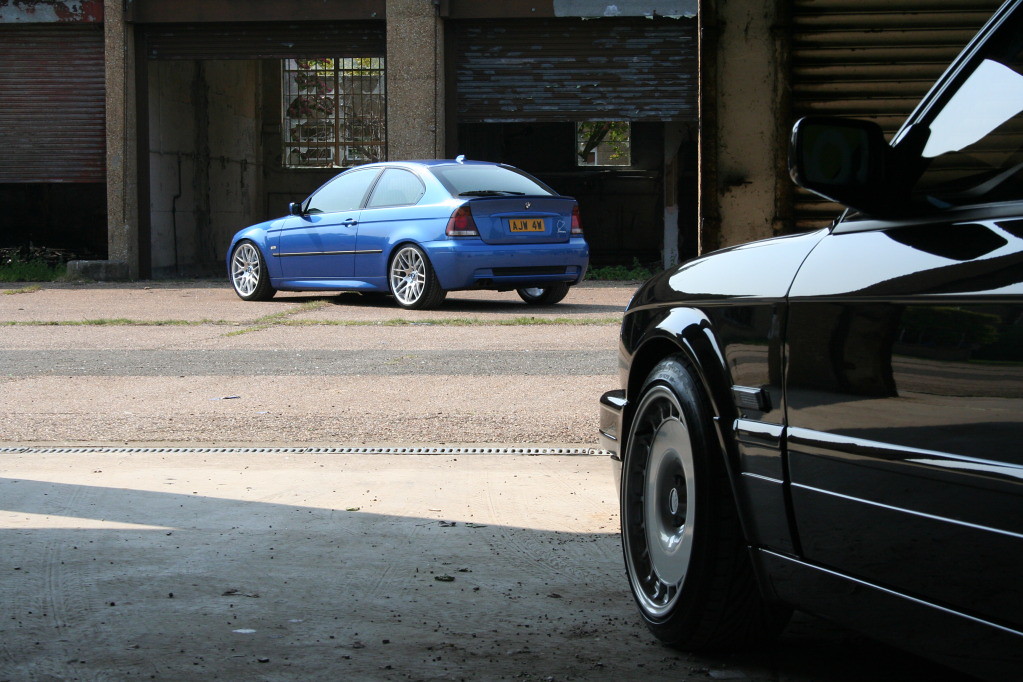

Which brings me to this photo,
Matty's E46 M3. Unfortunately he no longer owns the car, but 8 years later the picture is still in the back of my mind.
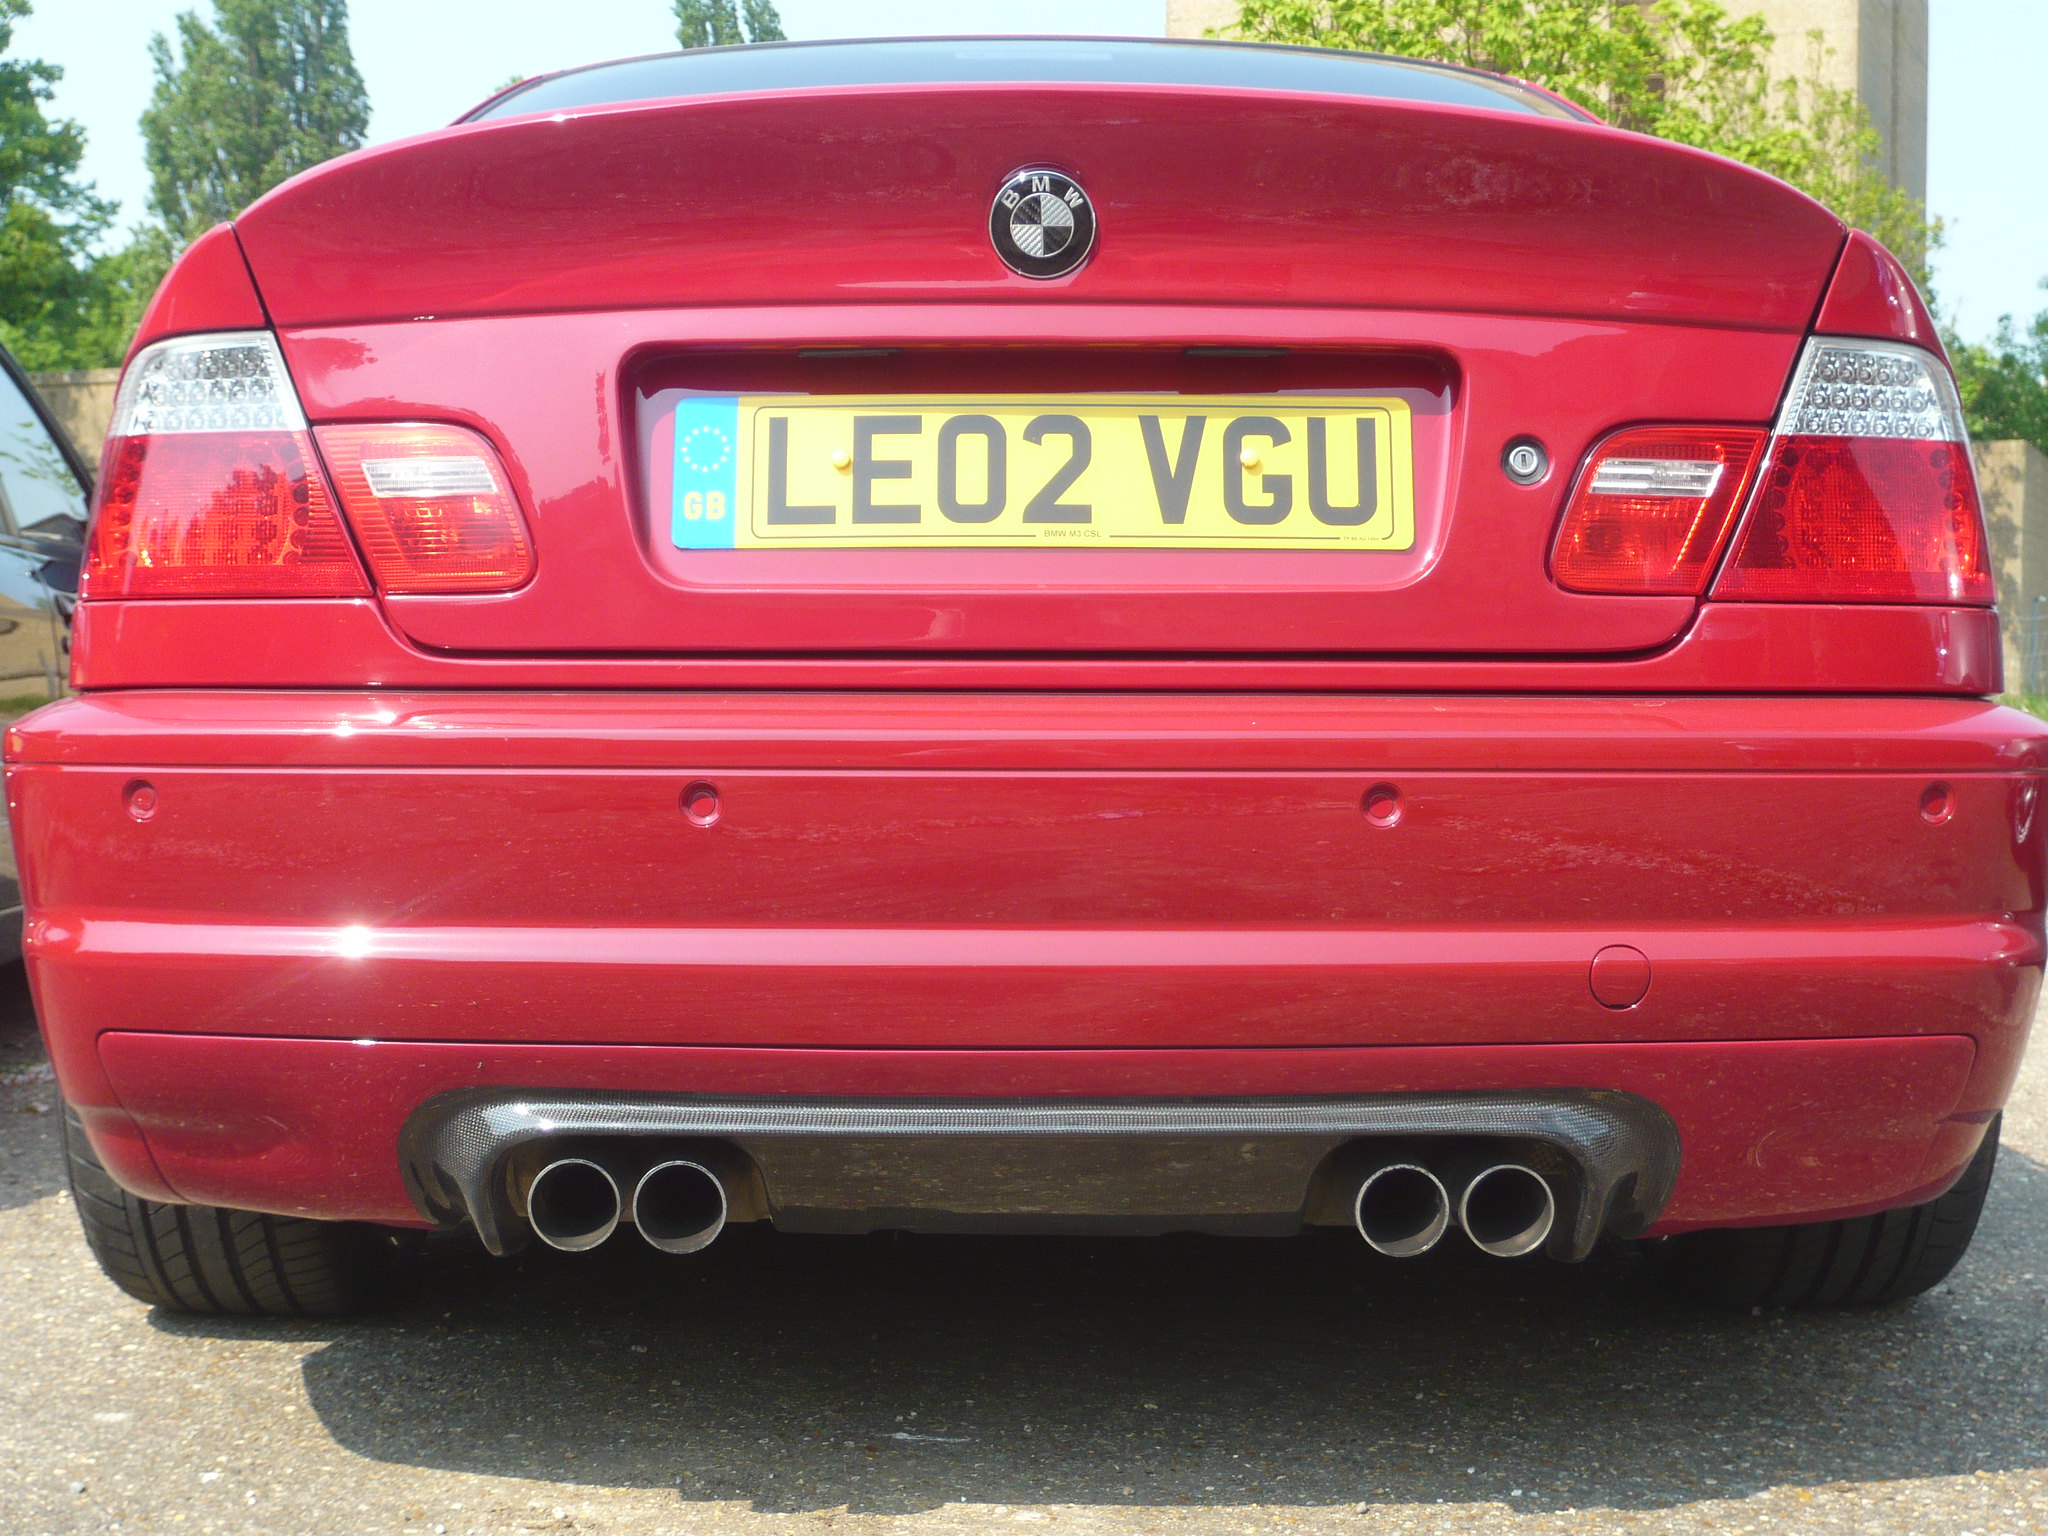
It's the CSL Diffuser, i took the photo with the intent to make one for the Compact and then have the quad exhaust too.
Here we go,
It just happens the M3 donor car had a CSL 'style' Diffuser on it, although it was carbon it was made poorly and didn't really fit the M3 very well.
The basic idea,
I wanted to make something that fitted within the recess of the bumper while maintaining the OEM look. After a fair amount of faffing with the panel that came from the donor vehicle it was far too floppy, wouldn't hold its shape and the contours didn't match the compact bumper. Plus it had body lines molded into it either side that matched the M3 bumper. It was going to be a loosing battle with the carbon fiber/fiber glass backed panel.
So sticking to what i know,
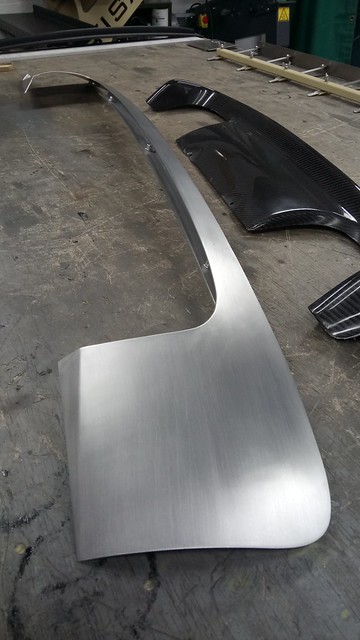
With some 2mm Aluminium i roughly cut the shape i needed, annealed it to make it more workable. Rolled each end to create a starting point,
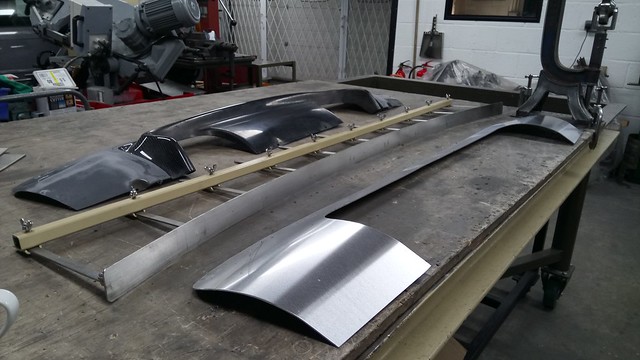
Then using a miniature English wheel i made from a big g-clamp i formed a compound curve to suit the contours of the Compact bumper,

With some more 2mm sheet a strip was cut and folded into an angle, then using the English wheel a curve was made to match the contour of the bumper, it was then notched, drilled and some nut inserts fitted.
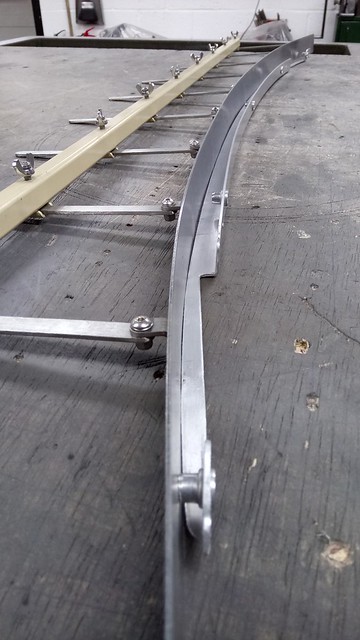
The angle strip was then TIG welded to the previously made panel, The carbon fiber section i wanted was cut out from the M3 panel,
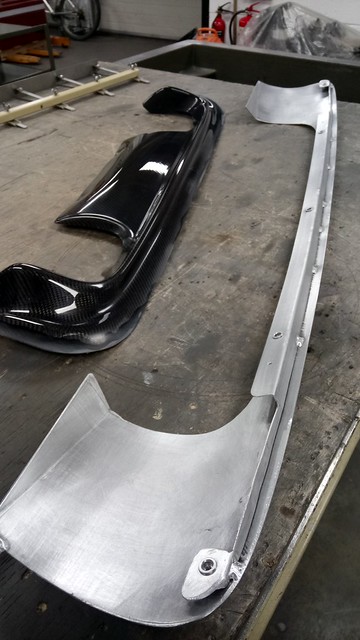
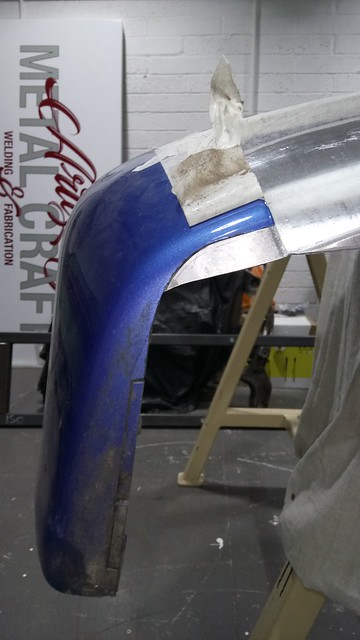
Upon fitting into the bumper recess something didn't look right, for what ever reason the underside of the bumper is cut differently from factory so that needed to be filled in,
Right hand side,
Left hand side, with the little infill,
After some metal finishing to get it all smooth,
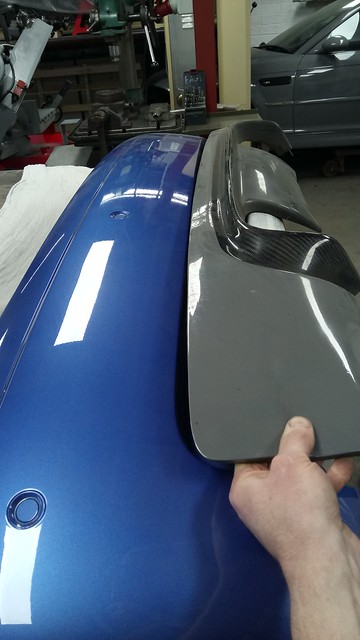
The carbon fiber part will be bonded in at a later date,
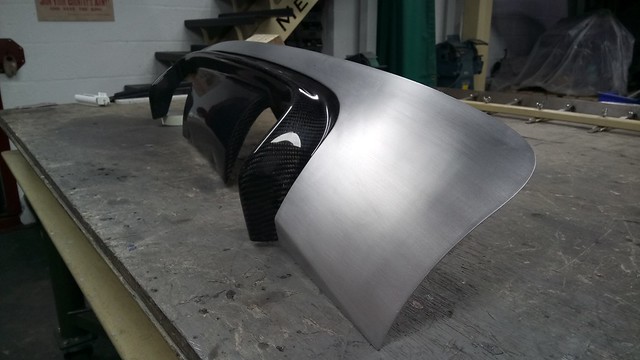

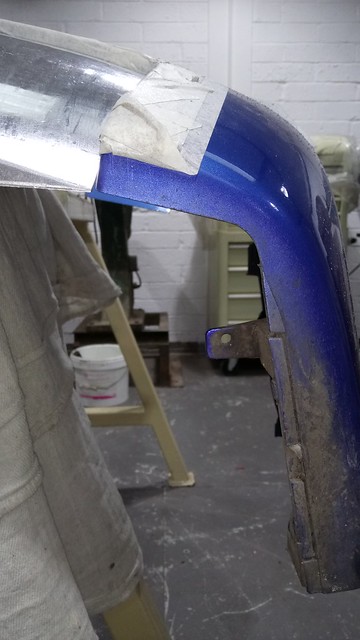
The Aluminium panel will be painted to match the Estoril Blue, no filler will be needed. The carbon weave will be left shown.
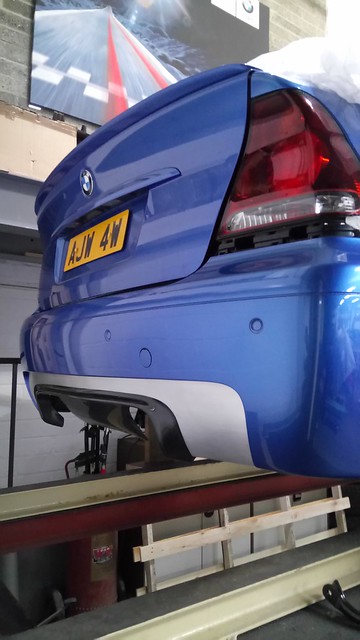
Here it is fitted to the car,
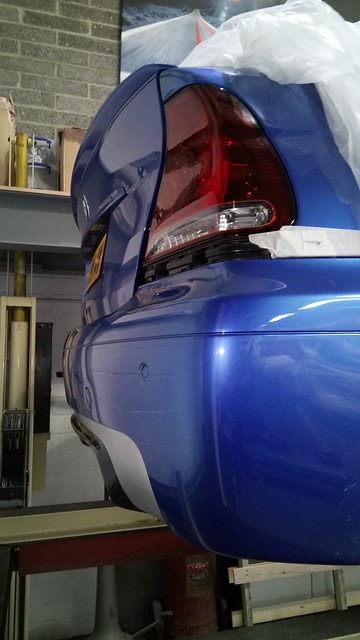
That's all for now folks!
So, way back in 2011 a few friends and i went to RAF Upwood....an old RAF base that you could pretty much just drive around. Which we did, and took lots of photos of our cars, as you do.
Which brings me to this photo,
Matty's E46 M3. Unfortunately he no longer owns the car, but 8 years later the picture is still in the back of my mind.
It's the CSL Diffuser, i took the photo with the intent to make one for the Compact and then have the quad exhaust too.
Here we go,
It just happens the M3 donor car had a CSL 'style' Diffuser on it, although it was carbon it was made poorly and didn't really fit the M3 very well.
The basic idea,
I wanted to make something that fitted within the recess of the bumper while maintaining the OEM look. After a fair amount of faffing with the panel that came from the donor vehicle it was far too floppy, wouldn't hold its shape and the contours didn't match the compact bumper. Plus it had body lines molded into it either side that matched the M3 bumper. It was going to be a loosing battle with the carbon fiber/fiber glass backed panel.
So sticking to what i know,
With some 2mm Aluminium i roughly cut the shape i needed, annealed it to make it more workable. Rolled each end to create a starting point,
Then using a miniature English wheel i made from a big g-clamp i formed a compound curve to suit the contours of the Compact bumper,
With some more 2mm sheet a strip was cut and folded into an angle, then using the English wheel a curve was made to match the contour of the bumper, it was then notched, drilled and some nut inserts fitted.
The angle strip was then TIG welded to the previously made panel, The carbon fiber section i wanted was cut out from the M3 panel,
Upon fitting into the bumper recess something didn't look right, for what ever reason the underside of the bumper is cut differently from factory so that needed to be filled in,
Right hand side,
Left hand side, with the little infill,
After some metal finishing to get it all smooth,
The carbon fiber part will be bonded in at a later date,
The Aluminium panel will be painted to match the Estoril Blue, no filler will be needed. The carbon weave will be left shown.
Here it is fitted to the car,
That's all for now folks!


Great work Adam, and good to see it slowly going back together!
In terms of the bumper the estoril/ali/carbon leaves a little too much going on for me so I'm behind your plan of colour coding, will also help the carbon diffuser really stand out.
What have you got to do underneath to make the exhaust work? Assume it'll be a completely custom effort?
In terms of the bumper the estoril/ali/carbon leaves a little too much going on for me so I'm behind your plan of colour coding, will also help the carbon diffuser really stand out.
What have you got to do underneath to make the exhaust work? Assume it'll be a completely custom effort?
Gassing Station | Readers' Cars | Top of Page | What's New | My Stuff