1984 Rover SD1 Vitesse
Discussion


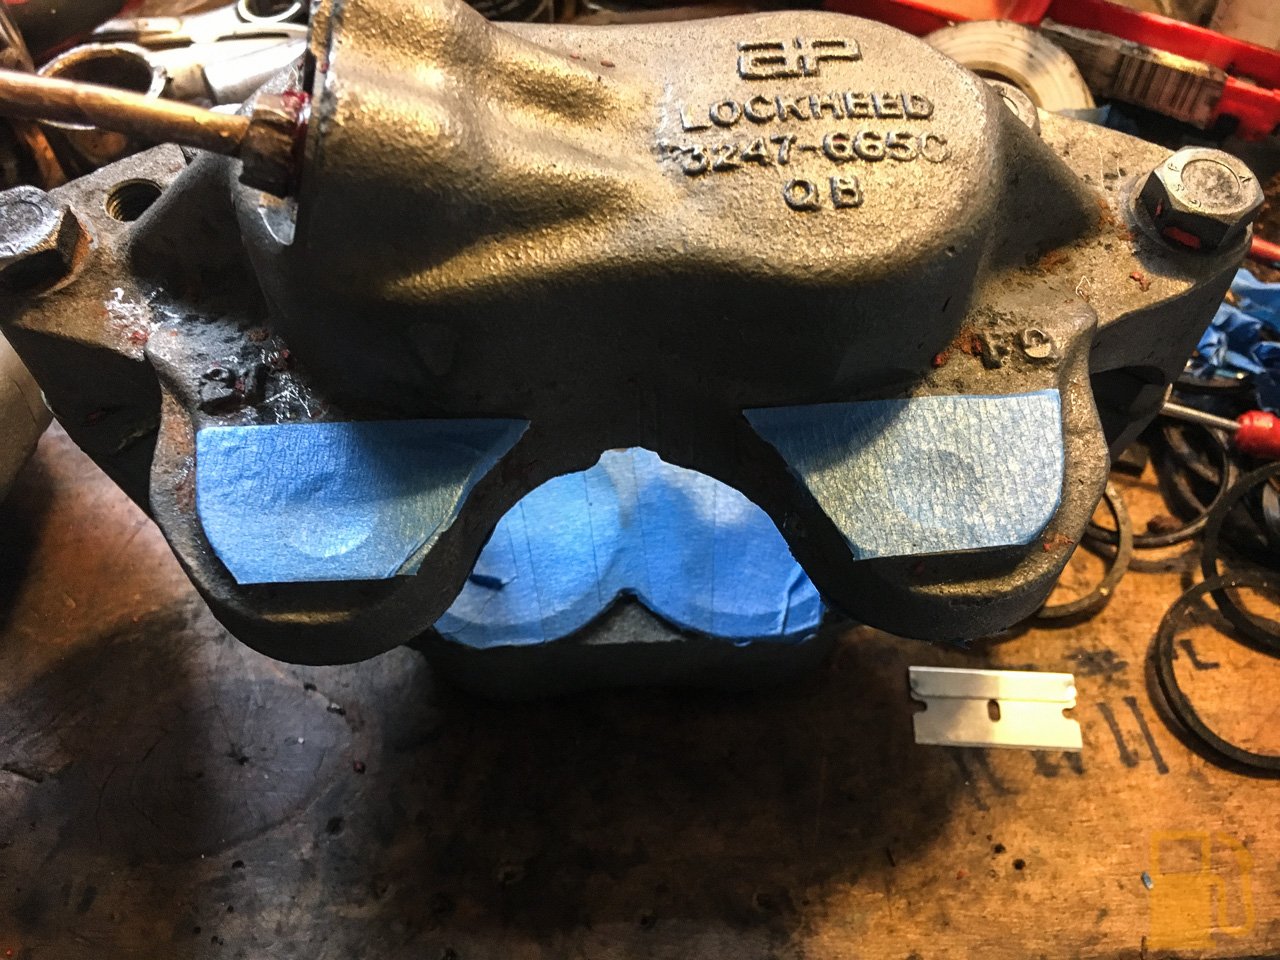
In the last post I had removed both calipers in order to strip and paint them.

I popped my wire cup wheel on the grinder, took one of them outside and had a bash at it. Most of the top layers of paint basically exploded on contact with the brush, but the red must be proper stuff because it's tougher to remove. (excuse the weeds, need more fire for them)


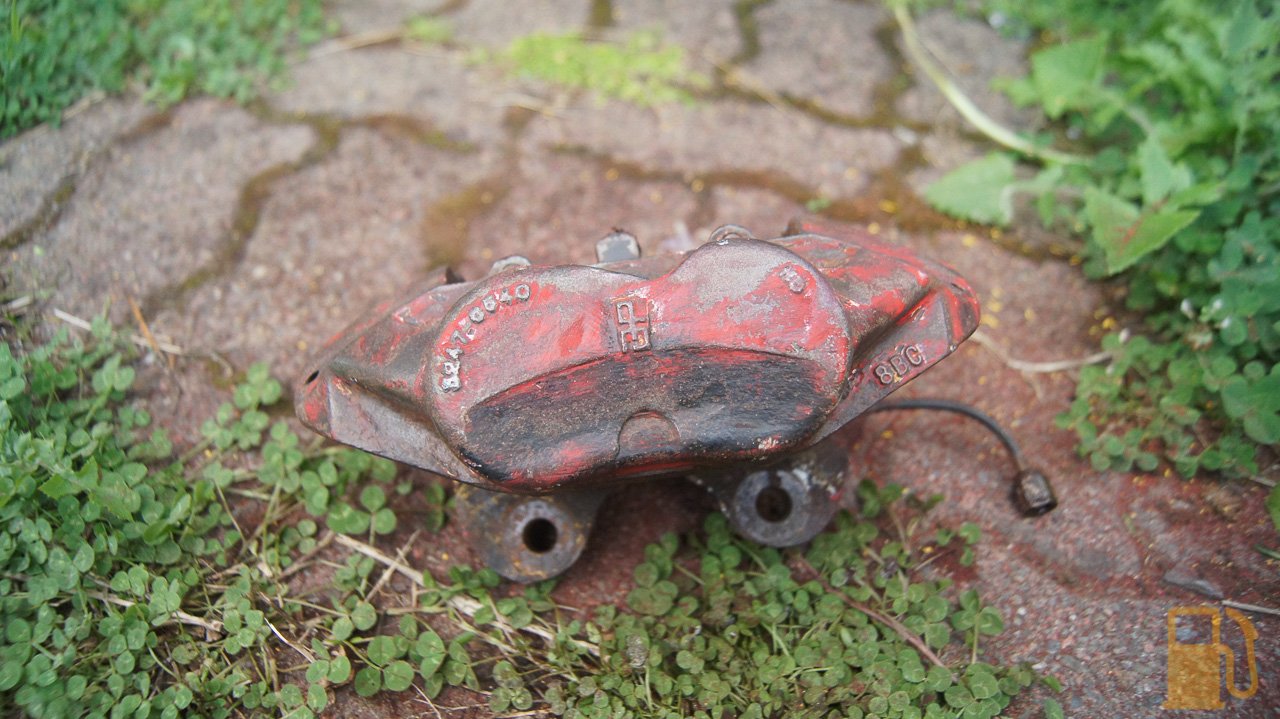
Under the layers and layers of paint, the caliper wasn't actually in bad shape. There is some corrosion under the paint at the back of the caliper, but nothing major.
I took the pads out so I could remove some more paint. The retaining hardware was worse than I thought. The pins have certainly lost some metal, but the plates have almost completely corroded through in places.


I have ordered some replacement plates from Rimmers, but the pins were out of stock so I will find the ones I removed from Effie, and use them.
The pads are Lucas GDB789. They seem to be listed for Range Rovers (like the ones fitted to Effie), and made by a few different brands, like TRW. Options are good.


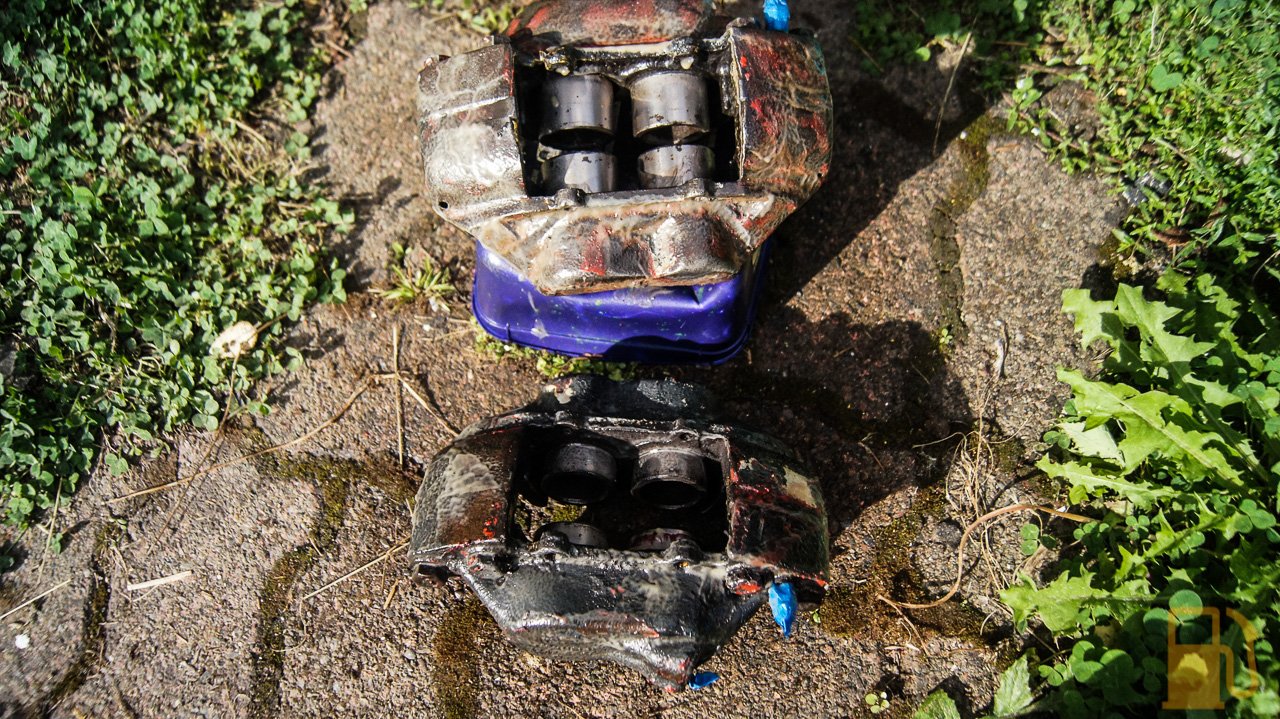
Hmm... something doesn't look right with those pads. Spot the piston that isn't doing its job (hint, it's the top photo, on the left). The pads seem new enough they aren't worn unevenly, but I'll double-check before refitting.
So that's where it all went to hell. After removing the pads I tried to push the pistons back into the caliper, and only three pistons (of four) on each caliper could be pushed back. One piston in each caliper was seized solid.
I used some compressed air, with my inflation thinggy, and the pin that is usually used to fill sports balls, to push the pistons out. I wrapped some tape around the pin to try to make a decent seal. Make sure the bleed valve is shut of course.

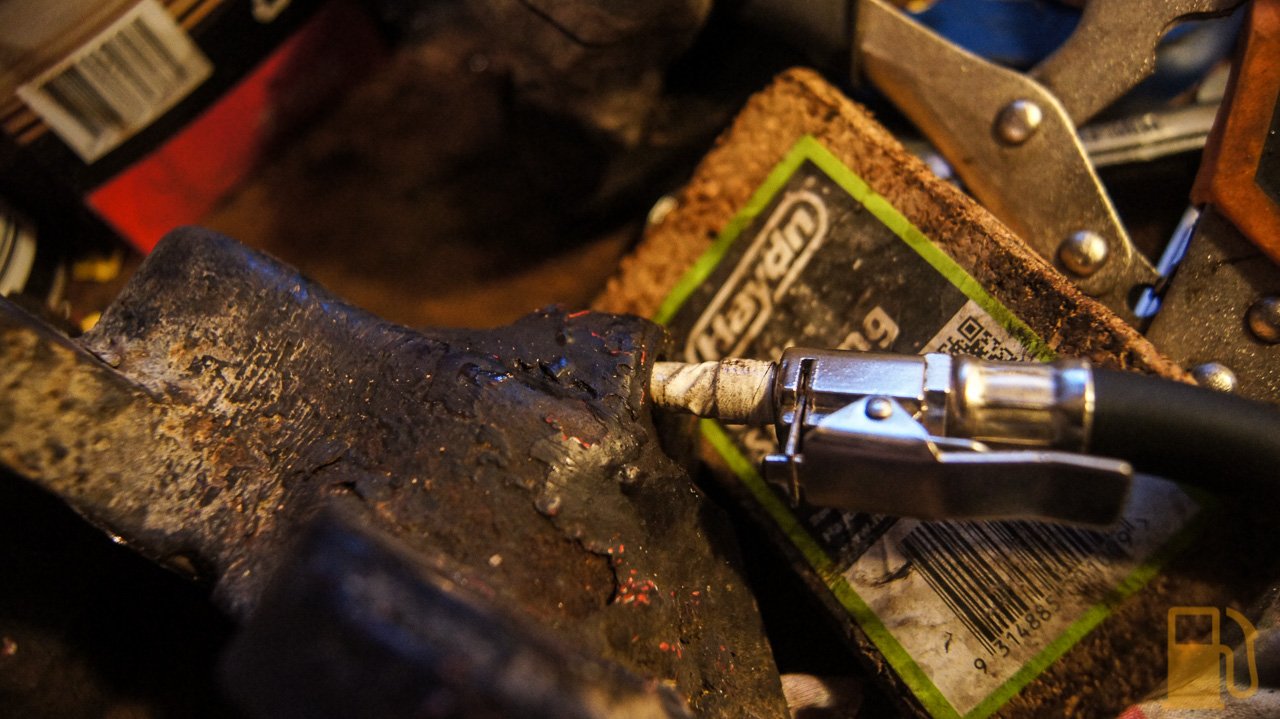
I found cork sanding blocks were a perfect size for pushing the pistons out far enough to remove them, but not have them shoot across the room. One of the calipers slowly but surely freed up the stuck piston with some compressed air (not the caliper from the above pads)

The other flat-out refused. No matter how much air I pumped into it, that one piston didn't move. The other three made a dash for freedom though. Oops.

I sprayed penetrating fluid into the caliper, and all around the stuck piston and left it to sit a couple of days. It wasn't magic, and didn't free up by itself. Darn.
Today I got the big guns out, and was determined to remove the piston one way or another. There is another method other than compressed air to remove a stuck piston, but it involves a tool I don't have, and didn't want to buy just for this job; a grease gun.
The big guns? A chisel, screwdriver and hammer.
First I removed the outer seal and retainer with a pick. It was well corroded in there but came out easy enough

WIth that removed I started beating on the piston with the hammer and chisel, trying to get it to turn in the bore. I quickly noticed the chisel was too sharp and was cutting into the piston a bit much, so changed to a nice big blunt screwdriver.

After much beating, some swearing, lots of penetrating fluid, a moderately sized fire as the penetrating fluid ignited when I tried to apply heat, the piston finally started to rotate. A little bit at a time i knocked it around, until it was moving much freer. Then I gave it some air, and this happened

Out the ******* comes. I stopped there and used air to remove all the other pistons first, and then used the vice grips to pull the sticky piston out.
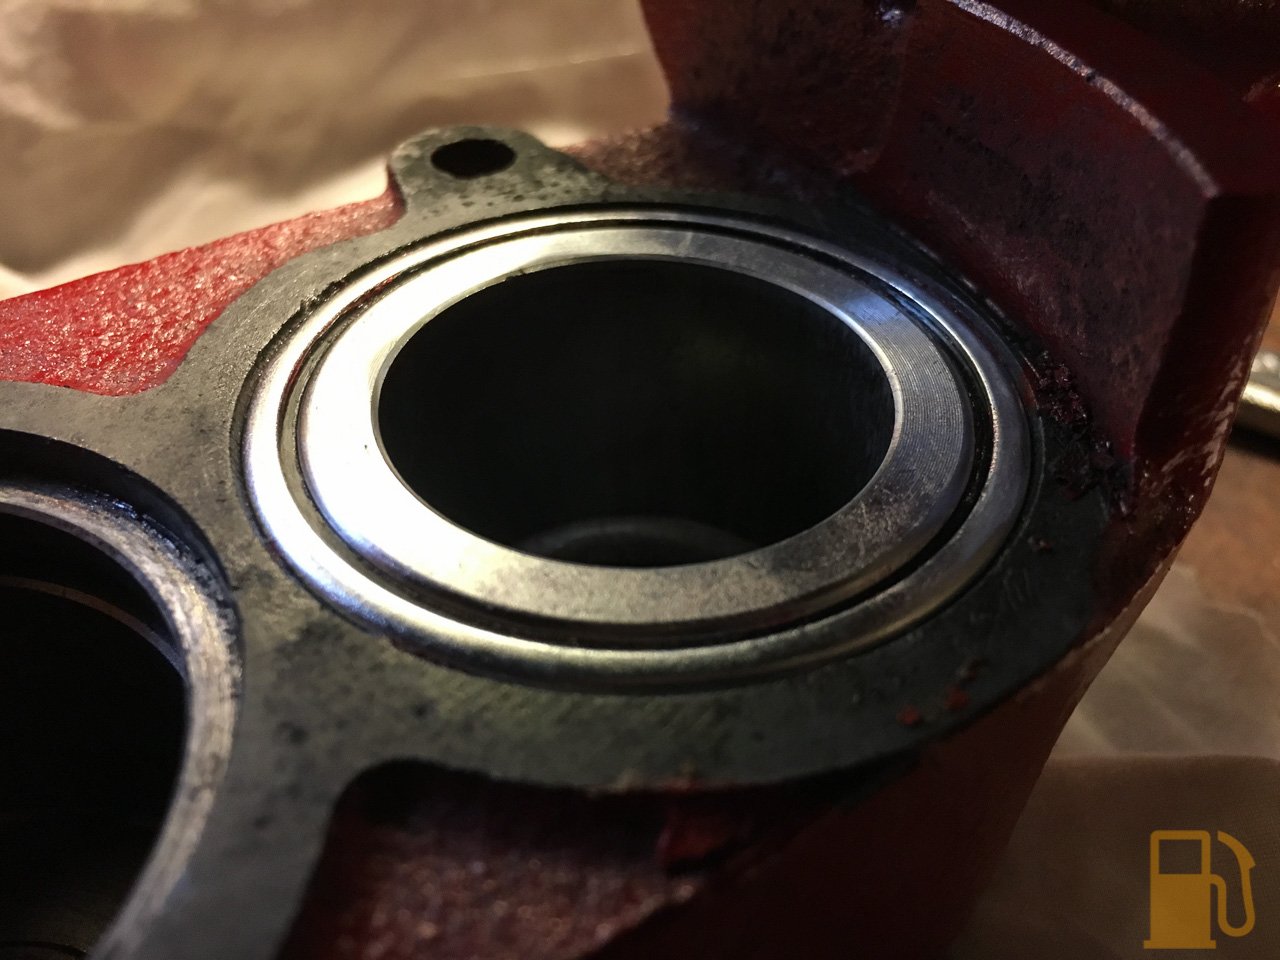
This might have something to do with why it was so hard to remove. That black stuff is corrosion/rust pitting in the piston.

The bore it came out of thankfully looks OK. No more worn than the others, but the section between the two seals is a bit worse for wear and will need some tweaking with fine sandpaper or emery tape.

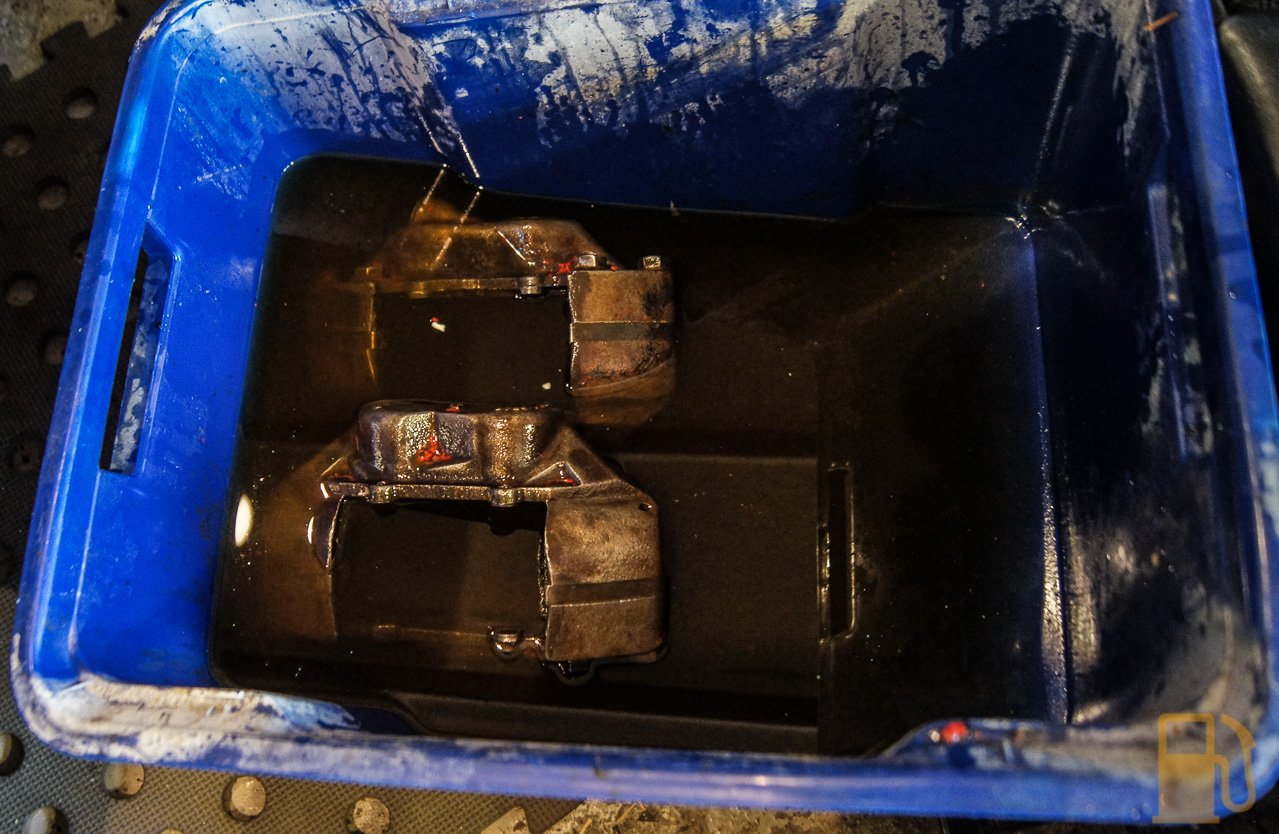
Upon close inspection of the pistons that came out of that caliper, all of them have signs of pitting and corrosion. Some worse than others, so along with a new seal kit, I have ordered a set of 8 new pistons also. Whilst I wait for them to arrive, I will be completely stripping the calipers down, soaking them in paint stripper, then in Evaporust, and after a clean down they will get a coat of paint.
In that same order I have ordered a new pipe for the one I broke (still available new), but the other side pipe is now NLA, so I have roped a friend (with all the tools and knowledge) into helping make a new pipe up for that side, using the fittings from a spare pipe I have ordered and will cut up for parts. I did manage to get that pipe off. I had to use vice grips, a spanner and lots of brute force to crack the nut. Some copper grease will help in future.

It's no wonder the brakes felt like rubbish. They had a very soft pedal, and when pushed hard they didn't work all that well. I'm glad I found this now, as it wasn't likely to fix itself and magically start to work, and doing the bleed I had planned wouldn't have done anything either. Once back together they should be as good as the Vitesse brakes can be.
Now the waiting game again.
I popped my wire cup wheel on the grinder, took one of them outside and had a bash at it. Most of the top layers of paint basically exploded on contact with the brush, but the red must be proper stuff because it's tougher to remove. (excuse the weeds, need more fire for them)
Under the layers and layers of paint, the caliper wasn't actually in bad shape. There is some corrosion under the paint at the back of the caliper, but nothing major.
I took the pads out so I could remove some more paint. The retaining hardware was worse than I thought. The pins have certainly lost some metal, but the plates have almost completely corroded through in places.
I have ordered some replacement plates from Rimmers, but the pins were out of stock so I will find the ones I removed from Effie, and use them.
The pads are Lucas GDB789. They seem to be listed for Range Rovers (like the ones fitted to Effie), and made by a few different brands, like TRW. Options are good.
Hmm... something doesn't look right with those pads. Spot the piston that isn't doing its job (hint, it's the top photo, on the left). The pads seem new enough they aren't worn unevenly, but I'll double-check before refitting.
So that's where it all went to hell. After removing the pads I tried to push the pistons back into the caliper, and only three pistons (of four) on each caliper could be pushed back. One piston in each caliper was seized solid.
I used some compressed air, with my inflation thinggy, and the pin that is usually used to fill sports balls, to push the pistons out. I wrapped some tape around the pin to try to make a decent seal. Make sure the bleed valve is shut of course.
I found cork sanding blocks were a perfect size for pushing the pistons out far enough to remove them, but not have them shoot across the room. One of the calipers slowly but surely freed up the stuck piston with some compressed air (not the caliper from the above pads)
The other flat-out refused. No matter how much air I pumped into it, that one piston didn't move. The other three made a dash for freedom though. Oops.
I sprayed penetrating fluid into the caliper, and all around the stuck piston and left it to sit a couple of days. It wasn't magic, and didn't free up by itself. Darn.
Today I got the big guns out, and was determined to remove the piston one way or another. There is another method other than compressed air to remove a stuck piston, but it involves a tool I don't have, and didn't want to buy just for this job; a grease gun.
The big guns? A chisel, screwdriver and hammer.
First I removed the outer seal and retainer with a pick. It was well corroded in there but came out easy enough
WIth that removed I started beating on the piston with the hammer and chisel, trying to get it to turn in the bore. I quickly noticed the chisel was too sharp and was cutting into the piston a bit much, so changed to a nice big blunt screwdriver.
After much beating, some swearing, lots of penetrating fluid, a moderately sized fire as the penetrating fluid ignited when I tried to apply heat, the piston finally started to rotate. A little bit at a time i knocked it around, until it was moving much freer. Then I gave it some air, and this happened
Out the ******* comes. I stopped there and used air to remove all the other pistons first, and then used the vice grips to pull the sticky piston out.
This might have something to do with why it was so hard to remove. That black stuff is corrosion/rust pitting in the piston.
The bore it came out of thankfully looks OK. No more worn than the others, but the section between the two seals is a bit worse for wear and will need some tweaking with fine sandpaper or emery tape.
Upon close inspection of the pistons that came out of that caliper, all of them have signs of pitting and corrosion. Some worse than others, so along with a new seal kit, I have ordered a set of 8 new pistons also. Whilst I wait for them to arrive, I will be completely stripping the calipers down, soaking them in paint stripper, then in Evaporust, and after a clean down they will get a coat of paint.
In that same order I have ordered a new pipe for the one I broke (still available new), but the other side pipe is now NLA, so I have roped a friend (with all the tools and knowledge) into helping make a new pipe up for that side, using the fittings from a spare pipe I have ordered and will cut up for parts. I did manage to get that pipe off. I had to use vice grips, a spanner and lots of brute force to crack the nut. Some copper grease will help in future.
It's no wonder the brakes felt like rubbish. They had a very soft pedal, and when pushed hard they didn't work all that well. I'm glad I found this now, as it wasn't likely to fix itself and magically start to work, and doing the bleed I had planned wouldn't have done anything either. Once back together they should be as good as the Vitesse brakes can be.
Now the waiting game again.
Well finally, the parts from Rimmers arrived!
We left Part 1 with the calipers off, and the pistons removed from one of the calipers. Because of the corrosion on the pistons I did remove, I chose to order a full set of pistons, instead of reusing some of them as planned.
In the meantime I tried some paint stripper to remove the paint from the calipers. It was a bad idea. Who ever would have thought caliper paint was pretty resistant to chemicals?
The whole lot kinda turned to a sticky mush, without doing a lot.


So I said ****** it, washed the calipers off, and hit them with the grinder and wire brush again. They came up pretty well really.

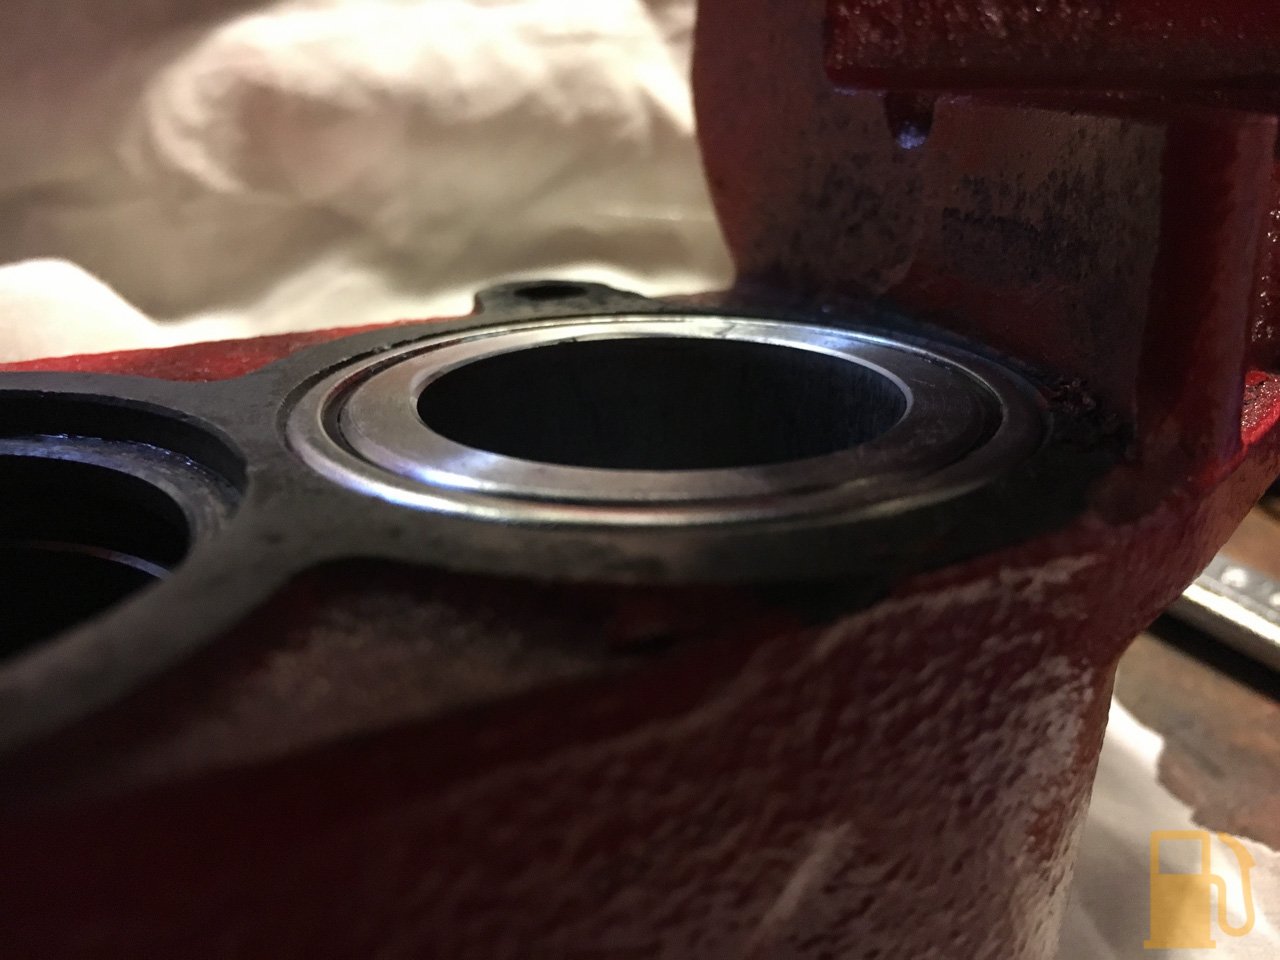
Before the next step, I had to completely strip the calipers of their seals and pistons. I popped the calipers out with compressed air, and used a small pick to gently remove the piston seal. The dust seal at the top of the bore was a bit harder because its held in with a metal retainer, which had rusted in place. To remove this I used a small pick to tear a gap in the seal, and then a narrow flat blade screwdriver to pop the retainer and seal out.

This is the top seal and retainer


With all those ripped out, the calipers went into 10L of Evapo-Rust for two days to clean any corrosion off them.
The calipers responded very well to the rust treatment, with no more corrosion hiding around the bolts on the back, and the seal retainer areas are spotless now.
Since the calipers were now just bare metal, I didn't have much time from rinsing them off to get paint on them otherwise corrosion will set in again.

I smeared a ton of red rubber grease over the bores, just to make sure they wouldn't corrode. Rubber grease plays nice with brake fluid, and wont swell seals.

And then on went the masking tape. I completely masked the flat areas around the bores

And the mounting tabs. I left these unpainted because the lower one is sandwiched between the hub and steering bracket. I didn't want paint to cause issues there.
After a wipe down with wax and grease remover, on went the paint.


For some reason Mrs Petrol didn't think it was a good idea to bake the calipers in the oven, so I made do with cooking them with a heat gun to set the paint. The true baking will happen on the car anyway.
Yesterday the parts I ordered from Rimmers arrived, so I set about rebuilding the calipers and preparing them to go on the car.
Off came the masking tape


A quick wipe out of the grease in the bores, and in went the piston seals. They slip easily into place. Just make sure they don't get twisted during fitting and use lots of red grease.
MMM, new piston and seals
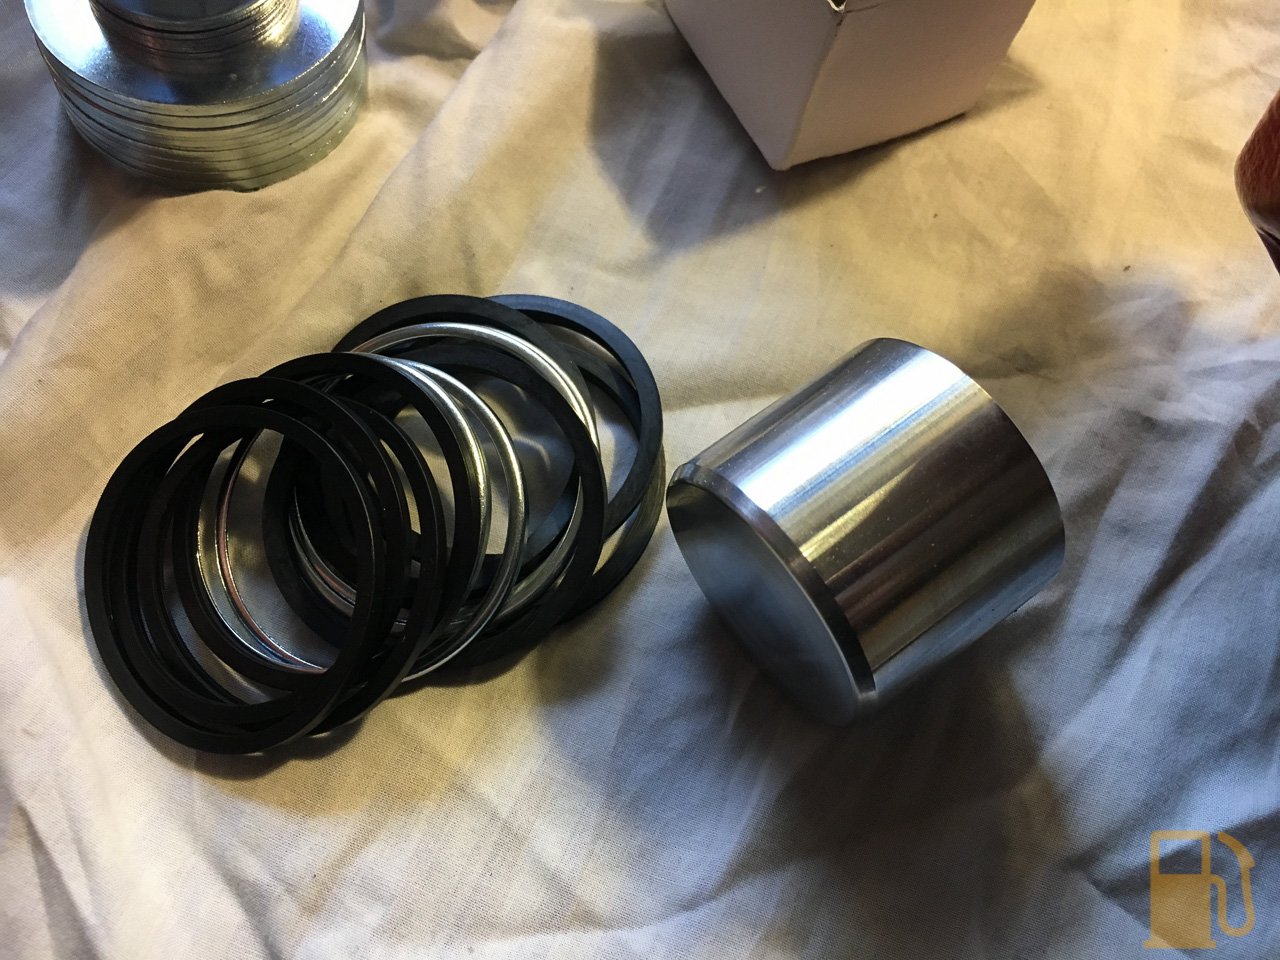
And with an old piston. This isn't even the worst piston, but has a lot of pitting.

With the piston seal smothered in red grease and inserted in the bore, in goes the piston, also smothered in red grease. I assembled the dust seal into the retainer, and slipped it over the piston.

Now, you can't just push this retainer into place by hand, it needs to be pressed into place. I have seen many ways to do this, but the simplest was posted in a YouTube video by an Alan Phillips. Big thanks to him for posting the details on it.
My version of it involves metric fittings, so it's a 75mm long M10 bolt and a couple of nuts, two 2" OD washers (minimum), and a handful of small M10 washers. I got these from Bunnings.


Because of the bolt I used, I had a lot of unthreaded shank to cover before I could use a nut to clamp all the washers together, hence the massive lump of washers.
Push the piston down by hand until it sits just above the seal retainer. Slip the tool into the caliper, being careful to not scrape the bore opposite the piston and unwind the lower nut to push the washer against the piston.

Using a spanner, gently wind the nut down, this pushes against the top of the caliper, and will push both the piston and the seal retainer down into the bore. This pushes them in completely straight, and wont bend the retainer like it can using other methods.
Does a pretty good job
Rinse and repeat, another 7 times. Love the nice clean metal.

I ordered a pair of new brake pipes. Only part number CRC3238 is available. This is the LH pipe for the single pipe caliper. The RH side is no longer available. I originally ordered two as I was going to cut one up to use the fittings with a new pipe that would be made up for the RH side. More on that later....

So with all the pistons and seals fitted, the only thing to do next was to fit them to the car.
We left Part 1 with the calipers off, and the pistons removed from one of the calipers. Because of the corrosion on the pistons I did remove, I chose to order a full set of pistons, instead of reusing some of them as planned.
In the meantime I tried some paint stripper to remove the paint from the calipers. It was a bad idea. Who ever would have thought caliper paint was pretty resistant to chemicals?
The whole lot kinda turned to a sticky mush, without doing a lot.
So I said ****** it, washed the calipers off, and hit them with the grinder and wire brush again. They came up pretty well really.
Before the next step, I had to completely strip the calipers of their seals and pistons. I popped the calipers out with compressed air, and used a small pick to gently remove the piston seal. The dust seal at the top of the bore was a bit harder because its held in with a metal retainer, which had rusted in place. To remove this I used a small pick to tear a gap in the seal, and then a narrow flat blade screwdriver to pop the retainer and seal out.
This is the top seal and retainer
With all those ripped out, the calipers went into 10L of Evapo-Rust for two days to clean any corrosion off them.
The calipers responded very well to the rust treatment, with no more corrosion hiding around the bolts on the back, and the seal retainer areas are spotless now.
Since the calipers were now just bare metal, I didn't have much time from rinsing them off to get paint on them otherwise corrosion will set in again.
I smeared a ton of red rubber grease over the bores, just to make sure they wouldn't corrode. Rubber grease plays nice with brake fluid, and wont swell seals.
And then on went the masking tape. I completely masked the flat areas around the bores
And the mounting tabs. I left these unpainted because the lower one is sandwiched between the hub and steering bracket. I didn't want paint to cause issues there.
After a wipe down with wax and grease remover, on went the paint.
For some reason Mrs Petrol didn't think it was a good idea to bake the calipers in the oven, so I made do with cooking them with a heat gun to set the paint. The true baking will happen on the car anyway.
Yesterday the parts I ordered from Rimmers arrived, so I set about rebuilding the calipers and preparing them to go on the car.
Off came the masking tape
A quick wipe out of the grease in the bores, and in went the piston seals. They slip easily into place. Just make sure they don't get twisted during fitting and use lots of red grease.
MMM, new piston and seals
And with an old piston. This isn't even the worst piston, but has a lot of pitting.
With the piston seal smothered in red grease and inserted in the bore, in goes the piston, also smothered in red grease. I assembled the dust seal into the retainer, and slipped it over the piston.
Now, you can't just push this retainer into place by hand, it needs to be pressed into place. I have seen many ways to do this, but the simplest was posted in a YouTube video by an Alan Phillips. Big thanks to him for posting the details on it.
My version of it involves metric fittings, so it's a 75mm long M10 bolt and a couple of nuts, two 2" OD washers (minimum), and a handful of small M10 washers. I got these from Bunnings.
Because of the bolt I used, I had a lot of unthreaded shank to cover before I could use a nut to clamp all the washers together, hence the massive lump of washers.
Push the piston down by hand until it sits just above the seal retainer. Slip the tool into the caliper, being careful to not scrape the bore opposite the piston and unwind the lower nut to push the washer against the piston.
Using a spanner, gently wind the nut down, this pushes against the top of the caliper, and will push both the piston and the seal retainer down into the bore. This pushes them in completely straight, and wont bend the retainer like it can using other methods.
Does a pretty good job
Rinse and repeat, another 7 times. Love the nice clean metal.
I ordered a pair of new brake pipes. Only part number CRC3238 is available. This is the LH pipe for the single pipe caliper. The RH side is no longer available. I originally ordered two as I was going to cut one up to use the fittings with a new pipe that would be made up for the RH side. More on that later....
So with all the pistons and seals fitted, the only thing to do next was to fit them to the car.
With the brakes rebuilt, it was time to get it all together and back on the ground.
It's finally time to finish the work I started a month ago. The calipers are now rebuilt, and ready to fit.
Before I got all excited and fitted the calipers, I wanted to get the rest of the car ready, so it needed the front under tray and spoiler refitted. When I removed the old undertray I noted it was completely ******ed, and cracked in multiple places. It was held together with hopes and dreams (and engine oil).

Thankfully smart me kept the spare under tray I got with my bulk lot of parts ages ago, so I pulled that down out of the ceiling and fitted it to the car. It's not perfect, it has a couple of broken spots but its way better than the old one.

I refitted the front spoiler too, making it a bit more secure than it was previously. I still need to fix the cracks, but it looks OK from a distance.
Another thing I needed to fix, since my parts came in, is why there was always a bad fuel smell from the rear of the car. When taking the LH rear shock out I noticed the fuel tank vent hose looked pretty average. Upon removal, this is what I noted

Yes, they go right through the hose
Well that will do it. Everyone should check this hose, as when the tank is full fuel could potentially leak out of this hose. Rimmers have the hose available, so on went a new one of those and a new clamp.


Now, back to the main task. Brakes.
Refitting is easy, it's just the two bolts per caliper.

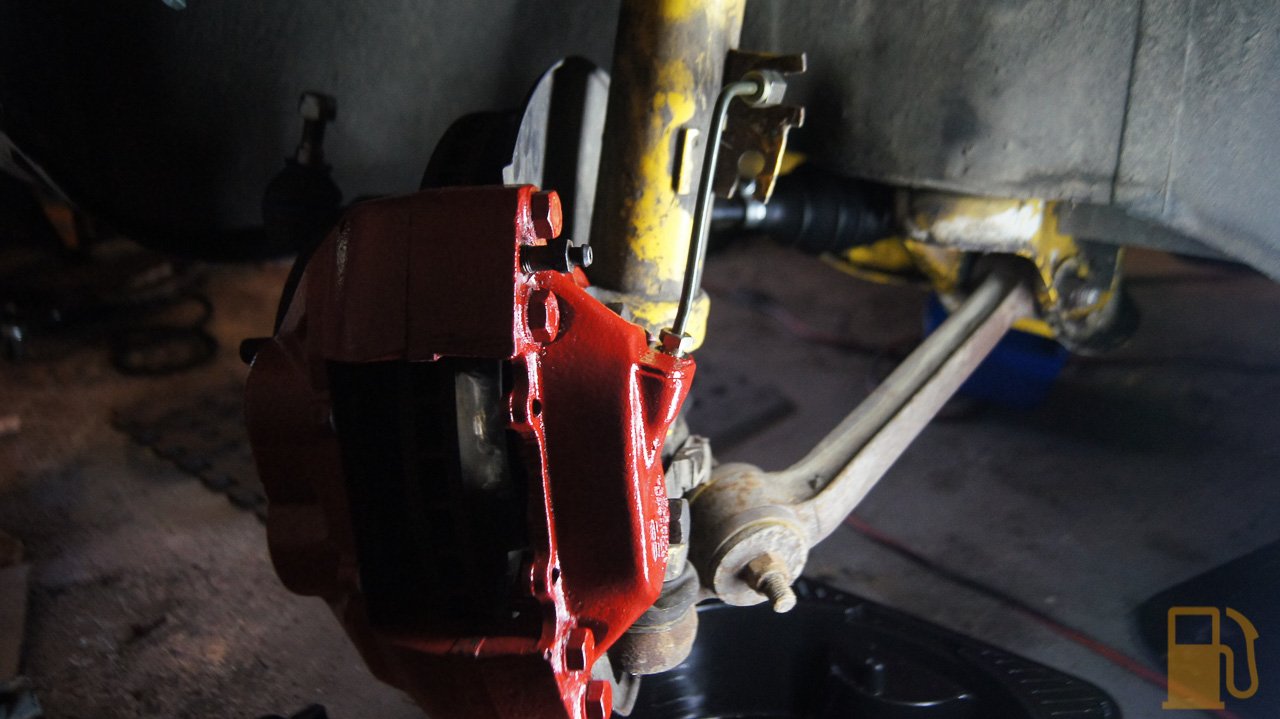
The perfectly aligned genuine pipe on the LH side. I had a bit of a fight on my hands with the braided hose nut that clamps to the strut, but a rattle gun freed that up.

Doesn't look bad

The RH side, as I mentioned in my previous brake post, doesn't have a genuine pipe available. The fittings are the same as the LH side, but as I suspected, the kink in the pipe is slightly out of place.

It lines up nicely with that lower slot, but needs to come to the right a bit. Some gentle pressure, and it all came together. It's not perfect, but a lot easier than making a new pipe.


In went the pads, with new retainer plates and reused pins

And then it was a matter of bleeding the brakes. I started with the two front ones just to get fluid into them, and then bled as per the book, starting at the rear.
The fluid from the rear lines was pretty gross. Dark and it appeared to have some floating matter in it. Thankfully with all the work I have done, all of the fluid in the master cylinder had been replaced, so I flushed the lines and it all came through nice. It took a bit of work to get all the air out of the front, but the pedal now feels pretty good. I think it will get better again as the pads bed in a bit better.
Oh wait, so does that mean she is on the road again?! Yes.

Oh yes she is.
She has lost of a bit of her aggressive low stance, but still sits lower than Effie, and the improvements in ride quality and not smashing the front spoiler on everything make up for it. The springs should settle a bit too over time.


Before

After

Ignore the massive difference in gloss...!
So, how does she drive?
Gearbox is much quieter, although a little more notchy. Hopefully this wears in a bit as I drive her more.
The brakes? Well they were a bit pants initially, but even that was better than it was. Now with some hard braking to bed the pads in, she pulls up pretty well. Pulls up straight, and can lock the brakes if needed. The pedal has a little mush to it, so I'll need to bleed the brakes again, obviously there is still some air in there, but it's so much better than it was.
Oh, and the suspension? Bloody awesome. Instead of being all crashy and thumpy like it was, the ride is firm, but she floats over bumps like she should. The rear that used to bottom out harshly, regularly, now dampens nicely. I tested it on a couple of bumps that I used to dodge because it literally hurt to go over them, and it was almost a pleasure now. I haven't driven her hard yet because I need to get an alignment, but already I can tell the cornering is flatter and more controlled. Oh, and I can get in and out of the garage without blocks now.
Its cost a lot, and taken a bit of time, but it was all well worth it.
It's finally time to finish the work I started a month ago. The calipers are now rebuilt, and ready to fit.
Before I got all excited and fitted the calipers, I wanted to get the rest of the car ready, so it needed the front under tray and spoiler refitted. When I removed the old undertray I noted it was completely ******ed, and cracked in multiple places. It was held together with hopes and dreams (and engine oil).
Thankfully smart me kept the spare under tray I got with my bulk lot of parts ages ago, so I pulled that down out of the ceiling and fitted it to the car. It's not perfect, it has a couple of broken spots but its way better than the old one.
I refitted the front spoiler too, making it a bit more secure than it was previously. I still need to fix the cracks, but it looks OK from a distance.
Another thing I needed to fix, since my parts came in, is why there was always a bad fuel smell from the rear of the car. When taking the LH rear shock out I noticed the fuel tank vent hose looked pretty average. Upon removal, this is what I noted
Yes, they go right through the hose
Well that will do it. Everyone should check this hose, as when the tank is full fuel could potentially leak out of this hose. Rimmers have the hose available, so on went a new one of those and a new clamp.
Now, back to the main task. Brakes.
Refitting is easy, it's just the two bolts per caliper.
The perfectly aligned genuine pipe on the LH side. I had a bit of a fight on my hands with the braided hose nut that clamps to the strut, but a rattle gun freed that up.
Doesn't look bad
The RH side, as I mentioned in my previous brake post, doesn't have a genuine pipe available. The fittings are the same as the LH side, but as I suspected, the kink in the pipe is slightly out of place.
It lines up nicely with that lower slot, but needs to come to the right a bit. Some gentle pressure, and it all came together. It's not perfect, but a lot easier than making a new pipe.
In went the pads, with new retainer plates and reused pins
And then it was a matter of bleeding the brakes. I started with the two front ones just to get fluid into them, and then bled as per the book, starting at the rear.
The fluid from the rear lines was pretty gross. Dark and it appeared to have some floating matter in it. Thankfully with all the work I have done, all of the fluid in the master cylinder had been replaced, so I flushed the lines and it all came through nice. It took a bit of work to get all the air out of the front, but the pedal now feels pretty good. I think it will get better again as the pads bed in a bit better.
Oh wait, so does that mean she is on the road again?! Yes.
Oh yes she is.
She has lost of a bit of her aggressive low stance, but still sits lower than Effie, and the improvements in ride quality and not smashing the front spoiler on everything make up for it. The springs should settle a bit too over time.
Before
After
Ignore the massive difference in gloss...!
So, how does she drive?
Gearbox is much quieter, although a little more notchy. Hopefully this wears in a bit as I drive her more.
The brakes? Well they were a bit pants initially, but even that was better than it was. Now with some hard braking to bed the pads in, she pulls up pretty well. Pulls up straight, and can lock the brakes if needed. The pedal has a little mush to it, so I'll need to bleed the brakes again, obviously there is still some air in there, but it's so much better than it was.
Oh, and the suspension? Bloody awesome. Instead of being all crashy and thumpy like it was, the ride is firm, but she floats over bumps like she should. The rear that used to bottom out harshly, regularly, now dampens nicely. I tested it on a couple of bumps that I used to dodge because it literally hurt to go over them, and it was almost a pleasure now. I haven't driven her hard yet because I need to get an alignment, but already I can tell the cornering is flatter and more controlled. Oh, and I can get in and out of the garage without blocks now.
Its cost a lot, and taken a bit of time, but it was all well worth it.
Well, all good things come to an end I guess.
I'll get back to that in a moment, but first, a couple of updates.
First, the Mini has been sold tonight. Although I will miss it, it was a great little car to drive, it needed to be sold. Owning it made me realise that the even without the supercharger the Cooper is actually a really great little car. Built like a BMW, but small, nimble and like a modern version of an old Mini (unsurprisingly). A+ would own again (with boost though).
Next up, Tess had a wheel alignment the other day. Thanks to Hutt Valley Tyres for aligning it. They treated Tess with enthusiasm and respect, which I really appreciate. The guy was stoked to work on her, and was full of compliments. A stark contrast to a call I made to another workshop the day before who, when I asked for an alignment, proceeded to rubbish my car over the phone when I said it was an SD1 I needed an alignment on. Pro-Tip, if you want customers, do NOT rubbish their car. You never know when that "piece of junk" is actually their baby, no matter what you think of it.
Here she is up on the alignment hoist.

I was impressed though, although the steering needed straightening (the wheel was on the wonky by 1/4 turn), I actually managed to get the toe pretty damn close just by eye when I reassembled it. Only needed tweaking by about a mm. Now the car tracks straight, and the wheel isn't on the piss. Lovely.
Unfortunately, now that the front brake calipers work properly, the damn master cylinder and servo/brake booster have packed a sad. The servo has started hissing when shutting off the engine (indicating a vacuum leak), and the brake pedal now sinks slowly to the floor if you keep pressure on it. I tried bleeding the brakes again, but although the pedal feels nice with the engine off straight after bleeding, with the booster helping the pedal sinks. I suspect fluid is bypassing the piston seal, and leaking internally (as im not losing fluid). There are signs that the master has been leaking down the servo in the past, its stripped the paint off the front under the master.
I'm working on options now, it's either get the master rebuilt locally and i'll re-kit the servo, or buy a new master and servo from Rimmers. But for now, that will have to wait as there are more pressing matters...
After five years, I have to move house. Unfortunately the landlord has come into some serious financial issues and the only way out is to sell the rental we are in.
We came to an agreement that instead of running open homes and selling it whilst we are still here, we have three weeks to move out. There is good and bad news to go with that.
The good news is that we are going to buy a house of our own; the new Tastes Like Petrol HQ. The bad thing is that we are still about a month away from having anywhere to move to. This leaves us with a sticky situation of a crossover period without a home.
Tess will hopefully be going to the same storage lockup that Nicks Vitesse is at, so that will keep her out of trouble, and off the street. All our other belongings are going into storage. I have a buyer for Effie, so hopefully (and sadly) she will be sold next weekend. I'll likely shed a tear when she drives off, it's like selling your first child. The buyer sounds like a great owner for her, and he is super excited. Moving is also why it was important to sell the Mini, I'm losing my parking spaces, and don't want to have to try to find parking for that car too.
So that's where we are; it's all chaos and mess. Due to this, I'll have to take a hiatus from posting as there just won't be anything happening, and I won't have a home and possibly no internet access. Of course I'll still be on Twitter and Instagram.
I will be back, and hopefully, bigger and better. As always, if you have it, drive it... or fix it.
I'll get back to that in a moment, but first, a couple of updates.
First, the Mini has been sold tonight. Although I will miss it, it was a great little car to drive, it needed to be sold. Owning it made me realise that the even without the supercharger the Cooper is actually a really great little car. Built like a BMW, but small, nimble and like a modern version of an old Mini (unsurprisingly). A+ would own again (with boost though).
Next up, Tess had a wheel alignment the other day. Thanks to Hutt Valley Tyres for aligning it. They treated Tess with enthusiasm and respect, which I really appreciate. The guy was stoked to work on her, and was full of compliments. A stark contrast to a call I made to another workshop the day before who, when I asked for an alignment, proceeded to rubbish my car over the phone when I said it was an SD1 I needed an alignment on. Pro-Tip, if you want customers, do NOT rubbish their car. You never know when that "piece of junk" is actually their baby, no matter what you think of it.
Here she is up on the alignment hoist.
I was impressed though, although the steering needed straightening (the wheel was on the wonky by 1/4 turn), I actually managed to get the toe pretty damn close just by eye when I reassembled it. Only needed tweaking by about a mm. Now the car tracks straight, and the wheel isn't on the piss. Lovely.
Unfortunately, now that the front brake calipers work properly, the damn master cylinder and servo/brake booster have packed a sad. The servo has started hissing when shutting off the engine (indicating a vacuum leak), and the brake pedal now sinks slowly to the floor if you keep pressure on it. I tried bleeding the brakes again, but although the pedal feels nice with the engine off straight after bleeding, with the booster helping the pedal sinks. I suspect fluid is bypassing the piston seal, and leaking internally (as im not losing fluid). There are signs that the master has been leaking down the servo in the past, its stripped the paint off the front under the master.
I'm working on options now, it's either get the master rebuilt locally and i'll re-kit the servo, or buy a new master and servo from Rimmers. But for now, that will have to wait as there are more pressing matters...
After five years, I have to move house. Unfortunately the landlord has come into some serious financial issues and the only way out is to sell the rental we are in.
We came to an agreement that instead of running open homes and selling it whilst we are still here, we have three weeks to move out. There is good and bad news to go with that.
The good news is that we are going to buy a house of our own; the new Tastes Like Petrol HQ. The bad thing is that we are still about a month away from having anywhere to move to. This leaves us with a sticky situation of a crossover period without a home.
Tess will hopefully be going to the same storage lockup that Nicks Vitesse is at, so that will keep her out of trouble, and off the street. All our other belongings are going into storage. I have a buyer for Effie, so hopefully (and sadly) she will be sold next weekend. I'll likely shed a tear when she drives off, it's like selling your first child. The buyer sounds like a great owner for her, and he is super excited. Moving is also why it was important to sell the Mini, I'm losing my parking spaces, and don't want to have to try to find parking for that car too.
So that's where we are; it's all chaos and mess. Due to this, I'll have to take a hiatus from posting as there just won't be anything happening, and I won't have a home and possibly no internet access. Of course I'll still be on Twitter and Instagram.
I will be back, and hopefully, bigger and better. As always, if you have it, drive it... or fix it.
A month later;
Its been a long month; without Tess, internet or for the most part, a home. But now all of that is over.
We purchased, and finally moved into our house just over a week ago. We are still surrounded by an ever shrinking pile of boxes (where does all this crap come from, and where does it go now?!) but at least everything is with us again.
Our two goldfish were being babysat whilst we had no home, as we didn't want to try to move them each week to a different AirBNB. Sadly, after over 6 years of him being around, our little guy Stan "High Fin" Lee passed away the day before we were to pick them up. He was an old chap, so it wasn't totally unexpected, but its a shame he's gone, and he couldn't wait a day and not make the babysitter feel bad. His little bro, Dwight, has taken up residence in our lounge now, and is doing well. RIP in the big tank in the sky Stan.
Dwight doing Dwight things.

Anyway, Tess also came home the other day. She had also been babysat which was a great help, as she was able to be stored away in a dry garage and I didn't have to try to move her around. A huge thanks to our babysitters for their help.

Tess seems happy in her new home, although she takes up an awful lot of it


In order to help reduce what we put into storage, I filled the boot and back seat with spare parts. There was a lot of weight in there but the new suspension handled it OK.

One thing I did change as soon as I got her into the garage, was to replace the tailgate struts, so that I didn't end up being decapitated by the stupidly heavy tailgate. I went to Supercheap with a spare strut and matched it up against the ones they had on the shelf, and tried to get the highest force they had, which was 450N. These are a little longer than the original struts, so you do have to take care when fitting them as the top edge of the tailgate might contact the body, but in normal use they work perfect, even with the Vitesse spoiler.


The other small thing I did was to add my trickle charge hard wire connector to the battery. As Tess sits around a bit, it'll be good to keep her battery topped up, without having to have clips on the battery and the bonnet open.


So that's where we are today. A good second-hand brake booster and master cylinder arrived this morning, so that will be fitted shortly, and then we should be back on the road. I have big plans to get this car in better shape, including stripping out the interior for cleaning (and fixing the heater box issues).
More on that later.
Its been a long month; without Tess, internet or for the most part, a home. But now all of that is over.
We purchased, and finally moved into our house just over a week ago. We are still surrounded by an ever shrinking pile of boxes (where does all this crap come from, and where does it go now?!) but at least everything is with us again.
Our two goldfish were being babysat whilst we had no home, as we didn't want to try to move them each week to a different AirBNB. Sadly, after over 6 years of him being around, our little guy Stan "High Fin" Lee passed away the day before we were to pick them up. He was an old chap, so it wasn't totally unexpected, but its a shame he's gone, and he couldn't wait a day and not make the babysitter feel bad. His little bro, Dwight, has taken up residence in our lounge now, and is doing well. RIP in the big tank in the sky Stan.
Dwight doing Dwight things.
Anyway, Tess also came home the other day. She had also been babysat which was a great help, as she was able to be stored away in a dry garage and I didn't have to try to move her around. A huge thanks to our babysitters for their help.
Tess seems happy in her new home, although she takes up an awful lot of it
In order to help reduce what we put into storage, I filled the boot and back seat with spare parts. There was a lot of weight in there but the new suspension handled it OK.
One thing I did change as soon as I got her into the garage, was to replace the tailgate struts, so that I didn't end up being decapitated by the stupidly heavy tailgate. I went to Supercheap with a spare strut and matched it up against the ones they had on the shelf, and tried to get the highest force they had, which was 450N. These are a little longer than the original struts, so you do have to take care when fitting them as the top edge of the tailgate might contact the body, but in normal use they work perfect, even with the Vitesse spoiler.
The other small thing I did was to add my trickle charge hard wire connector to the battery. As Tess sits around a bit, it'll be good to keep her battery topped up, without having to have clips on the battery and the bonnet open.
So that's where we are today. A good second-hand brake booster and master cylinder arrived this morning, so that will be fitted shortly, and then we should be back on the road. I have big plans to get this car in better shape, including stripping out the interior for cleaning (and fixing the heater box issues).
More on that later.
After rebuilding the calipers an issue that was slightly noticeable before, was very pronounced now. The brake pedal was sinking. This was not ideal.
The pedal had been soft and a little sink-y before I rebuilt the calipers, and I was hoping that the calipers may have been the cause of it, but clearly not. If anything, having all the pistons working properly had made the issue more evident, and holding pressure on the pedal would now cause it to gradually sink to the floor.
Unfortunately having just reassembled the calipers days before the car had to be moved into storage due to losing our house, there was nothing I could do at the time, and I had to drive her to storage. Needless to say driving down the hill from home was interesting; having to keep pumping the pedal to build pressure back up. I got there OK, and I got her to her new home again later.
A sinking pedal, with no fluid loss, means the master cylinder for the braking system was leaking fluid internally, passed the seals. Whether this was from the car sitting for so many years, or if it had just worn out, I'm not sure.
The other issue I had noticed, was that when shutting off the car there was a hissing noise coming from under the bonnet. I tracked this down to coming from the brake servo (or brake booster as its otherwise known as). This would indicate it was leaking vacuum, so that wouldn't be helping at all.
I was initially going to just rebuild the master cylinder, but once I narrowed down the noise to the servo I knew it was going to be a bigger job than just the master and started looking for other options. I would need to at the least, replace the servo (as rebuild kits are NLA) and rebuild the master.
Rimmers has both, and even do them as a pair for a discount, but the freight made the parts rather unattractive. I was wary about getting an old used one that had been sitting on a shelf somewhere for years, so wasn't too keen on getting something locally from a wrecker (if there was even anything still around).
I did end up going for a secondhand pair of servo and master, from a car that had been driven at speed into a tree, and came worse off. The seller claimed the servo was only two years old, and the master worked well (maybe too well...) and wasn't leaking. It was cheap enough to take a punt and hope it worked.
The replacement parts arrived the other day but I haven't had a chance to unbox and inspect them until today.

It's a bit dirty and covered in polystyrene from the packing, but there are no signs of fluid leaks or peeling paint on the servo under the master (like my current one does).
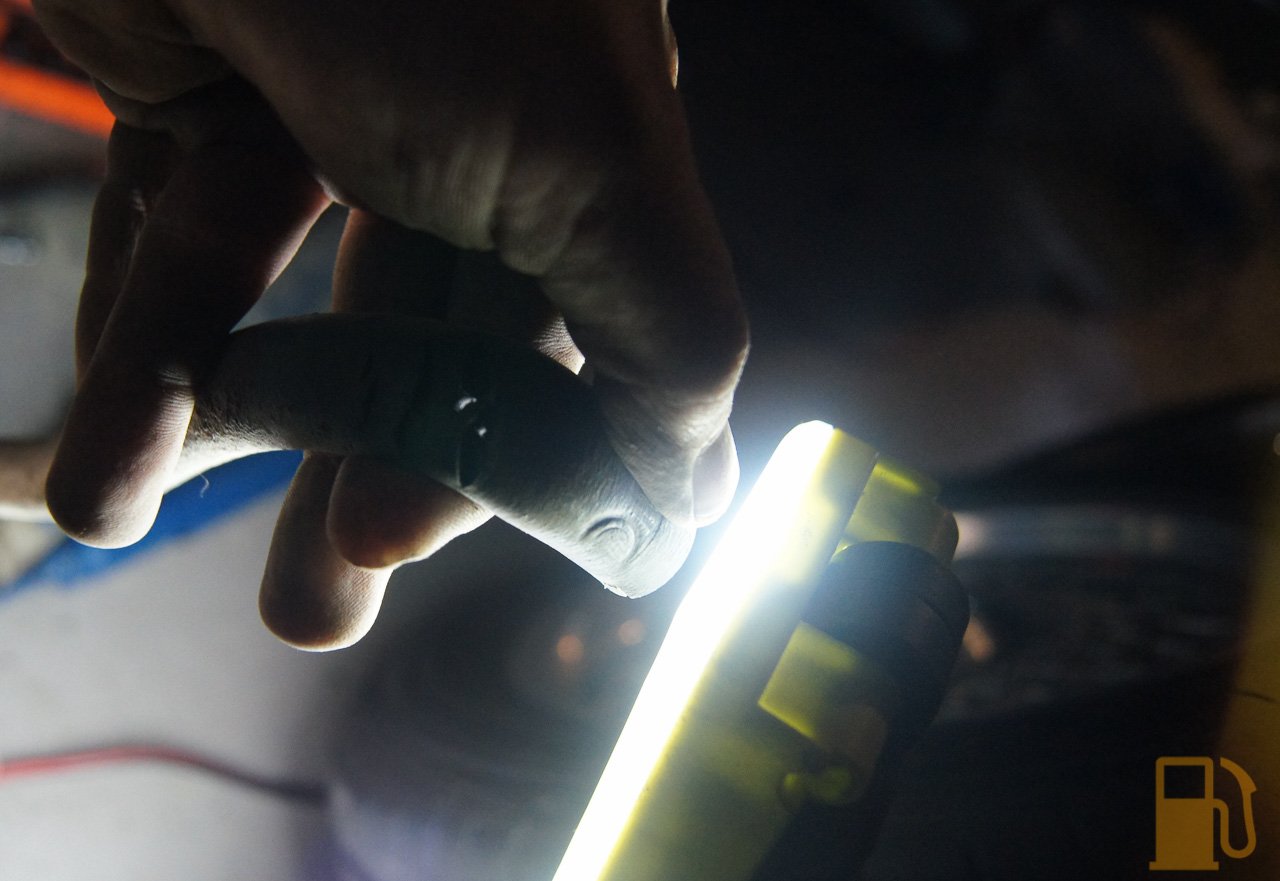
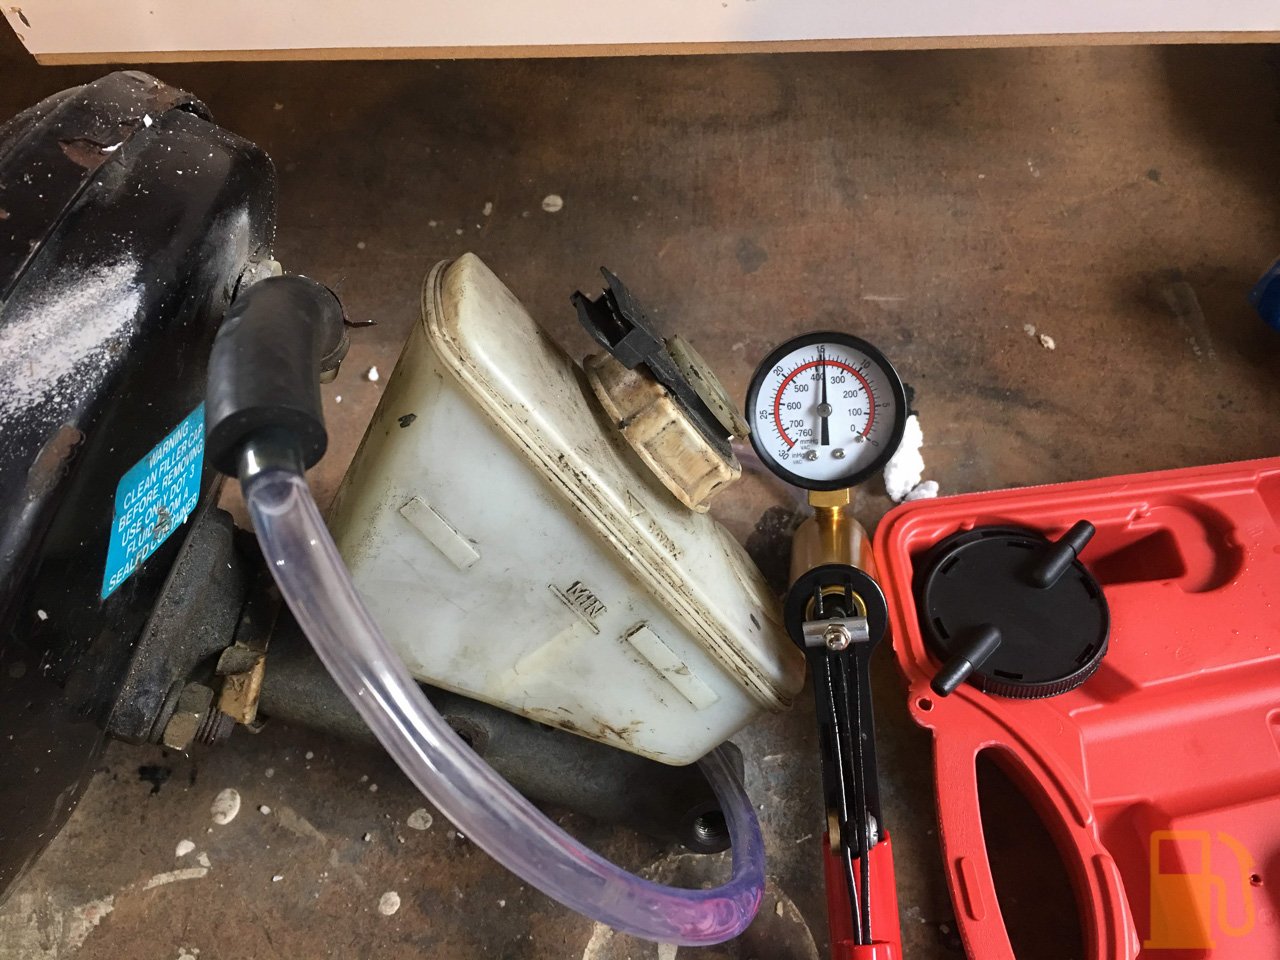
There aren't may ways to test if the servo is OK or not, but one of them is to see if it will hold a vacuum. I happen to have a small vacuum hand pump, so I plugged it into the vacuum line and drew a vacuum. Being such a big unit it took a while, but eventually I drew a decent vacuum, and sure enough to held it for a few minutes without dropping. Great success.
Of course I did the same test to the one on the car.... the results were uh... different.

I checked and double checked all the connections, but no matter how much I squeezed, I could not draw any vacuum at all. I guess that confirms that then, the servo is poked.
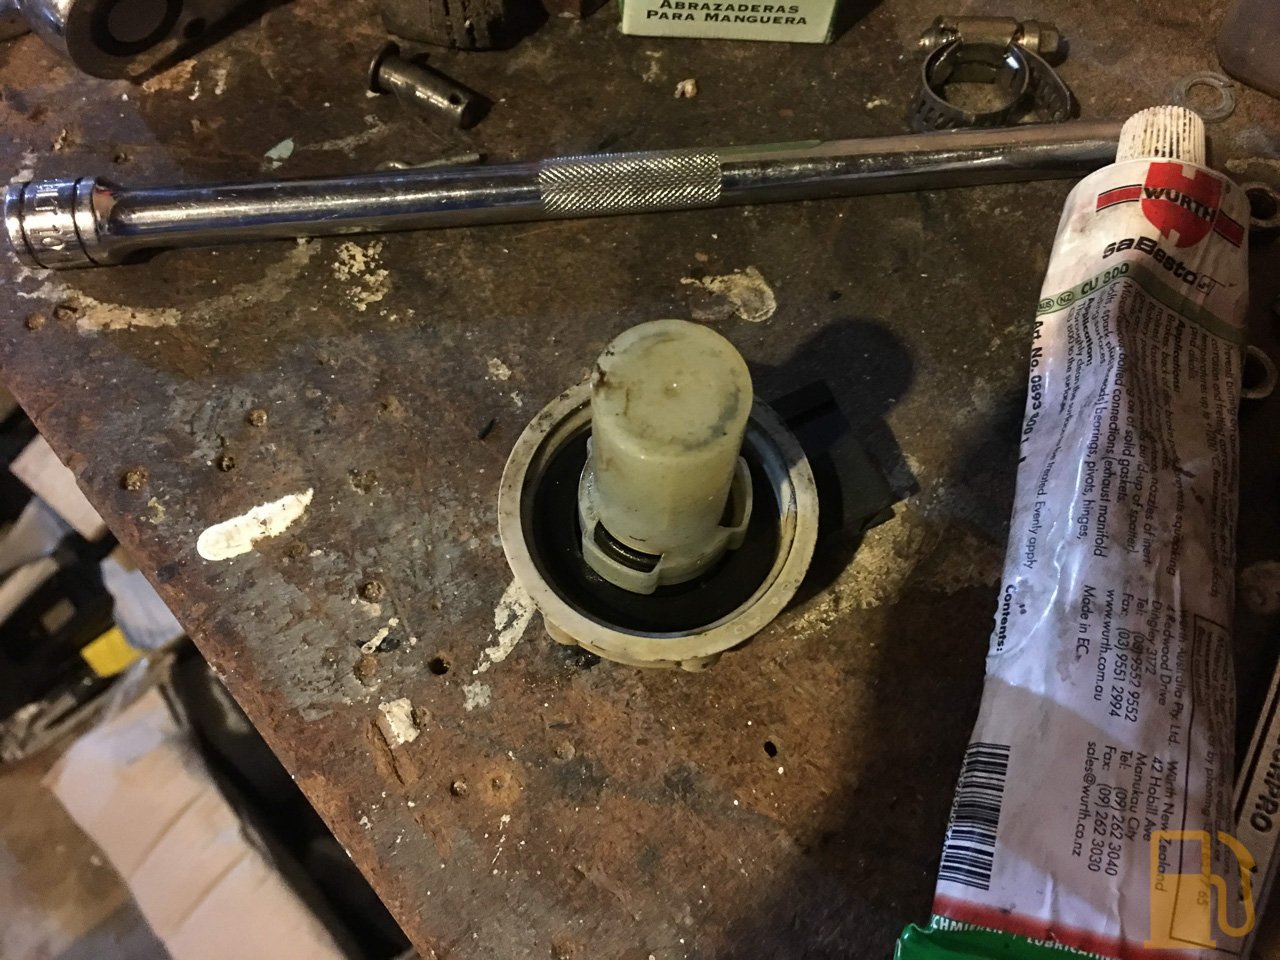
I can't really test much of the master, but I did split it from the servo to see if there were any signs of leaks.

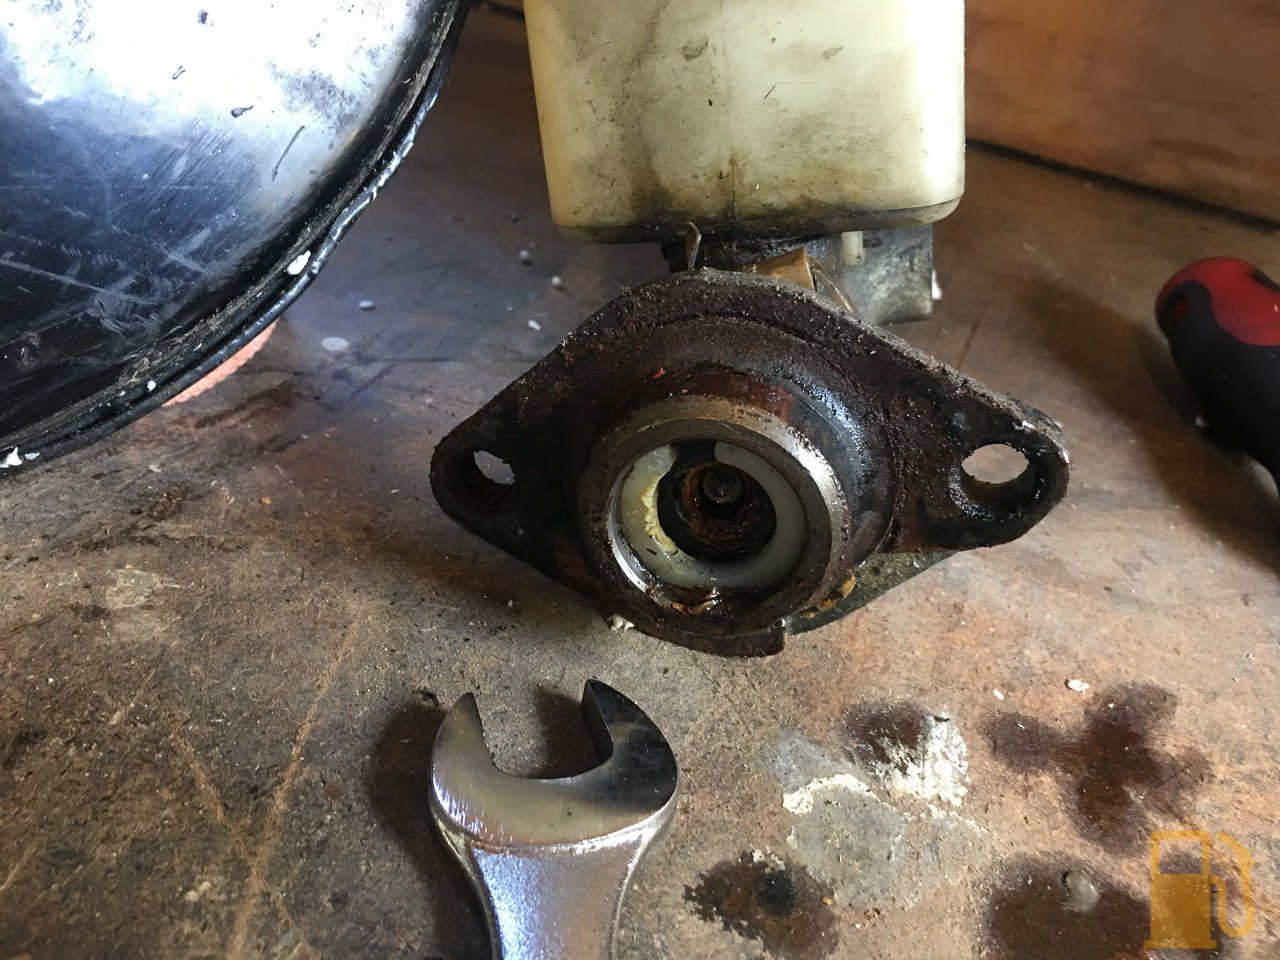
Plenty of grease, but no brake fluid. Excellent. It will be interesting to strip down the failed servo and master and see how it compares to this one. I'll tidy up the mating faces, and then use some copper grease before reassembly as they were a little seized together this time.
I still need to drain the brake fluid res, and removed the failed parts and fit these replacements, and then bleed the whole system. First though, I need a new, very expensive addition to my workshop tools, just to make my life easier.
The pedal had been soft and a little sink-y before I rebuilt the calipers, and I was hoping that the calipers may have been the cause of it, but clearly not. If anything, having all the pistons working properly had made the issue more evident, and holding pressure on the pedal would now cause it to gradually sink to the floor.
Unfortunately having just reassembled the calipers days before the car had to be moved into storage due to losing our house, there was nothing I could do at the time, and I had to drive her to storage. Needless to say driving down the hill from home was interesting; having to keep pumping the pedal to build pressure back up. I got there OK, and I got her to her new home again later.
A sinking pedal, with no fluid loss, means the master cylinder for the braking system was leaking fluid internally, passed the seals. Whether this was from the car sitting for so many years, or if it had just worn out, I'm not sure.
The other issue I had noticed, was that when shutting off the car there was a hissing noise coming from under the bonnet. I tracked this down to coming from the brake servo (or brake booster as its otherwise known as). This would indicate it was leaking vacuum, so that wouldn't be helping at all.
I was initially going to just rebuild the master cylinder, but once I narrowed down the noise to the servo I knew it was going to be a bigger job than just the master and started looking for other options. I would need to at the least, replace the servo (as rebuild kits are NLA) and rebuild the master.
Rimmers has both, and even do them as a pair for a discount, but the freight made the parts rather unattractive. I was wary about getting an old used one that had been sitting on a shelf somewhere for years, so wasn't too keen on getting something locally from a wrecker (if there was even anything still around).
I did end up going for a secondhand pair of servo and master, from a car that had been driven at speed into a tree, and came worse off. The seller claimed the servo was only two years old, and the master worked well (maybe too well...) and wasn't leaking. It was cheap enough to take a punt and hope it worked.
The replacement parts arrived the other day but I haven't had a chance to unbox and inspect them until today.
It's a bit dirty and covered in polystyrene from the packing, but there are no signs of fluid leaks or peeling paint on the servo under the master (like my current one does).
There aren't may ways to test if the servo is OK or not, but one of them is to see if it will hold a vacuum. I happen to have a small vacuum hand pump, so I plugged it into the vacuum line and drew a vacuum. Being such a big unit it took a while, but eventually I drew a decent vacuum, and sure enough to held it for a few minutes without dropping. Great success.
Of course I did the same test to the one on the car.... the results were uh... different.
I checked and double checked all the connections, but no matter how much I squeezed, I could not draw any vacuum at all. I guess that confirms that then, the servo is poked.
I can't really test much of the master, but I did split it from the servo to see if there were any signs of leaks.
Plenty of grease, but no brake fluid. Excellent. It will be interesting to strip down the failed servo and master and see how it compares to this one. I'll tidy up the mating faces, and then use some copper grease before reassembly as they were a little seized together this time.
I still need to drain the brake fluid res, and removed the failed parts and fit these replacements, and then bleed the whole system. First though, I need a new, very expensive addition to my workshop tools, just to make my life easier.
These brakes have been the bane of my existence, but finally, I may have them sorted.
So I left off last time with testing the replacement servo, and finding out for sure that my old one was as leaky as a leaky thing.
Obviously that was no good, so it was time to swap them over.
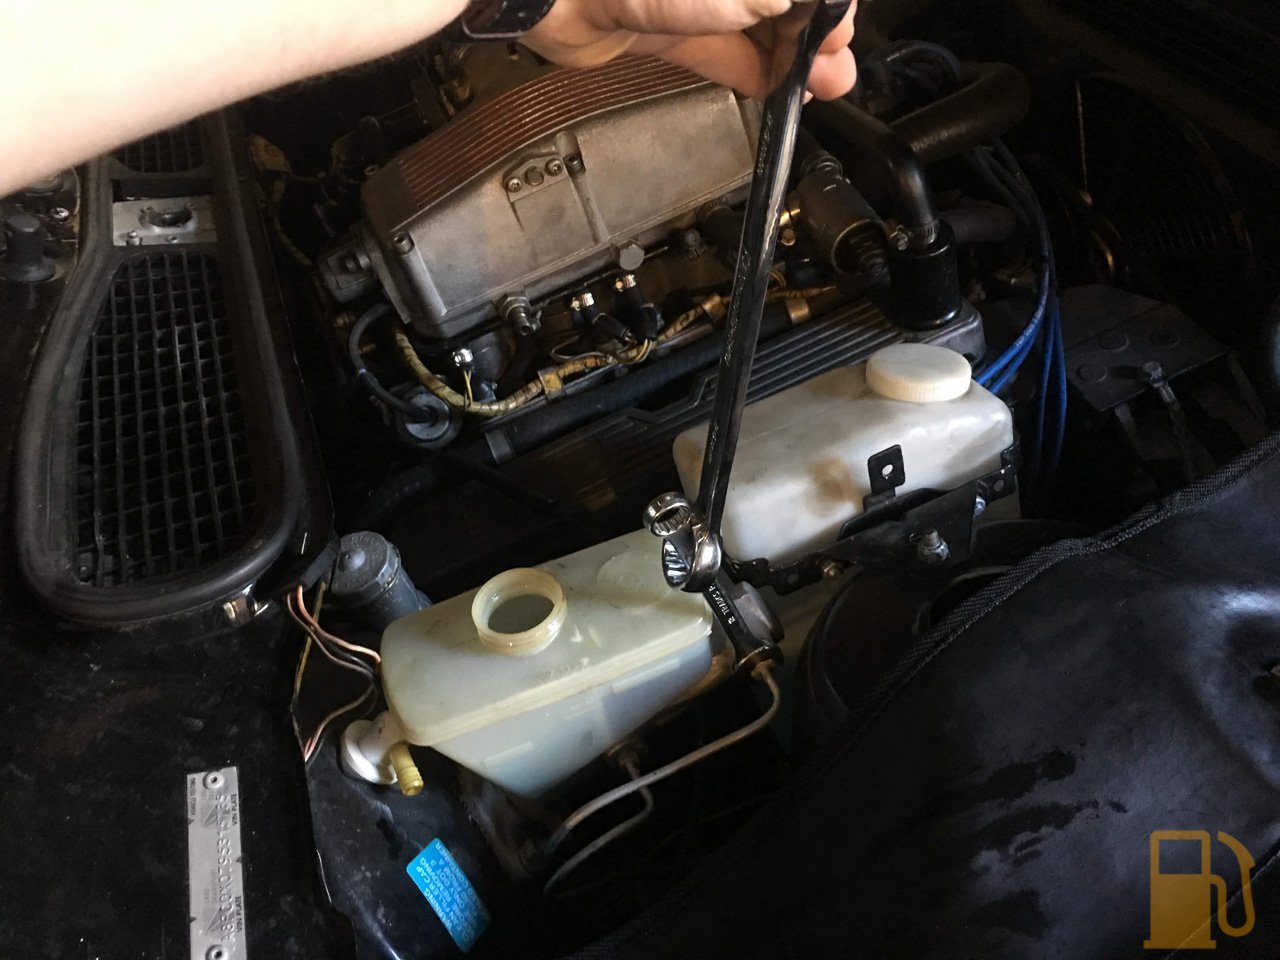
To remove the old servo and master, first you suck all the fluid out with your handy dandy vacuum pump. Of course being a spit res, half of it is still full of fluid with no way to drain. Its OK, you can tip this out later.

Then a small container and some rags were placed under the master, and the two brake pipes were cracked off. The larger nut was a little tight so needed some persuasion.
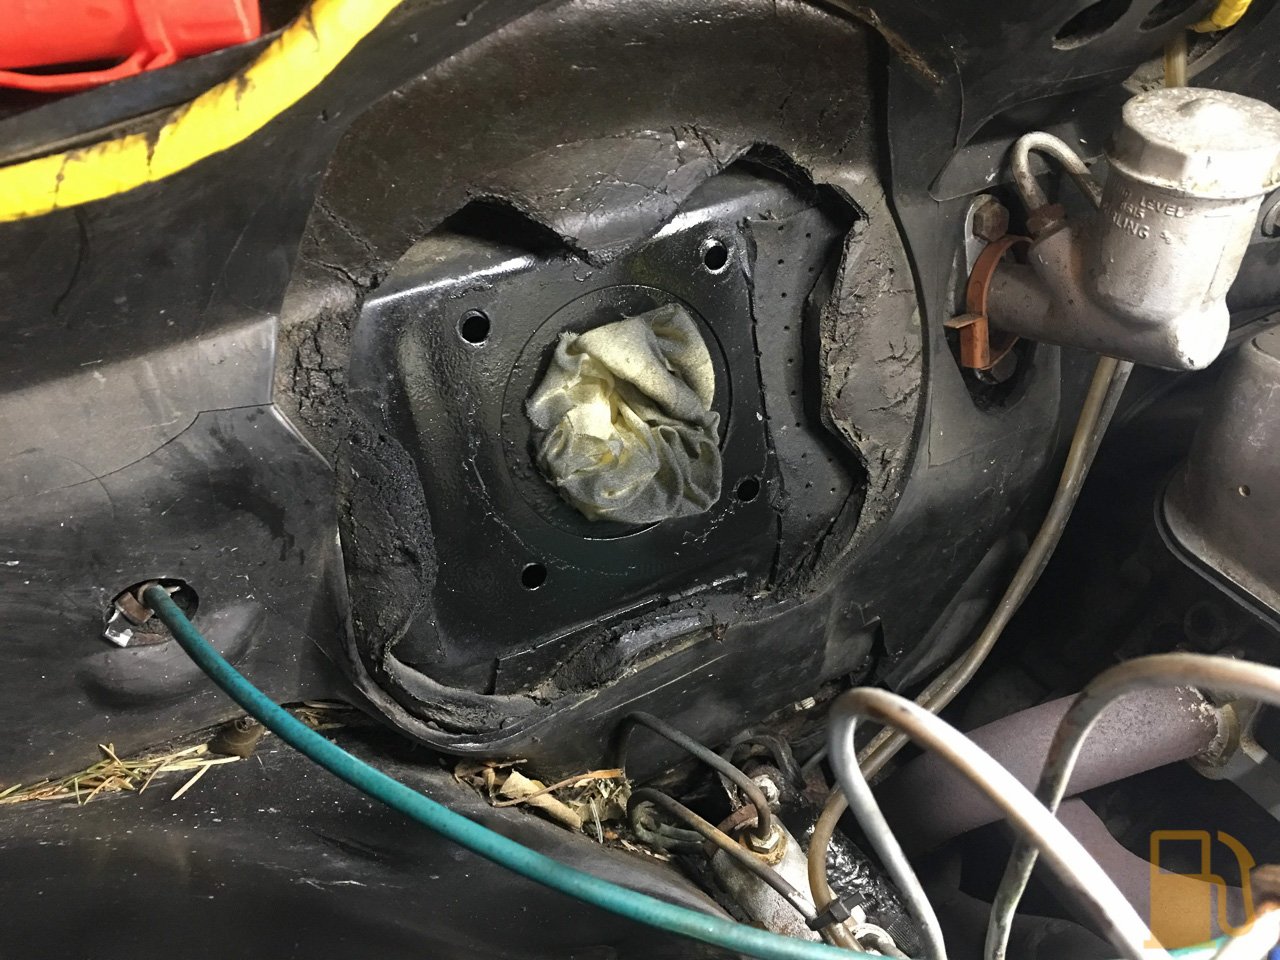
With the pipes removed from the master, it was only a matter of removing the two nuts that hold the master to the servo. Then with some percussive persuasion, off came the master, revealing how much it had been leaking and stripping the paint off the servo.


To remove the servo, first you must remove the four nuts that hold it to the firewall. These are accessed via the drivers footwell area, and access is a heck of a lot better if you remove the glovebox first, but it's still a nasty task to do. You also need to remove the split pin, washer and pin holding the clevis to the pedal.

But that's not the really nasty part of this job. That goes to removal and refitting of the actual servo. The only tip I can give, is to protect your paint on the guard, and use some brute force. Eventually it will come free. Thankfully no signs of rust on the firewall, but there was some missing paint and scuffs, so I gave it a quick shot of Zinc paint to protect it.
Since I had the Zinc paint out, I also touched up a couple other spots that have caused me some bother. The strut tower and inner guard near the battery were covered in these little rust spots under the paint. No idea whats happened there, maybe a battery exploded in the past? Anyway, it needed to be treated and tidied up. A wire brushed it all back, treated the rust spots and sprayed Zinc paint on it. It's not an ideal match, and it's not gloss, but it will protect it and make it look black again until I can one day paint the whole bay properly.


The replacement servo had some missing paint, so that also got a shot of Zinc paint to tidy it up

It didn't have as much missing paint as the old servo did!

And the old master had a layer of black goop in the bottom of the reservoir.

The replacement master came up well with a degrease and clean

The next day, when the paint was dry, I transferred the firewall-servo gasket to the replacement servo, and refitted. This was a pig of a job, but once again, protect the paint on the guard, and persuade it into place.

Refit the washers, nuts and clevis pin/washer/split pin

I smothered the mating face of the master cylinder, and the studs with copper grease, and fit the master.

I filled it up to the MAX line with new fluid. It's a rather different colour to what was in the old reservoir, despite having changed that not too long ago.

Interestingly, there are two different caps. The original res had a cap with removable center with the fluid level sensor, and a little red cup that sat in the neck of the res to presumably, smooth out any fluctuations in fluid level.

The replacement master came with a cap with a black electrical connector, and the sensor is encased in what would be the red part of the above cap, but it's now part of the cap.

Because I could easily clean out the original cap, I chose to run with that one instead of the replacement.
So with everything buttoned up and no obvious signs of leaks, I started the engine up to check the booster operation. Obvious without bleeding the system I didn't have any pressure in the pedal, but I wanted to check for any hissing. After a couple of minutes running, no obvious issues, and no hissing.
I did notice one thing though.... Since our garage is under the house I decided to get a Carbon Monoxide monitor and alarm for the garage, to make sure we don't end up with CO silently killing us (we also have a smoke alarm in the hallway above that also monitors CO levels).
After running Tess for a couple of minutes with the door behind her half open, we went from 0ppm (parts per million in the air), to about 85ppm. This isn't enough to trigger the alarm instantly, but will after an hour or so of that level. Higher levels have shorter trigger times, but the effects can be felt from about 50ppm, and 100ppm is enough to give you a decent headache. 200ppm is a loss of judgement, and 800ppm will kill you in 2 hours. Its serious stuff. I opened the doors fully and the levels started to drop

Until we hit zero again (I also wall mounted the alarm above my work bench for visibility)

These alarms with the monitor on them are cheap insurance, just to make sure you aren't working in a hazardous environment.
Moving along, since everything was together and not leaking, I needed to bleed the system. This is where my new toy, the QuickJack ( https://www.tasteslikepetrol.net/2018/05/tldr-revi...), came into it.

I got the car in the air, with the lovely wife in the drivers seat, and set about bleeding the brakes. I started at the rear, and got nothing. No fluid at all. I hadn't drained the lines, so I knew there was fluid in there, but the master wasn't pushing it through. We had an air lock.
I had read horror stories about people having to bench bleed master cylinders, so I was hoping to not have that issue. I cracked off both of the lines at the master cylinder, and had my helper slowly pump the pedal. Eventually out came some air, followed by fluid, but only from the smaller line. I bled this until fluid came out freely, and then tightened the smaller line up. This then allowed the bigger line to bleed, so out came air followed by fluid.
Thankfully this restored normal service, and fluid (albeit full of air) flowed from the bleed valves on the brakes. I started at the rear and worked my way forward, getting all the old fluid, and air out. I had to bleed the rear a few times to get all the air out, and get good pedal feel. The old fluid in the rear was also cloudy for some reason.
Once the air was out, and the pedal was solid I dropped the car down, and cleaned up. The next step was a test drive.

So how do the new, completely overhauled brakes work? Amazing. Better than they ever have since I got Tess. The pedal is firm, but progressive with good feel. The brakes bite hard when told to, and no sinking or softness in the pedal. The pedal feel is much more like Effie, who had a very nice pedal. Hopefully I finally have the brakes sorted.
I took Tess out for a nice hard run to meet up with some friends tonight, and Tess is running better than ever. Obviously the servo was leaking vacuum and causing a lack of response and smoothness. Sadly the fancy (but old) Optima Redtop battery chose to give up tonight though (before I went out), so I swapped that for a spare I had around, but will need to buy a new battery soon as I removed that spare from Effie as it wasn't starting easily. In the mean time it's finally time to get some road time with her.
So I left off last time with testing the replacement servo, and finding out for sure that my old one was as leaky as a leaky thing.
Obviously that was no good, so it was time to swap them over.
To remove the old servo and master, first you suck all the fluid out with your handy dandy vacuum pump. Of course being a spit res, half of it is still full of fluid with no way to drain. Its OK, you can tip this out later.
Then a small container and some rags were placed under the master, and the two brake pipes were cracked off. The larger nut was a little tight so needed some persuasion.
With the pipes removed from the master, it was only a matter of removing the two nuts that hold the master to the servo. Then with some percussive persuasion, off came the master, revealing how much it had been leaking and stripping the paint off the servo.
To remove the servo, first you must remove the four nuts that hold it to the firewall. These are accessed via the drivers footwell area, and access is a heck of a lot better if you remove the glovebox first, but it's still a nasty task to do. You also need to remove the split pin, washer and pin holding the clevis to the pedal.
But that's not the really nasty part of this job. That goes to removal and refitting of the actual servo. The only tip I can give, is to protect your paint on the guard, and use some brute force. Eventually it will come free. Thankfully no signs of rust on the firewall, but there was some missing paint and scuffs, so I gave it a quick shot of Zinc paint to protect it.
Since I had the Zinc paint out, I also touched up a couple other spots that have caused me some bother. The strut tower and inner guard near the battery were covered in these little rust spots under the paint. No idea whats happened there, maybe a battery exploded in the past? Anyway, it needed to be treated and tidied up. A wire brushed it all back, treated the rust spots and sprayed Zinc paint on it. It's not an ideal match, and it's not gloss, but it will protect it and make it look black again until I can one day paint the whole bay properly.
The replacement servo had some missing paint, so that also got a shot of Zinc paint to tidy it up
It didn't have as much missing paint as the old servo did!
And the old master had a layer of black goop in the bottom of the reservoir.
The replacement master came up well with a degrease and clean
The next day, when the paint was dry, I transferred the firewall-servo gasket to the replacement servo, and refitted. This was a pig of a job, but once again, protect the paint on the guard, and persuade it into place.
Refit the washers, nuts and clevis pin/washer/split pin
I smothered the mating face of the master cylinder, and the studs with copper grease, and fit the master.
I filled it up to the MAX line with new fluid. It's a rather different colour to what was in the old reservoir, despite having changed that not too long ago.
Interestingly, there are two different caps. The original res had a cap with removable center with the fluid level sensor, and a little red cup that sat in the neck of the res to presumably, smooth out any fluctuations in fluid level.
The replacement master came with a cap with a black electrical connector, and the sensor is encased in what would be the red part of the above cap, but it's now part of the cap.
Because I could easily clean out the original cap, I chose to run with that one instead of the replacement.
So with everything buttoned up and no obvious signs of leaks, I started the engine up to check the booster operation. Obvious without bleeding the system I didn't have any pressure in the pedal, but I wanted to check for any hissing. After a couple of minutes running, no obvious issues, and no hissing.
I did notice one thing though.... Since our garage is under the house I decided to get a Carbon Monoxide monitor and alarm for the garage, to make sure we don't end up with CO silently killing us (we also have a smoke alarm in the hallway above that also monitors CO levels).
After running Tess for a couple of minutes with the door behind her half open, we went from 0ppm (parts per million in the air), to about 85ppm. This isn't enough to trigger the alarm instantly, but will after an hour or so of that level. Higher levels have shorter trigger times, but the effects can be felt from about 50ppm, and 100ppm is enough to give you a decent headache. 200ppm is a loss of judgement, and 800ppm will kill you in 2 hours. Its serious stuff. I opened the doors fully and the levels started to drop
Until we hit zero again (I also wall mounted the alarm above my work bench for visibility)
These alarms with the monitor on them are cheap insurance, just to make sure you aren't working in a hazardous environment.
Moving along, since everything was together and not leaking, I needed to bleed the system. This is where my new toy, the QuickJack ( https://www.tasteslikepetrol.net/2018/05/tldr-revi...), came into it.
I got the car in the air, with the lovely wife in the drivers seat, and set about bleeding the brakes. I started at the rear, and got nothing. No fluid at all. I hadn't drained the lines, so I knew there was fluid in there, but the master wasn't pushing it through. We had an air lock.
I had read horror stories about people having to bench bleed master cylinders, so I was hoping to not have that issue. I cracked off both of the lines at the master cylinder, and had my helper slowly pump the pedal. Eventually out came some air, followed by fluid, but only from the smaller line. I bled this until fluid came out freely, and then tightened the smaller line up. This then allowed the bigger line to bleed, so out came air followed by fluid.
Thankfully this restored normal service, and fluid (albeit full of air) flowed from the bleed valves on the brakes. I started at the rear and worked my way forward, getting all the old fluid, and air out. I had to bleed the rear a few times to get all the air out, and get good pedal feel. The old fluid in the rear was also cloudy for some reason.
Once the air was out, and the pedal was solid I dropped the car down, and cleaned up. The next step was a test drive.
So how do the new, completely overhauled brakes work? Amazing. Better than they ever have since I got Tess. The pedal is firm, but progressive with good feel. The brakes bite hard when told to, and no sinking or softness in the pedal. The pedal feel is much more like Effie, who had a very nice pedal. Hopefully I finally have the brakes sorted.
I took Tess out for a nice hard run to meet up with some friends tonight, and Tess is running better than ever. Obviously the servo was leaking vacuum and causing a lack of response and smoothness. Sadly the fancy (but old) Optima Redtop battery chose to give up tonight though (before I went out), so I swapped that for a spare I had around, but will need to buy a new battery soon as I removed that spare from Effie as it wasn't starting easily. In the mean time it's finally time to get some road time with her.
Sometimes when working on cars, things just don't do what you want them to do. Today was one of those days.
I have had a tow bar sitting around since pillaging the Whanganui cars, and originally had the intention of it going on Effie, but when I tried to fit it to her I quickly found the tow bar will not fit without cutting the underside of the bumper for the tongue, and I didn't want to do that to her pristine bumper.
Tess on the other hand, has had a tow bar in the past, and already has a cutout on the underside of her bumper, so hey, lets whack the tow bar on her eh?
This job is made a lot easier now that the tailgate doesn't try to mash my head in, since the four bumper retaining nuts are in the rear panel, inside the boot. Undo those and the bumper simply just slides off the car. There are two side retainers that slide into rubber bushings, but they should slide out easy enough.

So the bumper came off easy enough, but that was about it. Unfortunately the bumper cutout didn't match the tow bar. Not such an issue, I can cut it larger, but that wasn't the worst part of it

The worst part was that the towbar isn't going to fit at all, because the bumper is all kinds of messed up. I noticed it didn't sit right when I got the car, and the RH sliding retainer is no longer attached to the bumper, what I didn't realise was that the RH bumper bracket is messed up and the bumper cracked.
The red arrow is pointing at a large crack in the bumper. The orange arrow points at someones attempt to stick the bumper mount back on with some snotty looking glue, and the purple arrow points at a very bent mounting plate.

It's hard to tell, but the mounting plate should only have a slight curve in it, like the one on the other side

Well that will explain why the bumper doesn't sit right. The impact obviously tore off the side retainer too, because someone tried to gloop that back into place too (which didn't work)

The tow bar doesn't fit onto the mounts (it has to slide over the studs on both mounts), so there's no hope of it fitting this bumper. I'll need to reassess once I track down another bumper and mounts.
So that was a fail. Since I was already out in the garage I decided to have a look at the hand brake system too, as it wasn't holding the car (and will fail the next WOF).
Up on the Quickjacks again. Super quick and easy to do, especially now that the frames live under Tess all the time, so just need to slide them out, plug them into the hoses, plug the hoses into the power unit, connect the jump pack and away I go.

No photos of this, because I detailed it when I replaced Effies hand brake cable, and its a fairly basic system.
My compensator wasn't at 30 degrees like it should be, so obviously it needed adjusting. I disconnected the cable from both drums, and backed off the adjuster at the lever. I proceeded to adjust it correctly, and went to test. The handle still moves about 6 clicks, which is WAY too many. I readjusted it three or four more times, and the issue remained. I checked the workshop manual to make sure I was doing it right, and yup, I was. Obviously the cable is stretched and I can't dial out the slack. Damn. I just cant get enough tension on the cable to lock the wheels, so I guess my next Rimmers order will have a new cable in it too. Thankfully replacing it on the Quickjacks will be better than when I did Effies one on the ground under just a pair of stands. Another fail.
Speaking of Quickjacks, I can now confirm that even despite my oversized belly, I can roll front to back under the car comfortably on my creeper. It's a much nicer height to work at than I'm used to. The only issue I have is that my axle hangs down a lot, so I have to slide to either side of the diff head, instead of under it or I'll get stuck.
While under the car I noticed that I had a fairly bad exhaust leak from the rear section join. Obviously this wouldn't be helping the fume ingress situation Tess has. I quickly undid the join, found it missing its olive (a round, metal seal), so just proceeded to smother it in exhaust paste and bolt it back together. I'll be replacing the rear section eventually anyway, so not a big deal. The other cause of fumes would have been from the four large holes I found drilled in the rear panel, behind the bumper. I don't know what they were for, but they were sleeved (so you can tighten a bolt down without crushing the two sections of metal the hole was through) and just went into the boot, behind the trim. I have taped them up for now, just to block them off.
A decent drive this afternoon shows that the exhaust sounds the same, but the fumes in the cabin are significantly reduced. I didn't realise how bad it was before, but now there is almost no exhaust smell with the windows shut. With the drivers window open a crack there can be wafts, but it's about 5% of what it was before. My wife wanted to put the CO meter in the car beforehand, to see how bad it was, but I was scared to know.
So you win some, and lose some. I still have a lot of things to do to Tess, but I'm just going to order parts and wait for the WOF to run out in July. Once that's run out, I'll use that as a chance to take her off the road for a bit to do some work, like stripping the interior and fixing the sump gasket leak.
I have had a tow bar sitting around since pillaging the Whanganui cars, and originally had the intention of it going on Effie, but when I tried to fit it to her I quickly found the tow bar will not fit without cutting the underside of the bumper for the tongue, and I didn't want to do that to her pristine bumper.
Tess on the other hand, has had a tow bar in the past, and already has a cutout on the underside of her bumper, so hey, lets whack the tow bar on her eh?
This job is made a lot easier now that the tailgate doesn't try to mash my head in, since the four bumper retaining nuts are in the rear panel, inside the boot. Undo those and the bumper simply just slides off the car. There are two side retainers that slide into rubber bushings, but they should slide out easy enough.
So the bumper came off easy enough, but that was about it. Unfortunately the bumper cutout didn't match the tow bar. Not such an issue, I can cut it larger, but that wasn't the worst part of it
The worst part was that the towbar isn't going to fit at all, because the bumper is all kinds of messed up. I noticed it didn't sit right when I got the car, and the RH sliding retainer is no longer attached to the bumper, what I didn't realise was that the RH bumper bracket is messed up and the bumper cracked.
The red arrow is pointing at a large crack in the bumper. The orange arrow points at someones attempt to stick the bumper mount back on with some snotty looking glue, and the purple arrow points at a very bent mounting plate.
It's hard to tell, but the mounting plate should only have a slight curve in it, like the one on the other side
Well that will explain why the bumper doesn't sit right. The impact obviously tore off the side retainer too, because someone tried to gloop that back into place too (which didn't work)
The tow bar doesn't fit onto the mounts (it has to slide over the studs on both mounts), so there's no hope of it fitting this bumper. I'll need to reassess once I track down another bumper and mounts.
So that was a fail. Since I was already out in the garage I decided to have a look at the hand brake system too, as it wasn't holding the car (and will fail the next WOF).
Up on the Quickjacks again. Super quick and easy to do, especially now that the frames live under Tess all the time, so just need to slide them out, plug them into the hoses, plug the hoses into the power unit, connect the jump pack and away I go.
No photos of this, because I detailed it when I replaced Effies hand brake cable, and its a fairly basic system.
My compensator wasn't at 30 degrees like it should be, so obviously it needed adjusting. I disconnected the cable from both drums, and backed off the adjuster at the lever. I proceeded to adjust it correctly, and went to test. The handle still moves about 6 clicks, which is WAY too many. I readjusted it three or four more times, and the issue remained. I checked the workshop manual to make sure I was doing it right, and yup, I was. Obviously the cable is stretched and I can't dial out the slack. Damn. I just cant get enough tension on the cable to lock the wheels, so I guess my next Rimmers order will have a new cable in it too. Thankfully replacing it on the Quickjacks will be better than when I did Effies one on the ground under just a pair of stands. Another fail.
Speaking of Quickjacks, I can now confirm that even despite my oversized belly, I can roll front to back under the car comfortably on my creeper. It's a much nicer height to work at than I'm used to. The only issue I have is that my axle hangs down a lot, so I have to slide to either side of the diff head, instead of under it or I'll get stuck.
While under the car I noticed that I had a fairly bad exhaust leak from the rear section join. Obviously this wouldn't be helping the fume ingress situation Tess has. I quickly undid the join, found it missing its olive (a round, metal seal), so just proceeded to smother it in exhaust paste and bolt it back together. I'll be replacing the rear section eventually anyway, so not a big deal. The other cause of fumes would have been from the four large holes I found drilled in the rear panel, behind the bumper. I don't know what they were for, but they were sleeved (so you can tighten a bolt down without crushing the two sections of metal the hole was through) and just went into the boot, behind the trim. I have taped them up for now, just to block them off.
A decent drive this afternoon shows that the exhaust sounds the same, but the fumes in the cabin are significantly reduced. I didn't realise how bad it was before, but now there is almost no exhaust smell with the windows shut. With the drivers window open a crack there can be wafts, but it's about 5% of what it was before. My wife wanted to put the CO meter in the car beforehand, to see how bad it was, but I was scared to know.
So you win some, and lose some. I still have a lot of things to do to Tess, but I'm just going to order parts and wait for the WOF to run out in July. Once that's run out, I'll use that as a chance to take her off the road for a bit to do some work, like stripping the interior and fixing the sump gasket leak.
Having tinted windows has its advantages, and its disadvantages. I finally got sick of one of the biggest disadvantages, you can't see through the windows when they are dirty... and the rear wiper doesn't work.
I originally wasn't too bothered by the wiper not working, I even planned on removing it completely and just plugging the hole in the glass, but having spent some time driving the car, I soon realised that in the dark if the tailgate glass is dirty or wet, its damn near impossible to see through. Without a wiper, you just cant clear that muck. The rear washer also doesn't work (the piping to the front is AWOL, and the pump outlet is plugged).
I know the switches get dirty and fail to work, but when the button is pressed I can hear a relay clicking from the rear. No response from the actual wiper though.
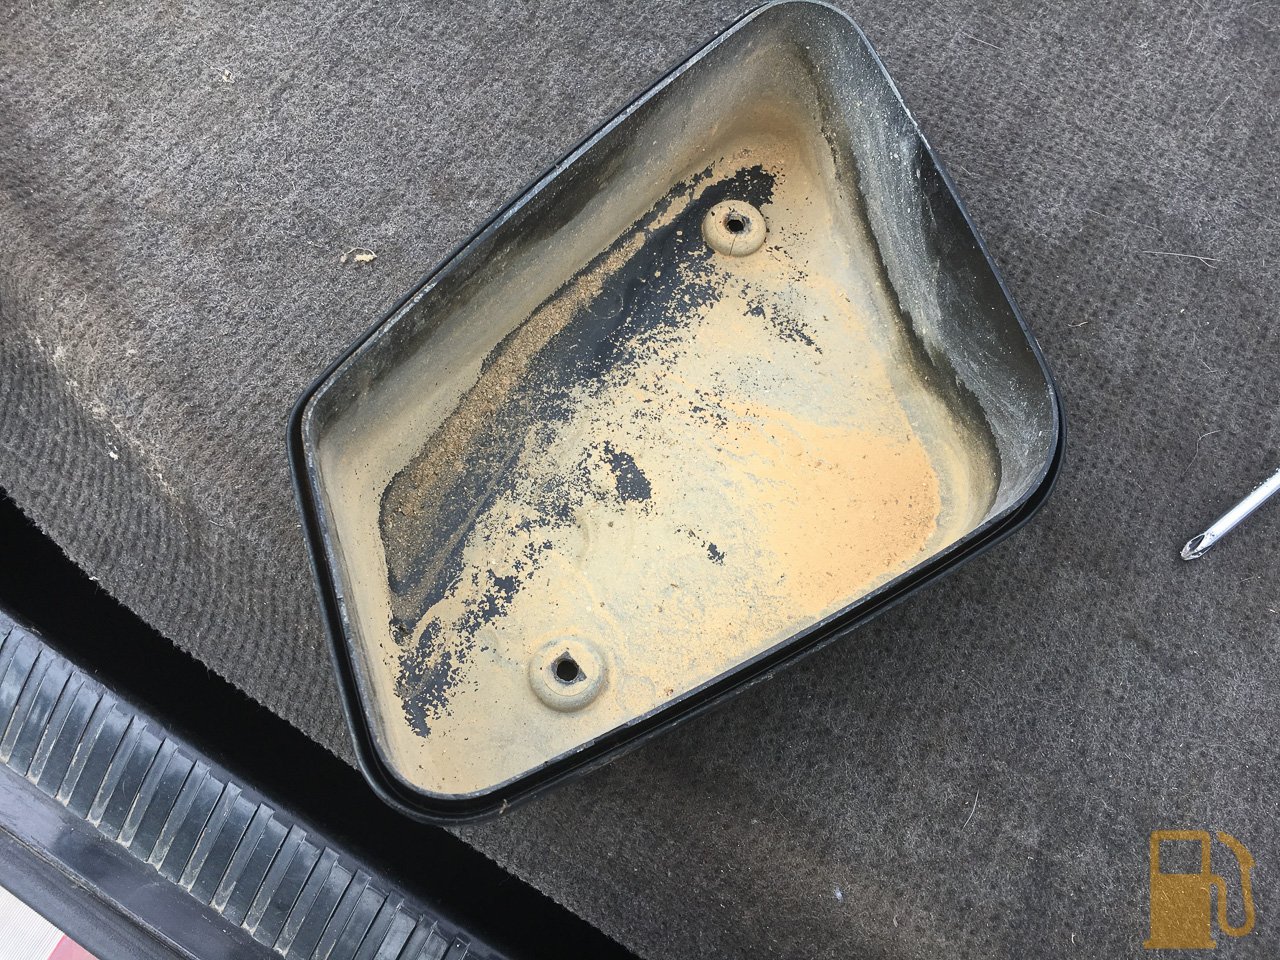
So yesterday I started by removing the wiper motor from the window and having a look over it. I knew from ages ago that the motor had previously been submerged in water, and didn't look good. The wiper spindle bushing through the glass had been leaking badly.

Looks like its been under the damn ocean. A sandy ocean.
Removal is easy. Well, if yours is as bodged in as mine was, it is. Remove the wiper arm by removing the plastic cap, and the 13mm nut. Remove the two screws on the underside of the motor housing and remove the cover. The wiring needs to be disconnected, the connector should be inside the lower edge of the tailgate, behind the lower plastic trim. My connector was missing, and someone had used spade terminals instead. Yay.

Then there are two bolts on the inside of the boot lid, a 12mm and 13mm, and the lot should drop off and come out.
Argh, not good looking.

There should be a large nut on the top of the spindle too, but mine was missing. Mine was missing more than I thought, but thankfully I had a couple of spare motor assemblies in my spares, and between the three I had enough parts to make a complete assembly.

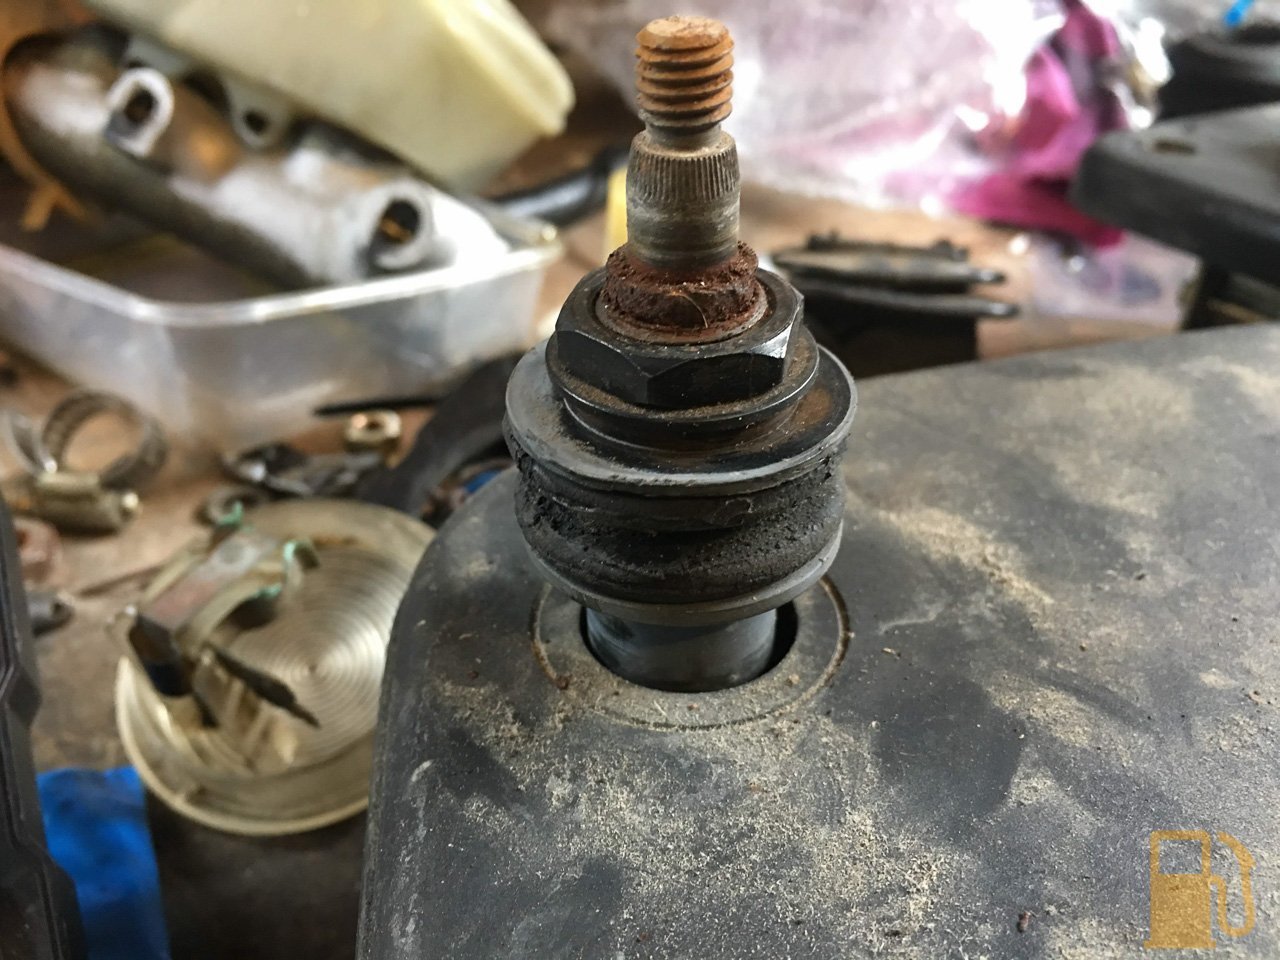
This is how the spindle should be setup. First there is a lower plastic sleeve (missing from my original assembly)

Then the rubber bushing that goes through the glass. I removed mine to clean and seal under it. This has another plastic sleeve that goes inside/on top of it.

And then a washer and big nut on top of that (both missing previously). When this nut is tightened, it actually compresses the bushing against the glass, creating a seal. No wonder mine leaked, it wasn't compressed.
This wouldn't help either, my bushing is super tired, and they are NLA now.


Before fitting a replacement motor I chose to test one to make sure it actually worked. I whacked some 12V into the motor, and sure enough the replacement came to life nicely. The original, nothing but a big blue spark. Completely seized.

Refitting isn't rocket surgery, but I did a couple of quick things to make my life better.
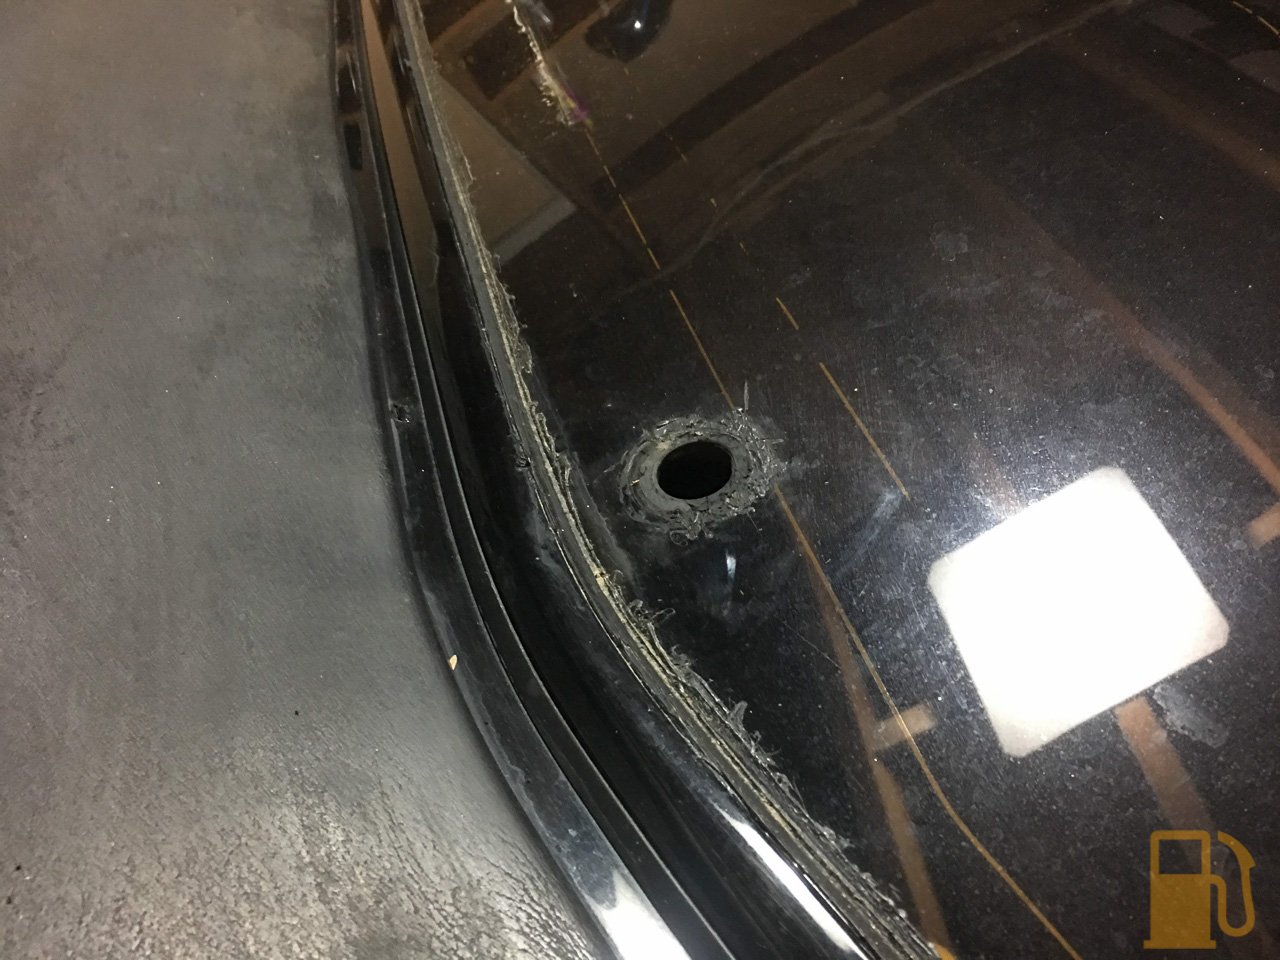
First, removing the motor allowed me to clean up and treat some rust in the tailgate

and then I smeared some Sikaflex on the glass, and refit the bushing.


Then it was time to refit the motor.

You can see how much squish there is in the bushing once tightened

And then on went the elusive rubber cap. WD40 helped to get this into place.

Then it was wiring time. I thought this would be straight forward, but no, someone had been here before and made some bodges.
This is the wiring diagram

Looks easy enough, just connect the colours up and away I go.
NOPE.
Someone has messed with the car side of the wiring, so instead of the required Red, Brown/Green, Black and Green, I had Green, Blue, Black and Red. I connected them as I would expect, Red to Red, Black to Black, and winged it with the other two (which are for the parking feature, where the wiper will stop at the bottom when the switch is turned off). Nothing.
I suspected the fuse may have blown because of the seized motor in the past, so had a look and sure enough, a blown fuse.
Replaced it, and bam, the fuse blows again. Damnit.
Long story short, red isn't the power feed. With some multimeter work I worked out that Blue is actually the main feed for the motor, black is of course ground, and the other two are for the park feature. With that revelation I managed to get the motor working when the switch is pressed.
No amount of work could get the parking to work. I even disassembled the gearbox for the wiper to check the contacts.


But it didn't matter. I did further digging and found why the wiring colours didn't match

That's where the random coloured wiring terminates. Presumably this replaces the original wiring. No idea why.
That's not the worst part though, I can work with that wiring, the worst part is that someone has replaced the rear wiper delay timer unit with a standard relay...
The delay timer should look like this

But instead someone took the time to make this (grey box at the top)

I don't know why, and from what I can establish, a normal relay wont do the same function as the delay unit. I'm also not sure why, no matter how it's connected, the parking function blows the fuse. It's obviously shorting, but without looking further into the relay and wiring, I don't know why.
They were too lazy to even run the wiring inside the guard, instead its on the outside of the inner guard, and gets trapped behind the plate the fuse box is on

I have decided at this point to just abandon the parking function, as I have the motor and wiper actually working properly as it is, I just have to time when I turn the switch off to where I want the wiper to stop.
I did chew through a few fuses during testing though (ignore the horrible stained carpet, its scheduled for cleaning next month)

So I insulated the spare terminals, wrapped all the wiring, zip tied the loose relay to the wiring harness (so it isn't rattling around) and reassembled the wiper housing

Back on went the wiper arm, after cycling the motor and checking it was at dead bottom when I fitted the arm

Wipe wipe
http://youtu.be/K6E6XKfbJcQ
The one good thing about having no parking function, is that I can park it where ever I damn well please. The wiper normally parks at the bottom, as per above photo, but it always bothered me that it collects dirt and gunk down there, so I parked it vertical (I really need to clean up that excess sealant).

Now I should be able to see out the back in the dark, since it seems to rain every day here at the moment.
Speaking of rain, I also replaced the front wiper refills the other day. I wanted to replace the whole blade, but since they are pin fitting blades, I'm not sure about finding a replacement. Refills work for now.
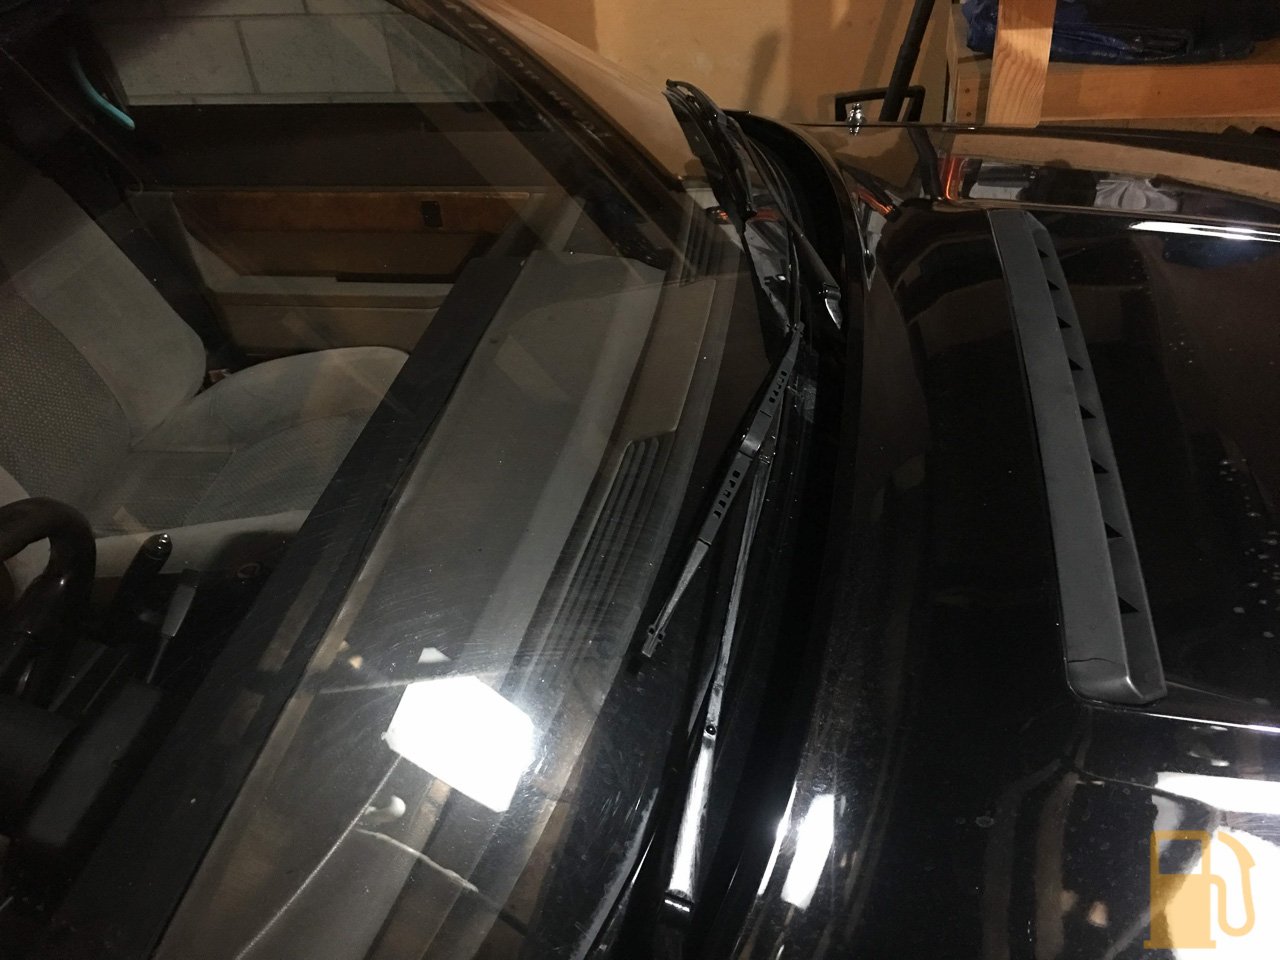
The old ones were a tad had it. This was the Drivers one.

I did find out the hard way that if your replacement refills have two widths (wide and narrow) and you accidentally fit it into the narrow instead of wide, when you wipe the screen on the motorway the refill will be torn out of the clips on the holder, and then you have no wipers. Thankfully they stayed on the car, so a quick pull over and refit them correctly and I was on my way again.
Rookie move.
Rookie. Move.
I originally wasn't too bothered by the wiper not working, I even planned on removing it completely and just plugging the hole in the glass, but having spent some time driving the car, I soon realised that in the dark if the tailgate glass is dirty or wet, its damn near impossible to see through. Without a wiper, you just cant clear that muck. The rear washer also doesn't work (the piping to the front is AWOL, and the pump outlet is plugged).
I know the switches get dirty and fail to work, but when the button is pressed I can hear a relay clicking from the rear. No response from the actual wiper though.
So yesterday I started by removing the wiper motor from the window and having a look over it. I knew from ages ago that the motor had previously been submerged in water, and didn't look good. The wiper spindle bushing through the glass had been leaking badly.
Looks like its been under the damn ocean. A sandy ocean.
Removal is easy. Well, if yours is as bodged in as mine was, it is. Remove the wiper arm by removing the plastic cap, and the 13mm nut. Remove the two screws on the underside of the motor housing and remove the cover. The wiring needs to be disconnected, the connector should be inside the lower edge of the tailgate, behind the lower plastic trim. My connector was missing, and someone had used spade terminals instead. Yay.
Then there are two bolts on the inside of the boot lid, a 12mm and 13mm, and the lot should drop off and come out.
Argh, not good looking.
There should be a large nut on the top of the spindle too, but mine was missing. Mine was missing more than I thought, but thankfully I had a couple of spare motor assemblies in my spares, and between the three I had enough parts to make a complete assembly.
This is how the spindle should be setup. First there is a lower plastic sleeve (missing from my original assembly)
Then the rubber bushing that goes through the glass. I removed mine to clean and seal under it. This has another plastic sleeve that goes inside/on top of it.
And then a washer and big nut on top of that (both missing previously). When this nut is tightened, it actually compresses the bushing against the glass, creating a seal. No wonder mine leaked, it wasn't compressed.
This wouldn't help either, my bushing is super tired, and they are NLA now.
Before fitting a replacement motor I chose to test one to make sure it actually worked. I whacked some 12V into the motor, and sure enough the replacement came to life nicely. The original, nothing but a big blue spark. Completely seized.
Refitting isn't rocket surgery, but I did a couple of quick things to make my life better.
First, removing the motor allowed me to clean up and treat some rust in the tailgate
and then I smeared some Sikaflex on the glass, and refit the bushing.
Then it was time to refit the motor.
You can see how much squish there is in the bushing once tightened
And then on went the elusive rubber cap. WD40 helped to get this into place.
Then it was wiring time. I thought this would be straight forward, but no, someone had been here before and made some bodges.
This is the wiring diagram
Looks easy enough, just connect the colours up and away I go.
NOPE.
Someone has messed with the car side of the wiring, so instead of the required Red, Brown/Green, Black and Green, I had Green, Blue, Black and Red. I connected them as I would expect, Red to Red, Black to Black, and winged it with the other two (which are for the parking feature, where the wiper will stop at the bottom when the switch is turned off). Nothing.
I suspected the fuse may have blown because of the seized motor in the past, so had a look and sure enough, a blown fuse.
Replaced it, and bam, the fuse blows again. Damnit.
Long story short, red isn't the power feed. With some multimeter work I worked out that Blue is actually the main feed for the motor, black is of course ground, and the other two are for the park feature. With that revelation I managed to get the motor working when the switch is pressed.
No amount of work could get the parking to work. I even disassembled the gearbox for the wiper to check the contacts.
But it didn't matter. I did further digging and found why the wiring colours didn't match
That's where the random coloured wiring terminates. Presumably this replaces the original wiring. No idea why.
That's not the worst part though, I can work with that wiring, the worst part is that someone has replaced the rear wiper delay timer unit with a standard relay...
The delay timer should look like this
But instead someone took the time to make this (grey box at the top)
I don't know why, and from what I can establish, a normal relay wont do the same function as the delay unit. I'm also not sure why, no matter how it's connected, the parking function blows the fuse. It's obviously shorting, but without looking further into the relay and wiring, I don't know why.
They were too lazy to even run the wiring inside the guard, instead its on the outside of the inner guard, and gets trapped behind the plate the fuse box is on
I have decided at this point to just abandon the parking function, as I have the motor and wiper actually working properly as it is, I just have to time when I turn the switch off to where I want the wiper to stop.
I did chew through a few fuses during testing though (ignore the horrible stained carpet, its scheduled for cleaning next month)
So I insulated the spare terminals, wrapped all the wiring, zip tied the loose relay to the wiring harness (so it isn't rattling around) and reassembled the wiper housing
Back on went the wiper arm, after cycling the motor and checking it was at dead bottom when I fitted the arm
Wipe wipe
http://youtu.be/K6E6XKfbJcQ
The one good thing about having no parking function, is that I can park it where ever I damn well please. The wiper normally parks at the bottom, as per above photo, but it always bothered me that it collects dirt and gunk down there, so I parked it vertical (I really need to clean up that excess sealant).
Now I should be able to see out the back in the dark, since it seems to rain every day here at the moment.
Speaking of rain, I also replaced the front wiper refills the other day. I wanted to replace the whole blade, but since they are pin fitting blades, I'm not sure about finding a replacement. Refills work for now.
The old ones were a tad had it. This was the Drivers one.
I did find out the hard way that if your replacement refills have two widths (wide and narrow) and you accidentally fit it into the narrow instead of wide, when you wipe the screen on the motorway the refill will be torn out of the clips on the holder, and then you have no wipers. Thankfully they stayed on the car, so a quick pull over and refit them correctly and I was on my way again.
Rookie move.
Rookie. Move.
And here we are, up to date. In the next few days i need to remove the sump to replace the horrifically leaking gasket, replace the transmission mounts that have turned to jello, and replace the stretched hand brake cable. The Quickjacks are ready to go, just need it to be warmer than 5 Degrees in the garage so i dont freeze.
Thanks guys, this car has really been a labour of love. Its spent more time in my garage than actually on the road, but considering how long it was off the road laid up, its not a huge surprise. I'm getting there though, once the oil leak is fixed it will finally be into "get in and drive when i feel like it" territory.
It is bit of a 20 footer though, it looks great clean but the paint has a multitude of issues here and there. I cant afford to repaint it, so have to live with it for now. Compared to how it was when i got it though, the paint actually shines now.
The brakes were a steep learning curve for me, as i generally refused to do anything other than pads and fluid as the risk to life if i got it wrong was very high, but in the end its actually a lot simpler than expected, and as long as you follow the manual, keep everything clean and take care not to pinch any seals, there isn't too much that can go wrong. The brakes on Tess are now superb. Since then i have overhauled my Minis front drum brakes too with good results. Don't be scared of brakes, but treat them with the care and respect they deserve.
Everyone that works on cars in their garage, especially if its attached to their house should have a CO meter. I triggered mine the other day tuning the Mini carb, and didn't even realise. I had the roller door behind the car wide open, but the wind must've been in the wrong direction. I had it up over 200ppm, and didn't realise until the alarm beeped. No smell of exhaust fumes, just silent gas (heh).
And yes i should have warned, the photos are rather large and there are a lot of them. Oops.
Fantastic thread OP - thanks for posting it. 
A Vitesse is probably one of the cars I should have owned at some point as I had a P6B 3500S in the late 70s, but being single I bought a Capri 2.8 Injection in 1984 - from someone who had replaced it with a Moonstone Blue VDP Efi!
A decade or so later a mate of mine who had been racing on ovals decided to try circuits and bought an SD1 (albeit on carbs) - it drove really well and sounded fantastic.
I'll be looking for your updates - to go with 1275GT's!
I know I have covered replacing the hand brake cable on Effie (http://www.tasteslikepetrol.net/2017/11/rover-sd1-reinstating-the-hand-brake/) before, but having done it again on Tess this time, I have some new insights to share.
One thing that had been getting worse and worse on Tess was the hand brake. Since the WOF is due for renewing, I needed to fix it, or it wouldn't pass.
I tried adjusting the cable in a previous post, but no mater what I did I just couldn't get the brakes to hold. I suspect the cable was stretched, so I ordered a replacement cable from Rimmers.
It was time to get Tess up on the QuickJacks, and do some work.

Speaking of QuickJacks, one of the party tricks is that once its up and on its locks, you can completely disconnect and remove the hydraulic hoses. Means you can have free access front and rear.
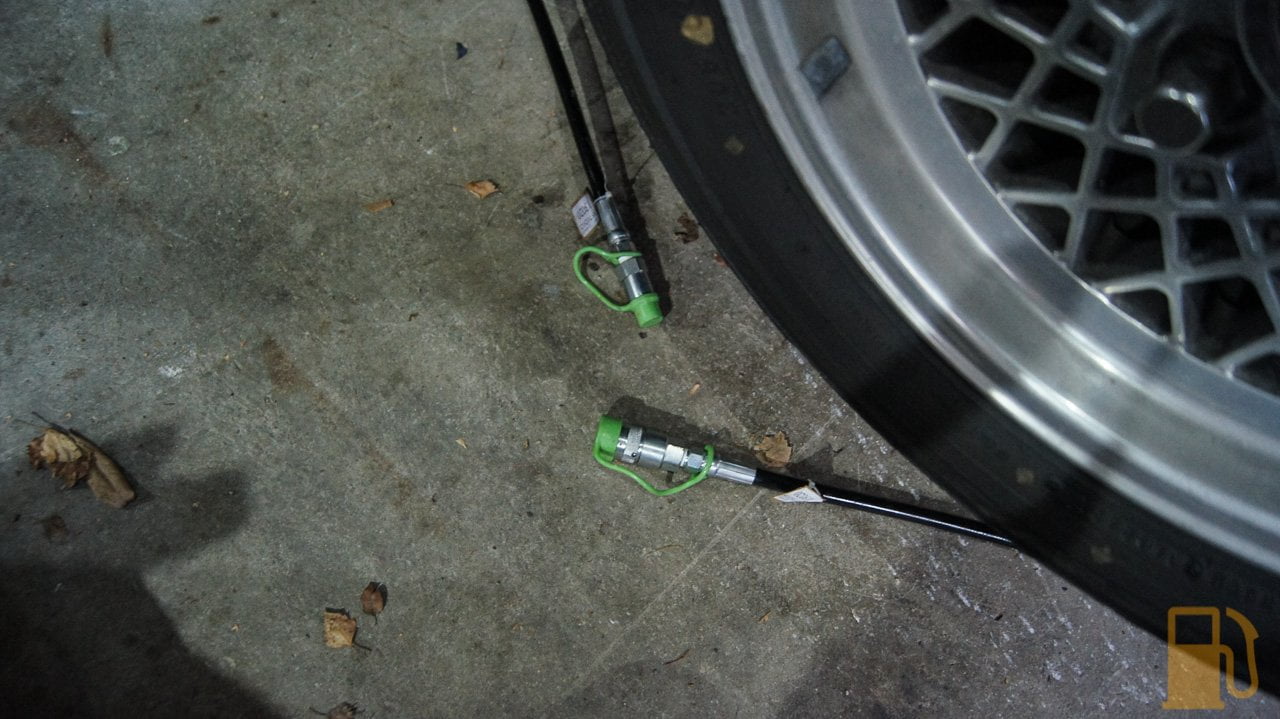
First step, disconnect the cable from both rear brakes. Remove the split pin, and pull the steel pin out.


Snip the zip ties holding the cable to the diff and torque tube

Use a spanner and ratchet to remove the nut and bolt that holds the compensator to the diff. The nut is hidden behind the bracket


Now move to the middle of the car/front of the cable and completely back off the locking nuts to adjust the cable. That square plate at the front of the mount will drop out, so keep it somewhere safe when it comes out. To remove the cable from this mount, you need to pull it towards the rear of the car so that the inner cable can pass through the slot in the mount. You may need to push a little rubber boot (at top of photo) on the cable out of the way to allow this.

The next part is a pain; removing the rubber boot over the lever clevis. Some careful brute force will free this up and then there is another split pin and steel pin to remove. The cable should be free to remove from the car now.

With the cable out of the car, this is what you have. The rubber boot and clevis

The adjuster section, showing the exposed inner cable section to pass through the mount
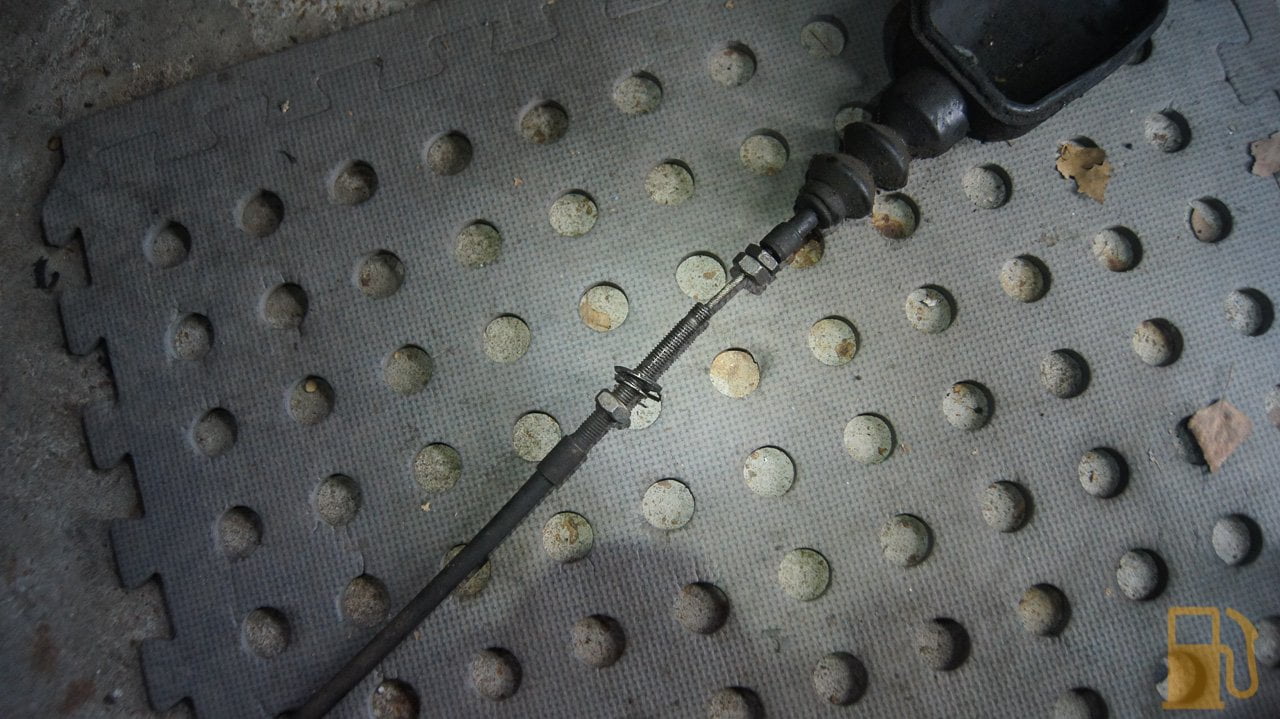
Rear section. The narrow cable looping around is for the left side wheel

Compensator

The new cable is complete other than two items. The compensator, and large rubber lever boot, both of which need to be transferred over.
The rubber boot pulls off the cable, and the clevis pulls through the bellows section. This was after a very thorough clean and degrease

The compensator needs to be disassembled to transfer over. There is a 10mm nut/bolt that goes through it, which will allow you to split the two halves

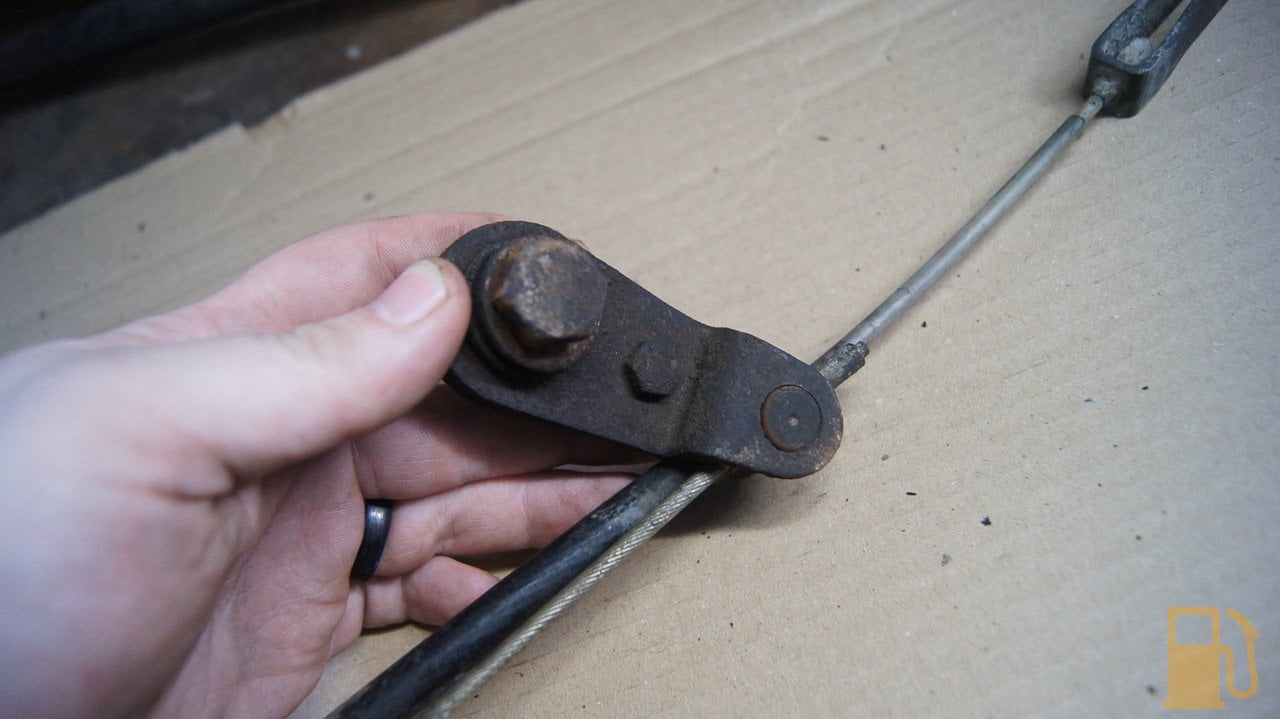
The old bushes were looking a tad flogged out and it didn't help someone had pinched the bushing and crushed it
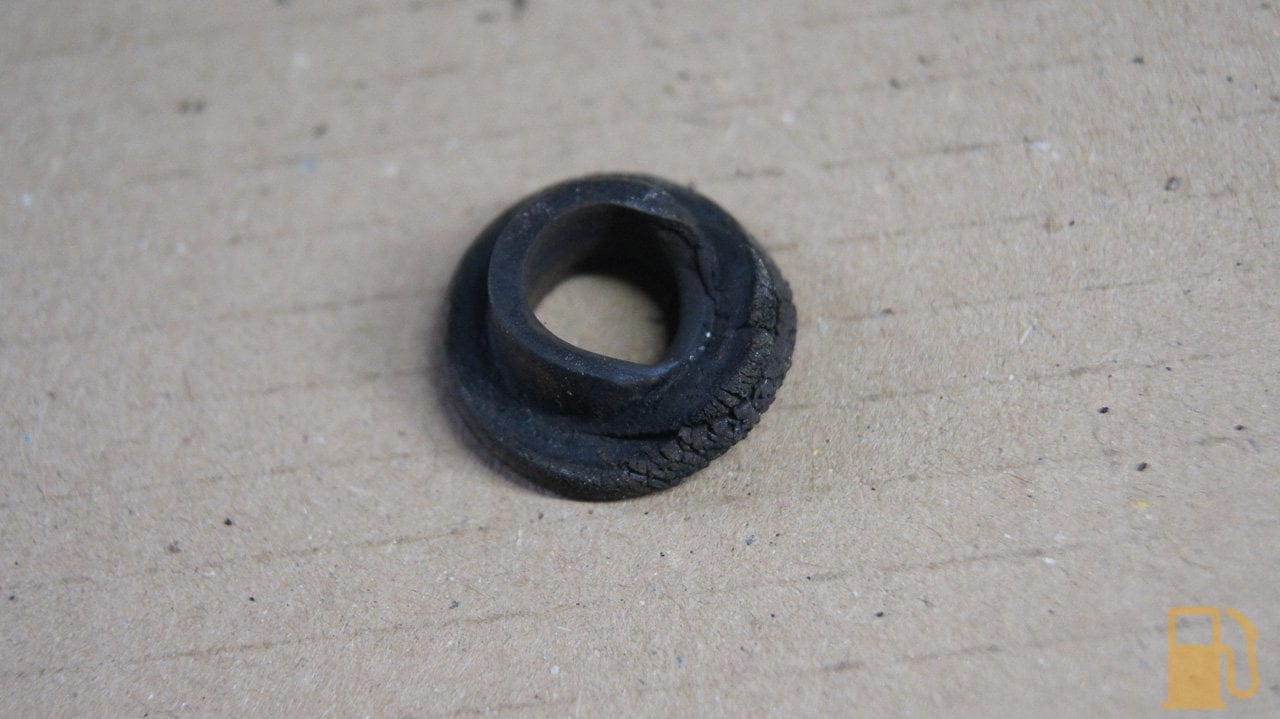

The 10mm on mine was VERY seized and needed some hefty ugga duggas to free it up, along with some WD40


Once off the two halves can be split. You may need to employ some brute force or percussive persuasion here, as they can be rusted together.

The fulcrum pin was looking worse for wear too. Luckily I always order a spare

Of course I couldn't refit those ugly, rusty parts to the car. So out came the twisted wire cup

ALWAYS gear up. You don't want a piece of wire in your eye

The parts are stuck in the vice and hit with the brush. It quickly stripped off any chunky bits, and brought it back to mostly bare metal.


There was a lot of pitting and ingrained rust, so I used some rust converter to treat it


I let this cure/dry, and then painted with some black Zinc paint. I only painted what would be the outside of the parts.

Once it was dry, I used a small file to clean up the inside of the holes, and smothered the whole inside of one half with copper grease, and where the cable would pivot on both


These are the parts you want to buy, as a minimum, when replacing the cable (as well as a cable, obviously)

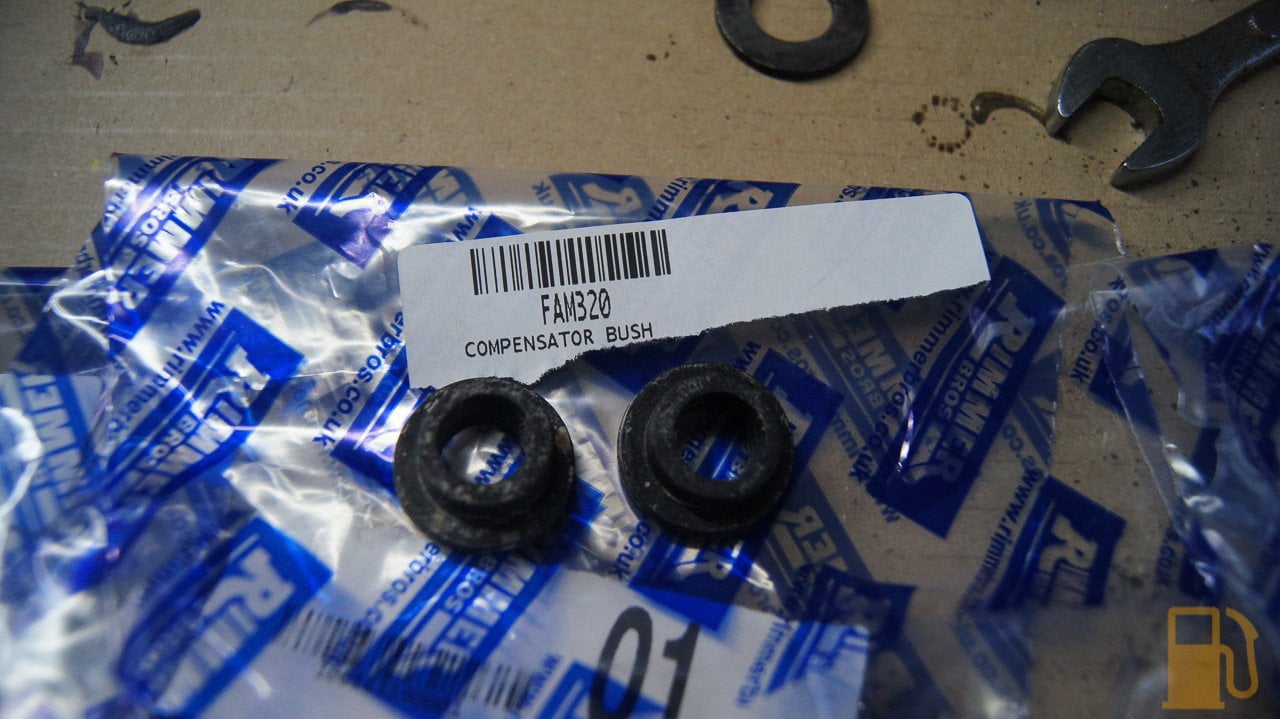

I would also recommend a new large lever boot, as they seem to perish. Effie's was OK, but the one on Tess is perished and cracked. I have used superglue to hold it together and seal the cracks, but it'll need redoing in a couple of years


Now to reassemble the compensator on the new cable. Place both halves on the cable, and refit the 10mm nut/bolt with some copper grease on it. Make sure the compensator pivots freely on the cable. If it doesn't, you may need to tweak the bracket slightly to ensure both halves are parallel where it pivots on the cable as they can bend easily.

The new bushes get fitted with some rubber grease
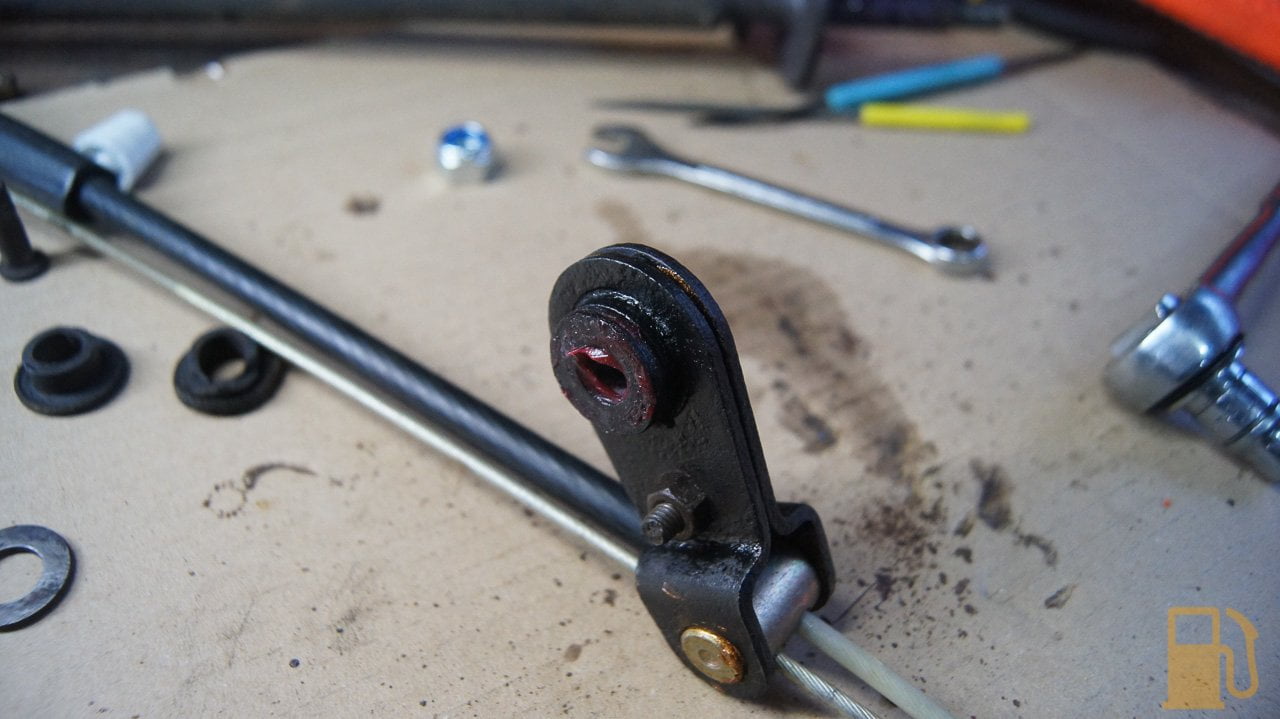
Smother the fulcrum pin and washer in copper grease, and slide it through the bushes, making sure the back one doesn't pop out

Now the boot needs to go back on. With an old boot like mine, this sucks. You need to feed the cable through the bellow section clevis first, until the bellows can be slid onto this little rubber bush. Use some grease to help side the clevis in.


Now its a case of refitting. Lay the cable under the car, and start by attaching the compensator. It's the reverse of disassembly.
Hook up the LEFT side cable to the brake lever. It's crucial that this cable end is adjusted so that the compensator is at a 30 degree from vertical, to the left.

Now connect the RIGHT cable to the brake lever. Slides the pins through, but don't fit the split pins yet as both may need some more tweaking.
Move up the front, and attach the cable into the mount, and to the hand brake lever. Refit the curse word boot, with lots of wiggling, jiggling and stretching to get it over the lip and into place. Fit two zip ties, one on the RH side of the diff, and one on the torque tube, to secure the cable into place. There are rubber sleeves that need to be under the zip ties on the cable to protect the outer sleeve.
Now it's time to adjust the cable
This sums up what to do. You need to back off the two locking nuts as far as possible, so that you have the freedom to pull the outer cable towards the rear of the car. Pull the cable back until you see the RIGHT brake lever moving and then snug the bottom nut in the photo up the mount (remembering to fit the square plate). Finger tighten the first lock nut up to the mount too.

Now get out from under the car, and test the brakes. Pull the hand brake lever up one click. The rear wheels should still turn, but some dragging should be noticeable. Now pull the lever to a total of three clicks. The rear wheels should be locked solid now.
If the wheels are locked before three clicks, you need to back off the lower nut in the above photo, to move the cable forward, towards the front of the car. If the wheels are still able to turn on three clicks, or the handle pulls further than three clicks, back off the top lock nut, and tighten the lower nut a few turns. Nip the lock nut up again and try again.
In my case it took a couple of tweaks of the adjustment to get the setting right, but now I have it so that it takes a firm pull to get onto three clicks, and the rear wheels lock solid. One click has noticeable binding but the wheels still turn.
Now slip the washer and split pin through each side brake lever, and you're done.
The cable will eventually stretch over time and need more adjustment, just follow the directions above to tighten the cable when the times comes, and you should be good for another few years.
I'm now two for two for my recent SD1s needing hand brake cables. My first SD1 (http://www.tasteslikepetrol.net/cars/rover/) also needed hand brake work (failed a WOF), but being young and having no garage, I outsourced that at considerable expense.
One thing that had been getting worse and worse on Tess was the hand brake. Since the WOF is due for renewing, I needed to fix it, or it wouldn't pass.
I tried adjusting the cable in a previous post, but no mater what I did I just couldn't get the brakes to hold. I suspect the cable was stretched, so I ordered a replacement cable from Rimmers.
It was time to get Tess up on the QuickJacks, and do some work.
Speaking of QuickJacks, one of the party tricks is that once its up and on its locks, you can completely disconnect and remove the hydraulic hoses. Means you can have free access front and rear.
First step, disconnect the cable from both rear brakes. Remove the split pin, and pull the steel pin out.
Snip the zip ties holding the cable to the diff and torque tube
Use a spanner and ratchet to remove the nut and bolt that holds the compensator to the diff. The nut is hidden behind the bracket
Now move to the middle of the car/front of the cable and completely back off the locking nuts to adjust the cable. That square plate at the front of the mount will drop out, so keep it somewhere safe when it comes out. To remove the cable from this mount, you need to pull it towards the rear of the car so that the inner cable can pass through the slot in the mount. You may need to push a little rubber boot (at top of photo) on the cable out of the way to allow this.
The next part is a pain; removing the rubber boot over the lever clevis. Some careful brute force will free this up and then there is another split pin and steel pin to remove. The cable should be free to remove from the car now.
With the cable out of the car, this is what you have. The rubber boot and clevis
The adjuster section, showing the exposed inner cable section to pass through the mount
Rear section. The narrow cable looping around is for the left side wheel
Compensator
The new cable is complete other than two items. The compensator, and large rubber lever boot, both of which need to be transferred over.
The rubber boot pulls off the cable, and the clevis pulls through the bellows section. This was after a very thorough clean and degrease
The compensator needs to be disassembled to transfer over. There is a 10mm nut/bolt that goes through it, which will allow you to split the two halves
The old bushes were looking a tad flogged out and it didn't help someone had pinched the bushing and crushed it
The 10mm on mine was VERY seized and needed some hefty ugga duggas to free it up, along with some WD40
Once off the two halves can be split. You may need to employ some brute force or percussive persuasion here, as they can be rusted together.
The fulcrum pin was looking worse for wear too. Luckily I always order a spare
Of course I couldn't refit those ugly, rusty parts to the car. So out came the twisted wire cup
ALWAYS gear up. You don't want a piece of wire in your eye
The parts are stuck in the vice and hit with the brush. It quickly stripped off any chunky bits, and brought it back to mostly bare metal.
There was a lot of pitting and ingrained rust, so I used some rust converter to treat it
I let this cure/dry, and then painted with some black Zinc paint. I only painted what would be the outside of the parts.
Once it was dry, I used a small file to clean up the inside of the holes, and smothered the whole inside of one half with copper grease, and where the cable would pivot on both
These are the parts you want to buy, as a minimum, when replacing the cable (as well as a cable, obviously)
I would also recommend a new large lever boot, as they seem to perish. Effie's was OK, but the one on Tess is perished and cracked. I have used superglue to hold it together and seal the cracks, but it'll need redoing in a couple of years
Now to reassemble the compensator on the new cable. Place both halves on the cable, and refit the 10mm nut/bolt with some copper grease on it. Make sure the compensator pivots freely on the cable. If it doesn't, you may need to tweak the bracket slightly to ensure both halves are parallel where it pivots on the cable as they can bend easily.
The new bushes get fitted with some rubber grease
Smother the fulcrum pin and washer in copper grease, and slide it through the bushes, making sure the back one doesn't pop out
Now the boot needs to go back on. With an old boot like mine, this sucks. You need to feed the cable through the bellow section clevis first, until the bellows can be slid onto this little rubber bush. Use some grease to help side the clevis in.
Now its a case of refitting. Lay the cable under the car, and start by attaching the compensator. It's the reverse of disassembly.
Hook up the LEFT side cable to the brake lever. It's crucial that this cable end is adjusted so that the compensator is at a 30 degree from vertical, to the left.
Now connect the RIGHT cable to the brake lever. Slides the pins through, but don't fit the split pins yet as both may need some more tweaking.
Move up the front, and attach the cable into the mount, and to the hand brake lever. Refit the curse word boot, with lots of wiggling, jiggling and stretching to get it over the lip and into place. Fit two zip ties, one on the RH side of the diff, and one on the torque tube, to secure the cable into place. There are rubber sleeves that need to be under the zip ties on the cable to protect the outer sleeve.
Now it's time to adjust the cable
This sums up what to do. You need to back off the two locking nuts as far as possible, so that you have the freedom to pull the outer cable towards the rear of the car. Pull the cable back until you see the RIGHT brake lever moving and then snug the bottom nut in the photo up the mount (remembering to fit the square plate). Finger tighten the first lock nut up to the mount too.
Now get out from under the car, and test the brakes. Pull the hand brake lever up one click. The rear wheels should still turn, but some dragging should be noticeable. Now pull the lever to a total of three clicks. The rear wheels should be locked solid now.
If the wheels are locked before three clicks, you need to back off the lower nut in the above photo, to move the cable forward, towards the front of the car. If the wheels are still able to turn on three clicks, or the handle pulls further than three clicks, back off the top lock nut, and tighten the lower nut a few turns. Nip the lock nut up again and try again.
In my case it took a couple of tweaks of the adjustment to get the setting right, but now I have it so that it takes a firm pull to get onto three clicks, and the rear wheels lock solid. One click has noticeable binding but the wheels still turn.
Now slip the washer and split pin through each side brake lever, and you're done.
The cable will eventually stretch over time and need more adjustment, just follow the directions above to tighten the cable when the times comes, and you should be good for another few years.
I'm now two for two for my recent SD1s needing hand brake cables. My first SD1 (http://www.tasteslikepetrol.net/cars/rover/) also needed hand brake work (failed a WOF), but being young and having no garage, I outsourced that at considerable expense.
Edited by KelvinatorNZ on Monday 16th July 11:56
Gassing Station | Readers' Cars | Top of Page | What's New | My Stuff