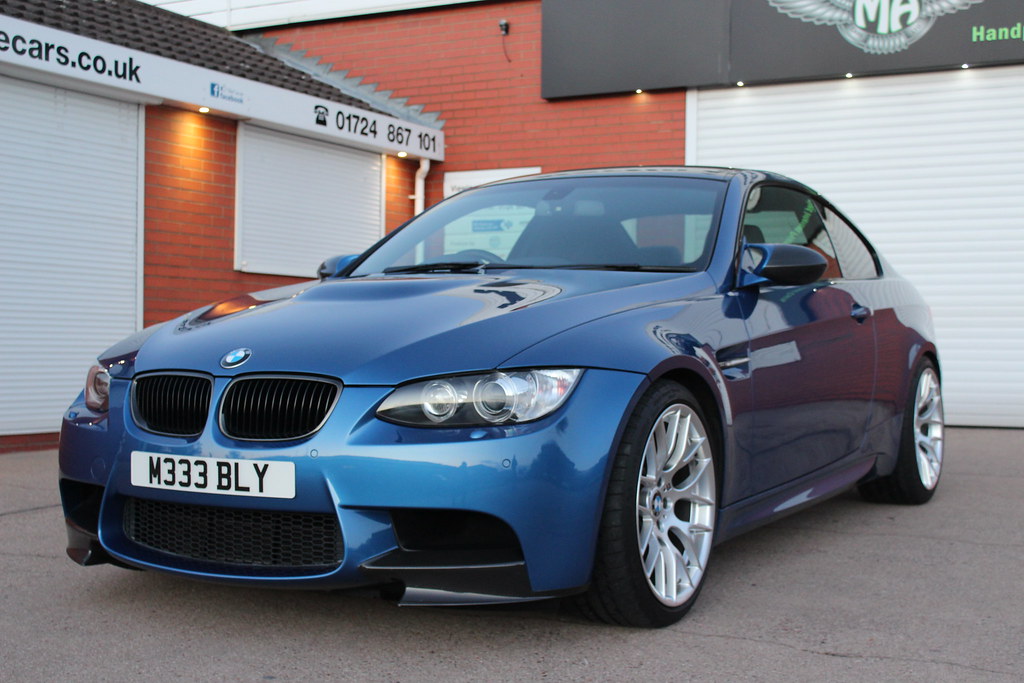
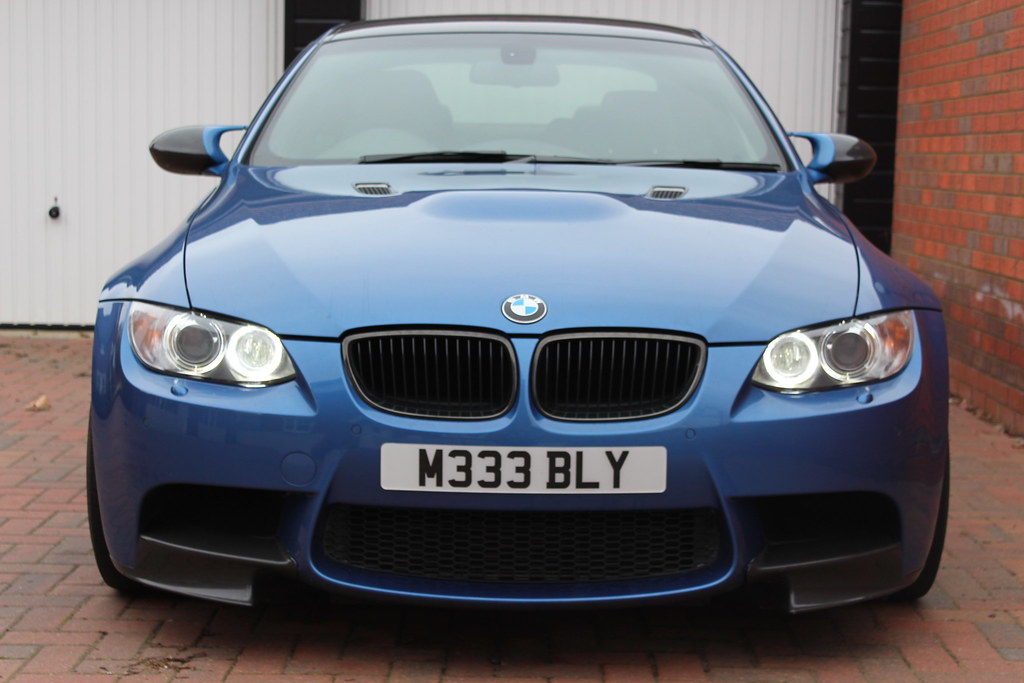
2009 E92 M3 - Monte Carlo Edition
Discussion


Today saw me drive 145 miles to see a family friend at their place of work - they detail the vehicles for sale at a car dealer - not just your usual brush over - they're in-house detailers and regularly spend 3 days on a job to get it right. Unfortunately, we had about 8 hours to see how far we could get with the M3.
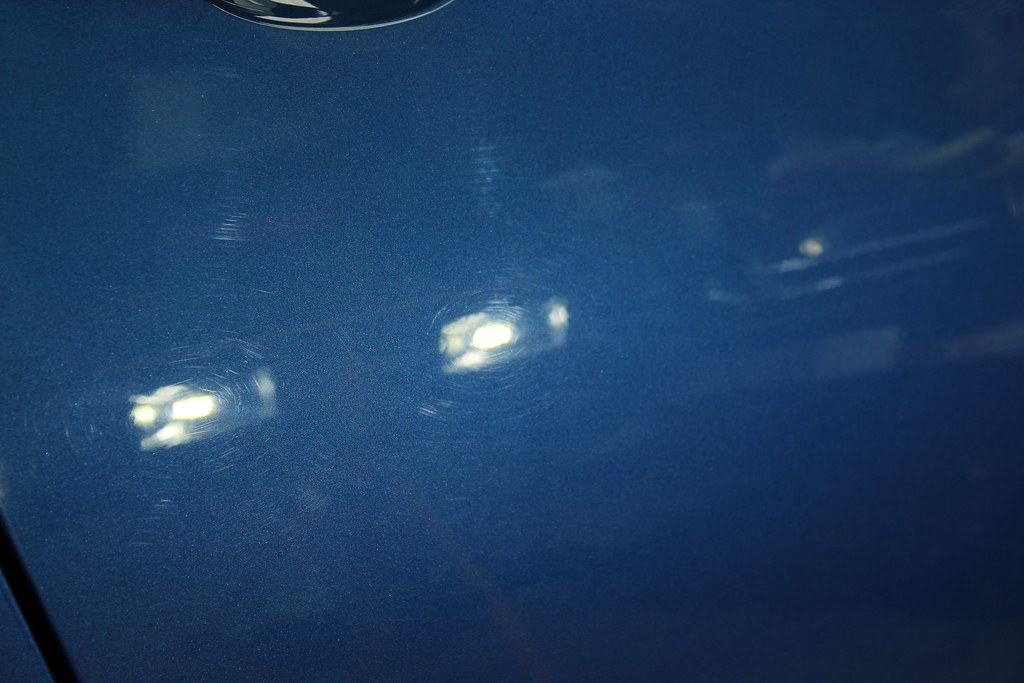
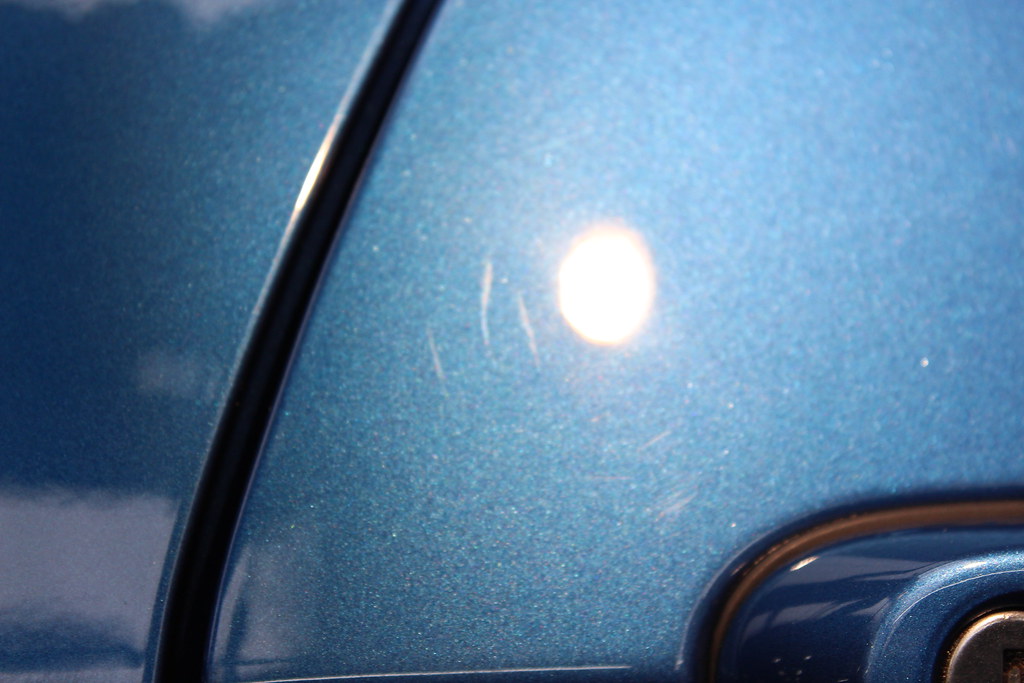
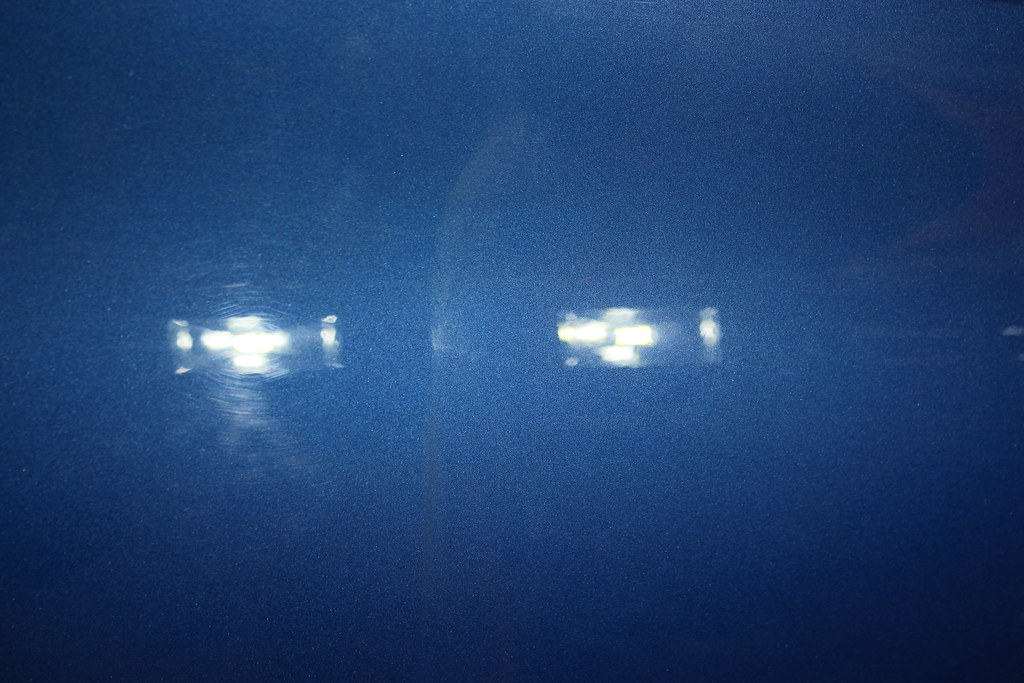
The usual wheels, foam, clay, fallout process ensued before getting an idea of the condition. Here are a few before pics:
 IMG_4949 by [url=https://www.flickr.com/photos/120760751@N02/][/url], on Flickr
 IMG_4945 by [url=https://www.flickr.com/photos/120760751@N02/][/url], on Flickr
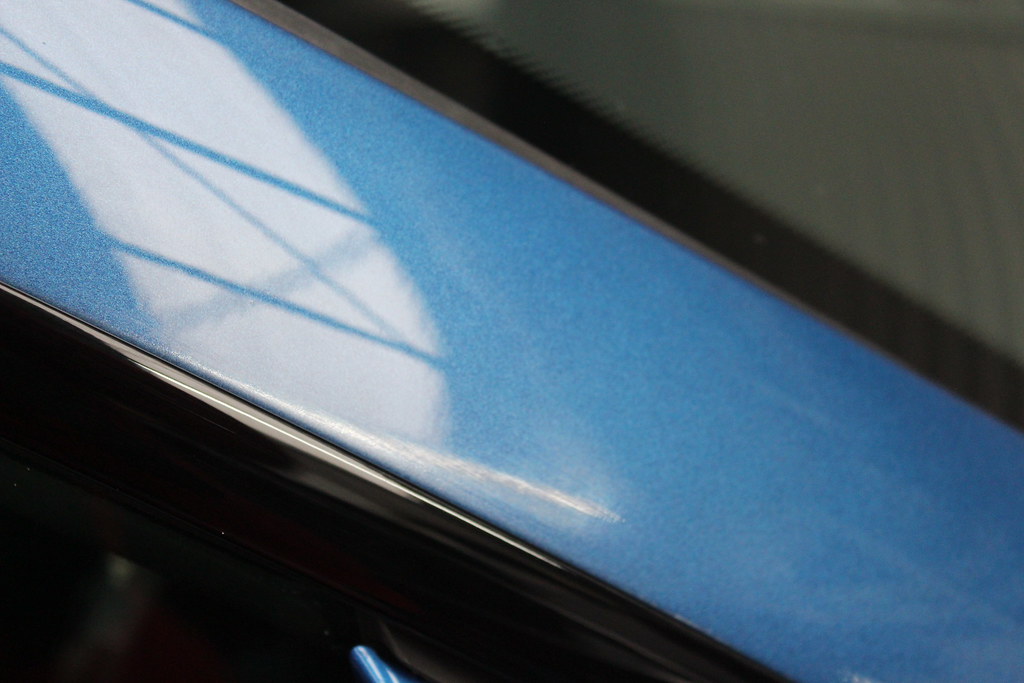
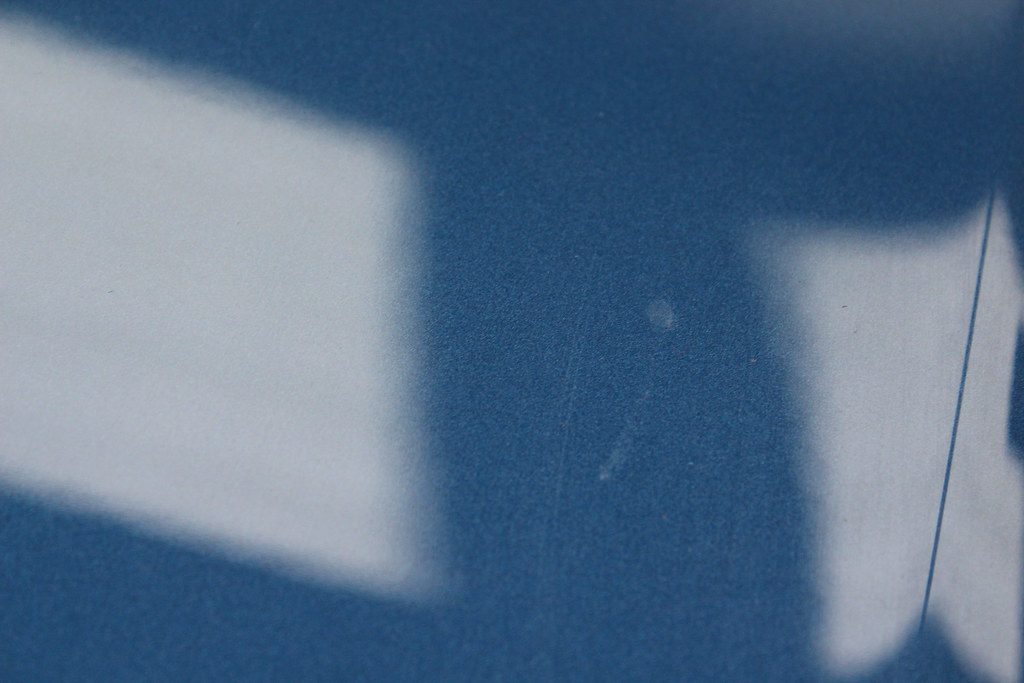
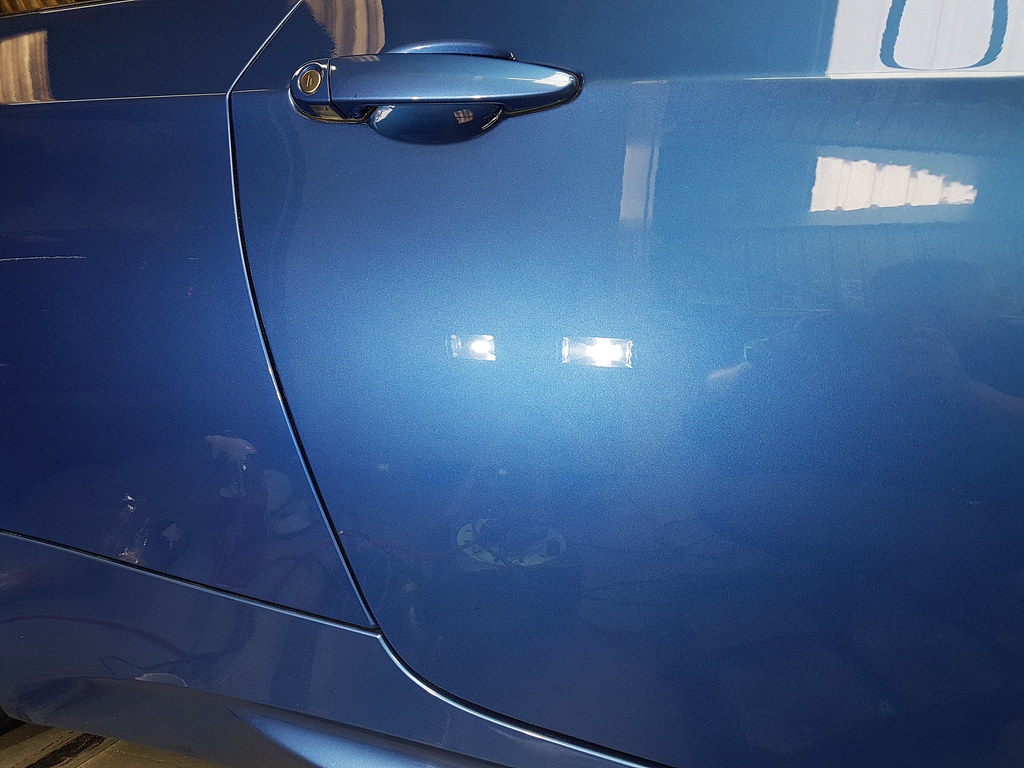
Blend mark from when the front end was sprayed (to the right of the skylight reflection):
 IMG_4940 by [url=https://www.flickr.com/photos/120760751@N02/][/url], on Flickr
 IMG_4941 by [url=https://www.flickr.com/photos/120760751@N02/][/url], on Flickr
 IMG_4942 by [url=https://www.flickr.com/photos/120760751@N02/][/url], on Flickr
Quick test:
 IMG_4951 by [url=https://www.flickr.com/photos/120760751@N02/][/url], on Flickr
Much Better
 20181027_135819 by [url=https://www.flickr.com/photos/120760751@N02/][/url], on Flickr
Action shot:
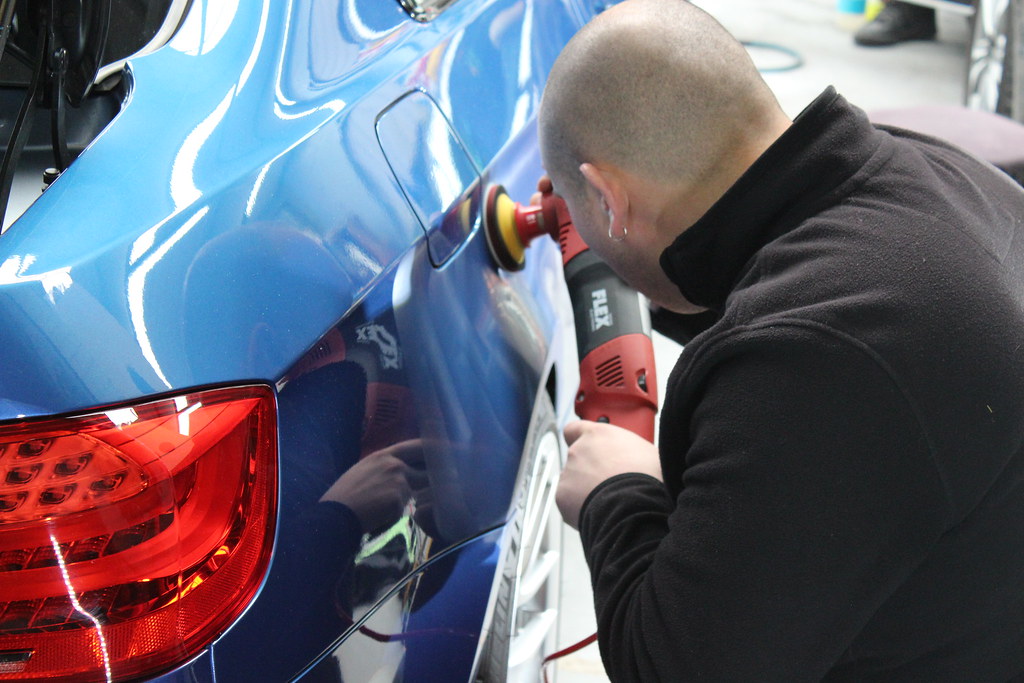 IMG_4952 by [url=https://www.flickr.com/photos/120760751@N02/][/url], on Flickr
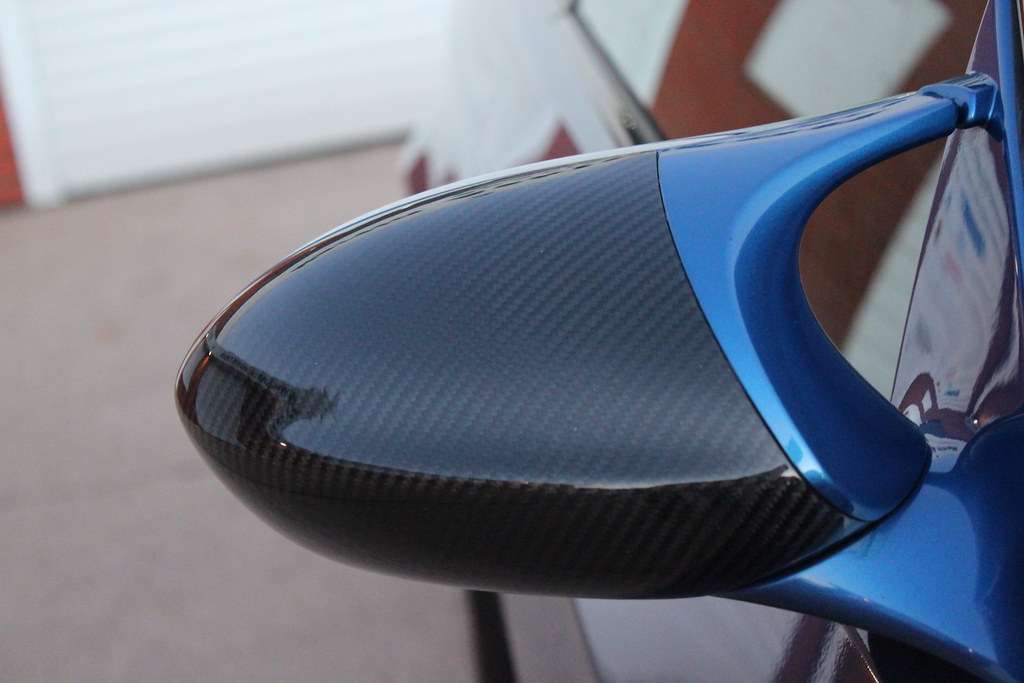
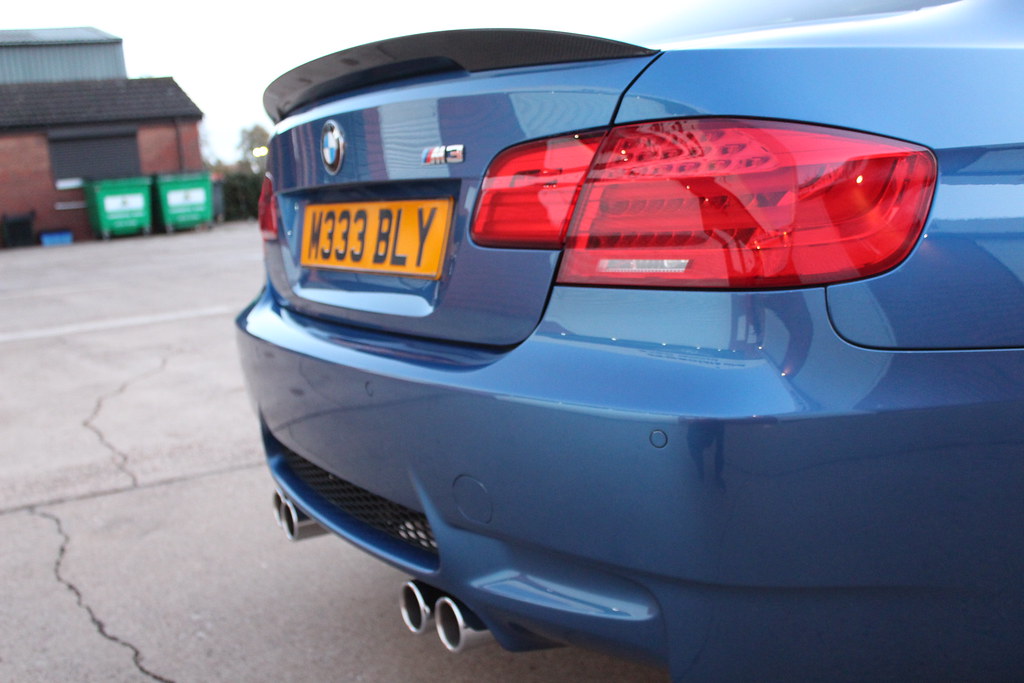
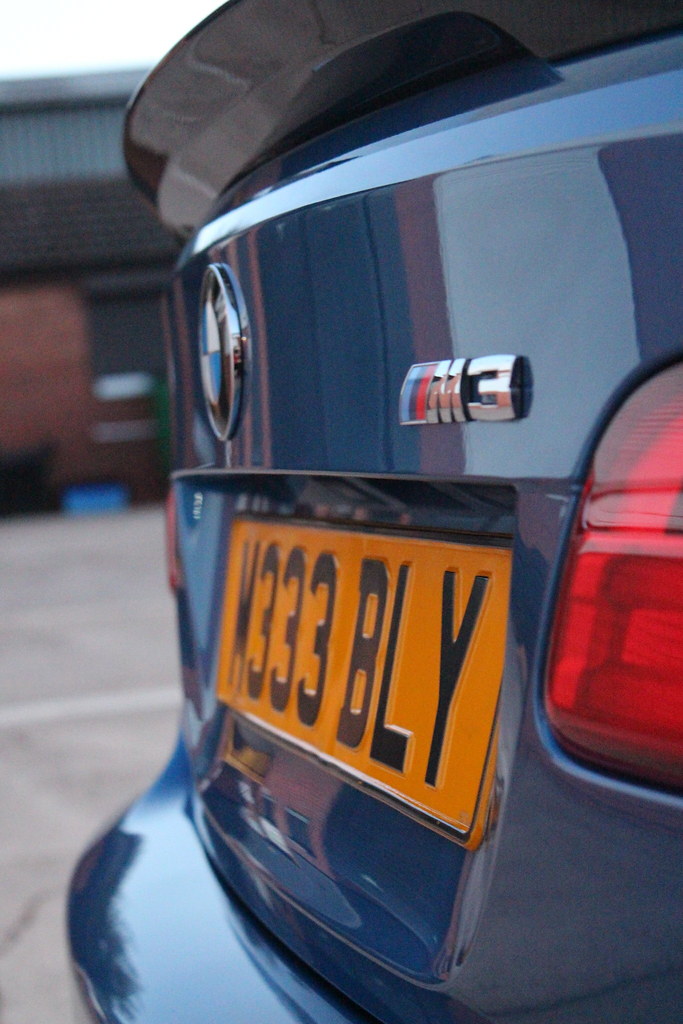
The goal was to get a decent amount of correction in the time so we weren't expecting perfection; the results were pretty good nonetheless. With another day we could have taken our time and concentrated on finessing things a little better. I could have also used the Optimum Gloss Coat I had just in case but this time I settled for some trusty Auto Finesse Illusion. Light was fading by the time we rolled the car out front to wax her as the owner of the garage locked up.
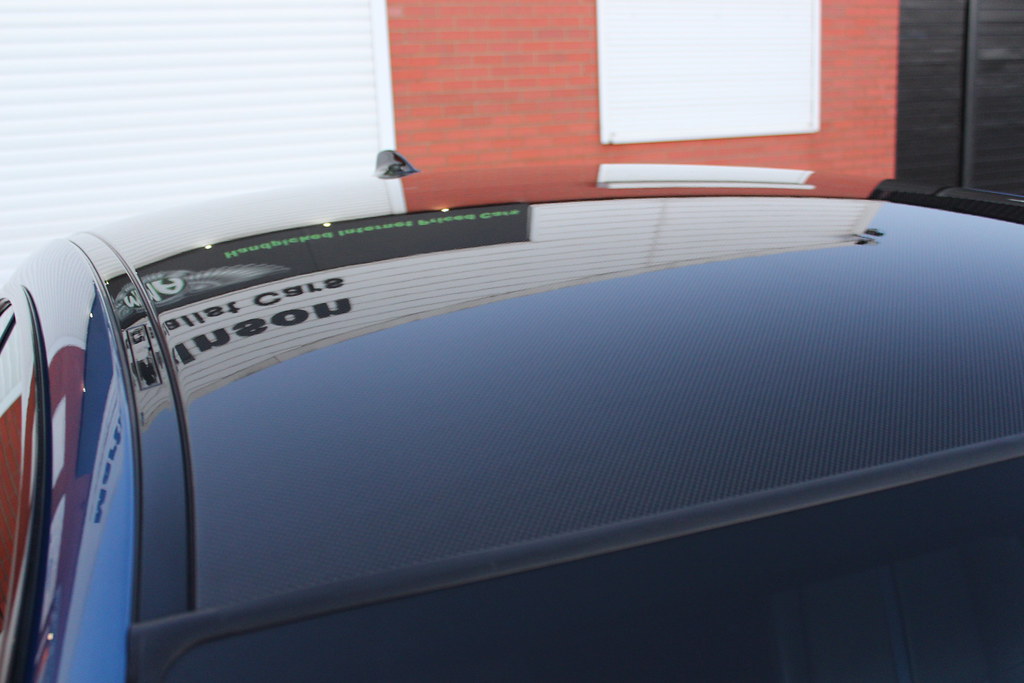
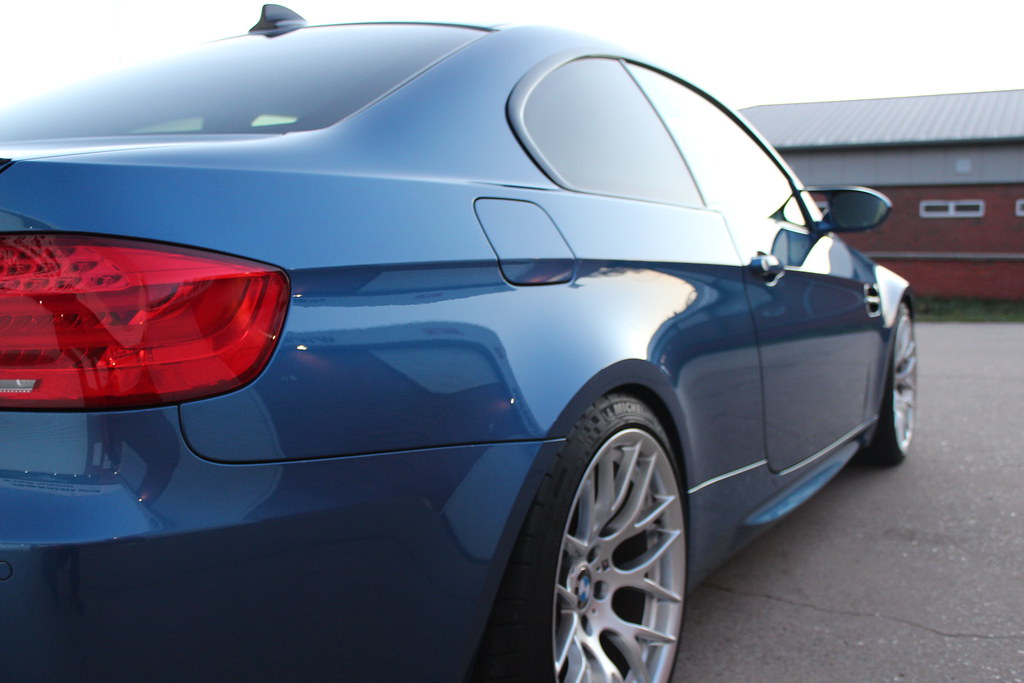
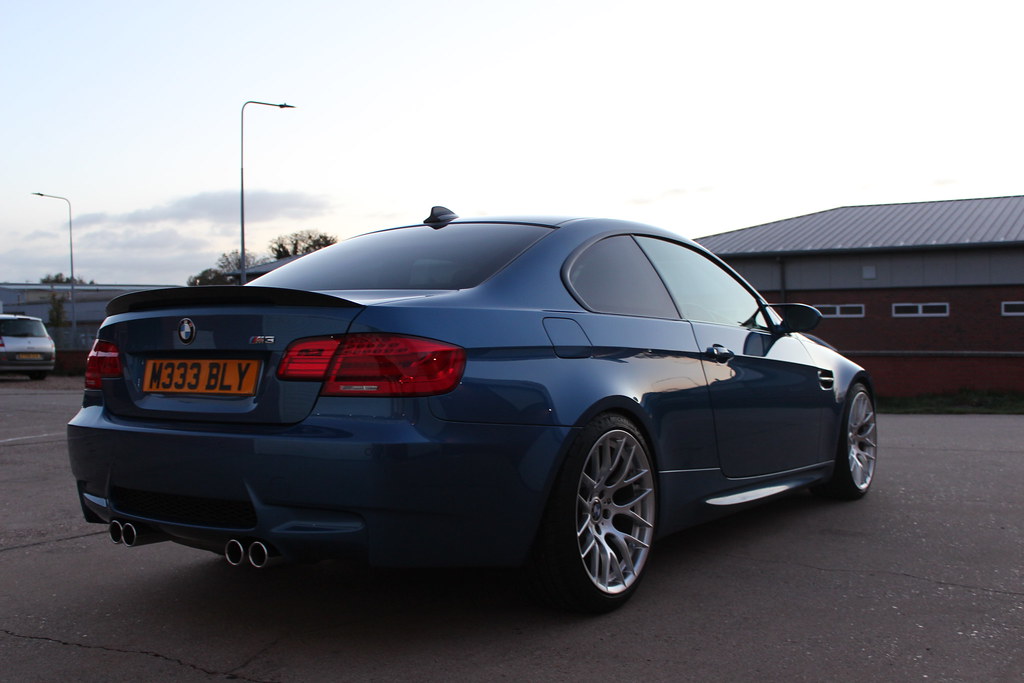
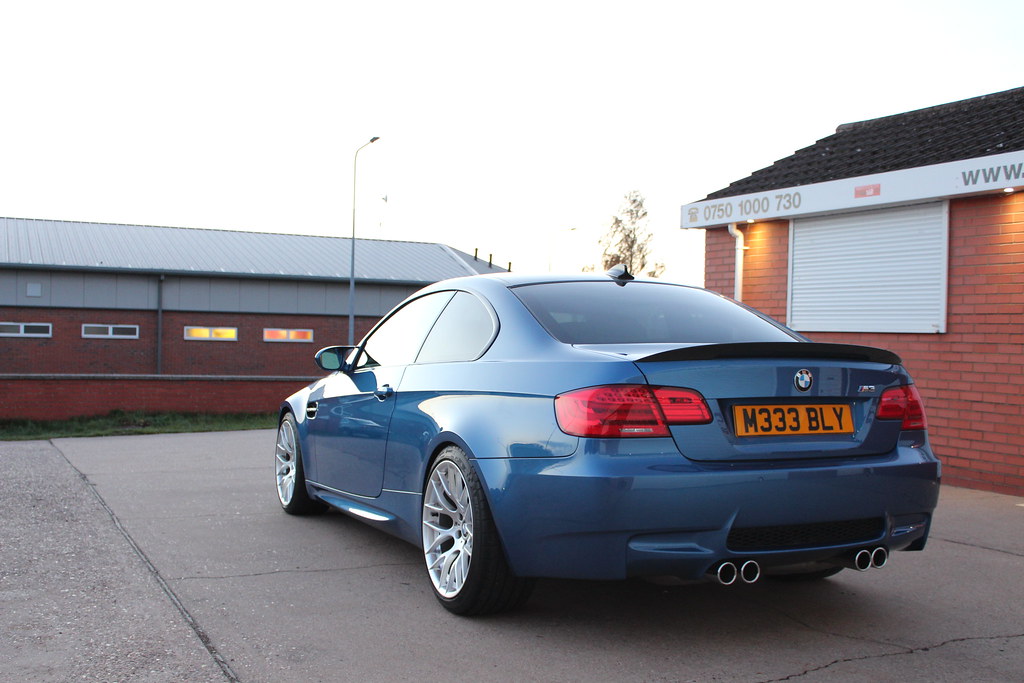
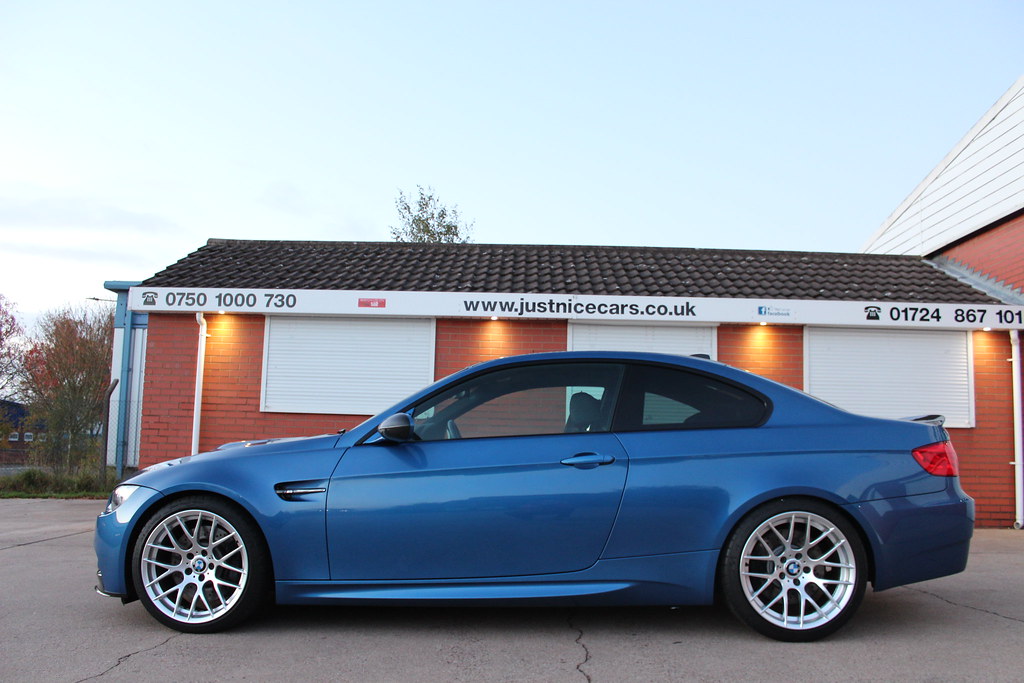
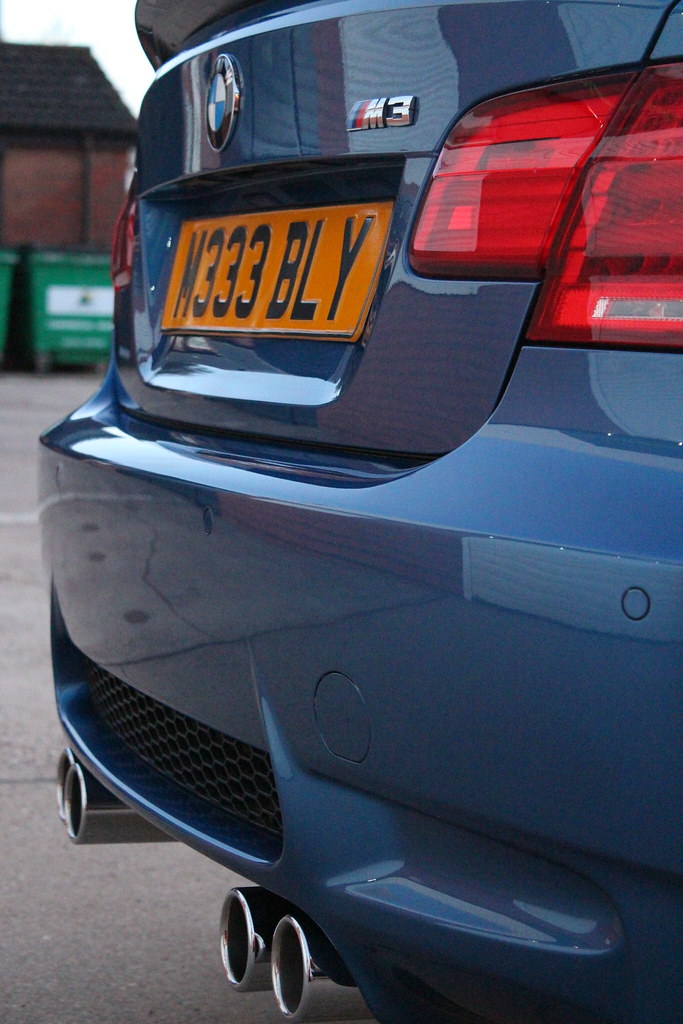
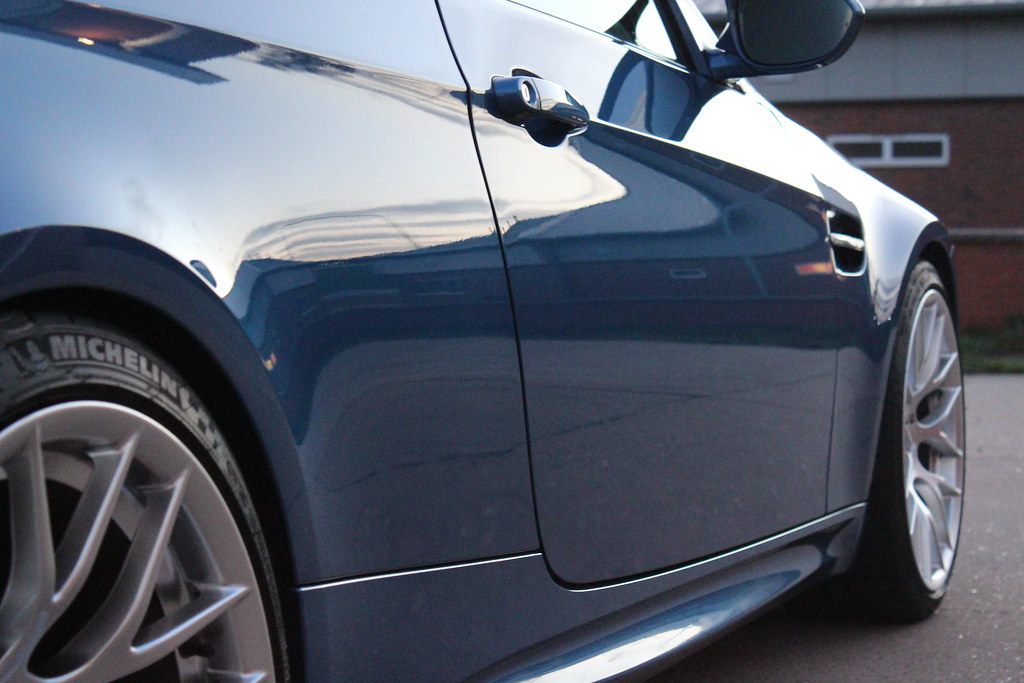
The images look brighter due to the settings on the camera but it was actually quite dark by the time I took them. Here's a few finished snaps:
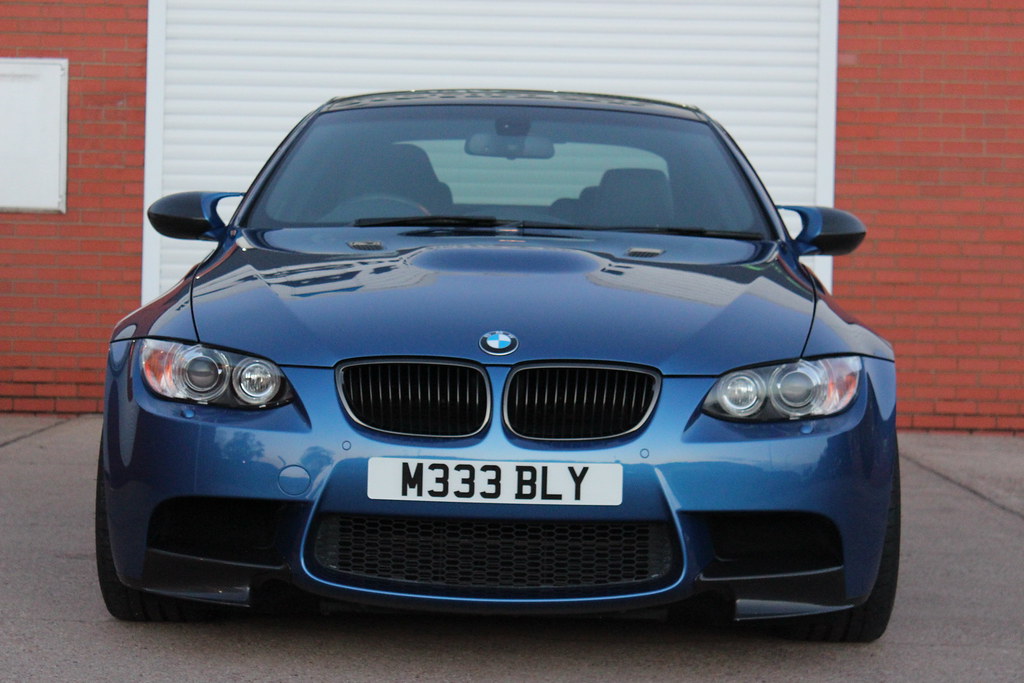 IMG_4955 by [url=https://www.flickr.com/photos/120760751@N02/][/url], on Flickr
 IMG_4956 by [url=https://www.flickr.com/photos/120760751@N02/][/url], on Flickr
 IMG_4959 by [url=https://www.flickr.com/photos/120760751@N02/][/url], on Flickr
 IMG_4960 by [url=https://www.flickr.com/photos/120760751@N02/][/url], on Flickr
 IMG_4961 by [url=https://www.flickr.com/photos/120760751@N02/][/url], on Flickr
 IMG_4962 by [url=https://www.flickr.com/photos/120760751@N02/][/url], on Flickr
 IMG_4963 by [url=https://www.flickr.com/photos/120760751@N02/][/url], on Flickr
 IMG_4964 by [url=https://www.flickr.com/photos/120760751@N02/][/url], on Flickr
 IMG_4966 by [url=https://www.flickr.com/photos/120760751@N02/][/url], on Flickr
 IMG_4970 by [url=https://www.flickr.com/photos/120760751@N02/][/url], on Flickr
 IMG_4977 by [url=https://www.flickr.com/photos/120760751@N02/][/url], on Flickr
 IMG_4979 by [url=https://www.flickr.com/photos/120760751@N02/][/url], on Flickr
 IMG_4980 by [url=https://www.flickr.com/photos/120760751@N02/][/url], on Flickr
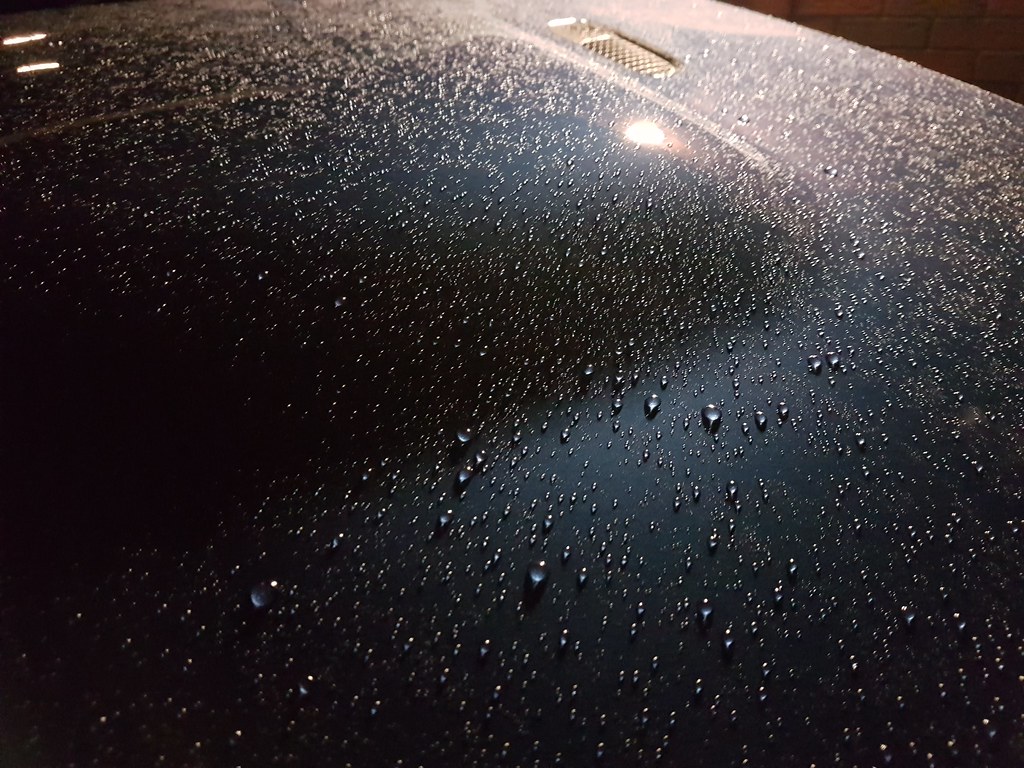
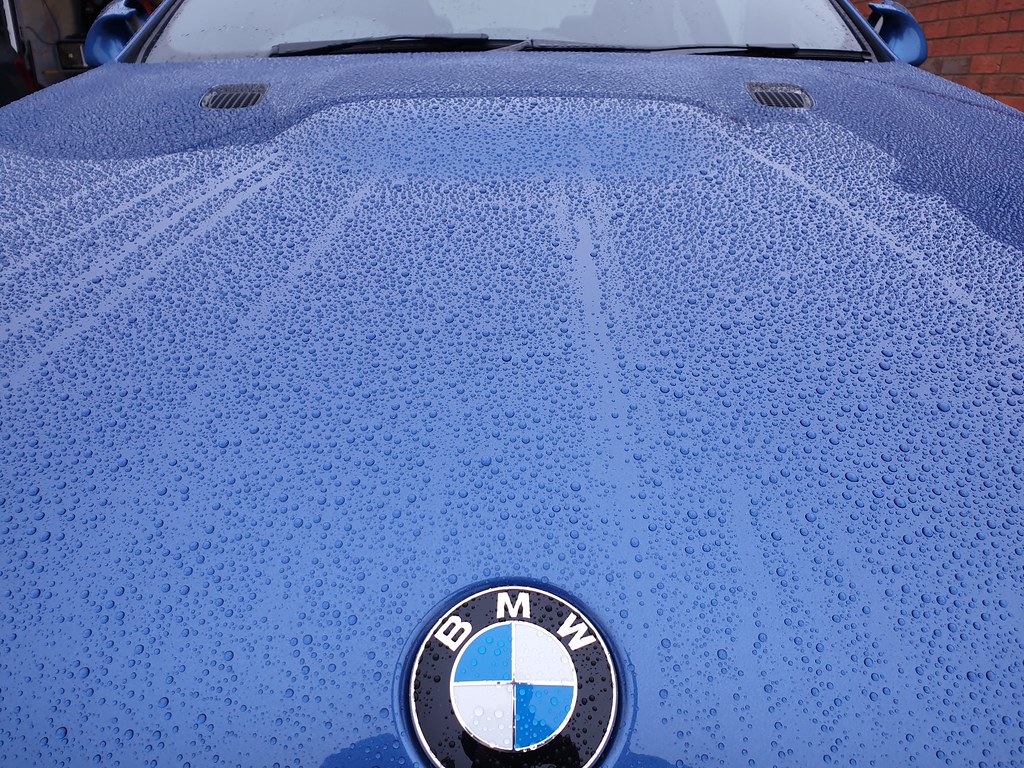
It peed it down on the way home - the result was some epic beading!
 20181027_202422 by [url=https://www.flickr.com/photos/120760751@N02/][/url], on Flickr
The usual wheels, foam, clay, fallout process ensued before getting an idea of the condition. Here are a few before pics:
IMG_4949 by [url=https://www.flickr.com/photos/120760751@N02/][/url], on FlickrIMG_4945 by [url=https://www.flickr.com/photos/120760751@N02/][/url], on FlickrBlend mark from when the front end was sprayed (to the right of the skylight reflection):
IMG_4940 by [url=https://www.flickr.com/photos/120760751@N02/][/url], on FlickrIMG_4941 by [url=https://www.flickr.com/photos/120760751@N02/][/url], on FlickrIMG_4942 by [url=https://www.flickr.com/photos/120760751@N02/][/url], on FlickrQuick test:
IMG_4951 by [url=https://www.flickr.com/photos/120760751@N02/][/url], on FlickrMuch Better
20181027_135819 by [url=https://www.flickr.com/photos/120760751@N02/][/url], on FlickrAction shot:
IMG_4952 by [url=https://www.flickr.com/photos/120760751@N02/][/url], on FlickrThe goal was to get a decent amount of correction in the time so we weren't expecting perfection; the results were pretty good nonetheless. With another day we could have taken our time and concentrated on finessing things a little better. I could have also used the Optimum Gloss Coat I had just in case but this time I settled for some trusty Auto Finesse Illusion. Light was fading by the time we rolled the car out front to wax her as the owner of the garage locked up.
The images look brighter due to the settings on the camera but it was actually quite dark by the time I took them. Here's a few finished snaps:
IMG_4955 by [url=https://www.flickr.com/photos/120760751@N02/][/url], on FlickrIMG_4956 by [url=https://www.flickr.com/photos/120760751@N02/][/url], on FlickrIMG_4959 by [url=https://www.flickr.com/photos/120760751@N02/][/url], on FlickrIMG_4960 by [url=https://www.flickr.com/photos/120760751@N02/][/url], on FlickrIMG_4961 by [url=https://www.flickr.com/photos/120760751@N02/][/url], on FlickrIMG_4962 by [url=https://www.flickr.com/photos/120760751@N02/][/url], on FlickrIMG_4963 by [url=https://www.flickr.com/photos/120760751@N02/][/url], on FlickrIMG_4964 by [url=https://www.flickr.com/photos/120760751@N02/][/url], on FlickrIMG_4966 by [url=https://www.flickr.com/photos/120760751@N02/][/url], on FlickrIMG_4970 by [url=https://www.flickr.com/photos/120760751@N02/][/url], on FlickrIMG_4977 by [url=https://www.flickr.com/photos/120760751@N02/][/url], on FlickrIMG_4979 by [url=https://www.flickr.com/photos/120760751@N02/][/url], on FlickrIMG_4980 by [url=https://www.flickr.com/photos/120760751@N02/][/url], on Flickr It peed it down on the way home - the result was some epic beading!
20181027_202422 by [url=https://www.flickr.com/photos/120760751@N02/][/url], on Flickr 
It's been a while since I did anything to the M3 but recently made a couple of small changes.
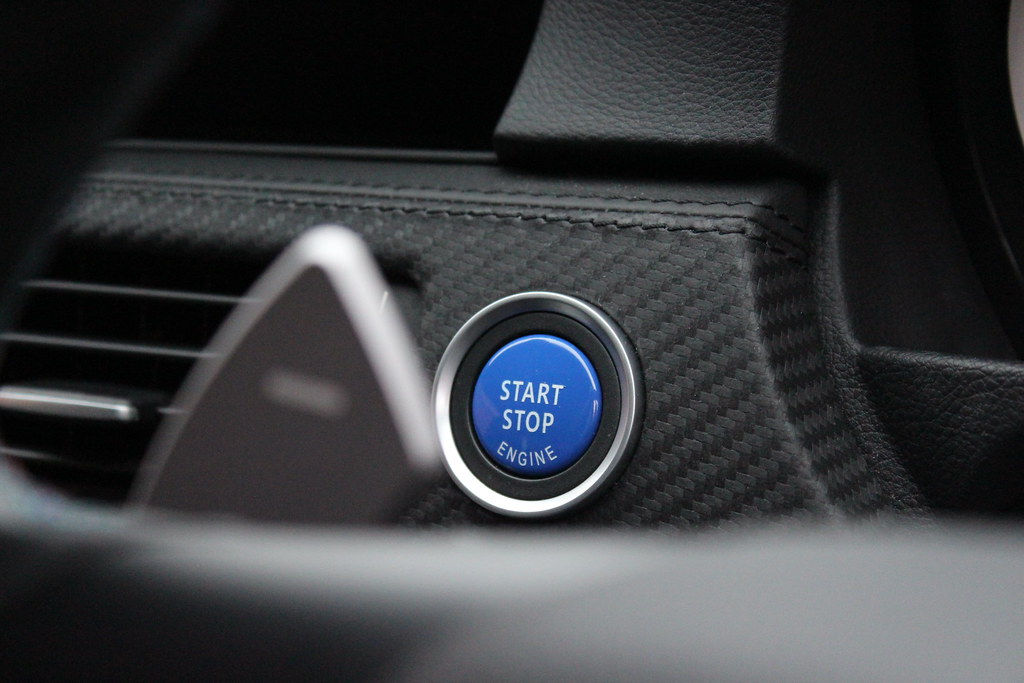
First up was a new starter button. A lot of folk go for the traditional red but having a blue car with the blue accents on the leather I thought I'd go with blue as a starter button. It was quite a simple job really and it only takes a few minutes to do.
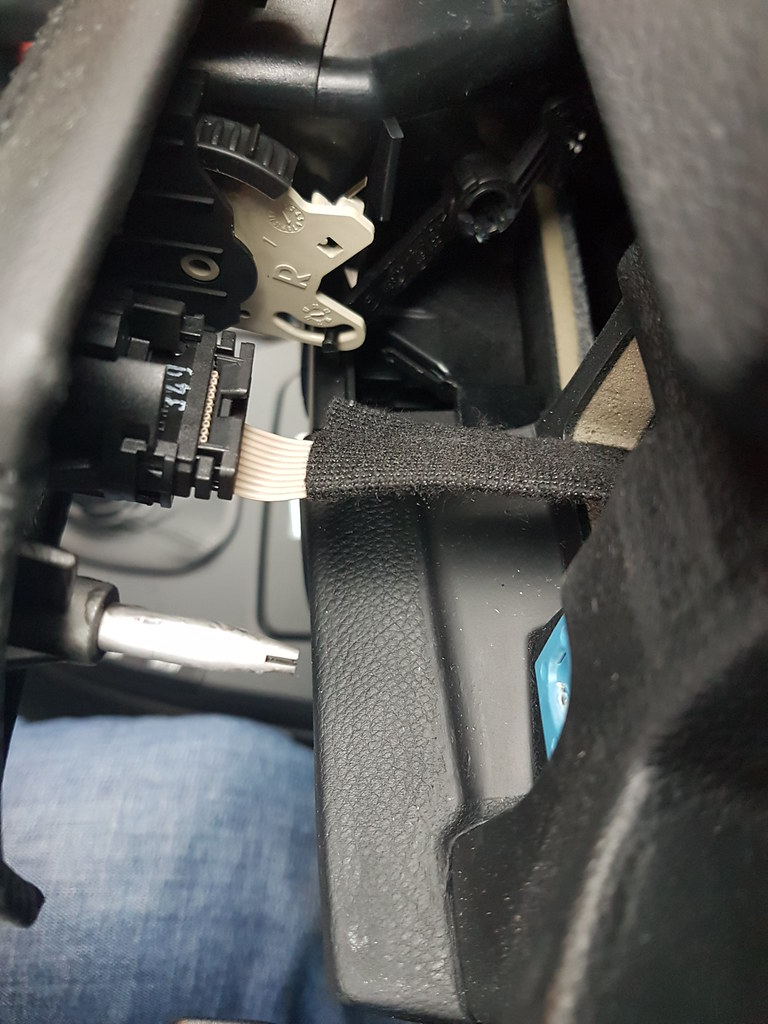
First step was to use a trim removal tool to get behind the trim panel and pull it out just enough to get to the back of the switch. The switch is released by pushing in on both sides of the body which lets it pop out as below:
 20190107_142601 by [url=https://www.flickr.com/photos/120760751@N02/][/url], on Flickr
 20190107_142722 by [url=https://www.flickr.com/photos/120760751@N02/][/url], on Flickr
The next bit is simply unclipping the old switch, remembering the orientation and replacing it with the new one.
Side by side:
 IMG_5004 by [url=https://www.flickr.com/photos/120760751@N02/][/url], on Flickr
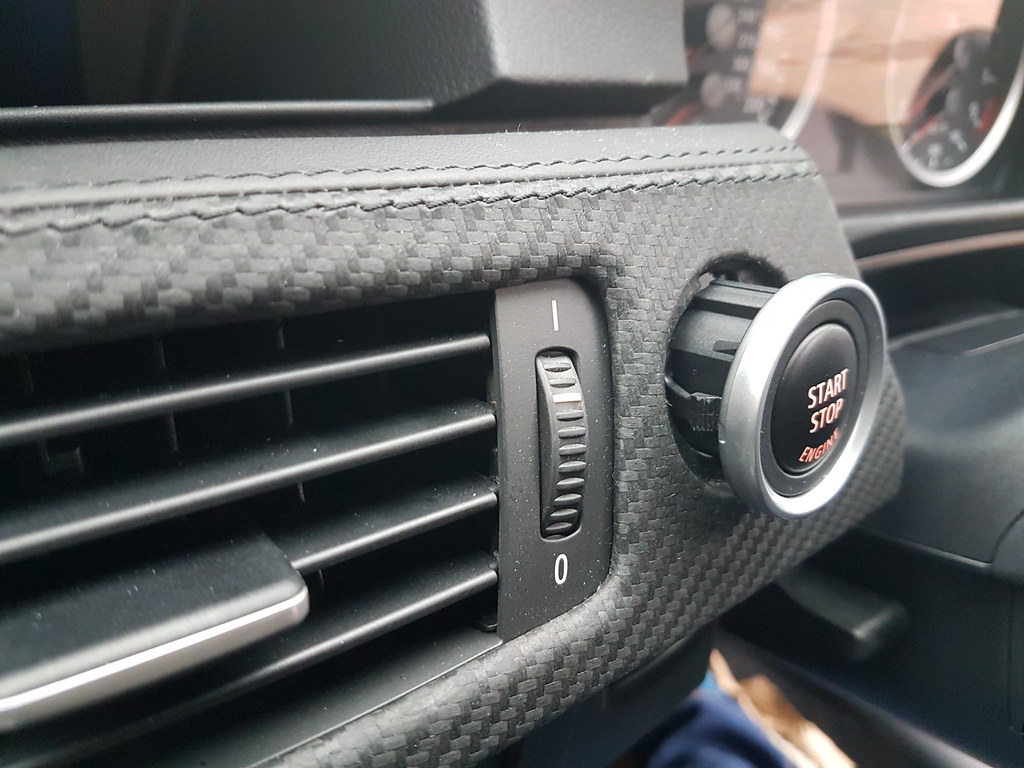
Pushed back in and trim panel secured:
 IMG_5008 by [url=https://www.flickr.com/photos/120760751@N02/][/url], on Flickr
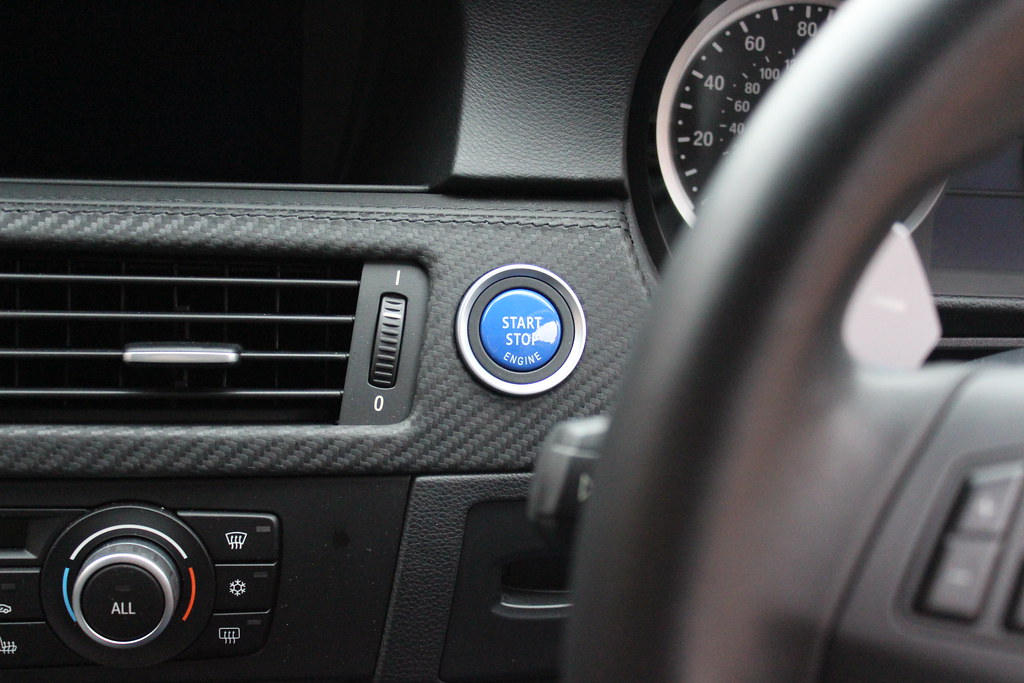
Not bad:
 IMG_5006 by Matt Bly, on Flickr
Next up was a blue steering wheel 'M' button. This is likely to be a more marmite mod but it's easily changed and I thought it would go well with the starter button. The process is a bit of a pain but it's one of those things that once you do once, it's easy. The first time is a right sod!
The airbag removal is the tricky part as you have to locate some almost invisible slits on the back of the wheel which you'll swear blind aren't actually there. Trust me, they are. Here's a pic of the screwdriver in one:
 IMG_5009 by [url=https://www.flickr.com/photos/120760751@N02/][/url], on Flickr
The goal is to press in the clips on either side of the airbag to release it - you can see the thin piece of metal that you have to get to in this picture:
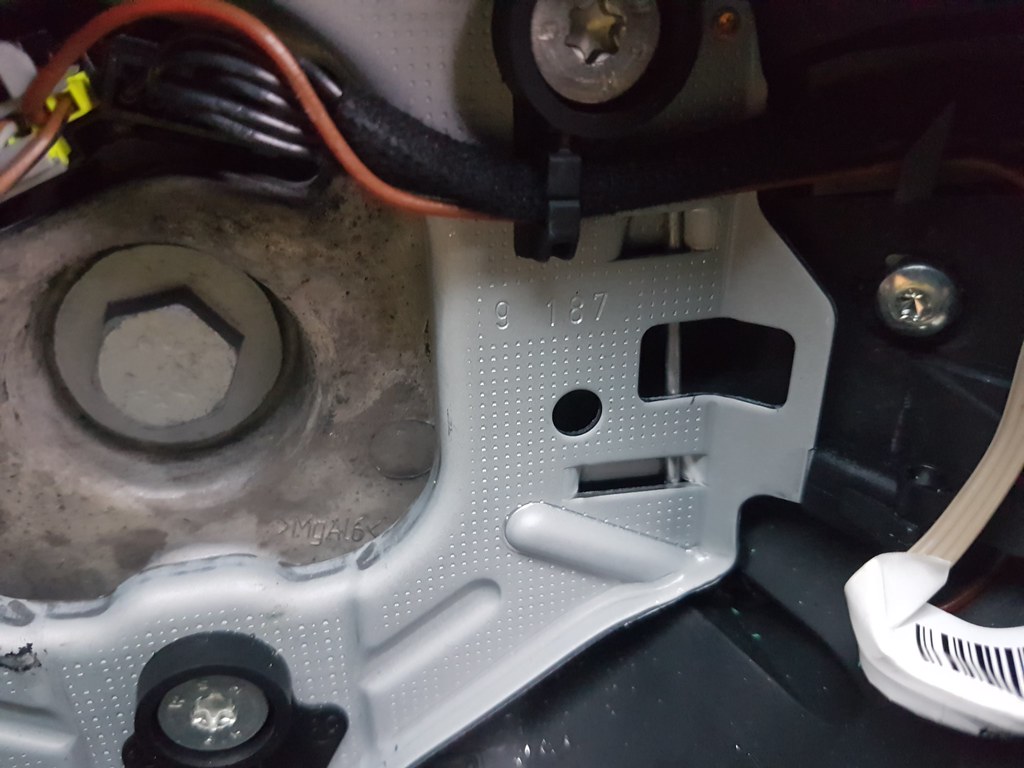 20190107_153819 by [url=https://www.flickr.com/photos/120760751@N02/][/url], on Flickr
Before doing anything airbag related, I made sure to disconnect the battery too. All the screws that hold the steering wheel trim in and the switches are T20 Torx.
Switches side by side:
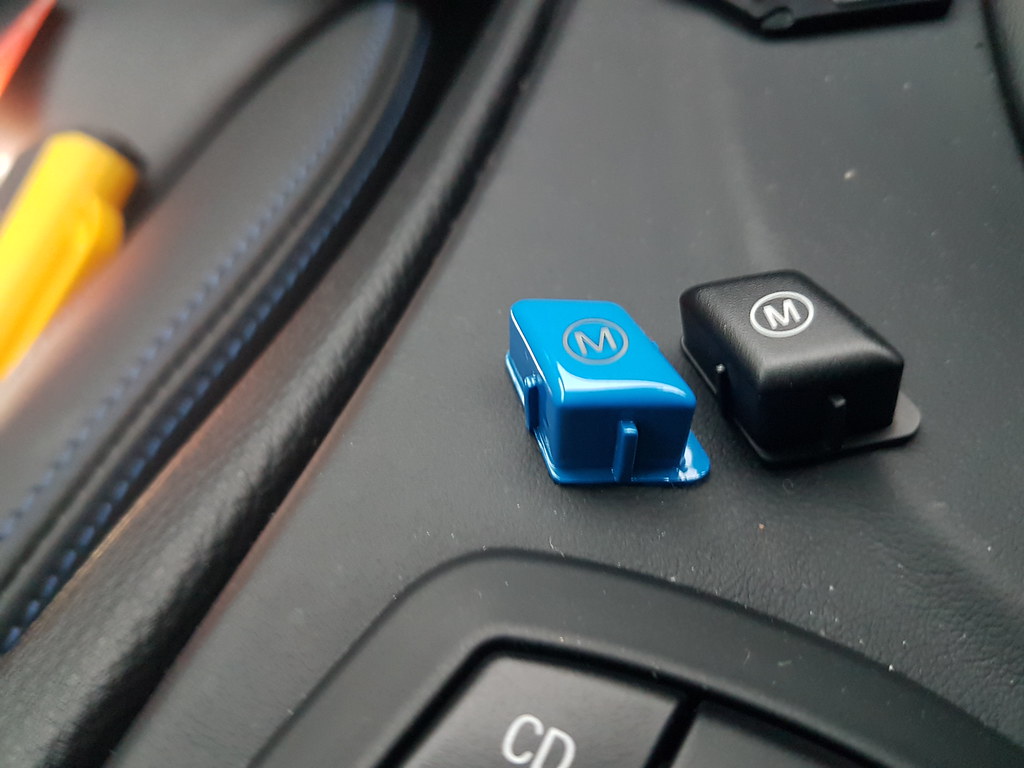 20190107_153232 by [url=https://www.flickr.com/photos/120760751@N02/][/url], on Flickr
Installed button:
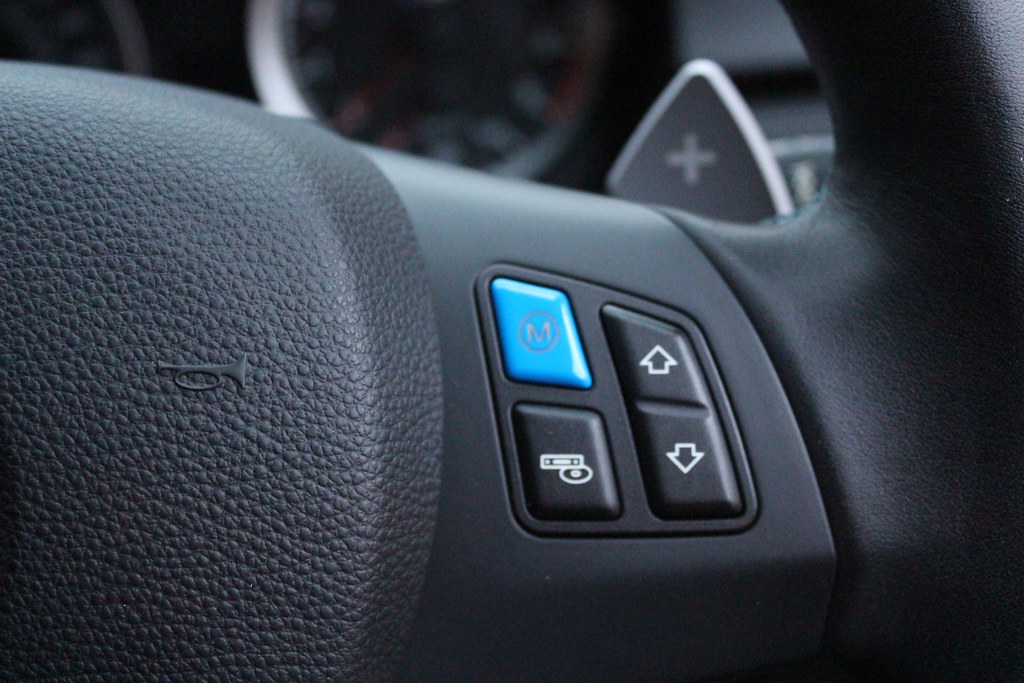 IMG_5010 by [url=https://www.flickr.com/photos/120760751@N02/][/url], on Flickr
Both together:
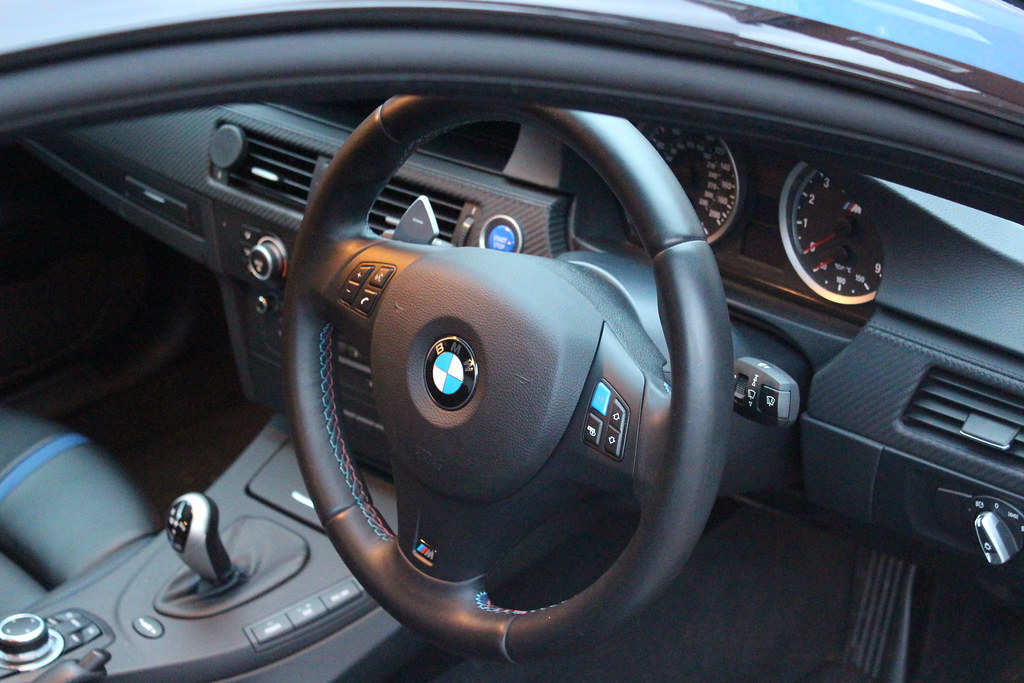 IMG_5012 by [url=https://www.flickr.com/photos/120760751@N02/][/url], on Flickr
I like the change and think it goes well - the thing that I'm not going to be able to live with long term is the fact that the steering wheel button has silver / grey writing and not white like the original. It's also a noticeable shade of blue different to the start button. It'll do for now though.
While the battery was disconnected, I hardwired the connectors for my Ctek battery conditioner. I don't use the car for too many long trips which can be troublesome with these cars in terms of battery discharge. I also had an operation just before xmas so haven't driven the car for a couple of weeks! I connected the cable to the live of the battery and an earthing point nearby (not the negative terminal as this will confuse the intelligent battery sensor). Sorry about the poor image but you get the idea:
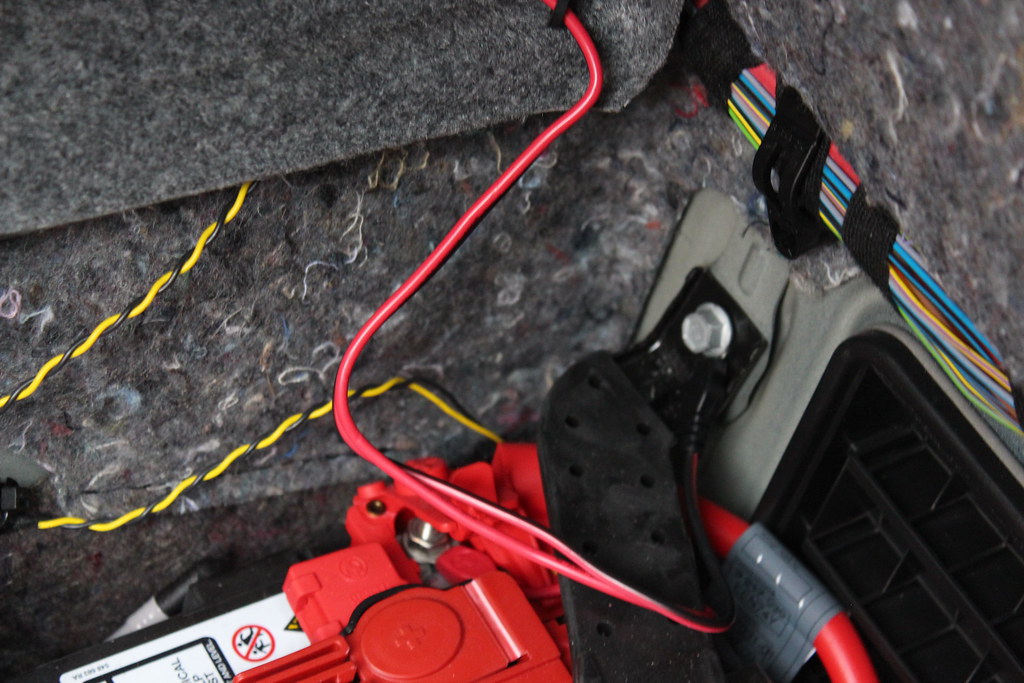 IMG_4997 by [url=https://www.flickr.com/photos/120760751@N02/][/url], on Flickr
The connector just pokes out from the trim panel now:
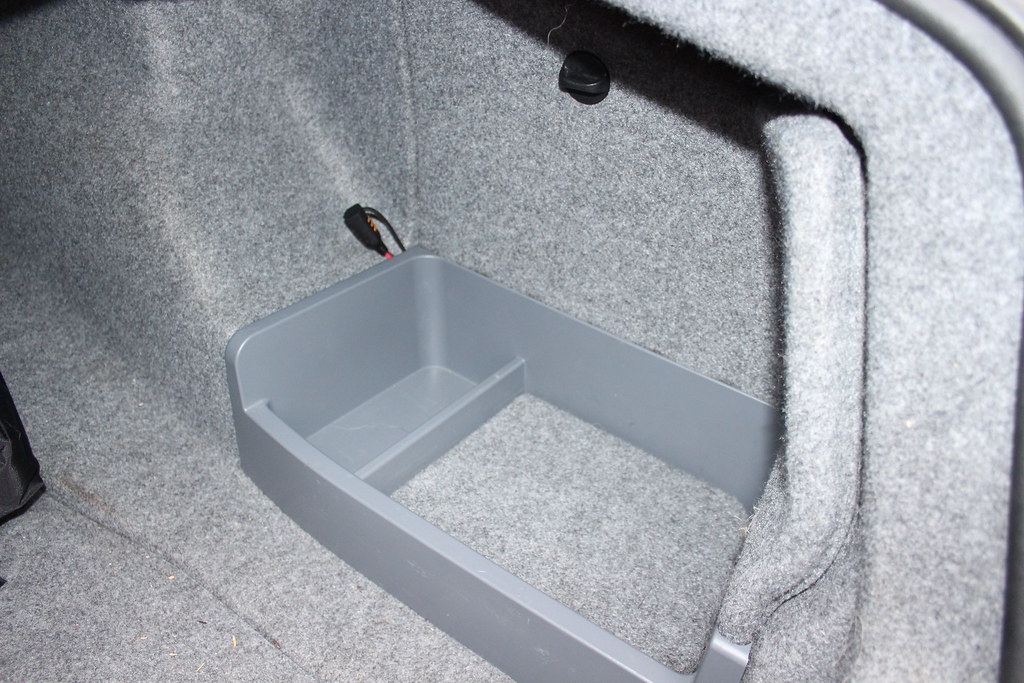 IMG_5001 by [url=https://www.flickr.com/photos/120760751@N02/][/url], on Flickr
I have a 2m extension cable for it which I can plug in easily - once the electrics in the garage are upgraded I'l have a dedicated socket for it near the door.
To finish, I installed the new halo rings I got a couple of weeks ago. The car did have white ones just prior to purchase but one was faulty and the seller put them back to OEM. This is the one thing that really dates the car in my opinion but is a simple fix.
As they came:
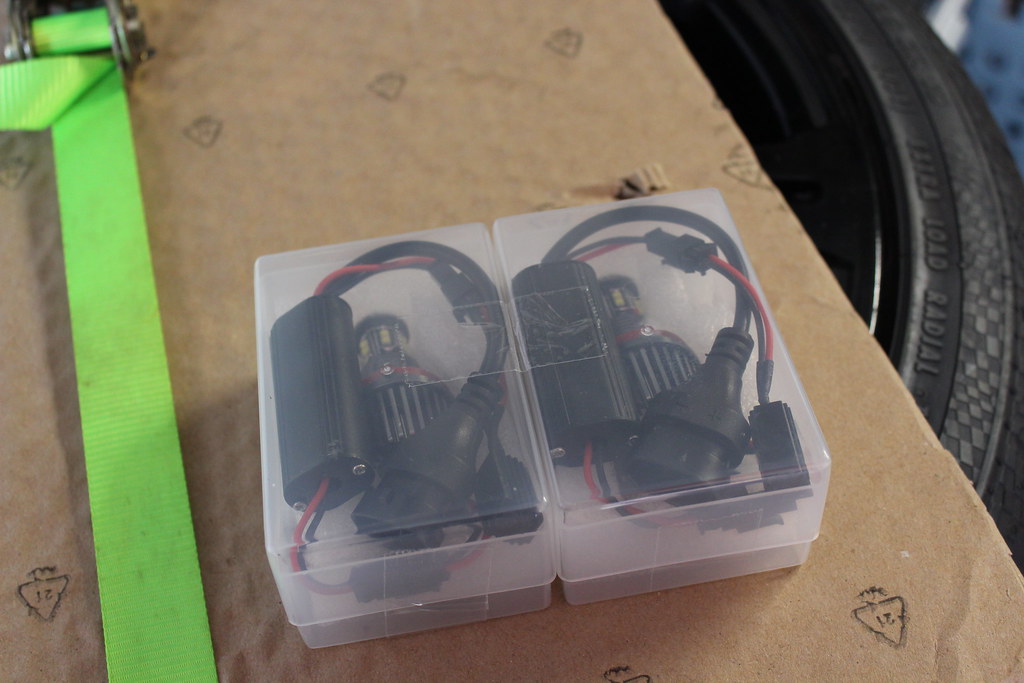 IMG_4982 by [url=https://www.flickr.com/photos/120760751@N02/][/url], on Flickr
One unboxed:
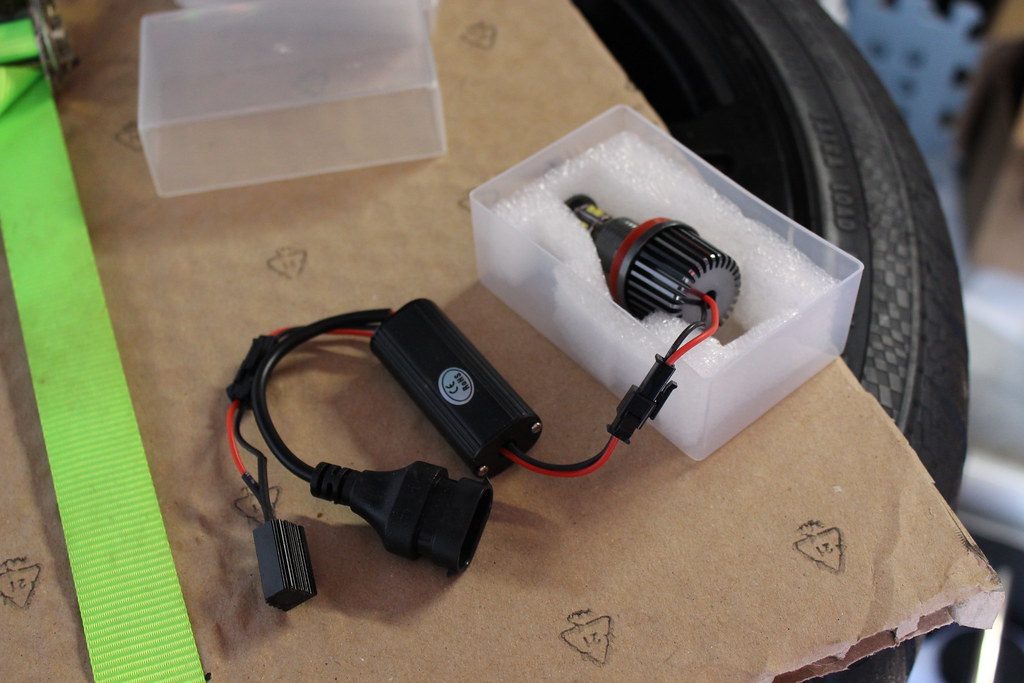 IMG_4983 by [url=https://www.flickr.com/photos/120760751@N02/][/url], on Flickr
Simply pop open this cover:
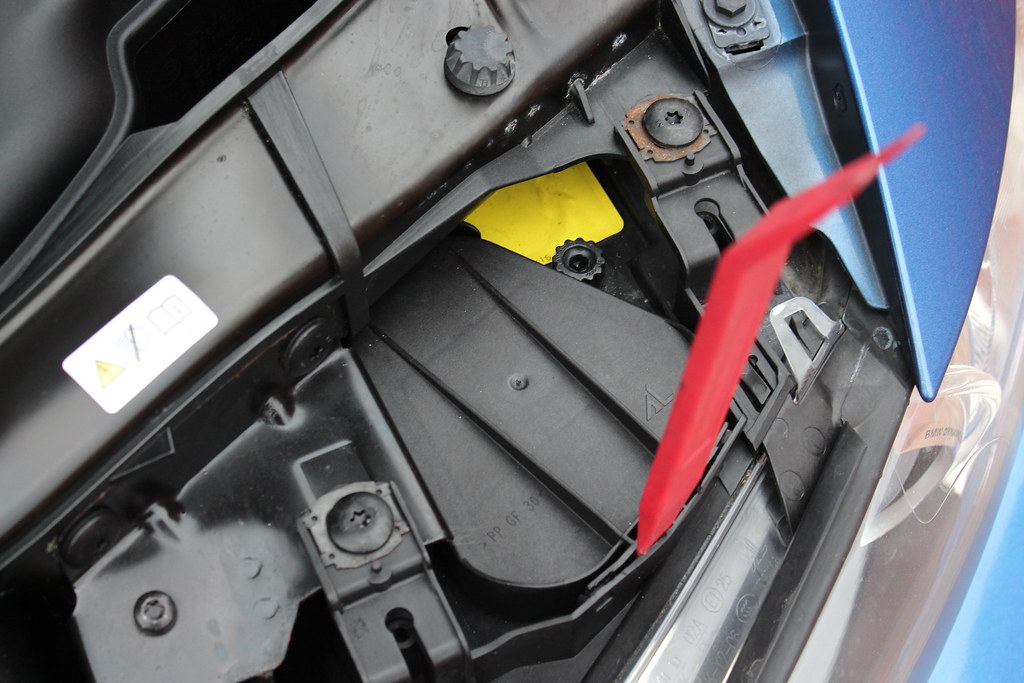 IMG_4990 by [url=https://www.flickr.com/photos/120760751@N02/][/url], on Flickr
Wiring gubbins exposed:
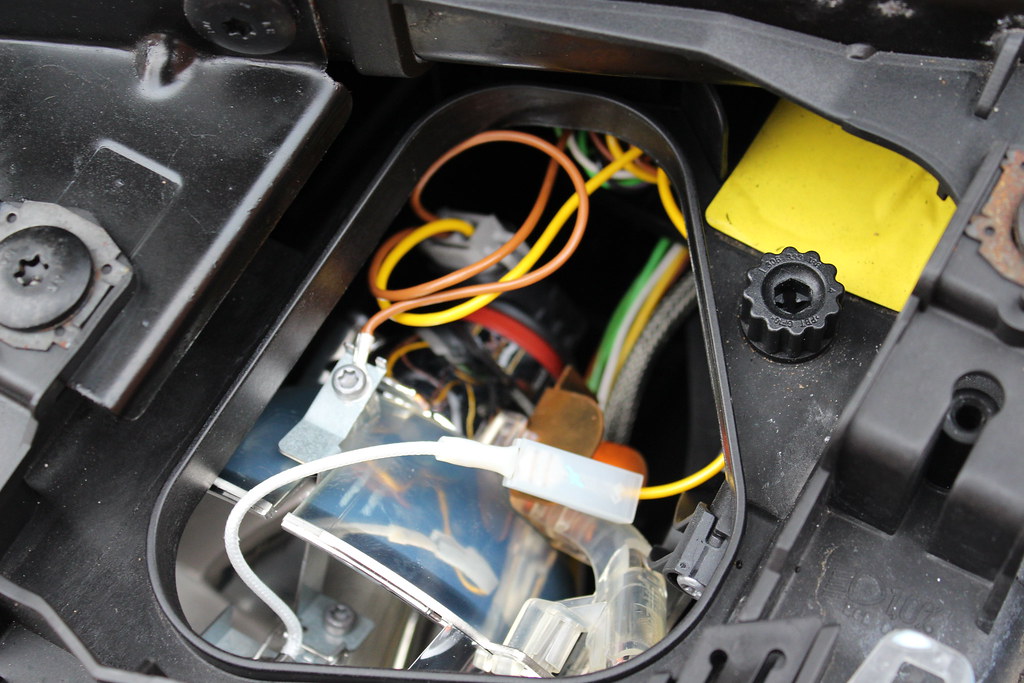 IMG_4985 by [url=https://www.flickr.com/photos/120760751@N02/][/url], on Flickr
Bulb removed before being set aside carefully:
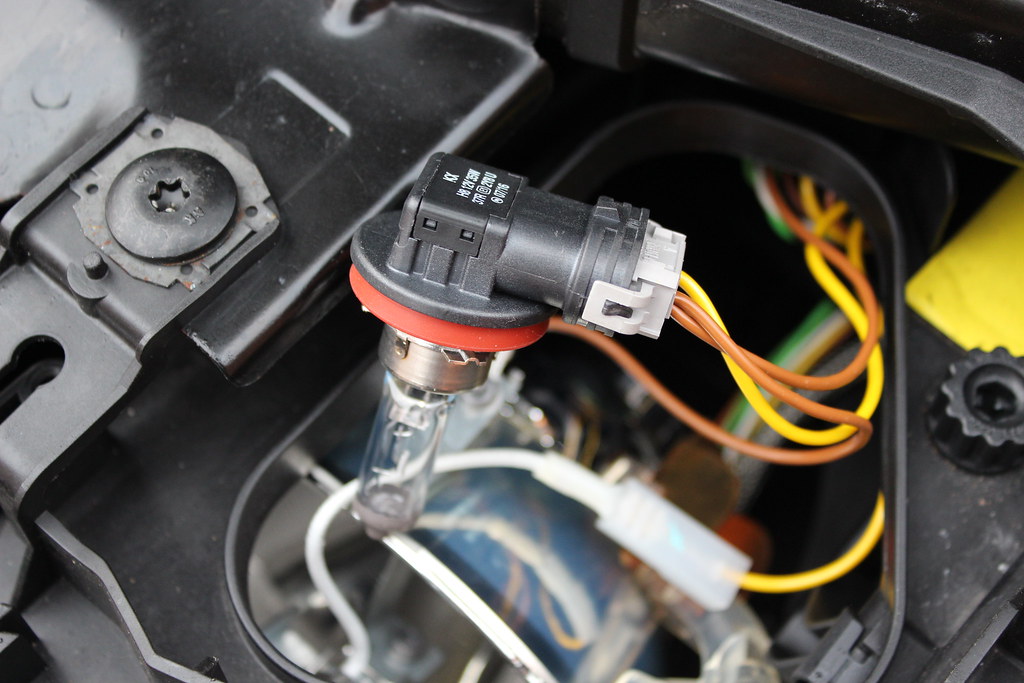 IMG_4986 by [url=https://www.flickr.com/photos/120760751@N02/][/url], on Flickr
Getting the new ones in is a bit of a faff as you have to reverse the bulb into the gap first before inserting it into the holder. I used a cable tie to keep the front of the new bulb horizontal ready to guide into the hole. Again, you'll know what I mean if you ever try this yourself.
Here's one done and one OEM:
 IMG_4988 by [url=https://www.flickr.com/photos/120760751@N02/][/url], on Flickr
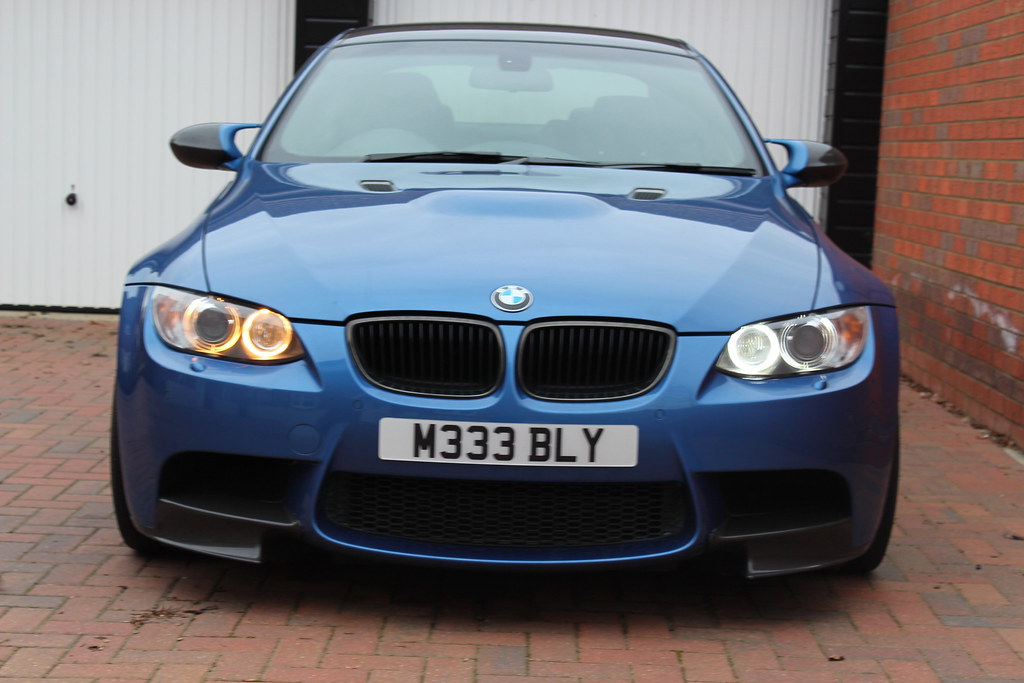
Both done:
 IMG_4991 by [url=https://www.flickr.com/photos/120760751@N02/][/url], on Flickr
The camera fills the headlight with light where it's not lit in real life. I'll try and get some more realistic images in the future to tell the difference. After all that, I was glad to come indoors as it was bloody freezing!
Thanks for reading.
First up was a new starter button. A lot of folk go for the traditional red but having a blue car with the blue accents on the leather I thought I'd go with blue as a starter button. It was quite a simple job really and it only takes a few minutes to do.
First step was to use a trim removal tool to get behind the trim panel and pull it out just enough to get to the back of the switch. The switch is released by pushing in on both sides of the body which lets it pop out as below:
20190107_142601 by [url=https://www.flickr.com/photos/120760751@N02/][/url], on Flickr20190107_142722 by [url=https://www.flickr.com/photos/120760751@N02/][/url], on FlickrThe next bit is simply unclipping the old switch, remembering the orientation and replacing it with the new one.
Side by side:
IMG_5004 by [url=https://www.flickr.com/photos/120760751@N02/][/url], on FlickrPushed back in and trim panel secured:
IMG_5008 by [url=https://www.flickr.com/photos/120760751@N02/][/url], on FlickrNot bad:
IMG_5006 by Matt Bly, on FlickrNext up was a blue steering wheel 'M' button. This is likely to be a more marmite mod but it's easily changed and I thought it would go well with the starter button. The process is a bit of a pain but it's one of those things that once you do once, it's easy. The first time is a right sod!
The airbag removal is the tricky part as you have to locate some almost invisible slits on the back of the wheel which you'll swear blind aren't actually there. Trust me, they are. Here's a pic of the screwdriver in one:
IMG_5009 by [url=https://www.flickr.com/photos/120760751@N02/][/url], on FlickrThe goal is to press in the clips on either side of the airbag to release it - you can see the thin piece of metal that you have to get to in this picture:
20190107_153819 by [url=https://www.flickr.com/photos/120760751@N02/][/url], on FlickrBefore doing anything airbag related, I made sure to disconnect the battery too. All the screws that hold the steering wheel trim in and the switches are T20 Torx.
Switches side by side:
20190107_153232 by [url=https://www.flickr.com/photos/120760751@N02/][/url], on FlickrInstalled button:
IMG_5010 by [url=https://www.flickr.com/photos/120760751@N02/][/url], on FlickrBoth together:
IMG_5012 by [url=https://www.flickr.com/photos/120760751@N02/][/url], on FlickrI like the change and think it goes well - the thing that I'm not going to be able to live with long term is the fact that the steering wheel button has silver / grey writing and not white like the original. It's also a noticeable shade of blue different to the start button. It'll do for now though.
While the battery was disconnected, I hardwired the connectors for my Ctek battery conditioner. I don't use the car for too many long trips which can be troublesome with these cars in terms of battery discharge. I also had an operation just before xmas so haven't driven the car for a couple of weeks! I connected the cable to the live of the battery and an earthing point nearby (not the negative terminal as this will confuse the intelligent battery sensor). Sorry about the poor image but you get the idea:
IMG_4997 by [url=https://www.flickr.com/photos/120760751@N02/][/url], on FlickrThe connector just pokes out from the trim panel now:
IMG_5001 by [url=https://www.flickr.com/photos/120760751@N02/][/url], on FlickrI have a 2m extension cable for it which I can plug in easily - once the electrics in the garage are upgraded I'l have a dedicated socket for it near the door.
To finish, I installed the new halo rings I got a couple of weeks ago. The car did have white ones just prior to purchase but one was faulty and the seller put them back to OEM. This is the one thing that really dates the car in my opinion but is a simple fix.
As they came:
IMG_4982 by [url=https://www.flickr.com/photos/120760751@N02/][/url], on FlickrOne unboxed:
IMG_4983 by [url=https://www.flickr.com/photos/120760751@N02/][/url], on FlickrSimply pop open this cover:
IMG_4990 by [url=https://www.flickr.com/photos/120760751@N02/][/url], on FlickrWiring gubbins exposed:
IMG_4985 by [url=https://www.flickr.com/photos/120760751@N02/][/url], on FlickrBulb removed before being set aside carefully:
IMG_4986 by [url=https://www.flickr.com/photos/120760751@N02/][/url], on FlickrGetting the new ones in is a bit of a faff as you have to reverse the bulb into the gap first before inserting it into the holder. I used a cable tie to keep the front of the new bulb horizontal ready to guide into the hole. Again, you'll know what I mean if you ever try this yourself.
Here's one done and one OEM:
IMG_4988 by [url=https://www.flickr.com/photos/120760751@N02/][/url], on FlickrBoth done:
IMG_4991 by [url=https://www.flickr.com/photos/120760751@N02/][/url], on FlickrThe camera fills the headlight with light where it's not lit in real life. I'll try and get some more realistic images in the future to tell the difference. After all that, I was glad to come indoors as it was bloody freezing!
Thanks for reading.

I managed to clean the car again today after about 5 weeks (foot op so out of action for a bit). Also managed to get the rest of the fleet cleaned up and out for a snap. It rained this morning after doing the car last night so left some nice beading:
 20190119_085324 by [url=https://www.flickr.com/photos/120760751@N02/][/url], on Flickr
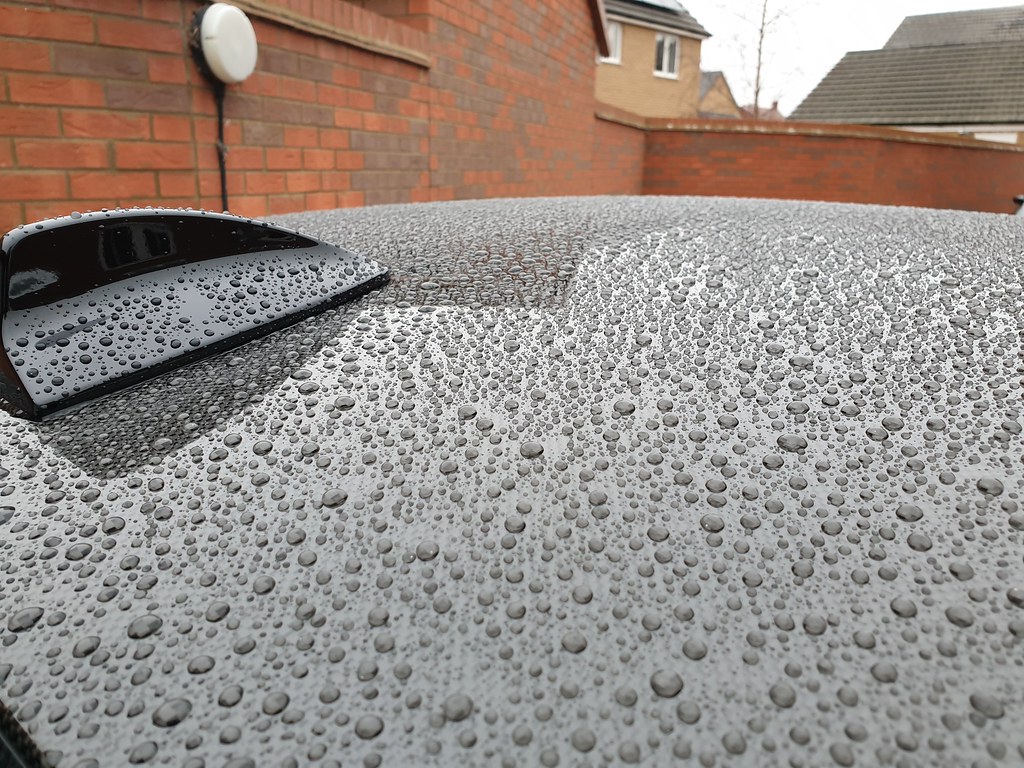 20190119_085349 by [url=https://www.flickr.com/photos/120760751@N02/][/url], on Flickr
 20190119_085308 by [url=https://www.flickr.com/photos/120760751@N02/][/url], on Flickr
All the family together:
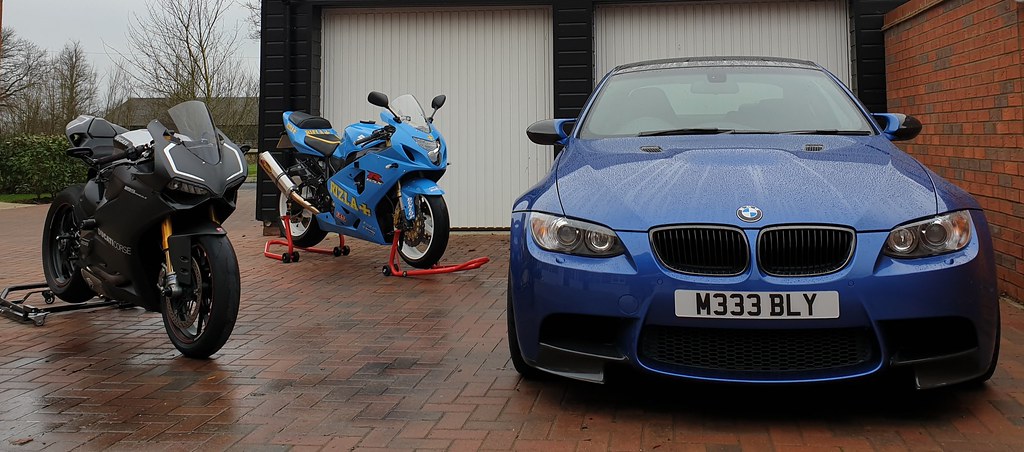 20190119_112510 by [url=https://www.flickr.com/photos/120760751@N02/][/url], on Flickr
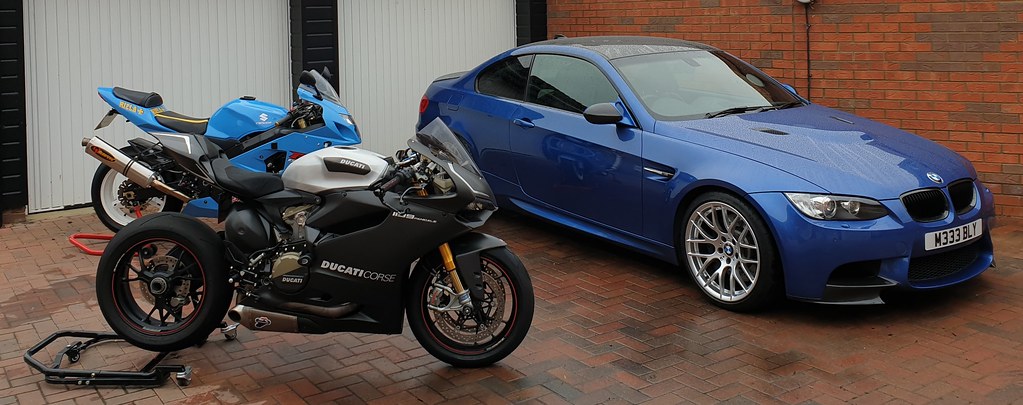 20190119_112607 by [url=https://www.flickr.com/photos/120760751@N02/][/url], on Flickr
20190119_085324 by [url=https://www.flickr.com/photos/120760751@N02/][/url], on Flickr20190119_085349 by [url=https://www.flickr.com/photos/120760751@N02/][/url], on Flickr20190119_085308 by [url=https://www.flickr.com/photos/120760751@N02/][/url], on FlickrAll the family together:
20190119_112510 by [url=https://www.flickr.com/photos/120760751@N02/][/url], on Flickr20190119_112607 by [url=https://www.flickr.com/photos/120760751@N02/][/url], on Flickrhorico said:
13aines said:
I have something similar in my car (sadly not an M3  - but one day).
They work really well - including the controls to pause, change track etc. and invoke Siri.
Why not mount it somewhere subtle and hide all of the wiring so that you can use the controls?
I'll definitely try to find a decent mount location - the lifting of the armrest each time will quickly become tiring. - but one day).They work really well - including the controls to pause, change track etc. and invoke Siri.
Why not mount it somewhere subtle and hide all of the wiring so that you can use the controls?
si_xsi said:
You didn't happen to be in Botley yesterday around midday? If notbi saw an identicle MCB e92 M3!
Given that I had to google where Botley was, it definitely wasn't me! ) and placed my controller just ahead of the arm rest in this car.
 The only thing is, I have to close the arm rest hard onto the cable, but I might file a little groove in the underside of the arm rest to accommodate the cable.


Neat enough for me, and accessible. Just wish it had orange LEDs rather than blue
My headlights and halo rings are quite a yellowy-orange. My car is fitted with Xenons. What bulbs are you using? They look great.
13aines said:
horico said:
13aines said:
I have something similar in my car (sadly not an M3 - but one day).
They work really well - including the controls to pause, change track etc. and invoke Siri.
Why not mount it somewhere subtle and hide all of the wiring so that you can use the controls?
I'll definitely try to find a decent mount location - the lifting of the armrest each time will quickly become tiring. - but one day).They work really well - including the controls to pause, change track etc. and invoke Siri.
Why not mount it somewhere subtle and hide all of the wiring so that you can use the controls?
si_xsi said:
You didn't happen to be in Botley yesterday around midday? If notbi saw an identicle MCB e92 M3!
Given that I had to google where Botley was, it definitely wasn't me!) and placed my controller just ahead of the arm rest in this car. The only thing is, I have to close the arm rest hard onto the cable, but I might file a little groove in the underside of the arm rest to accommodate the cable.
Neat enough for me, and accessible. Just wish it had orange LEDs rather than blue
My headlights and halo rings are quite a yellowy-orange. My car is fitted with Xenons. What bulbs are you using? They look great.
The bulbs are from perfekt lighting via a sponsor on M3Cutters - they're not the full white halos I'd prefer, like those from OSS for example, but will do for now.

C350 said:
Very nice M3!
For future reference, it’s possible to access the steering wheel buttons without removing the airbag. Just undo the screws thst hold in the trim, then with a little wiggling you can get the trim out without touching the airbag
I'll remember that one as I'm not 100% with the steering wheel button yet!For future reference, it’s possible to access the steering wheel buttons without removing the airbag. Just undo the screws thst hold in the trim, then with a little wiggling you can get the trim out without touching the airbag
Oil. For an engine sensitive to both type and temperature of oil where wilful ignorance will lead to the supposed self destruction of rod bearings, engines and your very soul - it's almost beyond belief that the measurement of said life giving substance is left to something that requires you to drive the car before being able to measure the oil level. Some may know this already but for those that don't, the E92 M3 (and most new BMW's now) have no dipstick (except the one behind the wheel, yeah I know - behave yourselves at the back).
Basically, the mighty V8 likes to have roughly 8.8 litres give or take swilling round to make it happy. If it's detected as being at the minimum level the car will warn you with a message as below:
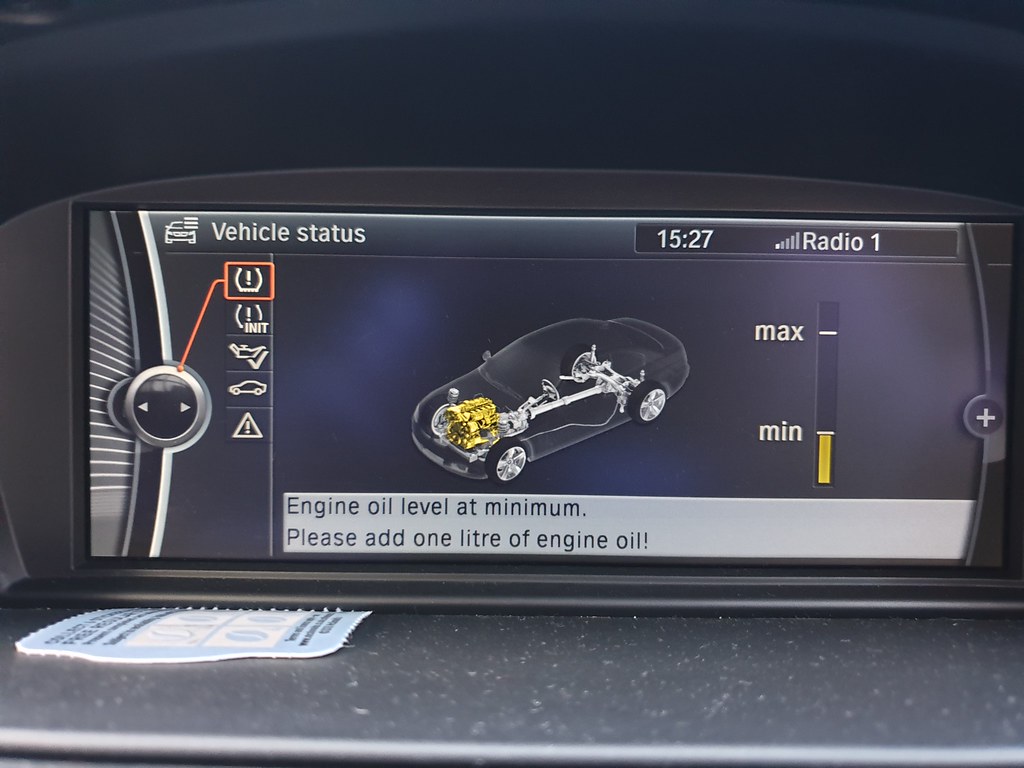 20190130_152757 by [url=https://www.flickr.com/photos/120760751@N02/][/url]
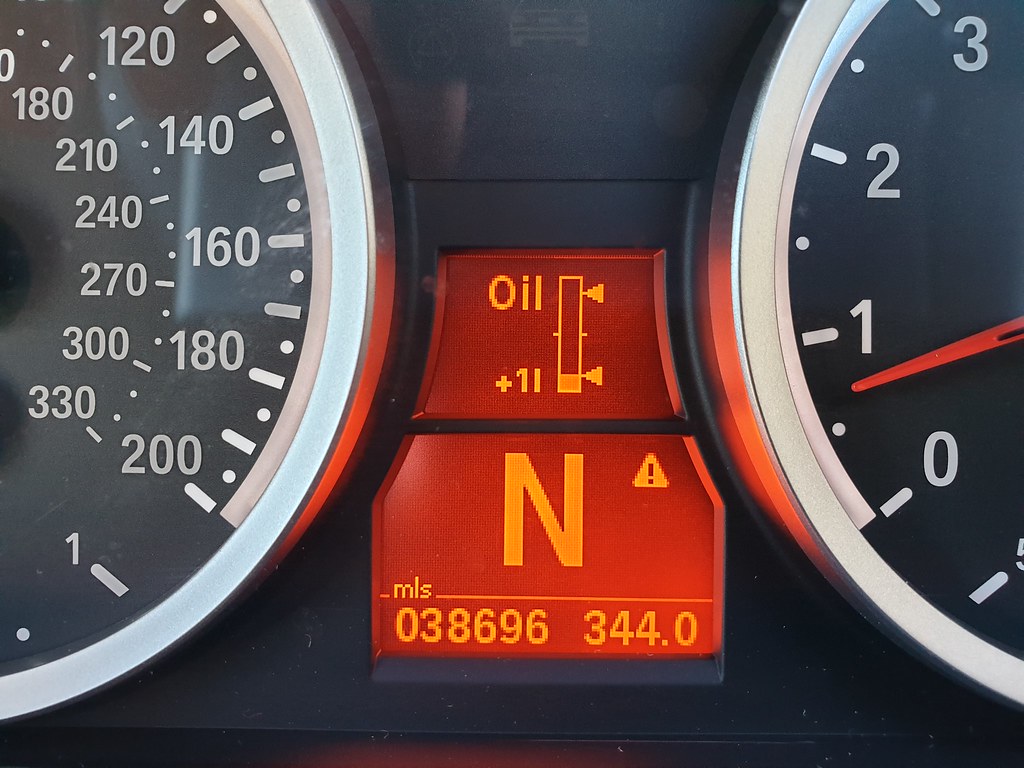
Now you'd be tempted to stick the litre of Castrol's finest 10w-60 and carry on about your day but the internet contains some strange stories of overfilling and trips to the dealer or having to drain it due to putting too much in. I was lucky enough to get this message towards the end of a 300 mile trip which isn't something that happens often at the moment. I got home and purchased both a spare litre and enough for an oil service due to a decent price at Opie Oils and didn't use the car. This is what the dash oil measurement looks like:
 20190128_125158 by [url=https://www.flickr.com/photos/120760751@N02/][/url]
I got the oil and stuck 250ml in before getting the car up to temperature so that the level could be checked again - it needs to get up to temperature and complete 7 miles before giving an up to date reading. Below is the result:
 20190130_152750 by [url=https://www.flickr.com/photos/120760751@N02/][/url]
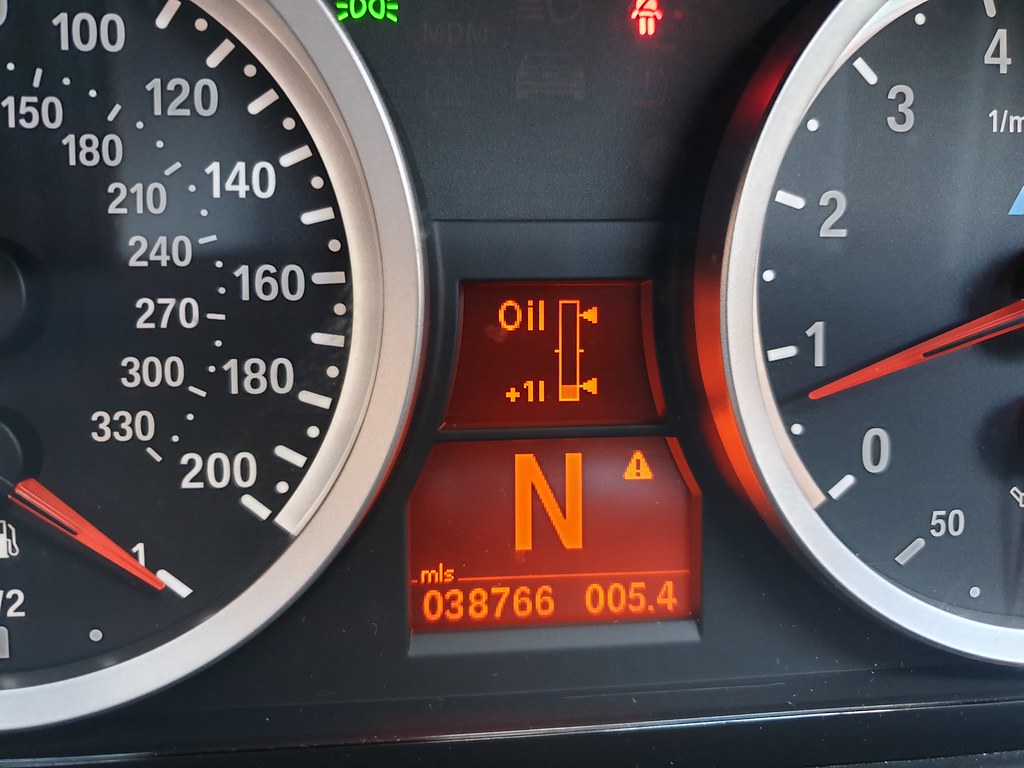
Another 250ml was put in and on driving it again today, it was still saying that the level was low and that I should add a litre of oil (after a slightly longer journey) so while driving I called the Indy I use and asked their advice. While discussing it, the display changed from saying add a litre of oil to the below:
 20190131_131054 by [url=https://www.flickr.com/photos/120760751@N02/][/url]
This was after only 500ml of oil was put in, rather than the litre suggested. It seems to me that the guage isn't the most accurate of inventions and this would explain why there are stories of overfilling! The option to convert to a manual dipstick is 'a pain in the arse' on these apparently so for anyone with a V8 M3, it's slowly slowly catchy monkey when it comes to adding oil.
Basically, the mighty V8 likes to have roughly 8.8 litres give or take swilling round to make it happy. If it's detected as being at the minimum level the car will warn you with a message as below:
20190130_152757 by [url=https://www.flickr.com/photos/120760751@N02/][/url]Now you'd be tempted to stick the litre of Castrol's finest 10w-60 and carry on about your day but the internet contains some strange stories of overfilling and trips to the dealer or having to drain it due to putting too much in. I was lucky enough to get this message towards the end of a 300 mile trip which isn't something that happens often at the moment. I got home and purchased both a spare litre and enough for an oil service due to a decent price at Opie Oils and didn't use the car. This is what the dash oil measurement looks like:
20190128_125158 by [url=https://www.flickr.com/photos/120760751@N02/][/url]I got the oil and stuck 250ml in before getting the car up to temperature so that the level could be checked again - it needs to get up to temperature and complete 7 miles before giving an up to date reading. Below is the result:
20190130_152750 by [url=https://www.flickr.com/photos/120760751@N02/][/url]Another 250ml was put in and on driving it again today, it was still saying that the level was low and that I should add a litre of oil (after a slightly longer journey) so while driving I called the Indy I use and asked their advice. While discussing it, the display changed from saying add a litre of oil to the below:
20190131_131054 by [url=https://www.flickr.com/photos/120760751@N02/][/url]This was after only 500ml of oil was put in, rather than the litre suggested. It seems to me that the guage isn't the most accurate of inventions and this would explain why there are stories of overfilling! The option to convert to a manual dipstick is 'a pain in the arse' on these apparently so for anyone with a V8 M3, it's slowly slowly catchy monkey when it comes to adding oil.
Gassing Station | Readers' Cars | Top of Page | What's New | My Stuff