Hold(en) my beer - Monaro, Ute and Commodore content
Discussion


SturdyHSV said:
Penelope Stopit said:
Oh well, will look elsewhere
Sorry missed this part, yeah the relay is built in to the pump presumably as it takes +ve / -ve and then there's a separate little plug with the trigger wires, 2 of the 3 (I forget which 2) need to be continuous and it activates the pump.I haven't taken it apart no, I've made enough work for myself with all the other bits to start taking more (presumed) working stuff apart!

Penelope Stopit said:
Play the game......................you have up to now
Pics of the job without the gloves please
Done it all my life, it's good to see others giving it their best shot
Cheers
I shall get some more pics, it's a proper mess in there though, so hearing you've done it all your life has certainly added to the stage fright Pics of the job without the gloves please
Done it all my life, it's good to see others giving it their best shot
Cheers


As there's a) so much space and b) so many wires, I've made most of the main bunch longer than necessary so I can loop it up into the recess out of the way. Perhaps with hindsight not the best way to go about it, certainly not in terms of being photogenic... but it's helped with working through it.

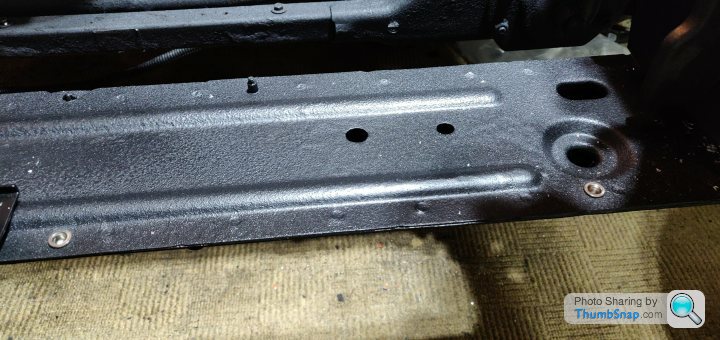
Considering the loom can't be seen, it's good to have the joined area up higher than the rest of it as this helps any water that may get in to run out rather than stay there
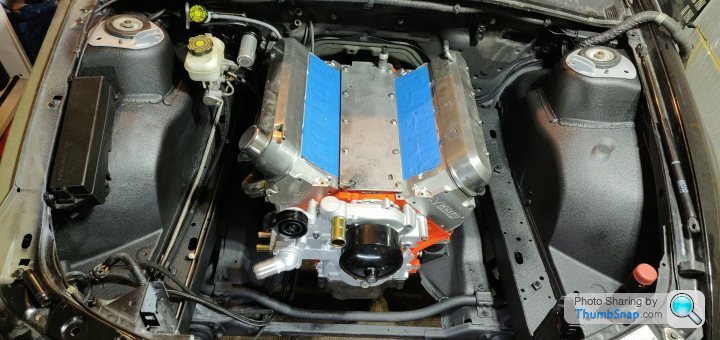
Looks stunning with the engine in position
Cheers
Coming along real nice. Not checked in for a while.
Sorry to do this to you :-) but I found this website....
https://showtimecustomsfabrication.com/products/ir...
They have some very attractive goodies, full knuckles , raised rack front subframes, with extra lock, all sorts.
Tubular rear subframe is just too temping.
Enjoy browsing.
Also I have found out the rear subframe bolts which are torque to yield, and a obscure size(m14 x 1.5pitch x177mm) are now obsolete from GM , to the point breakers in Australia are advertising used ones for sale!, had to order some stronger ones from US which are Re-usable, at £70 posted , the only one place I could find selling them in the correct size and strength
Edited by fred bloggs on Thursday 22 April 23:18
fred bloggs said:
Coming along real nice. Not checked in for a while.
Sorry to do this to you :-) but I found this website....
https://showtimecustomsfabrication.com/products/ir...
They have some very attractive goodies, full knuckles , raised rack front subframes, with extra lock, all sorts.
Tubular rear subframe is just too temping.
Enjoy browsing.
Also I have found out the rear subframe bolts which are torque to yield, and a obscure size(m14 x 1.5pitch x177mm) are now obsolete from GM , to the point breakers in Australia are advertising used ones for sale!, had to order some stronger ones from US which are Re-usable, at £70 posted , the only one place I could find selling them in the correct size and strength
That's a very lovely website Sorry to do this to you :-) but I found this website....
https://showtimecustomsfabrication.com/products/ir...
They have some very attractive goodies, full knuckles , raised rack front subframes, with extra lock, all sorts.
Tubular rear subframe is just too temping.
Enjoy browsing.
Also I have found out the rear subframe bolts which are torque to yield, and a obscure size(m14 x 1.5pitch x177mm) are now obsolete from GM , to the point breakers in Australia are advertising used ones for sale!, had to order some stronger ones from US which are Re-usable, at £70 posted , the only one place I could find selling them in the correct size and strength
Edited by fred bloggs on Thursday 22 April 23:18
 good to see some interesting bits being made for them, that rear subframe looks pretty serious!
I've been sorely lacking motivation of late, I thought the bank holiday would spur me in to action but no.
Last night I did at least go in the garage, took the brake booster back off, fractionally widened two of the holes in the firewall / brace and now the hydraulic brake booster fits in nicely.
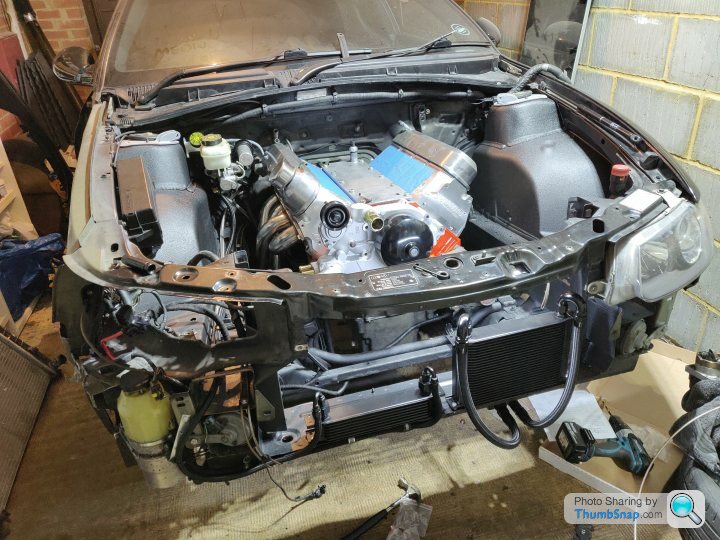
Bit of a pic, no intake manifold on as I sold the injectors (have some LSA injectors and adapters to go on)

Perhaps now that's in place I'll get around to actually making up the PS lines...

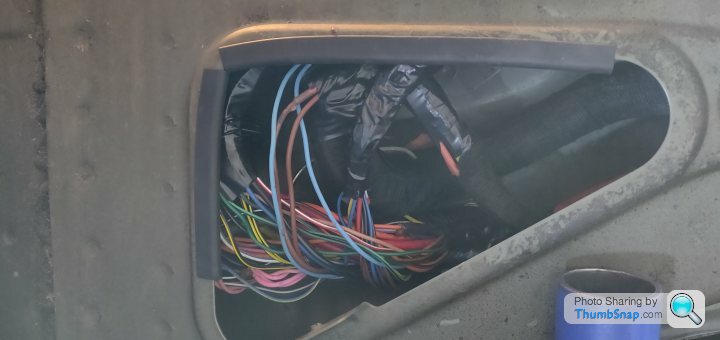
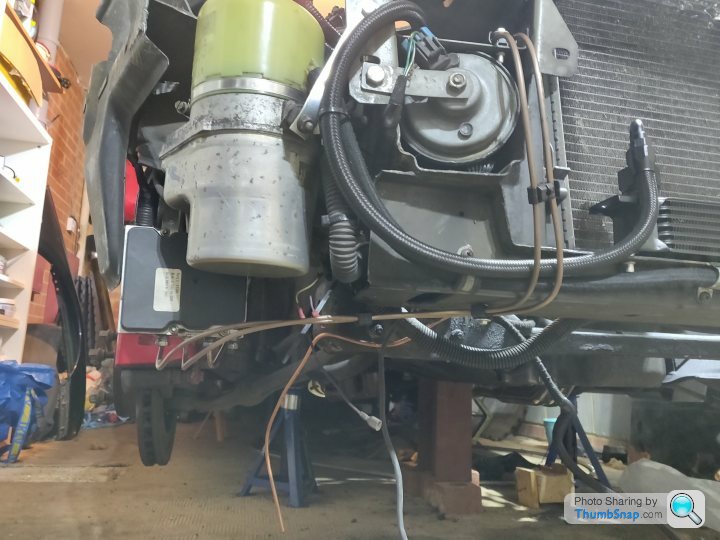
Haven't really touched the wiring since it was 'finished' (soldered anyway), still looks like this:
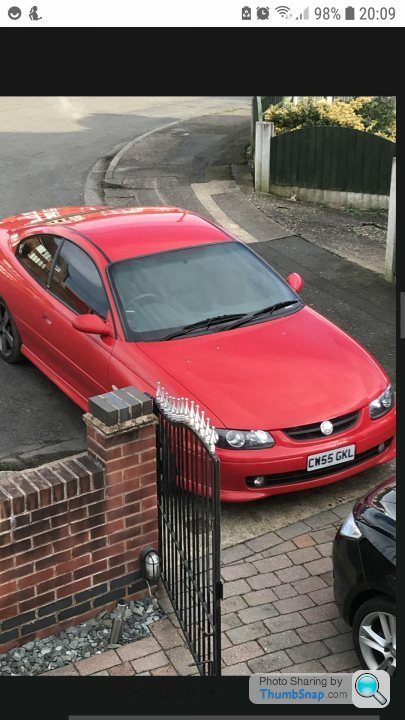
Got a budget of £10k to buy a Monaro when an inheritance comes through later in the year.
I saw this on another forum, saying it might be for sale sometime. So I asked if I could have first dibs.
Don't have the cash yet so it's a bit of a stretch right now. But tell me what we think?
I had a message back;
Monaro its up for sale next week for £7k.
its got 155k miles with a stamped service book for most. I have put new water pump, battery and tyres on it.
The paint is OK but has some marks on it.
the interior is good but bonnet pull, gear gaiter and volume control on steering wheel need attention (have spare).
it has stainless steel exhaust and decatted, sounds great.
has MOT until November I think.
its the big boot lower tax model.
I then asked some questions. And got the answers:
the bigger boot version has fuel tank under the boot and has single exhaust where later small boot has fuel tank behind seats meaning boot is smaller but has the twin tail pipes.
Road tax is £265 I think the later ones I think are £400 plus.
it has cruise control but aircon doent work.
The guy who had it before be had it MOTd without cats and when straight through.
Now personally I think I should avoid. ?
Mileage isn't a concern, ask if it's been rust proofed and if no evidence, I'd want some bloody good pictures or to go and look under it yourself.
Also any weird gearbox noises / difficulty selecting gears.
Otherwise it's bloody cheap, under 10k you're going to be in non-VXR territory so roll the dice I guess, personally I've found MOT testers are often a bit friendlier if it's an interesting car, but otherwise nah it won't pass a legit MOT without cats.
SturdyHSV said:
Mileage isn't a concern, ask if it's been rust proofed and if no evidence, I'd want some bloody good pictures or to go and look under it yourself.
Also any weird gearbox noises / difficulty selecting gears.
Otherwise it's bloody cheap, under 10k you're going to be in non-VXR territory so roll the dice I guess, personally I've found MOT testers are often a bit friendlier if it's an interesting car, but otherwise nah it won't pass a legit MOT without cats.
The mot mentions rear sub frame corrosion. Also any weird gearbox noises / difficulty selecting gears.
Otherwise it's bloody cheap, under 10k you're going to be in non-VXR territory so roll the dice I guess, personally I've found MOT testers are often a bit friendlier if it's an interesting car, but otherwise nah it won't pass a legit MOT without cats.
SturdyHSV said:
Bravo, you got thereWhen first visiting this topic and seeing a picture of many wires cut through in one place I shouted out to my partner - Oh no, someones cut straight through a big wiring loom, all wires cut in one place...............This could end in tears
No tears then, nicely done
Would have cost big money to get someone in for that job
Penelope Stopit said:
Bravo, you got there
When first visiting this topic and seeing a picture of many wires cut through in one place I shouted out to my partner - Oh no, someones cut straight through a big wiring loom, all wires cut in one place...............This could end in tears
No tears then, nicely done
Would have cost big money to get someone in for that job
Cheers, I was pretty confident that I'd finish it, and even if it now doesn't quite work, I'm happy to crack on and redo it all (albeit with some tears probably When first visiting this topic and seeing a picture of many wires cut through in one place I shouted out to my partner - Oh no, someones cut straight through a big wiring loom, all wires cut in one place...............This could end in tears
No tears then, nicely done
Would have cost big money to get someone in for that job
), my only concern was / is how long it might take to get it right as it was a lot to cut in one go as you say, and concerned whether I'll have introduced weird little electrical gremlins... Time will tell anyway!Not sure why motivation has been at such a low ebb the last couple of weeks, typical millenial, I want the end result but haven't wanted to do the work
One thing that came to light fitting the Hydratech (that's the brand of the hydraulic brake booster), the extra length of said booster means the clutch reservoir won't bolt to the end of the brake master cylinder like it did originally. Where the master bolts through to the booster means I have a couple of bolt ends to use to make a bit of a bracket though, so won't be a big issue, and another opportunity to try my hand a a bit of, and I use the term loosely, 'metalwork'.
Penelope Stopit said:
Can't see any but if there were any twisted pairs or screened cables then there could be a problem, as for standard electrical circuits all should be good
Cheers
There were a few loosely twisted pairs that I had to extend, I twisted the extended bits too, guess we'll see with them Cheers
I finally actually got back on with some progress yesterday, was going well and then the cheap crap rivnut tool wore out (after about 20 rivnuts in its lifetime I imagine
will get a better one...I was very lapse with my photography during this progress, but will take some when I carry on, but progress generally consisted of:
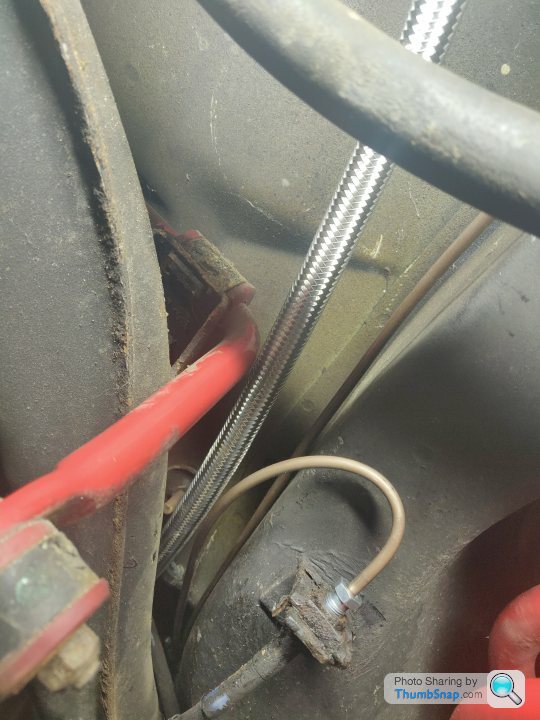
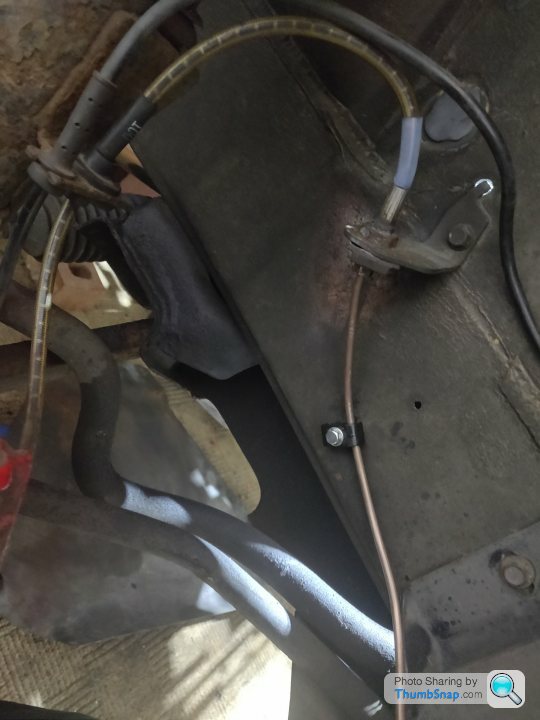
Rear left brake line run from abs module to flexi at rear, this is the longest line. I'd done them all in copper, but am doing them again in kunifer as it's better by all accounts.
Also did the front right, which is the shortest line. By then I'd gotten bored of brake lines, so I got on with the power steering lines. This just involved snipping the braided line (I have some snippers I got from Summit that do a tidy job of cutting it cleanly) and fitting the various AN ends.
Lines were from pump hi to brake booster input.
Brake booster hi output to power steering rack.
Steering rack low pressure return to a T fitting with the brake booster low pressure return.
I was then doing the rivnut fittings for the power steering cooler when the tool expired which sadly halted my progress. Have got the enthusiasm back though to crack on.
I need to order some larger diameter pipe for the lines from the brake master cylinder to the ABS module as well.
I did take a quick picture at the end, can see where the lines run along the chassis rail, should keep the bay looking tidy once I clip them down. I'm going to need a decent rivnut tool for all the clips, I want to keep the lines nice and straight and clean looking as I think that'll help ensure they don't draw the eye. I should have perhaps gone for black braided hose to hide the line better, we shall see if I change my mind on the stainless!
Bit more progress then, first off a tip for when your s t cheap rivnut tool breaks but you want to carry on...
Drill hole and put the rivnut in.
Get a bolt, nut, washer (probably optional) and a grippy washer spikey thing (technical term)

Screw this weird assembly into the rivnut

Put a spanner on the nut to hold it still (and once tight, the grippy spikey thing stops the rivnut from turning) and then tighten the the bolt with another spanner
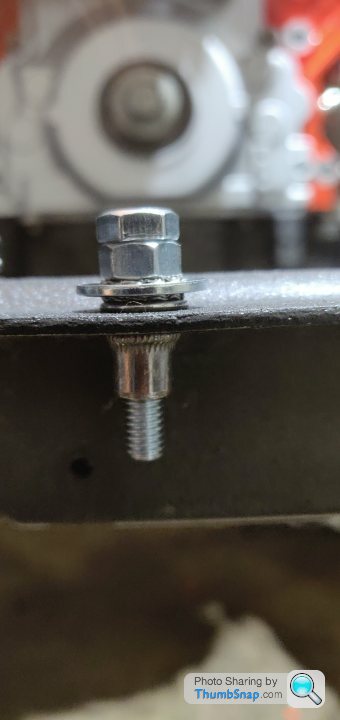
The grippy washer spikey thingies I used were basically disposable in this process, hence you can see the various flattened ones bitten into the washer
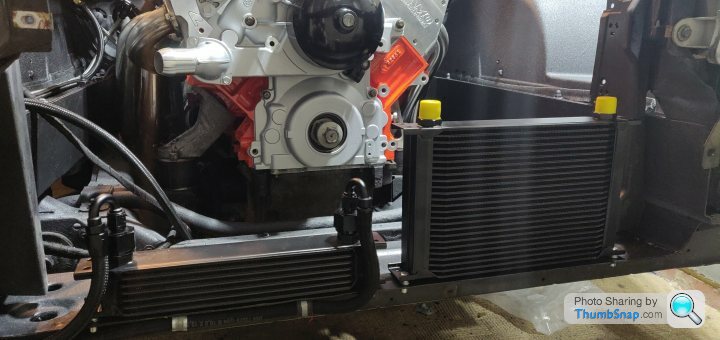
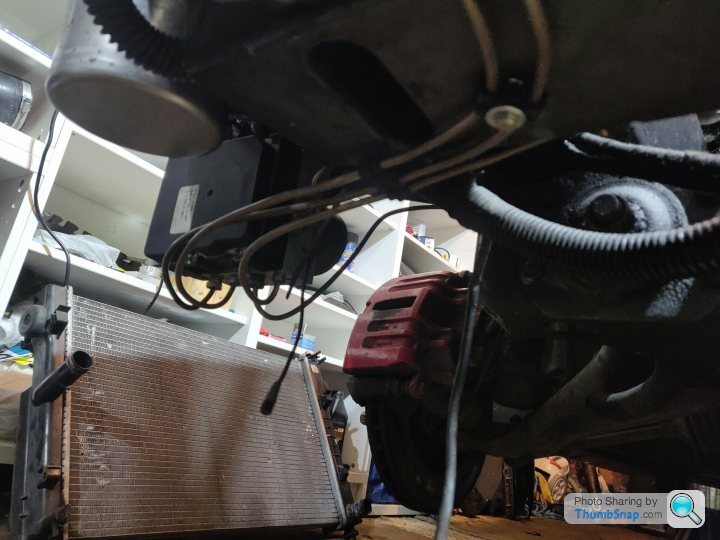
So anyway, that meant I could mount my power steering cooler and oil cooler for a nice picture.
I also routed the low pressure hose and clamped it down nicely
So at this point the power steering is plumbed in, has +ve/-ve and I just need to run the two trigger wires somewhere to switch it on / off.
I'm definitely going to make the stainless braid black as it draws the eye too much in tbr engine bay as it is. Tempted to just quick prime / paint it but mate thinks it'll flake off, so may just tape it up or bite the bullet and buy some black braided hose... May end up painting the brake lines too at this rate once they're in
t cheap rivnut tool breaks but you want to carry on...Drill hole and put the rivnut in.
Get a bolt, nut, washer (probably optional) and a grippy washer spikey thing (technical term)
Screw this weird assembly into the rivnut
Put a spanner on the nut to hold it still (and once tight, the grippy spikey thing stops the rivnut from turning) and then tighten the the bolt with another spanner
The grippy washer spikey thingies I used were basically disposable in this process, hence you can see the various flattened ones bitten into the washer
So anyway, that meant I could mount my power steering cooler and oil cooler for a nice picture.
I also routed the low pressure hose and clamped it down nicely
So at this point the power steering is plumbed in, has +ve/-ve and I just need to run the two trigger wires somewhere to switch it on / off.
I'm definitely going to make the stainless braid black as it draws the eye too much in tbr engine bay as it is. Tempted to just quick prime / paint it but mate thinks it'll flake off, so may just tape it up or bite the bullet and buy some black braided hose... May end up painting the brake lines too at this rate once they're in
Krikkit said:
Looks really good, nice improvising with the rivnuts! It's always a bugger when the cheap tool lets go mid-job.
I'd love to take the credit for the improvisation, but it was something I'd seen on youtube when I'd discovered what a rivnut was and was learning Worked alright though, so don't need to replace the tool immediately as I have decent access to the places I'm likely to need rivnuts to use the two spanner method.
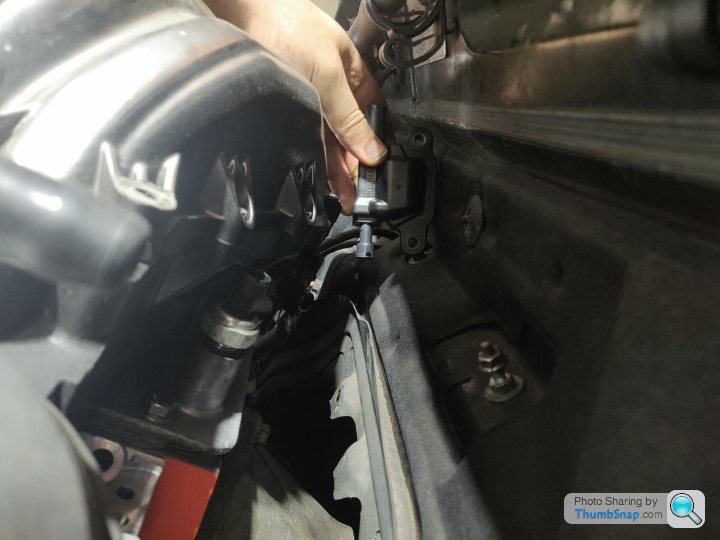
Current nuisance is although I can get some 1/4" brake line for the master cylinder to ABS module, finding a reasonably priced DIN flare tool for it is a nightmare.
Just fitting a few more bits to check clearances of things. Have run the other rear brake line and it's connected to the ABS module, just have the actual fitting to put on and flare at the other end, and then the final brake line to run.
I'm going to have to put the bumper on to really check finally whether the ABS module is safe down there (relatively speaking) otherwise I'll need to find a different washer fluid reservoir / pump so allow me to bring the module up higher.
Probably the wrong order to be checking these things in
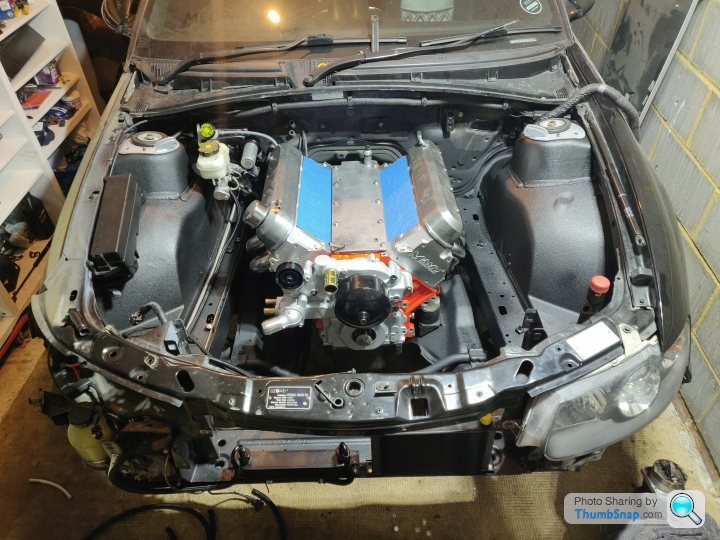
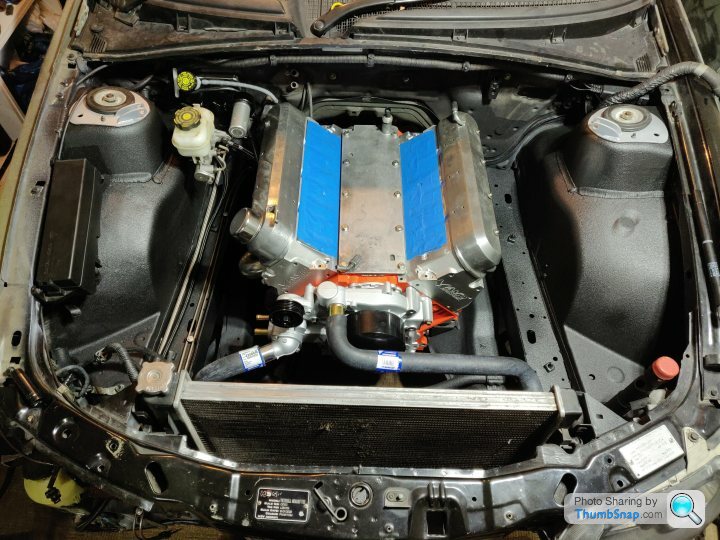
Pleased with how tidy the engine bay still looks despite all the crap that's in there now, I'm optimistic that by keeping things routed cleanly and black in colour it'll still look pretty tidy in there.
It's going to be quite a mess down there once the master cylinder lines are routed too. And obviously a decent front end impact is going to make a right bloody mess of everything, but that's pretty much a given anyway I suppose.
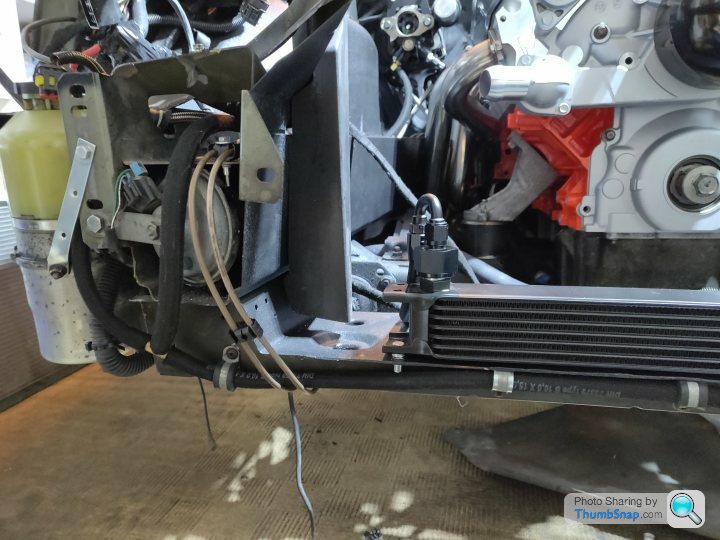
Loosely plumbed in the oil cooler last night, the lines don't stick as far forward as they look in the picture
Think it's time to test fit the bumper and check it clears everything before going too much further, realistically one more brake line (front passenger side, which is an easy one) and I'm running out of reasons to need the engine in there for mocking up.
The thermostat is on the underside, it's appreciably higher than the skid plate that protects the sump, but as it has some threaded holes in anyway I may well bolt a bit of metal over it spaced out a touch that also offers some shielding for the lines, will see where it sits relative to the chin of the bumper to get an idea of whether it's in any real danger.

10AN is overkill for the cooler lines and made them awkward to run, but I wanted to minimise adapters between fitting sizes and also to limit any flow restrictions as much as possible, hence the huge high flow AN fittings too
Think it's time to test fit the bumper and check it clears everything before going too much further, realistically one more brake line (front passenger side, which is an easy one) and I'm running out of reasons to need the engine in there for mocking up.
The thermostat is on the underside, it's appreciably higher than the skid plate that protects the sump, but as it has some threaded holes in anyway I may well bolt a bit of metal over it spaced out a touch that also offers some shielding for the lines, will see where it sits relative to the chin of the bumper to get an idea of whether it's in any real danger.
10AN is overkill for the cooler lines and made them awkward to run, but I wanted to minimise adapters between fitting sizes and also to limit any flow restrictions as much as possible, hence the huge high flow AN fittings too
So 4th and final brake line done last night, an easy one from the front left, and then also flared and connected the rear two which I hadn't done.
Any 'finished' clips I also flipped around (so the opening is against the bodywork, lines cannot escape that way!) and a touch of blue lock tight.
Some pictures for a change, rear left
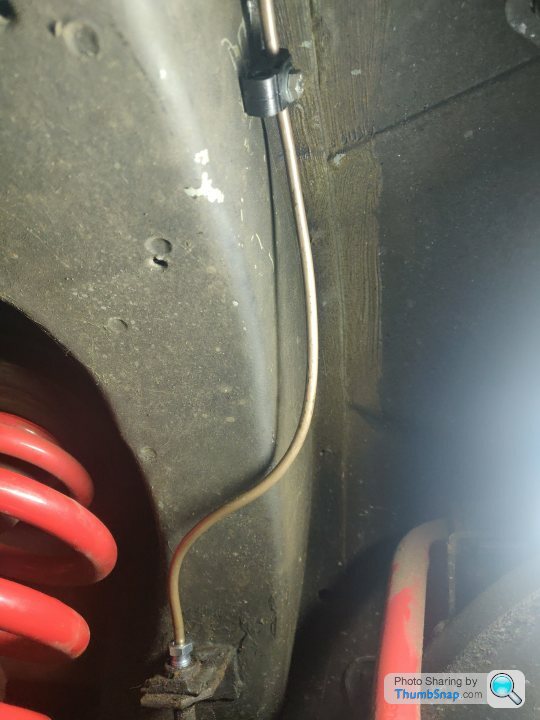
Rear right
Front right
Front left I didn't get a picture of but this is where it joins up with the rear lines and the module, reused an old 4 way clip just to help guide the line and stop them hitting each other
Also started securing the fuel line, am using clamps and just fitting them on top of the brake line clips. The factory clips were a rubber filled square that housed them all together, so trying to keep it a bit similar at least...

I started at about half 9 and it was somehow 10 to midnight at this point so called it there.
I have spotted a better (visually and performance wise) way to route the low pressure return from the rack / brake booster that will place the T join out of sight and also I think better reflect the flow rates of the two systems, will sadly mean having to buy some more of the braided line though as what I have left isn't long enough, d'oh. I shall have to file that under R&D costs / prototyping
Any 'finished' clips I also flipped around (so the opening is against the bodywork, lines cannot escape that way!) and a touch of blue lock tight.
Some pictures for a change, rear left
Rear right
Front right
Front left I didn't get a picture of but this is where it joins up with the rear lines and the module, reused an old 4 way clip just to help guide the line and stop them hitting each other
Also started securing the fuel line, am using clamps and just fitting them on top of the brake line clips. The factory clips were a rubber filled square that housed them all together, so trying to keep it a bit similar at least...
I started at about half 9 and it was somehow 10 to midnight at this point so called it there.
I have spotted a better (visually and performance wise) way to route the low pressure return from the rack / brake booster that will place the T join out of sight and also I think better reflect the flow rates of the two systems, will sadly mean having to buy some more of the braided line though as what I have left isn't long enough, d'oh. I shall have to file that under R&D costs / prototyping
Made a bracket from stainless to hold the clutch fluid reservoir on the hydratech. Not really done any metal work before so it's not great but it'll do the job!

So, thoughts please, I've had this larger billet reservoir for ages, never fitted it. It'll go on the bracket fine, as will the stock plastic one.
I'm half of the mind the plastic insulates it from engine bay heat better, so the metal may mean I end up heating up the fluid unnecessarily, how hot does clutch fluid get normally? The billet one is a decent amount larger and shiny, no other positives...

I've painted the brake master black so it doesn't draw the eye as much once fitted.
Also, with no more fuel hardlines behind the manifold, no more brake boost vacuum hose etc, I can't help but notice how much space I have on the firewall for.... 8 coil packs?
I shall investigate this, as if I can mount them there out the way and run the leads over the manifold / valve covers, I shall be a happy boy.
Oil cooler thermostat is properly mounted on now and I've put secured the cooler down, blue loctite on the bolts and also added another at the rear that will stop it rocking.
Rerouted the power steering low pressure line to the tidier route, have used some old hose initially for the brake booster run but will get some more of the nicer looking stuff for final fitment. More pics later
So, thoughts please, I've had this larger billet reservoir for ages, never fitted it. It'll go on the bracket fine, as will the stock plastic one.
I'm half of the mind the plastic insulates it from engine bay heat better, so the metal may mean I end up heating up the fluid unnecessarily, how hot does clutch fluid get normally? The billet one is a decent amount larger and shiny, no other positives...
I've painted the brake master black so it doesn't draw the eye as much once fitted.
Also, with no more fuel hardlines behind the manifold, no more brake boost vacuum hose etc, I can't help but notice how much space I have on the firewall for.... 8 coil packs?
I shall investigate this, as if I can mount them there out the way and run the leads over the manifold / valve covers, I shall be a happy boy.
Oil cooler thermostat is properly mounted on now and I've put secured the cooler down, blue loctite on the bolts and also added another at the rear that will stop it rocking.
Rerouted the power steering low pressure line to the tidier route, have used some old hose initially for the brake booster run but will get some more of the nicer looking stuff for final fitment. More pics later
Tidied the workshop as it was an absolute mess of metal dust, cutting wheel dust, sawdust and general mess that I had accumulated over the last couple of months. Beyond that didn't make any progress, went to the pub instead

Tidier PS lines, will support the hose off the edge of the chassis with something.
Tidier PS lines, will support the hose off the edge of the chassis with something.
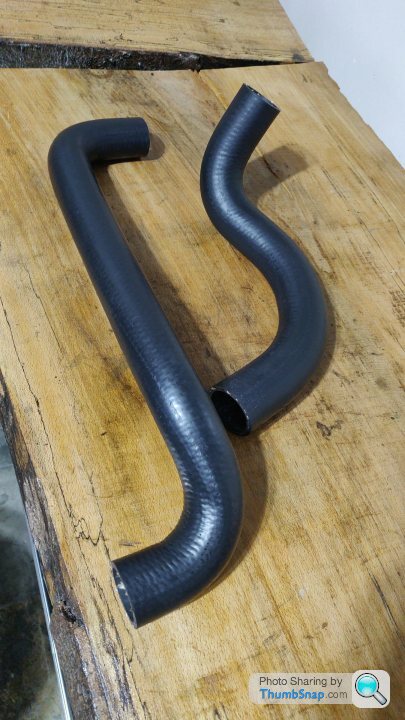
Gave the new coolant hoses a clean which took a surprising amount of effort to get them looking black.
Loosely bolted on the master cylinder to weigh up whether I'd keep the shiny clutch fluid reservoir or use the black painted one, I think I might go with the black one, the extra shiny bit doesn't add much to the overall look I don't think
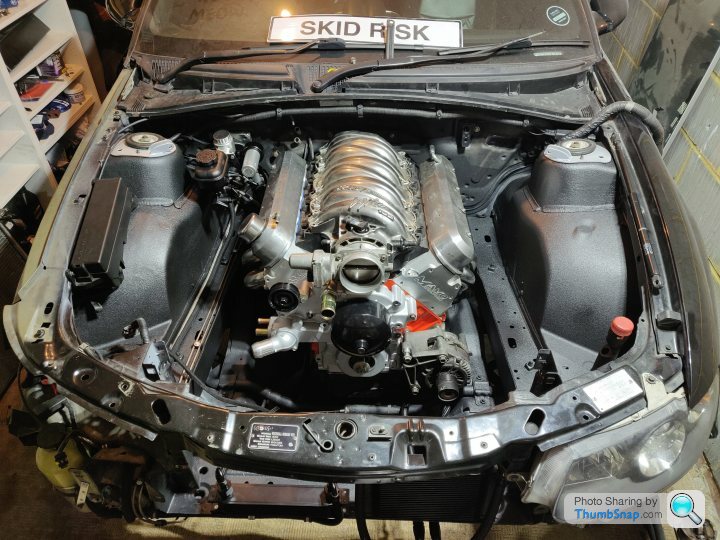
And yes, unofficial project name on the windscreen, was a gift from Camaro some years ago
Gassing Station | Readers' Cars | Top of Page | What's New | My Stuff