Hold(en) my beer - Monaro, Ute and Commodore content
Discussion


Camaro said:
I see you've found your validation.
Orange here, as the colour match looks on point!
The vagueries in your whatsapp responses frequently send me crawling to the internet for support, you're such an abuser Orange here, as the colour match looks on point!

Krikkit said:
Orange finned looks great to me, I like the contrast and it'll sit nicely in that engine bay.
Huskyman said:
Orange valve covers get a vote from me, It will tie in with the colour of the block
It's definitely the tie in with the block that I like, and I do love the colour. djgritt said:
Progress is good, looking great!
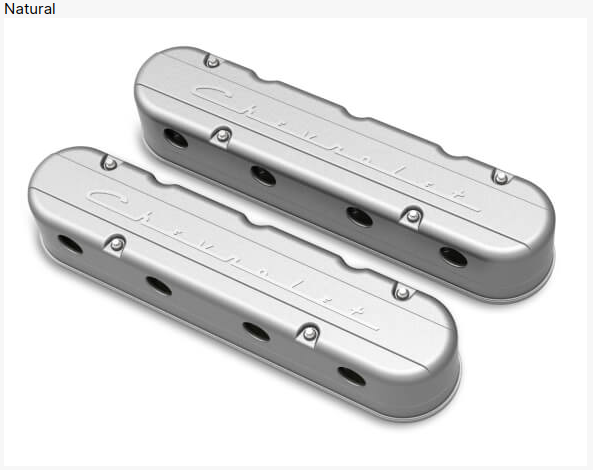
Natural or Black (both Finned) gets my vote. Orange looks good but as someone else said, there could be too much. I think the orange details look better than having it as a main/bulk colour.
Thanks, it's getting to the fun stuff now, although must remember to check 'the list' in all the excitement so I don't forget to refill the gearbox oil for example Natural or Black (both Finned) gets my vote. Orange looks good but as someone else said, there could be too much. I think the orange details look better than having it as a main/bulk colour.

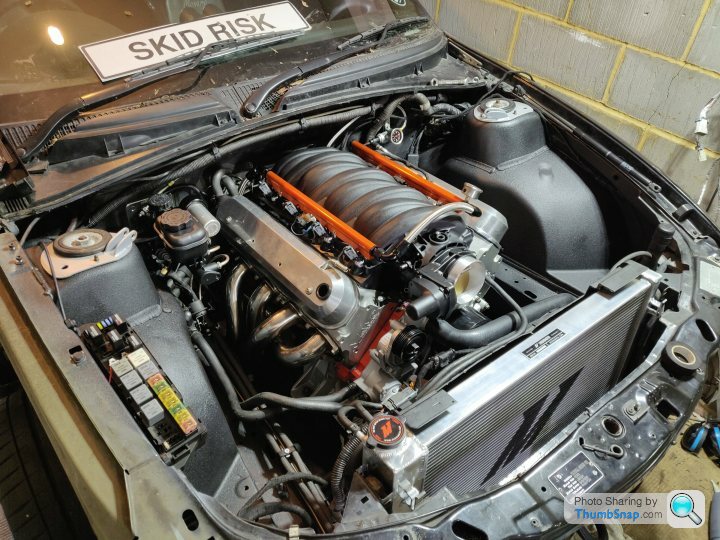
I'm still leaning towards the black finned at this point, my reasoning being:
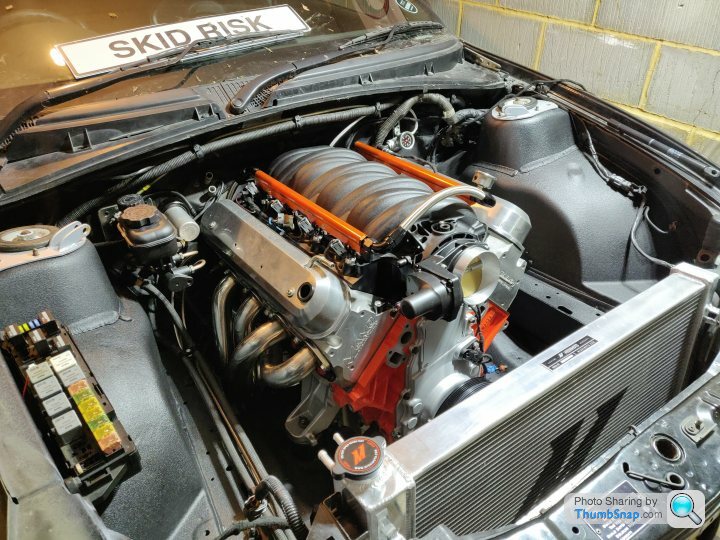
Other than the orange, black and silver fuel rails, the top of the engine (throttle and intake manifold) are black, so the black will tie that together. Then you have the 'middle' so the heads themselves, exhaust headers, water pump (once that goes on) silver, and the block is orange.
I think that the black covers will mean the harness for the injectors and coilpacks will be less noticeable, as they are also black, whereas I think they'll stand out against the orange.
I'm also being a bit of a tart that the chevy orange isn't the same as the fuel rail orange, and I think it'd bug me

I've looked at some pictures of LS engines dressed up with an orange block, bare heads and orange covers, and it didn't work as well for me compared to when they had black covers, because of the black intake manifold tied things together better.
Krikkit said:
That looks absolutely belting, when's the first fire up? 
Joking apart, you've got a theme going which will fit any of the colours available - lots of black, orange and unpainted metals in there, and it'll look great whichever.
Cheers, I'm hoping to give it a go next week, I have the week off and I'm running out of excuses not to try it... There will of course be video, I may loosely bolt some exhaust on initially just to allow me to hear if the engine is eating itself, but if it runs then there will of course be open header fury Joking apart, you've got a theme going which will fit any of the colours available - lots of black, orange and unpainted metals in there, and it'll look great whichever.
I agree it'll look great whichever, which is the bloody problem, as I can picture it looking great for different reasons whichever colour I go for
Classic problem of too much choice!Appreciate all the responses, didn't realise so many people still read the thread


gweaver said:
Good choice. I knew it had to be either au naturel, or black & ribbed..
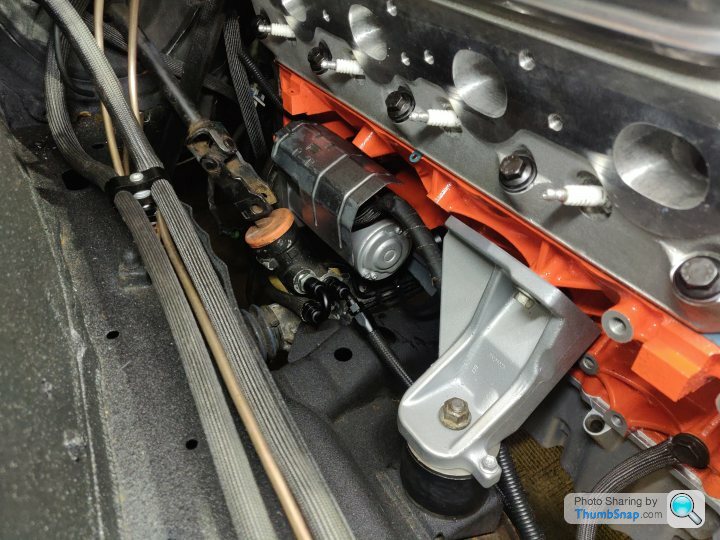
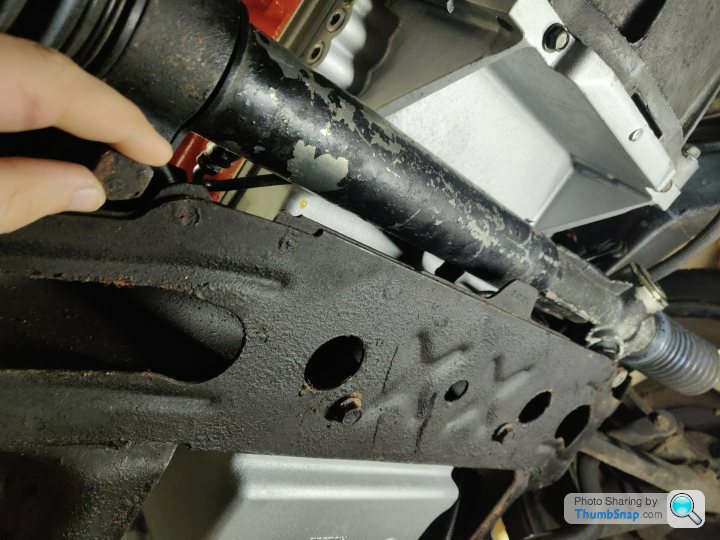
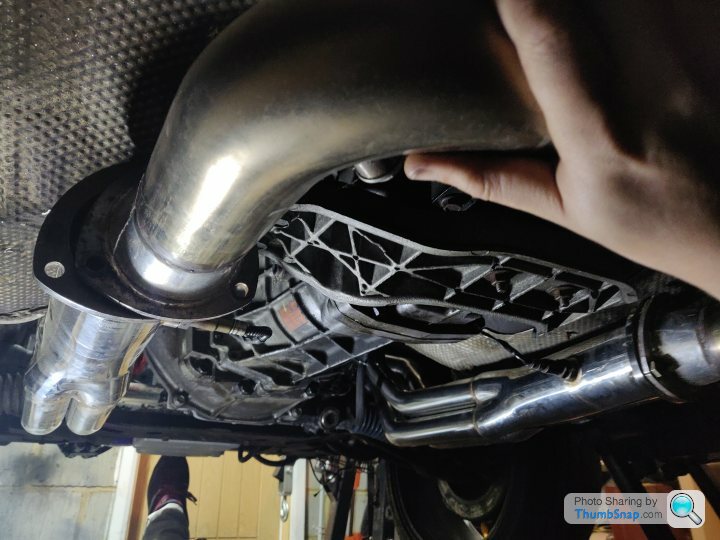
What can I say, for your pleasure of course So this evening was time to put the other header on. When I'd test fit stuff, this looked like it would touch the chassis rail, and it did not disappoint

So, to install a header on the driver's side, despite all the space I've made, you need to drop the steering rack a bit.
There's a weird bolt that I put in a drawer somewhere, then you can disconnect the steering column (I applied the steering lock this time around...) and then underneath the car there are two 19mm bolts to undo.
I left a little slack in the power steering lines, so fortunately don't need to disconnect them to drop the rack.
So yes, with all this new space I've made, may just need to take the rocker cover off, but then just sling the header in from the...

Ah. OK, well from underneath it is then.
This took SO MUCH massaging, must have taken it back in and out about 8 times. Eventually battered enough of it flat to make a gap, which I imagine will still rattle against the chassis rail possibly...
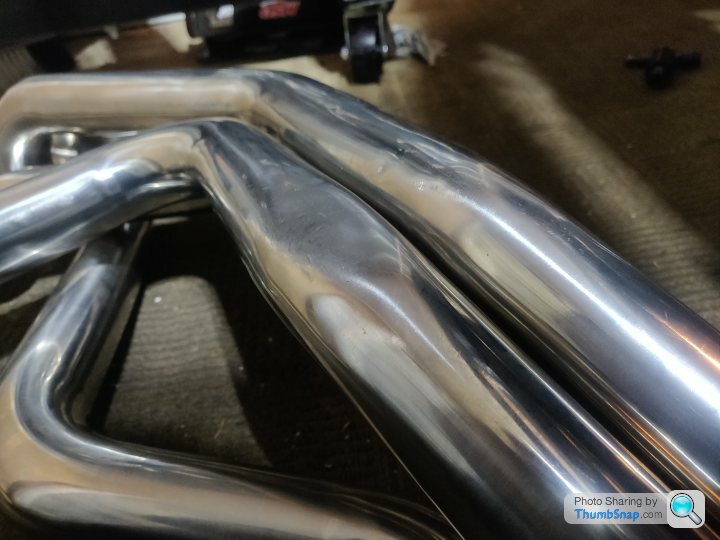
So now for the sexy shots
Shame you can't just leave those off really
So I bolted down the last couple of grounds that bolt to the cylinder heads, have thus also secured one additional point where the whole harness is secured instead of just hanging free.
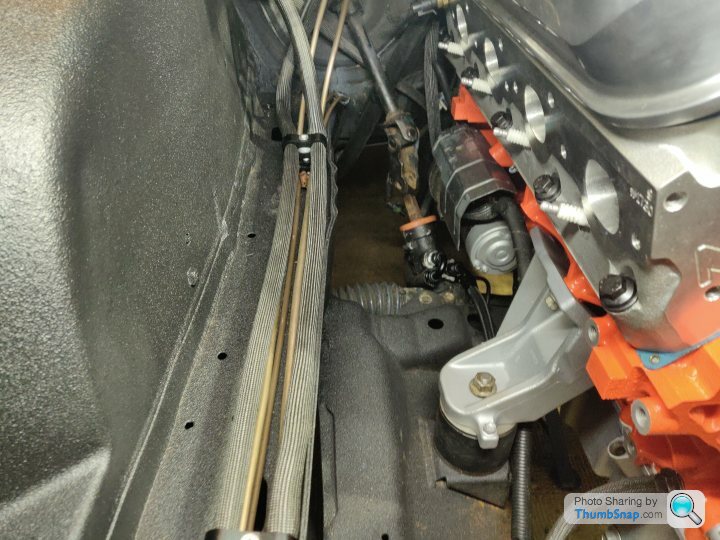
Also hid an additional cable that previously ran across the engine and off the front of it, routed that around the side.

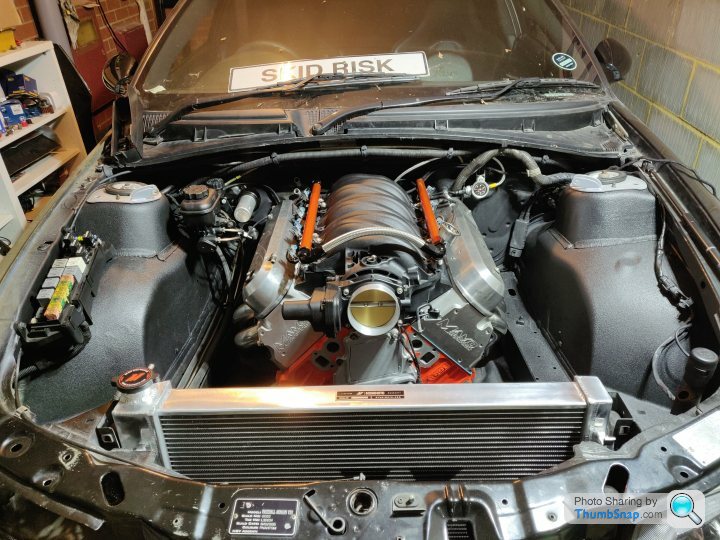
I removed the blue tape over the intake ports (I was getting concerned I'd forget as things got closer...) and have bolted the intake manifold down, and connected up the vacuum source on the back for the HVAC vents.
Not a great deal to show of that, so I have also now bolted the water pump on, with new gaskets of course, and fitted the HVAC hoses. There's a little vacuum operated valve that was mounted with a plastic clip. This through sheer lack of foresight is now exactly where one of my mounts are for the brake lines / PS lines, so the clip now mounts this valve too proud of the arch. I'll ideally need to find a way to secure that although it's held in place by all the hoses as they're a formed shape.

I thought I might as well do some checking that all the coolant stuff fits too, so the fans went back on. Naturally being American made, the mishimoto radiator is a perfect fit, except bits need some trimming
It's actually because they've fitted a nice bleed valve which slightly interferes with the radiator shroud plastic, so I just trimmed a corner off
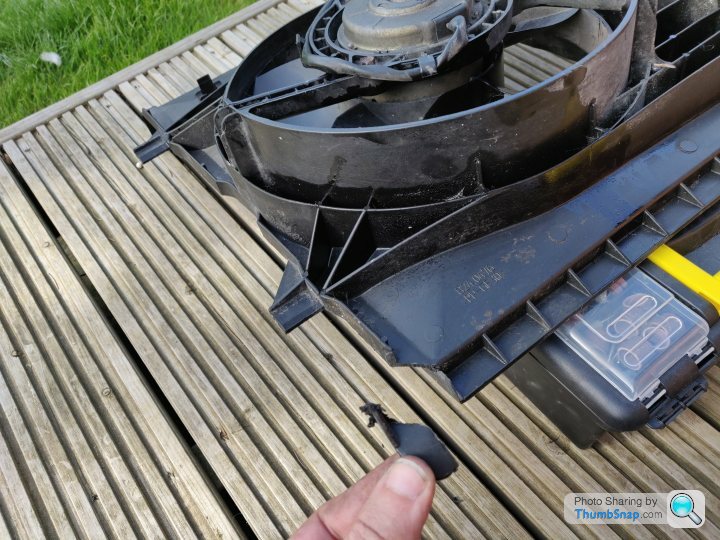
So that's now in there sitting flush, the overflow line is in and the steam vent port line is connected too. These both seemed a bit excessive in length so I trimmed them down to fit more tidily.
I need to get some O2 sensor extensions as the long tubes put the sensors much further back, just trying to source a pair that can arrive quickly.
I'm also painting the dipstick handle in the chevy orange as it's normally yellow and I couldn't face that
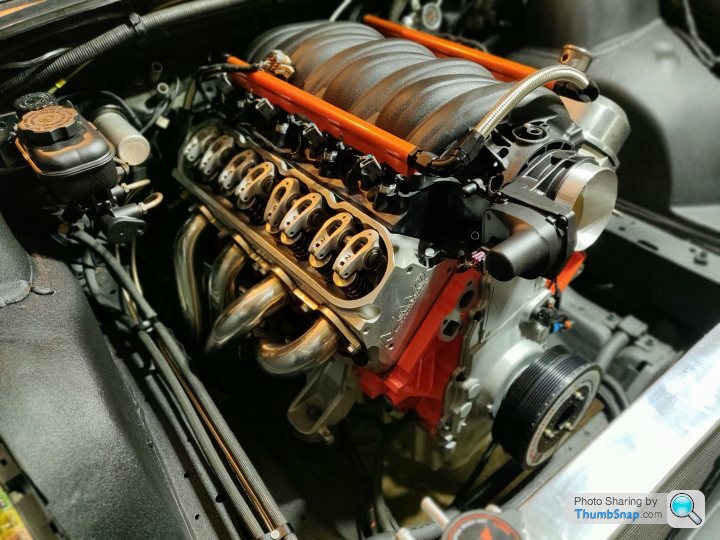
So this is how it looks at the moment, the alternator won't be going on just yet, I want to prime the oil system and the alternator blocks the port I'll use to do that. Once that's on I can put the accessory belt on.

Also hid an additional cable that previously ran across the engine and off the front of it, routed that around the side.
I removed the blue tape over the intake ports (I was getting concerned I'd forget as things got closer...) and have bolted the intake manifold down, and connected up the vacuum source on the back for the HVAC vents.
Not a great deal to show of that, so I have also now bolted the water pump on, with new gaskets of course, and fitted the HVAC hoses. There's a little vacuum operated valve that was mounted with a plastic clip. This through sheer lack of foresight is now exactly where one of my mounts are for the brake lines / PS lines, so the clip now mounts this valve too proud of the arch. I'll ideally need to find a way to secure that although it's held in place by all the hoses as they're a formed shape.
I thought I might as well do some checking that all the coolant stuff fits too, so the fans went back on. Naturally being American made, the mishimoto radiator is a perfect fit, except bits need some trimming
It's actually because they've fitted a nice bleed valve which slightly interferes with the radiator shroud plastic, so I just trimmed a corner off
So that's now in there sitting flush, the overflow line is in and the steam vent port line is connected too. These both seemed a bit excessive in length so I trimmed them down to fit more tidily.
I need to get some O2 sensor extensions as the long tubes put the sensors much further back, just trying to source a pair that can arrive quickly.
I'm also painting the dipstick handle in the chevy orange as it's normally yellow and I couldn't face that
So this is how it looks at the moment, the alternator won't be going on just yet, I want to prime the oil system and the alternator blocks the port I'll use to do that. Once that's on I can put the accessory belt on.
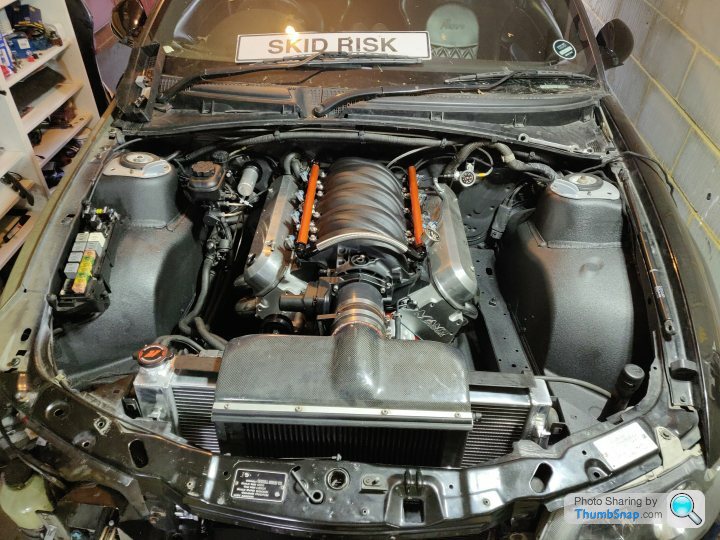
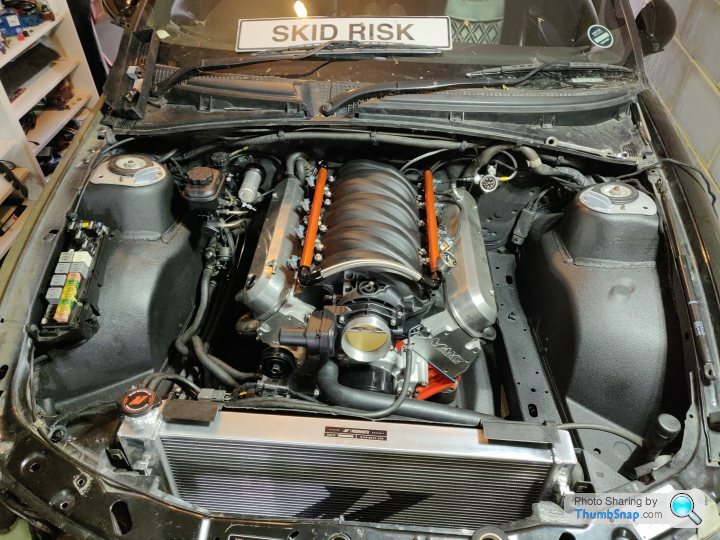
Popped the MAF and the intake on, I'm fairly sure the radiator is sitting a bit high, I'd read that some people have had to trim down the rubber bushings on the bottom of the radiator, so will have to check that when the bonnet goes back on.
Pleased that it's still looking fairly tidy despite basically being good to go
Looking great. I like the natural alloy colour of the covers.
Are they proflow headers ? The drivers side is a prick to fit for sure. What mounts do you have? I had some tough mounts which were mad harsh and made the headers hit the rail, I now went over to torque master ones and have no hitting on the chassis,and are much more compliant. incidentally, I had no problem with length of 02 wiring, weird.
Are they proflow headers ? The drivers side is a prick to fit for sure. What mounts do you have? I had some tough mounts which were mad harsh and made the headers hit the rail, I now went over to torque master ones and have no hitting on the chassis,and are much more compliant. incidentally, I had no problem with length of 02 wiring, weird.
fred bloggs said:
Looking great. I like the natural alloy colour of the covers.
Are they proflow headers ? The drivers side is a prick to fit for sure. What mounts do you have? I had some tough mounts which were mad harsh and made the headers hit the rail, I now went over to torque master ones and have no hitting on the chassis,and are much more compliant. incidentally, I had no problem with length of 02 wiring, weird.
Not proflow I don't think, they're from an Aussie guy over here who imports a few bits now and then, they're from a shop in Sydney.Are they proflow headers ? The drivers side is a prick to fit for sure. What mounts do you have? I had some tough mounts which were mad harsh and made the headers hit the rail, I now went over to torque master ones and have no hitting on the chassis,and are much more compliant. incidentally, I had no problem with length of 02 wiring, weird.
I have Hinson poly mounts, the slightly lower ones. Also have a trans mount that I gave the Window Weld treatment (filled the gap in the mount with window weld which stiffens it up a little).
Strange with the O2 wire length, mine are absolutely nowhere near!
Progress continues... So, I need to extend my O2 sensor wires to reach for the long tube headers (after some research to debunk the Internet myth that the sensor 'breathes through the wire' so can't be soldered...)
DENSO who make the sensors say:
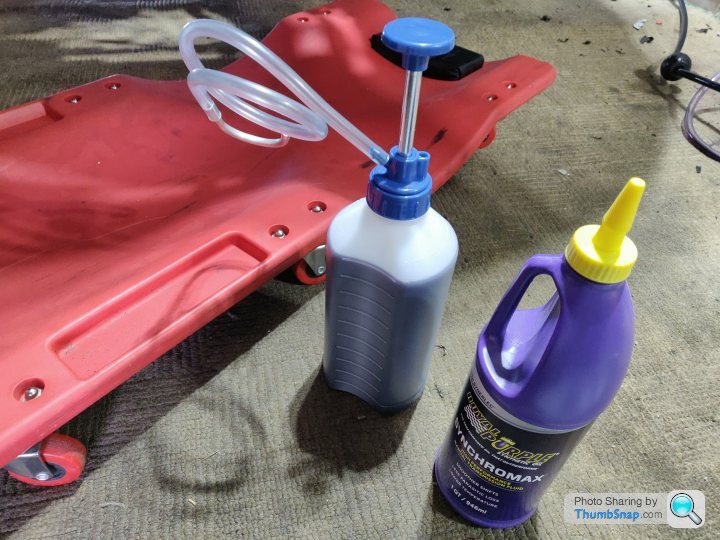
Anyway, Internet BS aside, I'll be doing that shortly, and in the mean time I decided to try and prime the oil system.
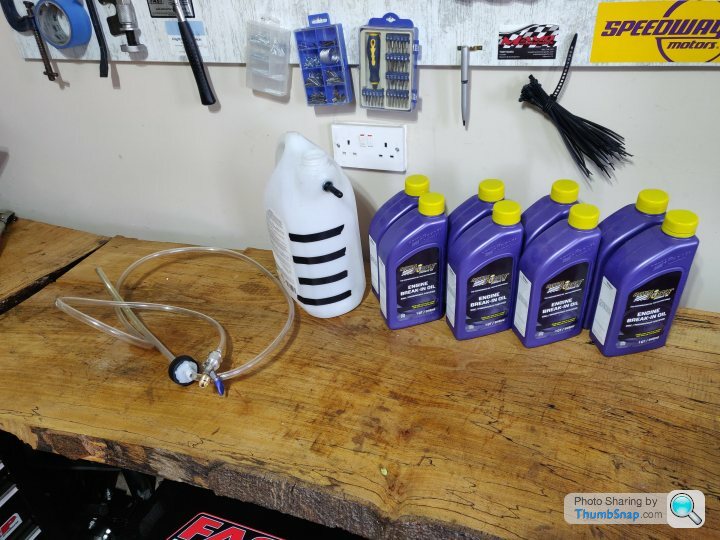
Connected up fine with a one way valve to hopefully keep the oil 'in'
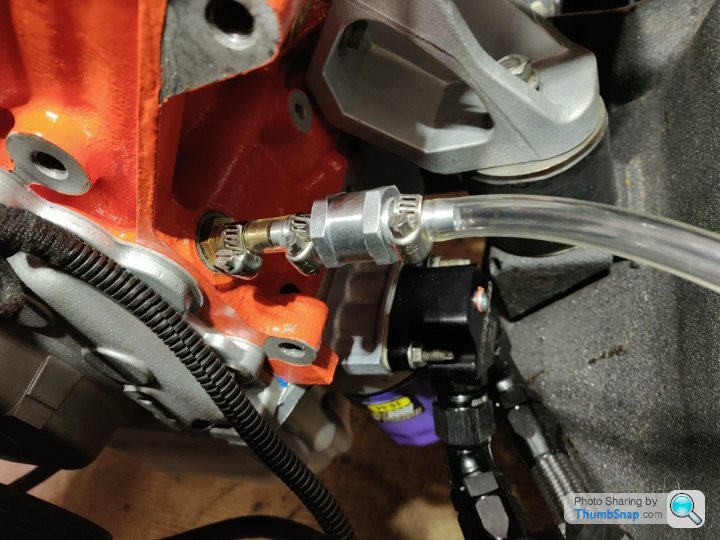
My initial bodge tool didn't work too well as it let air in, but a bit of a tidy up and it worked well enough to at least see 15psi or so on the pressure gauge. I wasn't quick enough getting a photo though...
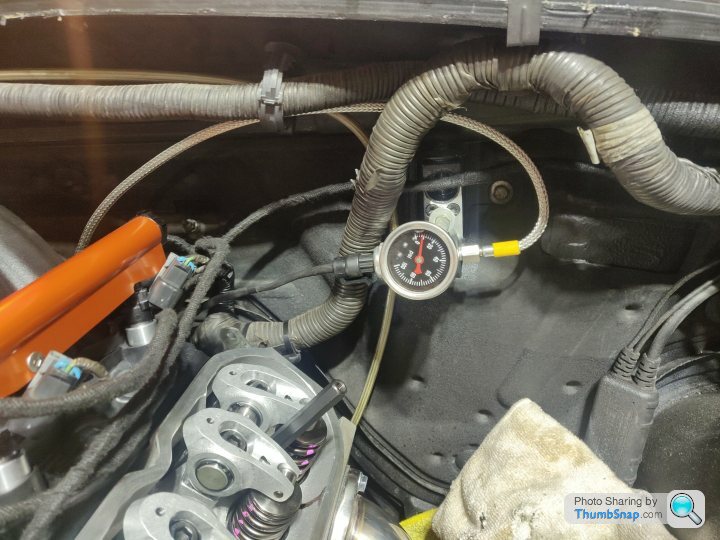
Oil is coming out of the pushrods though which is a good sign in terms of it's everywhere. I rotated the engine a bit as well to try and get oil all over, and also to give the rear main seal a minor test. A helper would've been useful to rotate / keep the pump going at the same time, but she's at work.

I checked underneath and my heart sank as I saw oil dripping on the floor under the middle by the bell housing. I assume rear main seal as this can be a faff to get right... Turns out it was in fact my alter ego ol' 'Finger Tight's Alright' Sturdy who hadn't felt the need to actually tighten up the oil pressure sender...

This ran down the bellhousing, and neatly around to exit just next to where the rear main would leak from, so that was a relief, albeit awkward to tighten up in situ...
So we have a decent amount of oil in there now, the pump should be pretty well primed and ready to go, certainly no worse than if the car had sat for a while.
Will crack on with the O2 sensor extending, then got a few more bits to plug in into the gearbox, and also fill said gearbox with oil.
DENSO who make the sensors say:
Anyway, Internet BS aside, I'll be doing that shortly, and in the mean time I decided to try and prime the oil system.
Connected up fine with a one way valve to hopefully keep the oil 'in'
My initial bodge tool didn't work too well as it let air in, but a bit of a tidy up and it worked well enough to at least see 15psi or so on the pressure gauge. I wasn't quick enough getting a photo though...
Oil is coming out of the pushrods though which is a good sign in terms of it's everywhere. I rotated the engine a bit as well to try and get oil all over, and also to give the rear main seal a minor test. A helper would've been useful to rotate / keep the pump going at the same time, but she's at work.
I checked underneath and my heart sank as I saw oil dripping on the floor under the middle by the bell housing. I assume rear main seal as this can be a faff to get right... Turns out it was in fact my alter ego ol' 'Finger Tight's Alright' Sturdy who hadn't felt the need to actually tighten up the oil pressure sender...
This ran down the bellhousing, and neatly around to exit just next to where the rear main would leak from, so that was a relief, albeit awkward to tighten up in situ...
So we have a decent amount of oil in there now, the pump should be pretty well primed and ready to go, certainly no worse than if the car had sat for a while.
Will crack on with the O2 sensor extending, then got a few more bits to plug in into the gearbox, and also fill said gearbox with oil.

Painting the previously yellow dipstick handle whilst extending one of the O2 harnesses. Took ages because the wire stripper doesn't like the seemingly extra tough wire coating. Wrapped it up with the cloth loom tape after that.
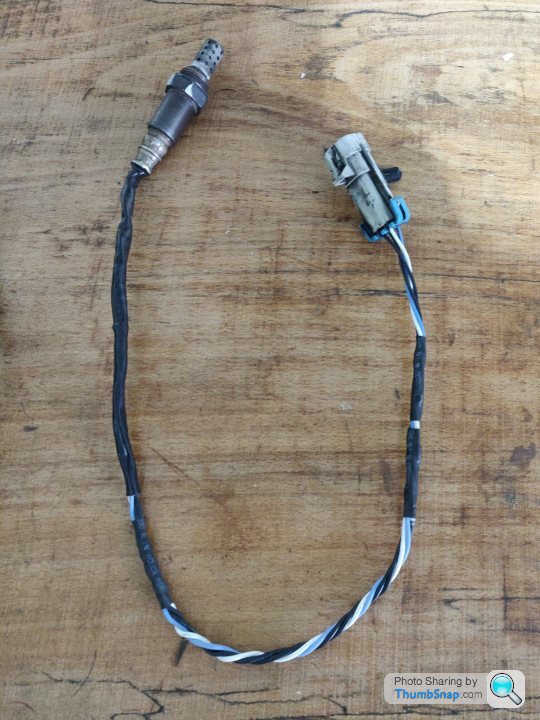
Tidied up the wiring underneath, plugged in the various plugs for the gearbox and zip tied a few bits in place to keep good clearance around the headers etc.
So all keen, thought I'd pop some more exhaust on to get a good measurement of the length needed. Ah, small issue.
Yeah that's not a good fit...
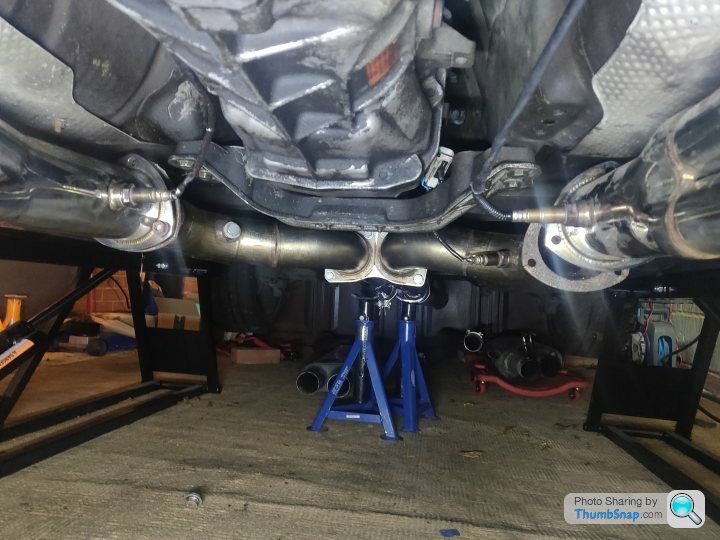
So it's going to be an open header fire up then
Whilst extricating myself I also noticed a little drip of oil on the filter. After some wiping up, have found it's just gently weeping out from here...
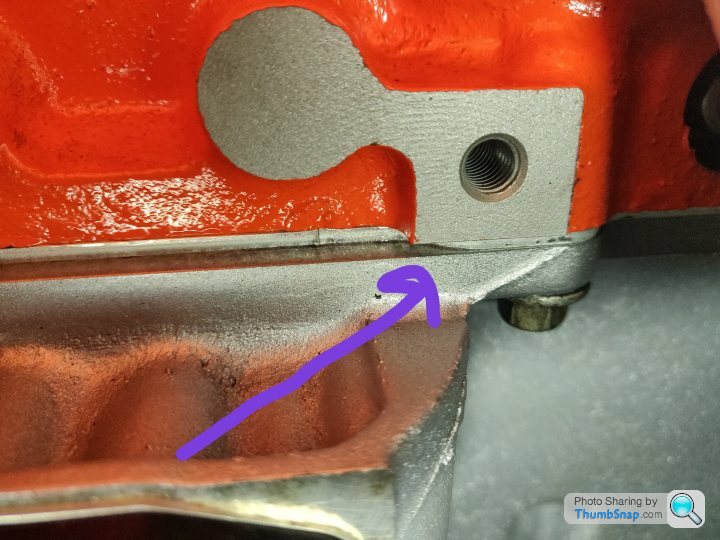
Twas a new gasket and these things are meant to seal, but as always, American made, so likely would've been good to use some RTV just to make sure. It's a faff to drop the sump as the everything is in the way, but will probably be able to work something out by lifting the engine a bit, we shall see.
It's not enough to prevent firing it up anyway, plan is to change the oil and filter after about 30 minutes running anyway, so a bit of a weep isn't a deal breaker.
Have arranged for the tuner (who is in Australia) to connect in Thursday morning so will likely be giving it a fire up around then. Tomorrow I'll be generally checking things over, flashing the updated tune on (updated for the new injectors) and picking whichever god looks best to pray to.
SturdyHSV said:
Progress continues... So, I need to extend my O2 sensor wires to reach for the long tube headers (after some research to debunk the Internet myth that the sensor 'breathes through the wire' so can't be soldered...)
Good name for a horror movie is breathing wiresMe too wishing you all the best at fire up
Really appreciate the comments guys, tomorrow is the day, probably around 11am or so. I've still got one O2 loom to extend, spent the morning out so had a busy afternoon with the car.
So, first things first was filling the gearbox with oil.
You actually fill through the reverse lamp switch, 22mm spanner to undo, takes about 4.6 quarts, because America.

Re-did the plug with PTFE tape and back in it went.

I discovered a slight weep of oil from the sump, can't remember if it was in a previous post, I think it'd be doable to get to all the bolts to lift the engine a touch and drop the sump in situ to RTV it up, but in the mean time, I've sealed it up as best I could. Given it'll be getting an oil change after about 30 minutes, a little weep isn't a concern.


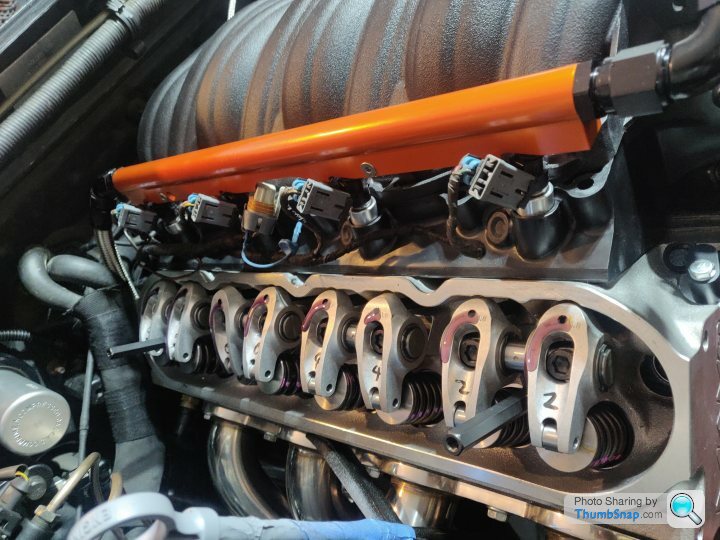
Cleaned up the OEM rocker covers, replaced the grommets for the bolts and also fitted the higher gasket, which is needed to ensure the larger 1.8 ratio rocker arms don't make contact.
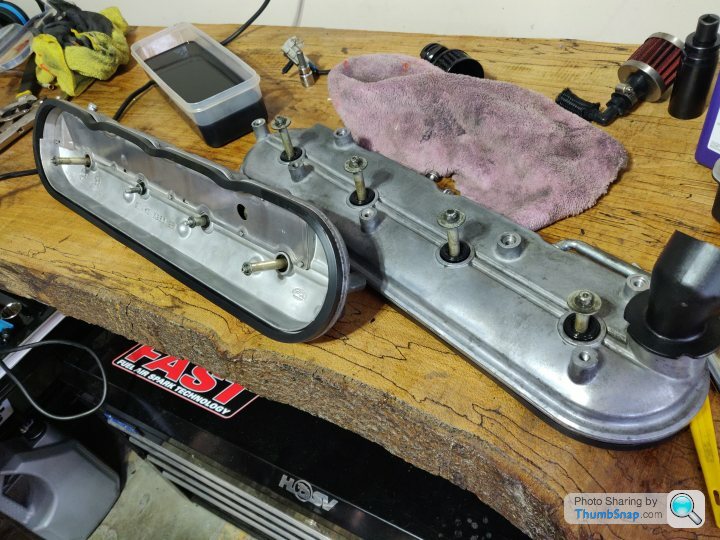
Will reuse these gaskets when the fancy valve covers finally arrive, if I can ever get through to someone to actually supply them...
Got the alternator mounted and plugged in, popped the idler pulley on the bracket and slipped the belt on. It's a really simple routing so was nice and easy to get it on and it looks to line up nicely
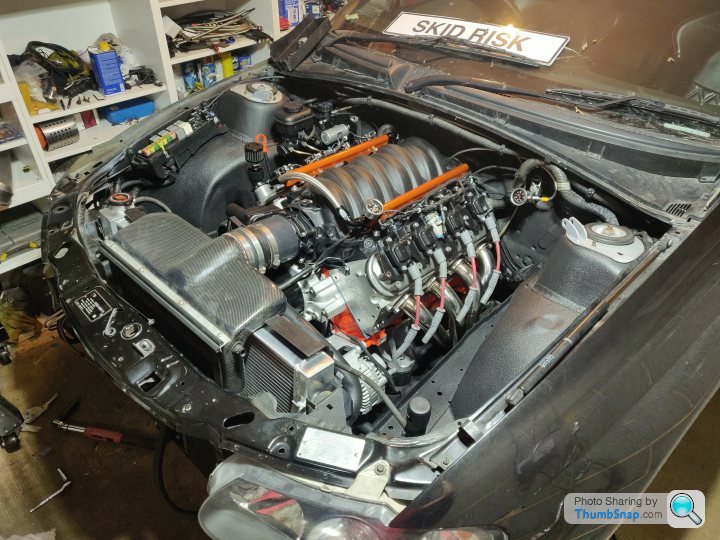
No plugs in as tuner may want to spin it to check oil pressure etc.
At this point it was just a case of filling it with coolant...

Feck I drained some coolant back out so it'd stop leaking, then took it off to inspect the o-ring annnd yeah, turns out that despite the fact I replaced all the o-rings, I clearly took one of them off or it fell off or something, as I later found it sat on the shelf...
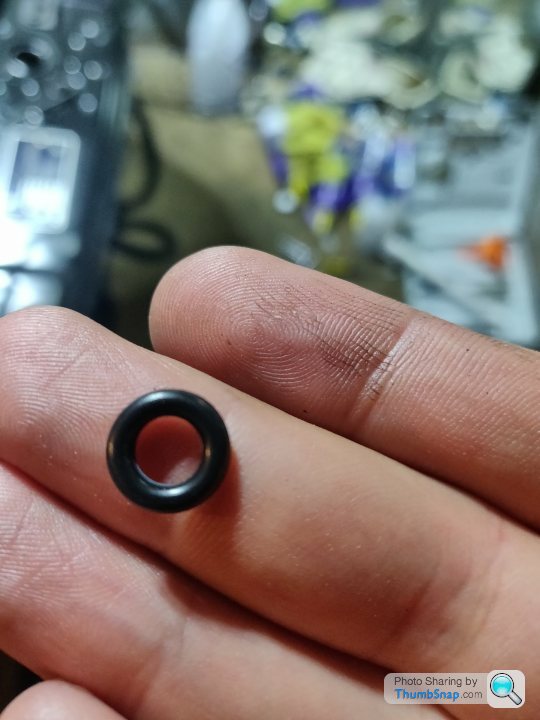
A simple one at least, so it now has 10 litres of coolant in it, it takes 12 but needs to be running first I imagine to bleed the system of air etc and get through to the HVAC system.

So there we go, it's pretty much a car...!
I also enlisted a helper to check the clutch, and yes, it appears pressing the clutch pedal means the engine no longer turns the wheels over, so it's doing clutch things
Will keep you all informed in the morning and obviously plenty of open header video (assuming it works!)
So, first things first was filling the gearbox with oil.
You actually fill through the reverse lamp switch, 22mm spanner to undo, takes about 4.6 quarts, because America.
Re-did the plug with PTFE tape and back in it went.
I discovered a slight weep of oil from the sump, can't remember if it was in a previous post, I think it'd be doable to get to all the bolts to lift the engine a touch and drop the sump in situ to RTV it up, but in the mean time, I've sealed it up as best I could. Given it'll be getting an oil change after about 30 minutes, a little weep isn't a concern.
Cleaned up the OEM rocker covers, replaced the grommets for the bolts and also fitted the higher gasket, which is needed to ensure the larger 1.8 ratio rocker arms don't make contact.
Will reuse these gaskets when the fancy valve covers finally arrive, if I can ever get through to someone to actually supply them...
Got the alternator mounted and plugged in, popped the idler pulley on the bracket and slipped the belt on. It's a really simple routing so was nice and easy to get it on and it looks to line up nicely
No plugs in as tuner may want to spin it to check oil pressure etc.
At this point it was just a case of filling it with coolant...
Feck
I drained some coolant back out so it'd stop leaking, then took it off to inspect the o-ring annnd yeah, turns out that despite the fact I replaced all the o-rings, I clearly took one of them off or it fell off or something, as I later found it sat on the shelf... A simple one at least, so it now has 10 litres of coolant in it, it takes 12 but needs to be running first I imagine to bleed the system of air etc and get through to the HVAC system.
So there we go, it's pretty much a car...!
I also enlisted a helper to check the clutch, and yes, it appears pressing the clutch pedal means the engine no longer turns the wheels over, so it's doing clutch things
Will keep you all informed in the morning and obviously plenty of open header video
(assuming it works!) Just waiting to hear from my tuner (he's in Australia) to run through a few bits and make sure he can see what's what etc.
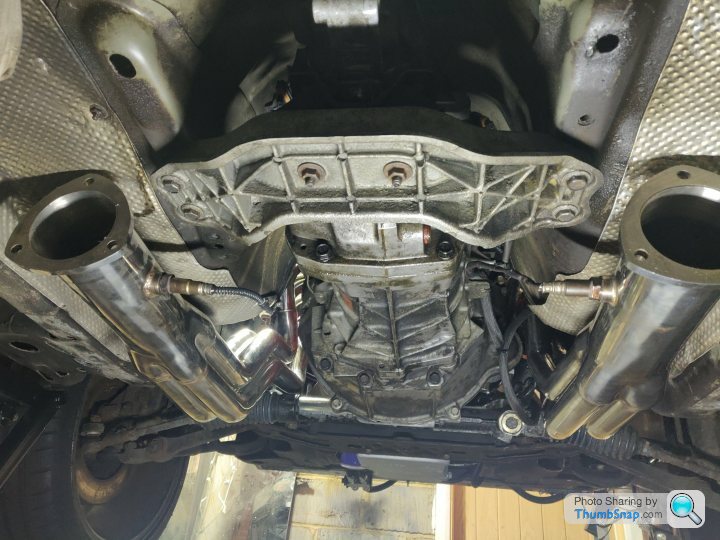
I am largely bricking it.
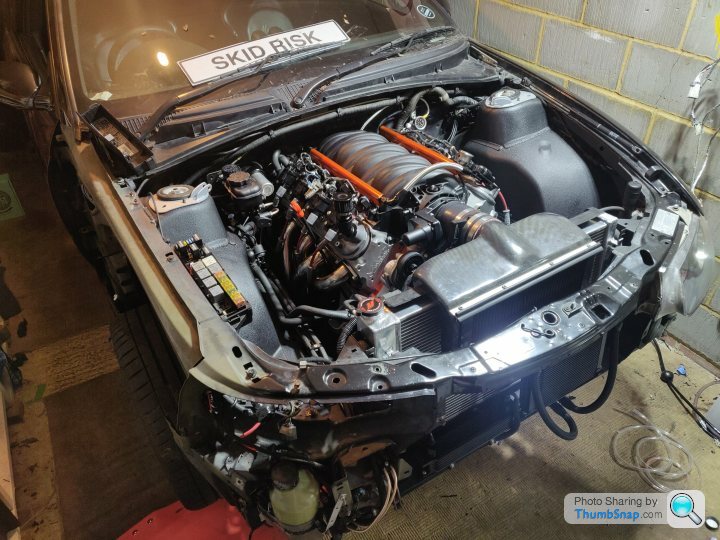
This is the full extent of the exhaust, extra bits on just to try to get the O2 sensors a little covered up and also extra bung for a wideband.
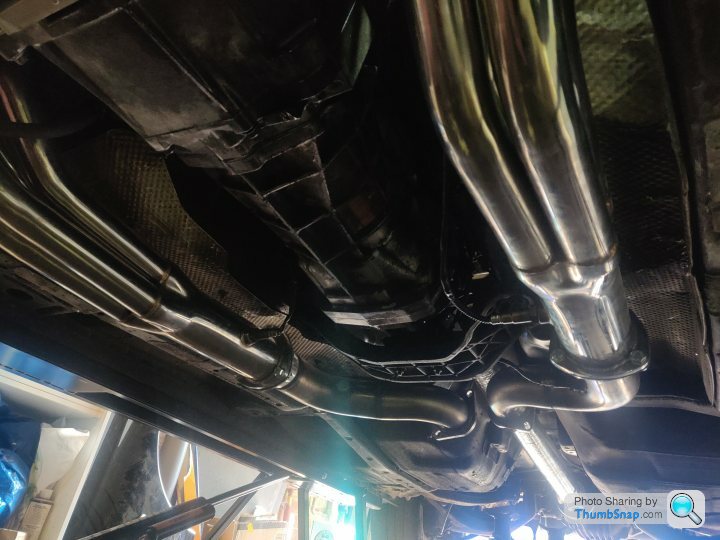
Have also pre-warned at least one of the neighbours. He's currently detailing a Tesla, so said he'd welcome a bit of noise
I am largely bricking it.
This is the full extent of the exhaust, extra bits on just to try to get the O2 sensors a little covered up and also extra bung for a wideband.
Have also pre-warned at least one of the neighbours. He's currently detailing a Tesla, so said he'd welcome a bit of noise

Gassing Station | Readers' Cars | Top of Page | What's New | My Stuff