Kelvinators TVR Tasmin
Discussion


I'm a little behind on posting this, as I did this work a couple of weeks ago, but since I'm now stuck at home in a COVID-19 Lockdown, I thought I would give a quick update.
When I first got the car there was a brand new Bosch GT40 coil fitted. This concerned me for two reasons, first, this isn't a coil designed to work with an ignition system that is fitted with a ballast resistor (which the TVR has. Bosch makes the GT40R for this use), and secondly, although they are great coils they are known to have issues with electronic ignition and prefer to be triggered by points (the TVR has an electronic ignition). Fail.


At first, I tried to replace it with the 40 year old original Ford coil that came with the car

Although this worked, when this didn't fix the issue I was having (knowing what I know now, it never would have anyway) I tried swapping it for a slightly newer known good coil from my SD1 spares (SD1 has both electronic ignition and a resistor, like the TVR). This worked fine and has been in the car until now, but being that it's from about 1983 its no spring chicken, so I looked for an alternate option.

I've been chasing a slight misfire/stumble when at cruise at operating temp, which I'm hoping is ignition and not fuelling, so the three things in the firing line were plugs, coil and ballast resistor.
The plugs that came in the car were a bit old and had seen some s t during my initial attempts to get the car running, so replacing them wasn't a bad idea. A new set of NGK plugs went in.
I went back and forth regarding the ballast resistor and coil. Was it best to keep the system as is and just replace the coil with another resistor coil, or bypass the resistor and fit a 12v coil instead?
In the end, it was the resistor it's self that made the decision for me. In the TVR/Ford use of it, its a section of resistance wire, not a traditional resistor. I believe in the Ford applications its run in a single length and kept in the air stream, but in the instance of my TVR, it was just a coil of wire floating around on the fibreglass wing behind the air box, with little to no airflow. This had obviously taken its toll over the 40 years of its life, as the coil of wire was looking worse for wear with sections where it had clearly melted the insulation (and zip ties). Keep in mind that a resistor generates heat by nature; This wire would get too hot to touch when the engine was running.


A plan was hatched. I would get a 12v coil and bypass the resistor. The resistor wire is joined into the loom via two bullet terminals, so that was easy to do.

Just get a short section of decent gauge wire, crimp two terminals on it, and plug it in.


Now that there is a solid 12v heading for the coil it was time to fit a replacement. I went with a Lucas Gold Sports coil, DLB105. I know not everyone is a fan of them, but it was a reasonable price, and would do what I needed.

This was basically plug and play. Remove the old coil, Check the terminals are around the right way on the new coil, bolt it to the car and wire it up with the existing wiring.


The car starts, runs and drives OK, so I guess that's a win. I haven't had a chance to get the car up to operating temp and see if it still stumbles, and won't for about a month now thanks to this pesky virus forcing the whole country into lockdown. Oh well, that gives me time to do a few more jobs on the TVR that I have been putting off, like front brakes and carpet. No excuses now.
When I first got the car there was a brand new Bosch GT40 coil fitted. This concerned me for two reasons, first, this isn't a coil designed to work with an ignition system that is fitted with a ballast resistor (which the TVR has. Bosch makes the GT40R for this use), and secondly, although they are great coils they are known to have issues with electronic ignition and prefer to be triggered by points (the TVR has an electronic ignition). Fail.


At first, I tried to replace it with the 40 year old original Ford coil that came with the car

Although this worked, when this didn't fix the issue I was having (knowing what I know now, it never would have anyway) I tried swapping it for a slightly newer known good coil from my SD1 spares (SD1 has both electronic ignition and a resistor, like the TVR). This worked fine and has been in the car until now, but being that it's from about 1983 its no spring chicken, so I looked for an alternate option.

I've been chasing a slight misfire/stumble when at cruise at operating temp, which I'm hoping is ignition and not fuelling, so the three things in the firing line were plugs, coil and ballast resistor.
The plugs that came in the car were a bit old and had seen some s
t during my initial attempts to get the car running, so replacing them wasn't a bad idea. A new set of NGK plugs went in.I went back and forth regarding the ballast resistor and coil. Was it best to keep the system as is and just replace the coil with another resistor coil, or bypass the resistor and fit a 12v coil instead?
In the end, it was the resistor it's self that made the decision for me. In the TVR/Ford use of it, its a section of resistance wire, not a traditional resistor. I believe in the Ford applications its run in a single length and kept in the air stream, but in the instance of my TVR, it was just a coil of wire floating around on the fibreglass wing behind the air box, with little to no airflow. This had obviously taken its toll over the 40 years of its life, as the coil of wire was looking worse for wear with sections where it had clearly melted the insulation (and zip ties). Keep in mind that a resistor generates heat by nature; This wire would get too hot to touch when the engine was running.


A plan was hatched. I would get a 12v coil and bypass the resistor. The resistor wire is joined into the loom via two bullet terminals, so that was easy to do.

Just get a short section of decent gauge wire, crimp two terminals on it, and plug it in.


Now that there is a solid 12v heading for the coil it was time to fit a replacement. I went with a Lucas Gold Sports coil, DLB105. I know not everyone is a fan of them, but it was a reasonable price, and would do what I needed.

This was basically plug and play. Remove the old coil, Check the terminals are around the right way on the new coil, bolt it to the car and wire it up with the existing wiring.


The car starts, runs and drives OK, so I guess that's a win. I haven't had a chance to get the car up to operating temp and see if it still stumbles, and won't for about a month now thanks to this pesky virus forcing the whole country into lockdown. Oh well, that gives me time to do a few more jobs on the TVR that I have been putting off, like front brakes and carpet. No excuses now.
Once again, it has been a bleeding long time since the last post, but of course, I haven't just been sitting around doing nothing. It may be a whole new world out there thanks to the current chaos, but the free time I suddenly had was enough to kick start work on the TVR.
Way back before Christmas last year I ordered new carpet and underlay. Until now it's been sitting in the garage waiting for me to get around to pulling the old carpet out and replacing it. It's not a job I was looking forward to. I'm not a huge fan of working in interiors due to cramped access and lots of kneeling on the ground.
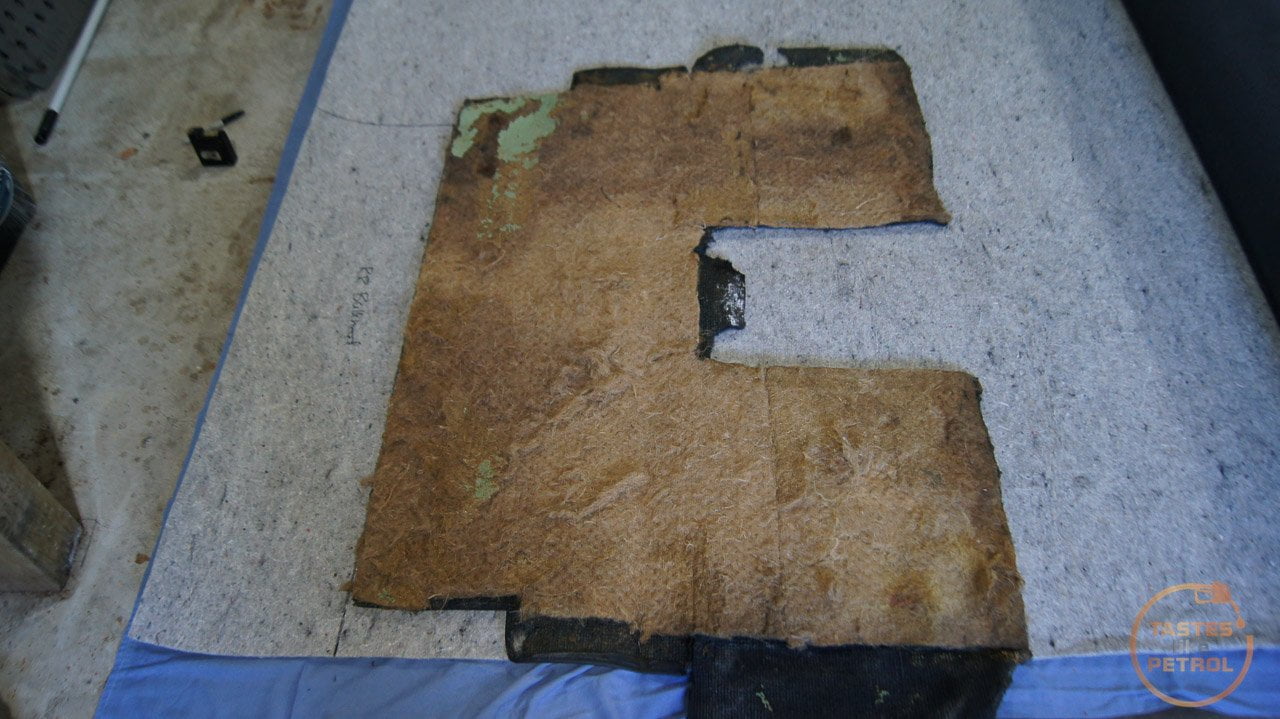
This is what I was dealing with. Old faded carpet which had started to come apart, especially in the footwells, due to being exposed to moisture for long periods of time.


When I got the car the whole floor pan was soaked in water and had been for a while I suspect. Even after trying the carpet out it always had a certain smell, and the carpet was dry and crunchy to the touch.
What I didn't realise until later was that the carpet wasn't mean to be that tan colour, it actually used to be dark blue. There were some spots, like this section in front of the hand brake and under the center console, that hadn't seen the sun and were still the original blue (albeit in this case, filthy and squished).


The first task was to remove the center console. First the surround on the center stack has to be removed, then the gear knob comes off, and there are three screws holding the console in. One at the back under the flap of carpet in the cubby, and two behind the radio in the cubby. Don't forget to disconnect and remove the switches too. It was pretty dirty under the console, with lots of shredded bits of insulation floating around.


Lots of black wiring and heat wrap


Next, the seats should be removed. I tried to remove the rails from the floor but had real issues. The rails are held in with two bolts, one on each end, which go through the floor and are secured with nuts from under the car. A combination of a little rust buildup on the threads, and a bolt head that isn't captive but is also inaccessible (no space for a socket or spanner) with the seat in place almost made me rage quit. I got a couple of the nuts off but got stuck fast on the passengers side, where the whole bolt was just spinning. The usual method is to jam the bolt head with a screwdriver to stop it spinning and wind the nut off, but this bolt wasn't having a bar of it. I rounded the head off quite nicely.

Thankfully, as is good practice, I walked away and left it for a bit, and when I came back I had a new game plan; remove the seats from the rails. This is FAR quicker than messing with the rails, as there are four bolts under the seats, easily accessible with a 13mm ratcheting spanner, and then the seat just lifts off.

One last thing that needs to come out are the roof struts. They are held in with a nut on the top hoop of the roof, and then nut/bolts through into the boot. Since the roof will not stay up without them, a couple of bungee cords were employed to keep it erect. One went between the two bolts on the hoop, and another from the wiper spindle to the cord between the bolts. A third was later added to hold the rear edge of the soft top up against the hoop for better access to the parcel shelf and rear bulkhead. I quickly added some offcut underlay under the cord where it touches the top of the windscreen frame to stop it damaging the paint.


Now it was just a case of pulling, tearing and cutting the old carpet out (but keeping the sections in one piece). The carpet on the sides of the tunnel was barely stuck on, but some of the other carpet like the parcel shelf was a real prick to remove since it had really thick jute underlay. I don't think this was the original carpet, there were a few telltale signs it had been replaced at least once before, but obviously a long time ago, and not that well.


This was a real time consuming and back-breaking process. Once all the carpet was off I needed to try and remove as much old adhesive as I could. This was done with a mixture of a wire brush and a grinder with a twist cup on it. It was very messy but quick to strip the glue off without damaging the body.
As each section of carpet was removed I tagged them all with a paint pen, according to the official layout in the parts guide. This was so I always knew where the sections came from and where to refit them.


With the carpet out it was time to start the job of measuring, cutting and fitting the new underlay and carpet. First was to lay out the underlay and trace the sections I would be fitting it to.
The underlay I purchased although isn't waterproof (yeah, I know, but I was struggling to find any decent padded waterproof underlay and this car now has a phobia of water, so shouldn't be an issue), should work well. Its sold in 1.8m sections, and in the end I only needed to use 1.8x2m total (I'm not sure why it's slightly longer than advertised but I ain't complaining).

I wasn't going to pad the whole car, only select sections, which were the inner tunnel walls, footwells, rear bulkhead and parcel shelf. Mainly places that will be touched, pressed or rested upon. I used the removed carpet sections as templates to trace around. All sections were also numbered with their identifier (or named for the obvious bits like bulkhead), and if needed, an arrow to show direction.


We also got our first glimpse of the new carpet colour. TBH its not as dark or as "blue" as I had hoped, but it ended up looking better than I was expecting.

Cutting the underlay with scissors literally tore my hands to bits. I ended up with a couple of gnarly blisters from the effort needed, as this underlay does not cut well. Regardless, I pushed on.
Once the sections were cut, they were test fitted and trimmed


Once I was happy with the fit, they were glued on with copious amounts of Ados high temp F38 contact adhesive, applied by a large brush. This stuff stinks (You MUST use a decent respirator as this stuff will get you as high as a kite before you get too far), but flashes off quickly and is as sticky as anything. I initially got two tins of this but had to buy two more later on as I ran out (and if I didn't change to spray adhesive for the rest of the work I would have needed a fifth tin). Work quick and get it in the right place first time as this glue isn't here to fornicate arachnids and sticks quick and sticks hard.


The underlay didn't need to be perfect as the carpet was going to cover it anyway, but any bumps, creases and edges in the underlay will show in the carpet over the top of it. The bumps in the sections behind the seats are from the wires and fuel tank brace strap that reside there; they do end up showing as bumps in the carpet too, but not much I can do about that.
Next was to trace and cut the carpet sections. This is where I made a fairly major whoopsie. I had been told to make sure my carpet "grain" was always going in the same direction on each part otherwise sections will look "shaded" as the grain will be going in different directions. Well, guess who immediately forgot this advice, and instead used his awesome Tetris skills to make all the carpet fit into the smallest space possible?

Sigh. By the time I realised what I had done, I had cut all the sections out and couldn't start over.
But hey, I got it all onto the carpet with some spare!
As you can see in the later photos its not that big of an issue but might look a little more obvious if I had used a thicker pile carpet.
I used engineers chalk to mark the back of the carpet, which was quick and easy to see. Everything was marked slightly oversize as it's far easier to trim it down than to make it bigger. A combo of scissors and a brand new knife were used to cut the carpet.


Slight colour difference

Trial fit, and then some trimming

On went the glue. I did this in two sections so I could ensure it was all lined up front to back. Before these side sections went on there are little sections on the floor that cover the humps inside and out, these were fitted too.


The corresponding outer section went on too. This was a real prick to do. I wondered why it was in two sections (split just aft of the A-pillar) when I removed it and thought "oh I'll just make it one piece, how hard can it be?", well, it didn't work and I had to cut my section into two pieces too as I just couldn't get it to line up at all. Working up under the dash and into the A-pillar space wasn't much fun either. The little strips of green tape behind the seat rails is to indicate the position of the now covered seatbelt mounting holes on each side, so I could cut the carpet in the right place later.

Both sides had their inner and outer sections glued on, and then the front bulkhead, under seat and footwell sections went in


Now, keep in mind this looks easy and seems to be progressing quickly, but in reality, the work was slow, painful and very hard to motivate myself to keep going. I also couldn't do too much in one go as I needed to wait for other sections to cure before moving forward with the next part. Stripping the carpet was about four days work, there were about ten days between finishing the underlay and fitting the first piece of carpet, and the last piece of carpet was fitted almost a month later.
Anyway, with the footwell and tunnel done it was only the rear bulkhead and parcel shelf to do. These were never going to be fun due to their location and size.
Before the bulkhead went in I had to fit the little sections that cover the arches. Now, I thought it was doing this right, and it looked right, until I later went to fit the interior trim panels, and found that I had placed them in the wrong order, but not until I had already screwed screws through them.
I had glued the carpet to the arches


Which was bad when the trim went on


But what needed to happen was to have the trim panel screwed into the arch and then the carpet glued in over the top of that, not the other way around. It's obvious now but wasn't at the time.


Now the parcel shelf carpet can go in. I did this in a couple of stages. First I trial fit it, trimmed and then using the Ados high temp I ran a strip of adhesive along the very back edge, making sure it butted up nicely against the bulkhead carpet. After 24 hours I came back and using ultra strong spray adhesive (which I had moved to for the footwell carpets and bulkhead due to ease of use and speed, but not needing the high temp for those sections) sprayed the top section

This allowed me to place the top section perfectly, and then once that was cured to move onto doing the lower section on each side.

In the very unflattering light, the bumps in the carpet behind the seats from the wiring/bracing is very obvious but in person, it's not that bad and is mostly hidden by the seat backs.
But that was it. I had finally glued in the last section of the carpet! This is about the point where I was finally starting to feel happy with the work I had done, as getting the parcel shelf carpet in really tied it all together and made the difference. Before this, I just wasn't really feeling it and wondered if it had even been worth the effort.


Now it was a case of refitting the seats, after a quick clean. I also cleaned and greased the rails.


There has been a lot of other work going in during this. Since I had the center console out the switches got overhauled, various bits got painted, the shifter got rebuilt, and new shift and handbrake boots are being made. There will be another post on that work later.
Today I decided to see what the carpet looked like out in the real world, not from under the harsh cold lights and out in the overcast day.
I connected the battery up, primed the fuel system and turned the key for the first time in about two months. The engine turned and sprang into life. I still can't believe how well it starts and runs hot or cold.
Reverse gear was selected, and I slowly backed out of the garage into the driveway.
This is what I had done. Enjoy. I know I did.


It's not perfect; there are still some bits I'm not 100% happy with, but overall I'm pleased. My first time working with carpet, and not even having a pre-cut or moulded carpet to work with. It was hard work, but the transformation from the old carpet is huge.
Way back before Christmas last year I ordered new carpet and underlay. Until now it's been sitting in the garage waiting for me to get around to pulling the old carpet out and replacing it. It's not a job I was looking forward to. I'm not a huge fan of working in interiors due to cramped access and lots of kneeling on the ground.
This is what I was dealing with. Old faded carpet which had started to come apart, especially in the footwells, due to being exposed to moisture for long periods of time.


When I got the car the whole floor pan was soaked in water and had been for a while I suspect. Even after trying the carpet out it always had a certain smell, and the carpet was dry and crunchy to the touch.
What I didn't realise until later was that the carpet wasn't mean to be that tan colour, it actually used to be dark blue. There were some spots, like this section in front of the hand brake and under the center console, that hadn't seen the sun and were still the original blue (albeit in this case, filthy and squished).


The first task was to remove the center console. First the surround on the center stack has to be removed, then the gear knob comes off, and there are three screws holding the console in. One at the back under the flap of carpet in the cubby, and two behind the radio in the cubby. Don't forget to disconnect and remove the switches too. It was pretty dirty under the console, with lots of shredded bits of insulation floating around.


Lots of black wiring and heat wrap


Next, the seats should be removed. I tried to remove the rails from the floor but had real issues. The rails are held in with two bolts, one on each end, which go through the floor and are secured with nuts from under the car. A combination of a little rust buildup on the threads, and a bolt head that isn't captive but is also inaccessible (no space for a socket or spanner) with the seat in place almost made me rage quit. I got a couple of the nuts off but got stuck fast on the passengers side, where the whole bolt was just spinning. The usual method is to jam the bolt head with a screwdriver to stop it spinning and wind the nut off, but this bolt wasn't having a bar of it. I rounded the head off quite nicely.

Thankfully, as is good practice, I walked away and left it for a bit, and when I came back I had a new game plan; remove the seats from the rails. This is FAR quicker than messing with the rails, as there are four bolts under the seats, easily accessible with a 13mm ratcheting spanner, and then the seat just lifts off.

One last thing that needs to come out are the roof struts. They are held in with a nut on the top hoop of the roof, and then nut/bolts through into the boot. Since the roof will not stay up without them, a couple of bungee cords were employed to keep it erect. One went between the two bolts on the hoop, and another from the wiper spindle to the cord between the bolts. A third was later added to hold the rear edge of the soft top up against the hoop for better access to the parcel shelf and rear bulkhead. I quickly added some offcut underlay under the cord where it touches the top of the windscreen frame to stop it damaging the paint.


Now it was just a case of pulling, tearing and cutting the old carpet out (but keeping the sections in one piece). The carpet on the sides of the tunnel was barely stuck on, but some of the other carpet like the parcel shelf was a real prick to remove since it had really thick jute underlay. I don't think this was the original carpet, there were a few telltale signs it had been replaced at least once before, but obviously a long time ago, and not that well.


This was a real time consuming and back-breaking process. Once all the carpet was off I needed to try and remove as much old adhesive as I could. This was done with a mixture of a wire brush and a grinder with a twist cup on it. It was very messy but quick to strip the glue off without damaging the body.
As each section of carpet was removed I tagged them all with a paint pen, according to the official layout in the parts guide. This was so I always knew where the sections came from and where to refit them.


With the carpet out it was time to start the job of measuring, cutting and fitting the new underlay and carpet. First was to lay out the underlay and trace the sections I would be fitting it to.
The underlay I purchased although isn't waterproof (yeah, I know, but I was struggling to find any decent padded waterproof underlay and this car now has a phobia of water, so shouldn't be an issue), should work well. Its sold in 1.8m sections, and in the end I only needed to use 1.8x2m total (I'm not sure why it's slightly longer than advertised but I ain't complaining).

I wasn't going to pad the whole car, only select sections, which were the inner tunnel walls, footwells, rear bulkhead and parcel shelf. Mainly places that will be touched, pressed or rested upon. I used the removed carpet sections as templates to trace around. All sections were also numbered with their identifier (or named for the obvious bits like bulkhead), and if needed, an arrow to show direction.


We also got our first glimpse of the new carpet colour. TBH its not as dark or as "blue" as I had hoped, but it ended up looking better than I was expecting.

Cutting the underlay with scissors literally tore my hands to bits. I ended up with a couple of gnarly blisters from the effort needed, as this underlay does not cut well. Regardless, I pushed on.
Once the sections were cut, they were test fitted and trimmed


Once I was happy with the fit, they were glued on with copious amounts of Ados high temp F38 contact adhesive, applied by a large brush. This stuff stinks (You MUST use a decent respirator as this stuff will get you as high as a kite before you get too far), but flashes off quickly and is as sticky as anything. I initially got two tins of this but had to buy two more later on as I ran out (and if I didn't change to spray adhesive for the rest of the work I would have needed a fifth tin). Work quick and get it in the right place first time as this glue isn't here to fornicate arachnids and sticks quick and sticks hard.


The underlay didn't need to be perfect as the carpet was going to cover it anyway, but any bumps, creases and edges in the underlay will show in the carpet over the top of it. The bumps in the sections behind the seats are from the wires and fuel tank brace strap that reside there; they do end up showing as bumps in the carpet too, but not much I can do about that.
Next was to trace and cut the carpet sections. This is where I made a fairly major whoopsie. I had been told to make sure my carpet "grain" was always going in the same direction on each part otherwise sections will look "shaded" as the grain will be going in different directions. Well, guess who immediately forgot this advice, and instead used his awesome Tetris skills to make all the carpet fit into the smallest space possible?
Sigh. By the time I realised what I had done, I had cut all the sections out and couldn't start over.
But hey, I got it all onto the carpet with some spare!
As you can see in the later photos its not that big of an issue but might look a little more obvious if I had used a thicker pile carpet.
I used engineers chalk to mark the back of the carpet, which was quick and easy to see. Everything was marked slightly oversize as it's far easier to trim it down than to make it bigger. A combo of scissors and a brand new knife were used to cut the carpet.


Slight colour difference

Trial fit, and then some trimming

On went the glue. I did this in two sections so I could ensure it was all lined up front to back. Before these side sections went on there are little sections on the floor that cover the humps inside and out, these were fitted too.


The corresponding outer section went on too. This was a real prick to do. I wondered why it was in two sections (split just aft of the A-pillar) when I removed it and thought "oh I'll just make it one piece, how hard can it be?", well, it didn't work and I had to cut my section into two pieces too as I just couldn't get it to line up at all. Working up under the dash and into the A-pillar space wasn't much fun either. The little strips of green tape behind the seat rails is to indicate the position of the now covered seatbelt mounting holes on each side, so I could cut the carpet in the right place later.

Both sides had their inner and outer sections glued on, and then the front bulkhead, under seat and footwell sections went in


Now, keep in mind this looks easy and seems to be progressing quickly, but in reality, the work was slow, painful and very hard to motivate myself to keep going. I also couldn't do too much in one go as I needed to wait for other sections to cure before moving forward with the next part. Stripping the carpet was about four days work, there were about ten days between finishing the underlay and fitting the first piece of carpet, and the last piece of carpet was fitted almost a month later.
Anyway, with the footwell and tunnel done it was only the rear bulkhead and parcel shelf to do. These were never going to be fun due to their location and size.
Before the bulkhead went in I had to fit the little sections that cover the arches. Now, I thought it was doing this right, and it looked right, until I later went to fit the interior trim panels, and found that I had placed them in the wrong order, but not until I had already screwed screws through them.
I had glued the carpet to the arches


Which was bad when the trim went on


But what needed to happen was to have the trim panel screwed into the arch and then the carpet glued in over the top of that, not the other way around. It's obvious now but wasn't at the time.


Now the parcel shelf carpet can go in. I did this in a couple of stages. First I trial fit it, trimmed and then using the Ados high temp I ran a strip of adhesive along the very back edge, making sure it butted up nicely against the bulkhead carpet. After 24 hours I came back and using ultra strong spray adhesive (which I had moved to for the footwell carpets and bulkhead due to ease of use and speed, but not needing the high temp for those sections) sprayed the top section

This allowed me to place the top section perfectly, and then once that was cured to move onto doing the lower section on each side.

In the very unflattering light, the bumps in the carpet behind the seats from the wiring/bracing is very obvious but in person, it's not that bad and is mostly hidden by the seat backs.
But that was it. I had finally glued in the last section of the carpet! This is about the point where I was finally starting to feel happy with the work I had done, as getting the parcel shelf carpet in really tied it all together and made the difference. Before this, I just wasn't really feeling it and wondered if it had even been worth the effort.


Now it was a case of refitting the seats, after a quick clean. I also cleaned and greased the rails.


There has been a lot of other work going in during this. Since I had the center console out the switches got overhauled, various bits got painted, the shifter got rebuilt, and new shift and handbrake boots are being made. There will be another post on that work later.
Today I decided to see what the carpet looked like out in the real world, not from under the harsh cold lights and out in the overcast day.
I connected the battery up, primed the fuel system and turned the key for the first time in about two months. The engine turned and sprang into life. I still can't believe how well it starts and runs hot or cold.
Reverse gear was selected, and I slowly backed out of the garage into the driveway.
This is what I had done. Enjoy. I know I did.


It's not perfect; there are still some bits I'm not 100% happy with, but overall I'm pleased. My first time working with carpet, and not even having a pre-cut or moulded carpet to work with. It was hard work, but the transformation from the old carpet is huge.

What a great way to start a lazy Sunday, reading a well written thread on a lovely old Wedge 
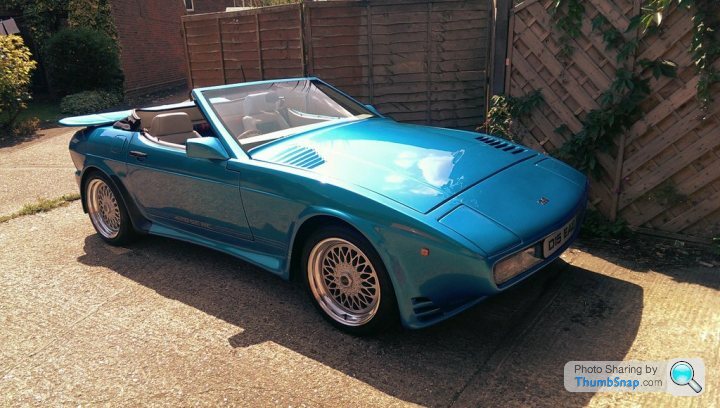
These cars can certainly get under your skin. I have owned 5 V8 Wedges in the last 17 years..
350i ,2 x 400SE, 450 SEAC, 420 SEAC. I did purchase a ‘curvy’ 450 Chimeara in between the 2 SEACs, but the lure of the Wedge brought me back.
My 2nd 400SE
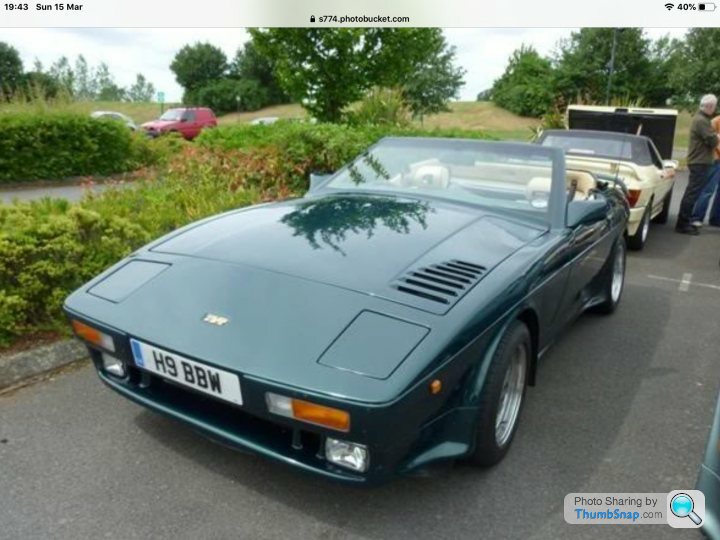
420 SEAC, that I sold 3 years ago
Agree with you re: ‘slippery’ wood steering wheels. I swapped this out of my non-power steering SEAC as gripping it wasn’t ideal. Replaced with a leather Momo.
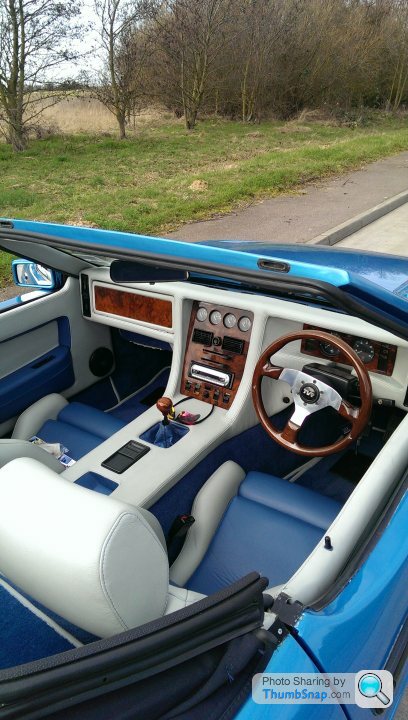
A good tip when putting the rear hood down is to put a rolled blanket within it. This prevents the plastic from pinching, creasing..or worse splitting, especially when it’s a bit colder
These cars can certainly get under your skin. I have owned 5 V8 Wedges in the last 17 years..
350i ,2 x 400SE, 450 SEAC, 420 SEAC. I did purchase a ‘curvy’ 450 Chimeara in between the 2 SEACs, but the lure of the Wedge brought me back.
My 2nd 400SE
420 SEAC, that I sold 3 years ago
Agree with you re: ‘slippery’ wood steering wheels. I swapped this out of my non-power steering SEAC as gripping it wasn’t ideal. Replaced with a leather Momo.
A good tip when putting the rear hood down is to put a rolled blanket within it. This prevents the plastic from pinching, creasing..or worse splitting, especially when it’s a bit colder
Always a treat when this thread is updated!
Looks like an excellent job, you really can't see the difference WRT to the 'grain' of the carpet. I assume you're going to pop some floor mats into the footwells? Have you got enough excess to make some matching ones?
I love the way this has got BL pedal rubbers but a Ford motor!
Looks like an excellent job, you really can't see the difference WRT to the 'grain' of the carpet. I assume you're going to pop some floor mats into the footwells? Have you got enough excess to make some matching ones?
I love the way this has got BL pedal rubbers but a Ford motor!
shalmaneser said:
Always a treat when this thread is updated!
Looks like an excellent job, you really can't see the difference WRT to the 'grain' of the carpet. I assume you're going to pop some floor mats into the footwells? Have you got enough excess to make some matching ones?
I love the way this has got BL pedal rubbers but a Ford motor!
Yes I have enough spare carpet that I intend on making some nice edged mats with heel pads on them for the footwells, but I'm waiting on my new sewing machine to arrive (and to sew the new shifter and hand brake boots).Looks like an excellent job, you really can't see the difference WRT to the 'grain' of the carpet. I assume you're going to pop some floor mats into the footwells? Have you got enough excess to make some matching ones?
I love the way this has got BL pedal rubbers but a Ford motor!
These cars are very much a "bitsa" from various parts bins. Looks like I might have a source for new brake and clutch plughole pedal pads, but I'm having issues with the accelerator pad. I got one from Racetech (listed as a Tasmin pedal pad) but it looks too narrow for my pedal.
Waynester said:
What a great way to start a lazy Sunday, reading a well written thread on a lovely old Wedge
These cars can certainly get under your skin. I have owned 5 V8 Wedges in the last 17 years..
350i ,2 x 400SE, 450 SEAC, 420 SEAC. I did purchase a ‘curvy’ 450 Chimeara in between the 2 SEACs, but the lure of the Wedge brought me back.
Lovely cars you have had, and I'm very jealous. I'd love any of the V8 wedges, but they are rare and expensive here, which means ownership is unlikely. A SEAC is almost an impossibility unless I imported one myself from the UK.These cars can certainly get under your skin. I have owned 5 V8 Wedges in the last 17 years..
350i ,2 x 400SE, 450 SEAC, 420 SEAC. I did purchase a ‘curvy’ 450 Chimeara in between the 2 SEACs, but the lure of the Wedge brought me back.
jamesson said:
Wow, what a pig of a job that was! Well done though. You made a far better job of that than I would have. I doubt I'd have even attempted it so hats off to you.
Thanks. I spent 90% of the time regretting starting the job, but the results are worth it. Its not a job I would do again in a hurry, especially without having a pre-cut or moulded carpet set to use.
vixen1700 said:
Have you done anything with the exhaust yet?
I have an S2 with the same Cologne V6 and with an ACT stainless-steel system, it does sound epic and not just loud for loud's sake.
The Tasmin looks great by the way.
No, unfortunately the car has been off the road for a while now and the exhaust has been pushed down the to-do list a bit. I have an S2 with the same Cologne V6 and with an ACT stainless-steel system, it does sound epic and not just loud for loud's sake.
The Tasmin looks great by the way.
The final piece of the puzzle for getting the interior finished was the gear and hand brake boots. The old ones were worn out, torn and manky. I couldn't refit them, they're letting the team down.
[SIZE=5]Old Gross Stuff[/SIZE]
From day one I wasn't really happy with the boots and knew I was going to have to do something about them. The shift boot in particular just looks gross, all loose and full of splits and holes. The top of it didn't seem to fit either.


And the hand brake boot was old and hard, with a big split down the back. Not to mention it was glued to some of the worst looking carpet in the car


So I knew what I had to do. I could hardly just buy these off the shelf, so it was up to me to make replacements.
[SIZE=5]Singing Machine[/SIZE]
The first step was to decide on a sewing machine and obtain one. We were lucky enough to use our Airpoints to get this, so didn't cost us any "real" money. Its a Singer Heavy Duty 4411

Its still a consumer machine, but its meant to be gruntier than your average dinky little white plastic thing.
At the advice of my sewing pro Sister in Law, I also purchased a teflon coated plastic foot, some "leather" needles and heavy-duty dark blue thread. These items are highly recommended when sewing vinyl as its quite thick and hard, but will also stick to a metal foot if used.
Automotive upholstery grade vinyl was obtained from Trademe cheap, as someone that had redone their interior had some leftover. This was perfect as it was dark blue and cheap.
I did some initial practice on an offcut of the vinyl, just to see what the machine could do. It seems as long as I get the settings right, it actually does pretty well through multiple layers. Its been probably 20+ years since I last touched a sewing machine, but hey, I still kinda know what to do.

[SIZE=5]Grotty Tracing[/SIZE]
In order to make copies of the old pieces I needed to unpick all the existing stitching and flatten them out for tracing around. I started with the hand brake boot as I thought this would be easier as there are only a couple of stitches.
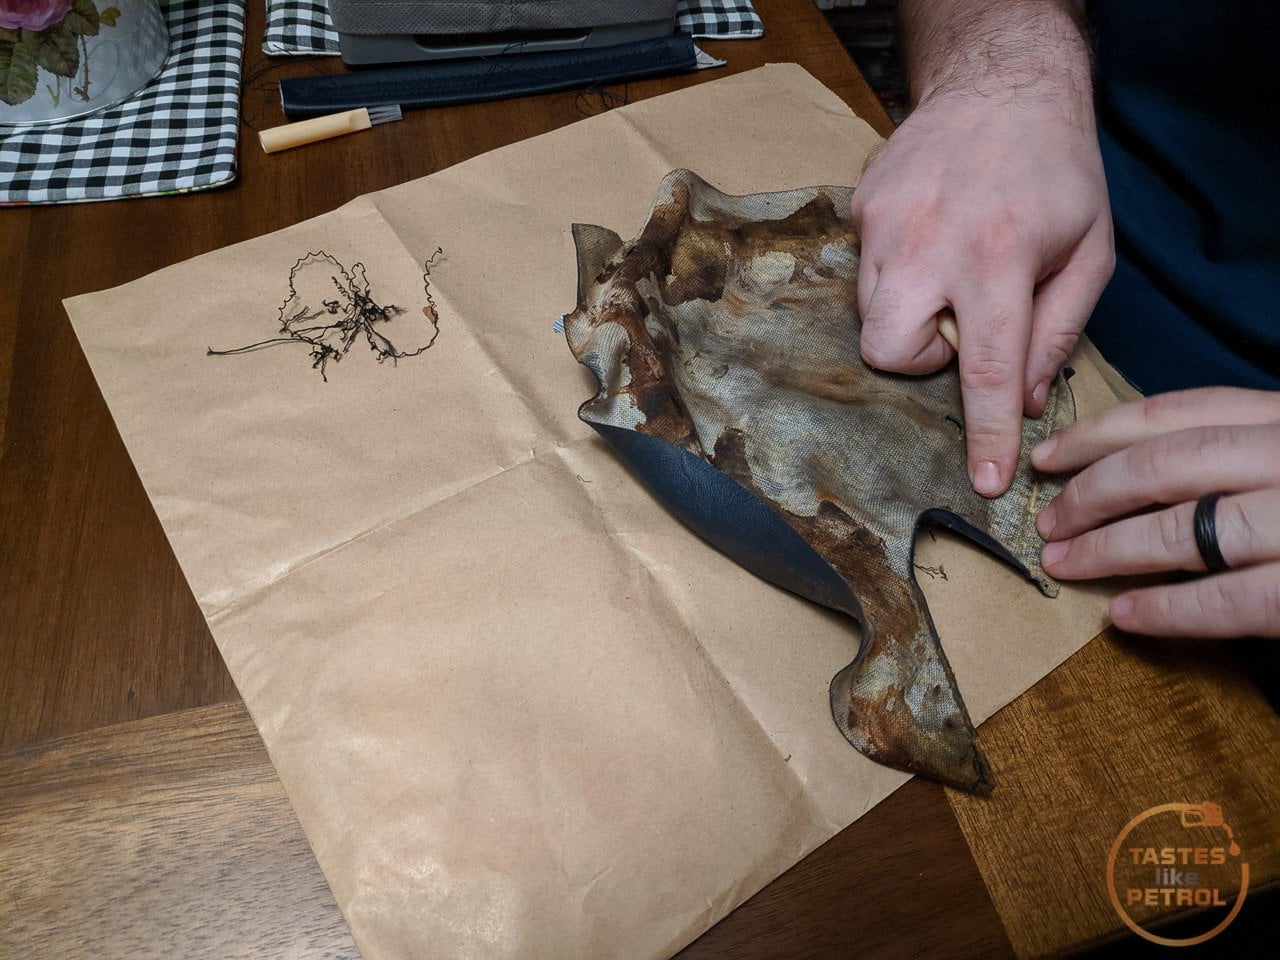


It was pretty gross. To be fair, most of it is old contact adhesive (why there is so much INSIDE the boot, well, who even knows?)

This is the template I made on brown paper. I flattened the original out as much as possible, including the folded over edges.

I then traced this onto vinyl, cut it out and whacked a needle through it a few times. The trial fit actually came out looking pretty decent


The shift boot was more complex. For a start, it was all one piece, not four panels stitched together. This is the one real join, the rest are all just "fake" stitches.


Eww, grotty.
This resulted in a weird looking template

Which I decided was too hard, so turned it into four panels, two short and two long (as the recess in the center console is rectangular). In hindsight I would make these from scratch instead of tracing the original, as it ended up with those weird looking shapes.

[SIZE=5]Stitch Up[/SIZE]
With the templates traced up and cut out of the vinyl, it was time to get sewing.


The trick here was to sew the inside seam of the two pieces, to join them together, and then stitch the outside to reinforce them, and give it a nice external stitch like the original had.


If I didn't do that external stitch, you just get this ugly fold


With all four sides stitched, and only a couple of issues (probably user error), it was time to trial fit

The top didn't look right, so I tried folding it over and attaching it to the rubber boot under the shift boot


It was better, although still needed some tweaking at the top. Unfortunately, the new vinyl is thicker than the old stuff so appears bulkier. It also needs a lot of free and loose material as the throw of the shifter is so long into 4th gear that the boot gets quite tight when shifted. This was an issue with the original boot too.
A little bit of tweaking at the top and we had an OK result. I was planning on remaking it, but tbh its OK as it is and I would probably make it worse if I did it again

All that was left to do was to staple the boot to the underside of the console, glue the carpet and board to the handbrake boot and install it all. One note is that the handbrake boot cannot be attached to the console, otherwise it wouldn't be possible to install it all in one go (or it appears that way anyway, the old one shows no signs of being attached previously).


Jobs a good 'un.
[SIZE=5]Old Gross Stuff[/SIZE]
From day one I wasn't really happy with the boots and knew I was going to have to do something about them. The shift boot in particular just looks gross, all loose and full of splits and holes. The top of it didn't seem to fit either.


And the hand brake boot was old and hard, with a big split down the back. Not to mention it was glued to some of the worst looking carpet in the car


So I knew what I had to do. I could hardly just buy these off the shelf, so it was up to me to make replacements.
[SIZE=5]Singing Machine[/SIZE]
The first step was to decide on a sewing machine and obtain one. We were lucky enough to use our Airpoints to get this, so didn't cost us any "real" money. Its a Singer Heavy Duty 4411

Its still a consumer machine, but its meant to be gruntier than your average dinky little white plastic thing.
At the advice of my sewing pro Sister in Law, I also purchased a teflon coated plastic foot, some "leather" needles and heavy-duty dark blue thread. These items are highly recommended when sewing vinyl as its quite thick and hard, but will also stick to a metal foot if used.
Automotive upholstery grade vinyl was obtained from Trademe cheap, as someone that had redone their interior had some leftover. This was perfect as it was dark blue and cheap.
I did some initial practice on an offcut of the vinyl, just to see what the machine could do. It seems as long as I get the settings right, it actually does pretty well through multiple layers. Its been probably 20+ years since I last touched a sewing machine, but hey, I still kinda know what to do.

[SIZE=5]Grotty Tracing[/SIZE]
In order to make copies of the old pieces I needed to unpick all the existing stitching and flatten them out for tracing around. I started with the hand brake boot as I thought this would be easier as there are only a couple of stitches.


It was pretty gross. To be fair, most of it is old contact adhesive (why there is so much INSIDE the boot, well, who even knows?)

This is the template I made on brown paper. I flattened the original out as much as possible, including the folded over edges.

I then traced this onto vinyl, cut it out and whacked a needle through it a few times. The trial fit actually came out looking pretty decent


The shift boot was more complex. For a start, it was all one piece, not four panels stitched together. This is the one real join, the rest are all just "fake" stitches.


Eww, grotty.
This resulted in a weird looking template

Which I decided was too hard, so turned it into four panels, two short and two long (as the recess in the center console is rectangular). In hindsight I would make these from scratch instead of tracing the original, as it ended up with those weird looking shapes.

[SIZE=5]Stitch Up[/SIZE]
With the templates traced up and cut out of the vinyl, it was time to get sewing.


The trick here was to sew the inside seam of the two pieces, to join them together, and then stitch the outside to reinforce them, and give it a nice external stitch like the original had.


If I didn't do that external stitch, you just get this ugly fold


With all four sides stitched, and only a couple of issues (probably user error), it was time to trial fit

The top didn't look right, so I tried folding it over and attaching it to the rubber boot under the shift boot


It was better, although still needed some tweaking at the top. Unfortunately, the new vinyl is thicker than the old stuff so appears bulkier. It also needs a lot of free and loose material as the throw of the shifter is so long into 4th gear that the boot gets quite tight when shifted. This was an issue with the original boot too.
A little bit of tweaking at the top and we had an OK result. I was planning on remaking it, but tbh its OK as it is and I would probably make it worse if I did it again

All that was left to do was to staple the boot to the underside of the console, glue the carpet and board to the handbrake boot and install it all. One note is that the handbrake boot cannot be attached to the console, otherwise it wouldn't be possible to install it all in one go (or it appears that way anyway, the old one shows no signs of being attached previously).


Jobs a good 'un.
Gassing Station | Readers' Cars | Top of Page | What's New | My Stuff