Kelvinators TVR Tasmin
Discussion


bolidemichael said:
That's made a really positive difference and it seems are though there are many strings to your bow!
Now that the interior is so tidy, my eye is drawn to the scar in the centre console in front of the gearknob... what's going on there?
Argh, that. The vinyl on that surround is shrinking (or has shrunk), so a previous owner in their wisdom filled the gap between the two ends of the fabric where they pulled apart, with glue. That's the white stuff. I've had to trim the fabric in various places on that surround to make it fit properly, but short of redoing all that vinyl (which then won't match the rest of the console) there isn't a lot I can do.Now that the interior is so tidy, my eye is drawn to the scar in the centre console in front of the gearknob... what's going on there?
Thanks for all the kind words, everyone.
With the last parts of the interior reinstalled today, I could finally test a couple of other jobs I did as "while I'm here" things when the interior was apart. One of those jobs was to rebuild the rather floppy shifter.
I rebuilt this a while back, as I was doing other work in the interior. There is no better time to do it than when the center console is already out, otherwise its bit of a pain to get to.
The shifter on the TVR, like the Classic Mini, isn't a sprung gate, so it doesn't self return to the center of the neutral gate, instead, it just chills out where you left it (either on the left between 1st and 2nd or on the right between 3rd and 4th). I kinda just got used to this feel and adapted to its vagueness thinking it was normal. It had a large amount of lateral play when in gear (to the point you could think it was in neutral).
I had missed gears a couple of times when driving due to this vagueness, but hey, its a 40 year old car with 40+ year old technology, how good is it meant to be?
Well, its meant to be a lot better than that. The interwebs indicate it should be fairly direct and tight.
[SIZE=5]Removal[/SIZE]
This is what the shifter looks like on the gearbox (note this shifter is back to front, the offset should be towards the front of the car)

That offset, and top of the shifter, is a TVR Engineering special. The original Capri gear lever looks like this

Removal is as easy as unscrewing the large cap that covers everything. It sounds easy in theory, but it took a bloody long time and lots of swearing to get it undone. I tried everything I could throw at it until I got mad and used a long flat blade as a chisel and a BFH to smack it off. It seems this is the only real way to crack it off as there isn't enough room around it to actually get much else on the cap. The only access to it is through the small, jagged hole in the fibreglass tub, which will happily shred your wrists if you arent careful. I have the scars to prove it.


Once the cap is undone the whole shifter will just pull up and out. Just as a note, don't bother trying to undo the three bolts on the turret and remove the shifter that way, it's not possible due to the shift rod.
[SIZE=5]The Problem and the Bodge[/SIZE]
With the shifter out it was immediately obvious something wasn't quite right.
This is what I had


And this is what I should have

Yup, I'm completely missing that large inverted mushroom bush. This bush is what locates the shifter and stops it from being moved around in the turret. The ball on the bottom of the shifter locates in a plastic bush in the selector rod (which you should check whilst the shifter is out as its also prone to failure; mine was OK). Having the base located, but not the middle of the shifter leads to a lot of excess movement.
[SIZE=5]The Fix[/SIZE]
This is the replacement nylon bush from Racetech

Under the large cap there is a smaller dome which is forced upwards by a couple of washers and a spring pushing against that mushroom bush. This creates the nice solid shift feel, and stops any upwards movement whilst allowing the shifter to move as it should (without the spring and dome the whole shifter could be lifted upwards and disengaged from the selector rod).
The spring and dome create the friction needed to give a firm shift and not be floppy. As the cap screws down onto the turret, it's pressing against this dome and spring, compressing it.

Now, this is where I discovered the bodge. I suspect at some point someone has had this shifter out, noticed the mushroom bush was in pieces and removed the remains of the bush. This resulted in the cross pin taking all the forces and load. This bent the pin, as well as wearing into the sides of the cap, as it normally wouldn't be able to move far enough sideways to touch the cap.
In order to fit the new bush I had to remove this bent pin, which I did with a hammer and punch

The rubber visible above the dome is another bodge. Its a section of rubber hose (heater hose?) that has been fitted in order to compress the spring and take out some of the play.
The mushroom bush can now be fitted and the pin replaced. I straightened the pin in the vice first and then tried to fit the bush. This is where I struck my biggest issue. I managed to get it all together (with much effort) but it was super tight, the spring was heavily compressed, and it was damn near impossible to refit the cap and screw it down as the dome was pushing it away from the turret with more force than I could push down. Far too much time was spent trying to do this; shredding my wrists on the fibreglass and wearing the skin raw until I rage quit and left it.
I did some research and noticed something. My spring was sitting on top of the stem of the mushroom, instead of over it like the example a couple of photos above. This means the spring was being compressed about twice as much as it needed to be. I tried to alter it and see if the spring would fit over the stem, but not a chance, the stem was too thick. In the end I cut the stem down to half its length and tried to fit it

This actually worked, I could screw the cup down and it all went together, but by golly was the shifter tight and stiff to work. It almost felt good to use, every movement was deliberate, but two things concerned me. One, the wear on the cap and dome would be excessive due to the friction of the two being forced together hard. Two, there was zero play in the shifter, which meant when you slotted it into gear it didn't move by its self at all. If you're familiar with manual shifting you will know that when you shift into a gear the shifter kinda moves its self slightly and finds its happy place (which is usually not hard up against the end of the gate, but slightly towards the neutral gate). This wasn't happening, and I didn't want to risk the excessive wear on the shifter forks or synchros.
So out it all came. This time I cut the stem almost completely off

This was much better. The spring didn't need to be compressed to fit the bush and pin, and there was just a little play before the spring touched the bush.


Refitting was a breeze, and the shifter had what I would consider the right amount of free play in it. It now popped nicely into gear, had zero lateral movement when in gear, no vertical movement, but was easy to move and shift. I had also added a coating of grease to the pivot points and to the top of the dome just to keep everything sliding nicely.
[SIZE=5]The Result[/SIZE]
It took a while to get the rest of the interior finished so I haven't been able to drive the car until today, and the results were immediately obvious.
The shifter is now very direct and it's hard to miss the gates. You can shift it quite quickly now too as it inspires confidence.
The shifter just by the nature of its design is a bit strange. Because of the offset, when shifted into 1st and 3rd it dips down, whilst 2nd and 4th the shifter actually raises slightly, and the throw into 4th especially is quite long. All part of the TVR charm I guess.
A worthy repair, and something other 280i owners should check if they have an excess play in their shifter.
The final part of the interior job was to recondition a few of the switches. The window, panel and headlight switches all needed an overhaul.
It was pretty obvious just by looking at the window switches why they needed a strip down and clean


It's no surprise that the windows were a tad slow, and the connectors had taken a real beating with excessive resistance melting the plastic around a couple of the pins. A sure sign of bad contact.

I decided to start with one of the window switches. These were filthy, having soaked up any fluff and muck that has been in the center console for years.
Start by removing the top casing from the bottom, using a small screwdriver to unhook the clips on each side. Before I removed it, I marked the top of the switch so I could refit the casing in the same orientation.

With the top casing off you can see the switch guts

Using that same small screwdriver carefully lever the toggle legs off their pins and lift the toggle up off the base. Take care, as under the toggle are two small plastic spring loaded pogo pins. Don't let these ping away.
After a quick wipe down to remove the dust and dirt, this is what we have


Make sure to note which way the metal strips go as they aren't all the same.
These are the little pogo pins in the toggle. They should face the other way with the spring going first into the toggle.

Remove the strips and inspect the contacts. Mine were coated in old dry grease and corrosion

I took the time to clean both the contacts and the strips and then using fine sandpaper give them all a good polish

The outer casing was given a good degrease and clean inside and out


The holes the pogo pins go into in the toggle had to be scraped out as old grease had solidified in there too. The pogo pins didn't escape the cleaning, they carefully had all the grease removed. They needed it.

Once everything was clean it was time to reassemble. The strips and contacts got a thin coating of dielectric grease, as did the pogo pins and the toggle was refitted to the base. The casing was reinstalled and we were ready to go.


The action was now quite nice and solid. The muck in it previously must have been dampening the feel.
The other window switch wasn't any better, so that got the same treatment.


Next was the panel light brightness switch. Unfortunately, this was in a pretty sorry state, with cracks and missing plastic in various places. Thankfully with switch doesn't get a lot of use.


The contacts and strips in this were disgusting


Everything got cleaned up as much as possible

The cracks in the casing were glued up, and it was refitted.
The headlight switch was the last one I wasn't to overhaul. The connector was in very bad shape, so I wanted to be sure the switch wasn't causing it. Looking at how clean the switch was, I suspect it was recently replaced with a New Old Stock item.


This was mostly just old congealed grease. All that got cleaned out and the contacts polished


And that's the switches done. Easy to strip down and clean, with minimal moving parts. They are quite a reliable design, but let down by not having the housing a bit better sealed, and the old grease drying out.
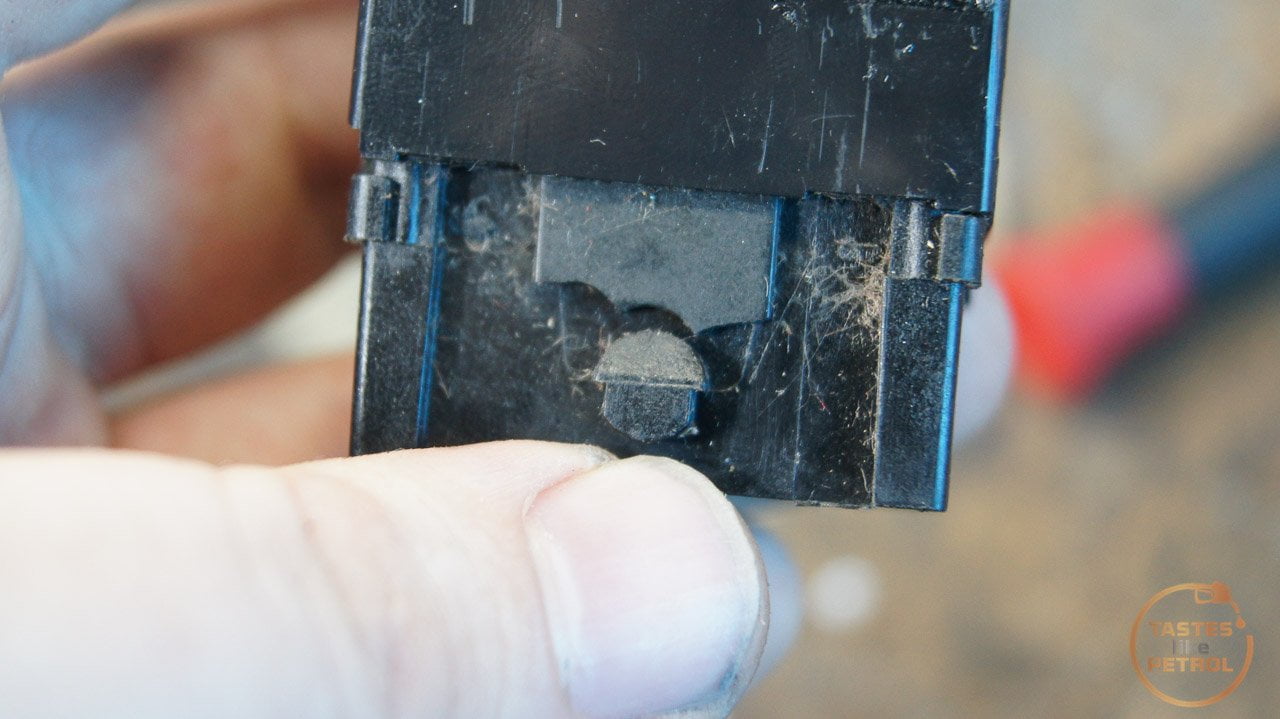
Before I could refit the center console and switches I had to do some quick repairs to the connectors on a couple of the switches. The headlight switch, in particular, had an issue with one terminal falling out as the plastic had melted from around the pin.

I had obtained replacement plugs from Minispares (Part PM03) as they sell a kit to replace the connectors for the Classic Mini hazard light switch. The plug isn't identical, as it's missing the locking tabs the TVR has, but it's a nice tight fit regardless and shouldn't fall out.
The kit comes with new pins too, but as my pins were OK I chose to reuse the existing ones in the new housings. Using a small flat blade I pushed the locking tabs on each side of the pin in and slipped it out the back of the housing. Flip the tabs back out again, and into the new housing it goes. The big white plug is the old one, the black one is the new one.


The only other one I needed to replace was the blower fan switch, as for some reason this didn't even have a plug at all, just bare terminals stuck on the pins and wrapped in tape! Bodge city.

This was as easy as just transferring the pins into the housing in the correct order


The center console went in next, and it was finally time to refit the switches into their freshly wrinkle-painted panel


The radio blank needs to be stuck in, but it looks good with the rest of the console

The switch panel looks a damn sight better than the old peeling and rusty look

The windows are still slow, I'll need to get in there and clean and grease the runners as I did for my SD1 (same regulator), but the blower fan and headlight switches work more reliably, and it appears I've gained a new full brightness setting on my dash lights.
All in all a good achievement, even just to know the switches will keep working for a bit longer.
It was pretty obvious just by looking at the window switches why they needed a strip down and clean


It's no surprise that the windows were a tad slow, and the connectors had taken a real beating with excessive resistance melting the plastic around a couple of the pins. A sure sign of bad contact.

I decided to start with one of the window switches. These were filthy, having soaked up any fluff and muck that has been in the center console for years.
Start by removing the top casing from the bottom, using a small screwdriver to unhook the clips on each side. Before I removed it, I marked the top of the switch so I could refit the casing in the same orientation.

With the top casing off you can see the switch guts

Using that same small screwdriver carefully lever the toggle legs off their pins and lift the toggle up off the base. Take care, as under the toggle are two small plastic spring loaded pogo pins. Don't let these ping away.
After a quick wipe down to remove the dust and dirt, this is what we have


Make sure to note which way the metal strips go as they aren't all the same.
These are the little pogo pins in the toggle. They should face the other way with the spring going first into the toggle.

Remove the strips and inspect the contacts. Mine were coated in old dry grease and corrosion

I took the time to clean both the contacts and the strips and then using fine sandpaper give them all a good polish

The outer casing was given a good degrease and clean inside and out


The holes the pogo pins go into in the toggle had to be scraped out as old grease had solidified in there too. The pogo pins didn't escape the cleaning, they carefully had all the grease removed. They needed it.

Once everything was clean it was time to reassemble. The strips and contacts got a thin coating of dielectric grease, as did the pogo pins and the toggle was refitted to the base. The casing was reinstalled and we were ready to go.


The action was now quite nice and solid. The muck in it previously must have been dampening the feel.
The other window switch wasn't any better, so that got the same treatment.


Next was the panel light brightness switch. Unfortunately, this was in a pretty sorry state, with cracks and missing plastic in various places. Thankfully with switch doesn't get a lot of use.


The contacts and strips in this were disgusting


Everything got cleaned up as much as possible

The cracks in the casing were glued up, and it was refitted.
The headlight switch was the last one I wasn't to overhaul. The connector was in very bad shape, so I wanted to be sure the switch wasn't causing it. Looking at how clean the switch was, I suspect it was recently replaced with a New Old Stock item.


This was mostly just old congealed grease. All that got cleaned out and the contacts polished


And that's the switches done. Easy to strip down and clean, with minimal moving parts. They are quite a reliable design, but let down by not having the housing a bit better sealed, and the old grease drying out.
Before I could refit the center console and switches I had to do some quick repairs to the connectors on a couple of the switches. The headlight switch, in particular, had an issue with one terminal falling out as the plastic had melted from around the pin.

I had obtained replacement plugs from Minispares (Part PM03) as they sell a kit to replace the connectors for the Classic Mini hazard light switch. The plug isn't identical, as it's missing the locking tabs the TVR has, but it's a nice tight fit regardless and shouldn't fall out.
The kit comes with new pins too, but as my pins were OK I chose to reuse the existing ones in the new housings. Using a small flat blade I pushed the locking tabs on each side of the pin in and slipped it out the back of the housing. Flip the tabs back out again, and into the new housing it goes. The big white plug is the old one, the black one is the new one.


The only other one I needed to replace was the blower fan switch, as for some reason this didn't even have a plug at all, just bare terminals stuck on the pins and wrapped in tape! Bodge city.

This was as easy as just transferring the pins into the housing in the correct order


The center console went in next, and it was finally time to refit the switches into their freshly wrinkle-painted panel


The radio blank needs to be stuck in, but it looks good with the rest of the console

The switch panel looks a damn sight better than the old peeling and rusty look

The windows are still slow, I'll need to get in there and clean and grease the runners as I did for my SD1 (same regulator), but the blower fan and headlight switches work more reliably, and it appears I've gained a new full brightness setting on my dash lights.
All in all a good achievement, even just to know the switches will keep working for a bit longer.

Such good work - you inherited soooo many issues with this vehicle.
I have a couple of questions, if I may:
1) How did you trim back the stem on the mushroom for the gear pivot? btw, it is fascinating to know how this located, nice work in explaining -nice-and-simply!
2) How did you 'wrinkle-paint' the panel for the switches?
I have a couple of questions, if I may:
1) How did you trim back the stem on the mushroom for the gear pivot? btw, it is fascinating to know how this located, nice work in explaining -nice-and-simply!
2) How did you 'wrinkle-paint' the panel for the switches?
Just read all of this thread.
Brilliant work and I love how original the Tasmin is. Those early wheels look so right on it. Great colour scheme too.
I think it great how the 70's futurism is starting to look better and better to my eyes, Oliver Winterbottom took a lot of inspiration from William Towns' Lagonda, the Tasmin just looks so right, and much prettier than the later V8 cars to my eye.
Great work, and I think you could probably set up in business and the K-Jet expert of the antipodes!
bolidemichael said:
Such good work - you inherited soooo many issues with this vehicle.
I have a couple of questions, if I may:
1) How did you trim back the stem on the mushroom for the gear pivot? btw, it is fascinating to know how this located, nice work in explaining -nice-and-simply!
2) How did you 'wrinkle-paint' the panel for the switches?
I'm a simple man, with simple solutions....I have a couple of questions, if I may:
1) How did you trim back the stem on the mushroom for the gear pivot? btw, it is fascinating to know how this located, nice work in explaining -nice-and-simply!
2) How did you 'wrinkle-paint' the panel for the switches?
1) With a reciprocating saw lol
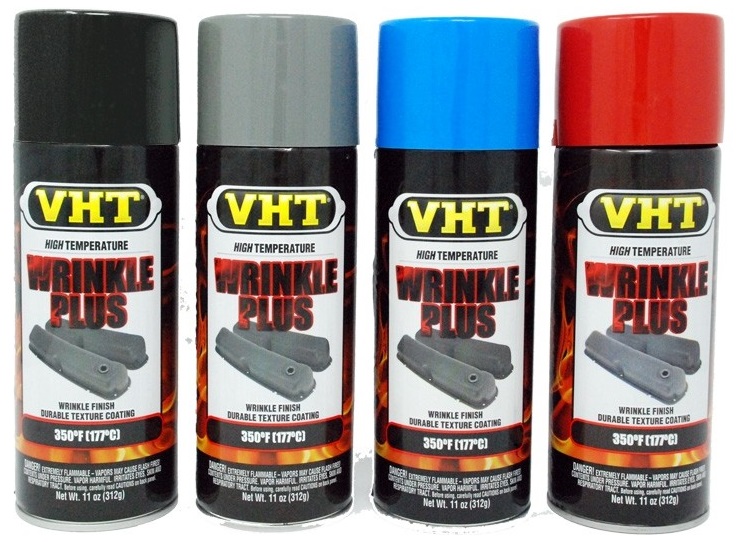
2) I'm not sure if its an NZ brand, but VHT Wrinkle Plus is my go to for wrinkles. Works real good on valve covers and the likes too.
Just read through the whole of this thread and thoroughly enjoyed it (especially your nice simple explanations and photos). Glad it had a happy ending too and you can now enjoy the fruits of your labour. There were points when it sounded like the fuelling/running issues were sapping all your enthusiasm!
Chris
Chris
Wow, it's been almost six months since I got this back on the road and warranted. Took it in for its WOF (MOT) check today, and passed with a clean sheet. Good feels.
I better get my arse into gear and do more than the 186 miles I've done in the last 6 month period!
Before the WOF I thought I had better take it for a quick shakedown, so went out for a hoon last night.
https://youtu.be/jSfq3_sakD8
https://youtu.be/tM-7Fp-nNe0
https://www.instagram.com/p/CCLCZ8Wl2yA/?utm_sourc...
With old cars, it always seems to feel like you're taking it for a WOF. Six monthly WOFs for old cars is a bit mean, but I wouldn't trust it any other way, with the state of the rubbish on our roads.
So its been almost six months since http://www.tasteslikepetrol.net/2020/01/tvr-tasmin... my first WOF inspection after getting the car on the road, and according to the previous WOF sheet, I've done a grand total of 186 Miles in that time. That's almost embarrassing, but in my defence, we did have COVID lockdown, and carpet replacement in that time.
With the car sitting for as long as it had, with minimal driving, I noticed last time I drove it that the tyres had gone a little out of round and the car shook quite badly at speed. This was to be expected, apparently on lower pressure big sidewall tyres like these they can get a flat spot from sitting on concrete, in about a month.
To fix this, and check the car was ready for its date with my WOF guy on Saturday, we took the car out for a decent run around the back roads. Mid-winter with the top down, a clear sky, and rugged up from the cold, its always an experience. An assault on the senses. My Wife is incredibly understanding sometimes.
Sure enough, the shakes quickly went away and the car ran and drove better than ever. Pulling well in all gears, and just a pleasure to drive. The improved shifter feel is great; very direct.

After that shakedown I was pretty happy, and ready for the WOF the next day.
Of course, if everything went to plan, it wouldn't be my car.
Driving along the motorway, just cruising along, not a care in the world as I head in for my WOF. I get to a set of traffic lights, and as they go green and I pull away with some gusto, BAM, the engine starts to splutter and cut out. As I back off it comes right again.
That was weird, so I give it another squirt, and sure enough, it's spluttering and cutting out. Oh no, I look around and assess my options just in case I need to pull over if it dies. I don't want to be that guy, stuck at the side of the motorway.
But then I had a thought, I remembered something.... I have just under a quarter of a tank left.
The wise words of my Wife pop into my head; "Does it have petrol in it?"
Yes, but once again, no. Its the http://www.tasteslikepetrol.net/2019/12/tvr-tasmin... same issue I encountered early on, cutting out under acceleration as the fuel sloshes away from the pickups. Stupid design.
I carefully nurse the car along, and it has no more issues along the way. I fill both the tanks, Fitting a total of 37L in before it starts ejecting from the opposite side filler. With a 60L capacity, It leaves me with about 10 litres or so in each tank. It's not a problem if the tanks are half full, but its maybe an issue I will need to look into later, by adding a swirl tank or the likes (as TVR did in later production).
Anyway, the car gets inspected for its WOF, and comes away with a new sticker and a clean sheet. My WOF guy is very impressed with the car, and the work I've done since the last WOF.
Because my WOF guy is awesome I was allowed to pop under the car and take some photos of its general condition and get some reference photos for where the exhaust could be run. Its a bit dirty, and oily, but otherwise very good. Certainly none of the rust issues these cars are known for in the UK.
The rear diff and brakes are looking good still. Nice even wear on the rotors, and the diff has nowhere near as much oil on it as it used to. There appears to still be a small leak, as there was some moisture near the drain plug, but very minor. Nothing from the output shafts anymore.


These are the main pipes, hanging down under the chassis. I'm quickly wearing down the front of these due to a lack of ground clearance

Its a bit oily under the engine and box, but I've had worse. A good degrease would probably help, but I'm running it in an honest, "Its British" condition instead of pretending it doesn't leak.

Up front looks pretty good too, although I really should clean up the mess from previous radiator overflows/burps


And finally, a shot of the exhaust, back to front, including ugly clamp fitted when I cut the exhaust to refit the diff.

I need to talk to a real good exhaust maker, and see if there is any way they could redo the exhaust so it would fit into the chassis backbone, instead of hanging down. There isn't much space, but I think I might know how it can be done, and not above the gearbox either.
In the meantime, the car is still road legal, so I best make the most of it, and try and put more than 186 Miles on it in the next 6 months.
What a great thread.
I had a similar 2.8 wedge about 12 years ago, same colours really great car. . I think I paid under £3000 for it with about 60000 miles on it. We toured Scotland, Spain and France/Belgium/Germany in it over an ownership of 4 years. It never let me down, I never touched anything -! Apart from getting a couple of window motors etc from a scrap SD1 to speed up the windows.As with this one all my wires were black, but even back then all the coloured tracers had gone to beige! I removed what seemed like miles of wire from a dodgy alarm system to simplify the electrics and had to replace a rear hub upright when I lost it going round an island in the wet ( I maintained that the tyre punctured first....) Alloy ones were NLA so it had to be a steel one to replace it.
The highlight was a couple of laps of the 'ring. It really loved the long corners. Super long distance car,quick enough, space for luggage and comfortable.
I sold it to a guy in Germany at 78000 and he bought it unseen for what I had paid for it four years earlier, I met him at Stansted and he drove it straight back to South of Heidelberg. He emailed me the next day & said " great drive home, got in about 2am (he left me at about 11am) , headlights only went out once!!"...
I had warned him they could be a bit erratic going from main to dip! So you left the spots switched on!
It replaced a TR3 A which I had for 15 years & was great, but primitive and I replaced it with a 944s2 cabriolet which I should not have ever sold......
Bit of a quick followup. Its been almost 6 months since the last post, so I guess its almost WOF time again.
Not much has been happening. The car, when I've driven it, has been completely reliable, starting first turn of the key. Unfortunately due to COVID, weather and general lack of effort I doubt I will have exceeded the 186 Mile/6 month target I was hoping to beat. I've barely driven the car at all. There are some "nice to do" things I can do to the car, like the braided brake lines, but I havent had the motivation to do it, but otherwise its needed no work at all.
The car is for sale, and I've had some bites, but I've also had some bites from people that seem to think they can get the car for damn near half of what I'm asking for it because its the "undesirable" model. To that I have to say, Jog on. If I don't get what I want for it (which is a very reasonable price in my opinion, considering its already 7K cheaper than the next cheapest TVR, which is the same model as mine), I will just keep it.
I did manage to get it out of the garage the other day after giving it a waterless wash, and its looking pretty damn good. Carpro Ech2o has impressed me.
C70R said:
I guess the size of your potential target market for this thing is pretty small, so it's going to pay to be patient if you are holding out for a value.
This is indeed very true, but I'm also in no hurry to move it on, so will keep the top down, put my hat on to cover the bald spot, and get out and enjoy the sun.Hell, it might motivate me to do some of the "nice to do" work I've had planned.
You have to WANT to a TVR to own a TVR. Its not something you can just pick up as a spare car to beat around in. Its quirks will kill the fun pretty quickly if you arent prepared to live with them. I still haven't got used to the quirks and I've owned the car for a bit now. I tried to fill it with fuel the other day and ended up pumping it in the hole on one side, and out the hole on the other side straight onto the ground >_< You cant help but laugh.


Gassing Station | Readers' Cars | Top of Page | What's New | My Stuff