540HP NA 7L V12 3 seater
Discussion


Thanks Petrus, hope you enjoy watching my descent into madness.
Paua, I intend to take it to the Caffiene and Classics at Smales farm and the Leadfoot Festival if I can get an invite - once it's roadlegal of course which is probably 2024. All going well it will be out on track in test mule form sometime first half 2023.
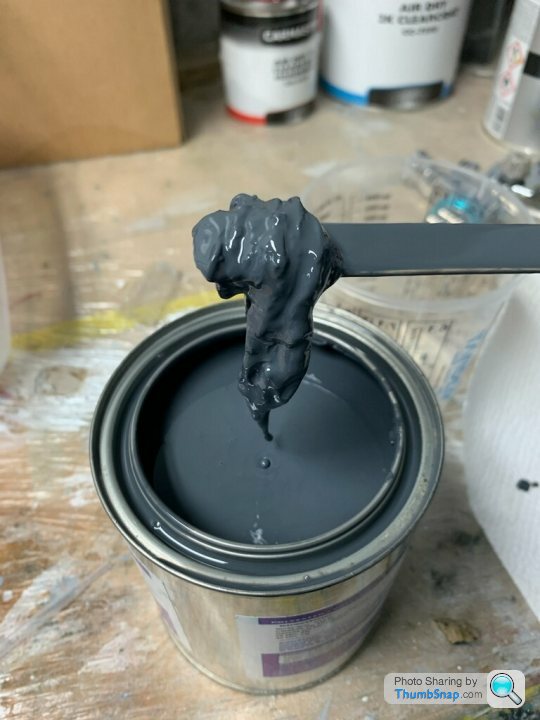
Today was going to be the day the plug got sprayed - until the new can of primer was opened at least! The high build primer appears to have settled very strongly and no way is it going to spray in the condition shown below. Supplier says it's normal - but my painter mixed it for 10 minutes and it was still the same - have no experience with this primer so progress is halted. Anyone have tips on how to make this gluggy mess sprayable? Initially was told 5% acetone works well to thin the mix so will try that tonight.
Prestec 2093 Surface Primer.
Paua, I intend to take it to the Caffiene and Classics at Smales farm and the Leadfoot Festival if I can get an invite - once it's roadlegal of course which is probably 2024. All going well it will be out on track in test mule form sometime first half 2023.
Today was going to be the day the plug got sprayed - until the new can of primer was opened at least! The high build primer appears to have settled very strongly and no way is it going to spray in the condition shown below. Supplier says it's normal - but my painter mixed it for 10 minutes and it was still the same - have no experience with this primer so progress is halted. Anyone have tips on how to make this gluggy mess sprayable? Initially was told 5% acetone works well to thin the mix so will try that tonight.
Prestec 2093 Surface Primer.
Edited by F1natic on Tuesday 14th December 04:39
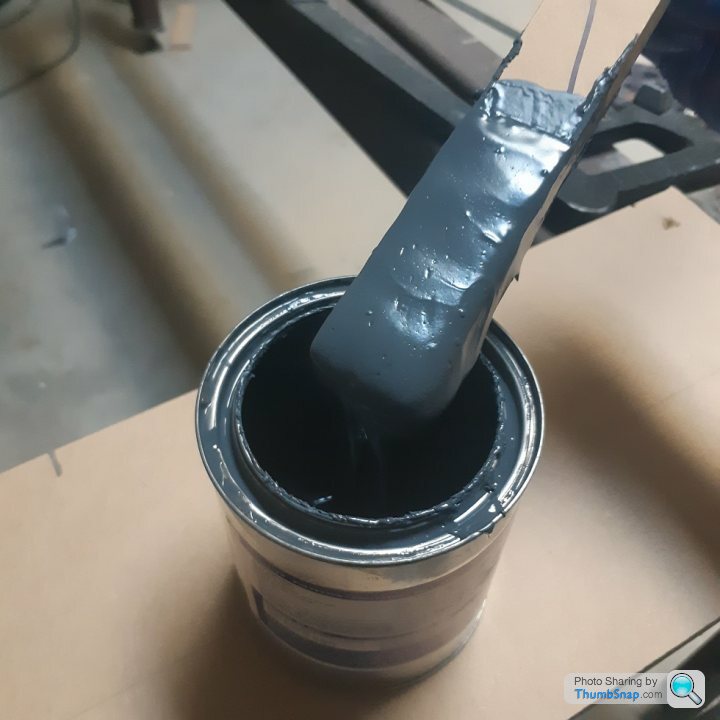
Decanted the liquid from the can and added 25ml of acetone (2.5% for 1 litre) to the solid filler clump that was at the base of the can. By smearing it into the end of the can with the flat end of the stick I was able to reinstate liquid properties, slowly mixing in more and more of the decanted liquid until it was all back in the original can and looking sprayable. Here is a shot without any of the liquid added back, hopefully back on track now;
Happy new year to all reading this build log, expect some major milestones to be knocked over this year but really looking forward to seeing how much actually gets done.
Some carbon fibre cloth appeared under the Christmas tree, going to have to see what that can be used for.
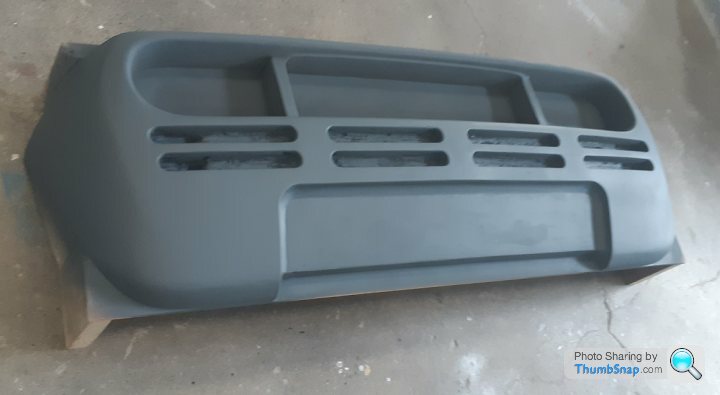
Have finished sanding the high build primer and waxed the plug, last step is shuttering off the vents slots and center gap and tool edge flanges - using corrugated polypropylene sheet and Chavant clay to seal the gaps and easily create draft on the hole sides - leaving the clay block in a closed car during a hot summers day made it very workable material. Plan is to get the tooling underway tomorrow.

Some carbon fibre cloth appeared under the Christmas tree, going to have to see what that can be used for.
Have finished sanding the high build primer and waxed the plug, last step is shuttering off the vents slots and center gap and tool edge flanges - using corrugated polypropylene sheet and Chavant clay to seal the gaps and easily create draft on the hole sides - leaving the clay block in a closed car during a hot summers day made it very workable material. Plan is to get the tooling underway tomorrow.
Edited by F1natic on Monday 3rd January 10:25
Finally got my A into G and completed the flanges for the rear mold and applied the tooling gelcoat. Conducted some tests last week on little patches to make sure everything released without damaging the plug and that was fine. 8 coats of release wax and no PVA. Used 1.5% MEKP catalyst for the gel coat as did not want to have any uncured resin, however it went off a little quicker than desired and resulting surface is not as smooth as I had hoped for, but will still get a useable result from it. The flanges are coreflute advertising signage board and the formers will unscrew off the sides after layup. All going well should be done soon... 
Flemke thread is still there, it's just not been active for a while https://www.pistonheads.com/gassing/topic.asp?h=0&...
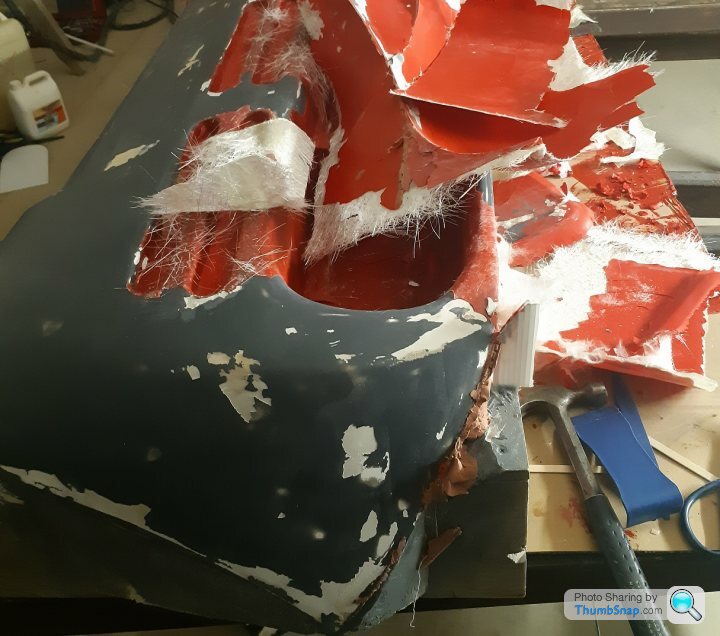
Was really not happy with the gelcoat application, sanded back the high points and put the tissue and first layer of chopped stand mat but even with stippling the hell out if I could not eliminate a lot of tiny voids which are critical to avoid in the first few layers for mould longevity (maybe not enough resin on the mould before applying the CSM?? I slathered it on before the tissue), so decided since it was still nice and flexible would be easy to pull off and redo. I was confident given how easy the test patches had popped right off. Wow was I wrong. Not a complete write off but some serious wounds to repair (mentally and physically). Was advised that the PVA release film was unnecessary if the plug was well polished, however next attempt will definitely use it and accept a bit of sanding inside the mold to improve the final surface quality.
Fortitudine Vincimus.
Fortitudine Vincimus.
Edited by F1natic on Friday 11th March 19:51
F1natic, what a huge under taking but don't let the blips in the road put you off
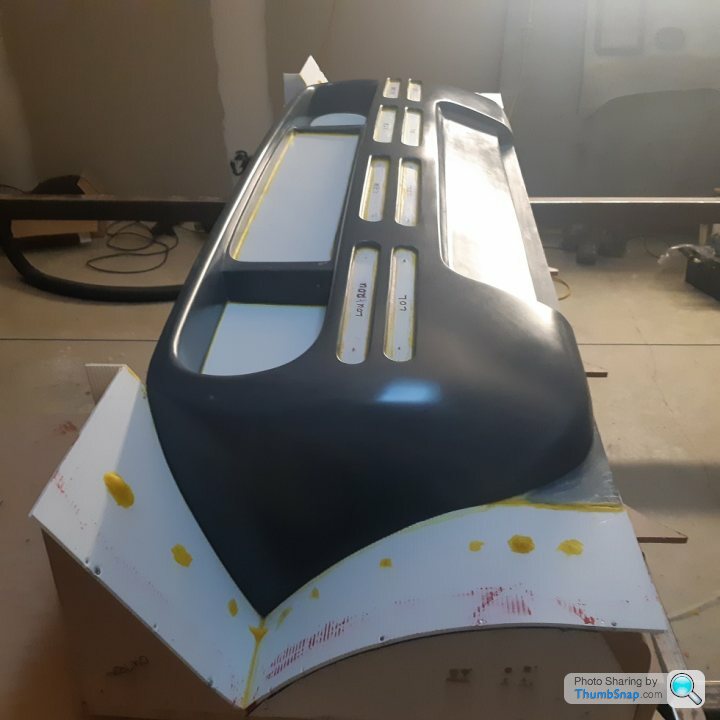
To help make you feel better, on the real F1 rear bumper we suffered what in the trade is called a 'sticker' too
Had to use a small forklift to push the rear bumper pattern against a vertical steel column in the factory so we apply enough force to remove the mould
To help make you feel better, on the real F1 rear bumper we suffered what in the trade is called a 'sticker' too
Had to use a small forklift to push the rear bumper pattern against a vertical steel column in the factory so we apply enough force to remove the mould
Thats a funny coincidence, thanks for the encouragement. That must have been quite a pop when it came out. I am going to drill all the way through the plug in a few central spots so that I can bury in some air lines. A bit of pressure over the large area might help it separate, works well for investment casting wax patterns stuck in a deep tooling recess.
Thanks Roy, damn that's a fine machine, looks great. Getting any track time soon?
Mistakes are part and parcel of going outside of ones knowledge and comfort zone. There will be many pitfalls ahead, but as Randy Pausch said the hurdles are there for those who don't want the end goal bad enough
https://youtu.be/ji5_MqicxSo
Recently recieved a new cam position sensor from Honda Japan (7 week wait), so that I can feed the ECU an accurate pulse train from the test engine.
Thought my old one was duff, turns out I read the wrong circuit diagram and the hall effect sensor grounds a pullup resistor rather than supplying voltage directly. The crank position sensor is the same arrangement but was outputting volts on the signal wire. Buried the receipt for that part in the garden!
F1natic said:
Thats a funny coincidence, thanks for the encouragement. That must have been quite a pop when it came out. I am going to drill all the way through the plug in a few central spots so that I can bury in some air lines. A bit of pressure over the large area might help it separate, works well for investment casting wax patterns stuck in a deep tooling recess.
This is the best of PH, a guy making an F1 replica gets replied to by a guy who was involved in making the original F1. Love it! Good progress on the plug repair, looking forward to getting some time devoted to second attempt over Easter if the filleting wax arrives from Easy Composites. The clay cooled quickly resulting in an unacceptably short working life, but as it was available locally thought it was worth a try - will use the wax this time. Also making the vent slots shallower.
Took a long time to get around to milling the exhaust manifolds, will be interesting to see how they perform. The J series components are easily interchanged between the variants, so could put J32 heads on the J35 block and have individual exhausts but routing will be challenging.
The engine mount plates have been fitted, next job is to weld the support tubing to them.
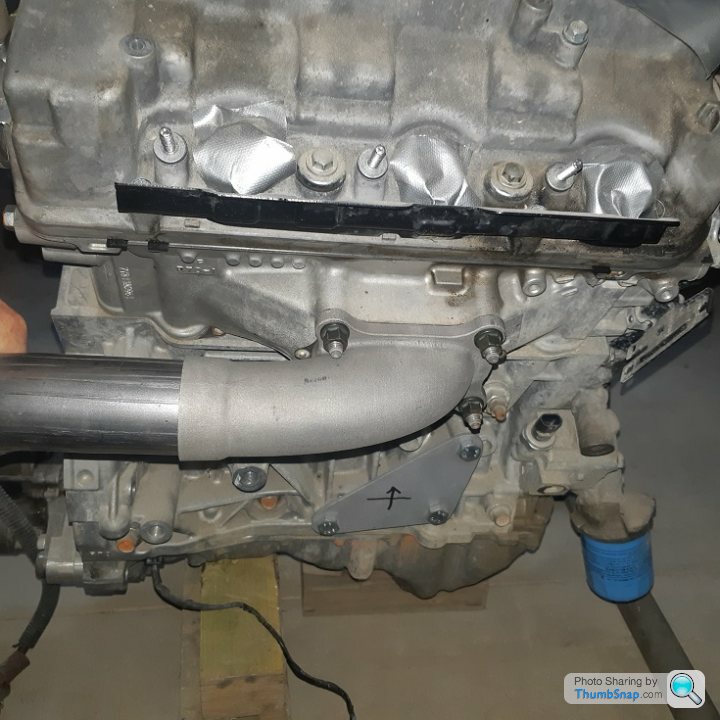
Whilst waiting for final layers of surface primer to dry on the plug have been measuring the pulse train for the camshaft now that I understand the circuit. The pulse train shown below allows synch in 1 revolution. Now need to build the logic table so it can be encoded for the ECU....
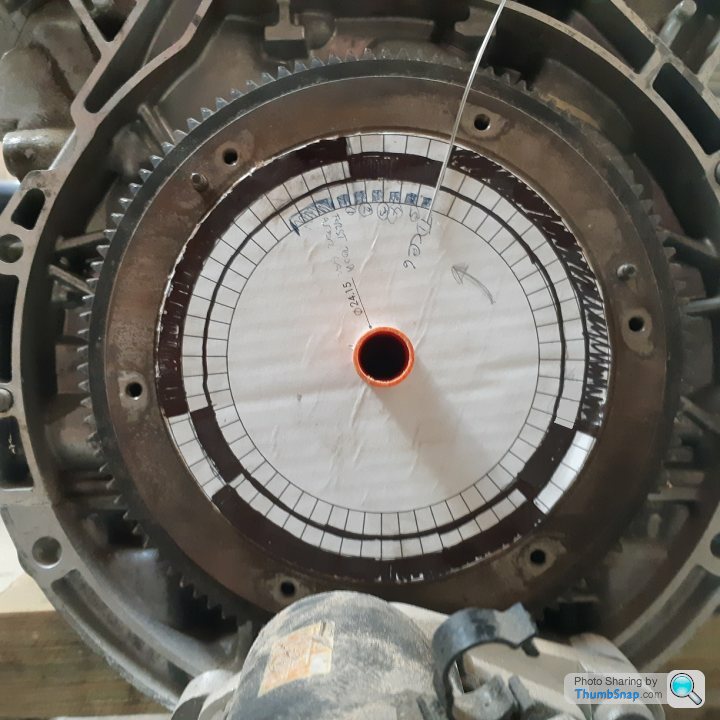
CMP signal is 0 - 360 middle ring, 360-720 outer ring
CKP pulse is inner ring, missing tooth to TDC #1/#5 region only was recorded - all other positions not of interest as it is a 60-2 design.
It will be a long time before I will be able to test synchronizing the 2 engines when the clutches are disengaged, intention is to take the primary signal from Dr Jekyll (primary engine #1) and retard or advance Mr Hyde (engine #2). It has been pointed out that clutches can walk, however these will start off as OEM output engines, i.e around 344nm each so may not be an issue initially. It is unlikely that the takeup of each clutch will be identical, but that is where experimentation will come in.
The algorithm recommended this video of 2 big blocks on dyno https://www.youtube.com/watch?v=hKVfl5CfL3U
Edited by F1natic on Sunday 24th April 01:39
Warren, the filleting wax that Easy Composites stock is the best. Applied PVA release agent a few days ago, however the original advice I received was correct, it left a horrible surface on the plug so removed it and put a few more coats of wax on instead (9 in total - as shown below). Plug now has gel coat applied, was working against the clock tonight so didn't take a photo of result. Gelcoat did not set early this time, as room temperature was 20C and had plenty of time to spread and smooth out - even using 2% catalyst. Added a couple of polypropylene panels for the flat regions of the taillight recesses to reduce the grip during mould release. Have all of tomorrow set aside to get the glassing underway, this time I have cut the templates before hand so that the draping is correct. The chopped strand mat did not conform well to the tight corners last time so this attempt have precut smaller sections to suit the contours.
Gassing Station | Readers' Cars | Top of Page | What's New | My Stuff