Maserati Gransport (aka the wedding dress)
Discussion


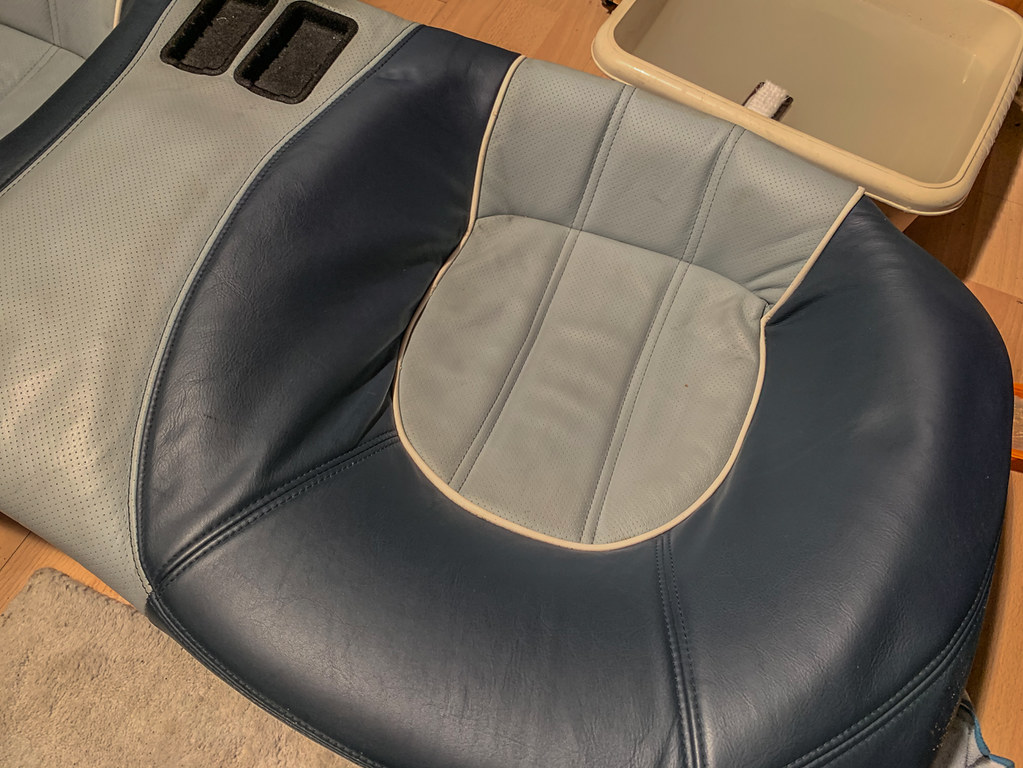
Now then, I've discussed the state of the seats / interior before now but here are some more pics to illustrate it.
One thing to note is that I took the pictures late on in the evening so I was under artificial lights which threw the white balance of the pics off. Idid try to rectify it but this created more issues than it solved.
 IMG_2318-2 by Chris, on Flickr
 IMG_2320 by Chris, on Flickr
I used some saddle soap and a soft scrubbing brush to clean them up. - At this point I'd just cleaned the seat base, there's a tide mark along the bottom of the seat back;
 IMG_2322 by Chris, on Flickr
 IMG_2321-2 by Chris, on Flickr
One down...
 IMG_2323 by Chris, on Flickr
 IMG_2325 by Chris, on Flickr
The rear seat was nearly as bad;
 IMG_2327 by Chris, on Flickr
 IMG_2331 by Chris, on Flickr
We also had another look at the heater matrix. This is the original part that came out of the car;
 IMG_2309 by Chris, on Flickr
I reiterate that it is not the OE part. It has been replaced with what appears to be an older 2nd hand unit that also failed.
This is the Saab 9000 matrix my Dad sourced (on my advice - ooops);
 IMG_2310 by Chris, on Flickr
Which has different outlet pipe dia (smaller) and they're not angled.
During last week and armed with the original matrix my Dad went to see a parts supplier some distance away. He came back with the heater matrix out of an Alfa 166;
 IMG_2315 by Chris, on Flickr
 IMG_2311 by Chris, on Flickr
 IMG_2316 by Chris, on Flickr
He's also been busy cleaning the switches in the centre console up. In addition, the bolts were scruffy, so he sourced 2 different types of replacements and polished both sets up.
 IMG_9056 by Chris, on Flickr
The paint on the gearshift paddles was also poor so my Dad also stripped the paint off them, cleaned them and repainted them;
 IMG_9063 by Chris, on Flickr
 IMG_9067 by Chris, on Flickr
In comparison, I've achieved very little. I put the capret back in the car, removing and refitting various bits and pieces numerous times as I kept missing bits out. I also didn't realise that the carpet is fitted behind the fuse box panel'
Wrong....
 IMG_2343 by Chris, on Flickr
 IMG_2345 by Chris, on Flickr
Riiiiight.... Only took me an hour to work it out.
 IMG_2350 by Chris, on Flickr
I also found this random bit of design;
 IMG_2338 by Chris, on Flickr
 IMG_2341 by Chris, on Flickr
It's a spare (backup) bonnet release cable.
One thing to note is that I took the pictures late on in the evening so I was under artificial lights which threw the white balance of the pics off. Idid try to rectify it but this created more issues than it solved.
IMG_2318-2 by Chris, on FlickrIMG_2320 by Chris, on FlickrI used some saddle soap and a soft scrubbing brush to clean them up. - At this point I'd just cleaned the seat base, there's a tide mark along the bottom of the seat back;
IMG_2322 by Chris, on FlickrIMG_2321-2 by Chris, on FlickrOne down...
IMG_2323 by Chris, on FlickrIMG_2325 by Chris, on FlickrThe rear seat was nearly as bad;
IMG_2327 by Chris, on FlickrIMG_2331 by Chris, on FlickrWe also had another look at the heater matrix. This is the original part that came out of the car;
IMG_2309 by Chris, on FlickrI reiterate that it is not the OE part. It has been replaced with what appears to be an older 2nd hand unit that also failed.
This is the Saab 9000 matrix my Dad sourced (on my advice - ooops);
IMG_2310 by Chris, on FlickrWhich has different outlet pipe dia (smaller) and they're not angled.
During last week and armed with the original matrix my Dad went to see a parts supplier some distance away. He came back with the heater matrix out of an Alfa 166;
IMG_2315 by Chris, on FlickrIMG_2311 by Chris, on FlickrIMG_2316 by Chris, on FlickrHe's also been busy cleaning the switches in the centre console up. In addition, the bolts were scruffy, so he sourced 2 different types of replacements and polished both sets up.
IMG_9056 by Chris, on FlickrThe paint on the gearshift paddles was also poor so my Dad also stripped the paint off them, cleaned them and repainted them;
IMG_9063 by Chris, on FlickrIMG_9067 by Chris, on FlickrIn comparison, I've achieved very little. I put the capret back in the car, removing and refitting various bits and pieces numerous times as I kept missing bits out. I also didn't realise that the carpet is fitted behind the fuse box panel'
Wrong....
IMG_2343 by Chris, on FlickrIMG_2345 by Chris, on FlickrRiiiiight.... Only took me an hour to work it out.
IMG_2350 by Chris, on FlickrI also found this random bit of design;
IMG_2338 by Chris, on FlickrIMG_2341 by Chris, on FlickrIt's a spare (backup) bonnet release cable.
Edited by Zombie on Monday 2nd December 21:10
Following on from my last post, we used the Christmas break to finish putting the interior back together.
My Dad had taken the door card home with him for some repairs and a clean;
 IMG_2474 by Chris, on Flickr
 IMG_2495 by Chris, on Flickr
I'm please with the way the interior cleaned up...
 IMG_2493-2 by Chris, on Flickr
 IMG_2489 by Chris, on Flickr
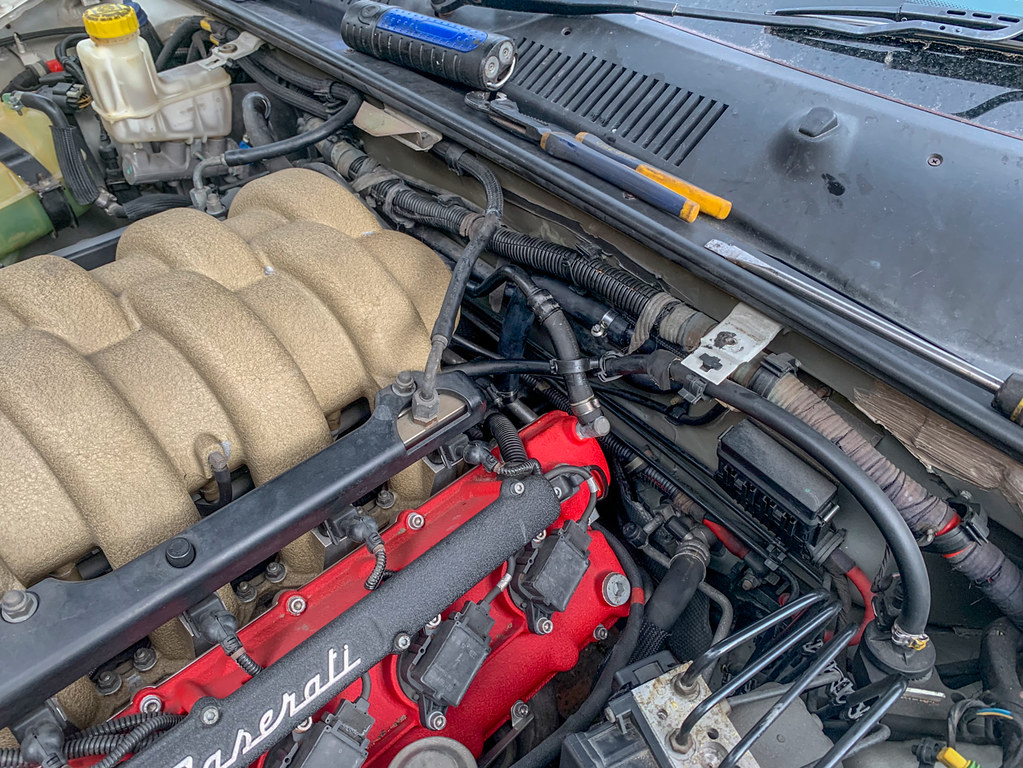
There's not much to see here, but it was the final piece of the jigsaw, reconnecting the heater matrix. Which went well, no leaks and it works!
 IMG_2478 by Chris, on Flickr
We also attached a more permanent connection for a trickle charger to the battery;
 IMG_2497 by Chris, on Flickr
I am tempted to get on of the c-tech bluetooth battery monitors as well.
As part of the rebuild, we also upgraded the door speakers to Infinity units as the old speakers were fubar. To compliment this we also added a Dension loudlink to the OEM Becker head unit.
This was not an entirely successful exercise. the (expensive) loudlink went pop when I connected it and the upgraded front speakers highlighted the fact the rear speakers were also shot.
My Dad had taken the door card home with him for some repairs and a clean;
IMG_2474 by Chris, on FlickrIMG_2495 by Chris, on FlickrI'm please with the way the interior cleaned up...
IMG_2493-2 by Chris, on FlickrIMG_2489 by Chris, on FlickrThere's not much to see here, but it was the final piece of the jigsaw, reconnecting the heater matrix. Which went well, no leaks and it works!
IMG_2478 by Chris, on FlickrWe also attached a more permanent connection for a trickle charger to the battery;
IMG_2497 by Chris, on FlickrI am tempted to get on of the c-tech bluetooth battery monitors as well.
As part of the rebuild, we also upgraded the door speakers to Infinity units as the old speakers were fubar. To compliment this we also added a Dension loudlink to the OEM Becker head unit.
This was not an entirely successful exercise. the (expensive) loudlink went pop when I connected it and the upgraded front speakers highlighted the fact the rear speakers were also shot.
Which brings me to the most recent work we've undertaken.A simple upgrade of the rear speakers to compliment the fronts....
We started by removing the back seat base and support, the side panels, all the boot trim and the rear shelf.
 IMG_2636 by Chris, on Flickr
 IMG_2638 by Chris, on Flickr
(Fuel tank is very nicely made)
 IMG_2650 by Chris, on Flickr
 IMG_2640 by Chris, on Flickr
 IMG_2630 by Chris, on Flickr
 IMG_2632 by Chris, on Flickr
 IMG_2635 by Chris, on Flickr
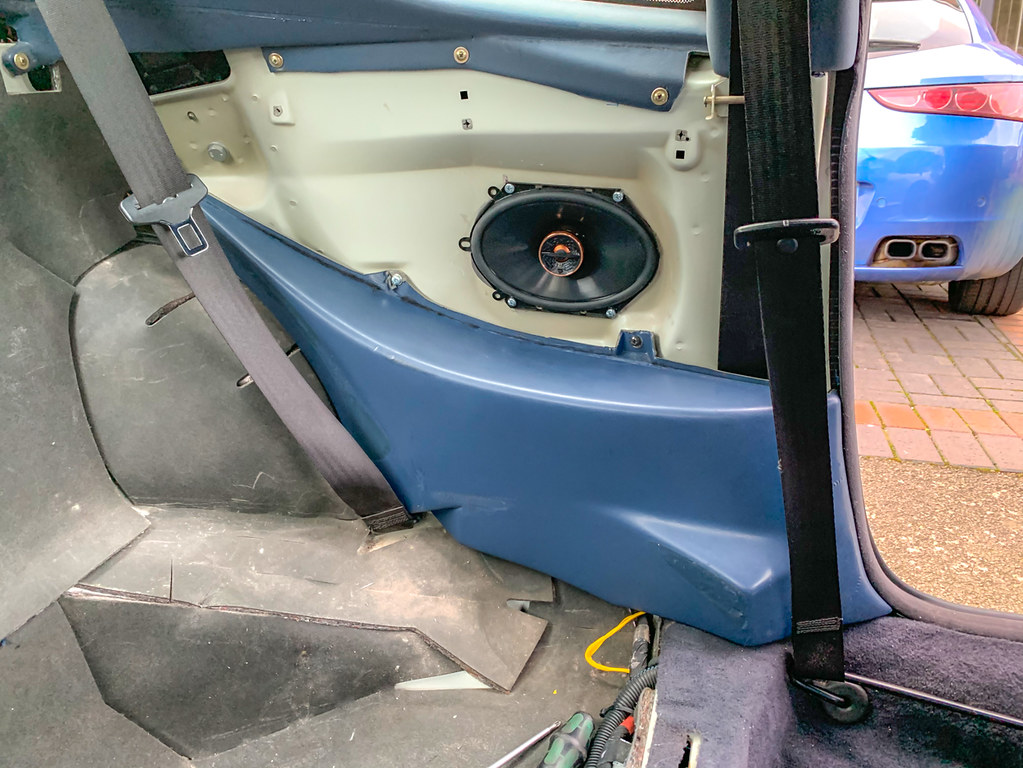
The speakers in the parcel shelf were an odd arrangement. They aren't sealed in an enclosure and are simply housed in a bracket. As suspected, they were as shagged as the front speakers;
 IMG_2658 by Chris, on Flickr
 IMG_2659-2 by Chris, on Flickr
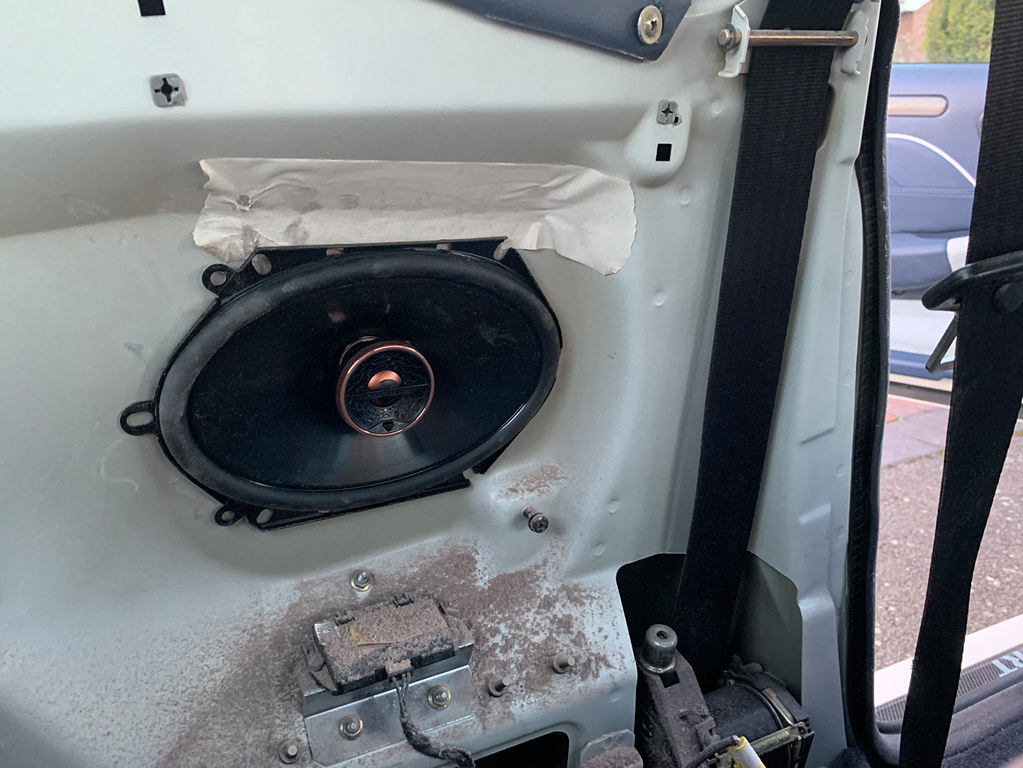
The same could be said of the speakers in the side panels too.
Whilst I felt it would be too much trouble to resolve the enclosure issue for the rear shelf speakers, Father spend quite a considerable amount of time engineering a solution to fitting them and achieving this;
 IMG_2701 by Chris, on Flickr
 IMG_2696 by Chris, on Flickr
 IMG_2692 by Chris, on Flickr
 IMG_2690 by Chris, on Flickr
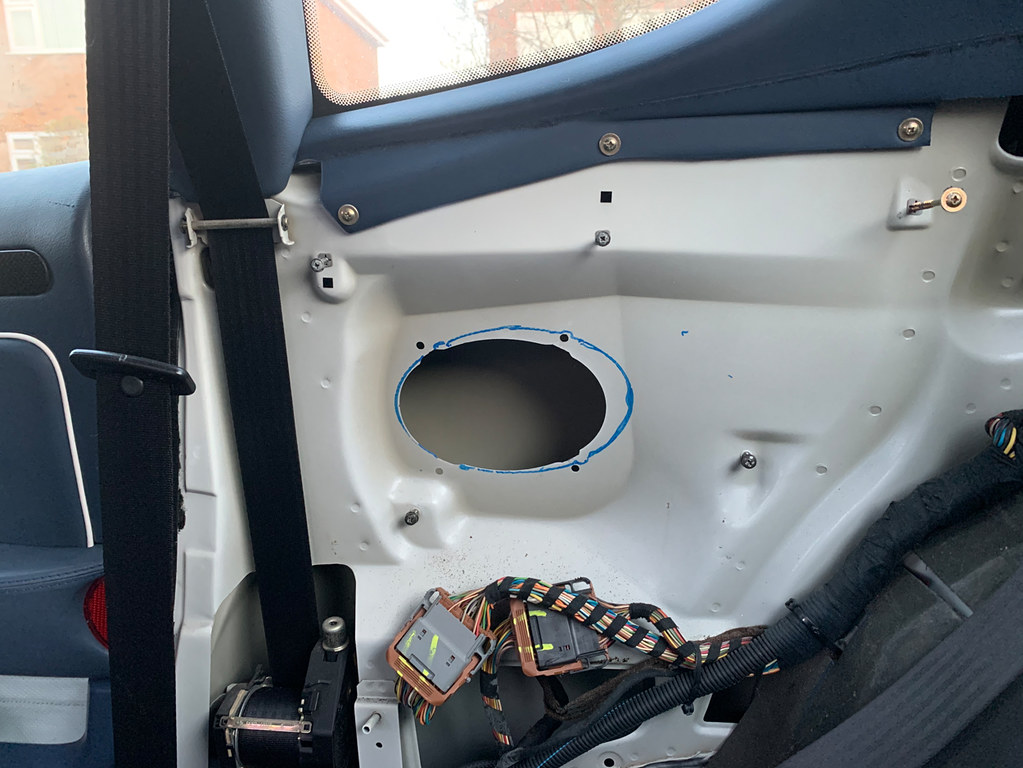
I, on the other hand, ended up with the the easier task of fitting what should have been the same size (6x8") replacement speakers in the side panels. After a bit of trial and error, we found that enlarging the hole off centre was the best option;
 IMG_2688 by Chris, on Flickr
Which I achieved using a flap wheel sander;
 IMG_2686 by Chris, on Flickr
 IMG_2685 by Chris, on Flickr
And made some new fixing points using some M5 riv-nuts;
 IMG_2703 by Chris, on Flickr
Handily, the speakers also came with a sealing strip meaning the new speakers have relatively well sealed enclosure
 IMG_2704 by Chris, on Flickr
After spending a hour (or 3) cleaning all the debris out of the interior, we put it back together this weekend;
 IMG_2710 by Chris, on Flickr
We also added a cheap bluetooth connector to the becker HU, which works well, apart from the blue tooth being on permanently. But this should be simple enough to resolve.
The end result was also worth the effort, the sound quality and volume is now comparable with the Bose system in my GTA.
We started by removing the back seat base and support, the side panels, all the boot trim and the rear shelf.
IMG_2636 by Chris, on FlickrIMG_2638 by Chris, on Flickr(Fuel tank is very nicely made)
IMG_2650 by Chris, on FlickrIMG_2640 by Chris, on FlickrIMG_2630 by Chris, on FlickrIMG_2632 by Chris, on FlickrIMG_2635 by Chris, on FlickrThe speakers in the parcel shelf were an odd arrangement. They aren't sealed in an enclosure and are simply housed in a bracket. As suspected, they were as shagged as the front speakers;
IMG_2658 by Chris, on FlickrIMG_2659-2 by Chris, on FlickrThe same could be said of the speakers in the side panels too.
Whilst I felt it would be too much trouble to resolve the enclosure issue for the rear shelf speakers, Father spend quite a considerable amount of time engineering a solution to fitting them and achieving this;
IMG_2701 by Chris, on FlickrIMG_2696 by Chris, on FlickrIMG_2692 by Chris, on FlickrIMG_2690 by Chris, on FlickrI, on the other hand, ended up with the the easier task of fitting what should have been the same size (6x8") replacement speakers in the side panels. After a bit of trial and error, we found that enlarging the hole off centre was the best option;
IMG_2688 by Chris, on FlickrWhich I achieved using a flap wheel sander;
IMG_2686 by Chris, on FlickrIMG_2685 by Chris, on FlickrAnd made some new fixing points using some M5 riv-nuts;
IMG_2703 by Chris, on FlickrHandily, the speakers also came with a sealing strip meaning the new speakers have relatively well sealed enclosure
IMG_2704 by Chris, on FlickrAfter spending a hour (or 3) cleaning all the debris out of the interior, we put it back together this weekend;
IMG_2710 by Chris, on FlickrWe also added a cheap bluetooth connector to the becker HU, which works well, apart from the blue tooth being on permanently. But this should be simple enough to resolve.
The end result was also worth the effort, the sound quality and volume is now comparable with the Bose system in my GTA.

swagmeister said:
Great work Sir, it was only at the weekend I realised I am now in the financial positon where I could indeed have a Maserati in the drive. This thread has killed off that notion. My heart says yes but my head says no, no and thrice no.
Quite. I've got one in the drive. That's the easy bit.
Getting out of the drive and on to the road is where the expense comes
 .
.Great thread, really enjoyed reading this
I had a Gransport for 5 years and I think i got off fairly lightly compared to what you've had to sort out. Absolutely loved the car though and can't think of anything for comparable money that even comes close to the overall package you get and the ownership experience.
I sold mine to a dealer in April 2018 and he still has it up for sale now. I still have the original head unit, secondary cats and resonator in the garage which i keep meaning to sell
swagmeister said:
Great work Sir, it was only at the weekend I realised I am now in the financial positon where I could indeed have a Maserati in the drive. This thread has killed off that notion. My heart says yes but my head says no, no and thrice no.
It's not that bad, I bought the cheapest GS by a considerable margin. The list of jobs so far runs to;Gearbox oil leak
Upper rear arms
Track rod
New rear tyres
Tracking
Heater Matrix repair
Window reg repair
Replacement speakers
Half of the works has been sorting out issues caused by incompetent mechanics.
On the plus side, it has a Ferrari V8 with 400bhp...
 Did Paddy / Alfa Dublin / Pat etc ever finish that?

psi310398 said:
swagmeister said:
Great work Sir, it was only at the weekend I realised I am now in the financial positon where I could indeed have a Maserati in the drive. This thread has killed off that notion. My heart says yes but my head says no, no and thrice no.
Quite. I've got one in the drive. That's the easy bit.
Getting out of the drive and on to the road is where the expense comes
.Gassing Station | Readers' Cars | Top of Page | What's New | My Stuff