1966 Mk1 Cortina GT
Discussion


I've finally resized the photos, which felt like a lifetime if I'm honest.
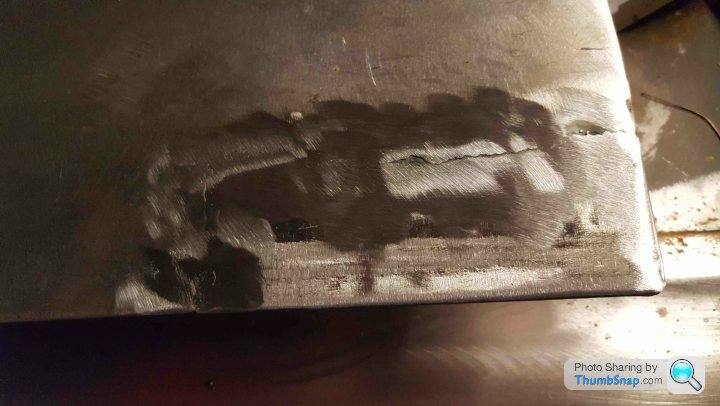
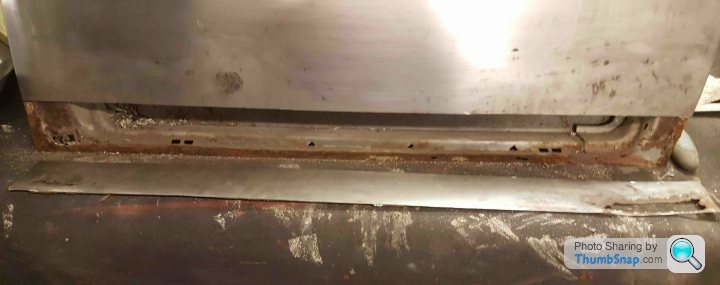
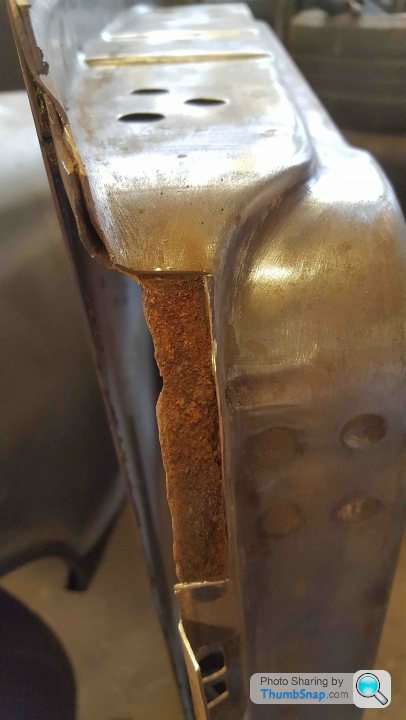
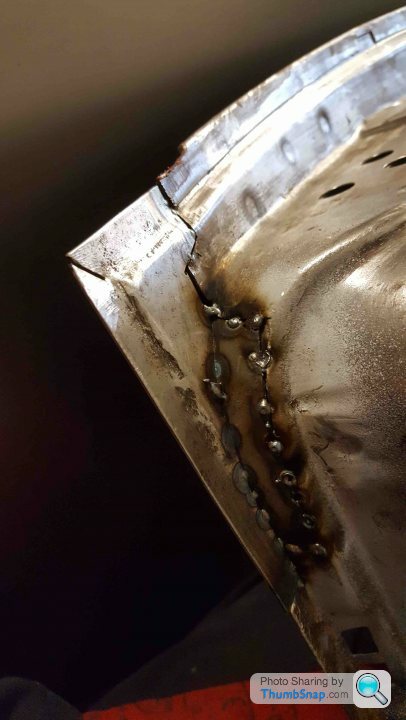
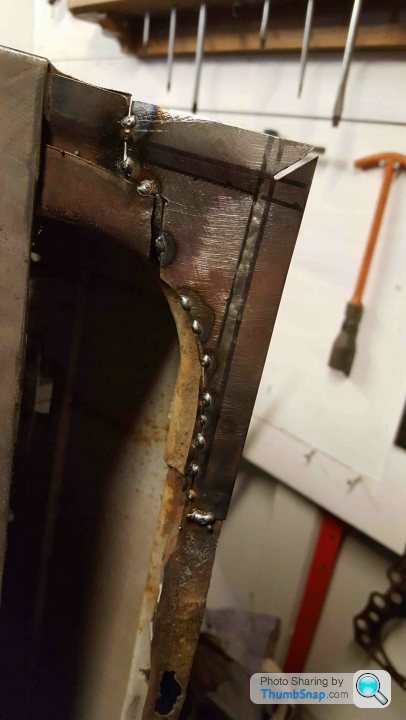
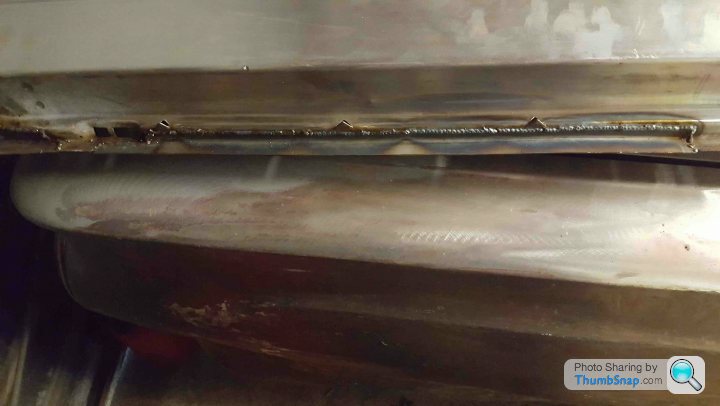
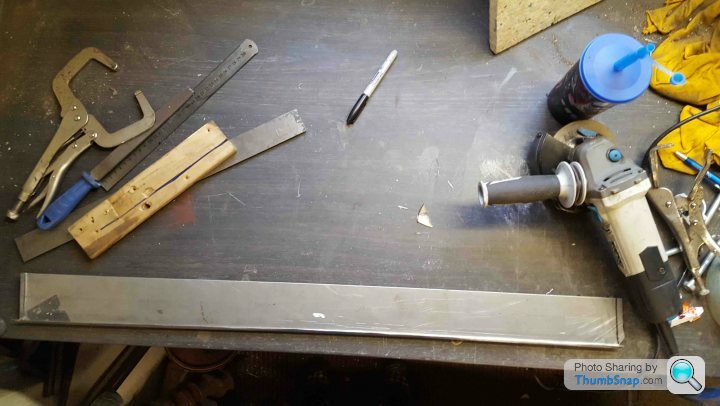
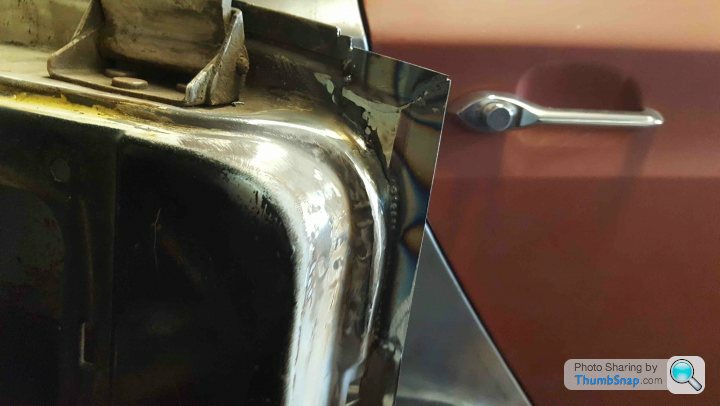
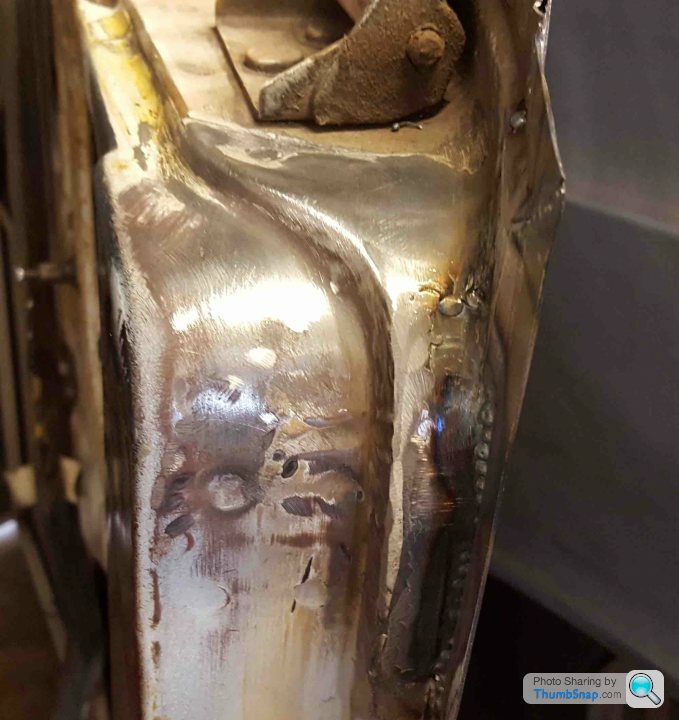
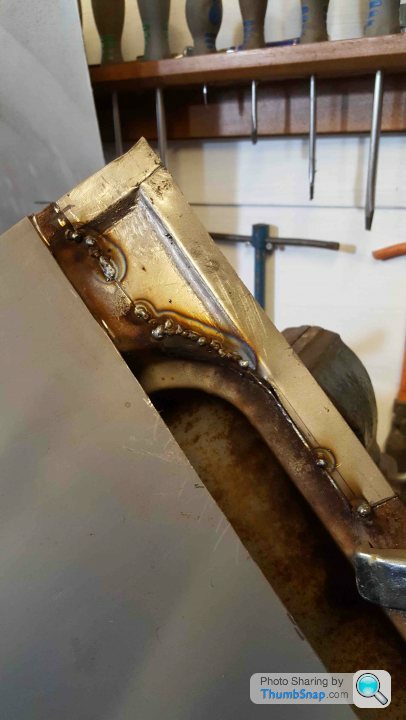
Keeping with the repairs to the chassis...
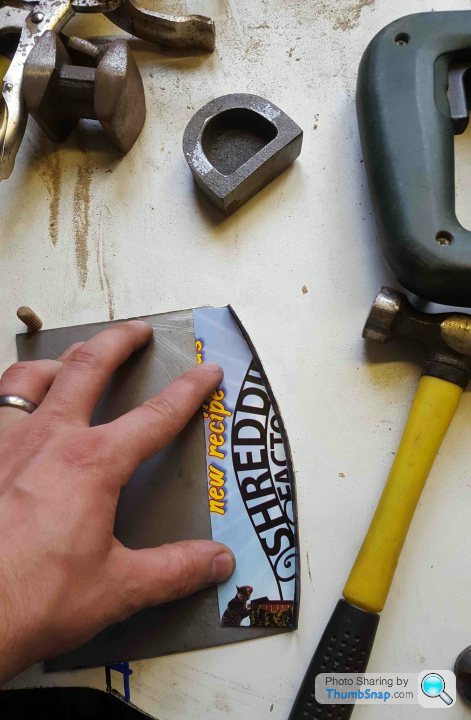
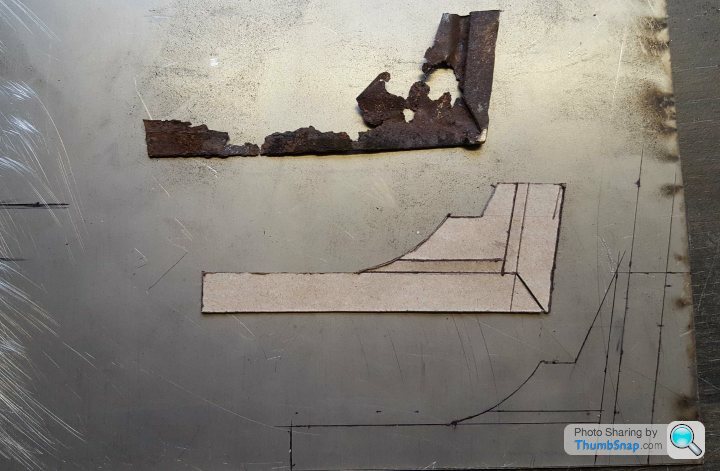
Some old chipboard came in handy for making formers - it's useful if you don't have a shrinker/stretcher

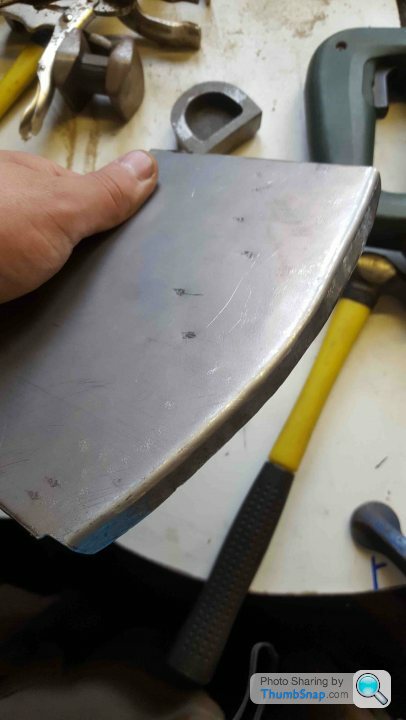
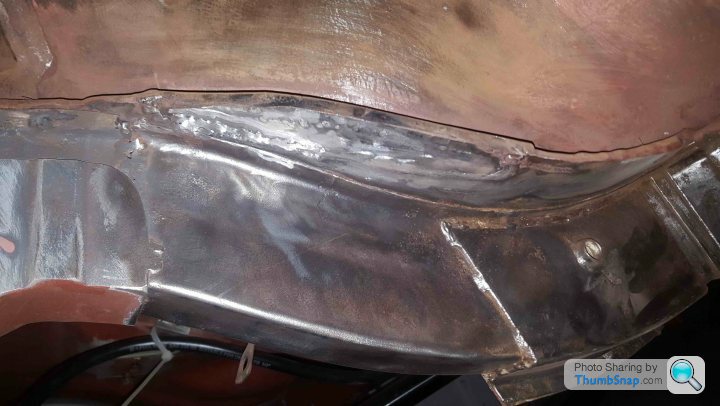
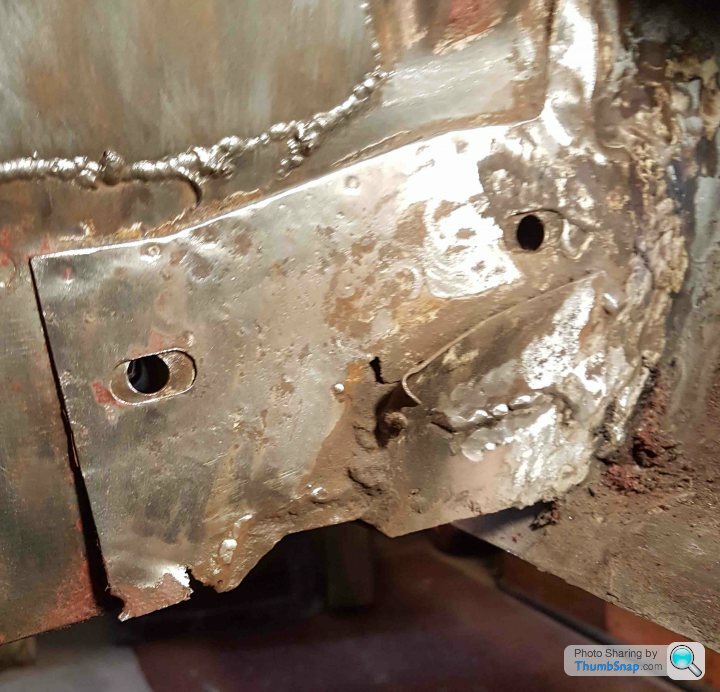
If you think it's ugly now...
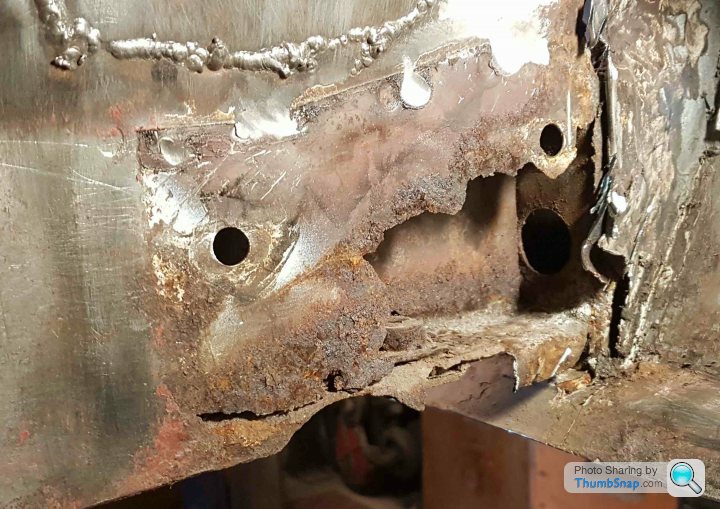
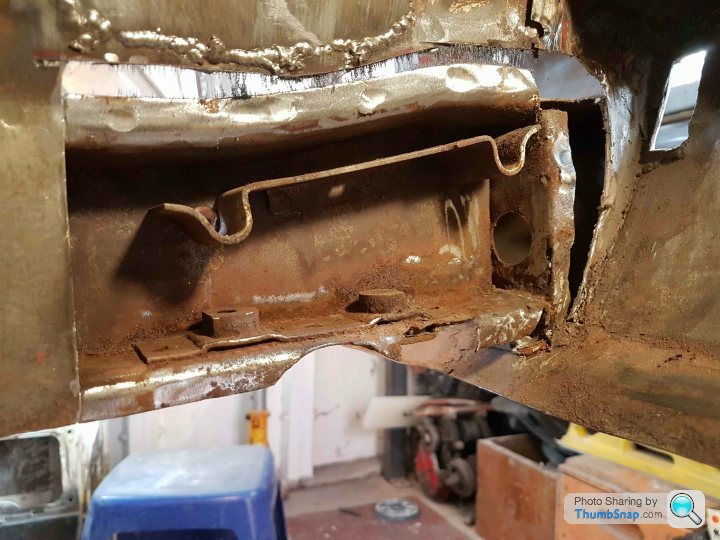
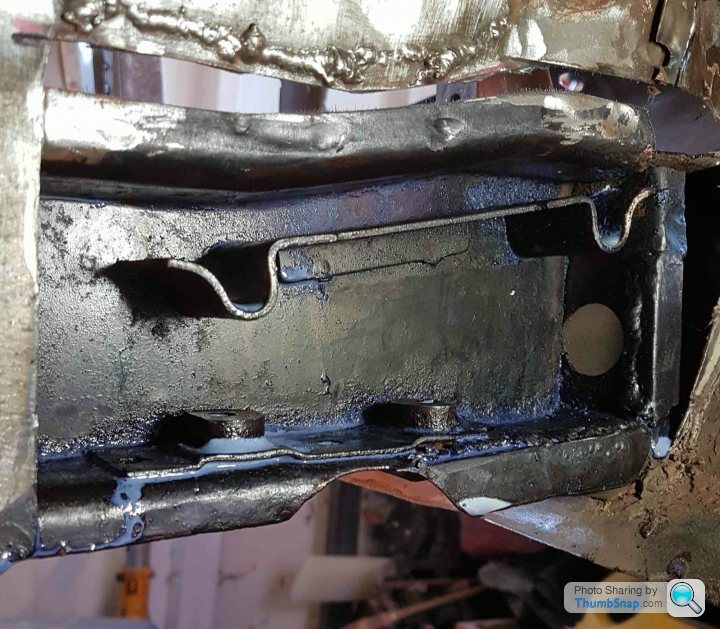


I should also apologise as the timeline for all this work is not correct, I kept a decent record of work in the form of photos but not so much in dates themselves!

Keeping with the repairs to the chassis...
Some old chipboard came in handy for making formers - it's useful if you don't have a shrinker/stretcher
If you think it's ugly now...
I should also apologise as the timeline for all this work is not correct, I kept a decent record of work in the form of photos but not so much in dates themselves!
In 2009 in preparation for the Le Mans trip and my return to university in September after finishing my work placement year I set about sorting the engine.
I feel I need to explain why I drove the engine with no oil pressure that day. Back in 2006 during daily duties the Cortina's oil pressure gauge suddenly dropped to 0. I saw this and quickly pulled over and proceeded to check everything I could at the side of the road but there was no loss of oil (which is odd because it's spilled more oil than BP!) nothing was seized or suffering from no oil pressure it was an issue with the pressure sender for the gauge.
Oil pressure senders are specific to the GT compared to the other models of the Mk1 (lotus used smiths gauges I think). so I removed it and cleaned it as best as I could be to no avail. I continued driving with no issues till it sprang into life 2 months later, a further 3 months later it dropped off again and I thought it had decided to have a day off - I was wrong! The sump plug wasn't attached to the car it was about a mile away with a trail of oil to help me find it!
So I lost my engine and upset the local council. Far from ideal!
I hadn't planned on reconditioning the engine as I was going to fit a zetec engine, I purchased an ST170 lump, a type 9 gearbox and a spare crossmember to modify. I measured it all up and just before I cut the crossmember I had a change in heart, I looked at the zetec and I didn't want to do that to my car.
My engine was sent to a local engine refurbishers who upon inspection saw that the work required to the block was uneconomical because of the damage to the cylinders which were blued due to heat and the cam bearing carriers needing to be line bored because we couldn't source a new set of +5 thou (modern ones only go up in 10's).
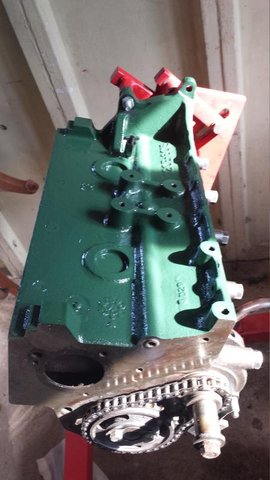
A hunt on eBay found this engine from a local college that had been used to teach student how to cross threads and do cam timing but it was dry stored and useable
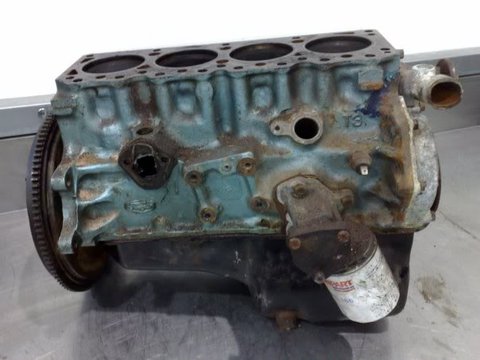
This block has been bored to +90 giving me 1590cc, the bottom end was balanced.

The engine has also had an A2 fast road cam, electronic ignition and a ported and polished head

This then sat till 2015 till I went it was finally placed into the car. I had decided to essentially rebuild the cortina to get make sure this all worked and get anything fabricated before it was all painted.
2015 was also a pinnacle year for the build - this was the 1st time in 10 years that I actually lived at the same place as the Cortina. All because I bought a house with a garage! I also got married that week so I took some time off working on the Cortina
I feel I need to explain why I drove the engine with no oil pressure that day. Back in 2006 during daily duties the Cortina's oil pressure gauge suddenly dropped to 0. I saw this and quickly pulled over and proceeded to check everything I could at the side of the road but there was no loss of oil (which is odd because it's spilled more oil than BP!) nothing was seized or suffering from no oil pressure it was an issue with the pressure sender for the gauge.
Oil pressure senders are specific to the GT compared to the other models of the Mk1 (lotus used smiths gauges I think). so I removed it and cleaned it as best as I could be to no avail. I continued driving with no issues till it sprang into life 2 months later, a further 3 months later it dropped off again and I thought it had decided to have a day off - I was wrong! The sump plug wasn't attached to the car it was about a mile away with a trail of oil to help me find it!
So I lost my engine and upset the local council. Far from ideal!
I hadn't planned on reconditioning the engine as I was going to fit a zetec engine, I purchased an ST170 lump, a type 9 gearbox and a spare crossmember to modify. I measured it all up and just before I cut the crossmember I had a change in heart, I looked at the zetec and I didn't want to do that to my car.
My engine was sent to a local engine refurbishers who upon inspection saw that the work required to the block was uneconomical because of the damage to the cylinders which were blued due to heat and the cam bearing carriers needing to be line bored because we couldn't source a new set of +5 thou (modern ones only go up in 10's).
A hunt on eBay found this engine from a local college that had been used to teach student how to cross threads and do cam timing but it was dry stored and useable
This block has been bored to +90 giving me 1590cc, the bottom end was balanced.
The engine has also had an A2 fast road cam, electronic ignition and a ported and polished head
This then sat till 2015 till I went it was finally placed into the car. I had decided to essentially rebuild the cortina to get make sure this all worked and get anything fabricated before it was all painted.
2015 was also a pinnacle year for the build - this was the 1st time in 10 years that I actually lived at the same place as the Cortina. All because I bought a house with a garage! I also got married that week so I took some time off working on the Cortina
I'll focus more on what's happened since 2016 as this was when the Cortina moved in with us officially!
To move the Cortina meant I had to get the shell rolling and placing the engine in situ - the engine bit was a bit redundant as it was stored in my Grans garage and we actually bought her house so I had moved it for nothing!
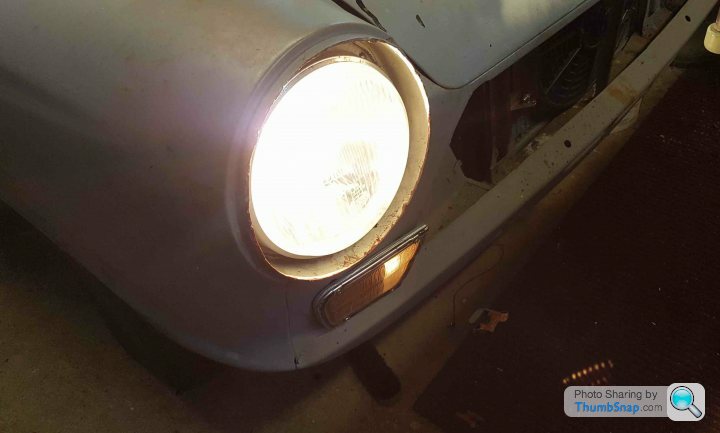
I stuck with the plan to not only build the engine up using its original carburettor rather than playing with the bike carbs that I had on a bench to avoid complications. I also wanted to replace the dynamo with an alternator because of the additional electrical loads I was going to add; the mechanical pump was toast and I figured I'd fit an electric fuel pump plus it allows for more carbs! An electric coolant fan because I intend to use the Cortina almost daily so will have to deal with traffic and H4 headlights for the same reason.
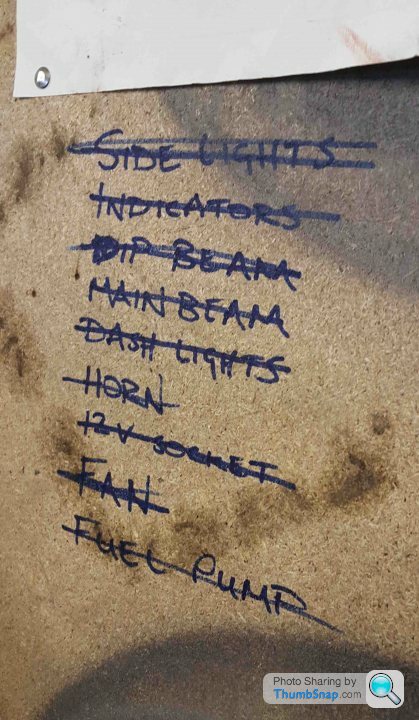
To do this I would need to add a fuse box because the Mk1 only has 1 fuse for the indicators! I'd also need a relays for the headlights, fuel pump and the coolant fan.
Alanis Morissette knows nothing about Irony!
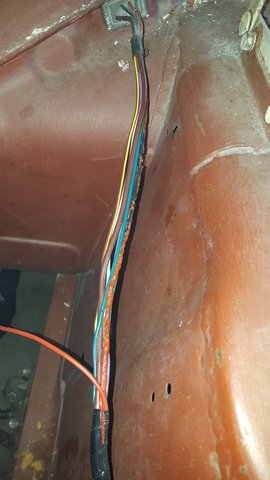
Whilst working my way through the fuse box installation which was me having the Cortina fully wired up insitu, cutting a wire then extending it to the fusebox and returning it back to where it came from. It was a solid plan on paper because if it worked before it should work after but with a fuse.
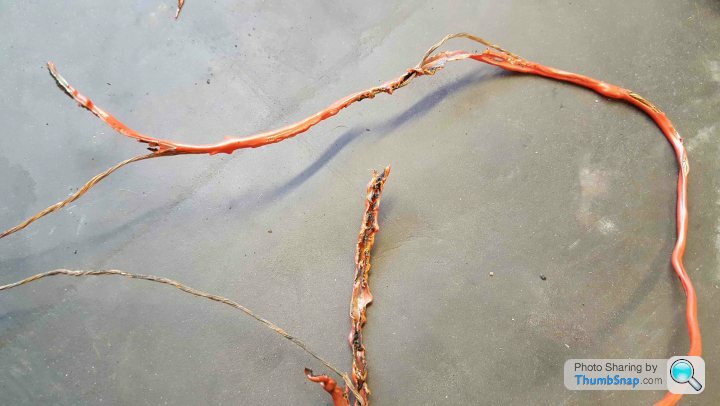
In reality the side light was being problematic so I wiggled the wire, I heard a fizzing sound and then my fingers got very hot! I jumped back to watch the side light wire get incredibly hot and smoky - it was like watching a long dynamite fuse in an old western!
I managed to cut the power just as it made it's way into the dash wiring but it was toast! As ironic as rain on your wedding day!

This left me frustrated, I'm not an electrician by any stretch so I decided to speak to autosparks in Nottingham who are able to produce wiring looms and add the additional items I wanted. I rang them to discuss and we agreed on a price of £400 - £200 for a standard loom and another £200 to modify it - a bit strong considering the fuse box I bought from them was £10!
An hour later I was at their workshop to drop the loom off to be told that they've decided the drawings they have aren't up to scratch so they'll need to make new ones, so my loom will cost £800! any looms made after than would be the agreed £400 because they won't need to reproduce a drawing - so I was being coerced into paying their development costs! Needless to say I didn't take them up on the offer!
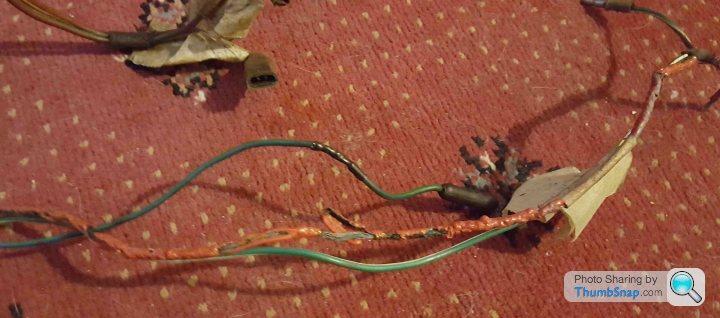
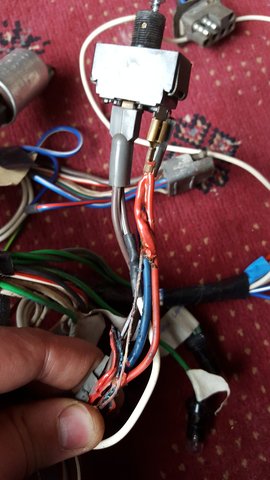
With a knackered loom and a ludicrous quote I thought I'd have a go at making my own loom. I ordered new wires in the correct colour and spec and made a cup of tea and slowly removed a wire from the loom and made a new one its place - I even used the correct uninsulated bullet connectors, it's as close to the original as anybody else would do it. All in all this loom fix was £100!


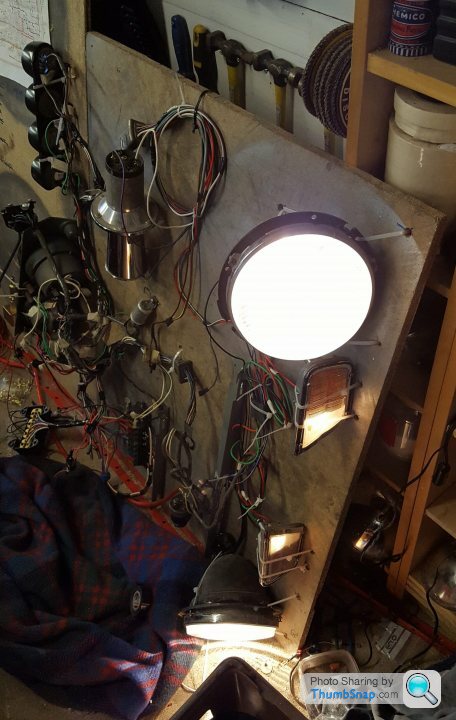
Being wary of how I ended up in this mess I used some old chipboard removed from our house that I turned into a pin board, if anyone is in my situation I'd recommend this - I used some old 90 degree racking brackets as earthing and simulate the loom till its all present and correct. It looks ropey but it worked!

Once satisfied this was transferred to the car.

I have recently pulled the loom out of storage but I'll get to that in a later post, those of you who are still awake after this - well done!
To move the Cortina meant I had to get the shell rolling and placing the engine in situ - the engine bit was a bit redundant as it was stored in my Grans garage and we actually bought her house so I had moved it for nothing!
I stuck with the plan to not only build the engine up using its original carburettor rather than playing with the bike carbs that I had on a bench to avoid complications. I also wanted to replace the dynamo with an alternator because of the additional electrical loads I was going to add; the mechanical pump was toast and I figured I'd fit an electric fuel pump plus it allows for more carbs! An electric coolant fan because I intend to use the Cortina almost daily so will have to deal with traffic and H4 headlights for the same reason.
To do this I would need to add a fuse box because the Mk1 only has 1 fuse for the indicators! I'd also need a relays for the headlights, fuel pump and the coolant fan.
Alanis Morissette knows nothing about Irony!
Whilst working my way through the fuse box installation which was me having the Cortina fully wired up insitu, cutting a wire then extending it to the fusebox and returning it back to where it came from. It was a solid plan on paper because if it worked before it should work after but with a fuse.
In reality the side light was being problematic so I wiggled the wire, I heard a fizzing sound and then my fingers got very hot! I jumped back to watch the side light wire get incredibly hot and smoky - it was like watching a long dynamite fuse in an old western!
I managed to cut the power just as it made it's way into the dash wiring but it was toast! As ironic as rain on your wedding day!
This left me frustrated, I'm not an electrician by any stretch so I decided to speak to autosparks in Nottingham who are able to produce wiring looms and add the additional items I wanted. I rang them to discuss and we agreed on a price of £400 - £200 for a standard loom and another £200 to modify it - a bit strong considering the fuse box I bought from them was £10!
An hour later I was at their workshop to drop the loom off to be told that they've decided the drawings they have aren't up to scratch so they'll need to make new ones, so my loom will cost £800! any looms made after than would be the agreed £400 because they won't need to reproduce a drawing - so I was being coerced into paying their development costs! Needless to say I didn't take them up on the offer!
With a knackered loom and a ludicrous quote I thought I'd have a go at making my own loom. I ordered new wires in the correct colour and spec and made a cup of tea and slowly removed a wire from the loom and made a new one its place - I even used the correct uninsulated bullet connectors, it's as close to the original as anybody else would do it. All in all this loom fix was £100!
Being wary of how I ended up in this mess I used some old chipboard removed from our house that I turned into a pin board, if anyone is in my situation I'd recommend this - I used some old 90 degree racking brackets as earthing and simulate the loom till its all present and correct. It looks ropey but it worked!
Once satisfied this was transferred to the car.
I have recently pulled the loom out of storage but I'll get to that in a later post, those of you who are still awake after this - well done!
Great read...brings back memories of working on my 1970 Elan S4... with the Ford Twicam 1558.
I had that car from about 2000 till 2012 : it was my Uncles project so I 'developed' it somewhat, not too much but mainly to improve upon the original....Colin Chapman would have approved !
I put in a proper roll cage system, solid driveshafts, diff strengthening bracket,,,etc etc, and when the CH gasket went, I had the head converted to unleaded spec with the bigger Sprint valves. It was on Strombergs from the factory and it went really well ...it was a Sprint in all but name really but looked like an ordinary S4.
I concur about the wiring of that period...the Elan only had 2 fuses...!!
But yours should be a bit more straightforward as it is a steel car, compared to the fibreglass Elan...there were twice as many wires as each had to be properly earthed to the chassis!
And the Elan Plus 2 later models were even more complex...the back of the wooden dash was so full of wiring !
Anyway, I always liked the Mk 1 Cortinas, a pal of my brother had a Mk 2 GT in white and I recall a trip in that !
More pics and keep us informed !
Paul S4 said:
Great read...brings back memories of working on my 1970 Elan S4... with the Ford Twicam 1558.
I had that car from about 2000 till 2012 : it was my Uncles project so I 'developed' it somewhat, not too much but mainly to improve upon the original....Colin Chapman would have approved !
I put in a proper roll cage system, solid driveshafts, diff strengthening bracket,,,etc etc, and when the CH gasket went, I had the head converted to unleaded spec with the bigger Sprint valves. It was on Strombergs from the factory and it went really well ...it was a Sprint in all but name really but looked like an ordinary S4.
I concur about the wiring of that period...the Elan only had 2 fuses...!!
But yours should be a bit more straightforward as it is a steel car, compared to the fibreglass Elan...there were twice as many wires as each had to be properly earthed to the chassis!
And the Elan Plus 2 later models were even more complex...the back of the wooden dash was so full of wiring !
Anyway, I always liked the Mk 1 Cortinas, a pal of my brother had a Mk 2 GT in white and I recall a trip in that !
More pics and keep us informed !
I had that car from about 2000 till 2012 : it was my Uncles project so I 'developed' it somewhat, not too much but mainly to improve upon the original....Colin Chapman would have approved !
I put in a proper roll cage system, solid driveshafts, diff strengthening bracket,,,etc etc, and when the CH gasket went, I had the head converted to unleaded spec with the bigger Sprint valves. It was on Strombergs from the factory and it went really well ...it was a Sprint in all but name really but looked like an ordinary S4.
I concur about the wiring of that period...the Elan only had 2 fuses...!!
But yours should be a bit more straightforward as it is a steel car, compared to the fibreglass Elan...there were twice as many wires as each had to be properly earthed to the chassis!
And the Elan Plus 2 later models were even more complex...the back of the wooden dash was so full of wiring !
Anyway, I always liked the Mk 1 Cortinas, a pal of my brother had a Mk 2 GT in white and I recall a trip in that !
More pics and keep us informed !
Thanks, a chap I used to work with had an S4 which he was having all sorts of earthing problems - it didn't sound like a fun fix! I think the stromberg head is pretty good and a little easier to live with than a weber head but that's going off other peoples experiences.
Your S4 sounded like a fun toy though, was an original chassis or a spyder?
swagmeister said:
Great thread and stunning car \ project however you lost points , HUGE points for using the phrase "Spirited Drive" - this should carry a jail sentence or a good slap, the other cringeworthy phrase is "Making Progress" .
That's why I shouldn't try to be cool on the internet! I'm in no danger of using the phrase "making progress" I'm some way off having the car on the road!
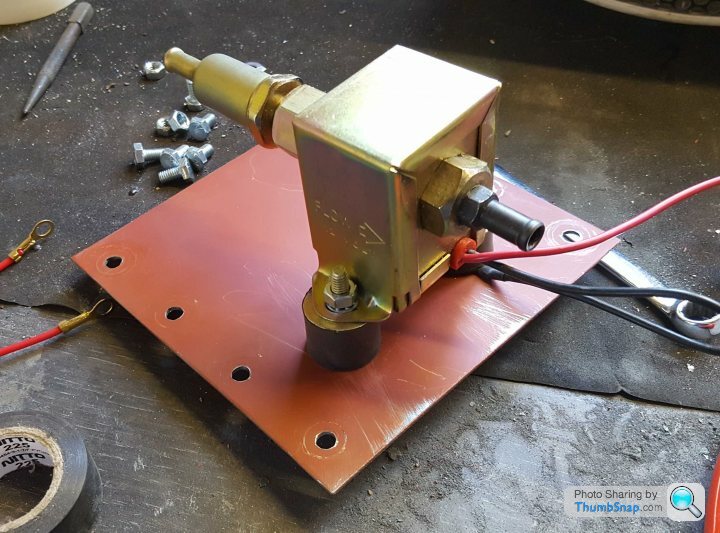
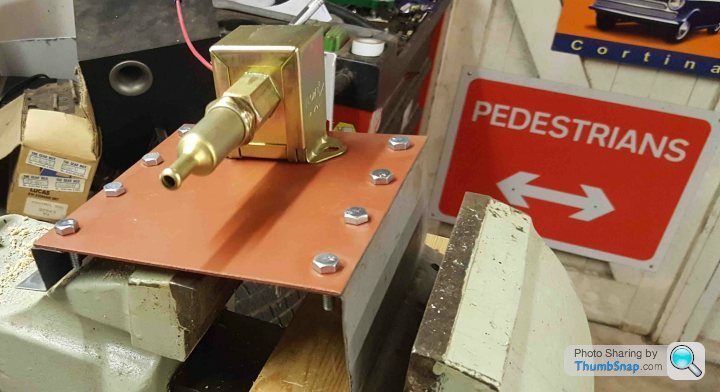
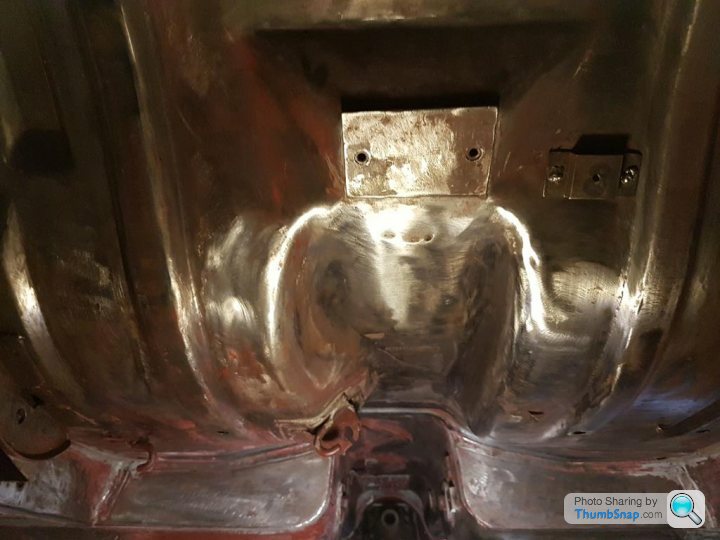
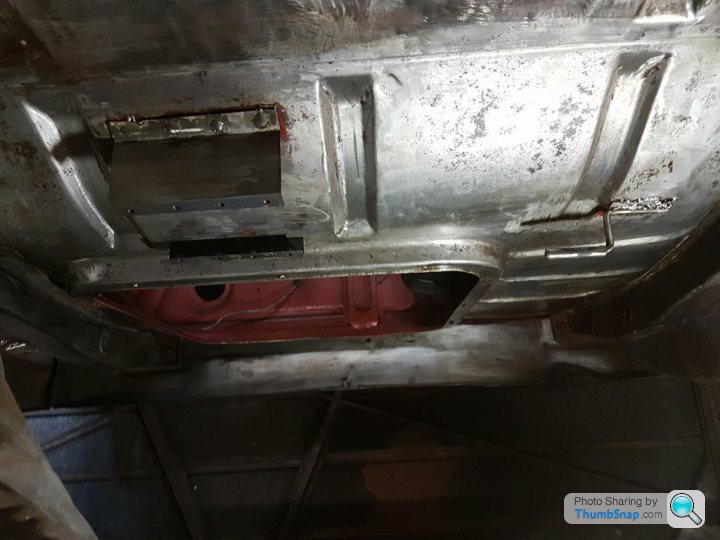
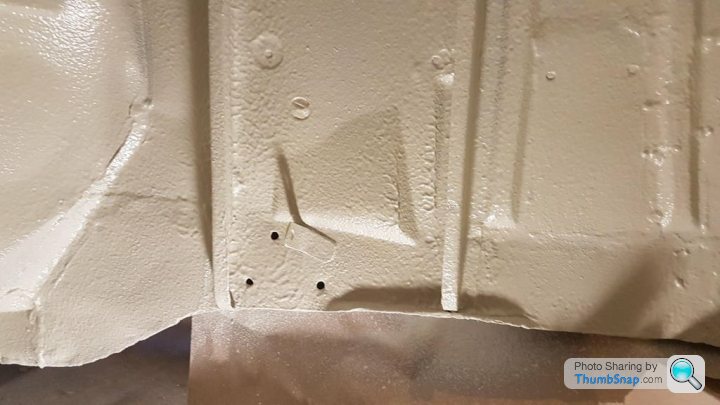
Whilst the loom was being reconstructed I had also started work on the fuel system. I'd already decided on a small fuel pump which will put out 4psi which is plenty, it also needs to sit close to the fuel tank.
I didn't want the fuel pump to have it bolted through the boot floor so I made up a removeable plate with 2 supports that are welded to the underside of the boot floor. The reason I made the pump plate removeable was so if I change the type of pump I use whether that's for carbs or fuel injection which I am tempted by.
[url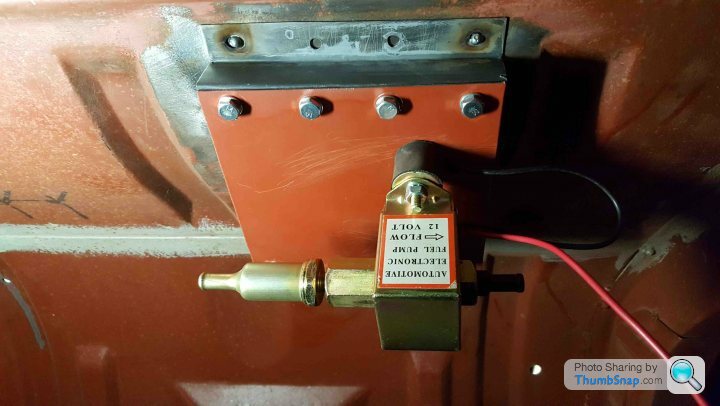 |https://thumbsnap.com/iVkF9zdz[/url]
I needed a fuel tank as my original was in a bad way, I have kept it as it could be fixed/ modified but I still haven't got round to it! At the time I found an ebay auction for 2 tanks and a Frost fuel tank seal kit for £50! which came at the right time! I went to pick them up - he threw in a 3rd tank!
I stripped the paint off them, cleaned them up using the Frost kit and fixed the pin holes using plumbers solder - an easy way to plug the pinholes that has a low thermal impact on the tank


This just reminds me of a bad night out!

I can't find any photos of them finished but I managed to refurb all 3 and sold 2 which paid for the wiring loom - stonks!
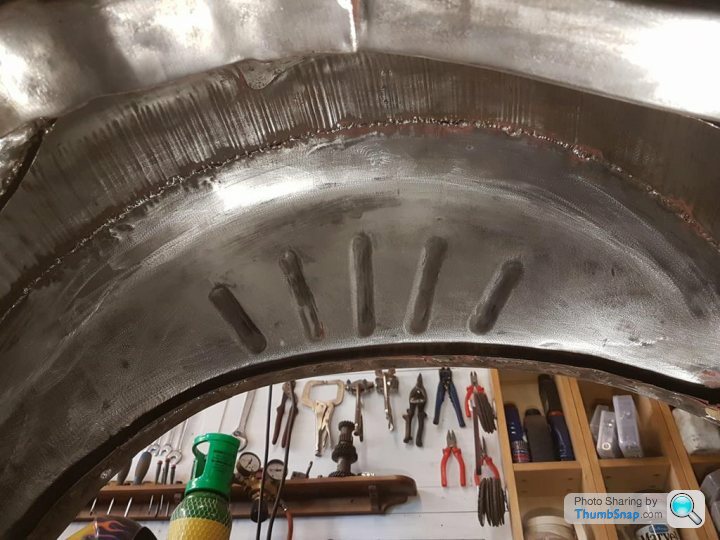
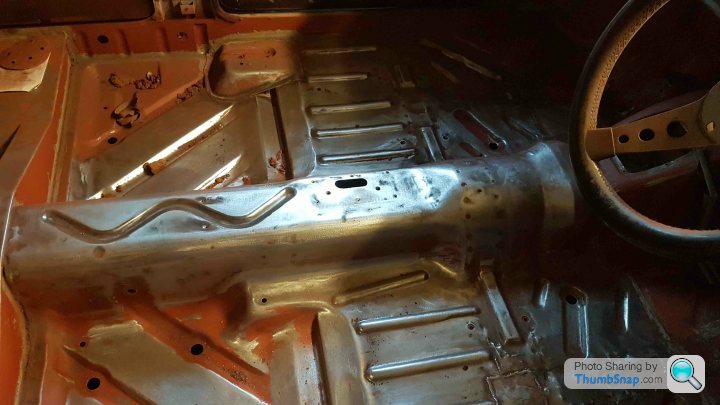
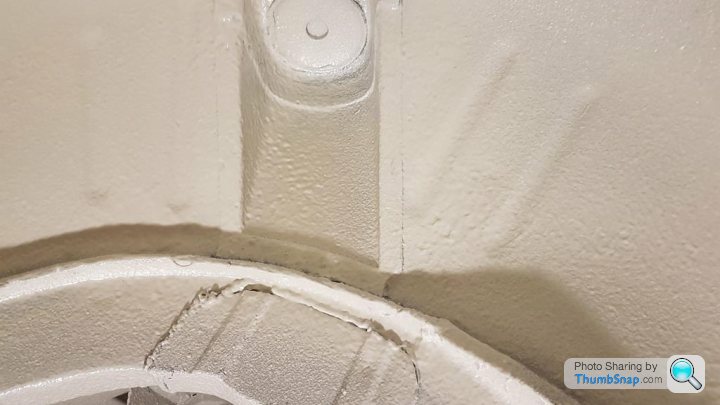
I moved onto the fuel line which I wanted to put some extra brackets on - again if I chose to go injection I'll need 2 fuel lines so I thought I'd sort that now plus the Cortina's fuel lines are held in with hair clips!


They have an M5 nut welded to the back and are dimensionally the same as the brake line brackets.
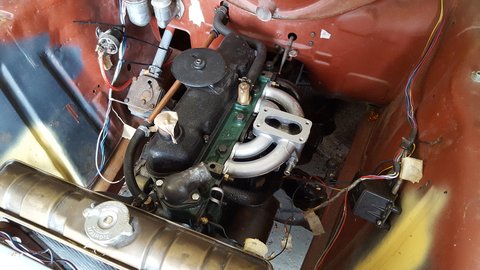
With a safe fuel supply I ran the engine - 7 years after it was refurbished! It was an amazing feeling to know that I had a running car, the motivation levels were through the roof!
My wife wasn't as enthused - I had been running the engine and tuning the carb and ignition with no exhaust and was worried about what the neighbours would say!
Performance exhausts for the Cortina are surprisingly sparse when compared to the escort. the Ashley ones are poorly made and mild steel, 105 speed used to have a manifold and system made by piper but the manifolds are no longer available and the systems will need modifying to work with the GT's original 4 branch manifold.
Modifying a £250 exhaust system wasn't what I wanted to do and as nice a that exhasut system is its a 2" system which is too large for the Cortina's performance. Fortunately I know a guy who can weld stainless so for the price of a few beers I'd make a system, tack weld it and he'd finish off the welding.
I bought 3 U bends, and over axle set, a 2m straight length and a straight through silencer - all in 1.75" and cost £120!
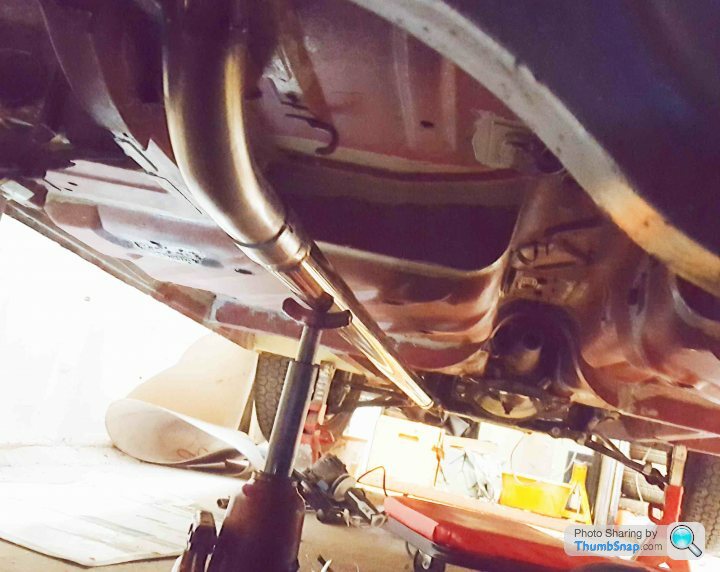
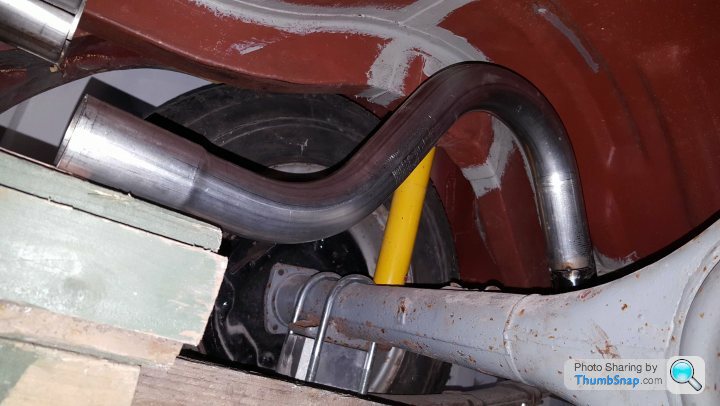
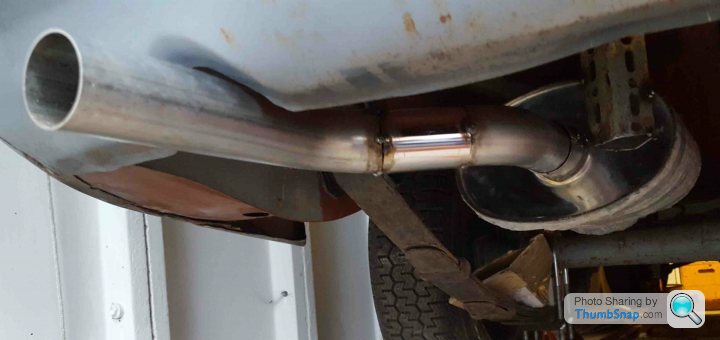

Once it was all welded up it's quiet on idle and has a nice rasp to it, I have videos of it but not sure how I can share it.
I didn't want the fuel pump to have it bolted through the boot floor so I made up a removeable plate with 2 supports that are welded to the underside of the boot floor. The reason I made the pump plate removeable was so if I change the type of pump I use whether that's for carbs or fuel injection which I am tempted by.
[url
|https://thumbsnap.com/iVkF9zdz[/url]I needed a fuel tank as my original was in a bad way, I have kept it as it could be fixed/ modified but I still haven't got round to it! At the time I found an ebay auction for 2 tanks and a Frost fuel tank seal kit for £50! which came at the right time! I went to pick them up - he threw in a 3rd tank!
I stripped the paint off them, cleaned them up using the Frost kit and fixed the pin holes using plumbers solder - an easy way to plug the pinholes that has a low thermal impact on the tank
This just reminds me of a bad night out!
I can't find any photos of them finished but I managed to refurb all 3 and sold 2 which paid for the wiring loom - stonks!
I moved onto the fuel line which I wanted to put some extra brackets on - again if I chose to go injection I'll need 2 fuel lines so I thought I'd sort that now plus the Cortina's fuel lines are held in with hair clips!
They have an M5 nut welded to the back and are dimensionally the same as the brake line brackets.
With a safe fuel supply I ran the engine - 7 years after it was refurbished! It was an amazing feeling to know that I had a running car, the motivation levels were through the roof!
My wife wasn't as enthused - I had been running the engine and tuning the carb and ignition with no exhaust and was worried about what the neighbours would say!
Performance exhausts for the Cortina are surprisingly sparse when compared to the escort. the Ashley ones are poorly made and mild steel, 105 speed used to have a manifold and system made by piper but the manifolds are no longer available and the systems will need modifying to work with the GT's original 4 branch manifold.
Modifying a £250 exhaust system wasn't what I wanted to do and as nice a that exhasut system is its a 2" system which is too large for the Cortina's performance. Fortunately I know a guy who can weld stainless so for the price of a few beers I'd make a system, tack weld it and he'd finish off the welding.
I bought 3 U bends, and over axle set, a 2m straight length and a straight through silencer - all in 1.75" and cost £120!
Once it was all welded up it's quiet on idle and has a nice rasp to it, I have videos of it but not sure how I can share it.
The plan was to get the Cortina essentially "built" basically running with parts that needed fabricating all taken on before the paint because that's how a paint job gets ruined!
Becasue I wanted to keep the Cortina as built as much as possible for as long as possible I started the bodywork with everything in situ so I could run the engine for 5 mins after a day of sanding which is quite frankly boring!
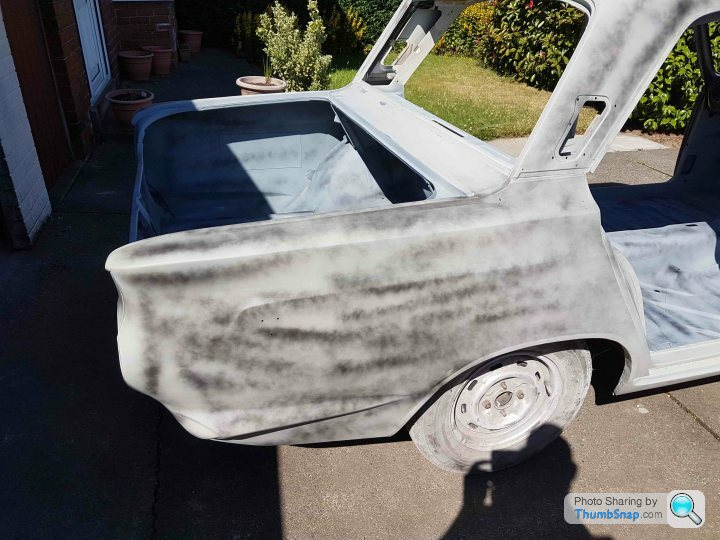
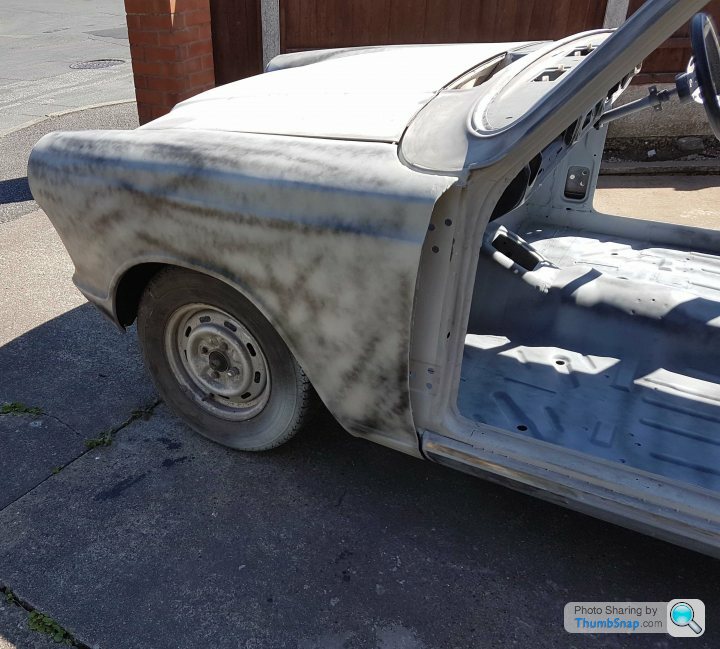
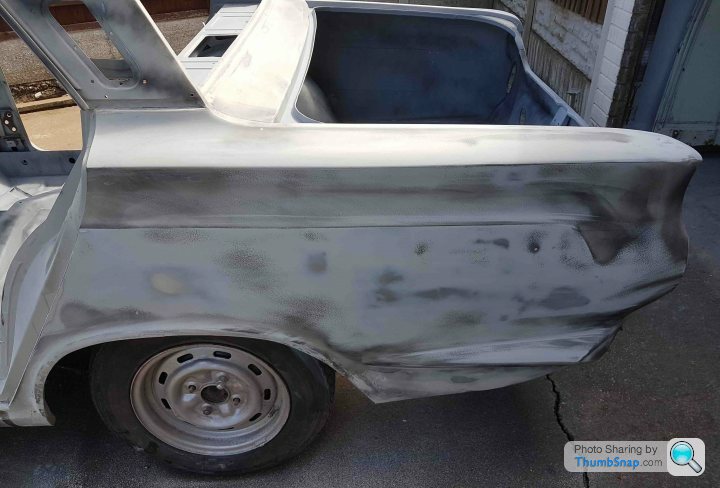
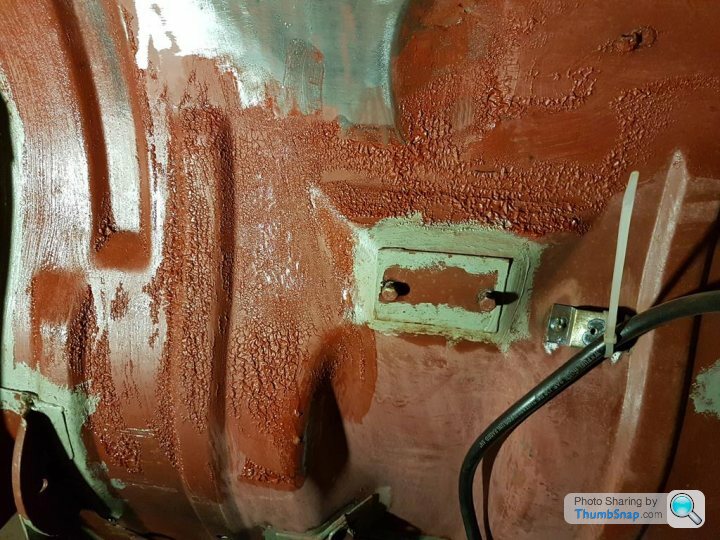
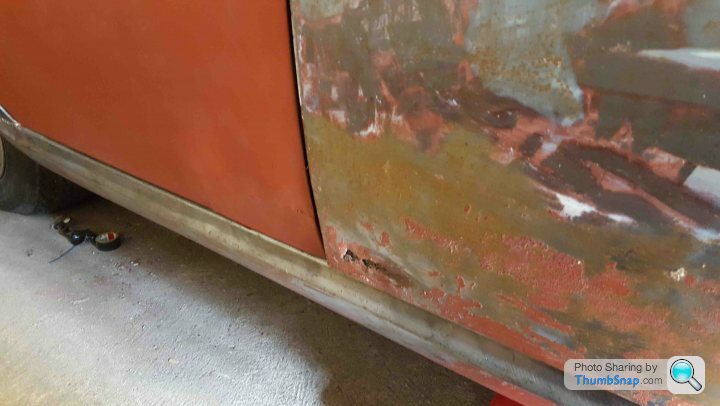
As you can see in the photos repairs had been started so the body was a mix of Ermine white, red oxide, etch primer, rust and filler!
I used nitromorse type stripper to get to the steel and then laid a 2K epoxy primer over the body.
I then took a 300mm long sanding block and a 180 grit pad to find the high and low points, This isn't the most effiecient way to work as you use double the epoxy primer but it does help find problem areas on your bodywork.

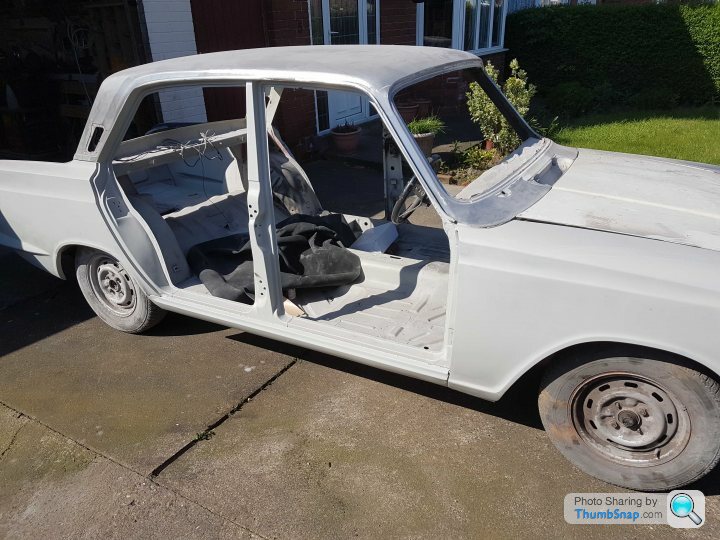
it was at this point the Cortina was stripped back down to a rolling shell.

Becasue I wanted to keep the Cortina as built as much as possible for as long as possible I started the bodywork with everything in situ so I could run the engine for 5 mins after a day of sanding which is quite frankly boring!
As you can see in the photos repairs had been started so the body was a mix of Ermine white, red oxide, etch primer, rust and filler!
I used nitromorse type stripper to get to the steel and then laid a 2K epoxy primer over the body.
I then took a 300mm long sanding block and a 180 grit pad to find the high and low points, This isn't the most effiecient way to work as you use double the epoxy primer but it does help find problem areas on your bodywork.
it was at this point the Cortina was stripped back down to a rolling shell.
The body work prep was a long blur as one week I'd be prepping the underside the next I'd take a break to look at a door, this was mainly down to getting the whole body bare, repaired and primed roughly at the same time.
I'll focus more on the floor first:
The red oxide had started to show signs of surface corrosion but it had been left "bare" for some time which is not how it is meant to be used.
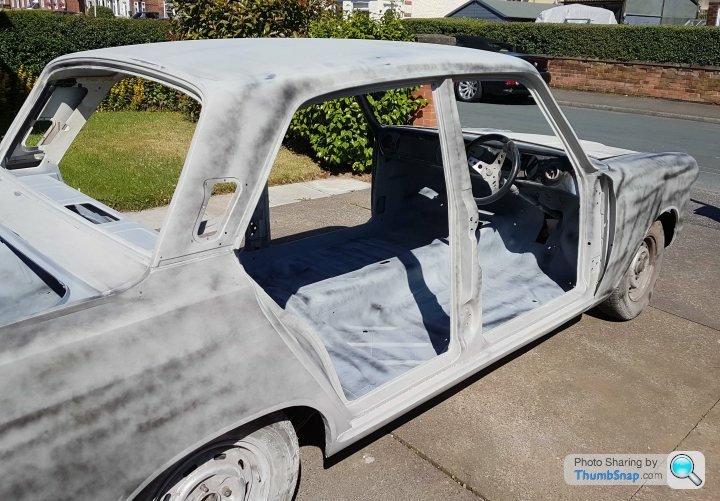
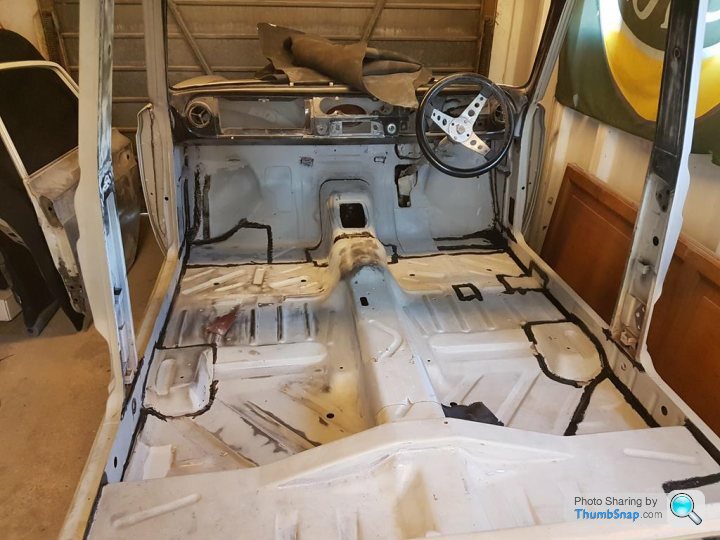
Whilst the underside was being taken back to bare metal the interior received the same treatment.


It was at this moment I became a massive tart and insisted that the boot floor needed some dressing up.
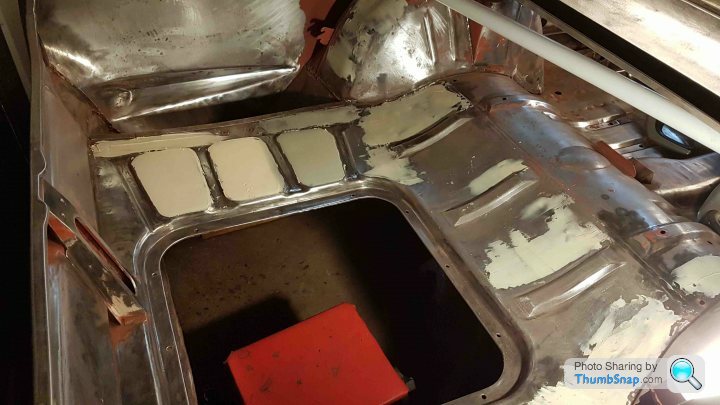
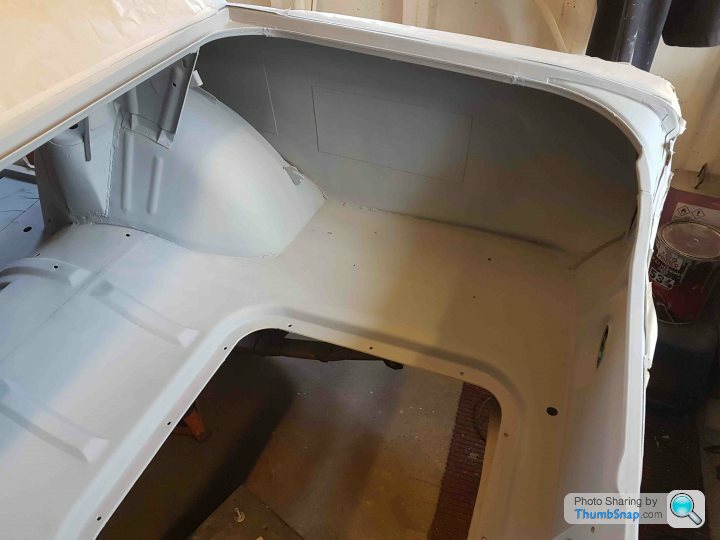
I used the interior as a trial for filler, priming and painting (which I'll come on to in a later post)
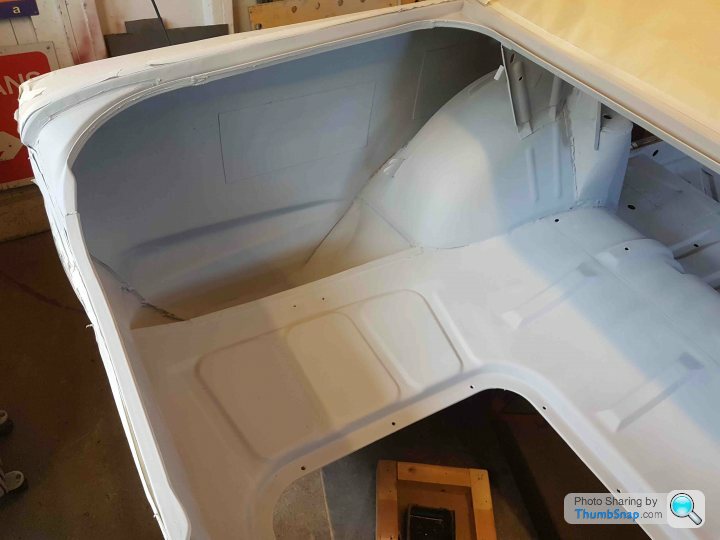
With both sides primed I could seam seal.
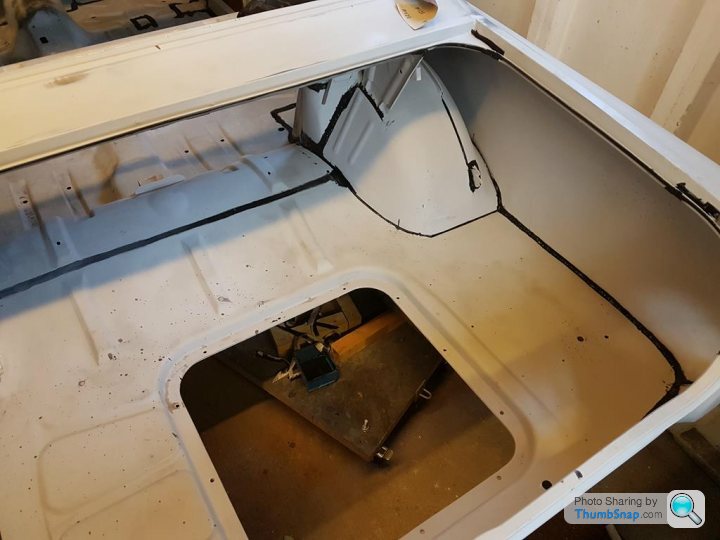
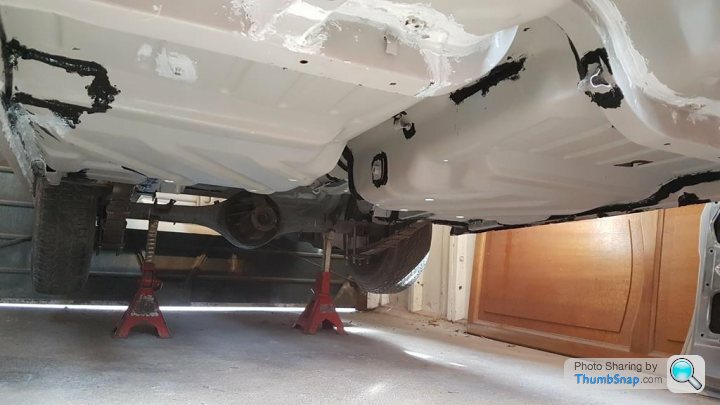
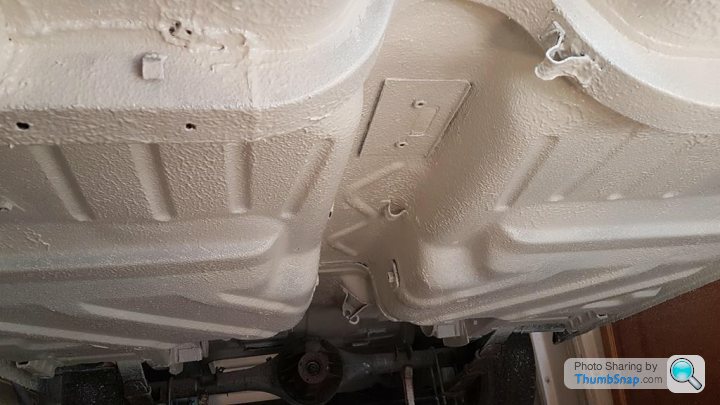
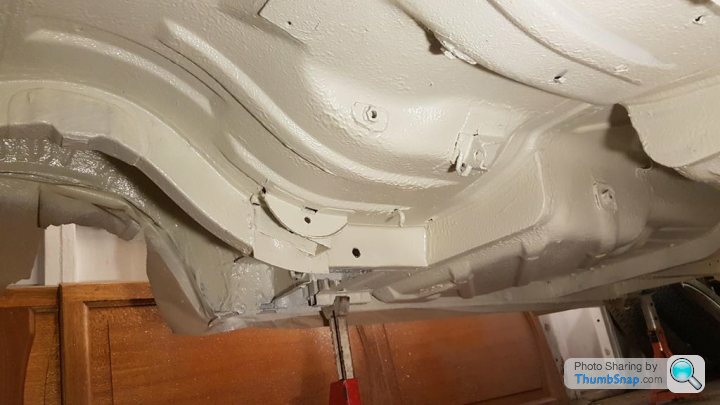
I had spent a lot of time researching the various treatments and coatings I could use for the underside, I settled on Upol Raptor which I would recommend, I used the tintable because I wanted the underside to be body colour. It's easy to mix and use an can be applied by brush, roller or sprayed, I started with a brush for seams and inside edges where spraying wouldn't be affective but spraying using a Shultz gun is simple but a pain in the @rse if you're on your back with the car above you!
White might not be the right colour for the underside of a car you intend to use but I felt that if I didn't attempt it I'd regret it and it's a lot easier to change to a black stone chip than go from black to white. This again was a motivational boost as I'd started the filling of the exterior panels which is soul destroying - mixing it, applying it then sanding it! you're always wearing a mask, it was the height of summer so work fast and sweat profusely and I have the upmost respect of people who do this daily!
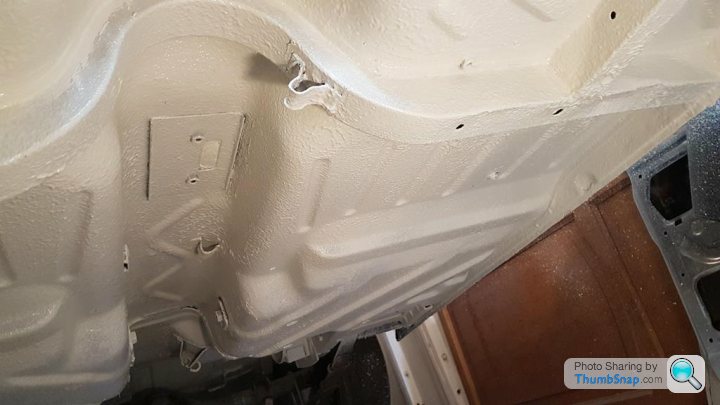

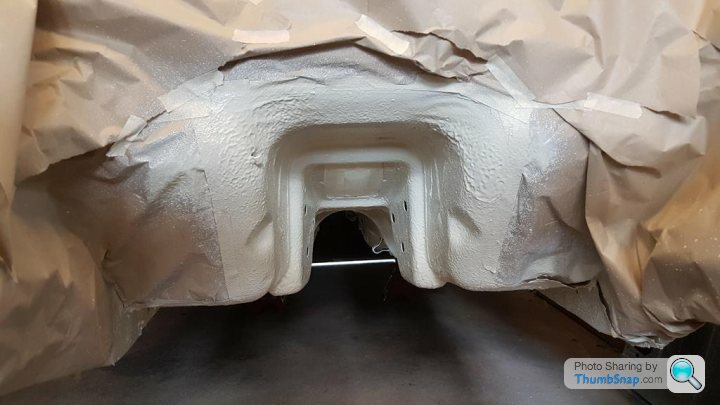
At this point the raptor was applied to the mid section of the Cortina as the front and rear suspension was still on the car, the plan was to then remove the suspension and finish the job.
With no way of moving the shell around and my narrow garage (I can only walk down 1 side of the Cortina.) I made up a frame for the front that uses the subframe mounts and a rear frame that uses the damper mounts.

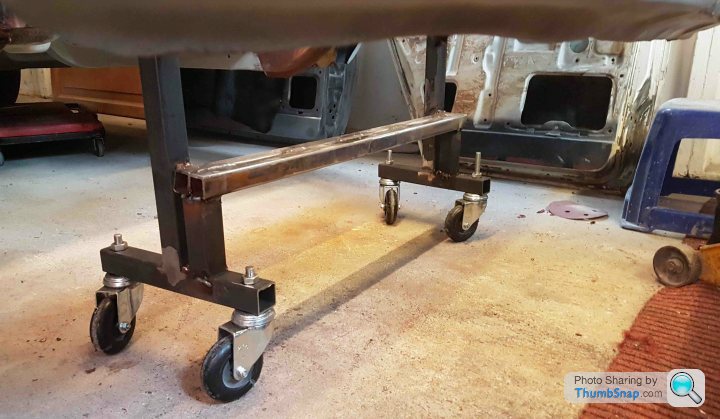
I now had a mobile shell that had could turn on the spot and be pushed around with minimal effort!
I'll focus more on the floor first:
The red oxide had started to show signs of surface corrosion but it had been left "bare" for some time which is not how it is meant to be used.
Whilst the underside was being taken back to bare metal the interior received the same treatment.
It was at this moment I became a massive tart and insisted that the boot floor needed some dressing up.
I used the interior as a trial for filler, priming and painting (which I'll come on to in a later post)
With both sides primed I could seam seal.
I had spent a lot of time researching the various treatments and coatings I could use for the underside, I settled on Upol Raptor which I would recommend, I used the tintable because I wanted the underside to be body colour. It's easy to mix and use an can be applied by brush, roller or sprayed, I started with a brush for seams and inside edges where spraying wouldn't be affective but spraying using a Shultz gun is simple but a pain in the @rse if you're on your back with the car above you!
White might not be the right colour for the underside of a car you intend to use but I felt that if I didn't attempt it I'd regret it and it's a lot easier to change to a black stone chip than go from black to white. This again was a motivational boost as I'd started the filling of the exterior panels which is soul destroying - mixing it, applying it then sanding it! you're always wearing a mask, it was the height of summer so work fast and sweat profusely and I have the upmost respect of people who do this daily!
At this point the raptor was applied to the mid section of the Cortina as the front and rear suspension was still on the car, the plan was to then remove the suspension and finish the job.
With no way of moving the shell around and my narrow garage (I can only walk down 1 side of the Cortina.) I made up a frame for the front that uses the subframe mounts and a rear frame that uses the damper mounts.
I now had a mobile shell that had could turn on the spot and be pushed around with minimal effort!
Bobberoo99 said:
Absolutely fantastic work Retro_Jim, please keep posting as I'm thoroughly enjoying this!!!
Thank you Bob, I'll keep rambling on!RC1807 said:
Great updates, and well done on the loom!
I recall my brother doing something similar - loom too - when he was about 20 (he was a panel beater) and he built a tasty mk 2 Escort...
Thank you RC It was immensely satisfying seeing it all light up rather than set alight! I do like the Mk2 Escort - what did he do to his?I recall my brother doing something similar - loom too - when he was about 20 (he was a panel beater) and he built a tasty mk 2 Escort...
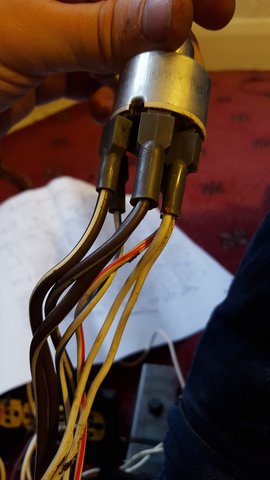
A quick tip on wiring looms and working on them - These classic looms look like a map for the London Underground and all in black. Make a few copies and colour the wires as built but focus on one system per copy i.e. the lights, indicators, engine etc
It's Janet and John looking but it makes working on a loom much easier.
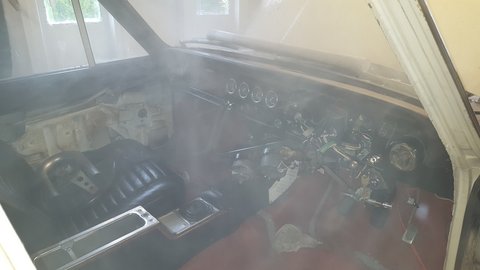
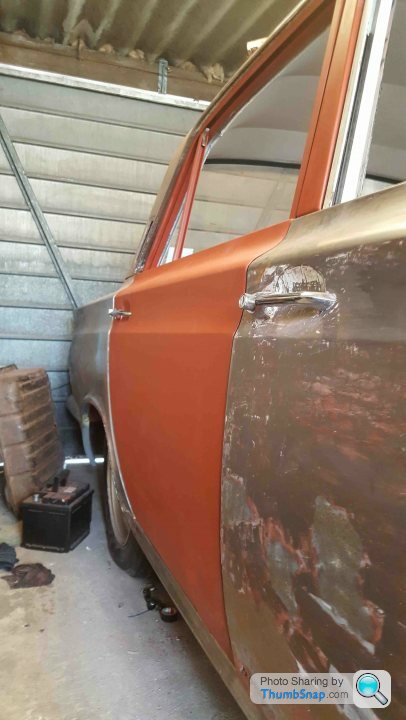
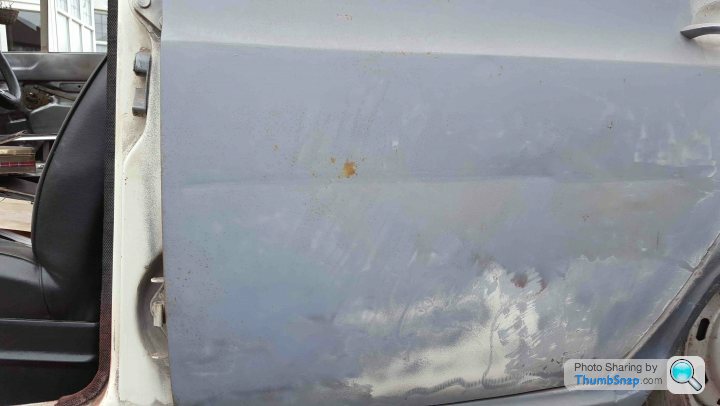
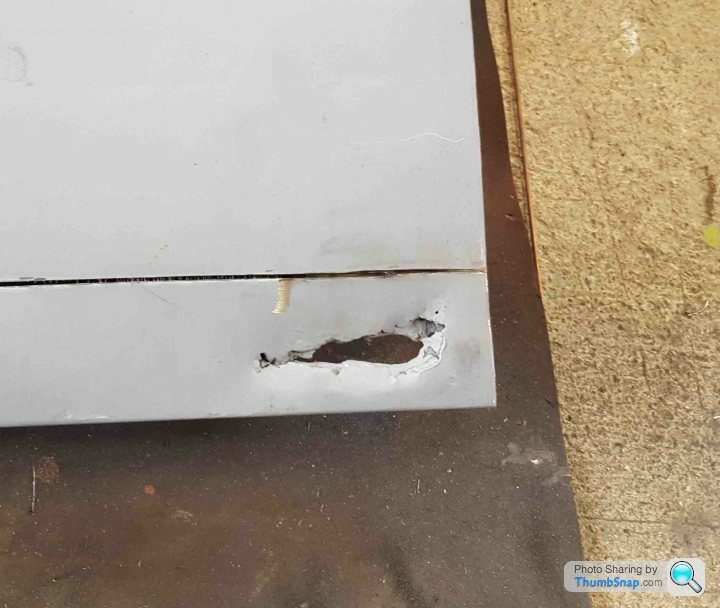
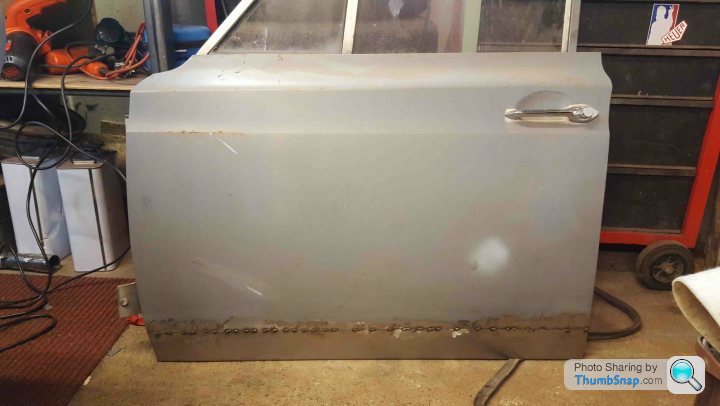
You will have noticed on an earlier post that the doors had been removed, the doors had until the stripping of paint had in my mind been an easy solution.
Strip, prime, paint, fit and home in time for tea and cake!
What actually happened:
Strip, find bodgery, swear, walk away, swear more, look at replacement doors, swear, have a cup of tea, put on a pair of big boy pants and get to work.
I'll apologise now for the sporadic photos - they we all roughly the same in bodgery and repairs so it's a miss mash of photos.


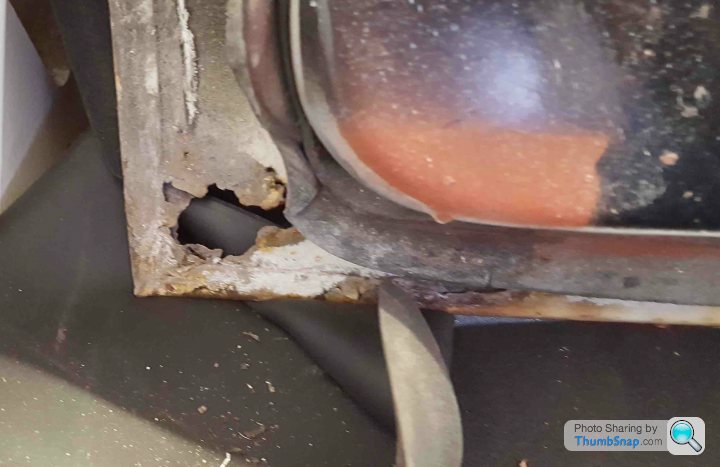
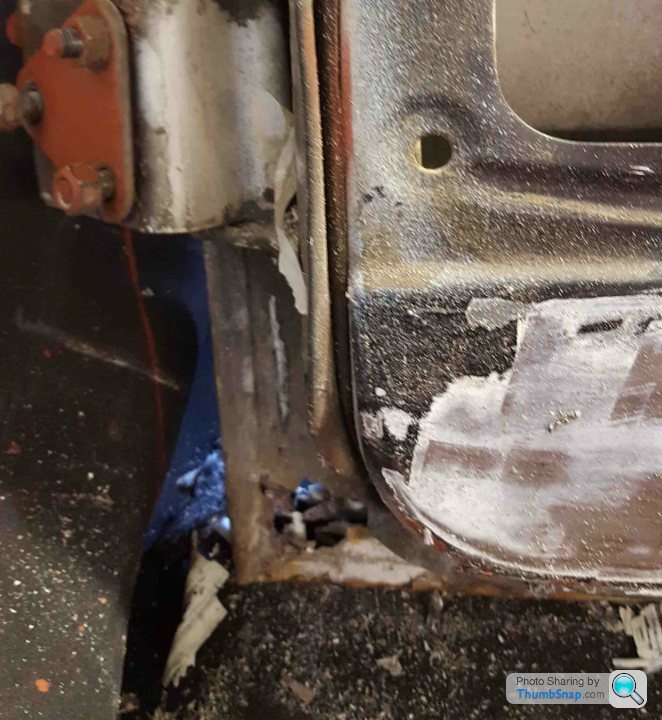
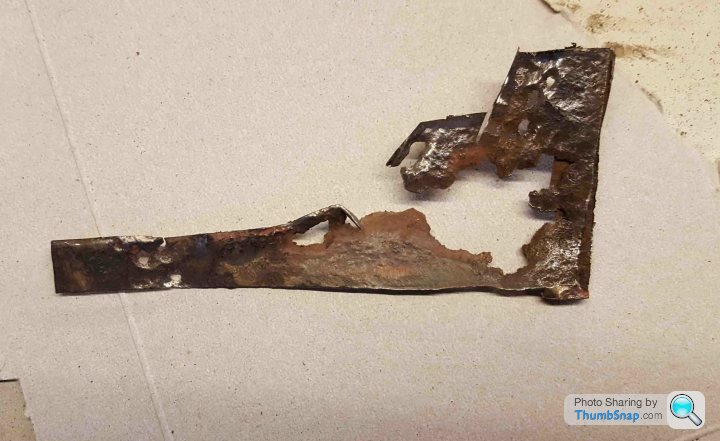
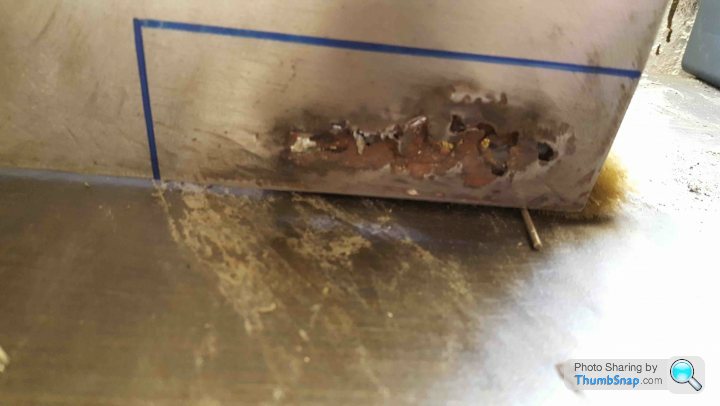
A previous owner had decided that instead of fixing these doors they would hammer the rust in, apply filler by the trowel and paint over as if nothing ever happened!
The worst offender however was the near side rear door which had also been in the wars and was sporting a rather large dent
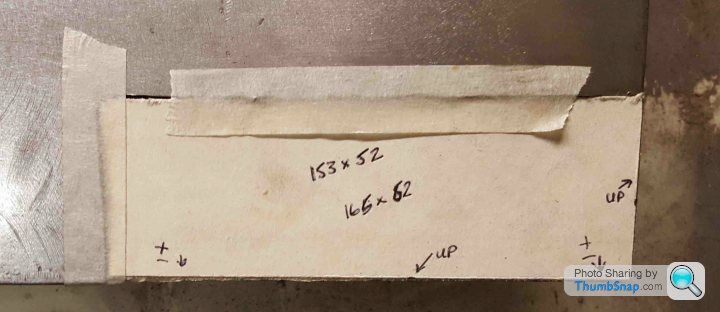
Having looked at replacement doors I concluded that I'd probably end up with 8 doors all of which needed welding! Replacement doorskins are available but I had plenty of sheet steel and that I couldn't make the doors any worse than they are now and if I did I'd replace the skin.

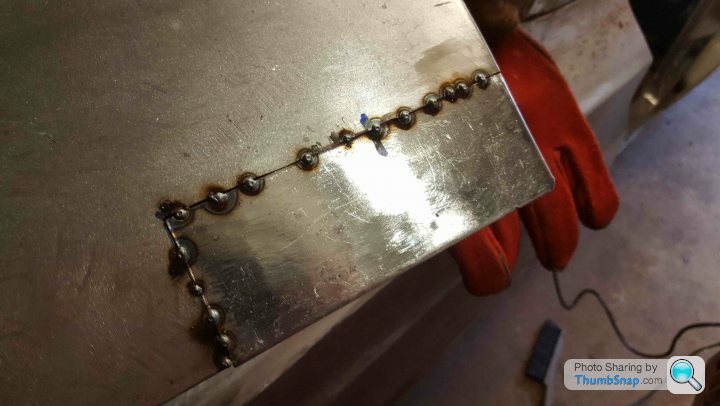


With all 4 welded up I game them a healthy coat of expoy primer both outside and in.

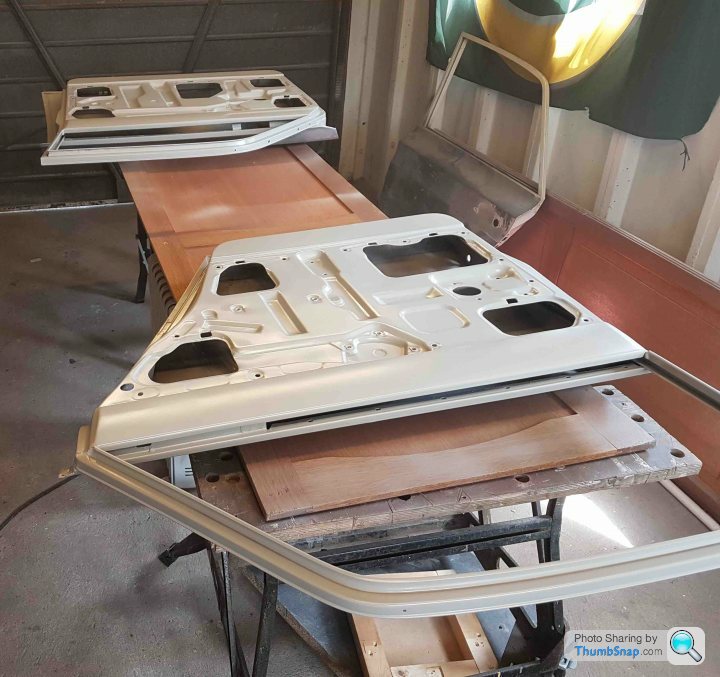
These then went into storage in our smallest spare room much to the dismay of Mrs. Retro Jim. This was because I had written into my wedding vows that I wouldn't fill our house with car parts - genuinely vowed it! In my defence however Mrs. Jim vowed to help and support me with the Cortina which using a box room for panel storage is her way of helping me!
Strip, prime, paint, fit and home in time for tea and cake!
What actually happened:
Strip, find bodgery, swear, walk away, swear more, look at replacement doors, swear, have a cup of tea, put on a pair of big boy pants and get to work.
I'll apologise now for the sporadic photos - they we all roughly the same in bodgery and repairs so it's a miss mash of photos.
A previous owner had decided that instead of fixing these doors they would hammer the rust in, apply filler by the trowel and paint over as if nothing ever happened!
The worst offender however was the near side rear door which had also been in the wars and was sporting a rather large dent
Having looked at replacement doors I concluded that I'd probably end up with 8 doors all of which needed welding! Replacement doorskins are available but I had plenty of sheet steel and that I couldn't make the doors any worse than they are now and if I did I'd replace the skin.
With all 4 welded up I game them a healthy coat of expoy primer both outside and in.
These then went into storage in our smallest spare room much to the dismay of Mrs. Retro Jim. This was because I had written into my wedding vows that I wouldn't fill our house with car parts - genuinely vowed it! In my defence however Mrs. Jim vowed to help and support me with the Cortina which using a box room for panel storage is her way of helping me!
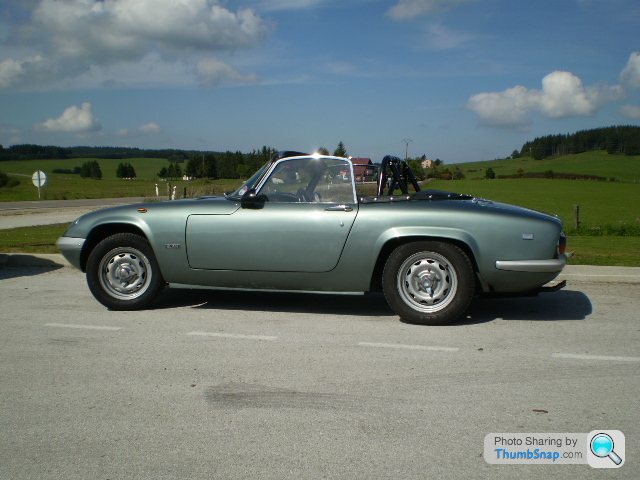
A bit late in response to your question... but here is a picture of my Elan S4DHC, taken in France on route back from Switzerland.
This was before the engine was taken out, as following this trip the CHG failed. ( I drove all the way back from The Alps to Calais with the roof down !!)
To answer your question, the car had a replacement Lotus chassis fitted, which WAS galvanised...( the original ones were not.. can you believe!) and was completely restored by my late Uncle : A talented man who was a Dental Surgeon but also did a 'nut & bolt' excellent restoration on his Elan, as well as being an accomplished artist as well !
The original factory colour was white, which IMHO does not suit an Elan ( but really suits your Cortina !!) so he had it changed to a Ford Jade Metallic Green...( the photo above does not really show it to its best ).
He rebuilt it and then did not use it much, mainly due to the fact that he moved into a much smaller house with no garage, so that was when I took over custody for the following 12 years.
The first photo shows the car sitting a bit low at the back...it was loaded up with stuff but I think that the rear springs were a bit tired !)
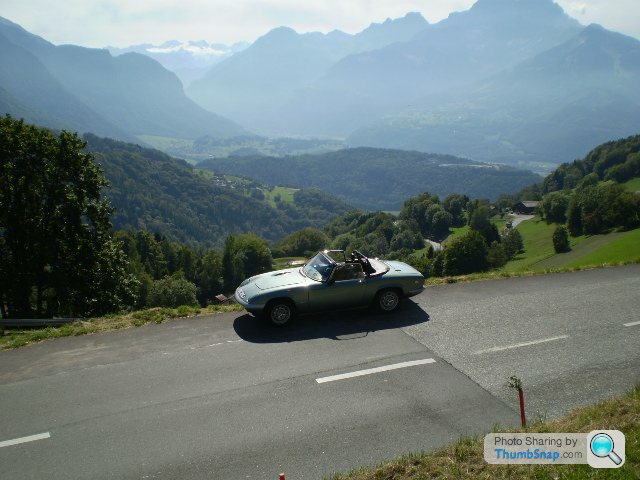
This was taken at Villars-Ollon on the Historic Hillclimb route ( the reason for the trip !), and where a good pal was competing in his Lotus 23B Nike racer.
Apologies for the long post but it is a bit of a tribute to my late Uncle George.
And it may be of interest... I hope !
Gassing Station | Readers' Cars | Top of Page | What's New | My Stuff