Kelvinators "boring car" - 1998 Corolla Liftback Project
Discussion


motomk said:
So the Liftback will morph into a wagon? Bonkers but cool, I love reading the "Kiwi-Fridge" threads!
Is that like a Tercel? I assume it is an import Toyota??
Yup, just giving the liftback bit of a nip and tuck. The Carib is a JDM model, and basically a slightly different looking Corolla. The underpinnings are all straight up Corolla (hence being able to swap all my suspension and brakes over), and the interior is a little weird. The pre-facelift like this one used a JDM "Sprinter" interior, whilst the facelift used the same interior as my liftback, albeit in black.Is that like a Tercel? I assume it is an import Toyota??
There are a whole bunch of weird JDM models out there. Sprinter is a line in its own right, based off the Corolla and meant to be the "sporty" line. You get everything from the Sprinter Carib (wagon) and Sprinter Marino (sedan), to the Sprinter Trueno (coupe).
A quick google shows the Sprinter Carib is the same as the European Corolla wagon, albeit with a different front.
I believe the Tercel is smaller, based off the Starlet platform. Kina the same idea though.
Edited by KelvinatorNZ on Monday 3rd May 07:19
drdino said:
Looking forward for the swap!
Shame about the rust though, why did it end up being so persistent?
I have a theory. The car must have lived near the sea for a while, as evidenced by the underside being covered in surface rust (we don't salt the roads here so for the underside to be crusty usually means sea spray).Shame about the rust though, why did it end up being so persistent?
The A pillar area had been (badly) fixed before, and when I open it up I keep digging out a bunch of damp black sludge. I dug a bunch out the first time and more out this time. Not all of the sludge is ferrous.
My theory is the A pillar had some bare metal, maybe from a stone chip, which rusted through due to the sea spray. This allowed sea spray/salt into the cavity in the panels, which is eating the car alive since unless I open up the whole roof and A pillar I cant clean it out.
That's only an uneducated theory though. It could be anything.
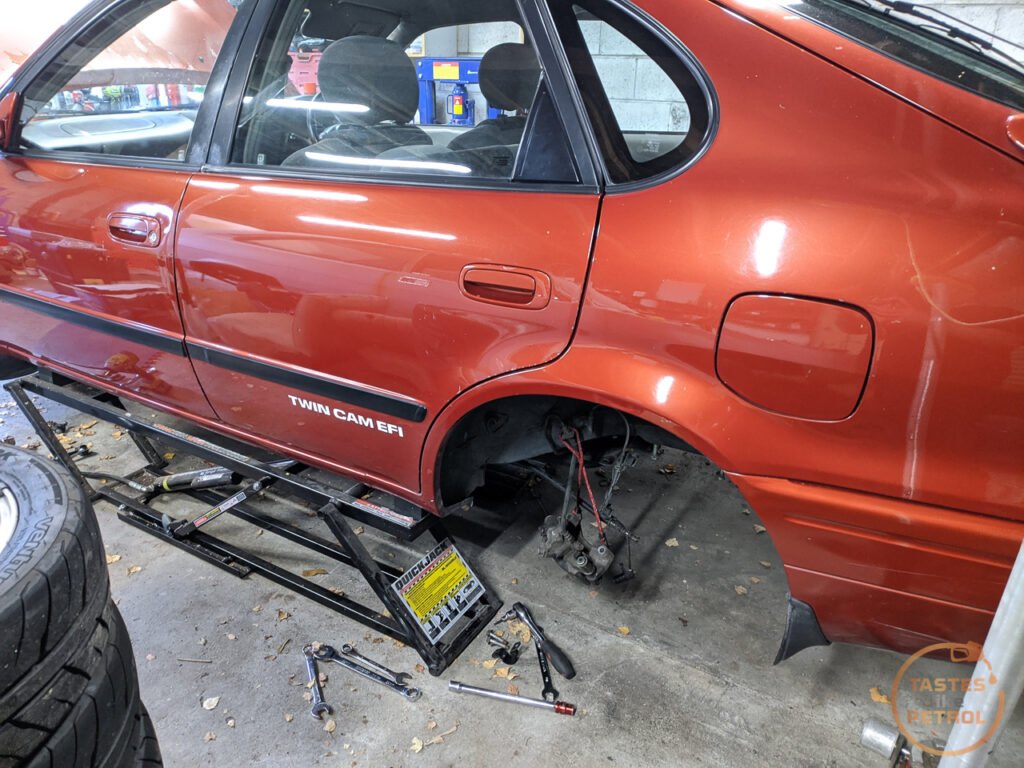
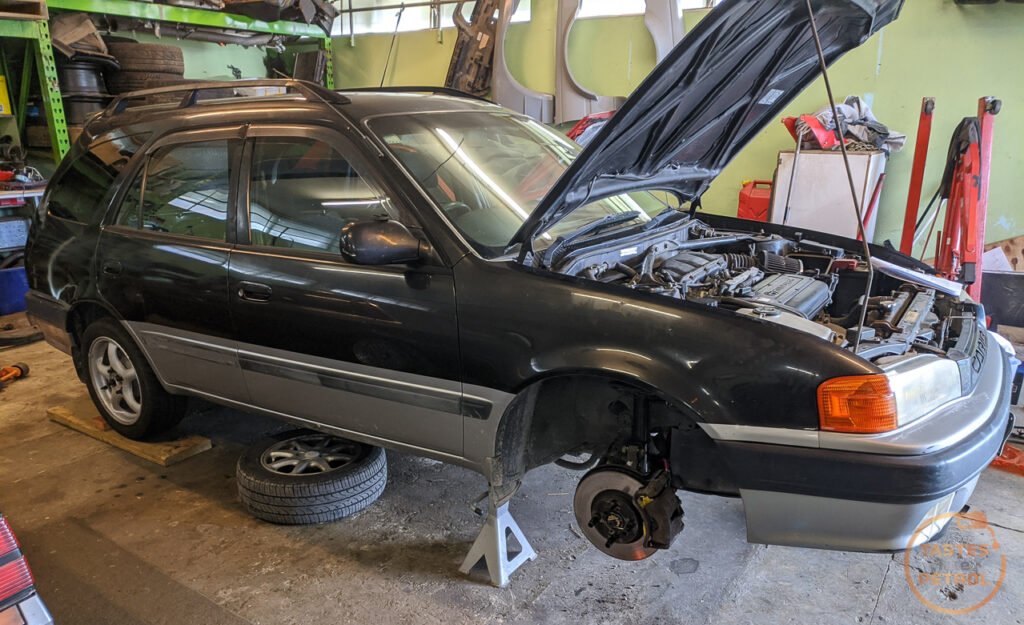
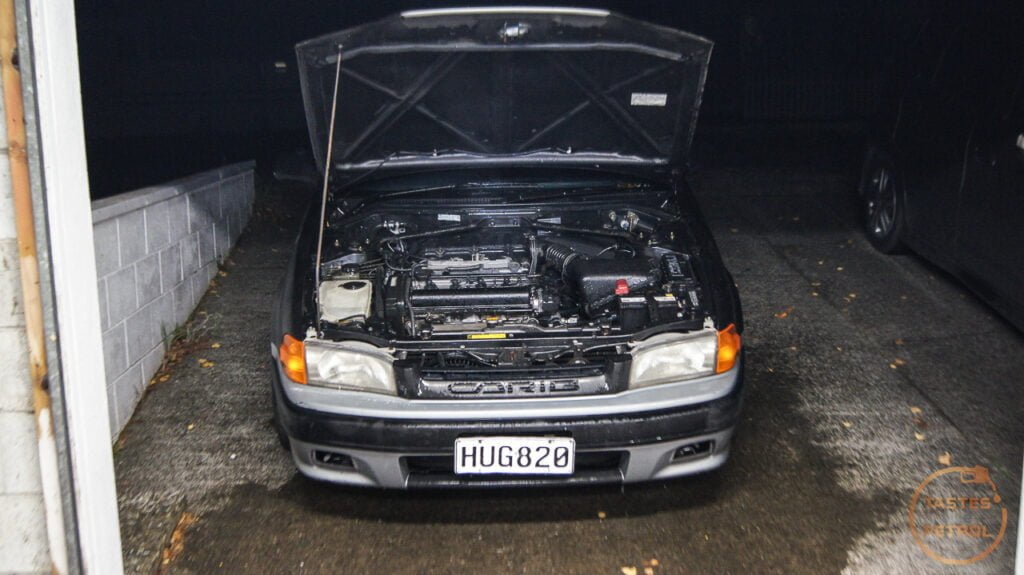
Well, today was the day. Picked the Carib up and drove it straight to the lockup to wait for the Liftback parts to be made available.

Its well worn, and had a hard life. It's also had a.... typical Kiwi Toyota life; Run on 91 petrol (should be 98 due to high compression), bare minimum servicing, no receipts. The car had been in the sellers family for about 10 years.
It feels all of its 301,000km; wobbly, loose and tired. Thankfully other than a couple of scrapes and dents it doesnt really look its age/mileage. It needs a damn good clean inside and out and the paint will benefit well from a machine polish, but there doesnt appear to be any obvious peeling paint or major fade. The "underside surface rust and rusty fuel pipe" looks very minor, and may even be less rusty than the Liftback was before I went over it with a wire brush, rust converter and epoxy zinc.
The engine smokes at high RPM but as far as we can tell its all black smoke from the s tty fuel its running on and not blue. The engine also feels real flat, which will be a combo of that fuel, and the VVTI pulley rattling like a diesel. The seller did advise he tops it up occasionally, but since its got a few pretty bad looking oil leaks, I'm not overly surprised. But hey, the AC and heater both work. Winning.
It needs more work than anticipated, but its kind of expected due to the KM and deferred maintenance (why is that such a running trend for cars I buy?!). Now to make the list, and order some parts.
Its well worn, and had a hard life. It's also had a.... typical Kiwi Toyota life; Run on 91 petrol (should be 98 due to high compression), bare minimum servicing, no receipts. The car had been in the sellers family for about 10 years.
It feels all of its 301,000km; wobbly, loose and tired. Thankfully other than a couple of scrapes and dents it doesnt really look its age/mileage. It needs a damn good clean inside and out and the paint will benefit well from a machine polish, but there doesnt appear to be any obvious peeling paint or major fade. The "underside surface rust and rusty fuel pipe" looks very minor, and may even be less rusty than the Liftback was before I went over it with a wire brush, rust converter and epoxy zinc.
The engine smokes at high RPM but as far as we can tell its all black smoke from the s
tty fuel its running on and not blue. The engine also feels real flat, which will be a combo of that fuel, and the VVTI pulley rattling like a diesel. The seller did advise he tops it up occasionally, but since its got a few pretty bad looking oil leaks, I'm not overly surprised. But hey, the AC and heater both work. Winning.It needs more work than anticipated, but its kind of expected due to the KM and deferred maintenance (why is that such a running trend for cars I buy?!). Now to make the list, and order some parts.
Progress is being made.


Got held up on removing the front suspension from the liftback due to forgetting my socket set had two 27s and no 30mm socket in the case, and a 30mm is what I needed to get the hub nuts undone to free the hubs from the axles. Grabbed a couple (one to replace my missing one, and an impact one) and will crack on with the front during the week. If all goes to plan, next weekend we should be doing the same to the Carib, swapping the good bits in and driving it home.
Got held up on removing the front suspension from the liftback due to forgetting my socket set had two 27s and no 30mm socket in the case, and a 30mm is what I needed to get the hub nuts undone to free the hubs from the axles. Grabbed a couple (one to replace my missing one, and an impact one) and will crack on with the front during the week. If all goes to plan, next weekend we should be doing the same to the Carib, swapping the good bits in and driving it home.
Looks like all the early posts had lost their photos, so went through and fixed those.
Tomorrow is the day, all the brakes and suspension are out of the liftback so will be ripping into the Carib and swapping it all over and then driving the Carib home. The Carib bits will then find their way into the liftback so it can be sold as a runner.
Tomorrow is the day, all the brakes and suspension are out of the liftback so will be ripping into the Carib and swapping it all over and then driving the Carib home. The Carib bits will then find their way into the liftback so it can be sold as a runner.
Today was a big day, spent turning two average cars into one good one.
I've made the decision to keep running this as Project Rolla, as it's more a continuation of the work I was doing on the Liftback than actually being a full replacement. It's kind of a body and engine swap, whilst everything else, including the future plans, are the same.
So a couple of weeks ago, as you know, I picked up the Carib and dropped it at a friends lockup. I hadn't seen it since.
During this time I had been working on stripping the good bits out of the Liftback, ready to transplant them into the Carib.

I'm not sure if I mentioned it, but way back when I did this work on the Liftback I noticed that the lower pivot bolt in one of the hubs had almost no bolt poking through the nut when torqued up. I knew it was tight but wondered if I had cocked up and used the wrong washers or something. No, as it turns out, someone had cut the end off the bolt...

Well, I guess that's why it was shorter, someone had taken a cutoff wheel to the end. I don't know why, but I replaced it with a spare I had anyway, to be safe.
It's pretty clean under there, much better than the Carib, as it turns out.
I left the calipers to last so I didn't end up with a bunch of brake fluid leaking everywhere for too long. I also took this chance to check the calipers over and give them a tweak. The fronts were good, only needing some debris removed from the gap in the middle of the pads.
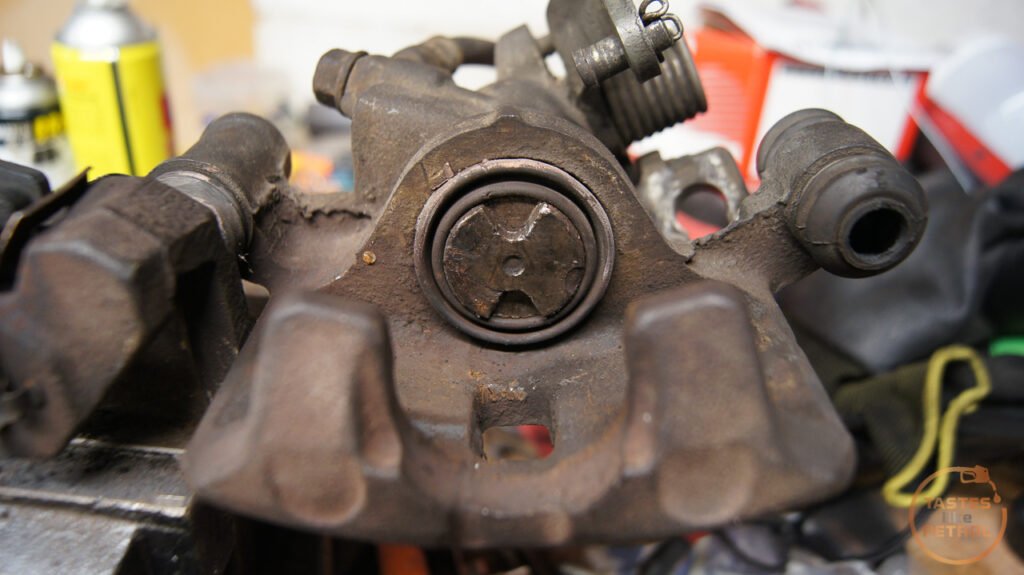
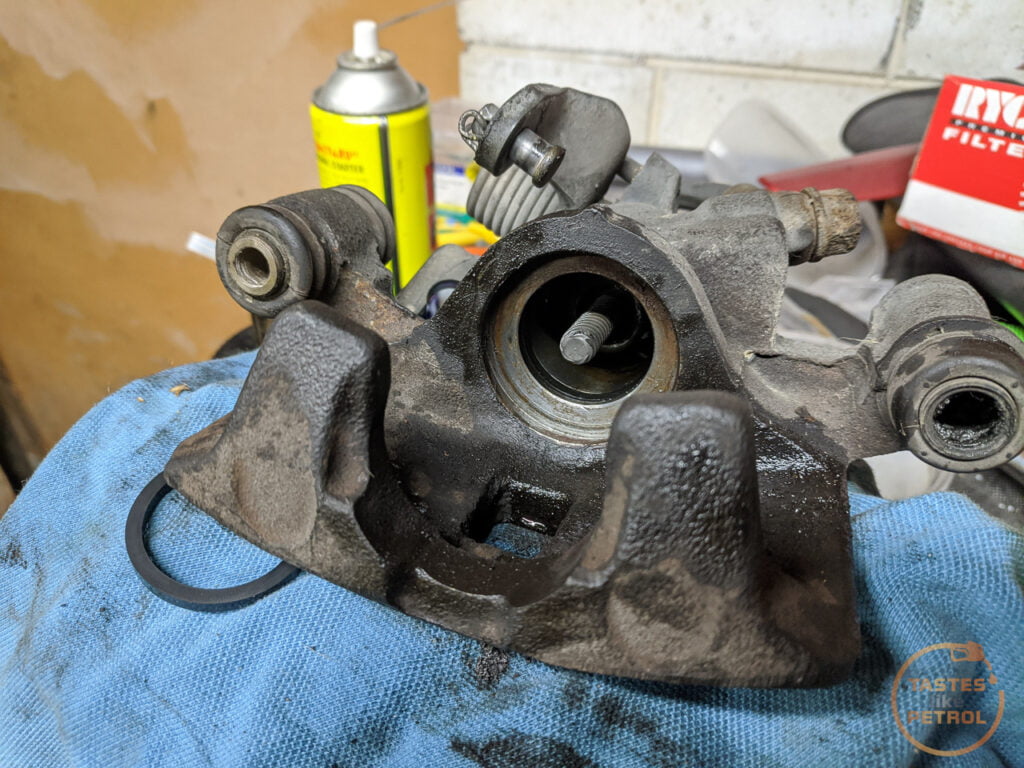
The rears I split to clean and grease the slides. Hopefully this makes the handbrake work a bit better as it's never really been good. One thing to take note of when assembling these calipers is that the rear has a piston that needs to be wound in to retract. This piston needs to be aligned so the notches are at the top and bottom, aligned with the bump on the housing at the top in the photo
I found one of the slider boots torn and not working as it should. As I had a rebuild kit spare (for the sticking caliper on the Carib) I pinched the boot from that. The old one was stuffed

The new boot was a different design but worked the same.

Hopefully that helps.
With that checkover done, everything was put aside ready to be transplanted.

Today was the day, the everything was loaded up into the back of the Honda, and taken to the lockup to be transplanted.
There aren't a lot of photos of this work as it's all been covered in previous posts, and we were working to a short timeframe.
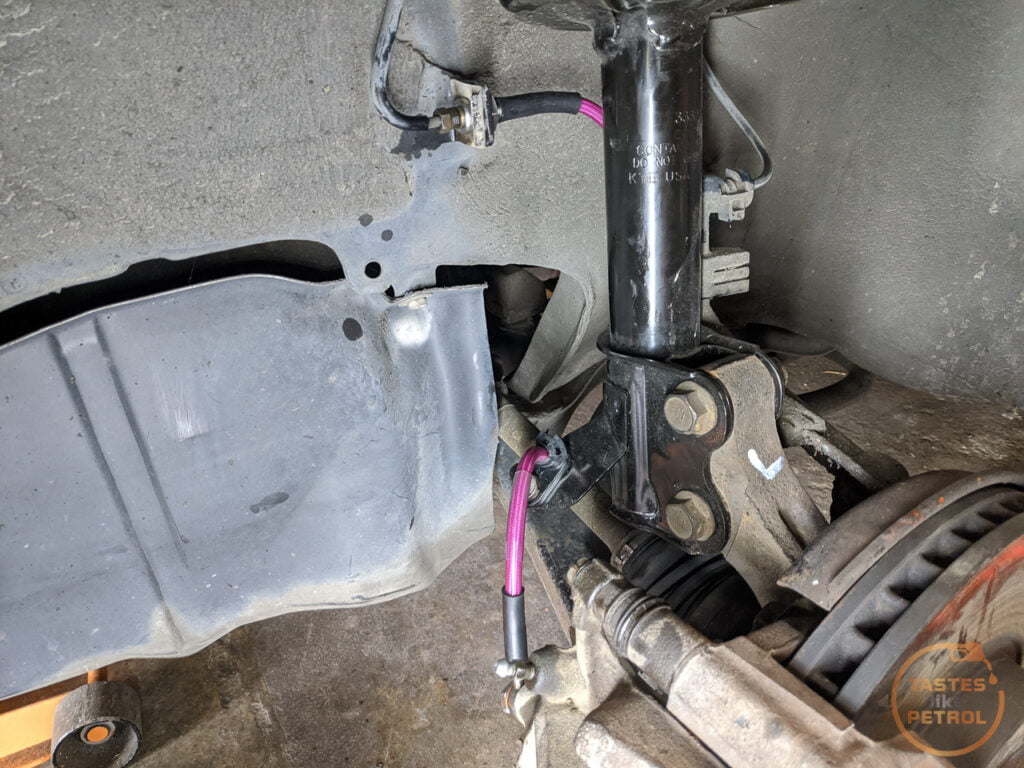
The rear came apart and went back together easy enough. Nothing too major, except finding the rear muffler hanger has almost rusted completely through, so will need to fix that soon. The first of the new HEL transparent purple braided brake lines went in too.

They look quite pink in the harsh light, but they are actually quite a decent match to the purple of the Vogtland springs.
We had some real issues removing the hub nuts. We suspect someone turned the ugga dugga gun to 11 and just went full send. On the Liftback, we torqued the nuts to the required 250 odd NM, and to remove them I used a long pry bar in the studs to stop the hub rotating whilst I used a big breaker bar to crack the nut. I tried that on the Carib and only ended up with a couple of bent studs and a bent and broken pry bar.


This bar used to be straight

It's probably my own stupid fault for using a jack handle on the end of that long breaker bar. The amount of force when the pry bar let go and shot across the workshop was shocking. Thankfully everyone was well out of the way and only the pry bar got hurt.
In the end, the winner of the day was my trusty old Ryobi cordless rattlegun. I didn't expect it would ever touch it, but after a big of ugging ad dugging it spun that nut right off. I'll be going straight to the gun for that in future.
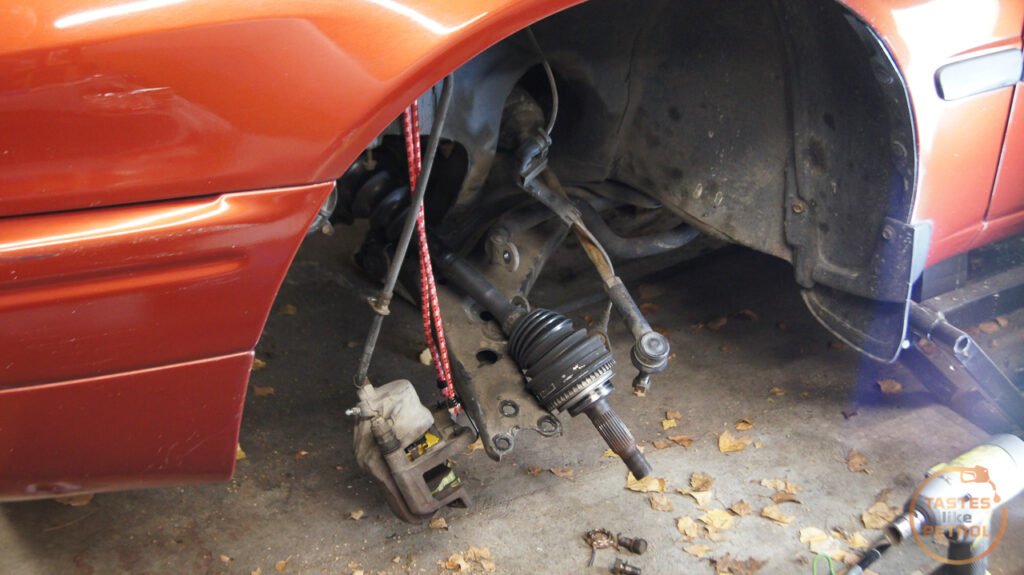
With those off the front could be swapped too, which meant more braided lines. But first, we had to remove the old struts, which are utterly caked in old CV grease, and exceed the threshold for festy and into some other realm of extreme grot.
The old, manky, black brake fluid was flushed through and the system bled. Full hovercar was required for this.

Once the brakes were all bled up nicely, we dropped the rear of the car down on its wheels, lifted the front higher and I slid under to replace the rear engine mount. This is a real bd of a job, but it seems the easiest way to do it is to remove the mount through bolt, remove all the bolts in the subframe, lower it down and pull the mount out that way. We supported the engine with a crane but it seems that might have been a bit overkill.
I found it easiest to barely line the mount mounting bolts up in the subframe but before raising the subframe up again, wiggle the mount enough to get the through bolt in place first. If you do it later you'll find the engine sags and is miles away from lining up the hole in the mount. Once the through bolt in you can lift the subframe up again and bolt it in. I took the time to replace the front swaybar bushes here too since all the bolts were already out.
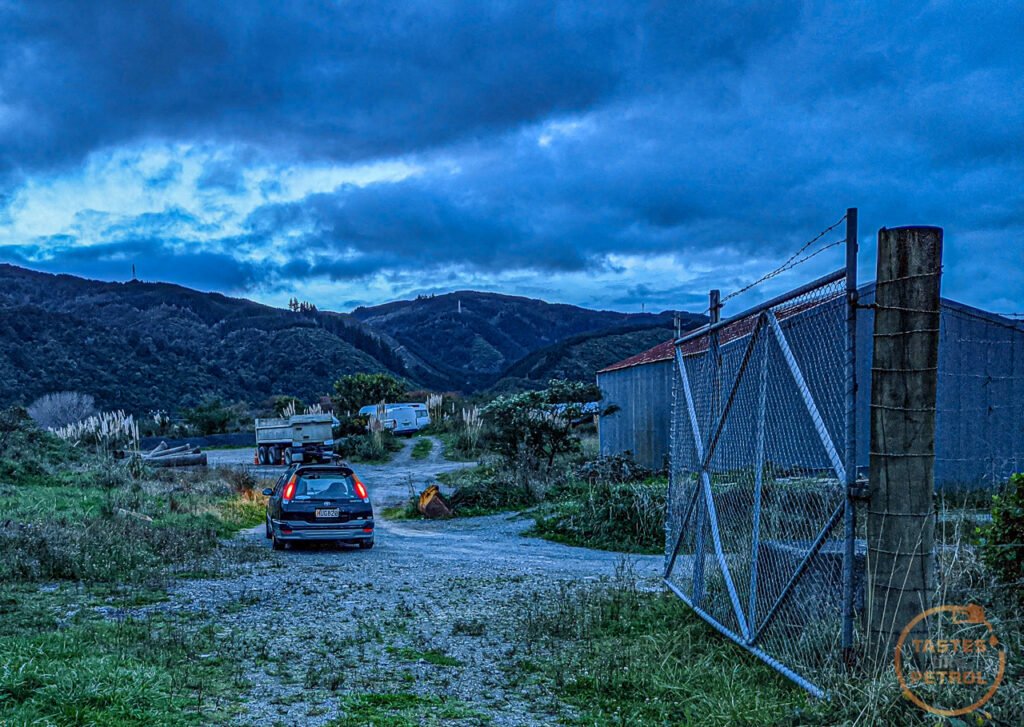
And that was that, the wheels went on and the car was loaded with all its remains. This caused some laughs at the rear ride height, as it was well dumped with all that weight in it.

Hopefully it still retains some lows with all the weight removed, but I'll need to wait and see.
Before heading home we snapped some more Corolla gang photos since my friends Corolla had arrived back today from having some work done.
Corolla Gang 1.0
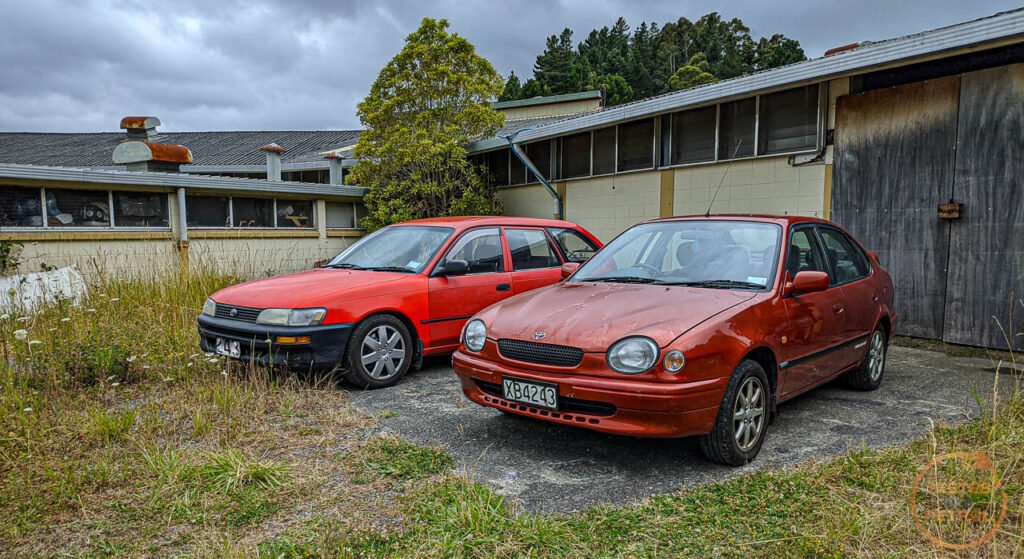
Corolla Gang 2.0

The drive home was interesting. having to try and dodge as many bumps as I could due to all the loose stuff rattling around in the boot, but I did notice it retained the nice ride quality of the Liftback, as well as the nice progressive brakes. What it's lost is some down-low torque, but it also gained many thousands of RPM to play with at the top end. I'm looking forward to driving the back roads in anger in this thing. Keep the RPM up, and keep the engine singing, seem to be the go.
Unfortunately, a couple of issues were highlighted, the main one being the RH CV joint being destroyed. It makes horrific noises when turning, and even makes noise when accelerating. Ugh. I kinda guessed this by the boot being split and ALL the grease being on the surrounding suspension components.
Thankfully I know a guy down south that wrecks Toyotas, and sure enough, he has a good axle, so that will be with me next week. I can't install it until the garage is free though, so need to get cracking on the liftback, fitting all the old Carib parts to it and get it driving again.
It also needs a wheel alignment, but that will happen after the front arms get polybushed. I'm waiting on the bushes to arrive at the moment.
I'm still not sure if it's a better looking car than the liftback or not. I guess most people probably think it is as the bugeye wasn't the most loved design, but I like both designs. The wagon is a hell of a lot more practical though, with its low loading floor and high roofline. Its also got a split rear seat base which the Liftback didn't have, which means one side of the rear seat can be completely folded flat and the other side still a useable seat.
There's more work to be done yet, specifically a WOF, but it'll be a couple of weeks before I can get on to that.


I've made the decision to keep running this as Project Rolla, as it's more a continuation of the work I was doing on the Liftback than actually being a full replacement. It's kind of a body and engine swap, whilst everything else, including the future plans, are the same.
So a couple of weeks ago, as you know, I picked up the Carib and dropped it at a friends lockup. I hadn't seen it since.
During this time I had been working on stripping the good bits out of the Liftback, ready to transplant them into the Carib.
I'm not sure if I mentioned it, but way back when I did this work on the Liftback I noticed that the lower pivot bolt in one of the hubs had almost no bolt poking through the nut when torqued up. I knew it was tight but wondered if I had cocked up and used the wrong washers or something. No, as it turns out, someone had cut the end off the bolt...
Well, I guess that's why it was shorter, someone had taken a cutoff wheel to the end. I don't know why, but I replaced it with a spare I had anyway, to be safe.
It's pretty clean under there, much better than the Carib, as it turns out.
I left the calipers to last so I didn't end up with a bunch of brake fluid leaking everywhere for too long. I also took this chance to check the calipers over and give them a tweak. The fronts were good, only needing some debris removed from the gap in the middle of the pads.
The rears I split to clean and grease the slides. Hopefully this makes the handbrake work a bit better as it's never really been good. One thing to take note of when assembling these calipers is that the rear has a piston that needs to be wound in to retract. This piston needs to be aligned so the notches are at the top and bottom, aligned with the bump on the housing at the top in the photo
I found one of the slider boots torn and not working as it should. As I had a rebuild kit spare (for the sticking caliper on the Carib) I pinched the boot from that. The old one was stuffed
The new boot was a different design but worked the same.
Hopefully that helps.
With that checkover done, everything was put aside ready to be transplanted.
Today was the day, the everything was loaded up into the back of the Honda, and taken to the lockup to be transplanted.
There aren't a lot of photos of this work as it's all been covered in previous posts, and we were working to a short timeframe.
The rear came apart and went back together easy enough. Nothing too major, except finding the rear muffler hanger has almost rusted completely through, so will need to fix that soon. The first of the new HEL transparent purple braided brake lines went in too.
They look quite pink in the harsh light, but they are actually quite a decent match to the purple of the Vogtland springs.
We had some real issues removing the hub nuts. We suspect someone turned the ugga dugga gun to 11 and just went full send. On the Liftback, we torqued the nuts to the required 250 odd NM, and to remove them I used a long pry bar in the studs to stop the hub rotating whilst I used a big breaker bar to crack the nut. I tried that on the Carib and only ended up with a couple of bent studs and a bent and broken pry bar.
This bar used to be straight
It's probably my own stupid fault for using a jack handle on the end of that long breaker bar. The amount of force when the pry bar let go and shot across the workshop was shocking. Thankfully everyone was well out of the way and only the pry bar got hurt.
In the end, the winner of the day was my trusty old Ryobi cordless rattlegun. I didn't expect it would ever touch it, but after a big of ugging ad dugging it spun that nut right off. I'll be going straight to the gun for that in future.
With those off the front could be swapped too, which meant more braided lines. But first, we had to remove the old struts, which are utterly caked in old CV grease, and exceed the threshold for festy and into some other realm of extreme grot.
The old, manky, black brake fluid was flushed through and the system bled. Full hovercar was required for this.
Once the brakes were all bled up nicely, we dropped the rear of the car down on its wheels, lifted the front higher and I slid under to replace the rear engine mount. This is a real b
d of a job, but it seems the easiest way to do it is to remove the mount through bolt, remove all the bolts in the subframe, lower it down and pull the mount out that way. We supported the engine with a crane but it seems that might have been a bit overkill.I found it easiest to barely line the mount mounting bolts up in the subframe but before raising the subframe up again, wiggle the mount enough to get the through bolt in place first. If you do it later you'll find the engine sags and is miles away from lining up the hole in the mount. Once the through bolt in you can lift the subframe up again and bolt it in. I took the time to replace the front swaybar bushes here too since all the bolts were already out.
And that was that, the wheels went on and the car was loaded with all its remains. This caused some laughs at the rear ride height, as it was well dumped with all that weight in it.
Hopefully it still retains some lows with all the weight removed, but I'll need to wait and see.
Before heading home we snapped some more Corolla gang photos since my friends Corolla had arrived back today from having some work done.
Corolla Gang 1.0
Corolla Gang 2.0
The drive home was interesting. having to try and dodge as many bumps as I could due to all the loose stuff rattling around in the boot, but I did notice it retained the nice ride quality of the Liftback, as well as the nice progressive brakes. What it's lost is some down-low torque, but it also gained many thousands of RPM to play with at the top end. I'm looking forward to driving the back roads in anger in this thing. Keep the RPM up, and keep the engine singing, seem to be the go.
Unfortunately, a couple of issues were highlighted, the main one being the RH CV joint being destroyed. It makes horrific noises when turning, and even makes noise when accelerating. Ugh. I kinda guessed this by the boot being split and ALL the grease being on the surrounding suspension components.
Thankfully I know a guy down south that wrecks Toyotas, and sure enough, he has a good axle, so that will be with me next week. I can't install it until the garage is free though, so need to get cracking on the liftback, fitting all the old Carib parts to it and get it driving again.
It also needs a wheel alignment, but that will happen after the front arms get polybushed. I'm waiting on the bushes to arrive at the moment.
I'm still not sure if it's a better looking car than the liftback or not. I guess most people probably think it is as the bugeye wasn't the most loved design, but I like both designs. The wagon is a hell of a lot more practical though, with its low loading floor and high roofline. Its also got a split rear seat base which the Liftback didn't have, which means one side of the rear seat can be completely folded flat and the other side still a useable seat.
There's more work to be done yet, specifically a WOF, but it'll be a couple of weeks before I can get on to that.


NGRhodes said:
Nice work, what was the reason for getting/choosing the Carib over the liftback ?
That was all explained on the previous page. Corolla has terminal rust, so decided to upgrade to a model with the sporty and more powerful 4AGE engine. The liftback never came with any good engines, so the Carib was just the first cheap one that came up with the spec I wanted.KelvinatorNZ said:
That was all explained on the previous page. Corolla has terminal rust, so decided to upgrade to a model with the sporty and more powerful 4AGE engine. The liftback never came with any good engines, so the Carib was just the first cheap one that came up with the spec I wanted.
Cheers, missed that. 4AGE is a good engine.BTW the Carib looks a bit like a Herse from the back !
The final task on the original Rolla was to stick the Carib suspension into it, and basically revert it back to the car as I bought it, but slightly better.
As mentioned in my last post I had removed all the suspension from the Liftback to swap into the Carib, and left the poor little Liftback a hovercar.
Well, over the past couple of days I have been working hard swapping the old Carib suspension back into the liftback so it can return to being a driveable, functional car again.
It's a pretty straightforward job, made only slightly complex by having to wrangle a bunch of bits up and over the exhaust. Completely doable solo though, with a little creative thinking.
I started on the rear, as that was always going to be the harder of the ends to work on, since there is a lot more to it, and a bunch of the work has to be done from under the car. The hardest bit was getting the lateral links mounted on the subframe, since they had to be left attached to the knuckles (as inevitably the lower bolt will be seized and its a prick to free it up) and the bolts cannot be fitted with the subframe mounted due to the proximity to the fuel tank. Some creative use of the jack to lift the knuckle up, got the bolts through the subframe and the subframe mounted.
Before fitting the struts I did need to replace the RH rear strut as it failed its WOF for leaking, which it certainly was; it was covered in oil. I ended up removing the spring and transferring the spring and top mount over to one of the shocks that originally came out of this Corolla (good thing I'm lazy and hadn't been to the scrap metal yard yet). Then it was a case of mounting the two struts at the top and swinging the knuckles into them.

Before I was done with the rear suspension, I had to fit the rear calipers. Another WOF fail was that there was a horrific imbalance, with the RH rear brake only having 30% effectiveness. Upon splitting the caliper from the bracket, it was obvious why.

A twisted and torn boot, and signs of moisture around the piston. I wound the piston out and removed the old boot. Behind the piston was a bunch of really old grotty fluid.
The piston was manky as, but cleaned up well. No rust or pitting. It might be stainless?

I removed the old piston seal and fit a replacement from the kit and after lubricating the seal and piston, carefully wound the piston back in.

Next was to fit the new boot. I left the piston out a little and slipped the boot over the piston first. I then used a tiny flat blade screwdriver to carefully push the boot into the recess around the opening for the piston. This was followed by the spring clip, making sure it seated properly. I wound the piston out a little further to check the boot had seated correctly.

Once the piston was wound right back in, the sliders greased, and the pads had some copper grease applied to them (they had been fitted dry previously and were almost jammed solid in their bracket) the caliper was done.
The other caliper was in much better shape, with only a tear in the slider boot.

So this was also replaced with a new one. Who knew one caliper kit could do so many calipers, albeit bits here and there.

All that was left was to fit the calipers to the rear knuckles. The last WOF fail for the brakes was to swap the brake hoses for the ones from the Liftback as the Carib ones were cracking.

Moving onto the fronts, this went a lot quicker. It worked out at a smidgen over 5 minutes to install the strut, and mount the knuckle, per side. This is quite simple in comparison.
The front calipers were in decent shape, with only the same issue as the rear pads; they had been fitted dry and were jammed in their bracket. That sure as hell won't help the braking effectiveness.
The only catch was that on the LH front hub I had bent two of the studs trying to remove the hub nut. This meant a quick trip in the rain to Pick A Part to grab a couple of studs from a donor there.
The old studs were a little tweaked

Compared to a replacement stud

I used the same method to remove these as I did on the other hubs when I fit the longer studs. A balljoint press to remove the stud, and an open ended nut to pull the replacement through.
With the replacement studs in, the rotor went back on and the front calipers were fitted.

I used a hand vacuum bleeder to suck fluid through the calipers, which worked fine on the front, but for some reason the rears had nothing coming through. I removed the bleed nipples to look further into it and sure enough, both rear bleed nipples were completely blocked with rust.
I spun them up in the drill and ran them against a wire brush until I could see where the hole should be.

And then cleaned the hole out with a pin until it was clear
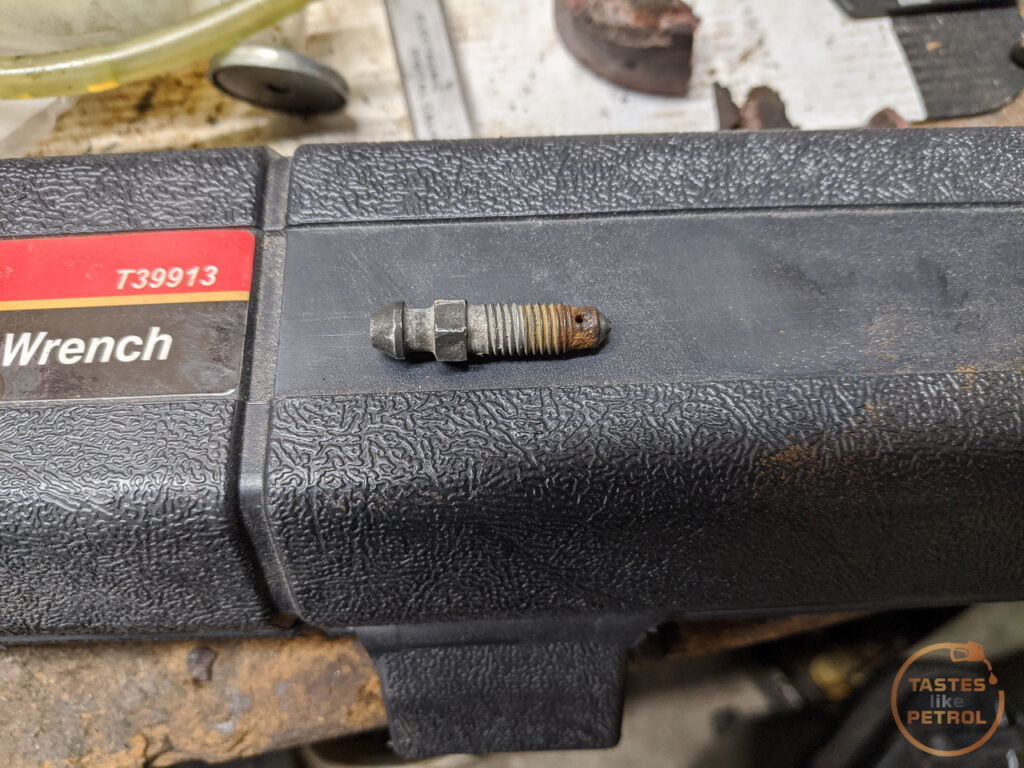
The actual sealing surface of them was perfect, but I suspect these brakes haven't seen any maintenance in a few years.
Fitting the bleed nipples, I finally had fluid coming from the rear brakes. After bleeding all the brakes, I had a good pedal and a working hand brake.
The only thing left to do was to back the car out of the garage, give the wheels a quick clean (it didn't help much, the brake dust is well baked on), and go out and take some photos.

The photos were so I could list the car for sale today. Hopefully in about a week I should have a buyer for the car, and it will be on its way to a new home shortly after.


Even with the worn-out old Carib suspension in it, it drives better than it did when I got the car. It rolls a lot, but doesn't drive like a leaky old boat this time around. It's a much better car than when I got it, even if it's kinda back to standard now.
Not even kidding, I will miss this car. I forgot how fun it is to bash around in it until I was driving it to take these photos. It's a great little car, and it will hopefully do someone well as cheap transport.
I just have to hope the Carib lives up to the little Liftback. I'm sure the 4AGE should keep me entertained.
As mentioned in my last post I had removed all the suspension from the Liftback to swap into the Carib, and left the poor little Liftback a hovercar.
Well, over the past couple of days I have been working hard swapping the old Carib suspension back into the liftback so it can return to being a driveable, functional car again.
It's a pretty straightforward job, made only slightly complex by having to wrangle a bunch of bits up and over the exhaust. Completely doable solo though, with a little creative thinking.
I started on the rear, as that was always going to be the harder of the ends to work on, since there is a lot more to it, and a bunch of the work has to be done from under the car. The hardest bit was getting the lateral links mounted on the subframe, since they had to be left attached to the knuckles (as inevitably the lower bolt will be seized and its a prick to free it up) and the bolts cannot be fitted with the subframe mounted due to the proximity to the fuel tank. Some creative use of the jack to lift the knuckle up, got the bolts through the subframe and the subframe mounted.
Before fitting the struts I did need to replace the RH rear strut as it failed its WOF for leaking, which it certainly was; it was covered in oil. I ended up removing the spring and transferring the spring and top mount over to one of the shocks that originally came out of this Corolla (good thing I'm lazy and hadn't been to the scrap metal yard yet). Then it was a case of mounting the two struts at the top and swinging the knuckles into them.
Before I was done with the rear suspension, I had to fit the rear calipers. Another WOF fail was that there was a horrific imbalance, with the RH rear brake only having 30% effectiveness. Upon splitting the caliper from the bracket, it was obvious why.
A twisted and torn boot, and signs of moisture around the piston. I wound the piston out and removed the old boot. Behind the piston was a bunch of really old grotty fluid.
The piston was manky as, but cleaned up well. No rust or pitting. It might be stainless?
I removed the old piston seal and fit a replacement from the kit and after lubricating the seal and piston, carefully wound the piston back in.
Next was to fit the new boot. I left the piston out a little and slipped the boot over the piston first. I then used a tiny flat blade screwdriver to carefully push the boot into the recess around the opening for the piston. This was followed by the spring clip, making sure it seated properly. I wound the piston out a little further to check the boot had seated correctly.
Once the piston was wound right back in, the sliders greased, and the pads had some copper grease applied to them (they had been fitted dry previously and were almost jammed solid in their bracket) the caliper was done.
The other caliper was in much better shape, with only a tear in the slider boot.
So this was also replaced with a new one. Who knew one caliper kit could do so many calipers, albeit bits here and there.
All that was left was to fit the calipers to the rear knuckles. The last WOF fail for the brakes was to swap the brake hoses for the ones from the Liftback as the Carib ones were cracking.
Moving onto the fronts, this went a lot quicker. It worked out at a smidgen over 5 minutes to install the strut, and mount the knuckle, per side. This is quite simple in comparison.
The front calipers were in decent shape, with only the same issue as the rear pads; they had been fitted dry and were jammed in their bracket. That sure as hell won't help the braking effectiveness.
The only catch was that on the LH front hub I had bent two of the studs trying to remove the hub nut. This meant a quick trip in the rain to Pick A Part to grab a couple of studs from a donor there.
The old studs were a little tweaked
Compared to a replacement stud
I used the same method to remove these as I did on the other hubs when I fit the longer studs. A balljoint press to remove the stud, and an open ended nut to pull the replacement through.
With the replacement studs in, the rotor went back on and the front calipers were fitted.
I used a hand vacuum bleeder to suck fluid through the calipers, which worked fine on the front, but for some reason the rears had nothing coming through. I removed the bleed nipples to look further into it and sure enough, both rear bleed nipples were completely blocked with rust.
I spun them up in the drill and ran them against a wire brush until I could see where the hole should be.
And then cleaned the hole out with a pin until it was clear
The actual sealing surface of them was perfect, but I suspect these brakes haven't seen any maintenance in a few years.
Fitting the bleed nipples, I finally had fluid coming from the rear brakes. After bleeding all the brakes, I had a good pedal and a working hand brake.
The only thing left to do was to back the car out of the garage, give the wheels a quick clean (it didn't help much, the brake dust is well baked on), and go out and take some photos.
The photos were so I could list the car for sale today. Hopefully in about a week I should have a buyer for the car, and it will be on its way to a new home shortly after.


Even with the worn-out old Carib suspension in it, it drives better than it did when I got the car. It rolls a lot, but doesn't drive like a leaky old boat this time around. It's a much better car than when I got it, even if it's kinda back to standard now.
Not even kidding, I will miss this car. I forgot how fun it is to bash around in it until I was driving it to take these photos. It's a great little car, and it will hopefully do someone well as cheap transport.
I just have to hope the Carib lives up to the little Liftback. I'm sure the 4AGE should keep me entertained.
I swear Deferred Maintenance should be the title of all my posts, because sure enough, here we are again.
It was kind of expected though since the seller didn't really know or care what he had and was running it on 91, I couldn't expect he kept up with the maintenance more than just the odd oil change.
I've been collecting various bits and pieces for a while now, getting ready for this lot of work. I need to get the car in for a wheel alignment and then a WOF, so this weekend was a perfect chance to get cracking on it.
The first job of the day was to get the car up on stands and drop the engine oil. The oil level was a bit low, so I topped with the finest thin synthetic 5W40, started the car up and ran it for a bit first to get some heat into the oil, and then drained it. It came out fairly dark, but not jet black and there were no chunks. The filter didn't look too old either, so I suspect it probably had the usual Kiwi "service" of an oil change and nothing else. Better than nothing I guess.
The filter on the 20v is a bit easier to access than the 7AFE as it has a spacer behind it. I'm not sure why, it's not an oil cooler, it's just a passthrough shifting the filter away from the block.
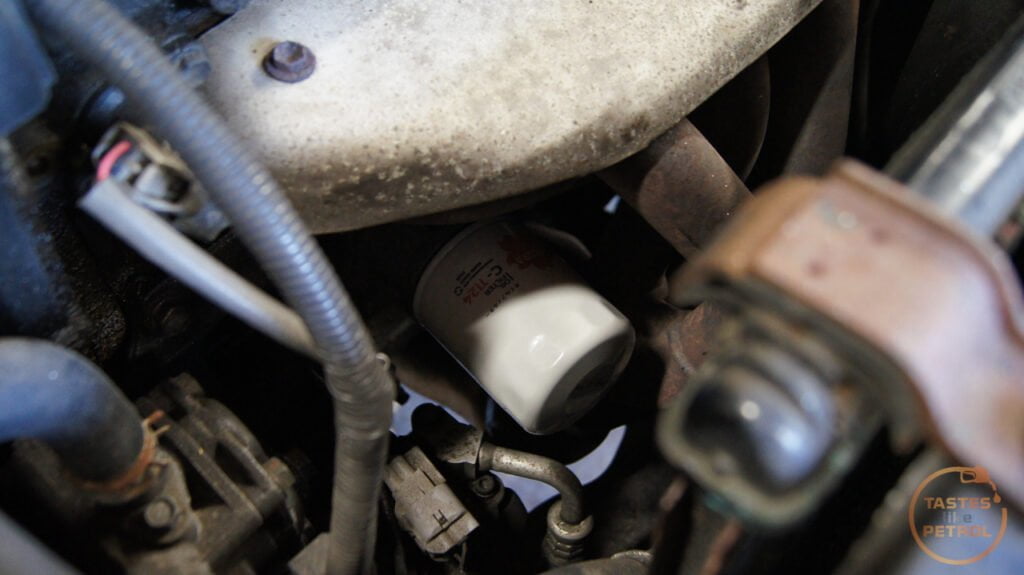
I poured in 3L of Penrite semi-synthetic 15W40, started the car up to check for leaks, and when there were none moved onto the next job.
The next fluid to change was the gearbox oil. The gearbox shifts OK, with no grinding or crunching but 2nd gear can be a bit stiff. It turns out this fluid may have been changed somewhat recently too, as it was a clean reddish colour and smelt like clean gear oil. Either way, I drained it and replaced it with Penrite 75W90.
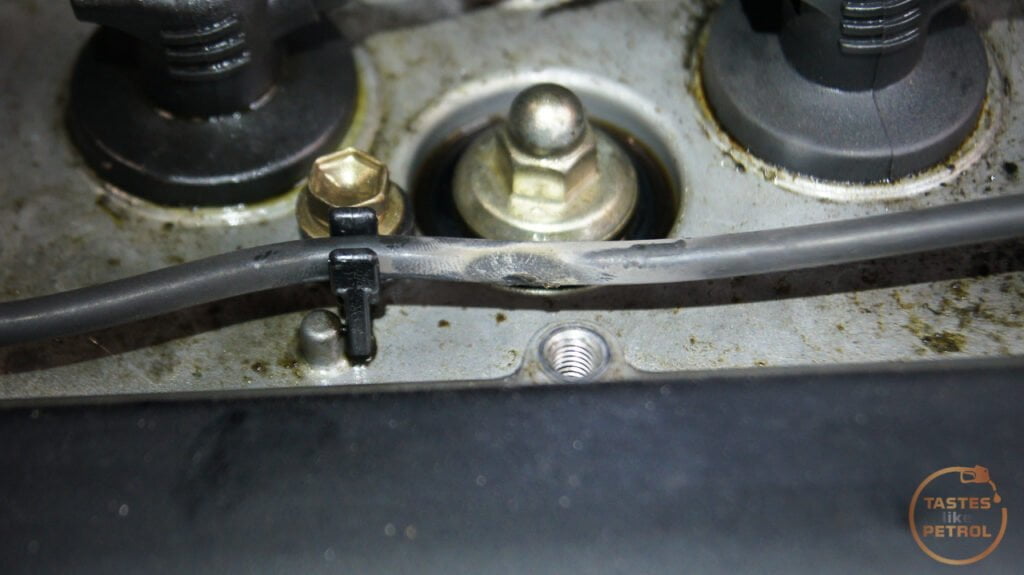
Always open the fill plug first, just in case it's seized and you find yourself with a drained box and no way to fill it. The fill plug is on the front of the box, covered in filth. The fill and drain are both 24mm.

The drain is under the car, on the very bottom of the gear box, kinda in line with where the filler is. Be aware that when you remove the drain plug the fluid will come out with some considerable gusto, especially if you have completely removed the fill plug, so get ready for it to shoot half way across the floor.
To fill the gearbox I used the flexi pipe that comes with the fluid, and extended it with some extra hose and just let gravity fill the gearbox until it started to dribble out again. Easy.
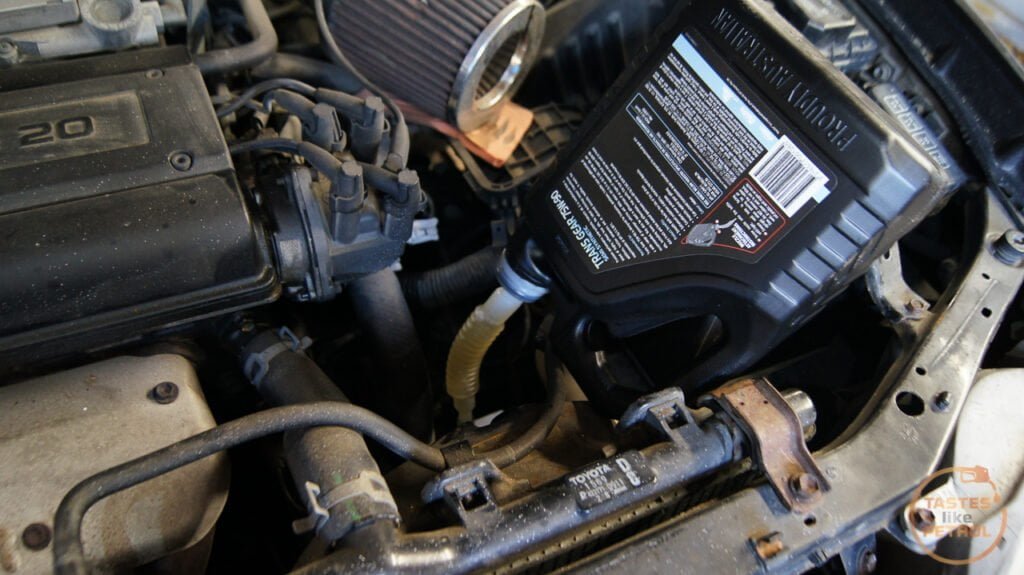

It took about 2.3L or so. A 2.5L bottle was plenty.
The last fluid I was curious about was the clutch fluid. I replaced the brake fluid when I replaced the brakes, and the fluid was black and very festy. The clutch fluid was no better.

I didn't want to drain the whole thing and introduce air into the system, so took to doing a few flushes whilst adding new fluid. It's not so dark now but certainly isn't as clean as the brake fluid.
One of the main jobs I had to get done was the front control arms, and the RH axle. I wanted to remove the arms and replace the bushes with poly bushes. The axle needed to be replaced as the outer CV had decided it wanted to be heard and was singing the song of its (broken) people, both when turning but also when accelerating, which was novel.
The control arms are really easy to get out. Undo the three nuts/bolts on the lower balljoint, remove the nut for the lower swaybar link, and then it's a series of bolts holding the swaybar bracket on and one big bolt through the bushing.
With the control arm out it was easy to pull the axle out and have a good look. I pulled it out and assessed its condition from the safety of the bin. Since I was only doing the outer shaft, I just removed the band from the inner CV boot and split the shaft that way, leaving the fixed section in place.
Needless to say the boot was stuffed

But the joint was even worse. All the grease that hadn't previously ejected its self everywhere, was turned to a hard putty-like substance. There was also noticeable play when twisting the CV on the shaft. I have no idea how this wasn't identified in the WOF inspection!

The replacement shaft had good boots, so all I did was clean the old grease out, pack new grease into the inner CV and reassembled it with a new clamp on the boot.

Next was the fun task of pressing the old control arm bushes out. Thankfully I have a press, and with some creative use of big sockets, It wasn't too bad of a job.

One side came out easy enough, the other side got a bit stuck and the inner rubber came away from the outer shell. This left me with a metal sleeve stuck in the arm. The easiest way to sort this was to was a reciprocating saw to cut a notch in it and use a chisel to crush the sleeve slightly and knock it out.

The new poly bush pressed in easy, you just need to make sure its even on both sides when done.

These are a multipart bush, with the main bush, a tube and washers/spacers on each side.

And when completed they should look like this

The front bushing pressed out easily too, but needed some jiggery-pokery to get it into place in the press. I'm not sure this is an officially supported method, so don't try it at home. I wouldn't do this to a metal sleeve bush, but these are an easy press fit rubber bush with no outer sleeve. The strap is only to stop the rear of the arm from coming up.

The outers for the polybush press in by hand, but I used the press to push the tube through. You could easily use a vice, or if you are a bit rough, a hammer.

One complete arm.

Refitting the first arm was something of a nightmare and not a job I want to do again in a hurry. Lining everything up was a real ball-ache, and at one point when the pry bar slipped, a face ache.
The second arm went a bit smoother. There isn't really any trick to it other than not attaching the balljoint to the arm until the very end, and using a dead blow hammer to get the front bush into place. To get the bolt into the rear bush you need the arm as flat as possible in the horizontal plane, but the front bush is also very sensitive to twist and angles. It's a lot of trial and error.
With both fitted though, everything got torqued to spec and I moved on.
I had a quick interlude from big work, mainly because I was at the end of my tether after the control arms and small jobs are easy wins.
The RH side fog light was secured in place with zip ties, and neither worked. I wanted to know why.
As it turns out, neither were plugged in. Both actually work once the connectors are... connected. The RH side one has a broken mount and cracked lens though. Thankfully all the bits are there though, so I can fix it and the lens isn't letting moisture or dirt in.

Someone had tried to fix it before, using what I presume is either a cheap superglue or PVA glue. It didn't stick at all. They also failed to key the surface, so the glue was sitting on the surface. On the plus side, it was really easy to remove the old glue. I mixed up a batch of super-strong Araldite, and after keying the surface with a wire bush, slathered it on.

And some creative taping kept pressure on the joint overnight.

It seems pretty strong today, but I'll give it a couple of days to fully cure before refitting.
Another small win was to fix the front plate, which was 90 shades of bent out of shape.

Some swift beating with a plastic hammer made it look somewhat normal again.

It won't ever look perfect on the car because the mounting points are twisted and bent, but since they are moulded into the bumper cover I'm kinda stuck with it, but it's better than it was. You can actually read it now.

Whilst fiddling around on the front of the car I decided to cut the tie wire and remove the random gopro mount from behind the grille. This also gave me the chance to realign the grille, which wasn't hooked in properly at the bottom.


The grille looks better now

It is all in a dire need of a clean, but that will come later.
The next day, before starting the under bonnet work I slid under the back of the car and wire brushed the "surface rust" on the "fuel pipes" that the car failed its WOF on. To be fair, there was a little surface rust under there, but it was on a brake pipe and was minor (less than the fuel pipe on the liftback had). This was followed by some rust convertor, and later in the day, epoxy zinc.
Back in the engine bay, I replaced the ancient fuel filter, which was full of black rubbish. No photos of this because it's a real bd of a job. Most of the access is through a cutout in the LH wheel well, and a lot of the work is done blind. Not much fun, but it's done.
After that, I pulled the stty pod filter intake out. It was just a pod filter stuck into the end of the standard intake pipe, resting on the bottom of the stock airbox with a foam pad to stop it from rubbing through (which going by the sealant on the top of the filter, it had done already).


The intake air temp sensor had been relocated to a bottle cap with a hole poked through it.


With the intake off, I couldn't help myself but to check out the reason you buy a 20V... the ITB trumpets.

Very big and trumpety.
Before refitting the standard intake, I removed the bottom of the airbox to clean it and decided it wouldn't be any easier than now to replace the thermostat (which was sticking open).
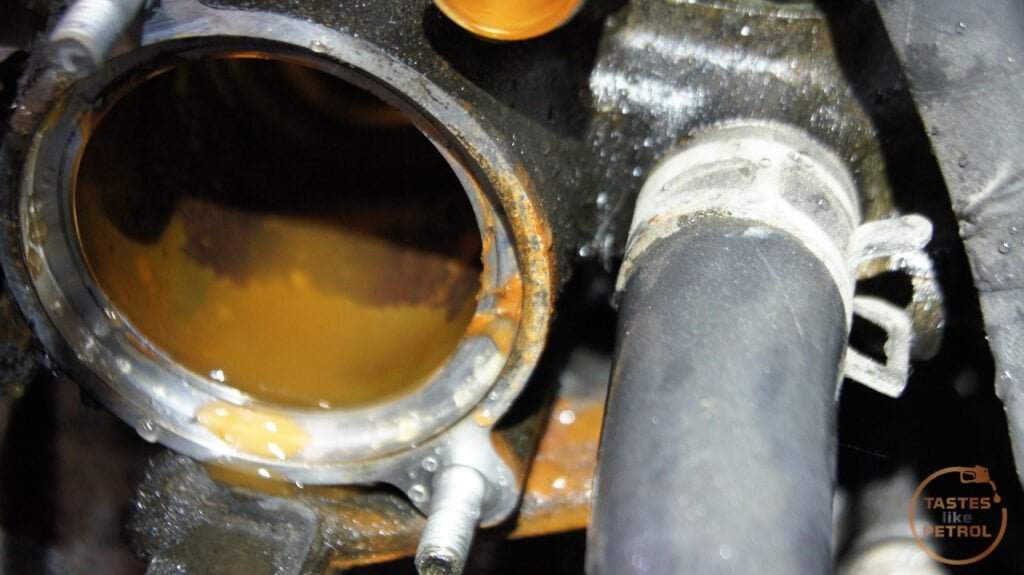
It turns out the thermostat housing had also been leaking, as shown by this mess on top of the gearbox.

Removing the housing gave an idea of what was going on. A pinched and torn gasket, and any colour you like as long as it's orange-brown.

You can see where the housing was leaking once the thermostat is removed. It was just seeping out the side, through the stuffed gasket.
The poor gasket had seen some st.

Some of it was even stuck in the thermostat, obviously jamming it.

The "coolant" wasn't just like rusty water, there was something thick and slimy in it. I presume it's that old bd Stop Leak. Ugh. I flushed some coolant through the top hose with the thermostat out, and got more brown mud out of the system. I'll need to run it for a bit and do a couple of flushes I guess. They probably put it in to stop the thermostat housing leaking... instead of, you know, fixing it.
The new thermostat and gasket looking mighty fine. Remember to place the jiggle pin at the top.
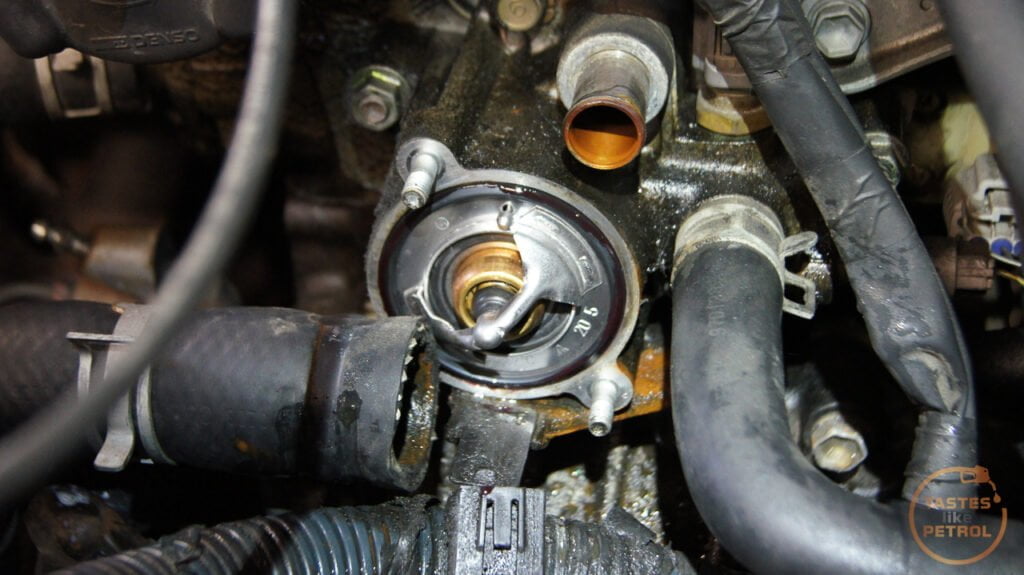
And the freshly cleaned housing goes back on.

The old thermostat had a date stamp of 97, so probably original.

Unfortunately this is where it all came a bit unstuck for a bit today. When checking out the hoses and front engine mount I noticed the radiator was looking a bit worse for wear. Sure enough, once removed you can see a whole bunch of fins have rotted away, and there are signs it's been leaking in the past.


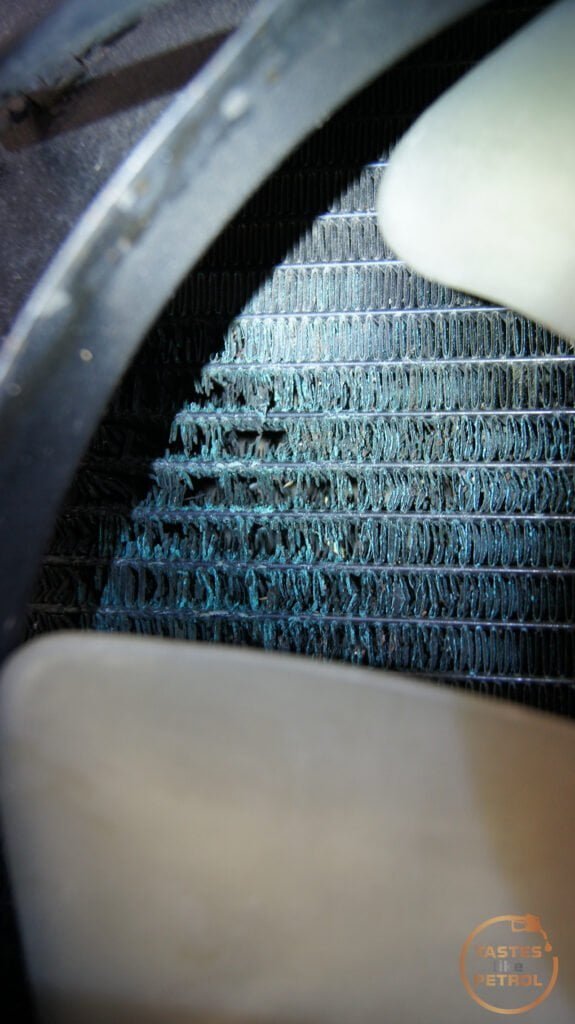
I knew I'd have to replace the radiator eventually, but didn't think it would be this soon. There was no point in reassembling with that radiator though, so in the bin it went, fan and all. I noticed the fan made a grinding noise when spun by hand, so had no desire to keep that. The car has been running cold for ages so it probably hasn't needed the fan.
A quick trip to Pick A Part ended with a clean enough radiator and fan from an AE111 liftback (like mine but 4AFE powered). There were remnants of clean red Toyota coolant in the system, and the sticker said it had been changed a few years back, so that's better than nothing. Some fins are a little out of shape from use, but no signs of leaks and it looks clean inside. I suspect it may have been replaced at some point as it doesn't have any Toyota logos on it like my original one.
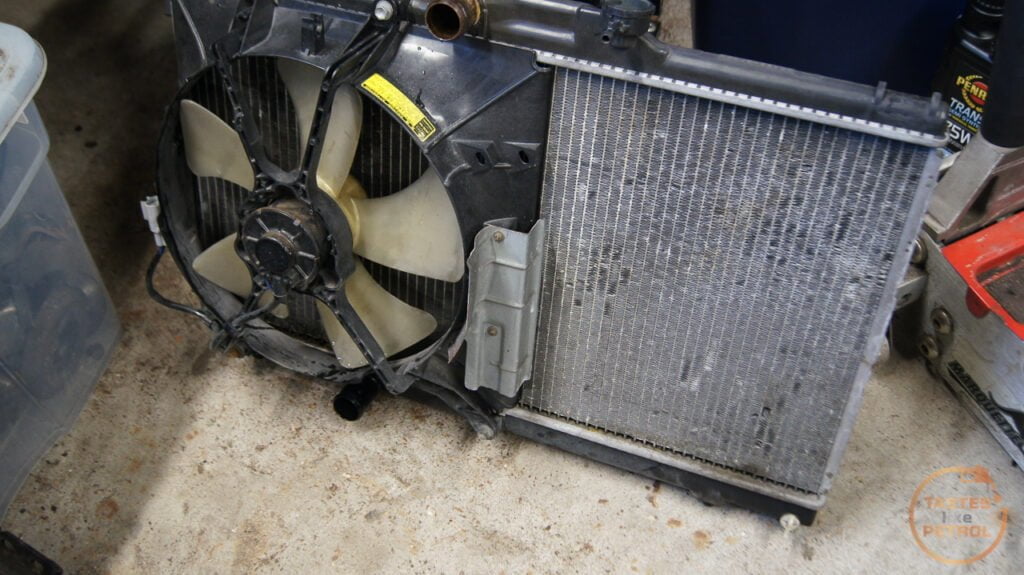
Interestingly, the NZDM AE111/AE112s have a nice plastic fan shroud, whilst the Carib had a metal shroud that was starting to look rubbish due to surface rust. The plugs are the same and as tested, it works fine in my car.
While the radiator was out, once again, there wouldn't be an easier time to replace the front engine mount. I had replaced the rear recently, but there was still quite a bit of shunting coming on and off the throttle.
Hmm, something doesn't look right

What way should the "forward" arrow be facing? Not backwards? Oh, okay then.
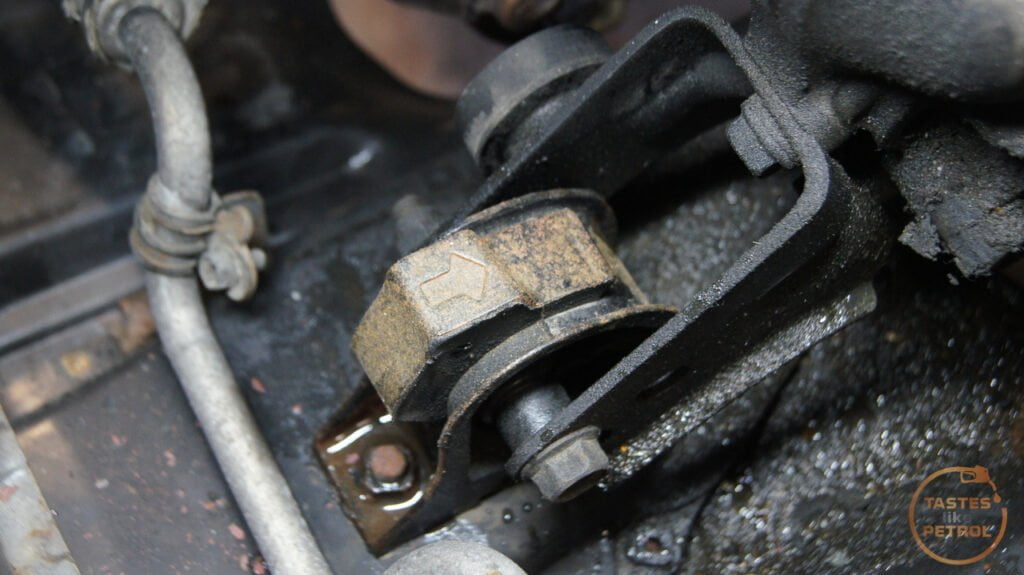
A couple of bolts and out the mount comes, showing the full horror of fitting a mount backwards. Torn to bits. No wonder the engine flopped about.


I made sure to fit mine with the arrow pointing forward.

Now I could refit the radiator and move onto other things, like fitting the intake.
Of course, I couldn't just fit the stock intake and hide all that intake noise away, so I pulled back the guard liner and whipped the big resonator out. The intake now draws air from inside the guard behind the liner, and from the snorkel behind the headlight.

The K&N panel filter I picked up cheap used, had a clean and oil and then got fitted.
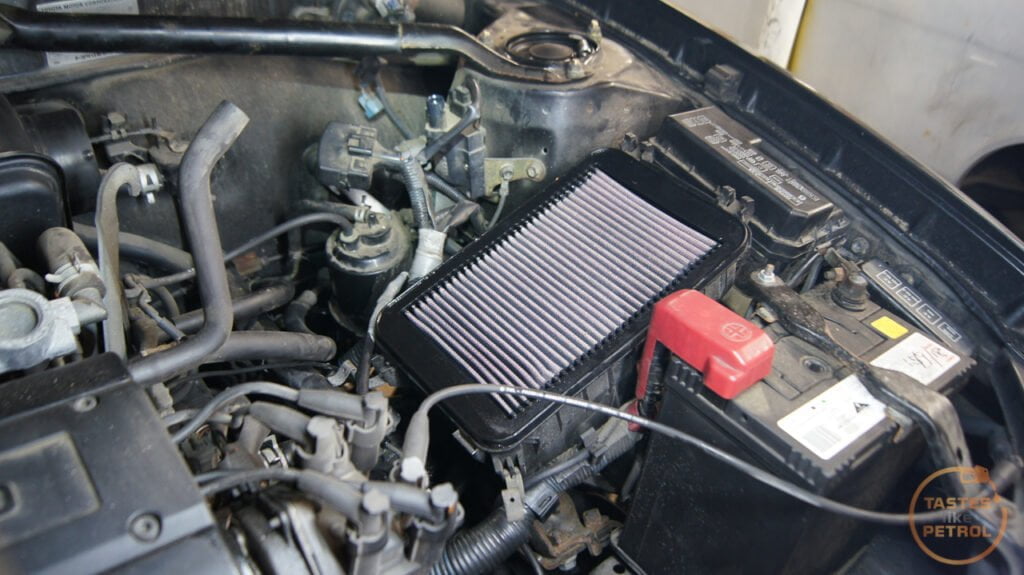
Followed by the rest of the intake, including refitting the diagnostic connector where it should be, and not taped to the charcoal canister.

Spark plugs were next on the list, so off came the cover. The whole valley is coated in old oil that had turned kinda sticky and gooey.


I suspect it's a mixture of the oil cap leaking due to a very compressed seal, and some hamfisted top-ups.
The spark plugs weren't as gross as I expected, all the spark plug tubes are bone dry, but the spark plugs are the wrong heat range (BKR5) and the EYA variant isn't the recommended plug.

Not to mention the HUGE gap due to wear
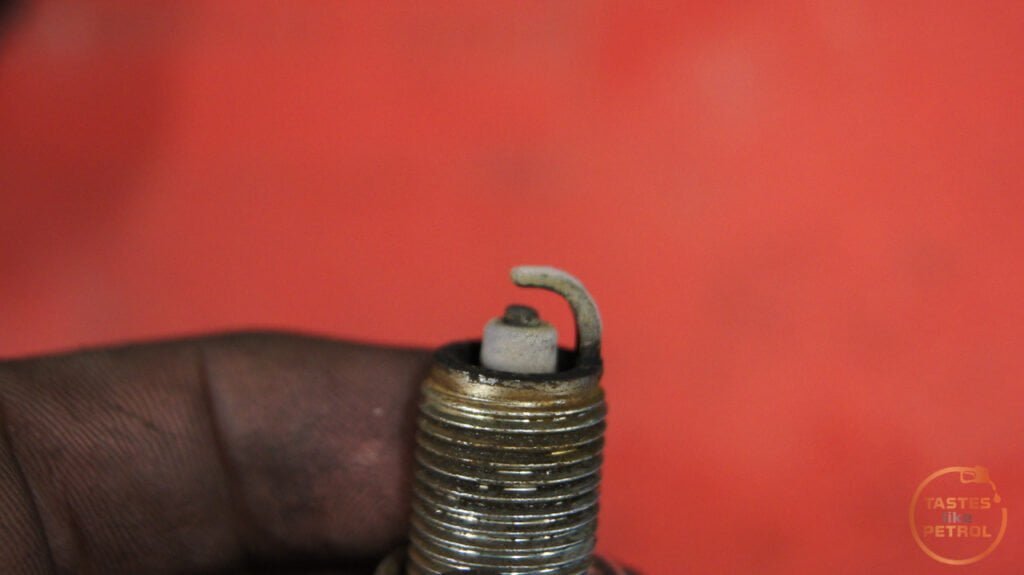
I measured them at about 1.4mm, when they should be 1.1mm, but thats at the highest point, and the wear slopes away towards the ground strap. They also read quite lean to me, being very white.

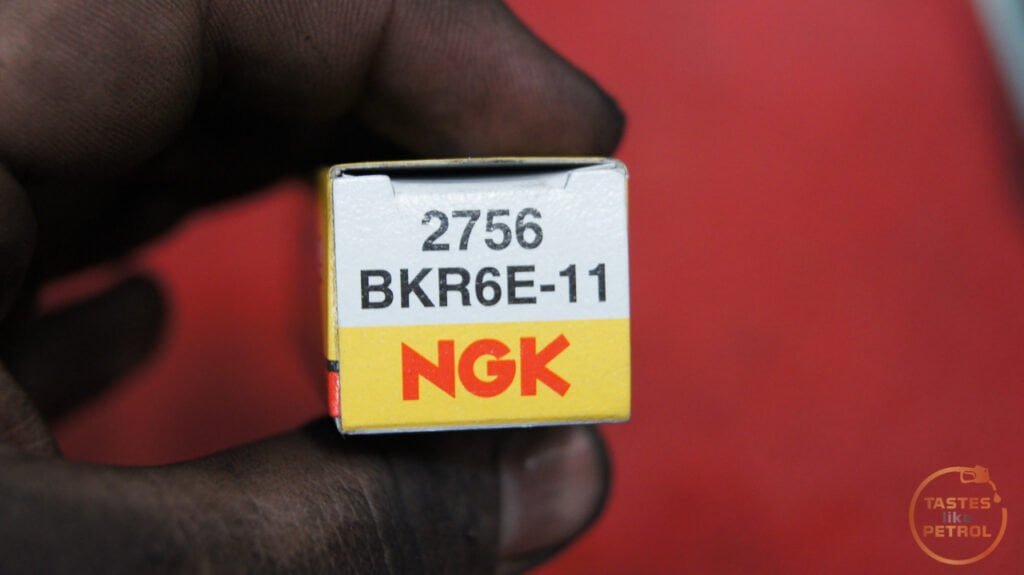
The new replacement plugs I used are BKR6E-11. These are the standard version of the recommended platinum plugs. The only real difference is the shorter service interval, which for me is fine, but the previous owner probably could have done with the platinum plugs.
The spark plugs leads are looking very tired. One was rubbing, and possibly arcing, on one of the center nuts (the below photo is after I moved it to the correct location, see photo a couple above for where it was).
Another is wrapped in tape and I'm too scared to find out why

I gave the valley a quick clean down and moved onto one of the sources of the oil leaks; the distributor oil seal.
I marked the starting location with a paint pen, so I can refit it in the same place. Whether that is the right place or not, I'll find out later when I crack out the timing light.

There is one bolt holding the distributor in place, and with that removed some careful levering will pop the distributor out. I think mine had been leaking a little...

The old O-ring practically broke in half when I tried to cut it with a knife. It's also very flat. The new O-ring was carefully placed into the groove after some vigorous cleaning (but taking care not to rotate the distributor). Some rubber grease on the O-ring before assembly, and all should be well.
The final job to do before giving it a quick degrease was to fill and bleed the cooling system. I was going to praise this funnel setup I have, which did a really good job of keeping the system topped up...

Until it decided, when it was half full of hot coolant, that it no longer wanted to be part of the cooling system and came out of the filler neck, tipped over, and poured coolant everywhere.

Well, it wouldn't be me if there wasn't coolant on the ground.
The good news is that it bled up OK, no obvious leaks and the temp came up quickly and held steady. Unfortunately, the heater is a bit average, so I will probably need to flush out the heater core. Another day.
Since there was now coolant over EVERYTHING on the LH side of the engine bay, I had to push forward on getting the car out of the garage so I could clean the coolant off before it dried and stained. This did give me a good opportunity to flood everything with degreaser and make it look a bit better.
Hopefully this will help me identify where leaks are actually coming from, and how old some of the grime was.

I couldn't help but take it for a quick shakedown around the block. It's still a work in progress, and I'll feel more confident in the suspension once it's been aligned, but the engine does rev out very nicely. Unfortunately the VVT pulley is dead, so there is little to no low/mid-range power, and it feels slow compared to the liftback, but that will be sorted eventually and I'll have all the power back. The ECU will still be learning again too, since the battery was disconnected.
There is also a difference in driving style between the two cars that I will need to get used to. With the 7AFE it's all torque, and it runs out of puff quickly, so you use lots of throttle down low and shift early. The 4AGE is all top end and all about revving the engine hard. Even with a new VVT pulley, I expect there will be minimal power down low, it's just the way it is. It's a screamer.
I have some more cosmetic and interior work to do, and some more parts are on the way (leads, cap and rotor), but I'll book an alignment for next weekend and hopefully have it in for a wof that following week. Other than a couple of bulbs, I've pretty well nailed the old WOF sheet now.

It was kind of expected though since the seller didn't really know or care what he had and was running it on 91, I couldn't expect he kept up with the maintenance more than just the odd oil change.
I've been collecting various bits and pieces for a while now, getting ready for this lot of work. I need to get the car in for a wheel alignment and then a WOF, so this weekend was a perfect chance to get cracking on it.
The first job of the day was to get the car up on stands and drop the engine oil. The oil level was a bit low, so I topped with the finest thin synthetic 5W40, started the car up and ran it for a bit first to get some heat into the oil, and then drained it. It came out fairly dark, but not jet black and there were no chunks. The filter didn't look too old either, so I suspect it probably had the usual Kiwi "service" of an oil change and nothing else. Better than nothing I guess.
The filter on the 20v is a bit easier to access than the 7AFE as it has a spacer behind it. I'm not sure why, it's not an oil cooler, it's just a passthrough shifting the filter away from the block.
I poured in 3L of Penrite semi-synthetic 15W40, started the car up to check for leaks, and when there were none moved onto the next job.
The next fluid to change was the gearbox oil. The gearbox shifts OK, with no grinding or crunching but 2nd gear can be a bit stiff. It turns out this fluid may have been changed somewhat recently too, as it was a clean reddish colour and smelt like clean gear oil. Either way, I drained it and replaced it with Penrite 75W90.
Always open the fill plug first, just in case it's seized and you find yourself with a drained box and no way to fill it. The fill plug is on the front of the box, covered in filth. The fill and drain are both 24mm.
The drain is under the car, on the very bottom of the gear box, kinda in line with where the filler is. Be aware that when you remove the drain plug the fluid will come out with some considerable gusto, especially if you have completely removed the fill plug, so get ready for it to shoot half way across the floor.
To fill the gearbox I used the flexi pipe that comes with the fluid, and extended it with some extra hose and just let gravity fill the gearbox until it started to dribble out again. Easy.
It took about 2.3L or so. A 2.5L bottle was plenty.
The last fluid I was curious about was the clutch fluid. I replaced the brake fluid when I replaced the brakes, and the fluid was black and very festy. The clutch fluid was no better.
I didn't want to drain the whole thing and introduce air into the system, so took to doing a few flushes whilst adding new fluid. It's not so dark now but certainly isn't as clean as the brake fluid.
One of the main jobs I had to get done was the front control arms, and the RH axle. I wanted to remove the arms and replace the bushes with poly bushes. The axle needed to be replaced as the outer CV had decided it wanted to be heard and was singing the song of its (broken) people, both when turning but also when accelerating, which was novel.
The control arms are really easy to get out. Undo the three nuts/bolts on the lower balljoint, remove the nut for the lower swaybar link, and then it's a series of bolts holding the swaybar bracket on and one big bolt through the bushing.
With the control arm out it was easy to pull the axle out and have a good look. I pulled it out and assessed its condition from the safety of the bin. Since I was only doing the outer shaft, I just removed the band from the inner CV boot and split the shaft that way, leaving the fixed section in place.
Needless to say the boot was stuffed
But the joint was even worse. All the grease that hadn't previously ejected its self everywhere, was turned to a hard putty-like substance. There was also noticeable play when twisting the CV on the shaft. I have no idea how this wasn't identified in the WOF inspection!
The replacement shaft had good boots, so all I did was clean the old grease out, pack new grease into the inner CV and reassembled it with a new clamp on the boot.
Next was the fun task of pressing the old control arm bushes out. Thankfully I have a press, and with some creative use of big sockets, It wasn't too bad of a job.
One side came out easy enough, the other side got a bit stuck and the inner rubber came away from the outer shell. This left me with a metal sleeve stuck in the arm. The easiest way to sort this was to was a reciprocating saw to cut a notch in it and use a chisel to crush the sleeve slightly and knock it out.
The new poly bush pressed in easy, you just need to make sure its even on both sides when done.
These are a multipart bush, with the main bush, a tube and washers/spacers on each side.
And when completed they should look like this
The front bushing pressed out easily too, but needed some jiggery-pokery to get it into place in the press. I'm not sure this is an officially supported method, so don't try it at home. I wouldn't do this to a metal sleeve bush, but these are an easy press fit rubber bush with no outer sleeve. The strap is only to stop the rear of the arm from coming up.
The outers for the polybush press in by hand, but I used the press to push the tube through. You could easily use a vice, or if you are a bit rough, a hammer.
One complete arm.
Refitting the first arm was something of a nightmare and not a job I want to do again in a hurry. Lining everything up was a real ball-ache, and at one point when the pry bar slipped, a face ache.
The second arm went a bit smoother. There isn't really any trick to it other than not attaching the balljoint to the arm until the very end, and using a dead blow hammer to get the front bush into place. To get the bolt into the rear bush you need the arm as flat as possible in the horizontal plane, but the front bush is also very sensitive to twist and angles. It's a lot of trial and error.
With both fitted though, everything got torqued to spec and I moved on.
I had a quick interlude from big work, mainly because I was at the end of my tether after the control arms and small jobs are easy wins.
The RH side fog light was secured in place with zip ties, and neither worked. I wanted to know why.
As it turns out, neither were plugged in. Both actually work once the connectors are... connected. The RH side one has a broken mount and cracked lens though. Thankfully all the bits are there though, so I can fix it and the lens isn't letting moisture or dirt in.
Someone had tried to fix it before, using what I presume is either a cheap superglue or PVA glue. It didn't stick at all. They also failed to key the surface, so the glue was sitting on the surface. On the plus side, it was really easy to remove the old glue. I mixed up a batch of super-strong Araldite, and after keying the surface with a wire bush, slathered it on.
And some creative taping kept pressure on the joint overnight.
It seems pretty strong today, but I'll give it a couple of days to fully cure before refitting.
Another small win was to fix the front plate, which was 90 shades of bent out of shape.
Some swift beating with a plastic hammer made it look somewhat normal again.
It won't ever look perfect on the car because the mounting points are twisted and bent, but since they are moulded into the bumper cover I'm kinda stuck with it, but it's better than it was. You can actually read it now.
Whilst fiddling around on the front of the car I decided to cut the tie wire and remove the random gopro mount from behind the grille. This also gave me the chance to realign the grille, which wasn't hooked in properly at the bottom.
The grille looks better now
It is all in a dire need of a clean, but that will come later.
The next day, before starting the under bonnet work I slid under the back of the car and wire brushed the "surface rust" on the "fuel pipes" that the car failed its WOF on. To be fair, there was a little surface rust under there, but it was on a brake pipe and was minor (less than the fuel pipe on the liftback had). This was followed by some rust convertor, and later in the day, epoxy zinc.
Back in the engine bay, I replaced the ancient fuel filter, which was full of black rubbish. No photos of this because it's a real b
d of a job. Most of the access is through a cutout in the LH wheel well, and a lot of the work is done blind. Not much fun, but it's done.After that, I pulled the s
tty pod filter intake out. It was just a pod filter stuck into the end of the standard intake pipe, resting on the bottom of the stock airbox with a foam pad to stop it from rubbing through (which going by the sealant on the top of the filter, it had done already).The intake air temp sensor had been relocated to a bottle cap with a hole poked through it.
With the intake off, I couldn't help myself but to check out the reason you buy a 20V... the ITB trumpets.
Very big and trumpety.
Before refitting the standard intake, I removed the bottom of the airbox to clean it and decided it wouldn't be any easier than now to replace the thermostat (which was sticking open).
It turns out the thermostat housing had also been leaking, as shown by this mess on top of the gearbox.
Removing the housing gave an idea of what was going on. A pinched and torn gasket, and any colour you like as long as it's orange-brown.
You can see where the housing was leaking once the thermostat is removed. It was just seeping out the side, through the stuffed gasket.
The poor gasket had seen some s
t.Some of it was even stuck in the thermostat, obviously jamming it.
The "coolant" wasn't just like rusty water, there was something thick and slimy in it. I presume it's that old b
d Stop Leak. Ugh. I flushed some coolant through the top hose with the thermostat out, and got more brown mud out of the system. I'll need to run it for a bit and do a couple of flushes I guess. They probably put it in to stop the thermostat housing leaking... instead of, you know, fixing it.The new thermostat and gasket looking mighty fine. Remember to place the jiggle pin at the top.
And the freshly cleaned housing goes back on.
The old thermostat had a date stamp of 97, so probably original.
Unfortunately this is where it all came a bit unstuck for a bit today. When checking out the hoses and front engine mount I noticed the radiator was looking a bit worse for wear. Sure enough, once removed you can see a whole bunch of fins have rotted away, and there are signs it's been leaking in the past.
I knew I'd have to replace the radiator eventually, but didn't think it would be this soon. There was no point in reassembling with that radiator though, so in the bin it went, fan and all. I noticed the fan made a grinding noise when spun by hand, so had no desire to keep that. The car has been running cold for ages so it probably hasn't needed the fan.
A quick trip to Pick A Part ended with a clean enough radiator and fan from an AE111 liftback (like mine but 4AFE powered). There were remnants of clean red Toyota coolant in the system, and the sticker said it had been changed a few years back, so that's better than nothing. Some fins are a little out of shape from use, but no signs of leaks and it looks clean inside. I suspect it may have been replaced at some point as it doesn't have any Toyota logos on it like my original one.
Interestingly, the NZDM AE111/AE112s have a nice plastic fan shroud, whilst the Carib had a metal shroud that was starting to look rubbish due to surface rust. The plugs are the same and as tested, it works fine in my car.
While the radiator was out, once again, there wouldn't be an easier time to replace the front engine mount. I had replaced the rear recently, but there was still quite a bit of shunting coming on and off the throttle.
Hmm, something doesn't look right
What way should the "forward" arrow be facing? Not backwards? Oh, okay then.
A couple of bolts and out the mount comes, showing the full horror of fitting a mount backwards. Torn to bits. No wonder the engine flopped about.
I made sure to fit mine with the arrow pointing forward.
Now I could refit the radiator and move onto other things, like fitting the intake.
Of course, I couldn't just fit the stock intake and hide all that intake noise away, so I pulled back the guard liner and whipped the big resonator out. The intake now draws air from inside the guard behind the liner, and from the snorkel behind the headlight.
The K&N panel filter I picked up cheap used, had a clean and oil and then got fitted.
Followed by the rest of the intake, including refitting the diagnostic connector where it should be, and not taped to the charcoal canister.
Spark plugs were next on the list, so off came the cover. The whole valley is coated in old oil that had turned kinda sticky and gooey.
I suspect it's a mixture of the oil cap leaking due to a very compressed seal, and some hamfisted top-ups.
The spark plugs weren't as gross as I expected, all the spark plug tubes are bone dry, but the spark plugs are the wrong heat range (BKR5) and the EYA variant isn't the recommended plug.
Not to mention the HUGE gap due to wear
I measured them at about 1.4mm, when they should be 1.1mm, but thats at the highest point, and the wear slopes away towards the ground strap. They also read quite lean to me, being very white.
The new replacement plugs I used are BKR6E-11. These are the standard version of the recommended platinum plugs. The only real difference is the shorter service interval, which for me is fine, but the previous owner probably could have done with the platinum plugs.
The spark plugs leads are looking very tired. One was rubbing, and possibly arcing, on one of the center nuts (the below photo is after I moved it to the correct location, see photo a couple above for where it was).
Another is wrapped in tape and I'm too scared to find out why
I gave the valley a quick clean down and moved onto one of the sources of the oil leaks; the distributor oil seal.
I marked the starting location with a paint pen, so I can refit it in the same place. Whether that is the right place or not, I'll find out later when I crack out the timing light.
There is one bolt holding the distributor in place, and with that removed some careful levering will pop the distributor out. I think mine had been leaking a little...
The old O-ring practically broke in half when I tried to cut it with a knife. It's also very flat. The new O-ring was carefully placed into the groove after some vigorous cleaning (but taking care not to rotate the distributor). Some rubber grease on the O-ring before assembly, and all should be well.
The final job to do before giving it a quick degrease was to fill and bleed the cooling system. I was going to praise this funnel setup I have, which did a really good job of keeping the system topped up...
Until it decided, when it was half full of hot coolant, that it no longer wanted to be part of the cooling system and came out of the filler neck, tipped over, and poured coolant everywhere.
Well, it wouldn't be me if there wasn't coolant on the ground.
The good news is that it bled up OK, no obvious leaks and the temp came up quickly and held steady. Unfortunately, the heater is a bit average, so I will probably need to flush out the heater core. Another day.
Since there was now coolant over EVERYTHING on the LH side of the engine bay, I had to push forward on getting the car out of the garage so I could clean the coolant off before it dried and stained. This did give me a good opportunity to flood everything with degreaser and make it look a bit better.
Hopefully this will help me identify where leaks are actually coming from, and how old some of the grime was.
I couldn't help but take it for a quick shakedown around the block. It's still a work in progress, and I'll feel more confident in the suspension once it's been aligned, but the engine does rev out very nicely. Unfortunately the VVT pulley is dead, so there is little to no low/mid-range power, and it feels slow compared to the liftback, but that will be sorted eventually and I'll have all the power back. The ECU will still be learning again too, since the battery was disconnected.
There is also a difference in driving style between the two cars that I will need to get used to. With the 7AFE it's all torque, and it runs out of puff quickly, so you use lots of throttle down low and shift early. The 4AGE is all top end and all about revving the engine hard. Even with a new VVT pulley, I expect there will be minimal power down low, it's just the way it is. It's a screamer.
I have some more cosmetic and interior work to do, and some more parts are on the way (leads, cap and rotor), but I'll book an alignment for next weekend and hopefully have it in for a wof that following week. Other than a couple of bulbs, I've pretty well nailed the old WOF sheet now.
The liftback should be on its way with its new owner tomorrow, so thats good. Just squeezed over the $1K mark, which is what i wanted, but more would've been nice. It will be gone though, which is more important than the money.
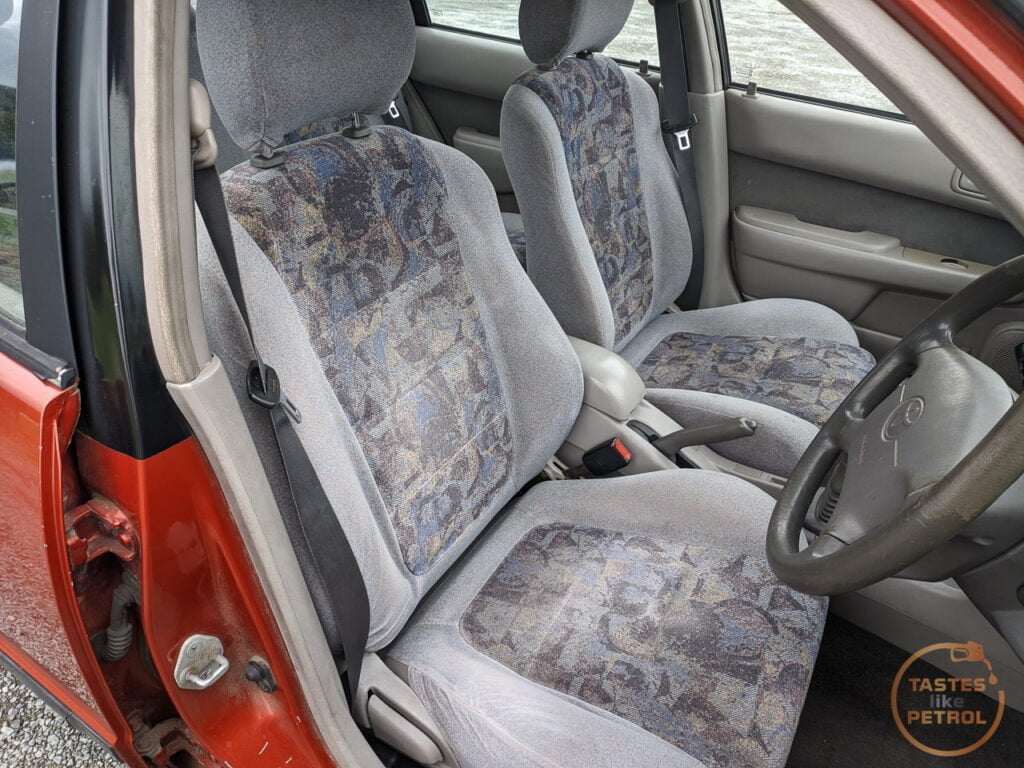
It occurred to me that I have no photos of the interior of the Carib. There was none on the listing and I hadnt even seen the interior before hitting buy now. I'll take some better ones later, once I clean everything, but at least its not festy and filthy.


It even has a sweet NO SMOKING "ash tray" that is felt lined and has coin slots in it, and the multibox with a series of little drawers. The big lit up thing is the FIELD MONITOR which is a compass and displays outside temp and weather forecast. The temp isnt working at the moment, so will need to find the sensor and see whats what.

The fusion headunit will come out and my Pioneer from the liftback will go in instead. A quick check through the front speaker grilles shows it has JVC speakers in the doors.
Couldn't help but take this photo whilst the Carib was parked on the drive. I love the way the tyre pokes out from behind the bumper. The spacers behind the rotors will be helping that fitment.

It occurred to me that I have no photos of the interior of the Carib. There was none on the listing and I hadnt even seen the interior before hitting buy now. I'll take some better ones later, once I clean everything, but at least its not festy and filthy.
It even has a sweet NO SMOKING "ash tray" that is felt lined and has coin slots in it, and the multibox with a series of little drawers. The big lit up thing is the FIELD MONITOR which is a compass and displays outside temp and weather forecast. The temp isnt working at the moment, so will need to find the sensor and see whats what.
The fusion headunit will come out and my Pioneer from the liftback will go in instead. A quick check through the front speaker grilles shows it has JVC speakers in the doors.
Couldn't help but take this photo whilst the Carib was parked on the drive. I love the way the tyre pokes out from behind the bumper. The spacers behind the rotors will be helping that fitment.
With WOF day looming, I had a few more things to get ready, starting with a wheel alignment.

Typical Corolla alignment. Camber is out on one side, but everything else is in spec, much like when I had the Liftback aligned. I might need to look at some camber bolts for the front. The car drives straight and tracks well, although I have now gained some guard rub in the RH Rear when cornering hard. I will need to find out what's touching and give it some smacks, but I suspect it's just a bit of the guard lip that's been tweaked in the past.
After the alignment I wanted to have a look at the timing. When I refitted the distributor after replacing the seal I noticed the adjustment was hard on the counter-clockwise stop, but didn't really think much of it at the time. It wasn't until a friend with another 20V Carib mentioned his was also run on 91 fuel and had the timing retarded just so it wouldn't knock its head off that it started to click that maybe that's what has happened to mine and why it feels to flat to drive.
Checking the timing marks on the crank is a nightmare on these. Even removing the washer bottle and cleaning the timing cover didn't help. I can just make out the 10deg mark stamped on the timing cover, but I can't see the notch on the edge of the pulley. I'll need to mark it all with paint when I have access next. In the meantime, I just haphazardly wound the distributor back and advanced the timing.

Unfortunately the combo of old 91 fuel in the tank mixed with new 98, and probably a lot of carbon in the engine meant that it was knocking like crazy under load on the test drive. A quick stop back at home to retard the timing just a little bit, and I had it just on the limits of knocking with this fuel. Once I've been through a tank I should be able to add some more timing back in again, especially if I can check it against the timing marks.
Whilst there I also changed the distributor cap and rotor. I was going to change the leads too, but the leads I bought (advertised for the 20v blacktop) were wrong, so I'll need to find another source.
The old cap and rotor were well used. The rotor has cracking in the plastic near the tip, and the cap is all crusty on the posts.


Extra timing, like in my friends Carib, has really livened the car up. It actually wants to rev now, whereas before it just felt flat and like revving was asking too much from it.
I took it for the first real drive since I got it, around some fast back roads, and it's a lot of fun to just REVVVVV. The liftback was far more punchy down low but the 7A was asking for a gear change at the same point the 20V is just getting warmed up. The more I drive it, the better it seems to be getting.
This evening I replaced the two bulbs that the car had previously failed the WOF on (rear number plate lamp and front park light), and refit the fog lights.


No more zip ties holding the light in!
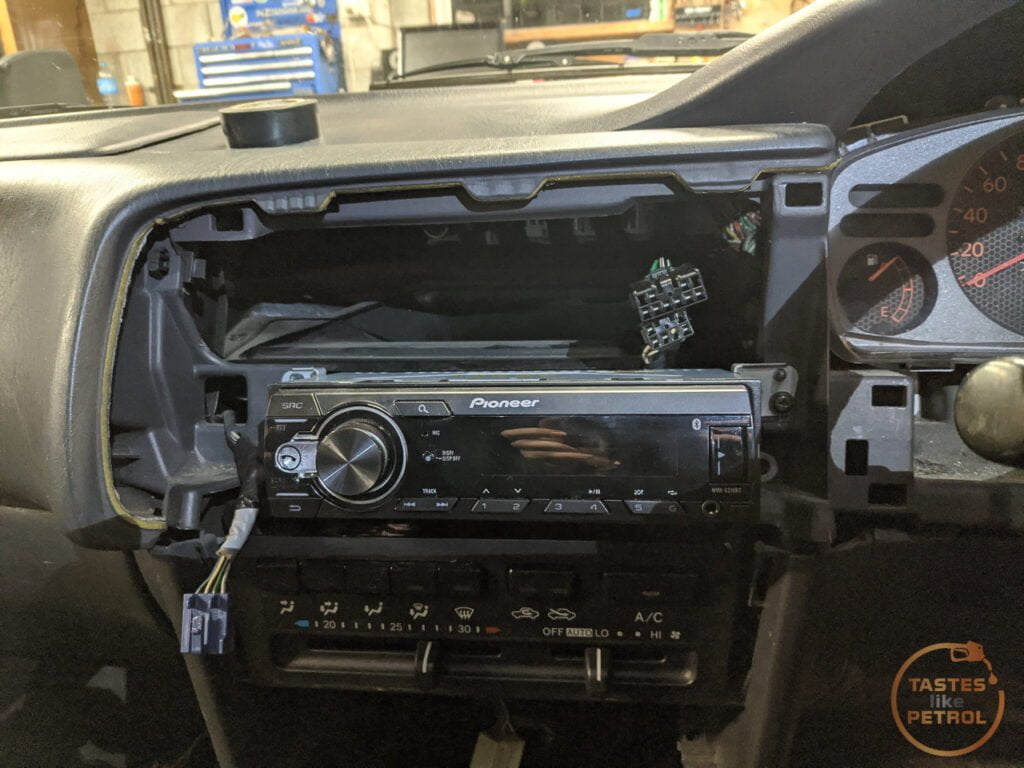
Since I was on a bit of a roll, and I had some spare time, I worked on replacing the barely functional headunit.
It's a Fusion unit with all the bells and whistles, but it never really worked all that well. FM never got reception, and the sound quality was rubbish. It was also jammed in the dash surround and didn't really fit well

Removing the dash surrounds was easy, since all the screws are missing and it's just held in with clips and hopes and dreams. The top surround the radio is housed in should have at least two screws under the edge below the radio and one on the far RH side under the mirror switch. This is one big panel that goes over the cluster. The surround below the radio with the climate control is just held in with clips.
I didn't know what to expect behind the radio, but with the state of the rest of the car, I figured it couldn't be good. I wasn't let down

Chocolate blocks. Oh no. But wait, what is that?

A band expander? On an NZ radio? No wonder FM doesn't work well.
With some further digging, I found this

Yes, that's a huge bundle of wires leading to the two intact OEM plugs with proper harness adaptors. Yay!
I suspect it had a flashy JDM radio in it when it came to NZ, and the dealer fit a band expander to get the FM radio working on it since the radio frequencies in Japan are different to NZ. The band expander shifts the frequencies so that JDM radios can pick them up.
Obviously the previous owner wanted more features so scrapped the JDM radio, cut the plugs off at the radio end and used the chocolate block to join it to the Fusion harness, whilst plugging the band expander in as it was on the old radio. I mean, it kinda worked. Kinda.
The headunit wasn't secured properly either, they had used the wrong holes in the side of the headunit so the brackets didn't fit and it flopped around all over the place.
I moved the brackets to the headunit out of the Liftback, plugged it in and away it went
This is what was pulled out and is now redundant

It fits in the dash well enough, certainly better than the Fusion did

It was already an improvement in sound quality, but something was still lacking.... sound from the front RH speaker. Nothing.
I removed the door card (which was easy since half the clips are missing) and found this. I knew it had aftermarket JVC speakers in the front doors since I spotted them through the grilles the other day, but didn't know they were held in with wood screws

Sure enough, the speaker was dead. I noticed when I removed the screw and moved the speaker it would cut in and out. Yay, intermittent connection. No surprise there...

Argh, no. Twist and tape. A pair of cheap crimpers and some terminals would have sorted this properly

I was going to crimp terminals on but someone had mangled the small terminal on the speaker, so I chose to solder the wires to the terminals instead. I figure I'll need to do the speaker on the Lh side soon, since that will be twisted and taped too.
I have proper mounting rings that I believe should fit this car, but the speakers are OK as they are for now. I have some nicer Sony ones on the way, so might fit the mounts if I swap to those down the track.
The difference in sound is like night and day now. Much more bass, it's clearer and fading to the front works now, whereas previously it just went quiet. It could do with new rear speakers as they are starting to distort a bit, but that will come down the track.
The last couple of things to do was to fit the rear cargo blind that had been sitting in my lounge for a while

And the center console arm rest. This is from the RV spec model, and has twin cup holders in the lid


I'll probably never use it since there is a twin cup holder in the dash, but its cool to have.
There is still some more work to be done, but nothing for the upcoming WOF check. I have completed the old checklist, and everything else is basically new, so hopefully, it'll go through easily.
If the weather is good I'm planning on heading to Pick A Part tomorrow and will be grabbing some screws to secure the dash trim, but also a clock spring so I can change to the three spoke steering wheel as the airbag connector is different.
On a slightly bittersweet note, the Liftback is gone. I'll miss that car, but needs must. I'm finally back down to three cars, which is a happy number for being able to store all of them. Once the Carib has a WOF we will have two useable cars and then I can push forward on the Marina.
Typical Corolla alignment. Camber is out on one side, but everything else is in spec, much like when I had the Liftback aligned. I might need to look at some camber bolts for the front. The car drives straight and tracks well, although I have now gained some guard rub in the RH Rear when cornering hard. I will need to find out what's touching and give it some smacks, but I suspect it's just a bit of the guard lip that's been tweaked in the past.
After the alignment I wanted to have a look at the timing. When I refitted the distributor after replacing the seal I noticed the adjustment was hard on the counter-clockwise stop, but didn't really think much of it at the time. It wasn't until a friend with another 20V Carib mentioned his was also run on 91 fuel and had the timing retarded just so it wouldn't knock its head off that it started to click that maybe that's what has happened to mine and why it feels to flat to drive.
Checking the timing marks on the crank is a nightmare on these. Even removing the washer bottle and cleaning the timing cover didn't help. I can just make out the 10deg mark stamped on the timing cover, but I can't see the notch on the edge of the pulley. I'll need to mark it all with paint when I have access next. In the meantime, I just haphazardly wound the distributor back and advanced the timing.
Unfortunately the combo of old 91 fuel in the tank mixed with new 98, and probably a lot of carbon in the engine meant that it was knocking like crazy under load on the test drive. A quick stop back at home to retard the timing just a little bit, and I had it just on the limits of knocking with this fuel. Once I've been through a tank I should be able to add some more timing back in again, especially if I can check it against the timing marks.
Whilst there I also changed the distributor cap and rotor. I was going to change the leads too, but the leads I bought (advertised for the 20v blacktop) were wrong, so I'll need to find another source.
The old cap and rotor were well used. The rotor has cracking in the plastic near the tip, and the cap is all crusty on the posts.
Extra timing, like in my friends Carib, has really livened the car up. It actually wants to rev now, whereas before it just felt flat and like revving was asking too much from it.
I took it for the first real drive since I got it, around some fast back roads, and it's a lot of fun to just REVVVVV. The liftback was far more punchy down low but the 7A was asking for a gear change at the same point the 20V is just getting warmed up. The more I drive it, the better it seems to be getting.
This evening I replaced the two bulbs that the car had previously failed the WOF on (rear number plate lamp and front park light), and refit the fog lights.
No more zip ties holding the light in!
Since I was on a bit of a roll, and I had some spare time, I worked on replacing the barely functional headunit.
It's a Fusion unit with all the bells and whistles, but it never really worked all that well. FM never got reception, and the sound quality was rubbish. It was also jammed in the dash surround and didn't really fit well
Removing the dash surrounds was easy, since all the screws are missing and it's just held in with clips and hopes and dreams. The top surround the radio is housed in should have at least two screws under the edge below the radio and one on the far RH side under the mirror switch. This is one big panel that goes over the cluster. The surround below the radio with the climate control is just held in with clips.
I didn't know what to expect behind the radio, but with the state of the rest of the car, I figured it couldn't be good. I wasn't let down
Chocolate blocks. Oh no. But wait, what is that?
A band expander? On an NZ radio? No wonder FM doesn't work well.
With some further digging, I found this
Yes, that's a huge bundle of wires leading to the two intact OEM plugs with proper harness adaptors. Yay!
I suspect it had a flashy JDM radio in it when it came to NZ, and the dealer fit a band expander to get the FM radio working on it since the radio frequencies in Japan are different to NZ. The band expander shifts the frequencies so that JDM radios can pick them up.
Obviously the previous owner wanted more features so scrapped the JDM radio, cut the plugs off at the radio end and used the chocolate block to join it to the Fusion harness, whilst plugging the band expander in as it was on the old radio. I mean, it kinda worked. Kinda.
The headunit wasn't secured properly either, they had used the wrong holes in the side of the headunit so the brackets didn't fit and it flopped around all over the place.
I moved the brackets to the headunit out of the Liftback, plugged it in and away it went
This is what was pulled out and is now redundant
It fits in the dash well enough, certainly better than the Fusion did
It was already an improvement in sound quality, but something was still lacking.... sound from the front RH speaker. Nothing.
I removed the door card (which was easy since half the clips are missing) and found this. I knew it had aftermarket JVC speakers in the front doors since I spotted them through the grilles the other day, but didn't know they were held in with wood screws
Sure enough, the speaker was dead. I noticed when I removed the screw and moved the speaker it would cut in and out. Yay, intermittent connection. No surprise there...
Argh, no. Twist and tape. A pair of cheap crimpers and some terminals would have sorted this properly
I was going to crimp terminals on but someone had mangled the small terminal on the speaker, so I chose to solder the wires to the terminals instead. I figure I'll need to do the speaker on the Lh side soon, since that will be twisted and taped too.
I have proper mounting rings that I believe should fit this car, but the speakers are OK as they are for now. I have some nicer Sony ones on the way, so might fit the mounts if I swap to those down the track.
The difference in sound is like night and day now. Much more bass, it's clearer and fading to the front works now, whereas previously it just went quiet. It could do with new rear speakers as they are starting to distort a bit, but that will come down the track.
The last couple of things to do was to fit the rear cargo blind that had been sitting in my lounge for a while
And the center console arm rest. This is from the RV spec model, and has twin cup holders in the lid
I'll probably never use it since there is a twin cup holder in the dash, but its cool to have.
There is still some more work to be done, but nothing for the upcoming WOF check. I have completed the old checklist, and everything else is basically new, so hopefully, it'll go through easily.
If the weather is good I'm planning on heading to Pick A Part tomorrow and will be grabbing some screws to secure the dash trim, but also a clock spring so I can change to the three spoke steering wheel as the airbag connector is different.
On a slightly bittersweet note, the Liftback is gone. I'll miss that car, but needs must. I'm finally back down to three cars, which is a happy number for being able to store all of them. Once the Carib has a WOF we will have two useable cars and then I can push forward on the Marina.
Gassing Station | Readers' Cars | Top of Page | What's New | My Stuff