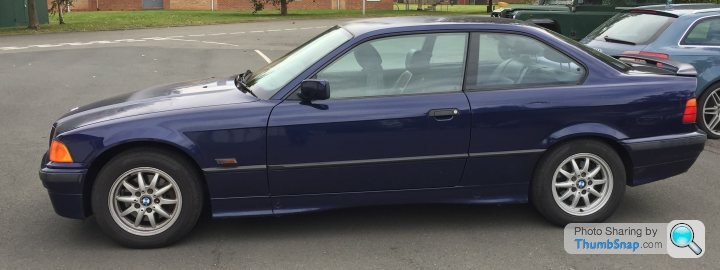
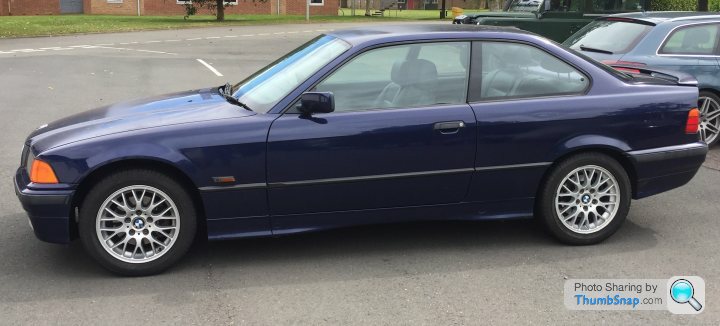
1996 BMW E36 328i Coupe - we have history...
Discussion


Pig benis said:
The E46 330ci is an excellent car, superb on fuel, super smooth engine and they make a nice soundtrack. The downside for me (coming from turbo Jap cars) is until I stripped the car out, I found it to be very boring. Now mine has no interior, semi slick tyres, exhaust mods and a closer ratio diff, which has made it very entertaining to drive.
The car cost £970 and I've spent circa £2.5k on modifications, I can't think of any other car which would be as much fun, rwd and reliable for £3.5k
Anyway, here was I complaining about too much to read and I've started to waffle.
Good thread OP.
The car cost £970 and I've spent circa £2.5k on modifications, I can't think of any other car which would be as much fun, rwd and reliable for £3.5k
Anyway, here was I complaining about too much to read and I've started to waffle.
Good thread OP.
Paul S4 said:
Excellent write up !
Having owned 2 E36s....my first was a family car that belonged to my late Uncle, and he had owned it since nearly new: it was a 328 convertible auto.
He stopped driving and so I bought it from him at a fair price. It was a dark metallic purple (?) colour with 'aubergine ? full heated leather, and all the toys ( remarkable for a 1997 P reg car.
I guess if it had been a manual I would have kept it.....apart from the Nikasil block that is !
However, I had already decided to take the car on a European road trip, so I kept the car for mainly sentimental reasons.
Prior to that trip I also did a Track Day at Croft ( my first of several ) which emphasised that the auto box was not best suited to that task.
I then replaced the convertible for a W reg E36 318iS, which I really liked, and did a couple of track days with that car, proving that the smaller 4 cylinder lighter engine gave the car a better balance, if not so much power of course.
Apologies for derailing your thread....but I am now envious of your manual 238 coupe...!!
I may be tempted again!
You can’t do much better for cheap thrills than E36/46. Please feel free to talk about your car(s). I know this is a Readers Cars thread but I feel it’d be pretty dull if others don’t share too! Having owned 2 E36s....my first was a family car that belonged to my late Uncle, and he had owned it since nearly new: it was a 328 convertible auto.
He stopped driving and so I bought it from him at a fair price. It was a dark metallic purple (?) colour with 'aubergine ? full heated leather, and all the toys ( remarkable for a 1997 P reg car.
I guess if it had been a manual I would have kept it.....apart from the Nikasil block that is !
However, I had already decided to take the car on a European road trip, so I kept the car for mainly sentimental reasons.
Prior to that trip I also did a Track Day at Croft ( my first of several ) which emphasised that the auto box was not best suited to that task.
I then replaced the convertible for a W reg E36 318iS, which I really liked, and did a couple of track days with that car, proving that the smaller 4 cylinder lighter engine gave the car a better balance, if not so much power of course.
Apologies for derailing your thread....but I am now envious of your manual 238 coupe...!!
I may be tempted again!
And who said it was manual? I mean, it is, but we haven’t got to that part of the story yet!
Having done lots of research and lots of YouTubing, it quickly became clear that these cars have a weakness with the cooling system, and that most discerning owners, if they don’t know the history, will by default replace much of the system, particularly the (sometimes plastic) water pump and the fan, as both have a tendency to shatter and cause no end of problems. Any problem with the cooling system is likely to quickly cause greater damage as the aluminium heads don’t need much encouragement to warp.
I was in the zone, so ordered a new radiator, silicone hose kit, fan, viscous coupling, thermostat housing (aluminium rather than the original plastic), thermostat, water pump and belt. Oh, and some new coolant, obviously. Again, YouTube provided the instructional videos. I went about draining the coolant from the radiator and the block. Some sources said the O2 sensor on the exhaust manifold gets in the way of the coolant drain plug on the block but I didn’t have any trouble with it. Coolant everywhere. Nice.
It was quite a nice project really. The only special tool I bought was a BMW fan clutch tool, which made removing the fan a piece of cake. I think it cost under £10. I took my time, unbolted stuff, bagged up and labelled the fixings, put the new stuff on, tightened it all up and filled the system with water. I did this because, as much as I may be an amateur, I have done enough plumbing on the house to know that the first time I filled it up, there would be a leak and I’d have to drain it again to sort it out. It wouldn’t do to be splashing my lovely new coolant all over the floor.
As predicted, water made its way out of the thermostat housing and made its escape onto the pulley below. I had bought a tube of gasket maker type stuff just in case, but I’d rather try to make a mechanical seal before I start squirting gunk in there and making a mess. I'm happy to disassemble and reassemble several times if necessary, and I'm equally happy to test thoroughtly before final reassembly - I'm not pushed for time here. The thermostat housing did have rubber gaskets, but the rear face seemed a bit rough to me, so I thought there was nothing to lose from trying to smooth it down a bit. I don’t think I every really thought it would work, but I wasn't in a rush so gave it a try. A bit of wet and dry paper and plenty of water, and half an hour of furious rubbing failed to produce a genie, but blow me if it didn’t fix the problem! I felt like a proper engineer then. My wet and dry rampage had smoothed the microns that were allowing the water out. Or the gaskets seated properly this time. I prefer to think that it was all my fine adjustment that did it.
I tested it again under pressure with just water from the hosepipe. I did have a bit of a scare when I had left it running to warm up and got distracted. I returned to a fountain of hot water spewing from the radiator and a cloud of steam billowing up like the Flying Scotsman. I thought I’d properly screwed it this time. The head was going to be warped now for sure. There was no obvious damage, though, so I carried on sorting the cooling system with a sense of foreboding, and once I was happy it was water tight, I put the new coolant in. Some people say that these cars can be a pain to bleed. Others say it’s fine if you just do this, or that. My approach was to do all of the things that the various people said would make it work (this, that and the other), and eventually I got all the air out and the heater worked again. I would say it isn’t as easy as it could be, and you need a bit of patience to get it right.
So, the cooling system was hunky dory. Far less chance now of fan-based shrapnel shredding hoses or the water pump impeller going exploring inside the block. But had I already screwed the pooch, as our American cousins might say? I was concerned I’d overheated it and bent the head.
After I’d run it a few times I had a cautious look under the oil filler cap for the tell-tale white slime. What I found there was what I would describe as ‘inconclusive’. I think what it actually was was evidence of condensation in an engine that hadn’t run much over the last year or so. At the time, though, given the circumstances, I was concerned it was the end of the world. Or at least the end of my engine. Had my run of good luck come crashing to an end? With a heavy heart I started researching ways of figuring out whether the head was knackered.
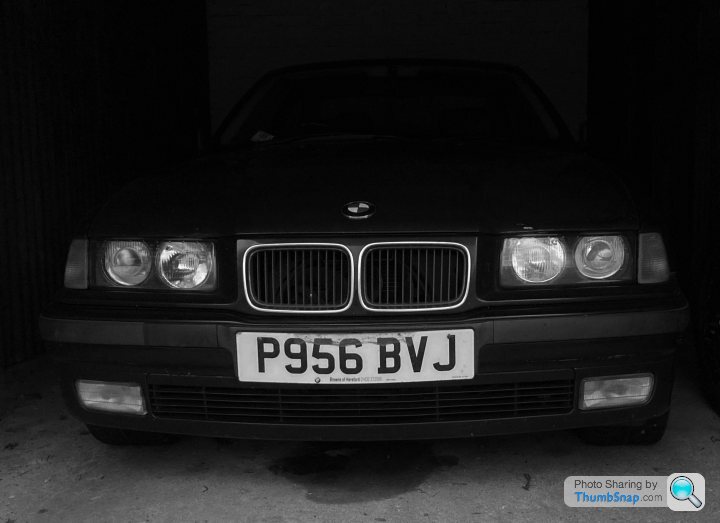
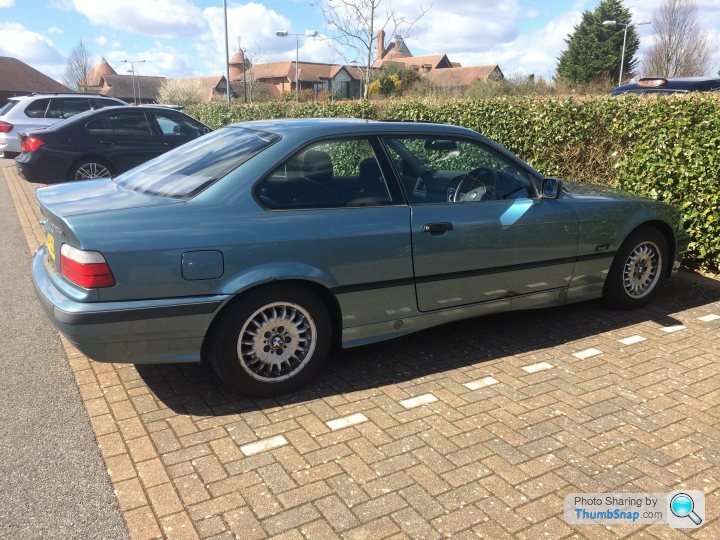
I haven’t got any pictures of the coolant system project (though given the quality of my pictures so far I’m not sure that’ll make much difference to anyone!). Here's an arty one I took yesterday instead. It's in hibernation mode in the garage.
I was in the zone, so ordered a new radiator, silicone hose kit, fan, viscous coupling, thermostat housing (aluminium rather than the original plastic), thermostat, water pump and belt. Oh, and some new coolant, obviously. Again, YouTube provided the instructional videos. I went about draining the coolant from the radiator and the block. Some sources said the O2 sensor on the exhaust manifold gets in the way of the coolant drain plug on the block but I didn’t have any trouble with it. Coolant everywhere. Nice.
It was quite a nice project really. The only special tool I bought was a BMW fan clutch tool, which made removing the fan a piece of cake. I think it cost under £10. I took my time, unbolted stuff, bagged up and labelled the fixings, put the new stuff on, tightened it all up and filled the system with water. I did this because, as much as I may be an amateur, I have done enough plumbing on the house to know that the first time I filled it up, there would be a leak and I’d have to drain it again to sort it out. It wouldn’t do to be splashing my lovely new coolant all over the floor.
As predicted, water made its way out of the thermostat housing and made its escape onto the pulley below. I had bought a tube of gasket maker type stuff just in case, but I’d rather try to make a mechanical seal before I start squirting gunk in there and making a mess. I'm happy to disassemble and reassemble several times if necessary, and I'm equally happy to test thoroughtly before final reassembly - I'm not pushed for time here. The thermostat housing did have rubber gaskets, but the rear face seemed a bit rough to me, so I thought there was nothing to lose from trying to smooth it down a bit. I don’t think I every really thought it would work, but I wasn't in a rush so gave it a try. A bit of wet and dry paper and plenty of water, and half an hour of furious rubbing failed to produce a genie, but blow me if it didn’t fix the problem! I felt like a proper engineer then. My wet and dry rampage had smoothed the microns that were allowing the water out. Or the gaskets seated properly this time. I prefer to think that it was all my fine adjustment that did it.
I tested it again under pressure with just water from the hosepipe. I did have a bit of a scare when I had left it running to warm up and got distracted. I returned to a fountain of hot water spewing from the radiator and a cloud of steam billowing up like the Flying Scotsman. I thought I’d properly screwed it this time. The head was going to be warped now for sure. There was no obvious damage, though, so I carried on sorting the cooling system with a sense of foreboding, and once I was happy it was water tight, I put the new coolant in. Some people say that these cars can be a pain to bleed. Others say it’s fine if you just do this, or that. My approach was to do all of the things that the various people said would make it work (this, that and the other), and eventually I got all the air out and the heater worked again. I would say it isn’t as easy as it could be, and you need a bit of patience to get it right.
So, the cooling system was hunky dory. Far less chance now of fan-based shrapnel shredding hoses or the water pump impeller going exploring inside the block. But had I already screwed the pooch, as our American cousins might say? I was concerned I’d overheated it and bent the head.
After I’d run it a few times I had a cautious look under the oil filler cap for the tell-tale white slime. What I found there was what I would describe as ‘inconclusive’. I think what it actually was was evidence of condensation in an engine that hadn’t run much over the last year or so. At the time, though, given the circumstances, I was concerned it was the end of the world. Or at least the end of my engine. Had my run of good luck come crashing to an end? With a heavy heart I started researching ways of figuring out whether the head was knackered.
I haven’t got any pictures of the coolant system project (though given the quality of my pictures so far I’m not sure that’ll make much difference to anyone!). Here's an arty one I took yesterday instead. It's in hibernation mode in the garage.
It seemed like a compression test was probably the way forward, so I ordered a cheapo kit for that purpose and watched a few videos to get the technique down. I’m a firm believer that these days we’re all just a YouTube video away from being able to do anything at all. Brain surgery anyone…?
Fuel pump disabled, plugs out. I recruited Mrs BCPL to crank the engine whilst I scrutinised the gauge. All six cylinders tested and the numbers looked… good. I think. They were all similar and not far off the quoted range in the Haynes manual, but with a tendency to be too high. Someone on here might be able to tell me why that might be, but my deduction was that it was one of two things.
1. The cheap gauge wasn’t all that accurate.
2. My engine is strong, like ox.
I prefer to think it’s the latter, but either way I took the fact that they were all similar and none were low to be a good sign, and my confidence that I hadn’t destroyed the engine began to recover. Feeling a bit happier with life, I put it all back together and had a think about what was next.
Having replaced the front brake pads and discs whilst doing the control arms etc, I thought it would be a good idea to replace the rears as well, and replace the brake fluid, as none of those things had been done for years and it was all a bit rusty. Having done this procedure on the front, it was fairly straightforward to do the same on the rear, although I did make one amateur mistake. Having fought the retaining screw out of the rotor, I hauled on the disc, wiggled it, hit it, asked it nicely and threatened it, but it wouldn’t come off. I couldn’t figure it out. Until I realised that none of those things are likely to work when the handbrake is on! Oops.
I replaced all the bleed nipples whilst I was replacing the fluid as the existing ones were pretty corroded. I found replacing the fluid simple in theory but somewhat tricky in practice. The reason it was tricky was purely due to cheap equipment that was incapable of holding a vacuum. I first tried a hand vacuum pump to pull the fluid through, but this was a non-starter really as the tubes just wouldn’t form a seal round the nipple. I eventually gave up on that and bought one of the ones that uses the pressure in your spare tyre to push the fluid through from the reservoir (Gunson I think). This would have worked a treat, if the connector on the end of it actually formed an airtight seal on the tyre valve, which it didn’t. I had more luck with my bike tyre (maybe lower pressure helped), but then had to keep putting more air in the tyre in between bleeding calipers. That made it all far more faff than it needed to be. I have since bought a couple of different connectors, which I will try next time I need to carry out this procedure, because apart from this weakness, the system was easy to use and worked a treat.
So, new pads and discs all round and lovely new brake fluid. Tick.
I then went down a bit of a rabbit hole watching detailing videos and decided that I should try and do something about my awful paint job with a bit of polish (polishing a turd or rolling it in glitter – it’s still a turd). The less said about this episode the better, really. Cheap, soft laquer, amateurish technique, polish and bits of foam pad as far as the eye can see. The paintwork actually ended up worse, if that were possible. At least I was practicing on a subject that didn’t matter, I suppose, rather than ‘cutting’ my detailing teeth (pun very much intended) on something more expensive. The polisher has now been retired to the shed, where it will stay until I forget how awful my first experience with it was.
Moving on.
At this point (Spring 20), I was looking towards getting it back on the road and in useable condition. I was about to start a new job (weekly commuting again) and wanted to use the beemer to commute, just for fun. The trip isn’t enormously long, but I thought that improving the experience in the cabin would be a worthwhile task. The car had what I thought was the original stereo, with tape deck. It did have a 6 CD changer in the boot, which had served me well on my long hauls across Europe (listening to Europe, coincidentally), but now I was looking for Bluetooth connectivity. This would allow me to stream era-appropriate music from my iPhone rather than loading CDs into the boot. The other annoyances to sort out in here were the speakers and the rattly door cards. Different speakers would work depending on whether I was going round a left-hand bend, a right-hand bend, or going straight ahead. It was vaguely amusing but got quite irritating after a while. I decided to change the speakers for new ones (including 6x9 in the back), hoping that by doing that and remaking the connections, that would sort the problem and maybe give me better sound quality at the same time. I don’t know why that even occurred to me given that I have a terrible ear and couldn’t tell the difference between the sound coming out of top end Bang & Olufsen headphones and someone singing down a bit of string between two tin cans.
I bought a speaker kit, including the adapters for the rear shelf to accommodate the 6x9s. It was a model-specific kit, which of course meant nothing fitted correctly and I ended up having to ‘fabricate’ (I use the term loosely as it doesn’t mean quite the same to me as it does to some of the artists on this site) some bits and pieces to make it all fit. It all went in in the end, and sound quality was… exactly the same as far as I could tell. At least the speakers didn’t take it in turns any more though, so that was one thing sorted.
I opted for a low-to-mid-range head unit that did what I wanted (my phone does most of the work, I just want to be able to stream whatever its playing to the car system really). It looked like a bit of a head-scratcher at first when I took the old head unit out and found the multi-coloured spaghetti behind it. I had done a bit of stereo work in my ‘youf’ so was undeterred by this. I just set about it logically with my multi-meter (and the internet) to figure out what was what. After a while of getting my teeth into this challenge, my eye travelled along the noodly mess to find that there was a connector further back that I had failed to notice on first inspection. Undoing this connector revealed a nice neat OEM loom on one side and technicolour vomit on the other. I have a feeling this wasn’t the original stereo. Having had this epiphany, I ordered the correct adaptor and the new head unit slotted in perfectly and worked a treat. The noodly mess went in the bin.
At this stage I was still keeping anything I replaced with non-OEM equivalent, in case in the far and misty future I or someone else wanted to return it to completely original spec. Yes, I know.
I had the door cards off to do the speakers. I’d seen somewhere that E6000 was the correct stuff to glue them back together with, so got hold of some of that and off I went. I followed the instructions carefully and clamped the plastic parts onto the back for a good few days to ensure a full set. It worked a treat and the door cards went back on as good as new – not a rattle to be heard. This is the sort of simple fix that gives me a good feeling for the rest of the day.
It was pretty close to being driveable again. Overhauled brakes and front suspension, a new starter, wiper mechanism and windscreen, a completely replaced cooling system, and an improved ‘driver experience’. I was very happy with it, apart from one thing (no, not the bodywork) – the air con still didn’t work. A regas in 2011 had resulted in it working for about a week before it all fell out again. I hadn’t had air con since then. It is now (in the story) Summer 20, and it’s bloody hot.
Shadow R1 said:
Great write up.
Taking up the op on his offer for us to post our E36's.

That was mine about 15 years ago. 318 8 valve.
Had it for a few years, great fun.
Thanks for sharing. I'm more of a coupe man myself, from an aesthetic point of view, but the saloons and convertibles can look good in the right circumstances. I think yours looks good in red.Taking up the op on his offer for us to post our E36's.
That was mine about 15 years ago. 318 8 valve.
Had it for a few years, great fun.
Unfortunately I have very few pictures of the work I’ve done to date. I never intended any of it to be for public consumption; it was just for my own pleasure/pain/satisfaction/frustration really. Now I’ve decided to write up the project for posterity (not to mention for something to do), I will properly document whatever I do from now on.
We’re not quite up to date in the story yet, though, there are a couple of jobs still to describe, so you’ll have to bear with the few crappy photos I took of those too. After that it’ll be like a big rusty German Instagram, there’ll be so many photos.
Once we’re up to date this thread will slow down somewhat, and I’ll start speculating about future plans. There’s plenty of life left in this old dog yet (fingers crossed!)
Nice E36 you have there. I have a 325i coupe which is SORN having failed its MOT due to rust a few years ago. I can't bear to part with it so it's currently languishing in my garage awaiting restoration when I retire. It needs a new bonnet, front wings, doors, rear wings, boot, the panel under the boot (not sure what you call that) and that's just the visible rust. There is definitely structural work to be done, I just don't know how much yet.
It's OEM apart from clear indicators. Currently on around 193,000 miles.
I'll be doing the usual component refresh work when the time comes but that is a good few years away unfortunately. Here's a pic in the meantime.
It's OEM apart from clear indicators. Currently on around 193,000 miles.
I'll be doing the usual component refresh work when the time comes but that is a good few years away unfortunately. Here's a pic in the meantime.
jamesson said:
Nice E36 you have there. I have a 325i coupe which is SORN having failed its MOT due to rust a few years ago. I can't bear to part with it so it's currently languishing in my garage awaiting restoration when I retire. It needs a new bonnet, front wings, doors, rear wings, boot, the panel under the boot (not sure what you call that) and that's just the visible rust. There is definitely structural work to be done, I just don't know how much yet.
It's OEM apart from clear indicators. Currently on around 193,000 miles.
I'll be doing the usual component refresh work when the time comes but that is a good few years away unfortunately. Here's a pic in the meantime.
Wow! You must really love that car! It certainly sounds like it'll keep you busy for a while.It's OEM apart from clear indicators. Currently on around 193,000 miles.
I'll be doing the usual component refresh work when the time comes but that is a good few years away unfortunately. Here's a pic in the meantime.
Where were we? Oh, yes, melting in the summer heat. Driving home with the windows open, suffering the wind noise and diesel fumes on the motorway in the search for half a degree's worth of cooling.
Air conditioning. What a lovely thought. I decided it was now time to tackle this, after 9 years or ownership. I’d done a bit of googling previously and had a feeling it was likely to be the condenser that was at fault, but rather than guess, replace that, and then find all the gas fell out somewhere else, I thought I’d take it to a garage for diagnosis. So that’s what I did. The gentleman in the garage filled it up with whatever they fill it up with, including their UV dye, and had a look to see if he could find out where it was leaking from. Well, the verdict was… pretty much everywhere. The engine bay looked like a porn studio under the UV light. So replacing the condenser alone wouldn’t have solved that little issue. I guess all the seals had given up the ghost having been unemployed for 9 years.
Knowledge is power, as they say. Now I knew the extent of the problem I could figure out how to solve it. I searched for the various components that make up a full system, and found that whilst I could buy new replacements for some, others were either completely impossible to find or ludicrously expensive. I settled on the idea of a new condenser, new dryer, new valves, new o-rings all round and a good clean up of all the pipework and connectors.
Now, if you ever read anything about air conditioning systems, it always says ‘DON’T MESS WITH AIR CONDITIONING SYSTEMS – YOU WILL DIE AND KILL EVERYTHING AROUND YOU AND THEN GO TO PRISON.’ However, given that all the seals had given up years ago, the chances of there being any refrigerant left in the system were pretty tiny. So, after a quick poke at the valves with a screwdriver to confirm, I set about dismantling the system.
Getting to the dryer and the condenser involved removing the OSF headlight and the front bumper, but both of those things are a piece of cake on an E36, even if you do it on the hottest day of the year and nearly kill yourself with heatstroke. The rest of the system was surprisingly simple. The unions are simple sockets with an o-ring, clamped in place with a screw. There was quite a lot of corrosion around some of the joins, which demonstrated where they had been leaking, I guess, but all the screws came out fine, except one, which I rounded off. I cleaned everything up with my not-a-dremel and some wire wheels, replaced the o-rings and that screw, and put it all back together. The only component in the engine bay I decided not to replace was the compressor, as it would have been more time consuming and more expensive to do that than the rest of it put together. Was it a risk? Sure. But I calculated that, as I was replacing the o-rings on the pipes that connected to the compressor, the risk of the component itself being leaky/at fault was small. To be honest, it all seemed far too simple and I couldn’t believe it would actually work. Surely it had to be more complicated than that?
I returned to my air conditioning man feeling averagely confident, at most. He applied a vacuum to it and, to my surprise, it held for a good ten minutes. All seemed well, and I was somewhat shocked! Full of admiration for my newly shiny pipes, he went ahead and pumped £100 worth of refrigerant into it. Seriously. £100. Where did it all go?
I handed over my money with a sort of grimace/smile and drove home shivering in the arctic blast coming out of my vents. Obviously my timing was perfect. It was early September by the time I got it regassed, and after that there was one vaguely warm day on which I turned the air con on. Apart from that it was grey and miserable. Ah well, it’s all sorted for next summer at least… or so I thought!
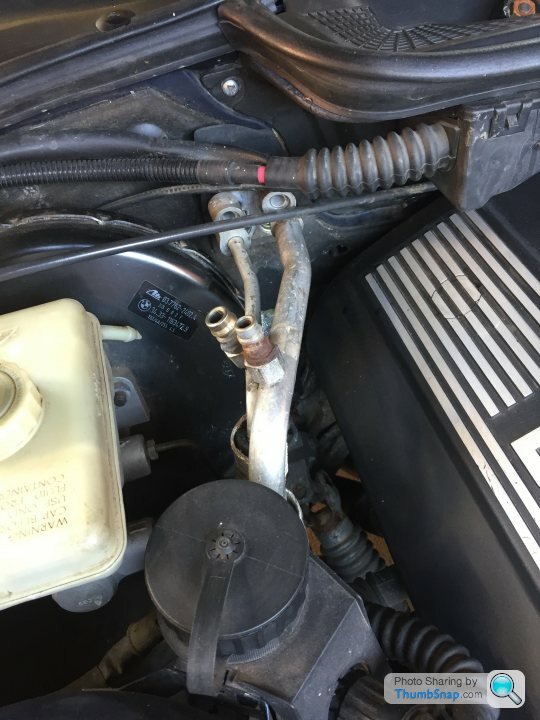
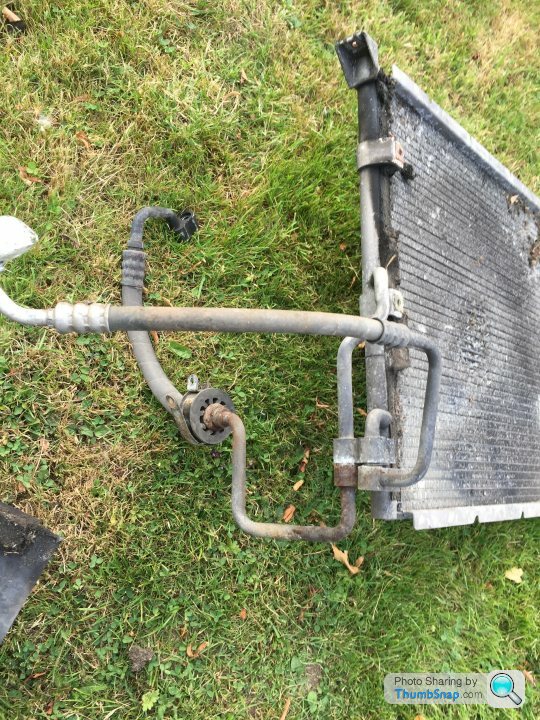
Here are some really bad pictures of some almost identifiable air conditioning components.

Air conditioning. What a lovely thought. I decided it was now time to tackle this, after 9 years or ownership. I’d done a bit of googling previously and had a feeling it was likely to be the condenser that was at fault, but rather than guess, replace that, and then find all the gas fell out somewhere else, I thought I’d take it to a garage for diagnosis. So that’s what I did. The gentleman in the garage filled it up with whatever they fill it up with, including their UV dye, and had a look to see if he could find out where it was leaking from. Well, the verdict was… pretty much everywhere. The engine bay looked like a porn studio under the UV light. So replacing the condenser alone wouldn’t have solved that little issue. I guess all the seals had given up the ghost having been unemployed for 9 years.
Knowledge is power, as they say. Now I knew the extent of the problem I could figure out how to solve it. I searched for the various components that make up a full system, and found that whilst I could buy new replacements for some, others were either completely impossible to find or ludicrously expensive. I settled on the idea of a new condenser, new dryer, new valves, new o-rings all round and a good clean up of all the pipework and connectors.
Now, if you ever read anything about air conditioning systems, it always says ‘DON’T MESS WITH AIR CONDITIONING SYSTEMS – YOU WILL DIE AND KILL EVERYTHING AROUND YOU AND THEN GO TO PRISON.’ However, given that all the seals had given up years ago, the chances of there being any refrigerant left in the system were pretty tiny. So, after a quick poke at the valves with a screwdriver to confirm, I set about dismantling the system.
Getting to the dryer and the condenser involved removing the OSF headlight and the front bumper, but both of those things are a piece of cake on an E36, even if you do it on the hottest day of the year and nearly kill yourself with heatstroke. The rest of the system was surprisingly simple. The unions are simple sockets with an o-ring, clamped in place with a screw. There was quite a lot of corrosion around some of the joins, which demonstrated where they had been leaking, I guess, but all the screws came out fine, except one, which I rounded off. I cleaned everything up with my not-a-dremel and some wire wheels, replaced the o-rings and that screw, and put it all back together. The only component in the engine bay I decided not to replace was the compressor, as it would have been more time consuming and more expensive to do that than the rest of it put together. Was it a risk? Sure. But I calculated that, as I was replacing the o-rings on the pipes that connected to the compressor, the risk of the component itself being leaky/at fault was small. To be honest, it all seemed far too simple and I couldn’t believe it would actually work. Surely it had to be more complicated than that?
I returned to my air conditioning man feeling averagely confident, at most. He applied a vacuum to it and, to my surprise, it held for a good ten minutes. All seemed well, and I was somewhat shocked! Full of admiration for my newly shiny pipes, he went ahead and pumped £100 worth of refrigerant into it. Seriously. £100. Where did it all go?
I handed over my money with a sort of grimace/smile and drove home shivering in the arctic blast coming out of my vents. Obviously my timing was perfect. It was early September by the time I got it regassed, and after that there was one vaguely warm day on which I turned the air con on. Apart from that it was grey and miserable. Ah well, it’s all sorted for next summer at least… or so I thought!
Here are some really bad pictures of some almost identifiable air conditioning components.
Edited by buy_cheap_pay_later on Monday 11th January 19:52
Next, a note on steering. On one of my journeys home I had a little bit of a moment on the motorway. I changed lanes to overtake. No problem. But when I moved the wheel back to the left to straighten up, it resisted. Hard. I had to use all my prodigious brute strength to haul the wheel back to the left. Not usually one to panic, I had a bit of a think and tried a little tweak of the steering again. Right, fine. Left, really stiff. As I could still steer, albeit by giving it a bit of grunt, I continued on my journey (wondering if I could plan a route home that involved only right-hand turns).
I did wonder if it was a BMW ‘lane assist’ feature encouraging me into the lane for German cars and discouraging me changing back the other way, but then concluded that it was more likely that something was knackered. I get a little bit perversely excited when these things happen because it presents me with another problem to solve. A bit of detective work, figure out the most likely cause, try a fix, see if it works, rinse, repeat. That is if it didn’t kill me before I got home. Weirdly enough, though, after a short while, the problem ‘self-rectified’. I tried to replicate it in a carpark near home, but it all seemed to be working fine.
Naturally I did a bit of Googling to see what the collective wisdom of The Internet could tell me. There was mention of blocked valves, knackered pumps, old fluid and all sorts of things. I decided that changing the PAS fluid was probably not a bad place to start. I imagine it had never been done previously and some nice new fluid might just make the system a bit happier. I can’t remember the exact technique I used, because I purge that information from my head after use, knowing that if I need it again I’ll just ask The Internet again (I know, I’m equally as disgusted with myself). I do know I didn’t do the one where you take off the banjo fitting and squirt fluid all over the place. I just sucked it out of the reservoir with a giant syringe and replaced with new, several times, whilst doing some sort of dance in between. I managed not to cover myself entirely with hydraulic fluid or kick over the open container, which I think makes me at least semi-pro.
Whilst doing the suspension work previously, I had noticed that there was a bit of a leak from the PAS reservoir, and since I’d just put some lovely new fluid in there I thought it a good idea to do something to prevent it all falling out again (the level wasn’t excessively low previously so I don’t think this was the cause of my random steering-stiffy). Despite the seal around the reservoir cap being a common failure point (I think), it turned out my leak was coming from the pipes where they met the bottom of the reservoir. The old, non-adjustable clips were clearly no longer doing a sufficient job of clamping them on there. I got some suitably-sized jubilee clips and replaced them (that sounds really quick and easy when I say it like that – it wasn’t). New fluid. No more leak. Problem solved? Nope. A few days later, the steering-stiffy struck again.
I was getting all excited about replacing the PAS pump or something, when I came across a forum post that suggested my steering-stiffy might have been caused by something as simple as the universal joint on the steering column being a bit stiff. ‘Really?’ I thought. ‘It’s never going to be something that simple.’ However, having literally nothing to lose apart from one penny’s worth of WD40, I gave it a good, long squirt and worked it back and forth a bit. From that day until I put the car up for the winter in the garage, not a hint of a steering-stiffy. Not even a semi. Sometimes it really is that simple.
Here’s where we get to the really fun stuff. Before we get into that though, a bit of background.
After sorting pretty much everything that wasn’t doing what it should be, I started thinking about how I could get a bit more fun out of the car. I get plenty of enjoyment and satisfaction out of spannering on it, and will have a go at pretty much anything, but I also enjoy driving it. I’ve never really done anything out of the ordinary, apart from the odd deliberate slide on snow or on a runway (with zero finesse, if finesse is even possible in an auto), but had enjoyed motorway cruising and booting it up the arse every now and then.
I started looking into track days, thinking that even though it’s an auto and not in any way set up for track driving, it’d still be a hoot to take it along and throw it around a bit. I booked one at Mallory park in early October, and set about persuading a friend to come along in case I blew up the engine and needed a lift home.
Around this time I got a bit obsessive about having another car (two’s not enough, right?). I think the fixation might have been bit of a distraction from other things going on in my life that I’d rather not think about, but it resulted in me nearly pulling the trigger on an E36 328is manual coupe, an MX-5 10AE, and on a 306 XSi (I’m properly a child of the ‘90s). I was looking for something more suited to the track, that I could fix up, modify and have as a toy. A manual gearbox was very important, as despite being a track novice I do know that an auto on the track is not going to be as much fun as a manual! I say novice, though I actually did a track day in 1999 courtesy of a friend’s dad. My friend and I spent the day driving 306 GTI-6s and some sort of single seaters around Donnington Park, which was great. 21 years on, I’m sure the lessons will still be in there somewhere! To my eternal shame I never took either of my BMWs to the Nürburgring, despite living about an hour from it for a while.
As I veered back and forth and agonised over whether I could afford a third car and where I would keep it, I kept rueing the fact that the beemer was an auto, because otherwise I’d love to track mod it and make that my toy. It’s got a great engine, after all.
Tick… tock… tick… tock…
You’re all waiting for the penny to drop, aren’t you?
I had been vaguely aware for some time that some lunatics took auto boxes out of E36s and replaced them with manuals (indeed Edd China did it to an E46 M3 on Wheeler Dealers), but only vaguely. Why on earth would I be interested in a procedure that probably requires the brains of Einstein, the hands of Edd China and the spirit of Ranulph Fiennes? Well, hold that thought.
I tentatively started watching some YouTube videos by M3NACE. He’s a Californian gentleman with a penchant for E36 BMWs, and if you ever need to know how to do pretty much anything to your E36, you can definitely do worse than checking out his channel. He is excellent at getting the right shot and explaining everything really clearly and logically. As a result, I came away from watching his manual swap series thinking ‘Holy s t, Batman! I could do this!’ It was the answer I hadn’t been looking for. No need to empty the bank account on another four-wheeled money pit. I could simply turn the one I already had into what I wanted!
Doing a manual swap on an E36 genuinely isn’t complicated. I say that as a rank amateur (ok, so maybe I’m more mechanically inclined than Car Throttle’s Ethan, but I’m closer to Ethan than to Edd). If you have ever thought you’d prefer your E36 to be manual but it all seems too hard, my advice is to watch M3NACE and just go for it (if you don’t mind getting under your car and getting your hands, and everything else, dirty). It’s not exactly easy (or cheap), and there are a lot of steps to it, but complicated it ain’t, and as long as you follow the steps logically and carefully, it is eminently doable.
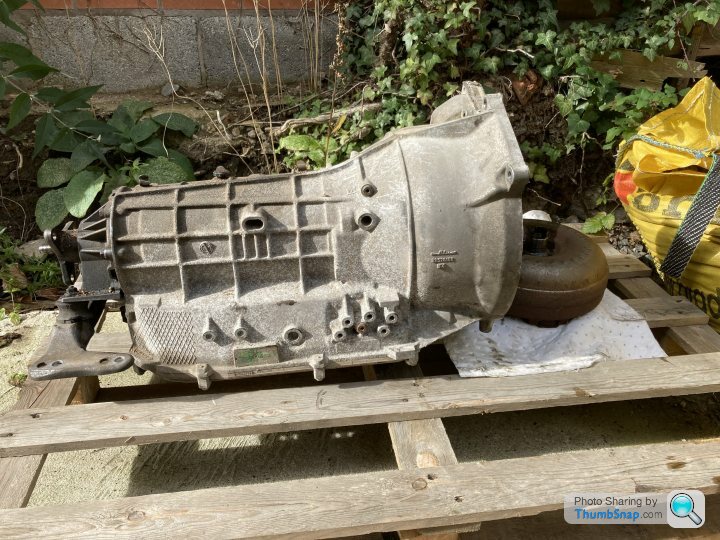
I did a bit of research on the best way of obtaining all the bits and bobs one needs to effect this change. There is quite a long parts list, and I soon discovered that if you try getting hold of each part individually the cost soon mounts up. Probably more to the point though, there are a few parts whose form and function I was unsure of, so the risk of getting the wrong thing that didn’t fit would have been quite high. It made more sense, in the end, to buy a full kit. These are offered by a number of sellers on the obvious festival of junk/quality car parts. As a known job that people like to do, it is served by car breakers etc, who pull all the bits you need out of a dead manual car and offer them up as a kit. I got mine from Chris at CR M-Tech in Shrewsbury. The parts had come out of a dead 323 coupe I believe. It was a Getrag box. I had read that the 328 and M3 had a ZF box that was a bit beefier, but Chris assured me that he runs E36 race cars with Getrag boxes and never has a drama. I figured that my driving might be poor, but it was unlikely to put as much strain on the gearbox as an actual racing driver in an actual race, so the Getrag would be fine for me. It's lighter than the ZF anyway. Chris was very helpful and gave me some advice on various things, like how to bleed the clutch effectively. He also said he could remap my ECU if I wanted. I had read/heard that this was necessary when doing a manual swap, but he said it wasn’t.
With about two weeks to go to my track day, then, I came home with the Skoda laden down with a bounty of parts for the E36. I couldn’t wait to get started, so I didn’t. Rather than do the track day in the auto and then crack on with the swap, I cancelled the track day, figuring I’d re-book once I had the car back up and running with the manual box in it. Much more fun.
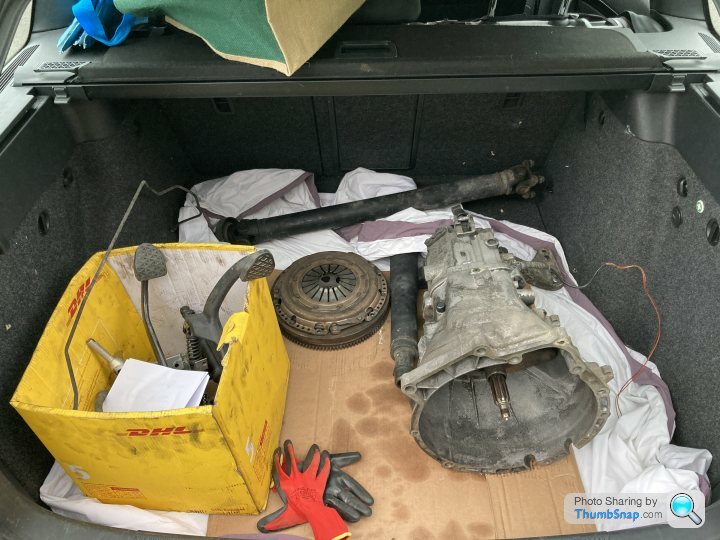
Up the car went, as high as I could safely get it, and off I went, unbolting the exhaust. I was very excited, but still realistic about the sort of timeframe I could achieve this in. There was no time pressure, no rush. If I got stuck there would be thought, the obtaining of tools, sleeping on problems rather than hitting things with hammers. I stuck to my methodology, and although things didn’t go 100% smoothly (which fool would think they would?), I had the car back down on the ground in manual configuration almost exactly a month after it went up in the air.

I’m not going to try and describe all of the steps in detail. If that’s what you’re after, go and find M3NACE on YouTube. You’re welcome. It might be worth me recounting any lessons I learned, though.
The most important one is the one I’ve already mentioned – it’s doable. It’s all beautifully mechanical and uncomplicated. Once you’ve disabled the car, it’s worth whipping out the ECU, if you’re getting that done, so you can send it/take it to whoever is doing that for you whilst you crack on with the rest. If you’re doing your own ECU, fair play. I took mine back to Chris at CR M-Tech who put a performance map on it – higher rev limit, higher idle (useful should I ever put a lightweight flywheel on it), earlier VANOS activation and one or two other things. It’s also set up ready should I ever put an M50 manifold on it for a bit of extra power.
Chris’ method of bleeding the clutch worked a treat. It involves pumping the slave cylinder by hand to prime it before you bolt it to the clutch housing. Do it that way if you can. I also bought new master and slave cylinders and a braided clutch line. This means buying new parts over and above the kit (which already includes those parts), but it still works out cheaper than buying everything piecemeal and it’s worth it for the peace of mind of having brand new hydraulic components in there.

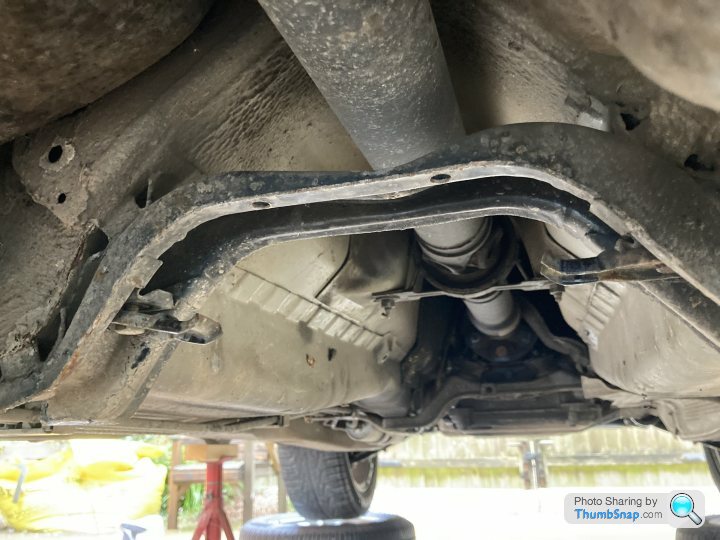
Undoing the bell housing bolts is probably the most fun (?!) part of this job. You’ll be sweating away under the car, putting all of your might through your breaker bar, about three and a half feet of extension bars, a flexible connector and a torx socket, wondering which part will be the first to explode in a shower of razor sharp chromium steel fragments with an apparent homing instinct for your eyeballs. It’s a b*tch of a job. I managed to get all but one of the bolts out. The last one accounted for a torx socket (RIP) and resisted heroically enough to defeat my efforts to undo it. It was coming, but at the cost of about half an hour’s maximum effort per 1/8 of a turn and at great peril to my life and limb. I called in reinforcements, in the shape of my not-a-dremel and some grinding bits, and spent a glorious hour or so on my back (with eye protection) grinding away the head of the bolt. This eventually allowed me to separate the transmission from the engine, but left the rest of the bolt sticking out like a sort of locating lug. This required a bit of thought. I had all sorts of ideas of trying to free it with heat, drilling it out, leaving it as it was, or cutting it flush. I didn’t rate my chances of drilling it out whist keeping the thread intact, so was looking at helicoils. I was looking at all sorts of bolt extractors to see if I’d be able to get purchase on what was left and apply more leverage now that the transmission was out of the way. Then I spoke to Chris.
He heard my plight and offered me the benefit of his wisdom. ‘We run race cars with the transmissions on three bolts. I don’t know why the rest of them are there.’
Good enough for me! Even if I left the stubborn bolt as a sort of locating lug, I’d still be able to get three of the four big bolts back in, as well as all the smaller ones (can’t remember how many). Problem solved. Or ignored. Whatever. It was going to be fine!
I bolted it all back up, flywheel on, clutch centred and bled, gearbox on, propshaft on, heatshield, exhaust. The in-car stuff was reasonably straightforward, though getting the new pedal assembly in was a bit fiddly, requiring me to be upside-down in the driver’s seat. I didn’t have to move the same air duct that M3NACE did, but I had to move something else. You figure out what’s in the way once you’re in there. The electrics took a little bit of thought (bypassing the neutral safety circuit) as it wasn’t quite the same as in the M3NACE video. All I can remember of it now is that I figured it out because it’s symmetrical/a mirror image. I think I wrote it down somewhere. If anyone needs help with this let me know, I can probably be more helpful!
So that was that. ECU plugged back in, the transmission control unit lobotomised, three pedals, a proper gearstick. All that remained was for me to see if I’d completely fudged my car. A trip to Lidl for some bread for lunch was my first in the newly manual E36. To say I was tentative is probably an understatement. I expected the clutch to st itself spectacularly at any moment, because I had put it in. Me. All by myself (ok, with M3NACE). To my surprise, it made it to Lidl and back without any problem at all. In fact, not only were there no problems, it was smooth. As smooth as polished butter. As I grew in confidence that it wasn’t about to cack its pants, the grin on my face just grew wider with every gearchange. I know it’s no Porsche, and by objective standards it’s probably as woolly and imprecise as a particularly vague sheep, but to me it’s perfection. It’s mine, and I did it.
 [url]
[url]
Happy with my work, I re-booked my track day, this time at Donnington Park, for 2 Dec. Excited wasn’t the word!
Bloody Lockdown started on 1 Dec, didn’t it?!!!
So that one was cancelled. That’s why I gave up for the winter. I’ve since put probably 400 commuting miles on the car before putting it into hibernation, and I’m over the moon with the clutch and gearbox. The final drive gearing is a bit off for the manual box, as it sits at just under 3k rpm at 70 mph. This isn't too intrusive on the motorway, and the short gearing probably makes it a better proposition on the track than it might be otherwise. I can’t wait to get it out in the spring, or whenever we’re allowed to do stuff again, and get it on a track.
I guess the point at which I decided it was going to be a manual was the point at which any thought of faithful restoration went out the window for good. It was never a realistic proposition, to be honest. The car has 135k miles on it and the bodywork is a wreck (albeit not quite as rusty as jamesson’s!). It’s hardly a promising starting point for anyone, let alone someone as cack-handed as me. I don’t think restoration is my game. I have decided that my game is now tracking this car and doing some mods to make it even more fun. That way lies the future!
After sorting pretty much everything that wasn’t doing what it should be, I started thinking about how I could get a bit more fun out of the car. I get plenty of enjoyment and satisfaction out of spannering on it, and will have a go at pretty much anything, but I also enjoy driving it. I’ve never really done anything out of the ordinary, apart from the odd deliberate slide on snow or on a runway (with zero finesse, if finesse is even possible in an auto), but had enjoyed motorway cruising and booting it up the arse every now and then.
I started looking into track days, thinking that even though it’s an auto and not in any way set up for track driving, it’d still be a hoot to take it along and throw it around a bit. I booked one at Mallory park in early October, and set about persuading a friend to come along in case I blew up the engine and needed a lift home.
Around this time I got a bit obsessive about having another car (two’s not enough, right?). I think the fixation might have been bit of a distraction from other things going on in my life that I’d rather not think about, but it resulted in me nearly pulling the trigger on an E36 328is manual coupe, an MX-5 10AE, and on a 306 XSi (I’m properly a child of the ‘90s). I was looking for something more suited to the track, that I could fix up, modify and have as a toy. A manual gearbox was very important, as despite being a track novice I do know that an auto on the track is not going to be as much fun as a manual! I say novice, though I actually did a track day in 1999 courtesy of a friend’s dad. My friend and I spent the day driving 306 GTI-6s and some sort of single seaters around Donnington Park, which was great. 21 years on, I’m sure the lessons will still be in there somewhere! To my eternal shame I never took either of my BMWs to the Nürburgring, despite living about an hour from it for a while.
As I veered back and forth and agonised over whether I could afford a third car and where I would keep it, I kept rueing the fact that the beemer was an auto, because otherwise I’d love to track mod it and make that my toy. It’s got a great engine, after all.
Tick… tock… tick… tock…
You’re all waiting for the penny to drop, aren’t you?
I had been vaguely aware for some time that some lunatics took auto boxes out of E36s and replaced them with manuals (indeed Edd China did it to an E46 M3 on Wheeler Dealers), but only vaguely. Why on earth would I be interested in a procedure that probably requires the brains of Einstein, the hands of Edd China and the spirit of Ranulph Fiennes? Well, hold that thought.
I tentatively started watching some YouTube videos by M3NACE. He’s a Californian gentleman with a penchant for E36 BMWs, and if you ever need to know how to do pretty much anything to your E36, you can definitely do worse than checking out his channel. He is excellent at getting the right shot and explaining everything really clearly and logically. As a result, I came away from watching his manual swap series thinking ‘Holy s
t, Batman! I could do this!’ It was the answer I hadn’t been looking for. No need to empty the bank account on another four-wheeled money pit. I could simply turn the one I already had into what I wanted!Doing a manual swap on an E36 genuinely isn’t complicated. I say that as a rank amateur (ok, so maybe I’m more mechanically inclined than Car Throttle’s Ethan, but I’m closer to Ethan than to Edd). If you have ever thought you’d prefer your E36 to be manual but it all seems too hard, my advice is to watch M3NACE and just go for it (if you don’t mind getting under your car and getting your hands, and everything else, dirty). It’s not exactly easy (or cheap), and there are a lot of steps to it, but complicated it ain’t, and as long as you follow the steps logically and carefully, it is eminently doable.
I did a bit of research on the best way of obtaining all the bits and bobs one needs to effect this change. There is quite a long parts list, and I soon discovered that if you try getting hold of each part individually the cost soon mounts up. Probably more to the point though, there are a few parts whose form and function I was unsure of, so the risk of getting the wrong thing that didn’t fit would have been quite high. It made more sense, in the end, to buy a full kit. These are offered by a number of sellers on the obvious festival of junk/quality car parts. As a known job that people like to do, it is served by car breakers etc, who pull all the bits you need out of a dead manual car and offer them up as a kit. I got mine from Chris at CR M-Tech in Shrewsbury. The parts had come out of a dead 323 coupe I believe. It was a Getrag box. I had read that the 328 and M3 had a ZF box that was a bit beefier, but Chris assured me that he runs E36 race cars with Getrag boxes and never has a drama. I figured that my driving might be poor, but it was unlikely to put as much strain on the gearbox as an actual racing driver in an actual race, so the Getrag would be fine for me. It's lighter than the ZF anyway. Chris was very helpful and gave me some advice on various things, like how to bleed the clutch effectively. He also said he could remap my ECU if I wanted. I had read/heard that this was necessary when doing a manual swap, but he said it wasn’t.
With about two weeks to go to my track day, then, I came home with the Skoda laden down with a bounty of parts for the E36. I couldn’t wait to get started, so I didn’t. Rather than do the track day in the auto and then crack on with the swap, I cancelled the track day, figuring I’d re-book once I had the car back up and running with the manual box in it. Much more fun.
Up the car went, as high as I could safely get it, and off I went, unbolting the exhaust. I was very excited, but still realistic about the sort of timeframe I could achieve this in. There was no time pressure, no rush. If I got stuck there would be thought, the obtaining of tools, sleeping on problems rather than hitting things with hammers. I stuck to my methodology, and although things didn’t go 100% smoothly (which fool would think they would?), I had the car back down on the ground in manual configuration almost exactly a month after it went up in the air.
I’m not going to try and describe all of the steps in detail. If that’s what you’re after, go and find M3NACE on YouTube. You’re welcome. It might be worth me recounting any lessons I learned, though.
The most important one is the one I’ve already mentioned – it’s doable. It’s all beautifully mechanical and uncomplicated. Once you’ve disabled the car, it’s worth whipping out the ECU, if you’re getting that done, so you can send it/take it to whoever is doing that for you whilst you crack on with the rest. If you’re doing your own ECU, fair play. I took mine back to Chris at CR M-Tech who put a performance map on it – higher rev limit, higher idle (useful should I ever put a lightweight flywheel on it), earlier VANOS activation and one or two other things. It’s also set up ready should I ever put an M50 manifold on it for a bit of extra power.
Chris’ method of bleeding the clutch worked a treat. It involves pumping the slave cylinder by hand to prime it before you bolt it to the clutch housing. Do it that way if you can. I also bought new master and slave cylinders and a braided clutch line. This means buying new parts over and above the kit (which already includes those parts), but it still works out cheaper than buying everything piecemeal and it’s worth it for the peace of mind of having brand new hydraulic components in there.
Undoing the bell housing bolts is probably the most fun (?!) part of this job. You’ll be sweating away under the car, putting all of your might through your breaker bar, about three and a half feet of extension bars, a flexible connector and a torx socket, wondering which part will be the first to explode in a shower of razor sharp chromium steel fragments with an apparent homing instinct for your eyeballs. It’s a b*tch of a job. I managed to get all but one of the bolts out. The last one accounted for a torx socket (RIP) and resisted heroically enough to defeat my efforts to undo it. It was coming, but at the cost of about half an hour’s maximum effort per 1/8 of a turn and at great peril to my life and limb. I called in reinforcements, in the shape of my not-a-dremel and some grinding bits, and spent a glorious hour or so on my back (with eye protection) grinding away the head of the bolt. This eventually allowed me to separate the transmission from the engine, but left the rest of the bolt sticking out like a sort of locating lug. This required a bit of thought. I had all sorts of ideas of trying to free it with heat, drilling it out, leaving it as it was, or cutting it flush. I didn’t rate my chances of drilling it out whist keeping the thread intact, so was looking at helicoils. I was looking at all sorts of bolt extractors to see if I’d be able to get purchase on what was left and apply more leverage now that the transmission was out of the way. Then I spoke to Chris.
He heard my plight and offered me the benefit of his wisdom. ‘We run race cars with the transmissions on three bolts. I don’t know why the rest of them are there.’
Good enough for me! Even if I left the stubborn bolt as a sort of locating lug, I’d still be able to get three of the four big bolts back in, as well as all the smaller ones (can’t remember how many). Problem solved. Or ignored. Whatever. It was going to be fine!
I bolted it all back up, flywheel on, clutch centred and bled, gearbox on, propshaft on, heatshield, exhaust. The in-car stuff was reasonably straightforward, though getting the new pedal assembly in was a bit fiddly, requiring me to be upside-down in the driver’s seat. I didn’t have to move the same air duct that M3NACE did, but I had to move something else. You figure out what’s in the way once you’re in there. The electrics took a little bit of thought (bypassing the neutral safety circuit) as it wasn’t quite the same as in the M3NACE video. All I can remember of it now is that I figured it out because it’s symmetrical/a mirror image. I think I wrote it down somewhere. If anyone needs help with this let me know, I can probably be more helpful!
So that was that. ECU plugged back in, the transmission control unit lobotomised, three pedals, a proper gearstick. All that remained was for me to see if I’d completely fudged my car. A trip to Lidl for some bread for lunch was my first in the newly manual E36. To say I was tentative is probably an understatement. I expected the clutch to s
t itself spectacularly at any moment, because I had put it in. Me. All by myself (ok, with M3NACE). To my surprise, it made it to Lidl and back without any problem at all. In fact, not only were there no problems, it was smooth. As smooth as polished butter. As I grew in confidence that it wasn’t about to cack its pants, the grin on my face just grew wider with every gearchange. I know it’s no Porsche, and by objective standards it’s probably as woolly and imprecise as a particularly vague sheep, but to me it’s perfection. It’s mine, and I did it.[url]Happy with my work, I re-booked my track day, this time at Donnington Park, for 2 Dec. Excited wasn’t the word!
Bloody Lockdown started on 1 Dec, didn’t it?!!!
So that one was cancelled. That’s why I gave up for the winter. I’ve since put probably 400 commuting miles on the car before putting it into hibernation, and I’m over the moon with the clutch and gearbox. The final drive gearing is a bit off for the manual box, as it sits at just under 3k rpm at 70 mph. This isn't too intrusive on the motorway, and the short gearing probably makes it a better proposition on the track than it might be otherwise. I can’t wait to get it out in the spring, or whenever we’re allowed to do stuff again, and get it on a track.
I guess the point at which I decided it was going to be a manual was the point at which any thought of faithful restoration went out the window for good. It was never a realistic proposition, to be honest. The car has 135k miles on it and the bodywork is a wreck (albeit not quite as rusty as jamesson’s!). It’s hardly a promising starting point for anyone, let alone someone as cack-handed as me. I don’t think restoration is my game. I have decided that my game is now tracking this car and doing some mods to make it even more fun. That way lies the future!

Wow top effort OP. Really impressive work, I'd love to tackle a job like this, but the feeling of screwing something up and having my car on axel stands for eternity, while my gf moans every day about how I'm turning our driveway into a scrap yard is all too much.
If you were to do this again, would you be tempted to buy an e46 M3 SMG convert it to manual and then sell for ££££? I've read about the conversion is fairly straight forward and you've clearly got the skills (to pay the bills).
PB
If you were to do this again, would you be tempted to buy an e46 M3 SMG convert it to manual and then sell for ££££? I've read about the conversion is fairly straight forward and you've clearly got the skills (to pay the bills).
PB
In all the excitement of recounting the manual conversion, I forgot to mention a couple of things.
I had intimated in a previous post that my air conditioning troubles weren’t over. Whilst under the car doing manual conversion type stuff, I happened to notice that there was some kind of fluid falling out of it. It looked somewhat familiar. In fact, it gave me a flashback to Germany in 2011 when I had just had the air con regassed whilst I was in the UK and had driven it back out there. At that point a knowledgeable (?) chap suggested maybe it was my transmission fluid, but to my mind it was coming from the wrong place for that to be the case (somewhere near the front of the engine block).
As it turned out, the answer then, as it was now, was that what was dripping off the bottom of my engine was the lubricating oil that goes in the air con system with the refrigerant. It’s a pretty sure sign that the system is returning itself to atmospheric pressure, aka pissing out all over the place. I tried to trace exactly where it was coming from. It was hard to be sure precisely where on the compressor it was escaping, but it was definitely coming from the compressor. Yes, that’s right. The one part I hadn’t replaced. A false economy? You bet!
So that was the end of my rather short-lived arctic experience in the driving seat. Given that by this time the weather was heading arctic-wards anyway, I decided that wasn’t my most pressing concern. After a momentary stab of regret at not swapping the compressor, and that sinking feeling that you get when you realise you’ve effectively just shredded and burnt a wad of cash, I shrugged my shoulders and cracked on with the fun stuff. That is a problem for future BCPL.
The other thing was the wheels. The more observant among you may have noticed in the manual swap pictures it is wearing different shoes. Indeed, the original shoes provided my safety system. I’m not really sure what my motivation was (perhaps just too much time with access to eBay), but I had taken a liking to BMW’s Style 42 wheels (the budget version of the proper BBS split rims) and found some dirt-cheap ones for sale. I secured the deal and took a bit of a road trip to pick them up from a very nice young man in Harrow, who also had an E46 M3, the lucky sod. They even came with Pirellis with a legal amount of tread, and due to their age, the pliability and friction characteristics of a Teflon frying pan.
Here are some comparison pictures. I think it looks a bit more purposeful with the 16 inch rims as opposed to the 15s it had on before. They’re a fair bit wider too, the tyre profile being 225 as opposed to 205. That made a difference to the feel through the steering wheel, but I quickly got used to it. It's likely those aren't its forever-wheels. They were cheap enough that I'm not wedded to them.
That brings us up to date. I’m satisfied with what I’ve achieved so far. Everything works as it should. The cooling system, brakes and starter are nice and new, and even the little orange computer screen does what it’s supposed to without any dead pixels. Yes, the bodywork is shoddy, and the air con doesn’t work (we’re ignoring that), but this car has already given me great satisfaction and pleasure up to this point, and it’s all good.
The question is, what’s next? The whole restoration idea is now completely dead, and good riddance to it. For the right car I could probably develop the patience and eye for detail needed for a proper restoration, but this wasn’t the right car. It was just the one I had. My new direction, and I think it’s the right one, is to transform this motorway-munching rep cruiser into something more suited to chucking round Donnington or Mallory Park. That makes sense to me. I have the Skoda for every-day real-world driving, and it does it well. Giving myself a choice between two cars to perform the same task makes very little sense to me. Each needs to have its own focus really. Thus, it is decreed that the beemer shall be a Track Car.
Now, this is a one-step-at-a-time kind of approach, not a ‘look what I built in a week!’ kind of thing. I would have liked to track the car in its basically stock configuration (albeit manual rather than auto, and with decent brake pads), but COVID had other ideas. Doing that would have given me a good baseline to compare my mods to, but by the time I get it on track now I will most likely have done something to the suspension, and probably have proper tyres on it. You might say ‘well just wait until you’ve done a ‘stock’ track day before you fit your coilovers,’ but you might as well also say, ‘don’t press that button.’ We all know what’s going to happen.
After that, the sky is the limit. Who knows, in a few years I might have gone full Brian:
https://www.pistonheads.com/gassing/topic.asp?h=0&...
For now, I’d like to keep it useable on the road, but in the long term I have no objection in principle to it being a dedicated, illegal-in-most-countries, snarling track weapon that needs trailering around. I doubt it will ever really get that far, as that takes dedication I don’t have, and requires the car to survive long enough to undergo all that work. All I’m saying is I’m not ruling it out, ok?
Anyway, back to reality, and the near future. The most important stuff is suspension, brakes and tyres (says I, the Driving God of precisely one track day when I was barely out of nappies), so that is where my focus will be for now. I’ll be looking at putting coilovers on it probably late Feb/early March. Having done a bit of internet research, I’m thinking of BC or HSD. I’m looking for something decent, but not premium (not much point right at the beginning of my racing career…). I’m not averse to second-hand as long as they’re decent quality and not too jiggered. Maybe I should get myself on some suitable fora and ask away…
I’ve already got some EBC yellow stuff pads that I bought in anticipation of my December track day. They’re waiting to be fitted. I have no intention of doing anything about the discs or the rest of the braking setup just yet (well, maybe some ATE Super Blue fluid). The existing discs are vented, and hopefully they’ll do well enough for me.
When I looked, I was pleasantly surprised at how affordable track day tyres can be (depends on your car and how quickly you get through them I suppose). I’ll do a bit more research but Toyos or Nankangs seem to fit the bill. Again, something decent, track focussed but not excessively expensive. Anything will be better than the Teflon Pirellis, though.
Beyond that, I have a few ideas but really no set preference. I guess I’ll listen to the car and see what I feel it needs. A sporty exhaust is most likely on the agenda (once it’s ‘stanced’ the exhaust is mandatory, isn’t it?). Poly bushes are also likely, and when I get better at increasing cornering speed I imagine better seats might become necessary to avoid swapping from driver to passenger mid-corner. More power is probably unnecessary, but as the ECU is ready to accept an M50 manifold it’d be rude not to add that to the list for some future occasion. An LSD might be fun, both to fit and to drive, but probably unnecessary for a while.
It’s all up for grabs – we’ll see how far I get before I crash it, or the engine explodes, or the car turns to rust. When any of those things happens, I’ll re-evaluate and then buy a new project car.
Gassing Station | Readers' Cars | Top of Page | What's New | My Stuff