1932 Rolls-Royce 20/25HP Park Ward Saloon - barnfind project
Discussion


Hi all,
Many thanks for the comments! @ Lord Flashheart – I fully understand about the need for family support when taking on a project like this! My wife Sarah is very supportive of my automotive projects – even to the extend of lending a hand in the repair work. And point noted re: missing parts information – that is a very kind offer!
As it is cold and damp here this morning, I have a chance to write up the next instalment – Doors!
The next stage was to get the doors open so that I could access the interior, get it and the exposed areas of the chassis cleaned up a bit and begin to look in detail at the condition of different parts and continue to list out what was missing / broken etc. The challenge was that none of the doors would open! From the start of this project, I have told myself that I need to assume that everything is seized and will need very careful attention to get anything to move/open again, for fear of damaging / shearing something off that I find to be irreplaceable! So soaking everything in lots of WD40/penetrating oil and gentle persuasion over a number of days has been the method.
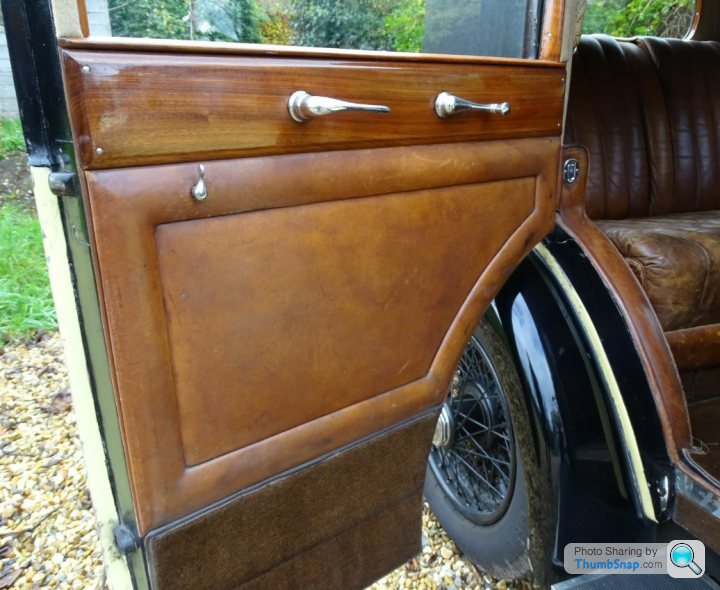
Of the 4 doors on the car, 2 had no interior or exterior handles, 1 had a badly bent exterior handle that would not turn and the last did at least have an exterior handle that turned a little. I decided to focus my efforts on this one (rear right door) and, with good access to the latch mechanism, I proceeded to soak it in WD40 over a number of days. Things looked good, movement increased and I felt sure that it was all about to unlatch. But would it open? No! After much jiggling, I came to the conclusion that the door must be locked! But how on earth do you unlock it – there is no exterior key hole? After much searching, I recognised that one of the unmarked shafts that stuck out of the door interior must be a sort of door latch – so with much WD40 and a spanner, I managed to get it to move about 45 deg. Deep breath and twist the door handle – it popped open! Huzzah! I was beaming… silly really, such a small step forwards, but at this stage everything seems like a massive battle.
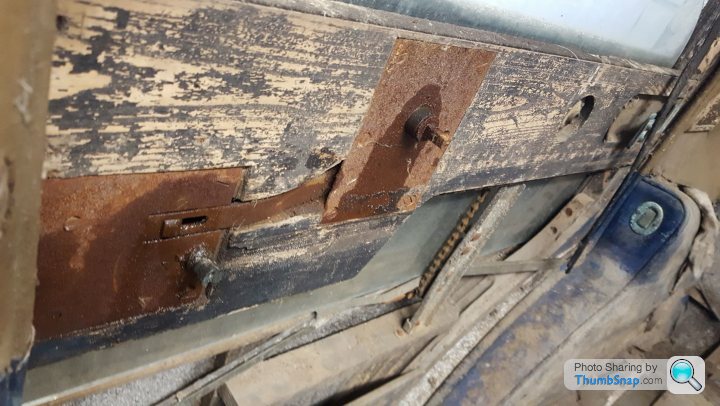

I soaked the hinges and the check arm and then proceeded to very gently work the door backwards and forwards until it was fully open! Primed with the knowledge from this first door, I could then replicate the procedure on the remaining 3 doors. Once complete I could sit back and contemplate what I had learnt.
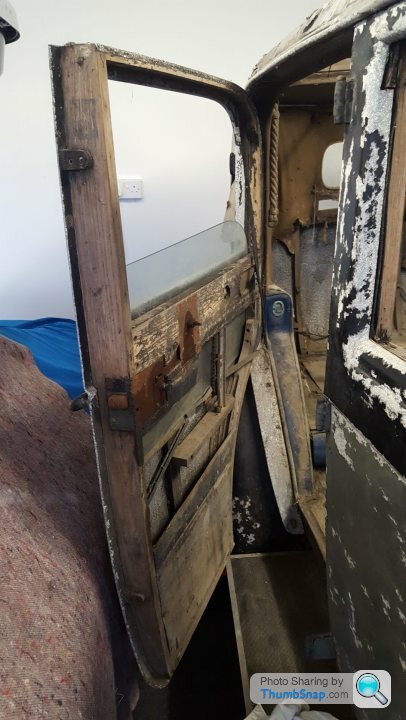

Firstly, the approach of taking it very slowly and soaking things in WD40/penetrating oil seems to be a good one. Secondly, there were more of the detailed interior fittings missing that I had original noticed. Once you added up the missing interior and exterior handles, the thumb operated locks, the window winder handles etc, it was beginning to look like quite a lot.
From the research that I am doing to support the restoration, it seems that spares and new parts for engine, chassis, brakes etc (i.e. parts common to all versions of the 20/25) seem to be available from a range of suppliers. Indeed, there is a network of companies who can do an excellent job at machining parts to the original drawings. It is a very different story when it comes to body or coach work specific items. Due to the range of coachbuilders who bodied the 20/25 in period, parts supply for a specific coachbuilder / design is very very small. James Taylor, in his excellent new book “Coachwork on Rolls-Royce Twenty, 20/25, 25/30 and Wraith 1922 – 1939” lists some 78 different coachbuilders for the 3830 20/25s built between 1928 and 1936. So trying to hunt down some spare Park Ward door handles, window winders and thumb latches for my car has proved to be incredibly difficult. So, a new direction is needed.
I have been lucky enough to identify 2 Park Ward bodied cars which still exist which are very close in age / build sequence to mine. GBT25 / EV 5476 (the car from my childhood) wears body number SO3559 and GKT6 / GX 3476 wears body number SO3561 – so 4 bodies and 2 bodies earlier than mine respectively!
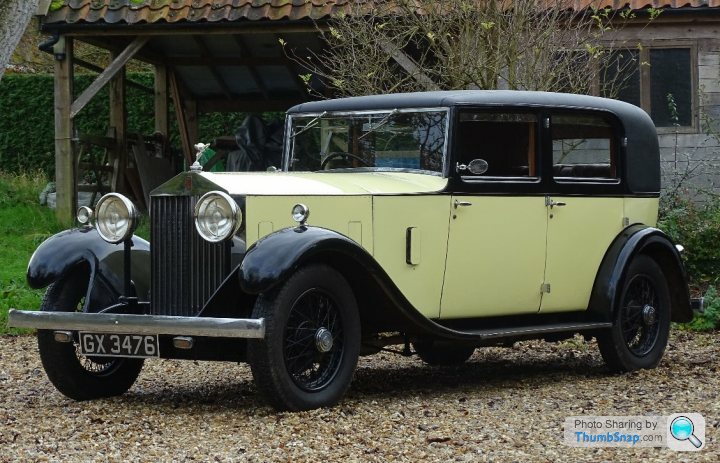
GKT6 still survives and has been advertised for sale at auction in November 2020. My hope is that I might be able to approach the owners of both of these cars to allow me to use theirs as references and then reverse engineer new parts. I have had some success in doing this with my XJS – where I 3D printed some replacement parts and have had headlamp lenses scanned and CAD models created to replicate what I was missing. Again, there are some good firms out there who can help with this, and these reverse engineering jobs will become mini projects in their own right.
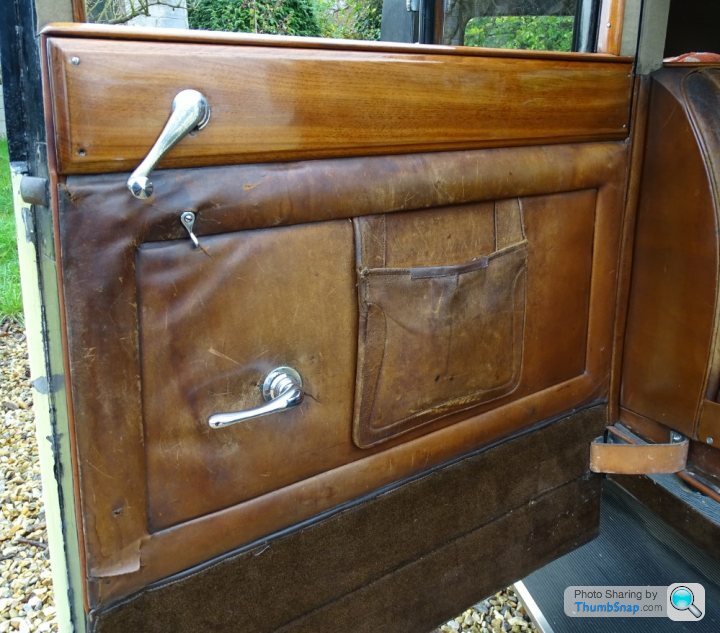
This is what I hope to achieve (GKT6 examples) with the reverse engineered handles etc.... some way to go to get here!
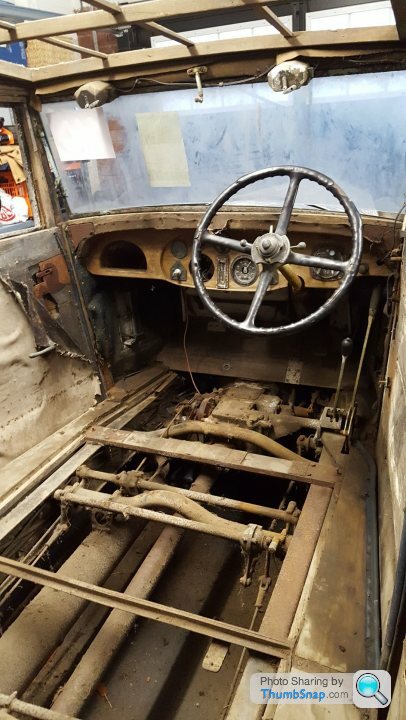
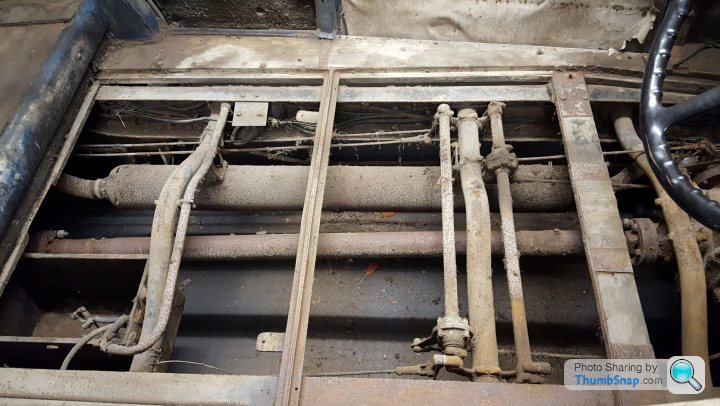
But for now, it is all about cleaning and working out what is missing. The interior of the car cleaned up pretty well – once I had removed 50 years worth of hay, dust, bird poo and general muck! There seemed to be little in the way of water damage where the car had been caught out in the snow storm in Buxton and generally the chassis and body seemed sound. I could identify some areas of the ash frame which were rotten and also had been attacked by wood worm, but nothing too serious.

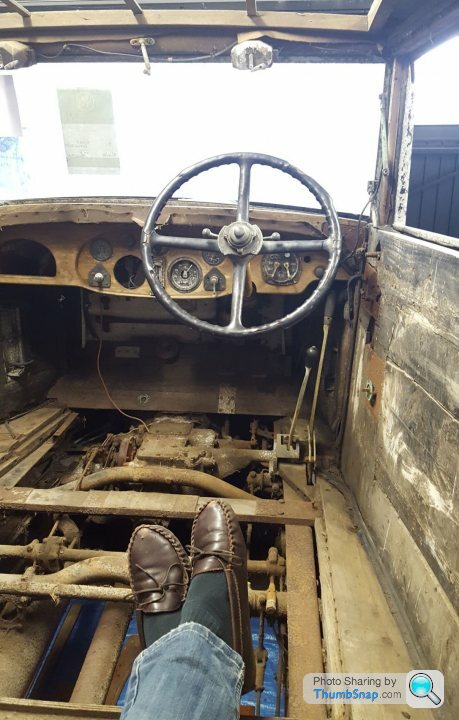
All was left for me to do was to have a cuppa and enjoy the view from where the back seat would be! And to consider where to go next….
And I cannot for the life of me work out why the pictures keep coming out the wrong way up. I will have to investigate alternative photo hosting options which allow more control. (Edit 31/03/22 - all sorted)
Take care,
AF
Many thanks for the comments! @ Lord Flashheart – I fully understand about the need for family support when taking on a project like this! My wife Sarah is very supportive of my automotive projects – even to the extend of lending a hand in the repair work. And point noted re: missing parts information – that is a very kind offer!
As it is cold and damp here this morning, I have a chance to write up the next instalment – Doors!
The next stage was to get the doors open so that I could access the interior, get it and the exposed areas of the chassis cleaned up a bit and begin to look in detail at the condition of different parts and continue to list out what was missing / broken etc. The challenge was that none of the doors would open! From the start of this project, I have told myself that I need to assume that everything is seized and will need very careful attention to get anything to move/open again, for fear of damaging / shearing something off that I find to be irreplaceable! So soaking everything in lots of WD40/penetrating oil and gentle persuasion over a number of days has been the method.
Of the 4 doors on the car, 2 had no interior or exterior handles, 1 had a badly bent exterior handle that would not turn and the last did at least have an exterior handle that turned a little. I decided to focus my efforts on this one (rear right door) and, with good access to the latch mechanism, I proceeded to soak it in WD40 over a number of days. Things looked good, movement increased and I felt sure that it was all about to unlatch. But would it open? No! After much jiggling, I came to the conclusion that the door must be locked! But how on earth do you unlock it – there is no exterior key hole? After much searching, I recognised that one of the unmarked shafts that stuck out of the door interior must be a sort of door latch – so with much WD40 and a spanner, I managed to get it to move about 45 deg. Deep breath and twist the door handle – it popped open! Huzzah! I was beaming… silly really, such a small step forwards, but at this stage everything seems like a massive battle.
I soaked the hinges and the check arm and then proceeded to very gently work the door backwards and forwards until it was fully open! Primed with the knowledge from this first door, I could then replicate the procedure on the remaining 3 doors. Once complete I could sit back and contemplate what I had learnt.
Firstly, the approach of taking it very slowly and soaking things in WD40/penetrating oil seems to be a good one. Secondly, there were more of the detailed interior fittings missing that I had original noticed. Once you added up the missing interior and exterior handles, the thumb operated locks, the window winder handles etc, it was beginning to look like quite a lot.
From the research that I am doing to support the restoration, it seems that spares and new parts for engine, chassis, brakes etc (i.e. parts common to all versions of the 20/25) seem to be available from a range of suppliers. Indeed, there is a network of companies who can do an excellent job at machining parts to the original drawings. It is a very different story when it comes to body or coach work specific items. Due to the range of coachbuilders who bodied the 20/25 in period, parts supply for a specific coachbuilder / design is very very small. James Taylor, in his excellent new book “Coachwork on Rolls-Royce Twenty, 20/25, 25/30 and Wraith 1922 – 1939” lists some 78 different coachbuilders for the 3830 20/25s built between 1928 and 1936. So trying to hunt down some spare Park Ward door handles, window winders and thumb latches for my car has proved to be incredibly difficult. So, a new direction is needed.
I have been lucky enough to identify 2 Park Ward bodied cars which still exist which are very close in age / build sequence to mine. GBT25 / EV 5476 (the car from my childhood) wears body number SO3559 and GKT6 / GX 3476 wears body number SO3561 – so 4 bodies and 2 bodies earlier than mine respectively!
GKT6 still survives and has been advertised for sale at auction in November 2020. My hope is that I might be able to approach the owners of both of these cars to allow me to use theirs as references and then reverse engineer new parts. I have had some success in doing this with my XJS – where I 3D printed some replacement parts and have had headlamp lenses scanned and CAD models created to replicate what I was missing. Again, there are some good firms out there who can help with this, and these reverse engineering jobs will become mini projects in their own right.
This is what I hope to achieve (GKT6 examples) with the reverse engineered handles etc.... some way to go to get here!
But for now, it is all about cleaning and working out what is missing. The interior of the car cleaned up pretty well – once I had removed 50 years worth of hay, dust, bird poo and general muck! There seemed to be little in the way of water damage where the car had been caught out in the snow storm in Buxton and generally the chassis and body seemed sound. I could identify some areas of the ash frame which were rotten and also had been attacked by wood worm, but nothing too serious.
All was left for me to do was to have a cuppa and enjoy the view from where the back seat would be! And to consider where to go next….
And I cannot for the life of me work out why the pictures keep coming out the wrong way up. I will have to investigate alternative photo hosting options which allow more control. (Edit 31/03/22 - all sorted)
Take care,
AF
Edited by andyfeaver on Thursday 31st March 10:29

Hello all,
Many thanks for the positive comments - I think I am making slow and steady progress in what will be the first phase of this restoration project - the scoping of the scale of the project and working out which parts are missing.
So, to that end, this update is entitled - Leather and a dry build!
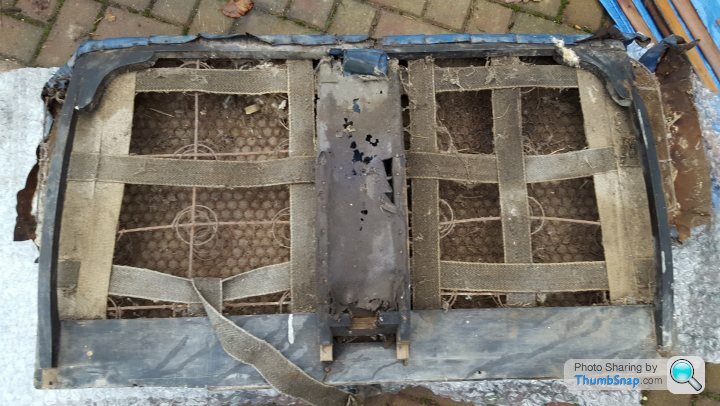
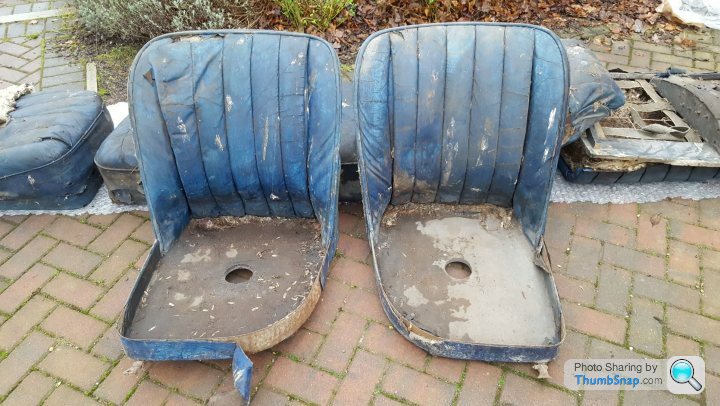
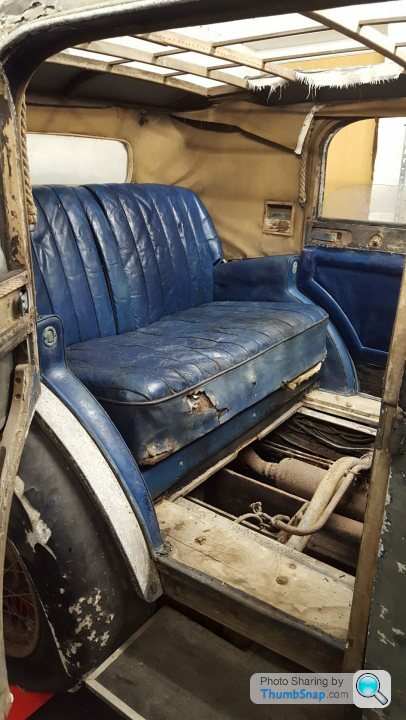
Once I had cleaned the interior of the car out, it was time to turn my attention to the seats and interior fittings that had been removed. They were in a pretty poor cosmetic state and smelt pretty appalling. Here is the rear seat squab, as an example.

The wooden frame of the squab is cracked, the webbing falling apart and the springs are badly corroded. One positive point is that the integrated arm rest, as originally specified on the Rolls-Royce factory build sheets, is still in place.
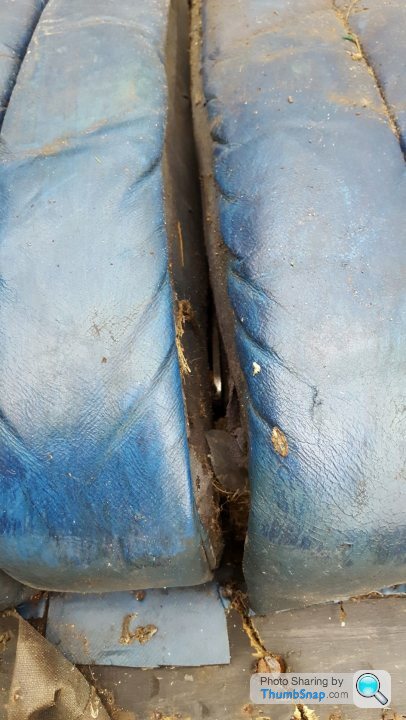
The rear seat cushion is in a similarly bad state!
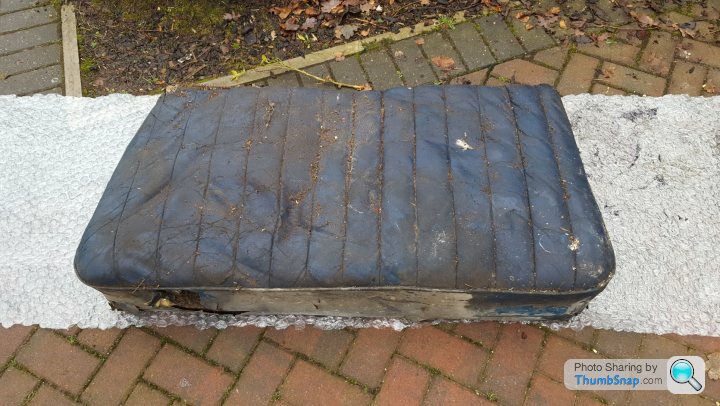
The front seats, now removed, seem to have lots of sycamore seeds in them (?)
In order to get a proper feeling for their condition, the only route was to clean them up and see what still existed under all the dirt. At this stage, all I was interested to achieve was some degree of "preservation", so at least I could keep the leather as a pattern for any new leatherwork. In an ideal world, I'd like to keep all the leather which is still present, but that may not be possible. I would be interested to hear how other people have tackled bringing back to life very old, dry and dirty leather. Was it salvageable or was it too far gone? What materials did you use?
Considering the age of the leather, I planned to use a fairly traditional approach to cleaning - using the same method as I would use if I was cleaning horse tack (ah, my farm boy youth coming back to me!). The logic being that the leather would have been tanned and dyed using 1930's technology, so modern chemical cleaners may not work so well on them.
I cleaned and fed the leather in a 3 stage process:
1) Clean with Carr & Day & Martin Belvoir Tack Cleaner - spray on, work into leather and wipe off
2) Clean and feed with Belvoir Tack Conditioner - Glycerine Saddle Soap - apply with a damp cloth and then buff up
3) Feed with Connolly Hide Care - work into the leather with a cloth and then buff off
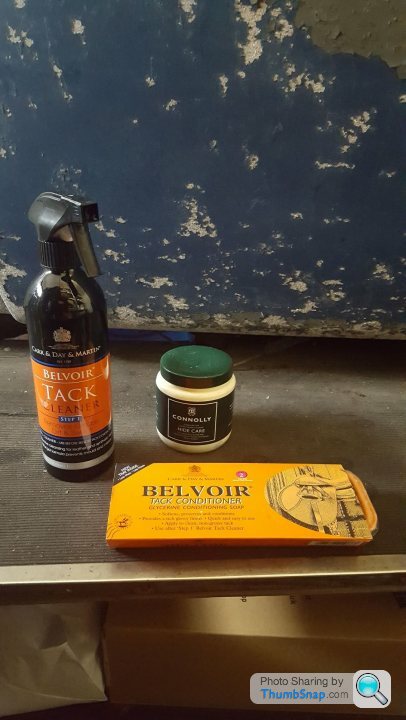
Sadly I ran out of Belvoir Tack Cleaner towards the end, and ended up cleaning the front seat squabs with Autoglym Leather Cleaner, before applying the saddle soap and hide food. It is only an impression, but it seemed that the Autoglym cleaner stripped more of the oils out of the leather and left a drier and rougher finish. While it works fine on the newer leathers in my Disco 4 or XJS, it doesn't seem to work so well on the older leather. So - lesson learnt, I will stick with the old fashioned approach!
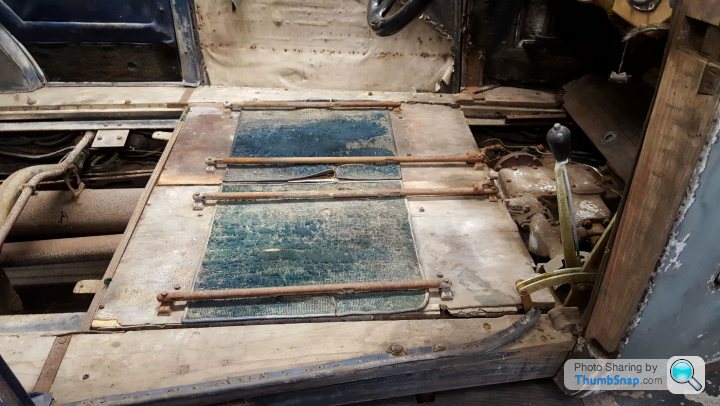
With the seats now clean, I was able to start a dry build of the interior, as much as anything to help visualise what was missing. So in went the front seat floorboards - note the wood worm on the driver's side!

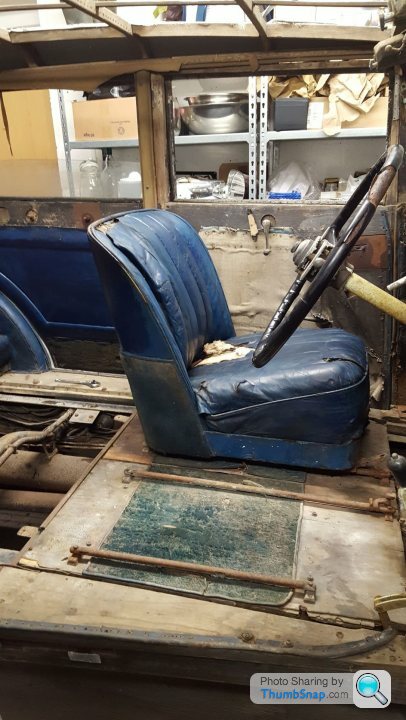
Front passenger seat goes in!
Rear seat squab, followed by cushion.
All fully in place!

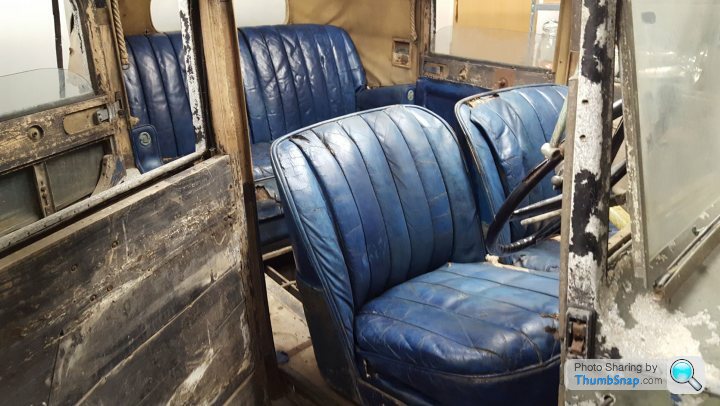
It was very encouraging to see the car back in one piece and actually looking like a car again! From having everything now back in the right place, I was able to make a much more detailed list of missing components on the interior.
Small steps, but slowly getting through this first stage.
Take care!
AF
Many thanks for the positive comments - I think I am making slow and steady progress in what will be the first phase of this restoration project - the scoping of the scale of the project and working out which parts are missing.
So, to that end, this update is entitled - Leather and a dry build!
Once I had cleaned the interior of the car out, it was time to turn my attention to the seats and interior fittings that had been removed. They were in a pretty poor cosmetic state and smelt pretty appalling. Here is the rear seat squab, as an example.
The wooden frame of the squab is cracked, the webbing falling apart and the springs are badly corroded. One positive point is that the integrated arm rest, as originally specified on the Rolls-Royce factory build sheets, is still in place.
The rear seat cushion is in a similarly bad state!
The front seats, now removed, seem to have lots of sycamore seeds in them (?)
In order to get a proper feeling for their condition, the only route was to clean them up and see what still existed under all the dirt. At this stage, all I was interested to achieve was some degree of "preservation", so at least I could keep the leather as a pattern for any new leatherwork. In an ideal world, I'd like to keep all the leather which is still present, but that may not be possible. I would be interested to hear how other people have tackled bringing back to life very old, dry and dirty leather. Was it salvageable or was it too far gone? What materials did you use?
Considering the age of the leather, I planned to use a fairly traditional approach to cleaning - using the same method as I would use if I was cleaning horse tack (ah, my farm boy youth coming back to me!). The logic being that the leather would have been tanned and dyed using 1930's technology, so modern chemical cleaners may not work so well on them.
I cleaned and fed the leather in a 3 stage process:
1) Clean with Carr & Day & Martin Belvoir Tack Cleaner - spray on, work into leather and wipe off
2) Clean and feed with Belvoir Tack Conditioner - Glycerine Saddle Soap - apply with a damp cloth and then buff up
3) Feed with Connolly Hide Care - work into the leather with a cloth and then buff off
Sadly I ran out of Belvoir Tack Cleaner towards the end, and ended up cleaning the front seat squabs with Autoglym Leather Cleaner, before applying the saddle soap and hide food. It is only an impression, but it seemed that the Autoglym cleaner stripped more of the oils out of the leather and left a drier and rougher finish. While it works fine on the newer leathers in my Disco 4 or XJS, it doesn't seem to work so well on the older leather. So - lesson learnt, I will stick with the old fashioned approach!
With the seats now clean, I was able to start a dry build of the interior, as much as anything to help visualise what was missing. So in went the front seat floorboards - note the wood worm on the driver's side!
Front passenger seat goes in!
Rear seat squab, followed by cushion.
All fully in place!
It was very encouraging to see the car back in one piece and actually looking like a car again! From having everything now back in the right place, I was able to make a much more detailed list of missing components on the interior.
Small steps, but slowly getting through this first stage.
Take care!
AF
Fast Bug said:
Don't quote me on this, but I have a funny feeling PH user Fermit does something with leather interiors. I might be thinking of the wrong person, but there's definately a leather guy on here somewhere!
Yes I've seen him posting about leather restoration and colouring etc. Not sure if you can message him direct, his user name seems to change slightly from time to time. All a pleasure to read about and see. Congratulations on what you've done so far! As regards the leather, it looks potentially worth saving. I'd imagine that new springs could be sourced and certainly things like seat webbing and horsehair or whatever constitutes the padding will be pretty normal upholstery stuff. I restored some bits of the seats in a P4 Rover I had - feeding the leather worked pretty well, and I was able to remove the leather altogether and restitch a couple of seams. I liked the detail of the writing on the backs of the wood trim bits, as when I worked on the Rover's wood, I found it had been done by "Violet".
I don't know if you have the book, but "The restoration of vintage and thoroughbred cars" by R. Wheatley and B.Morgan (Batsford 1957) whilst very much a period piece is full of all sorts of practical tips and techniques, including "coach trimming".
I don't know if you have the book, but "The restoration of vintage and thoroughbred cars" by R. Wheatley and B.Morgan (Batsford 1957) whilst very much a period piece is full of all sorts of practical tips and techniques, including "coach trimming".
dbdb said:
A beautiful old thing. The leather on the seats looks saveable to my inexpert eye - they're certainly a lovely colour with a patina that's wonderful.
I’d agree - have saved much worse. There may be the odd new panel plus some reinforcing but that leather is good enough to save and is a wonderful colour.It’s only original once..
Forget WD-40 for freeing off rusted bolts etc. you need something much stronger, plus gas is a decent penetrating fluid but I've found things that it wouldn't undo before, however a mix of ATF with 5% acetone has undone some stuff I thought would never come undone, you're going to need it, and heat!
dbdb said:
A beautiful old thing. The leather on the seats looks saveable to my inexpert eye - they're certainly a lovely colour with a patina that's wonderful.
Have a chat with Martin Ashworthhttp://www.mlworkshop.co.uk/
he's the go-to leather guy for Drew Pritchard and his abilities are astounding.
I suspect he won't be crazy expensive either as he comes across as a craftsman of the old school if you know what i mean.
EddyP said:
Forget WD-40 for freeing off rusted bolts etc. you need something much stronger, plus gas is a decent penetrating fluid but I've found things that it wouldn't undo before, however a mix of ATF with 5% acetone has undone some stuff I thought would never come undone, you're going to need it, and heat!
Best thing I've found recently is heating the fastener up until it's just starting to colour (where you can of course!), then walk away and let it go absolutely stone cold before you try undoing it.Gassing Station | Readers' Cars | Top of Page | What's New | My Stuff