Discussion


sdh2903 said:
So at this point I needed to think about what to do regarding the engine, I did a compression test which was bang on across all 6, removed a couple of big end caps which were all clean and looked down the bores as best i could. All seemed ok, so i rolled the dice and decided to use it, a decision which may or may not cost me later!
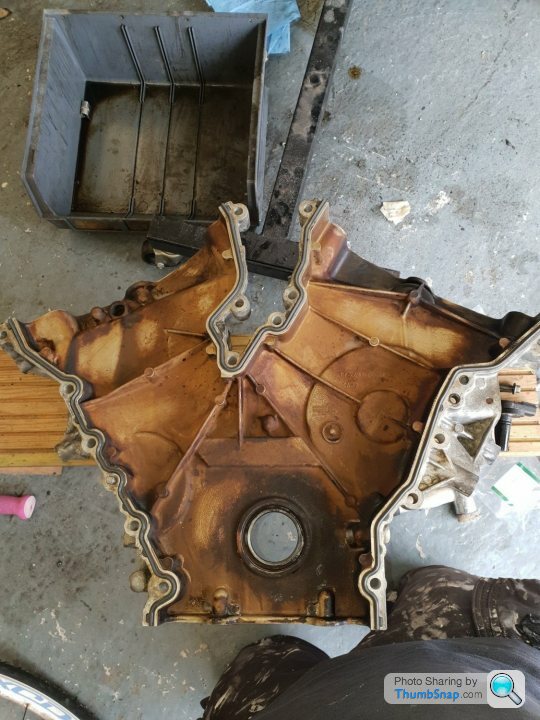
New timing cover gaskets fitted to cure an oil weep, along with a new crank pulley seal.
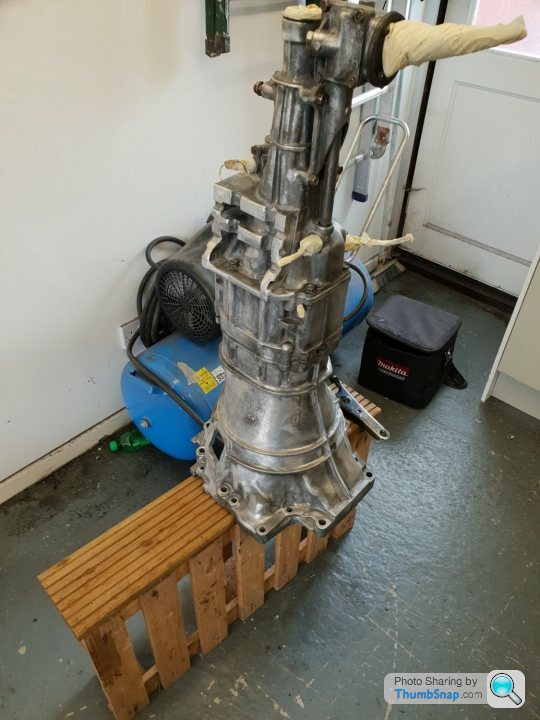
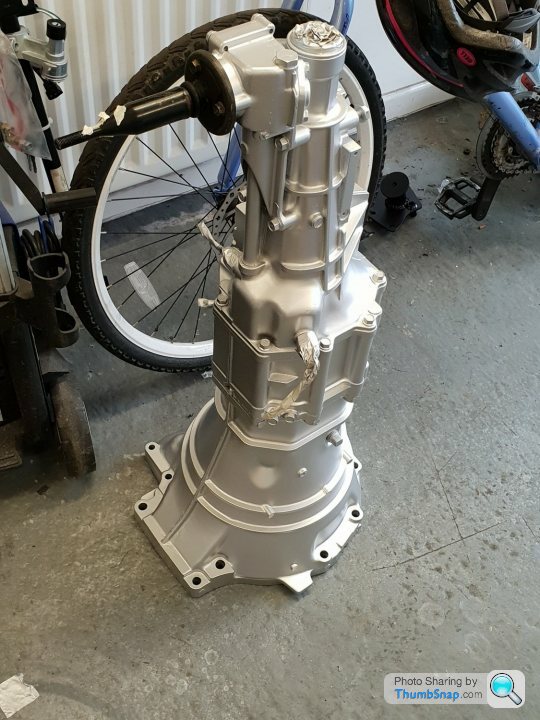
Adapter plate and sump, along with new gasket fitted up, so i could get on with cleaning up the engine and gearbox ready for some titivating. Lechler epoxy used again here.
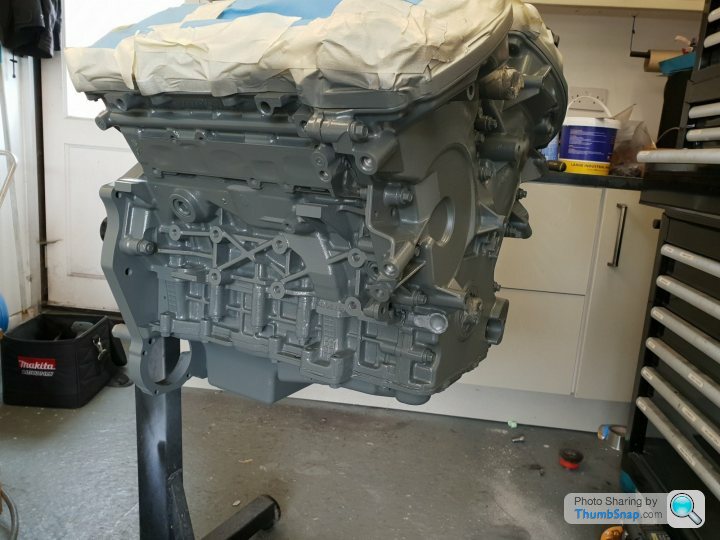
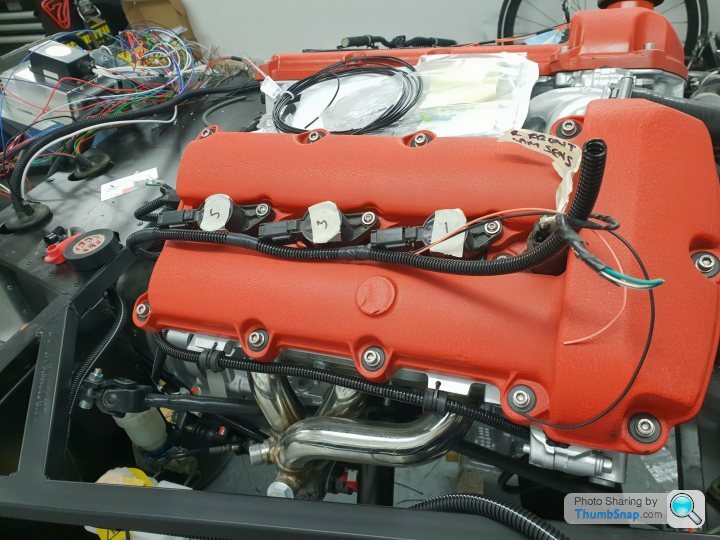
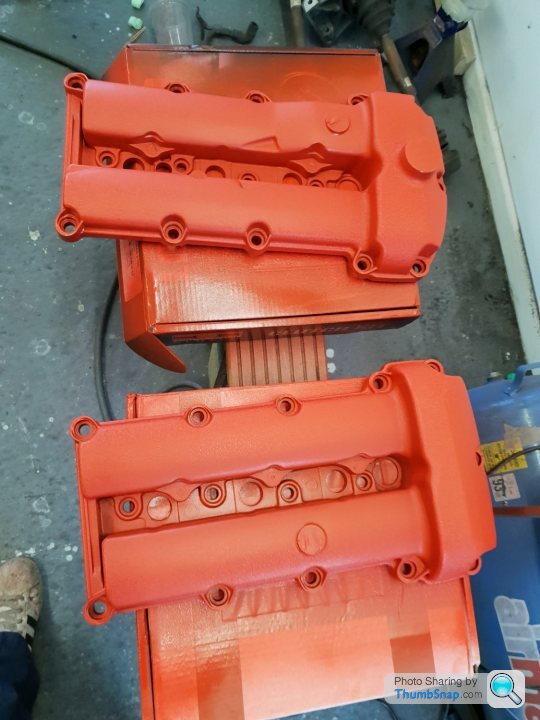
And then made a start on the cam covers.
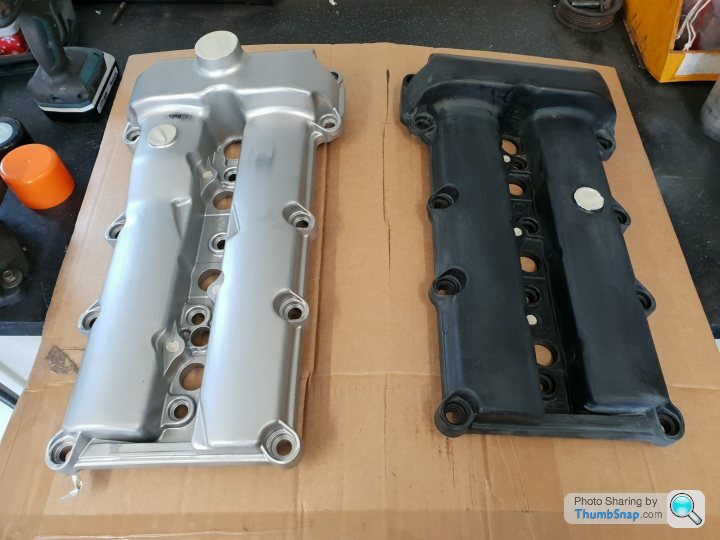

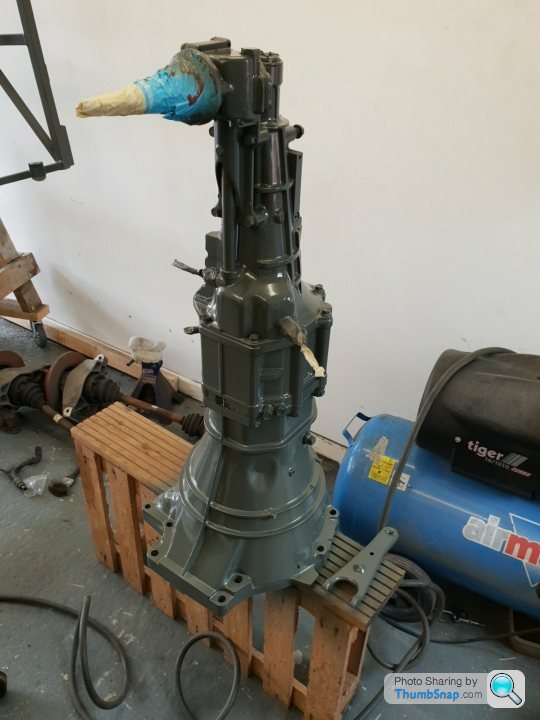
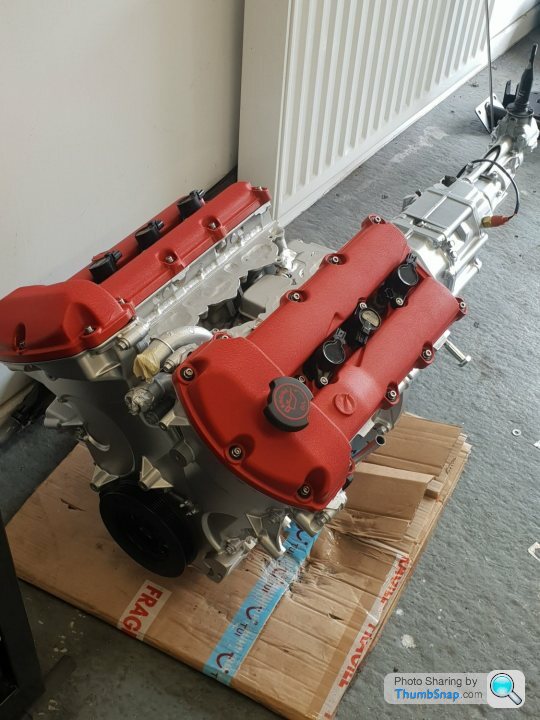
And then into top coat, aluminium silver for the engine and box and wrinkle red for the cam covers.
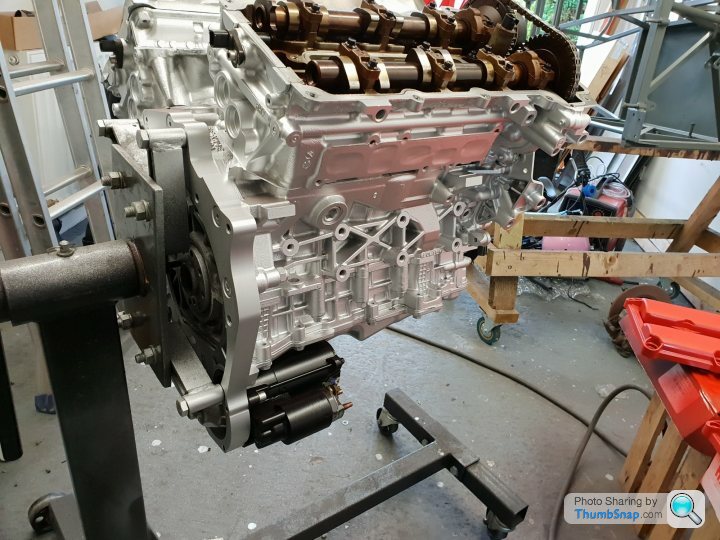
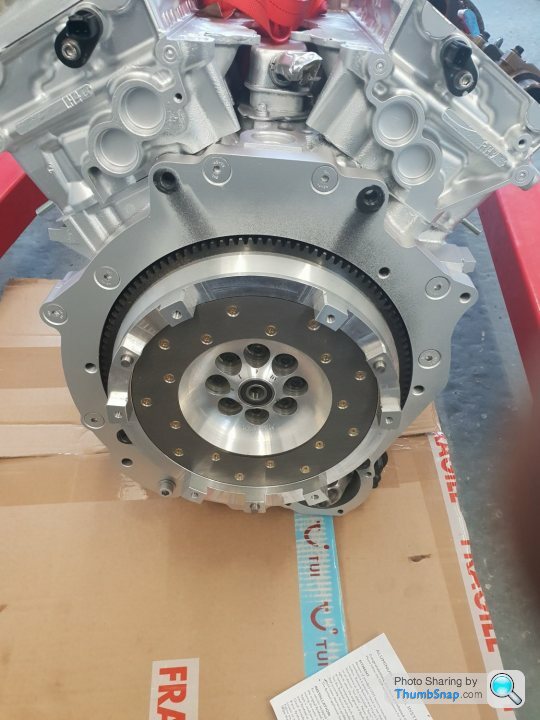
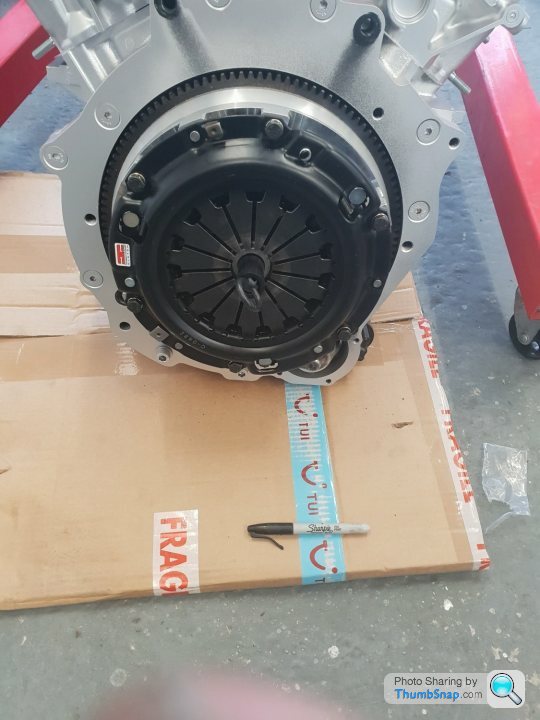
Then could get on with some assembly work. Flywheel on and torqued. Competition clutch stage 2 was chosen and fitted up.
The old girl didnt look too bad at this point
Ooft!!! Filth!!! I think I may have a Kleenex moment coming on....New timing cover gaskets fitted to cure an oil weep, along with a new crank pulley seal.
Adapter plate and sump, along with new gasket fitted up, so i could get on with cleaning up the engine and gearbox ready for some titivating. Lechler epoxy used again here.
And then made a start on the cam covers.
And then into top coat, aluminium silver for the engine and box and wrinkle red for the cam covers.
Then could get on with some assembly work. Flywheel on and torqued. Competition clutch stage 2 was chosen and fitted up.
The old girl didnt look too bad at this point


Thank you for the complements. It's certainly not been easy. It's really highlighted the differences in putting a none standard engine choice in with regards to parts availability. I think the end product is worth the hassle tho.
shalmaneser said:
Nice work! How are you running the COPs? Do you need ignitors or are they 'smart' coils?
No they are just simple 2 pin 'dumb' coils. 12v supply then the ECU supplies the ground to fire them. I know of others using a coil pack and wasted spark with this engine. But I figured it runs sequential spark and the ECU can do it so I may as well use it. When ordering the ECU emerald just asked what config I was running regarding spark and it came setup ready.sdh2903 said:
Thank you for the complements. It's certainly not been easy. It's really highlighted the differences in putting a none standard engine choice in with regards to parts availability. I think the end product is worth the hassle tho.
An nice didn't know that the k6 could be configured to fire dumb coils that's good to know.shalmaneser said:
Nice work! How are you running the COPs? Do you need ignitors or are they 'smart' coils?
No they are just simple 2 pin 'dumb' coils. 12v supply then the ECU supplies the ground to fire them. I know of others using a coil pack and wasted spark with this engine. But I figured it runs sequential spark and the ECU can do it so I may as well use it. When ordering the ECU emerald just asked what config I was running regarding spark and it came setup ready.pd2 said:
Hey Steve,
Good to see your still around!
When the weather picks up give me a shout and we can get a fun out.
Paul.
Hi Paul, good to hear from you, if you still have my number send me a message as I lost a load of my contacts and whatsapp stuff last year when my phone threw a wobbler. How is the car going? Yes we'll def sort a run out when the weather picks up Good to see your still around!
When the weather picks up give me a shout and we can get a fun out.
Paul.
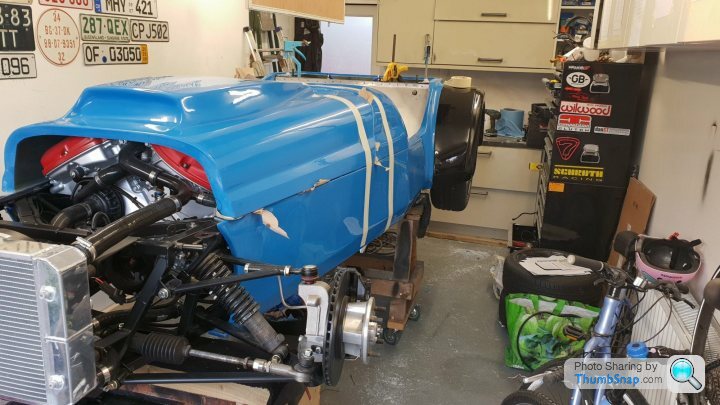
Regarding the bodywork, my 2 previous kits were both red, and despite the body panels being in really good nick i fancied a change and as a bonus the bonnet with this set has a higher than normal bonnet scoop which would help with clearance.
Loosely in place
Its a bit snug in there
So following the westfield manual guidelines for body fitment had the body too far back meaning the rear wheels weren't central in the arches which really bugs me. So I made the wheels central and worked forward from that, ended up around 10 to 15mm further forward than the book figure. All strapped into place and left the garage heating cranked up to get it to settle.

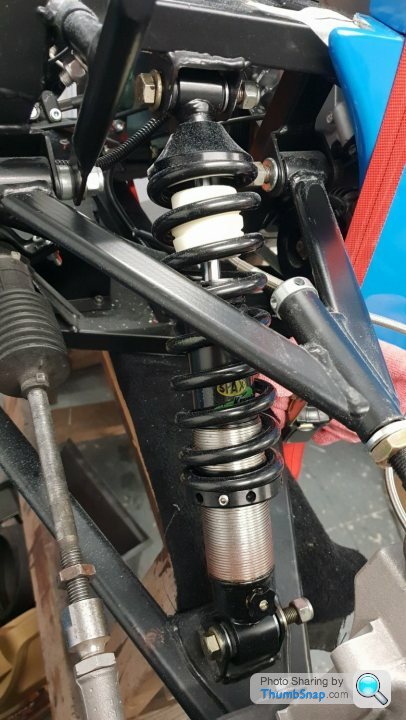
My new dampers had also arrived and were fitted. The guy who runs spax is a westfield owner and these are his home brew setup designed for the car along with some nice progressive springs for the rears.
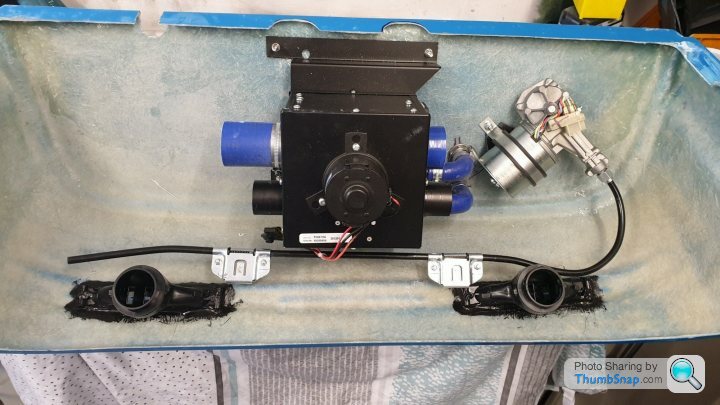
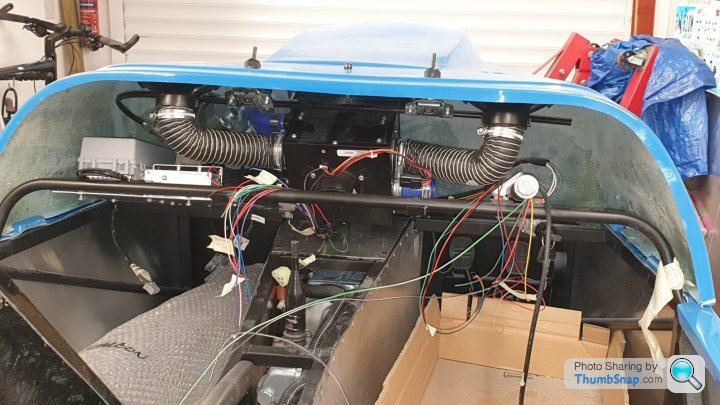
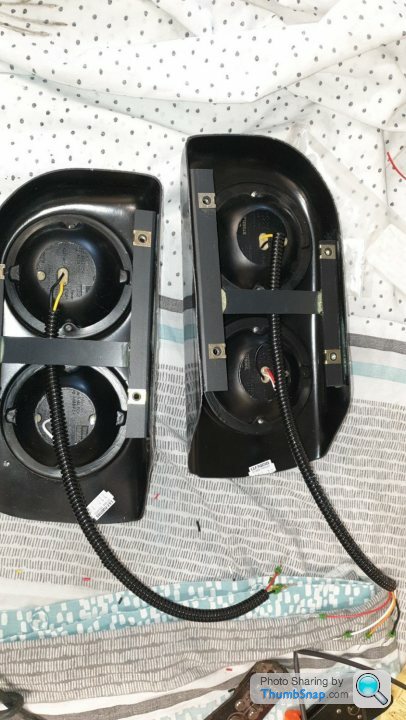
Then got on with building the scuttle up with the heater unit and wiper motor
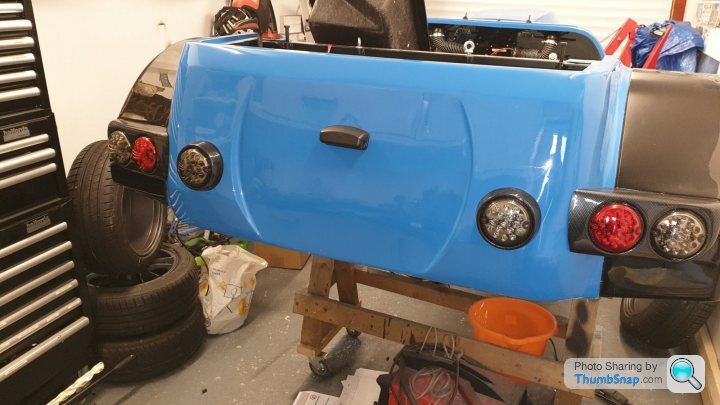
Then onto the rear lights, went for the wipac smoked LEDs
Loosely in place
Its a bit snug in there
So following the westfield manual guidelines for body fitment had the body too far back meaning the rear wheels weren't central in the arches which really bugs me. So I made the wheels central and worked forward from that, ended up around 10 to 15mm further forward than the book figure. All strapped into place and left the garage heating cranked up to get it to settle.
My new dampers had also arrived and were fitted. The guy who runs spax is a westfield owner and these are his home brew setup designed for the car along with some nice progressive springs for the rears.
Then got on with building the scuttle up with the heater unit and wiper motor
Then onto the rear lights, went for the wipac smoked LEDs
Edited by sdh2903 on Wednesday 11th January 09:35
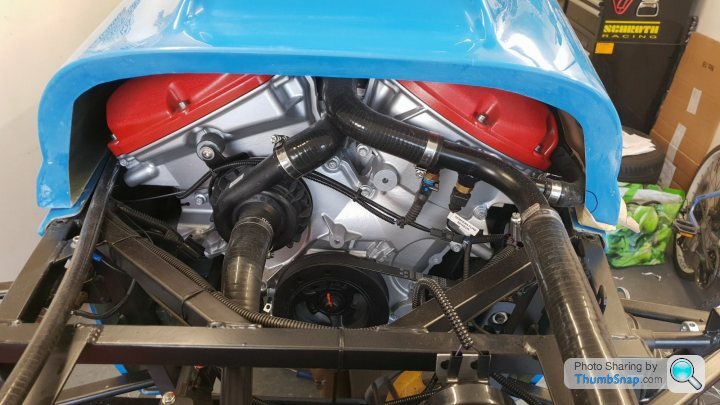
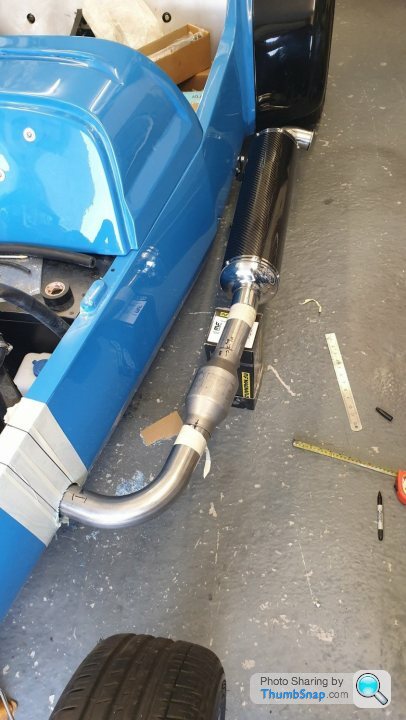
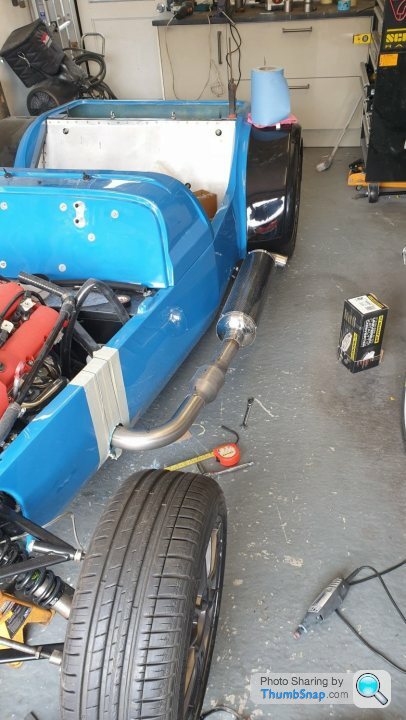
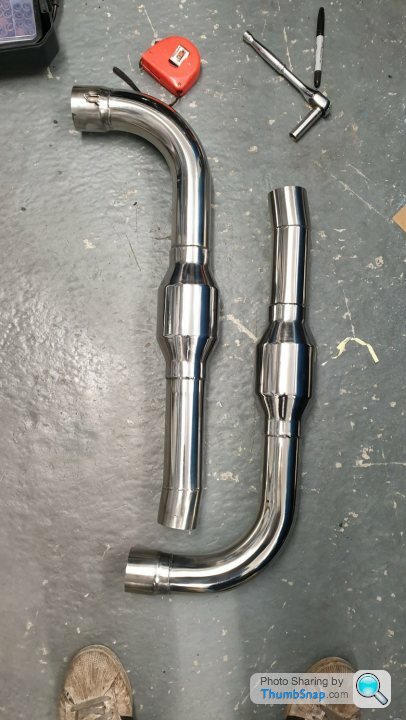
Another expense that was much larger due to the V engine was the exhaust. The 2 cans alone were around 1k at the time, i had to keep waiting for Westfield to have one of their discount sales before buying. This was at least offset somewhat by the use of the cheap headers.
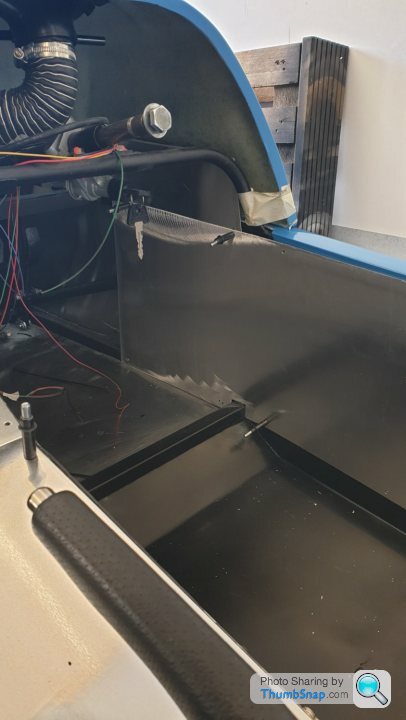
So all mocked up and some big holes drilled in the tub.
Whilst they were away getting welded i got the rest of the metal work finished, tunnel tops and interior panels, including the small covers for the scuttle bolts which can be a common iva fail point.
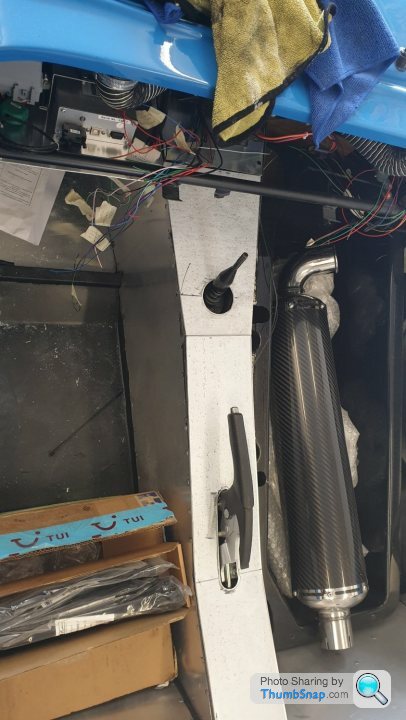
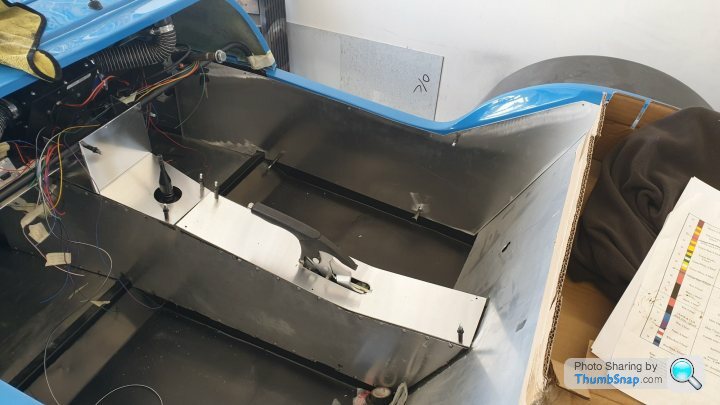
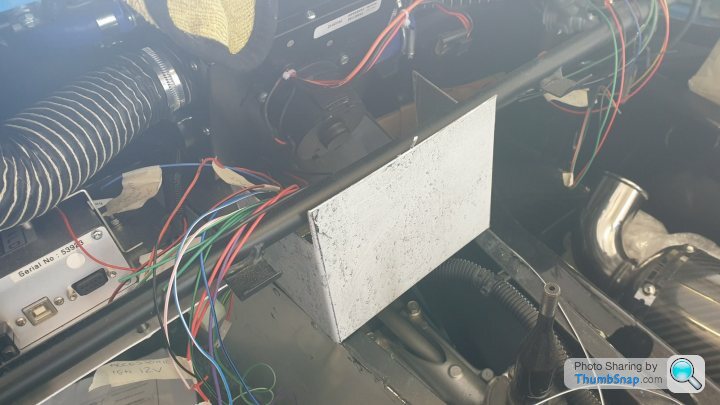
And a small panel for some switches under the dash.
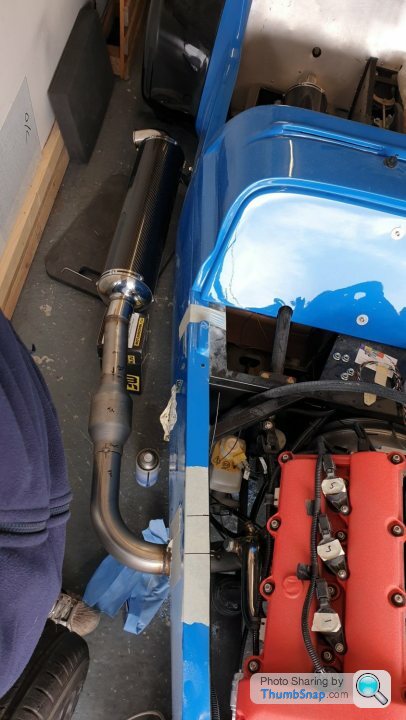
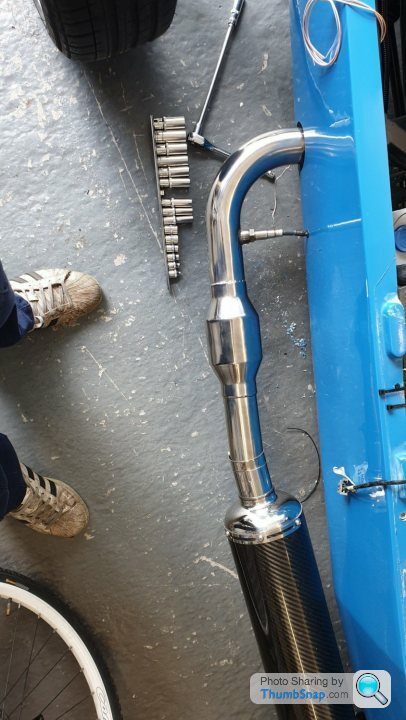
Exhausts back and polished up
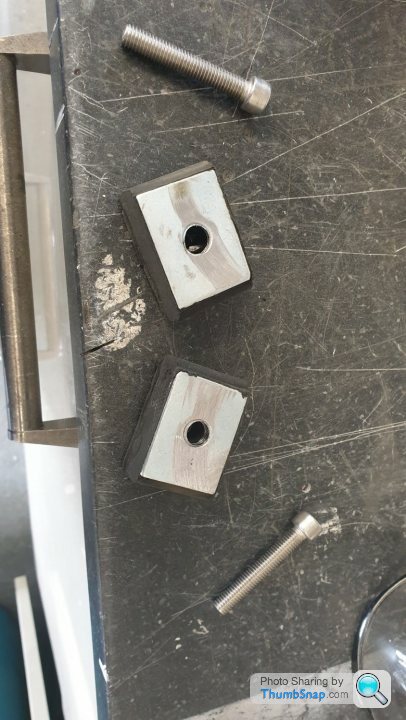
The westfield exhaust mounts are renowned for snapping, they are effectively 2 studs bonded to a rubber mount which just pulls itself apart. Why they never changed it i dont know, i just lop the studs off and drill through the block using a nut and bolt through.
All fitted up
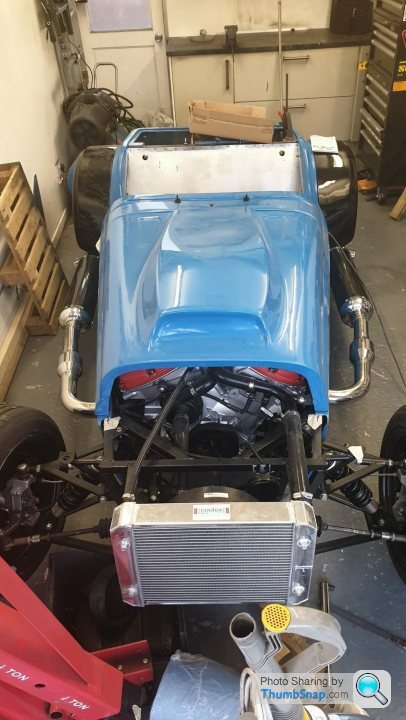
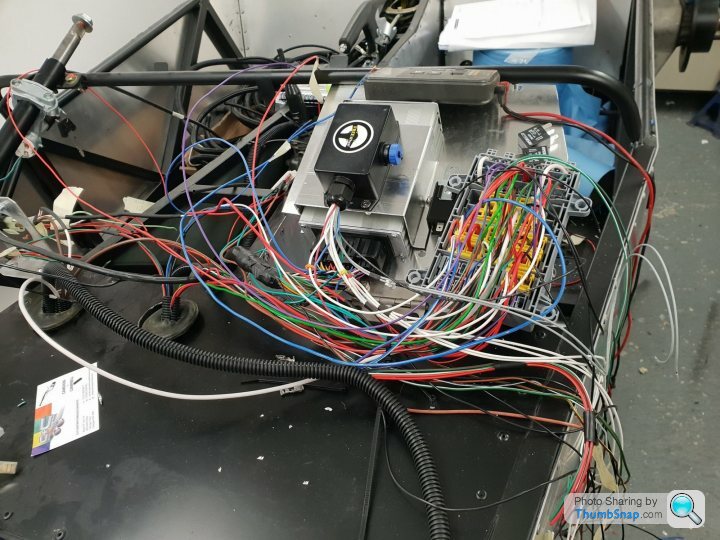
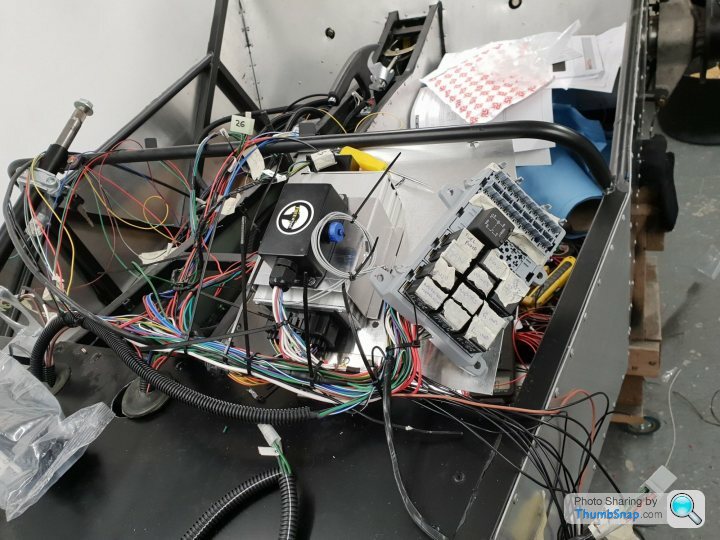
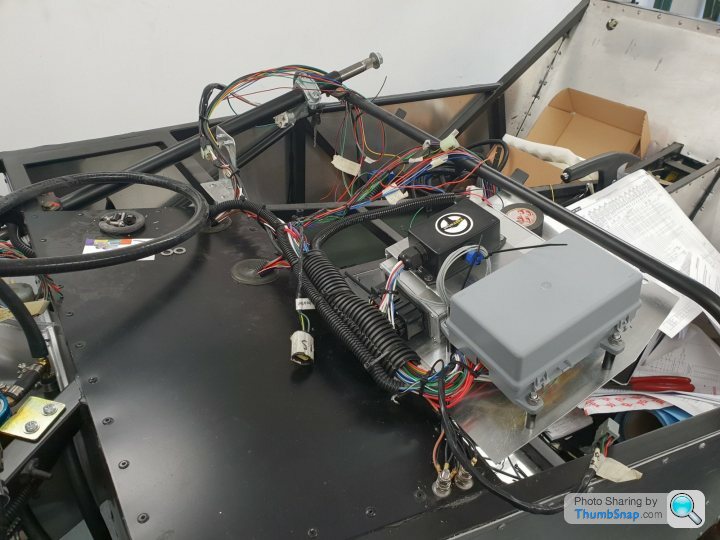
And the wideband fitted, went for a spartan in the end, feeds directly into the ECU and then via canbus to the dash.
So all mocked up and some big holes drilled in the tub.
Whilst they were away getting welded i got the rest of the metal work finished, tunnel tops and interior panels, including the small covers for the scuttle bolts which can be a common iva fail point.
And a small panel for some switches under the dash.
Exhausts back and polished up
The westfield exhaust mounts are renowned for snapping, they are effectively 2 studs bonded to a rubber mount which just pulls itself apart. Why they never changed it i dont know, i just lop the studs off and drill through the block using a nut and bolt through.
All fitted up
And the wideband fitted, went for a spartan in the end, feeds directly into the ECU and then via canbus to the dash.
Edited by sdh2903 on Wednesday 11th January 10:14
So by this point we were about a year in and at mid 2019. Bit of a mid build lull, needing funds, waiting on parts and lacking a bit of enthusiasm.
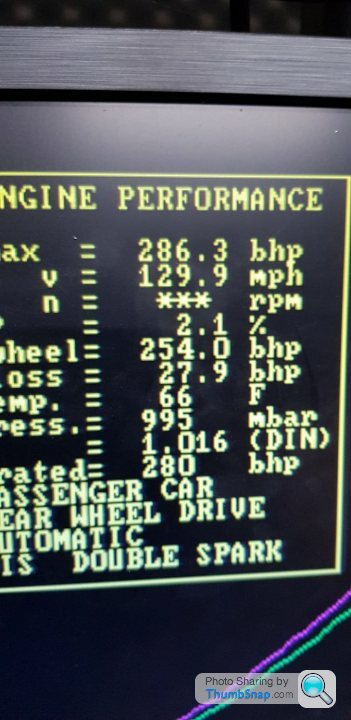
By this point another builder had overtaken me with his engine swap and sent me his dyno figures for some motivation
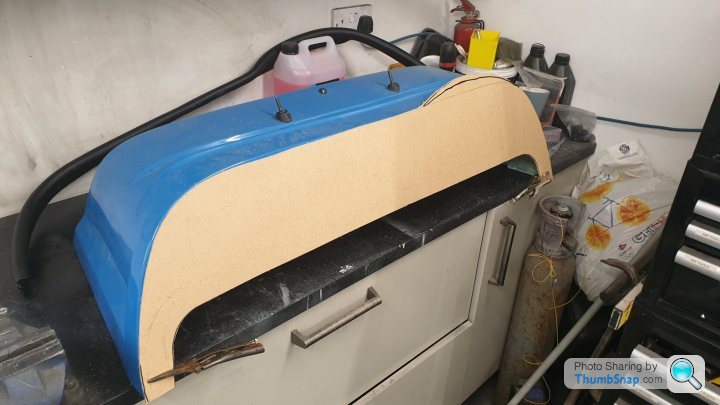
Time to crack on then! Started on the dash, mocked up in cardboard and then transferred into carbon. I wanted this profile, which is known as the contoured dash, to give maximum visibility for the dash display.
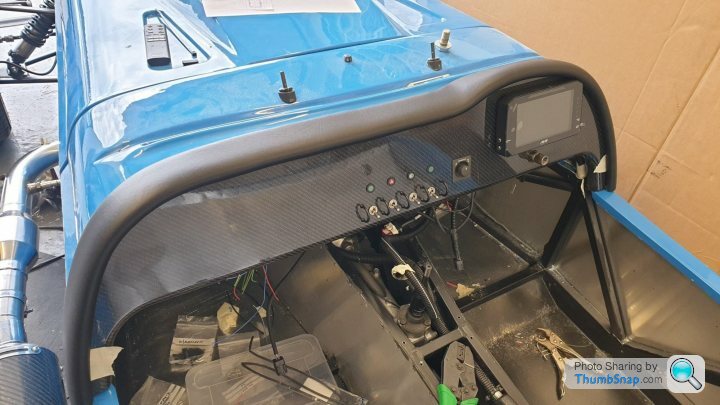
I know the toggle switches are a bit old hat, however they are still easily reached for and operated even wearing gloves. Not as old hat as the rover metro electric mirror switch, yes i went for the electric version of the standard westfield mirrors. The standard ones only need a slight knock to move them and its really infurating if youve just strapped in and then you need to adjust the nearside mirror.
By this point another builder had overtaken me with his engine swap and sent me his dyno figures for some motivation
Time to crack on then! Started on the dash, mocked up in cardboard and then transferred into carbon. I wanted this profile, which is known as the contoured dash, to give maximum visibility for the dash display.
I know the toggle switches are a bit old hat, however they are still easily reached for and operated even wearing gloves. Not as old hat as the rover metro electric mirror switch
, yes i went for the electric version of the standard westfield mirrors. The standard ones only need a slight knock to move them and its really infurating if youve just strapped in and then you need to adjust the nearside mirror.Edited by sdh2903 on Wednesday 11th January 10:31
Regarding inlets, I had been working on a custom inlet plenum, i won't bore you with the details as i never ended up using it, id used the wrong gauge aluminium for some of the bits and it was just a potential minefield of airleaks. This was how it ended up.
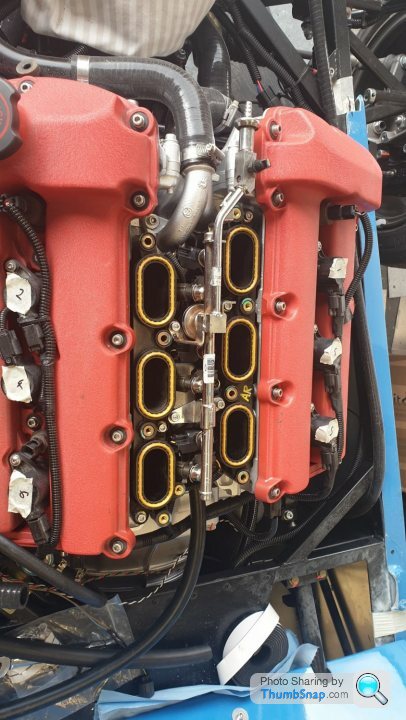
So in the end i went with the method of using a ford inlet from the mondeo st200 v6. This fits via adapter plates to the standard jag lower manifold. Unfortunately i had the wrong version of lower manifold so needed to source one.
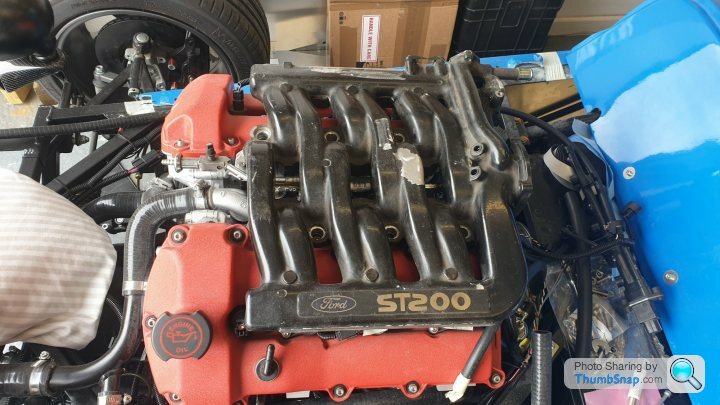
The mondeo inlet sat on, fugly thing.
Made up some adapters, done with an angle grinder and hole saws, not a fun day (and why they look a bit well rough)
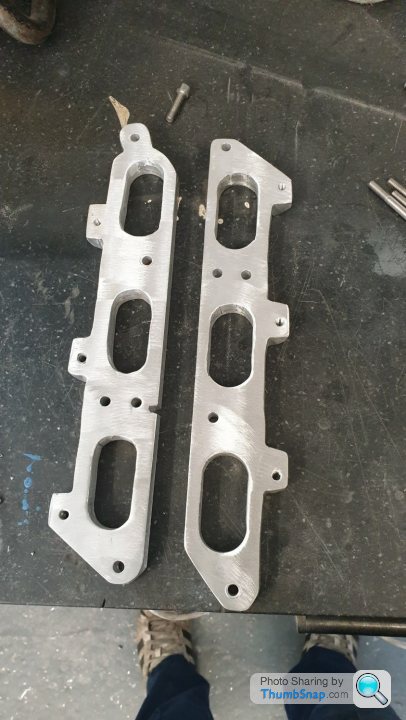
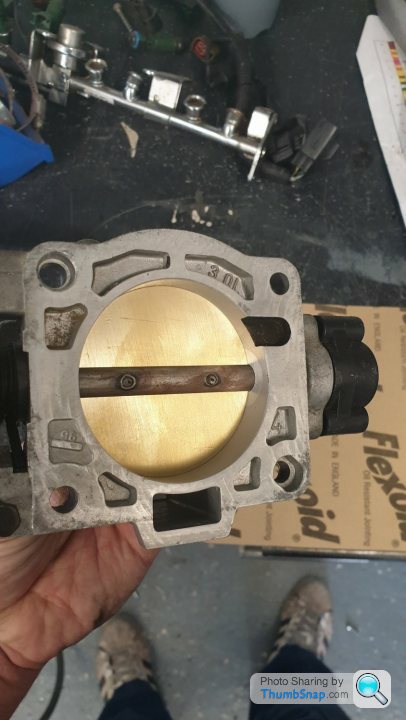
Standard st200 TB is 60 mm, a few other had used either a later st220 TB or had this one bored to match, so I sent the TB to be rebored and a new butterfly fitted to take it to 65mm. In hindsight i dont think it would have been detrimental to keep this at 60mm.
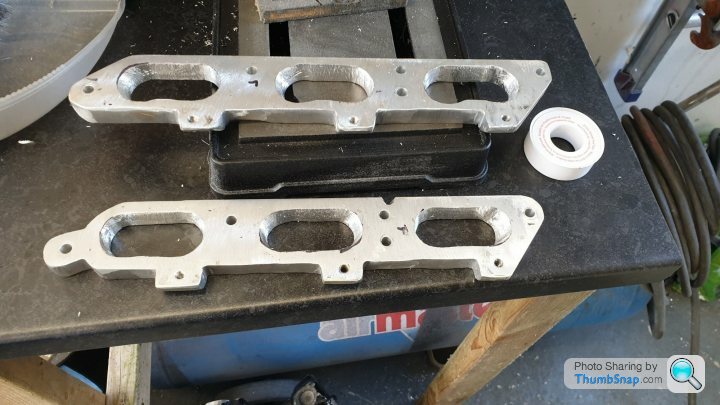
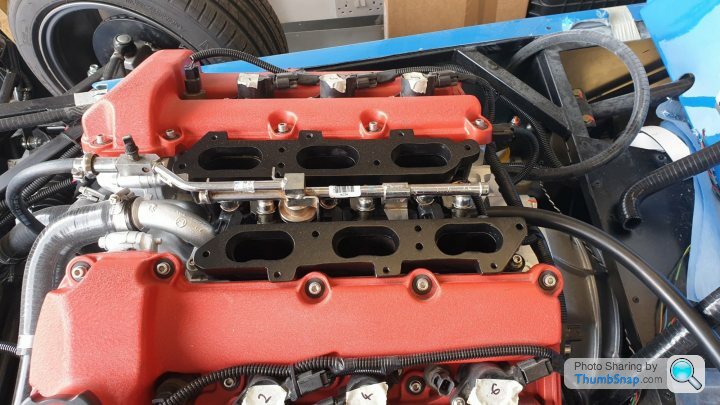
So then all the unneccessary ports and iacv ducts were lopped off the inlet ready for welding up.
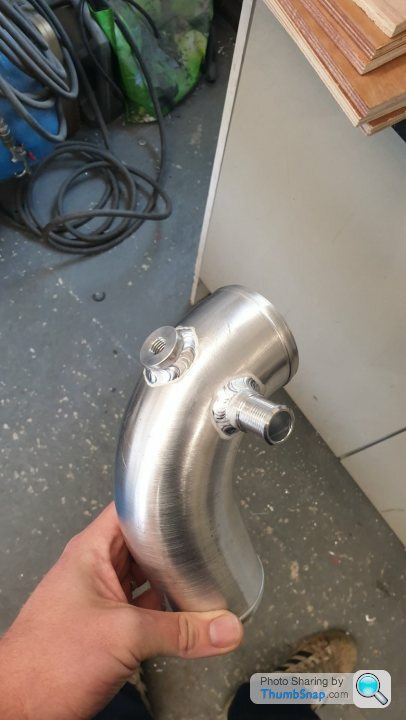
Welded up, and a nice inlet elbow made up with ports for breather and Intake air temp sensor.
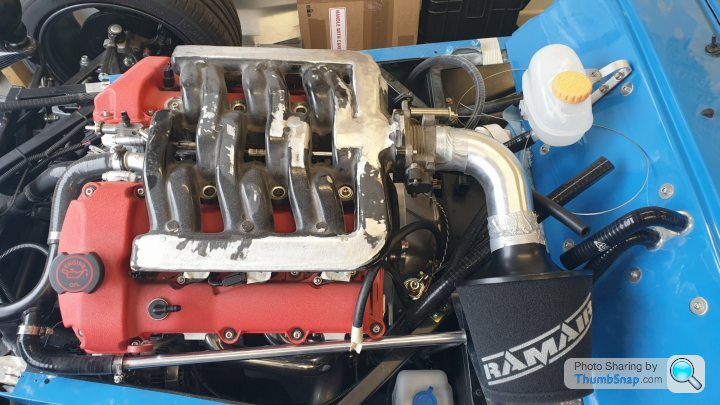
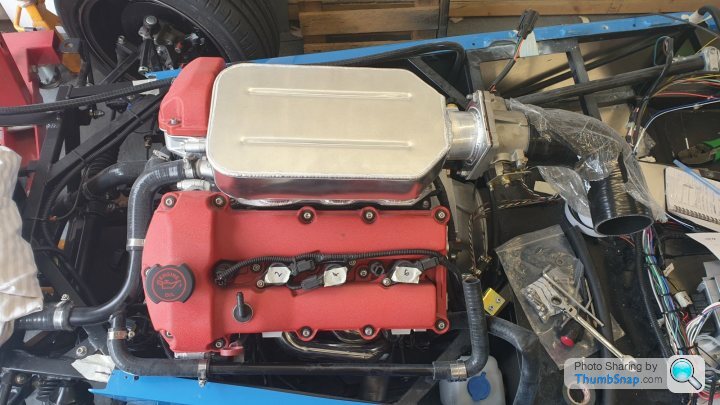
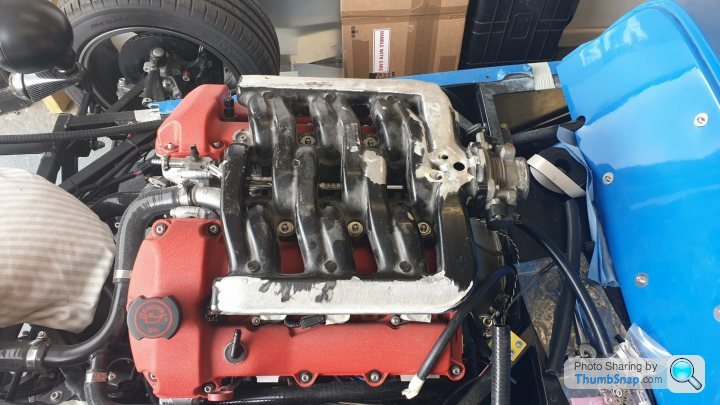
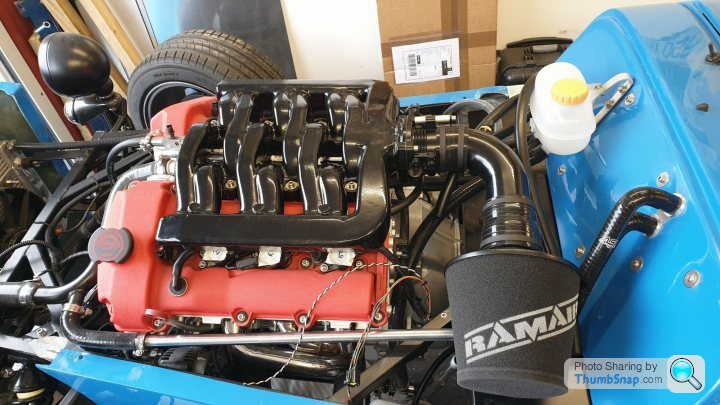
All powdercoated up and fitted
So in the end i went with the method of using a ford inlet from the mondeo st200 v6. This fits via adapter plates to the standard jag lower manifold. Unfortunately i had the wrong version of lower manifold so needed to source one.
The mondeo inlet sat on, fugly thing.
Made up some adapters, done with an angle grinder and hole saws, not a fun day (and why they look a bit well rough)
Standard st200 TB is 60 mm, a few other had used either a later st220 TB or had this one bored to match, so I sent the TB to be rebored and a new butterfly fitted to take it to 65mm. In hindsight i dont think it would have been detrimental to keep this at 60mm.
So then all the unneccessary ports and iacv ducts were lopped off the inlet ready for welding up.
Welded up, and a nice inlet elbow made up with ports for breather and Intake air temp sensor.
All powdercoated up and fitted
Gassing Station | Readers' Cars | Top of Page | What's New | My Stuff